Tableware
How To Make An Outdoor Dining Table
Modified: March 2, 2024
Discover the perfect tableware for your outdoor dining table. Learn how to make an outdoor dining table and create a stunning setting for your next gathering.
(Many of the links in this article redirect to a specific reviewed product. Your purchase of these products through affiliate links helps to generate commission for Storables.com, at no extra cost. Learn more)
Introduction
Welcome to the ultimate guide on how to make an outdoor dining table. Whether you’re a seasoned DIY enthusiast or a beginner looking to embark on your first woodworking project, creating your own outdoor dining table can be a rewarding and enjoyable experience. Not only will you have a beautiful and functional addition to your outdoor space, but you’ll also have the satisfaction of knowing that you crafted it with your own hands.
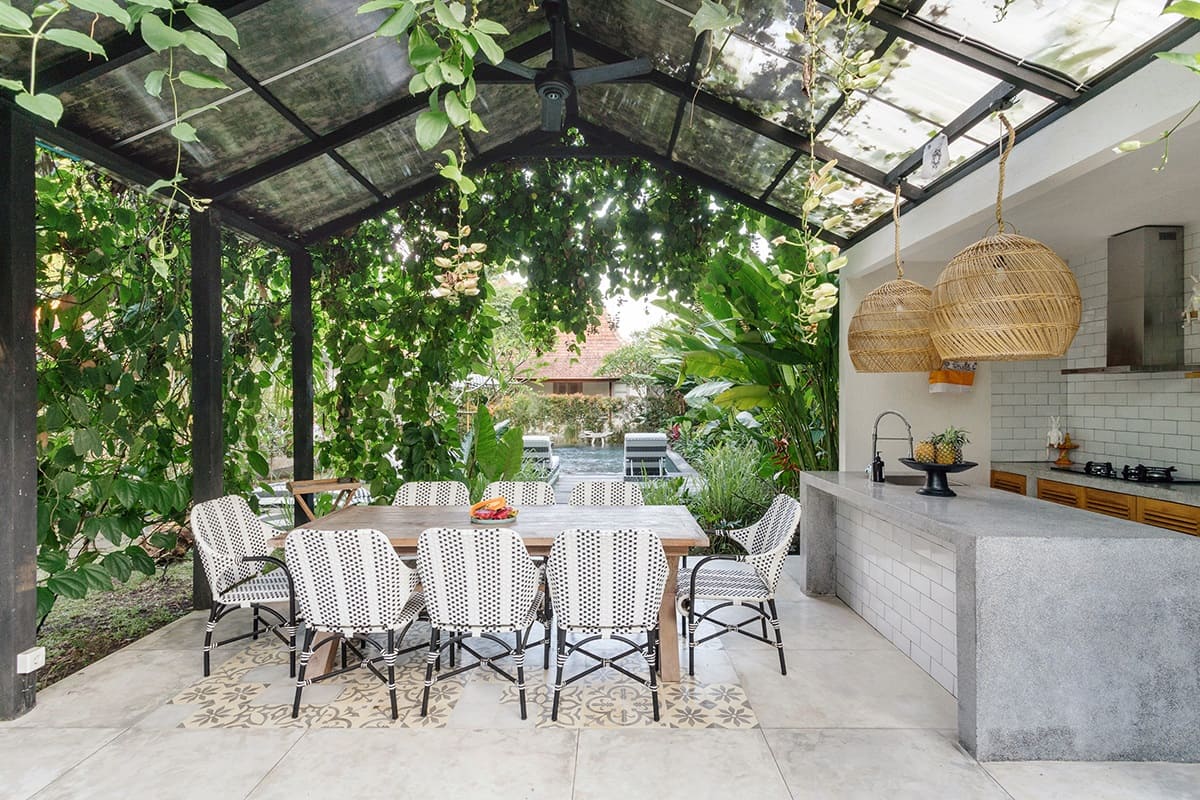
An outdoor dining table is an ideal addition to any backyard or patio, providing a space for family and friends to gather and enjoy meals together. The great thing about building your own table is that you can customize it to suit your specific style and needs. From choosing the type of wood to adding unique details, every step of the process allows for personalization.
In this guide, we will take you through the step-by-step process of making your own outdoor dining table. We will cover everything from selecting the right wood to finishing touches and maintenance tips. So, let’s grab our tools and get started!
Key Takeaways:
- Crafting your own outdoor dining table allows for personalization, from wood selection to finishing touches. Enjoy the satisfaction of creating a unique and functional piece that reflects your style and woodworking skills.
- Regular maintenance, protective coatings, and thoughtful positioning can ensure the longevity of your DIY outdoor dining table. With proper care, it will be a centerpiece for cherished gatherings and lasting memories.
Read more: How To Build An Outdoor Dining Table
Materials and Tools Needed
Before we dive into the construction process, let’s gather all the materials and tools you’ll need to successfully build your outdoor dining table. Here’s a comprehensive list:
Materials:
- Wood for the tabletop (e.g., cedar, teak, or pressure-treated pine)
- Wood for the frame and legs (e.g., 4×4 or 2×4 lumber)
- Screws
- Wood glue
- Wood filler
- Sandpaper (various grits)
- Outdoor wood finish or sealant
- Paint or stain (optional)
- Protective cover or tarp (for storage)
Tools:
- Tape measure
- Pencil
- Miter saw or circular saw
- Drill with various drill bits
- Clamps
- Sander or sanding block
- Paintbrush or foam brush
- Safety goggles
- Dust mask
- Ear protection
Having all the necessary materials and tools in place before starting the project will ensure a smooth construction process. You may need to adjust the quantities and sizes of certain materials based on the specific dimensions and design of your outdoor dining table.
Now that we have everything we need, it’s time to move on to the first step: selecting the wood for your tabletop.
Step 1: Selecting the Wood
Choosing the right type of wood is crucial for a durable and visually appealing outdoor dining table. You’ll want to select a wood species that is resistant to weathering and can withstand outdoor conditions. Here are a few options:
Read more: How To Make A Dining Table Taller
Cedar:
Cedar is a popular choice for outdoor furniture due to its natural resistance to rot, insects, and decay. It has a beautiful reddish-brown color and a pleasant aroma. Cedar is relatively lightweight and easy to work with, making it an excellent choice for DIY projects.
Teak:
Teak is a high-quality hardwood known for its exceptional durability and weather resistance. It has natural oils that make it resistant to rot, decay, and pests. Teak has an attractive golden-brown color that can be maintained with regular oiling.
Pressure-Treated Pine:
If you’re looking for an economical option, pressure-treated pine is a viable choice. It is affordable and treated to resist rot and decay. Keep in mind that pressure-treated wood can have a greenish tint, so consider staining or painting it to achieve your desired aesthetic.
When selecting the wood, make sure to choose boards that are straight, free of knots, and have a smooth surface. You’ll want the boards to be wide enough to accommodate your desired tabletop dimensions.
Additionally, consider the environmental impact of the wood you choose. Look for sustainably sourced options to ensure responsible forestry practices.
With the wood selected, it’s time to move on to the next step: cutting the wood to the appropriate lengths.
Step 2: Cutting the Wood
Now that you have your chosen wood, it’s time to cut it to the appropriate lengths for your outdoor dining table. This step will require a miter saw or a circular saw, depending on the tools you have available.
Read more: How To Make A Resin Dining Table
1. Measure and mark:
Start by measuring and marking the dimensions you want for your tabletop and frame. Use a tape measure and pencil to ensure accurate measurements. Make sure to account for any desired overhang for the tabletop.
2. Cut the tabletop:
Using a miter saw or circular saw, carefully cut the selected wood boards to the desired length for the tabletop. Make clean and straight cuts following your marked lines. It’s essential to use proper safety precautions, such as wearing protective goggles and using a clamp to secure the wood during cutting.
3. Cut the frame and legs:
Next, cut the wood boards for the frame and legs of the dining table. Measure and mark the desired dimensions for the frame, ensuring that it aligns with the dimensions of the tabletop. Cut the pieces according to your measurements, making sure all corners are square.
4. Sand the edges:
After cutting the wood, use sandpaper or a sander to smooth out any rough edges or splintered surfaces. Pay special attention to the edges of the boards to ensure a clean and professional-looking finish.
Remember to take your time and work carefully during the cutting process to achieve precise and accurate cuts. Once the wood is cut to the proper lengths, we can move on to the next step: preparing the tabletop for assembly.
Read more: How To Make A Marble Dining Table
Step 3: Preparing the Tabletop
Now that you have your wood cut to size, it’s time to prepare the tabletop for assembly. This step involves arranging and connecting the wood boards to create a sturdy and attractive surface for your outdoor dining table.
1. Arrange the boards:
Lay out the wood boards for the tabletop in the desired configuration. Pay attention to the grain patterns and color variations to create an aesthetically pleasing arrangement. Ensure that the boards are evenly spaced and flush with one another.
2. Connect the boards:
To connect the boards, you have a few options. One option is to use pocket hole joinery, which involves drilling pocket holes into the underside of the boards and using screws to secure them together. Another option is to use wooden dowels or biscuits along with wood glue to create strong and seamless joints.
3. Secure the boards:
Once the boards are connected, use clamps to hold them tightly in place. This will ensure that the joints are secure and that the tabletop remains flat and level. Check for any gaps or misalignments and make necessary adjustments before proceeding.
Read more: How To Make A Farmhouse Dining Table
4. Reinforce the underside (optional):
If desired, you can reinforce the underside of the tabletop with additional support. This can be done by attaching wood bracing or metal brackets to increase stability and prevent warping over time.
5. Fill gaps and sand:
If there are any small gaps or imperfections between the boards, use wood filler to fill them in. Allow the filler to dry according to the manufacturer’s instructions, then sand the entire tabletop to smooth out any rough spots and create a uniform surface.
With the tabletop prepared and assembled, we can now move on to the next step: constructing the frame to support the tabletop.
Step 4: Assembling the Frame
With the tabletop prepared, it’s time to move on to constructing the frame of your outdoor dining table. The frame will provide crucial support for the tabletop and ensure the stability and durability of the entire structure.
1. Mark and measure:
Start by marking and measuring the dimensions for your frame on the prepared tabletop. Use a pencil to make clear and accurate marks for the placement of the frame pieces.
Read more: How To Make A Live Edge Dining Table
2. Cut the frame pieces:
Using a miter saw or circular saw, cut the wood boards for the frame to the appropriate lengths according to your marked measurements. Ensure that the corners are cut at a 90-degree angle for a square frame.
3. Align and secure the frame pieces:
Place the cut frame pieces on the underside of the tabletop, aligning them with the marked lines. Use screws to secure the frame pieces to the tabletop, making sure they are flush with the edges.
4. Add additional support:
For added stability, you can attach additional support pieces within the frame. These pieces can be cut to fit between the corners of the frame, securely attaching them with screws or brackets.
5. Check for stability:
Once the frame is assembled and secured, check for stability by gently shaking the table. If there is any wobbling or instability, make necessary adjustments or add additional supports to ensure a solid and sturdy frame.
With the frame assembled, we can now move on to the next step: attaching the legs to complete the structure of the outdoor dining table.
Read more: How To Make A Trestle Dining Table
Step 5: Attaching the Legs
Now that we have the tabletop and frame assembled, it’s time to attach the legs to complete the structure of the outdoor dining table. The legs provide stability and support to ensure that your table stands firm on any surface.
Read more: How To Make A Resin Dining Table
1. Measure and mark:
Start by measuring and marking the desired height for your table legs on the frame. Consider the standard height for a dining table, which is around 30 inches, but feel free to adjust it to your preferred height.
2. Cut the leg pieces:
Using a miter saw or circular saw, cut the wood boards for the legs to the appropriate lengths according to your marked measurements. Make sure to cut all leg pieces to the same length for a level table.
3. Attach the legs to the frame:
Position the leg pieces at each corner of the frame and make sure they are flush with the top of the table. Use screws to attach the legs securely to the frame, driving the screws through the frame and into the legs.
Read more: How To Make A Pool Table Dining Top
4. Reinforce the legs (optional):
If desired, you can reinforce the attachment of the legs by adding additional support pieces between the legs and the frame. This can be done by cutting cross braces that fit diagonally between the legs and securing them with screws or brackets.
5. Check for stability:
Once the legs are attached, check for stability by applying gentle pressure to different areas of the table. Ensure that all legs are firmly secured and that the table does not wobble or shift. Make any necessary adjustments or reinforcements to achieve a stable structure.
With the legs attached, we can now move on to the next step: sanding and finishing the table for a smooth and polished look.
Step 6: Sanding and Finishing
Now that the construction of your outdoor dining table is complete, it’s time to focus on sanding and finishing the surface to achieve a smooth and polished look. This step will not only enhance the aesthetics of your table but also provide protection against the elements.
1. Sand the entire surface:
Begin by sanding the entire surface of the table, including the tabletop, frame, and legs. Start with coarse-grit sandpaper (around 80 grit) to remove any rough spots or imperfections. Gradually progress to finer-grit sandpaper (120 grit, 220 grit) to achieve a smooth and even finish.
Read more: How To Make A Round Dining Table Base
2. Pay attention to details:
As you sand, pay extra attention to the corners, edges, and any intricate details of the table. Use sanding blocks or folded sandpaper to reach these areas and ensure a consistent finish throughout.
3. Remove dust:
After sanding, use a clean cloth or a tack cloth to remove any dust or debris from the surface. Pay close attention to ensure all surfaces are thoroughly clean before applying any finish.
4. Choose your finish:
Next, decide on the type of finish you want for your outdoor dining table. There are several options available, such as outdoor wood stain, paint, or a clear sealant. Consider the style and look you want to achieve while keeping in mind the durability and protection required for outdoor use.
5. Apply the finish:
Follow the manufacturer’s instructions to apply the chosen finish to all surfaces of the table. Use a paintbrush or foam brush to evenly coat the wood. Allow the finish to dry completely before proceeding to the next step.
6. Sand between coats (if necessary):
If you choose to apply multiple coats of finish, lightly sand the surface with fine-grit sandpaper (220 grit) between coats. This will help achieve a smoother finish and enhance the longevity of the protective layer.
With the sanding and finishing complete, we’re almost done! The next step is to add a protective coat for extra durability against the outdoor elements.
Step 7: Adding a Protective Coat
To ensure the longevity and durability of your outdoor dining table, it’s important to add a protective coat that will shield the wood from the elements. This step will help to prevent damage caused by moisture, UV rays, and other outdoor factors.
1. Choose a protective coating:
Select a high-quality outdoor wood sealant or varnish that is specifically designed for exterior use. Look for a product that offers protection against water, UV rays, and mildew.
2. Prepare the workspace:
Before applying the protective coat, ensure that your workspace is well-ventilated and free of dust and debris. Consider covering the surrounding area with a drop cloth or plastic sheeting to protect it from overspray or drips.
3. Apply the protective coat:
Using a paintbrush or foam brush, carefully apply an even coat of the chosen protective coating to all surfaces of the table, including the tabletop, frame, and legs. Follow the manufacturer’s instructions for the recommended number of coats and drying times.
4. Allow adequate drying time:
After applying the first coat, allow it to dry completely according to the manufacturer’s instructions. This drying time will vary depending on the type of protective coating used. Avoid using the table until the protective coat is fully cured.
5. Sand between coats (if necessary):
If desired, lightly sand the surface with fine-grit sandpaper (220 grit) between coats of the protective coating. This will help to create a smooth and even finish and promote better adhesion of subsequent coats.
6. Apply additional coats (if desired):
Consider applying multiple coats of the protective coating for enhanced durability. This will provide an extra layer of defense against the outdoor elements, ensuring the longevity of your outdoor dining table.
Read more: How To Make A Dining Chair More Comfortable
7. Allow for curing time:
Once all coats have been applied, allow the protective coating to fully cure according to the manufacturer’s instructions. This curing time will typically be around 24 to 48 hours. Avoid exposing the table to moisture or heavy use during this time.
With the protective coating applied, your outdoor dining table is now ready for its final touches and ready to be enjoyed for years to come.
Step 8: Final Touches and Maintenance Tips
Congratulations on completing your outdoor dining table! Now it’s time to add those final touches and learn how to maintain and care for your table to keep it looking great for years to come.
1. Add finishing details:
If desired, you can add some final decorative touches to personalize your outdoor dining table. Consider adding an umbrella hole for shade, attaching tablecloth clips to secure outdoor tablecloths, or even adding cup holders or built-in storage compartments.
2. Choose suitable outdoor furniture accessories:
Select outdoor furniture accessories that complement your newly constructed table. This could include weather-resistant cushions, outdoor-friendly dinnerware, or ambient lighting to enhance the overall dining experience.
Read more: How To Make A Pool Table Dining Top
3. Regular cleaning and maintenance:
Regular cleaning is essential to maintain the beauty and lifespan of your outdoor dining table. Remove dirt, debris, and food particles after each use with a soft brush or cloth. Avoid using harsh chemicals or abrasive cleaners that could damage the protective finish.
4. Cover and protect:
Invest in a protective cover or tarp to shield your outdoor dining table from harsh weather conditions when not in use. This will help prevent warping, fading, and other damage caused by exposure to the elements.
5. Avoid direct sunlight:
If possible, position your table in a shaded area or use an umbrella to protect it from direct sunlight. Prolonged exposure to UV rays can cause fading and deterioration of the wood over time.
6. Refinish as needed:
Over time, the protective finish on your outdoor dining table may wear off. When this happens, consider refinishing the table by sanding down the surface and applying a fresh coat of protective sealant or varnish to revive its appearance and protection.
Read more: How To Make Dining Room Chair Covers
7. Inspect for damage:
Periodically inspect your table for any signs of damage, such as loose screws, cracks, or rotting wood. Address any issues promptly to prevent further damage and ensure the structural integrity of the table.
By following these final touches and maintenance tips, you will be able to enjoy your outdoor dining table for many seasons, creating cherished memories with family and friends.
Now, invite your loved ones over, set the table with your favorite dishes, and enjoy the fruits of your labor around your beautiful outdoor dining table!
Conclusion
Congratulations on completing your DIY outdoor dining table! Through careful selection of materials, precise cutting and assembly, and attention to detail in sanding, finishing, and maintenance, you have created a beautiful and functional addition to your outdoor space.
Not only does your handmade table provide a space for gathering and enjoying meals with family and friends, but it also reflects your personal style and creativity. The customization options, from the choice of wood to the finishing details, allow you to create a unique piece that perfectly suits your outdoor environment.
By following the step-by-step guide provided, you have learned valuable woodworking skills and gained confidence in your abilities to tackle future DIY projects. Your outdoor dining table is a testament to your hard work, patience, and dedication.
Remember to care for your table with regular cleaning, protection from the elements, and timely maintenance. By doing so, you can ensure its longevity and continued beauty for many years to come.
Now it’s time to gather your loved ones, set a table with delicious food, and create lasting memories in the comfort of your outdoor space. Whether it’s a casual backyard BBQ, a festive holiday meal, or a relaxing weekend brunch, your outdoor dining table will be the centerpiece of countless joyful moments.
So, bask in the satisfaction of your accomplishment, enjoy the fruits of your labor, and continue to explore the world of DIY projects and woodworking. Cheers to your new outdoor dining table and all the memories it will facilitate!
Frequently Asked Questions about How To Make An Outdoor Dining Table
Was this page helpful?
At Storables.com, we guarantee accurate and reliable information. Our content, validated by Expert Board Contributors, is crafted following stringent Editorial Policies. We're committed to providing you with well-researched, expert-backed insights for all your informational needs.
0 thoughts on “How To Make An Outdoor Dining Table”