Tableware
How To Make A Pool Table Dining Top
Modified: May 23, 2024
Learn how to transform your pool table into a stylish dining space with our tableware. Enjoy the best of both worlds - entertainment and functionality in one!
(Many of the links in this article redirect to a specific reviewed product. Your purchase of these products through affiliate links helps to generate commission for Storables.com, at no extra cost. Learn more)
Introduction
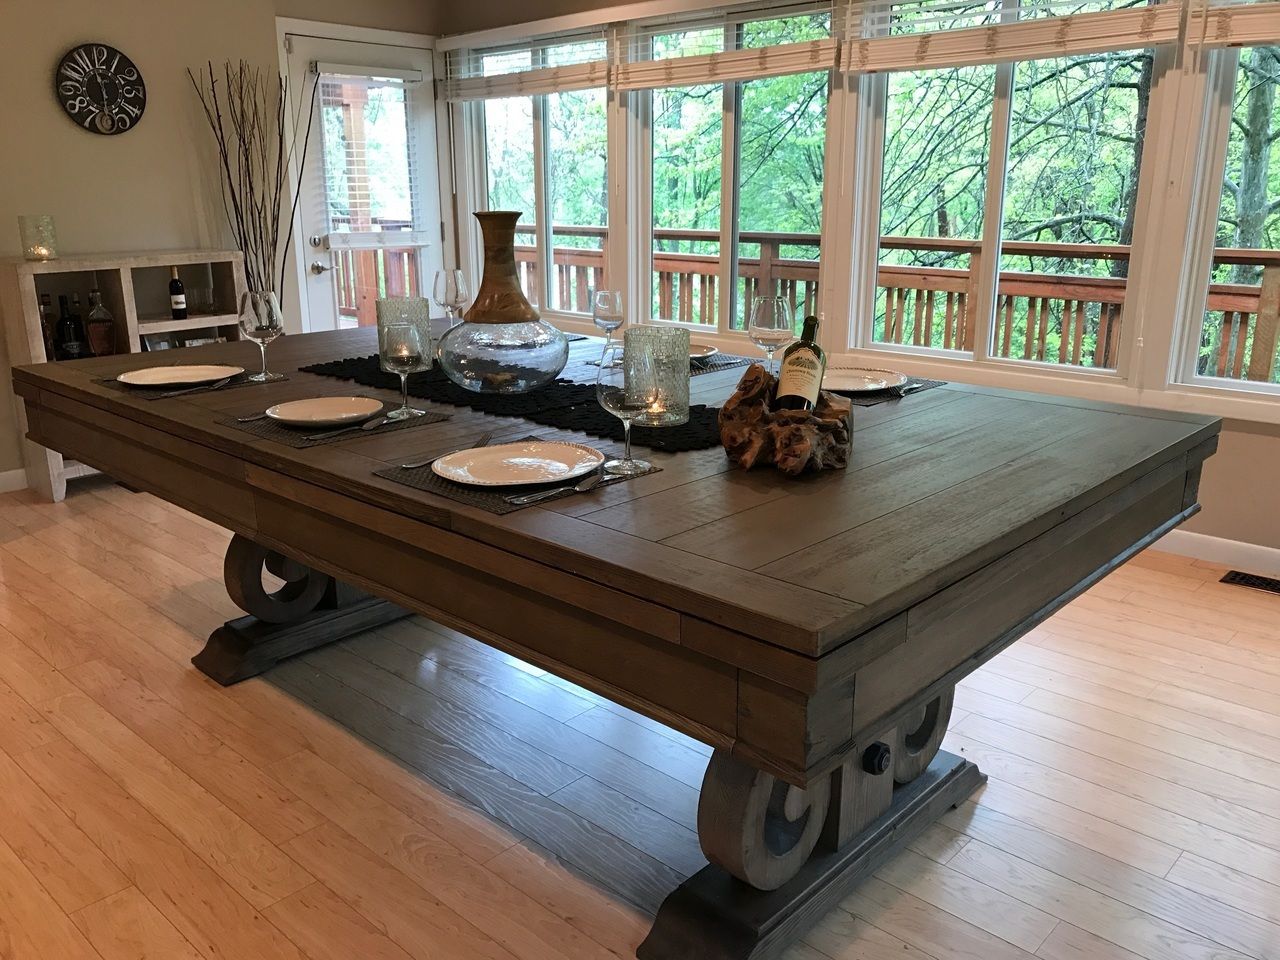
Welcome to the world of versatile and functional tableware – the pool table dining top. If you’re looking to make the most out of your space, this innovative solution allows you to seamlessly switch between a dining table and a pool table, giving you endless entertainment options.
The pool table dining top is a practical and stylish addition to any home or recreational space. Whether you’re hosting a dinner party or enjoying a game of pool with friends and family, this dual-purpose piece of furniture is a must-have for tableware enthusiasts.
In this article, we’ll guide you through the process of making your own pool table dining top. With a few basic materials and some handy DIY skills, you’ll be able to create a beautiful and functional piece that will impress your guests and provide endless hours of entertainment.
Key Takeaways:
- Create a versatile and stylish pool table dining top with basic materials and DIY skills. Impress guests and enjoy endless entertainment with this dual-purpose piece of furniture.
- Transform a regular pool table into a functional and elegant addition to your home. Seamlessly switch between dining and playing mode, and cherish the memories created around your new pool table dining top.
Read more: How Thick Should A Dining Table Top Be
Materials Needed
Before you begin constructing your pool table dining top, make sure you have the following materials on hand:
- Pool table: Start with a standard-sized pool table that is in good condition.
- Plywood: Purchase a sheet of plywood that is large enough to cover the surface of your pool table.
- Padding: You’ll need foam padding to provide cushioning under the playing surface.
- Fabric: Choose a durable and suitable fabric to upholster the playing surface, such as felt or billiard cloth.
- Rails: Measure and purchase railings that fit the dimensions of your pool table.
- Pocket openings: Acquire pocket openings that are compatible with your pool table’s design and size.
- Screws and brackets: Collect screws and brackets to secure the various components of your pool table dining top.
- Tools: Have a measuring tape, saw, staple gun, screwdriver, and level on hand to aid in the construction process.
Once you have gathered these materials, you are ready to move on to the next steps in creating your pool table dining top. Ensure that you have enough space and a suitable work area to comfortably work on the project.
Step 1: Preparing the Table
The first step in creating your pool table dining top is to prepare the existing pool table. This involves clearing the table of any debris, removing the felt or cloth covering, and ensuring that the surface is clean and level.
Start by removing the balls and any other accessories from the pool table. Use a soft cloth or brush to remove any dust or dirt that may have accumulated on the surface. It’s important to have a clean and smooth table to ensure the proper installation of the dining top.
Next, carefully remove the existing felt or cloth covering from the pool table. Gently lift the edges of the fabric and peel it off, being cautious not to damage the slate or table surface underneath. Dispose of the old covering responsibly.
Inspect the table surface for any imperfections or unevenness. If you notice any bumps or dents, you may need to fill them in or sand them down to ensure a level playing surface. Use a level to check the table and make any necessary adjustments.
Once the table is clean and level, you’re ready to move on to the next steps of creating your pool table dining top. Taking the time to properly prepare the table will ensure a smooth and professional-looking finish for your project.
Step 2: Cutting the Plywood Top
Now that you have prepared the pool table, it’s time to cut the plywood top that will serve as the playing surface for your pool table dining top.
Measure the dimensions of your pool table, ensuring that you account for any overhang you desire for the dining top portion. Transfer these measurements onto the plywood sheet, marking the corners and edges with a pencil.
Using a saw, carefully cut along the marked lines to obtain the desired size for the plywood top. If you don’t have access to a saw or prefer to have the cutting done professionally, you can have the plywood cut to size at a local hardware store or lumberyard.
After cutting the plywood, place it on top of the pool table to double-check the fit. Ensure that it aligns properly with the edges of the table and covers the playing surface completely. Make any necessary adjustments by trimming the plywood if needed.
Once the plywood top fits perfectly, remove it from the pool table and set it aside for the next step in the process. You’re one step closer to having your very own pool table dining top!
Step 3: Adding Padding
Now that you have the plywood top cut to size, it’s time to add some padding to provide cushioning and enhance the playing experience of your pool table dining top.
Measure the dimensions of the plywood top and cut a piece of foam padding to match those measurements. Make sure the foam is dense enough to provide adequate support but still soft enough for a comfortable playing surface. You can find foam padding at your local craft or upholstery store.
Place the foam padding on top of the plywood, ensuring that it covers the entire surface. Trim any excess foam if necessary. It’s important to have an even layer of padding to ensure a consistent playing experience across the entire table.
Once the padding is positioned properly, use a staple gun to secure it to the plywood. Start by stapling the foam along the edges, spacing the staples about 6-8 inches apart. Then, work your way towards the center, stapling the foam down in a grid pattern. This will keep the padding in place and prevent any bunching or shifting during gameplay.
Take a moment to test the foam padding by pressing down on various areas of the table. Make sure there are no lumps or uneven sections. If you notice any issues, adjust the foam padding or add additional staples to secure it in place.
Adding foam padding is an essential step in creating a comfortable and professional playing surface for your pool table dining top. With this step complete, you’re ready to move on to the next phase of the construction process.
When making a pool table dining top, ensure that the dimensions of the top are slightly larger than the pool table to allow for a comfortable dining experience. Additionally, use durable and easy-to-clean materials for the top surface.
Read more: How To Make A Dining Table Taller
Step 4: Upholstering the Playing Surface
With the padding securely in place, it’s time to upholster the playing surface of your pool table dining top. The fabric you choose will not only provide a smooth and sleek surface for gameplay but also add a touch of elegance to your dining area.
Measure and cut the fabric to fit the dimensions of the plywood top with a few inches of overhang on each side. This additional fabric will ensure that you have enough material to wrap around the edges and secure it underneath.
Place the fabric on top of the padding, ensuring that it is centered and straight. Smooth out any wrinkles or creases along the surface, working from the center towards the edges.
Starting on one side, fold the excess fabric over the edge of the plywood, creating a neat and clean edge. Use a staple gun to secure the fabric in place, placing staples along the edge about 1-2 inches apart. Continue this process along each side, pulling the fabric tightly as you go to ensure a smooth and taut playing surface.
Once you have stapled all four sides of the fabric, double-check for any wrinkles or unevenness. If needed, carefully remove the staples and make any adjustments to ensure a flawless finish.
Take a moment to run your hands across the surface, ensuring that it feels smooth and even. The fabric should be securely attached to the plywood, creating a professional-looking playing surface for your pool table dining top.
Upholstering the playing surface is a crucial step in creating a functional and aesthetically pleasing pool table dining top. With this step complete, you’re ready to move on to the next phase of the construction process.
Step 5: Attaching the Rails
Now that you have upholstered the playing surface, it’s time to attach the rails to complete the construction of your pool table dining top. The rails not only add stability but also provide an essential element for the gameplay experience.
Start by measuring and marking the placement of the rails on the plywood top. The rails should be evenly spaced and positioned to align with the pockets on your pool table. This will ensure that the balls can smoothly enter the pockets during gameplay.
Using a screwdriver and screws, secure the rails to the plywood top. Start by attaching the corners of the rails, then work your way along the length of each rail, spacing the screws evenly and ensuring a secure fit.
Once the rails are securely attached, test their stability by gently pressing on them. They should be firmly in place without any wobbling or movement.
Next, inspect the rails for any sharp edges or rough surfaces that may affect gameplay or cause damage to the fabric. If you notice any imperfections, use sandpaper to smooth them out, ensuring a seamless and safe playing surface.
Attaching the rails is an important step in creating a functional pool table dining top. Once completed, you’re one step closer to enjoying a game of pool and a meal all in one unique piece of furniture!
Step 6: Adding Pocket Openings
Adding pocket openings to your pool table dining top is an essential step to ensure that the balls have a designated area to enter the pockets during gameplay. This step will provide the finishing touch and ensure the functionality of your pool table.
Start by measuring and marking the positions for the pocket openings on the plywood top. Use the existing pool table as a reference for the size and placement of the pockets. Ensure that the markings are accurate and aligned with the rails.
Once you have marked the positions for the pocket openings, use a saw or jigsaw to carefully cut out the openings. Take your time and follow the markings precisely to ensure clean and accurate cuts.
After cutting the pocket openings, inspect them for any rough edges or splinters. Use sandpaper to smooth out any imperfections, ensuring a safe and seamless finish.
Next, carefully position the pocket openings on the table. Ensure that they align properly with the rails and that there is ample space for the balls to enter the pockets without obstruction.
Secure the pocket openings to the table by using screws or brackets. Make sure they are tightly attached and do not wobble or move during gameplay.
Take a moment to run your hands along the edges of the pocket openings, ensuring they are smooth and snag-free. Any sharp edges can cause damage to the balls or the fabric, so it’s important to ensure a safe playing environment.
Adding the pocket openings is a crucial step in creating a functional and enjoyable pool table dining top. With this step completed, your pool table is now ready for the finishing touches.
Step 7: Finishing Touches
You’re nearing the final stage of creating your pool table dining top! Step 7 involves adding some finishing touches to ensure that your table is not only functional but also aesthetically pleasing.
First, take a moment to inspect the entire structure. Check for any loose screws or brackets and tighten them if necessary. Ensure that all components are securely attached and that there are no visible signs of wear or damage.
Consider adding some decorative elements to enhance the appearance of your pool table dining top. This could include adding trim or molding along the edges of the table, painting or staining the rails to match your decor, or even adding custom decals or designs to personalize your table.
Additionally, you may want to consider adding a protective cover for the playing surface. A cover will not only help keep dust and dirt off the table but also protect it from scratches and spills. Look for a cover that is sized to fit your table and made of a durable material.
Finally, create a designated storage area for pool cues, balls, and other accessories. This could be a built-in drawer or cabinet, or a separate storage unit nearby. Having a convenient and organized storage solution will make it easy to transition from dining to playing mode.
Once you have added these finishing touches, take a step back and admire your creation. You’ve successfully transformed a regular pool table into a versatile and stylish pool table dining top!
Congratulations on completing all the steps and creating your very own pool table dining top. It’s time to invite friends and family over to enjoy a game of pool or gather around for a delicious meal. Cheers to your DIY craftsmanship and the endless entertainment your table will provide!
Read more: How To Make A Resin Dining Table
Conclusion
Congratulations on successfully creating your own pool table dining top! By following the steps outlined in this article, you have transformed a regular pool table into a versatile and functional piece of tableware. Not only will it provide endless entertainment for you and your loved ones, but it will also serve as a stylish addition to your home.
Your pool table dining top offers the best of both worlds, allowing you to seamlessly switch between a dining table and a pool table. Whether you’re hosting a dinner party or enjoying a fun game of pool, this dual-purpose piece of furniture is sure to impress your guests and provide endless hours of enjoyment.
Remember to take care of your pool table dining top to ensure its longevity and continued functionality. Clean the playing surface regularly, use a protective cover when not in use, and keep the rails and pockets in good condition. By properly maintaining your table, you can enjoy its benefits for many years to come.
So, gather your family and friends, set the table for a delicious meal, and then challenge each other to a friendly game of pool. With your new pool table dining top, you have the perfect centerpiece for creating lasting memories and bringing people together.
Thank you for embarking on this DIY journey with us. We hope you found this guide helpful and that you have a fantastic time using your pool table dining top!
Frequently Asked Questions about How To Make A Pool Table Dining Top
Was this page helpful?
At Storables.com, we guarantee accurate and reliable information. Our content, validated by Expert Board Contributors, is crafted following stringent Editorial Policies. We're committed to providing you with well-researched, expert-backed insights for all your informational needs.


0 thoughts on “How To Make A Pool Table Dining Top”