Tableware
How To Paint A Dining Table
Modified: March 2, 2024
Learn how to paint a dining table and transform your tableware. Follow our step-by-step guide to create a stunning new look for your dining space.
(Many of the links in this article redirect to a specific reviewed product. Your purchase of these products through affiliate links helps to generate commission for Storables.com, at no extra cost. Learn more)
Introduction
Welcome to the world of tableware! Whether you’re hosting an elegant dinner party or enjoying a casual meal with your family, the dining table is the centerpiece of your dining experience. However, over time, your dining table may start to show signs of wear and tear. Scratches, stains, and an outdated finish can make your beloved table look tired and dull.
But fear not! With a little bit of creativity and elbow grease, you can transform your dining table and give it a brand new lease on life. One of the most effective ways to achieve this is by painting your dining table. Painting not only allows you to cover up imperfections but also gives you the freedom to customize the look of your table to match your style and décor.
In this step-by-step guide, we will walk you through the process of painting a dining table, from gathering supplies to reassembling and styling the table. We will also provide helpful tips and tricks along the way to ensure that your final result is a table that you can be proud of.
Before we dive in, it’s important to note that the process of painting a dining table requires time and patience. It’s not a project that can be completed in a few hours, but the end result will be well worth the effort. So, roll up your sleeves, put on your painting clothes, and let’s get started on transforming your dining table into a stunning piece of tableware!
Key Takeaways:
- Transform your dining table with a fresh coat of paint, bringing new life to worn-out furniture and allowing for personalized customization to match your style and decor.
- Proper preparation, meticulous painting techniques, and patience are key to achieving a stunning and durable finish, ensuring your newly painted dining table becomes a timeless centerpiece for your home.
Read more: How To Paint A Dining Table
Step 1: Gather Supplies
Before you begin painting your dining table, it’s essential to gather all the necessary supplies. Having everything you need on hand will make the process smoother and more efficient. Here’s a list of the supplies you’ll need:
- Paint: Choose a high-quality paint that is specifically formulated for furniture. Opt for a paint with a durable finish, such as satin or semi-gloss, to ensure that it stands up to everyday use.
- Primer: A primer is essential for creating a smooth and even base for the paint. Look for a primer that is suitable for the type of paint you’ll be using.
- Sandpaper: You’ll need sandpaper in various grits to help prepare the surface of the table. Start with a coarse grit to remove any roughness or old finish, and then gradually move to finer grits for a smoother surface.
- Painter’s Tape: Painter’s tape is useful for masking off areas that you don’t want to paint, such as table legs or edges.
- Drop Cloth or Plastic Sheet: To protect the surrounding area from paint drips and spills, lay down a drop cloth or plastic sheet.
- Paintbrushes: Invest in high-quality paintbrushes in various sizes to ensure smooth and even application of the paint. Synthetic brushes are often recommended for painting furniture.
- Roller and Tray: If you prefer to use a roller for faster coverage, make sure to have a roller and tray on hand.
- Disposable Gloves: Wearing disposable gloves will protect your hands from paint and make cleanup easier.
- Clean Cloth: Keep a clean cloth or rag nearby for wiping away dust and excess paint.
- Paint Thinner or Mineral Spirits (if using oil-based paint): If you choose to use oil-based paint, you’ll need paint thinner or mineral spirits for cleaning brushes and thinning the paint if necessary.
Double-check that you have all the supplies listed above before starting the project. Being prepared will save you time and prevent any unnecessary disruptions during the painting process. Once you have everything ready, it’s time to move on to the next step: preparing the surface of the table.
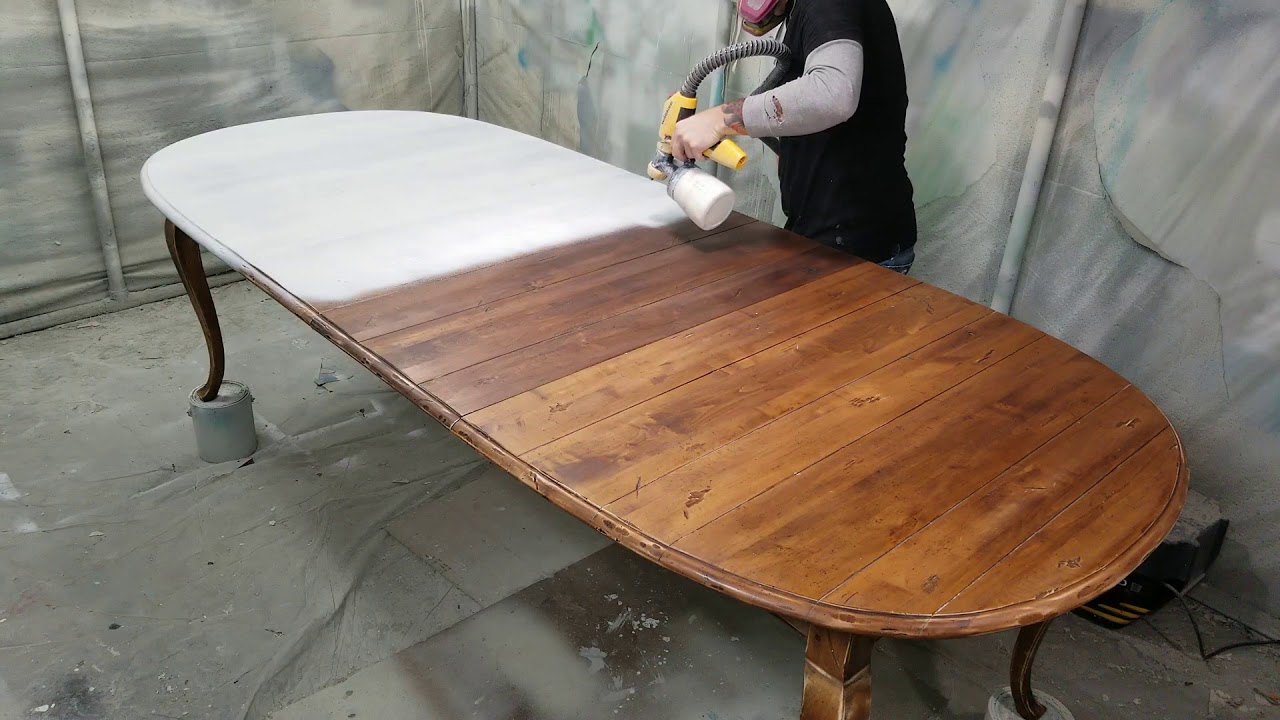
Step 2: Prepare the Surface
Preparing the surface of your dining table is a crucial step in ensuring a smooth and long-lasting paint finish. This step involves removing any existing paint or finish, cleaning the table, and filling in any cracks or imperfections. Follow these steps to properly prepare the surface:
- Clear the workspace: Start by clearing the area around the table and protecting the floor with a drop cloth or plastic sheet. This will prevent any accidental damage or paint splatters.
- Remove the old finish: If your table has an existing paint or varnish, you’ll need to strip it off. Using a paint stripper or sander, carefully remove the old finish following the manufacturer’s instructions. Make sure to wear protective eyewear and a dust mask while working.
- Repair any damage: Inspect the table for any cracks, dents, or scratches. Use wood filler or putty to fill in any imperfections, and sand it smooth once dry.
- Remove hardware: If your table has any hardware, such as drawer pulls or hinges, remove them to ensure an even paint application. Set them aside in a safe place.
- Clean the table: Thoroughly clean the table to remove any dust, dirt, or grease. Use a mild detergent or wood cleaner and a soft cloth or sponge. Rinse well and allow it to dry completely.
- Smooth the surface: Use a fine-grit sandpaper to lightly sand the entire table surface. This will help create a rough texture that allows the paint to adhere better. Wipe away any dust with a clean cloth.
By properly preparing the surface, you’ll ensure that the paint adheres well and provides a smooth and professional-looking finish. Once you’ve completed the surface preparation, you’re ready to move on to the next step: sanding the table.
Step 3: Sand the Table
Sanding the table is an essential step in the painting process as it helps to further smoothen the surface and promote better paint adhesion. Follow these steps to sand your dining table:
- Select the right sandpaper: Start by choosing the appropriate sandpaper grit. If the surface is rough or has a thick finish, begin with a coarse grit, such as 80 or 100. Then, gradually progress to finer grits, such as 120 or 150, for a smoother finish.
- Sand the table: Using a sanding block or a power sander, sand the table surface in the direction of the wood grain. Apply even pressure and make sure to cover the entire surface, including the edges. This will help remove any remaining finish, smooth out imperfections, and create a uniform surface for painting. Be mindful not to sand too aggressively, as it can damage the wood.
- Remove dust: After sanding, use a clean, damp cloth or a vacuum cleaner with a brush attachment to remove all the sanding dust from the table. Ensure that the surface is completely clean and dry before proceeding to the next step.
Sanding the table not only helps in achieving a smooth painting surface but also helps in removing any remaining traces of the old finish and preparing the wood for optimal paint adhesion. Once you’ve completed the sanding process, you’re now ready to move on to priming the table.
Step 4: Prime the Table
Priming the table is a crucial step that helps to create a smooth and even base for the paint, enhances the durability of the final finish, and prevents the wood from absorbing too much paint. Follow these steps to prime your dining table:
- Choose the right primer: Select a high-quality primer that is specifically designed for furniture painting. The type of primer you use will depend on the type of paint you’ll be applying. If you’re using latex or water-based paint, choose a water-based primer. For oil-based paint, use an oil-based primer.
- Prepare the primer: Thoroughly stir the primer to ensure it is well-mixed. If needed, thin the primer according to the manufacturer’s instructions.
- Apply the primer: Using a paintbrush or a roller, apply the primer to the table surface in smooth, even strokes. Work in small sections, starting from one end and moving to the other. Make sure to cover the entire surface, including the edges. Take care to avoid drips or excess primer. If using a roller, roll in one direction for a consistent finish.
- Allow the primer to dry: Follow the recommended drying time mentioned on the primer’s packaging. It’s important to allow the primer to dry fully before proceeding to the next step. This will ensure proper adhesion and a smooth base for the paint.
- Sand the primed surface (optional): If you notice any imperfections or rough spots on the primed surface, lightly sand them with fine-grit sandpaper. Wipe away any dust with a clean cloth.
- Clean the paintbrush or roller: After you’ve finished priming, clean your brush or roller thoroughly to remove any primer residue. If you’re using a water-based primer, wash with soap and water. For oil-based primers, use paint thinner or mineral spirits. Allow them to dry completely before reusing.
Priming the table not only improves the appearance of the final paint finish but also provides a protective barrier and helps the paint adhere better to the surface. Once the primer is completely dry, you’re ready to move on to the exciting part – applying the base coat of paint!
Read more: How To Paint A Dining Table Black
Step 5: Apply the Base Coat
Now it’s time to bring your dining table to life by applying the base coat of paint. The base coat will determine the overall color and tone of your table. Here are the steps to apply the base coat:
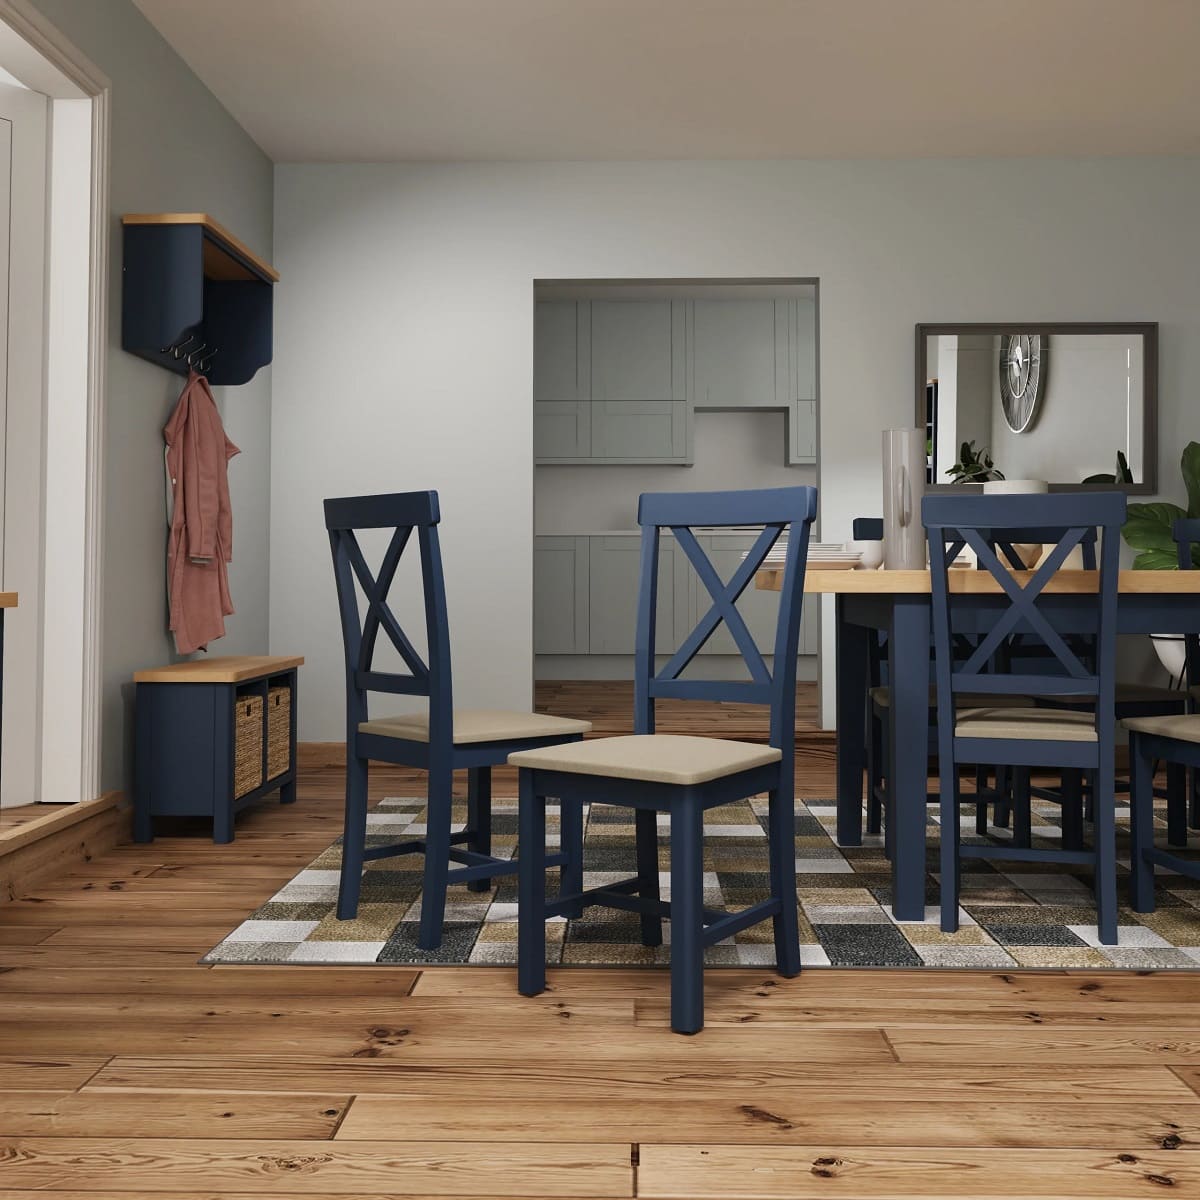
- Choose your paint color: Select a paint color that suits your style and complements your dining area’s decor. Consider the mood and ambiance you want to create – whether it’s a vibrant pop of color or a more subtle and neutral tone.
- Prepare the paint: Stir the paint thoroughly to ensure that it is well-mixed and any settled pigments are evenly distributed. If necessary, thin the paint to achieve the desired consistency, following the instructions on the paint can.
- Start painting: Begin by applying the base coat to the table surface using a paintbrush or a roller. Work in long, smooth strokes, following the direction of the wood grain. Ensure even coverage, and avoid leaving brush marks or roller lines.
- Paint in stages: Work in small sections, starting from one end of the table and moving to the other. This will help you maintain a consistent finish and prevent the paint from drying too quickly.
- Cover all areas: Pay attention to the table’s edges, corners, and any intricate details. Use a smaller brush or a foam brush to reach these areas with precision.
- Allow the base coat to dry: Follow the drying time mentioned on the paint can. It’s essential to allow the base coat to dry fully before applying additional coats or moving on to the next step.
- Assess the coverage: Once the base coat is dry, assess the coverage. If needed, apply a second coat to ensure an even and opaque finish. Follow the same painting technique as before, allowing the second coat to dry completely.
- Clean your brushes or rollers: Clean your brushes or rollers thoroughly using soap and water for water-based paints or the appropriate solvent for oil-based paints. Remove any excess paint and allow them to dry before reusing.
Applying the base coat is an exciting step as you begin to see your dining table transform with color. Take your time, work in stages, and ensure even coverage for a professional result. Once the base coat is dry, you’re ready to move on to applying additional coats, if necessary, for a more polished finish.
Before painting a dining table, make sure to thoroughly clean and sand the surface to ensure the paint adheres properly. Use a high-quality primer to create a smooth base for the paint to adhere to.
Step 6: Apply Additional Coats
After applying the base coat, you may find that the desired color and finish are not fully achieved. Applying additional coats of paint will help enhance the color depth and provide a more even and consistent appearance. Follow these steps to apply additional coats:
- Assess the coverage: Once the base coat is dry, examine the table surface for any areas where the color may appear uneven or translucent. This will guide you in determining if additional coats are necessary.
- Prepare the paint: If you need to apply more coats, stir the paint thoroughly to ensure an even color and consistency. You may not need to thin the paint unless specified by the manufacturer.
- Apply the additional coats: Using the same painting technique as before, apply the paint in thin and even layers. Allow each coat to dry completely before applying the next one. This will help prevent the paint from becoming tacky or peeling.
- Assess and repeat if needed: After each coat has dried, assess the coverage and color. If you’re satisfied with the result, you can proceed to the next step. Otherwise, repeat the process of applying additional coats until you achieve the desired color and finish.
- Allow the final coat to dry: Once you’re satisfied with the painted surface, allow the final coat of paint to dry completely. This ensures that the paint cures properly, providing a durable and long-lasting finish.
Applying additional coats of paint is a crucial step in achieving a professional and flawless finish. Taking the time to assess the coverage and applying thin and even layers will result in a beautifully painted dining table. Once the final coat is dry, you’re ready to seal the table to protect the paint and add a finishing touch.
Step 7: Seal the Table
Sealing the painted surface of your dining table is an important step to protect the paint and ensure its longevity. A sealant acts as a barrier against everyday wear and tear, spills, and scratches. Follow these steps to properly seal your table:
- Select the appropriate sealant: Choose a sealant that is compatible with the type of paint you used. If you used latex or water-based paint, opt for a water-based polyurethane or acrylic sealant. For oil-based paint, use an oil-based polyurethane or varnish.
- Prepare the sealant: Stir the sealant gently to mix it. Avoid excessive shaking or vigorous stirring, as it can introduce air bubbles. If needed, thin the sealant according to the manufacturer’s instructions.
- Apply the sealant: Using a clean brush or a foam brush, apply a thin and even layer of sealant to the entire painted surface of the table. Follow the wood grain and avoid leaving brush marks or streaks. Work in small sections to ensure complete coverage.
- Allow the first coat to dry: Allow the first coat of sealant to dry according to the manufacturer’s instructions. This typically takes a few hours, but it may vary depending on the specific product used.
- Lightly sand (optional): After the first coat has dried, you may choose to lightly sand the sealed surface with a fine-grit sandpaper. This helps to smooth out any imperfections or brush marks. Remember to wipe away any sanding residue before applying subsequent coats.
- Apply additional coats: Repeat the process of applying thin and even coats of sealant, allowing each coat to dry before applying the next. The number of coats recommended depends on the specific sealant and the level of protection you desire. Typically, 2-3 coats are sufficient for most applications.
- Clean your brushes: Clean your brushes or foam brushes thoroughly using the appropriate cleaner for the sealant used. Remove any excess sealant and allow the brushes to dry before storing them.
Sealing the table will not only protect the painted surface but also add a beautiful sheen and enhance the overall appearance. It is important to follow the drying times between coats to ensure optimal results. Once the final coat of sealant is dry, you can proceed to the next step of allowing the table to fully dry.
Step 8: Let the Table Dry
After completing the sealing process, it’s crucial to allow sufficient time for the dining table to dry. This step ensures that the paint and sealant cure properly and create a durable and long-lasting finish. Here’s what you need to do:
- Find a well-ventilated area: Choose a well-ventilated space for drying, preferably away from direct sunlight or extreme temperatures. Good air circulation helps the paint and sealant to dry evenly and without any issues.
- Follow the manufacturer’s instructions: Check the paint and sealant cans for specific drying times recommended by the manufacturer. The drying time can vary depending on the type of paint, sealant, and environmental conditions. It’s important to adhere to these guidelines to ensure optimal results.
- Be patient: Allow ample time for the table to dry completely. This typically ranges from a few hours to a few days. It’s better to wait longer than to rush the process and risk damaging the finish. During this time, avoid placing any objects or heavy items on the table to prevent imprints or damage.
- Perform a touch test: To check if the table is fully dry, lightly touch an inconspicuous area of the painted surface. If it feels cool or tacky, it’s an indication that it needs more drying time. However, if it feels dry and smooth, it’s safe to proceed to the final step.
Allowing the table to dry thoroughly ensures that the paint and sealant bond properly, resulting in a durable and beautiful finish. Once you’re confident that the table is fully dry, you can move on to the exciting final step – reassembling and styling your freshly painted dining table!
Read more: How To Paint An Ikea Dining Table
Step 9: Reassemble and Style the Table
Now that your dining table is dry and ready for use, it’s time to put all the pieces back together and add some stylish touches to complete the transformation. Follow these steps to reassemble and style your newly painted table:
- Retrieve all table components: Gather all the parts of your dining table, including the tabletop, legs, and any hardware or accessories that were removed during the painting process.
- Attach the legs: Position the table legs in their respective slots or attachment points on the tabletop. Secure them using screws or bolts, following the manufacturer’s instructions or the original assembly method.
- Tighten all connections: Ensure that all connections between the tabletop and the legs, as well as any additional components, are tightened securely. This will provide stability and prevent any wobbling or movement of the table during use.
- Replace hardware: If you removed any hardware, such as drawer pulls or hinges, during the painting process, now is the time to reattach them. Make sure they are properly aligned and fastened securely.
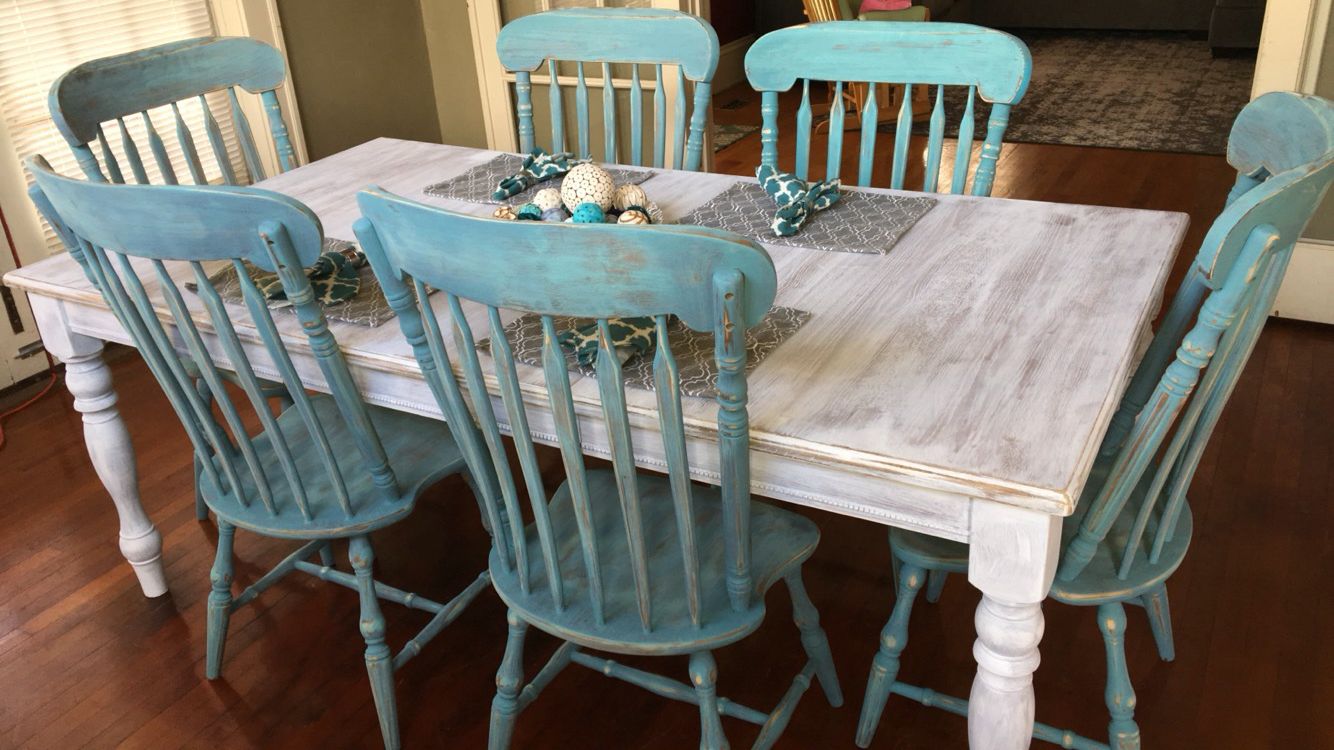
- Style your table: With the main structure of your table reassembled, it’s time to put your personal touch on it. Consider adding a tablecloth or runner in a complementary color or pattern to protect the surface and add visual interest. Decorate the table with centerpieces, candles, or other decorative elements that reflect your personal style and enhance the overall ambiance of the dining area.
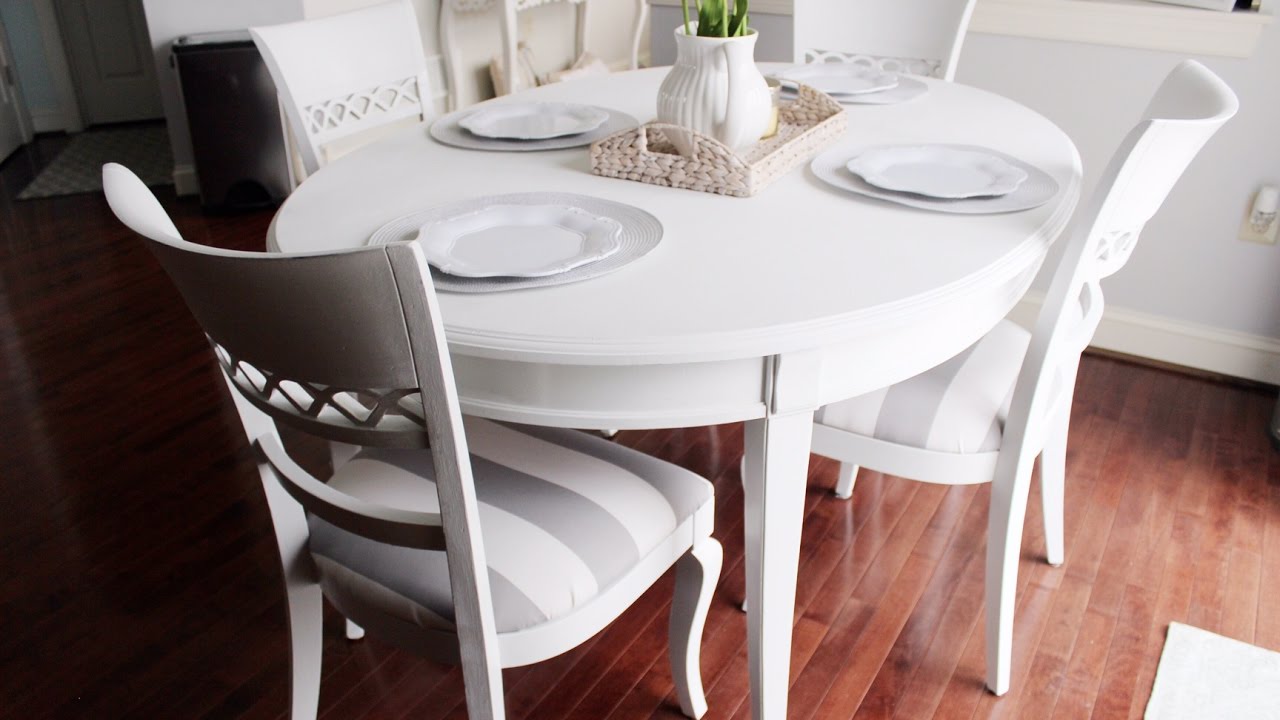
- Enjoy your newly painted dining table: Your dining table is now transformed into a stunning and refreshed piece of furniture. Gather your loved ones around the table and enjoy the fruits of your labor. Whether it’s a cozy family meal or a festive gathering with friends, your newly painted dining table will surely become the centerpiece of many memorable moments.
Reassembling and styling the table is the final step in the process. By taking the time to ensure all connections are secure and putting your personal touches on the table, you add the finishing touches that enhance its overall appearance and make it uniquely yours. Now, sit back, relax, and enjoy the beauty of your newly painted dining table!
Conclusion
Congratulations! You’ve successfully transformed your dining table from worn-out to wonderful through the power of paint. By following the step-by-step guide provided, you were able to gather the necessary supplies, prepare the surface, sand the table, prime it, apply the base coat, add additional coats if needed, seal the table, let it dry, and finally, reassemble and style it to perfection.
Painting a dining table is a rewarding project that allows you to revive an old piece of furniture and customize it to suit your style and décor. Through careful preparation, meticulous painting techniques, and patience, you’ve created a beautiful and unique centerpiece for your dining area.
Remember, a well-painted and sealed dining table not only enhances the visual appeal of your space but also protects it from everyday wear and tear. With the right care and maintenance, your freshly painted table will continue to be a stunning focal point in your home for years to come.
Now that you’ve unlocked the secrets of transforming a dining table, feel free to explore other furniture painting projects. Let your creativity shine as you reimagine and revitalize your living space through the transformative power of paint.
So, gather your supplies, prepare your surface, and let your imagination guide you as you embark on your next painting adventure. Happy painting!
Frequently Asked Questions about How To Paint A Dining Table
Was this page helpful?
At Storables.com, we guarantee accurate and reliable information. Our content, validated by Expert Board Contributors, is crafted following stringent Editorial Policies. We're committed to providing you with well-researched, expert-backed insights for all your informational needs.


0 thoughts on “How To Paint A Dining Table”