Home>diy>Architecture & Design>How To Start Learning 3D Modeling
Architecture & Design
How To Start Learning 3D Modeling
Modified: January 19, 2024
Learn the basics of 3D modeling and kickstart your journey in architecture design. Explore step-by-step guides, tutorials, and tips to master the art of creating stunning architectural designs.
(Many of the links in this article redirect to a specific reviewed product. Your purchase of these products through affiliate links helps to generate commission for Storables.com, at no extra cost. Learn more)
Introduction
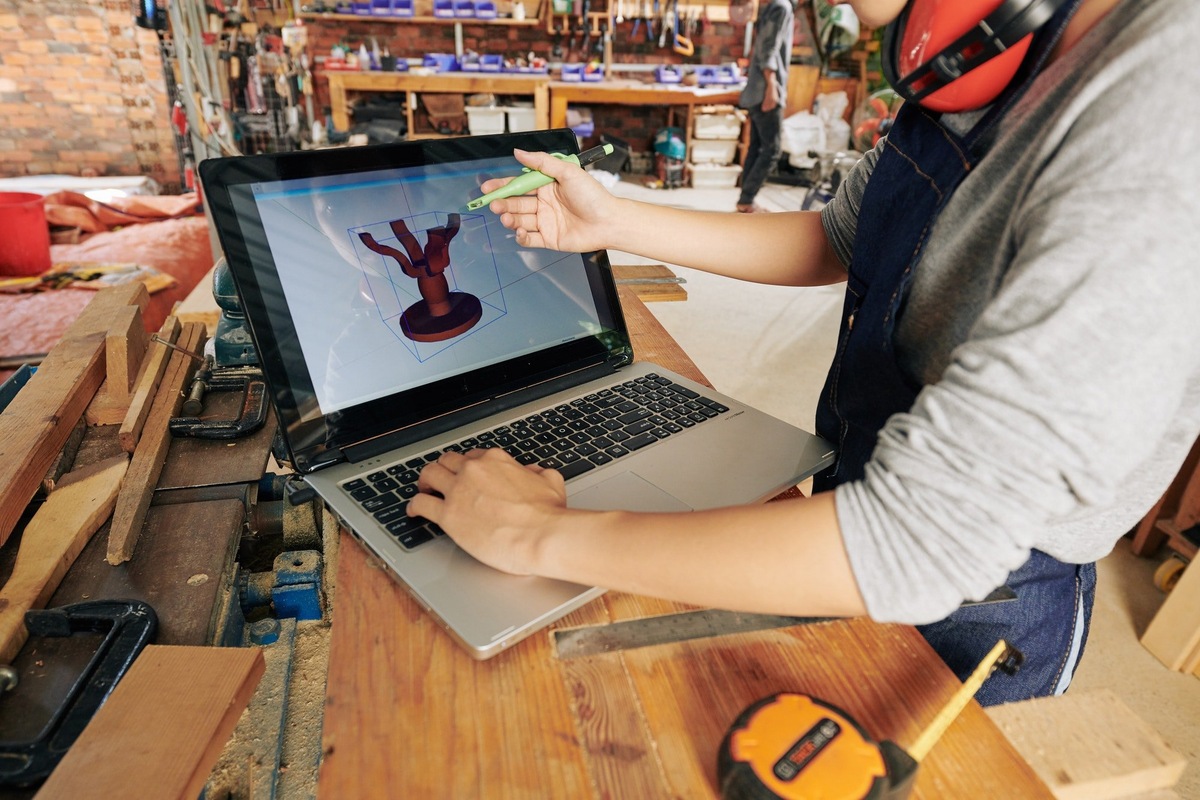
Welcome to the exciting world of 3D modeling! Whether you’re a budding artist, a designer, or someone who simply has an interest in creating stunning visualizations, learning 3D modeling can open up a whole new realm of possibilities for you. 3D modeling is the process of creating three-dimensional digital representations of objects, characters, environments, and more. It allows you to bring your imagination to life and create stunning visuals that can be used in various industries such as gaming, animation, visual effects, architecture, product design, and more.
But where do you begin? With so many different software options, techniques, and resources available, it can be overwhelming to know where to start. Fear not, as this article will guide you through the process of learning 3D modeling and provide you with the necessary information and resources to begin your journey.
Before diving straight into the technical aspects of 3D modeling, it’s essential to develop a strong foundation and understanding of the different types of 3D modeling and the tools and software available. This knowledge will help you make informed decisions and choose the right approach for your projects.
Throughout this article, we’ll explore the various types of 3D modeling, including polygonal modeling, NURBS modeling, sculpting techniques, texturing and UV mapping, lighting and rendering techniques, animation and rigging basics, efficient workflow tips, and resources for further learning and practice. By the end, you’ll have a solid understanding of the fundamentals and be well-equipped to embark on your 3D modeling journey.
So, fasten your seatbelt, grab your virtual sculpting tools, and let’s dive into the fascinating world of 3D modeling!
Key Takeaways:
- Embark on your 3D modeling journey by familiarizing yourself with the basic concepts, choosing the right software, and continuously practicing to refine your skills. Embrace challenges and let your creativity guide your creations.
- Efficient workflow, continuous learning, and exploration of diverse resources are essential for mastering 3D modeling. Embrace experimentation, seek inspiration, and enjoy the process of bringing your imagination to life in the fascinating world of 3D modeling.
Read more: What Is 3D Modeling?
Getting Started with 3D Modeling
Before you start your journey into the world of 3D modeling, it’s important to familiarize yourself with the basic concepts and principles. Here are a few steps to help you get started:
- Research and Explore: Take some time to research and explore various 3D modeling techniques and applications. Understand the different types of models, such as character modeling, architectural modeling, or product modeling, and see which ones interest you the most. This will give you a better idea of where to focus your efforts.
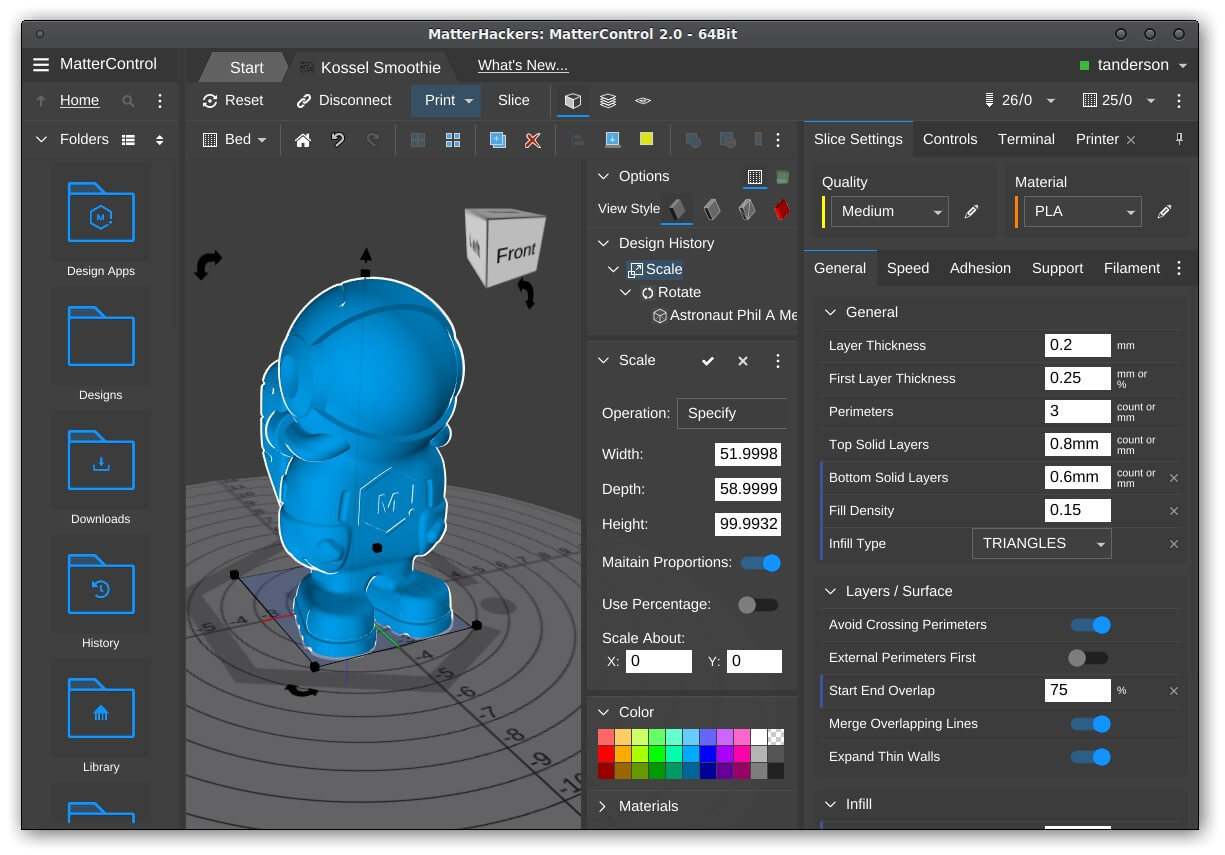
- Choose the Right Software: There are several 3D modeling software options available, ranging from beginner-friendly to industry-standard tools. Some popular choices include Blender, Autodesk Maya, and ZBrush. Consider your budget, the complexity of the software, and the type of projects you want to work on when making your decision.
- Find Learning Resources: Once you’ve chosen your software, it’s time to find learning resources. Look for online tutorials, video courses, books, and forums dedicated to 3D modeling. These resources will provide you with step-by-step guidance and help you grasp the fundamental concepts and techniques.
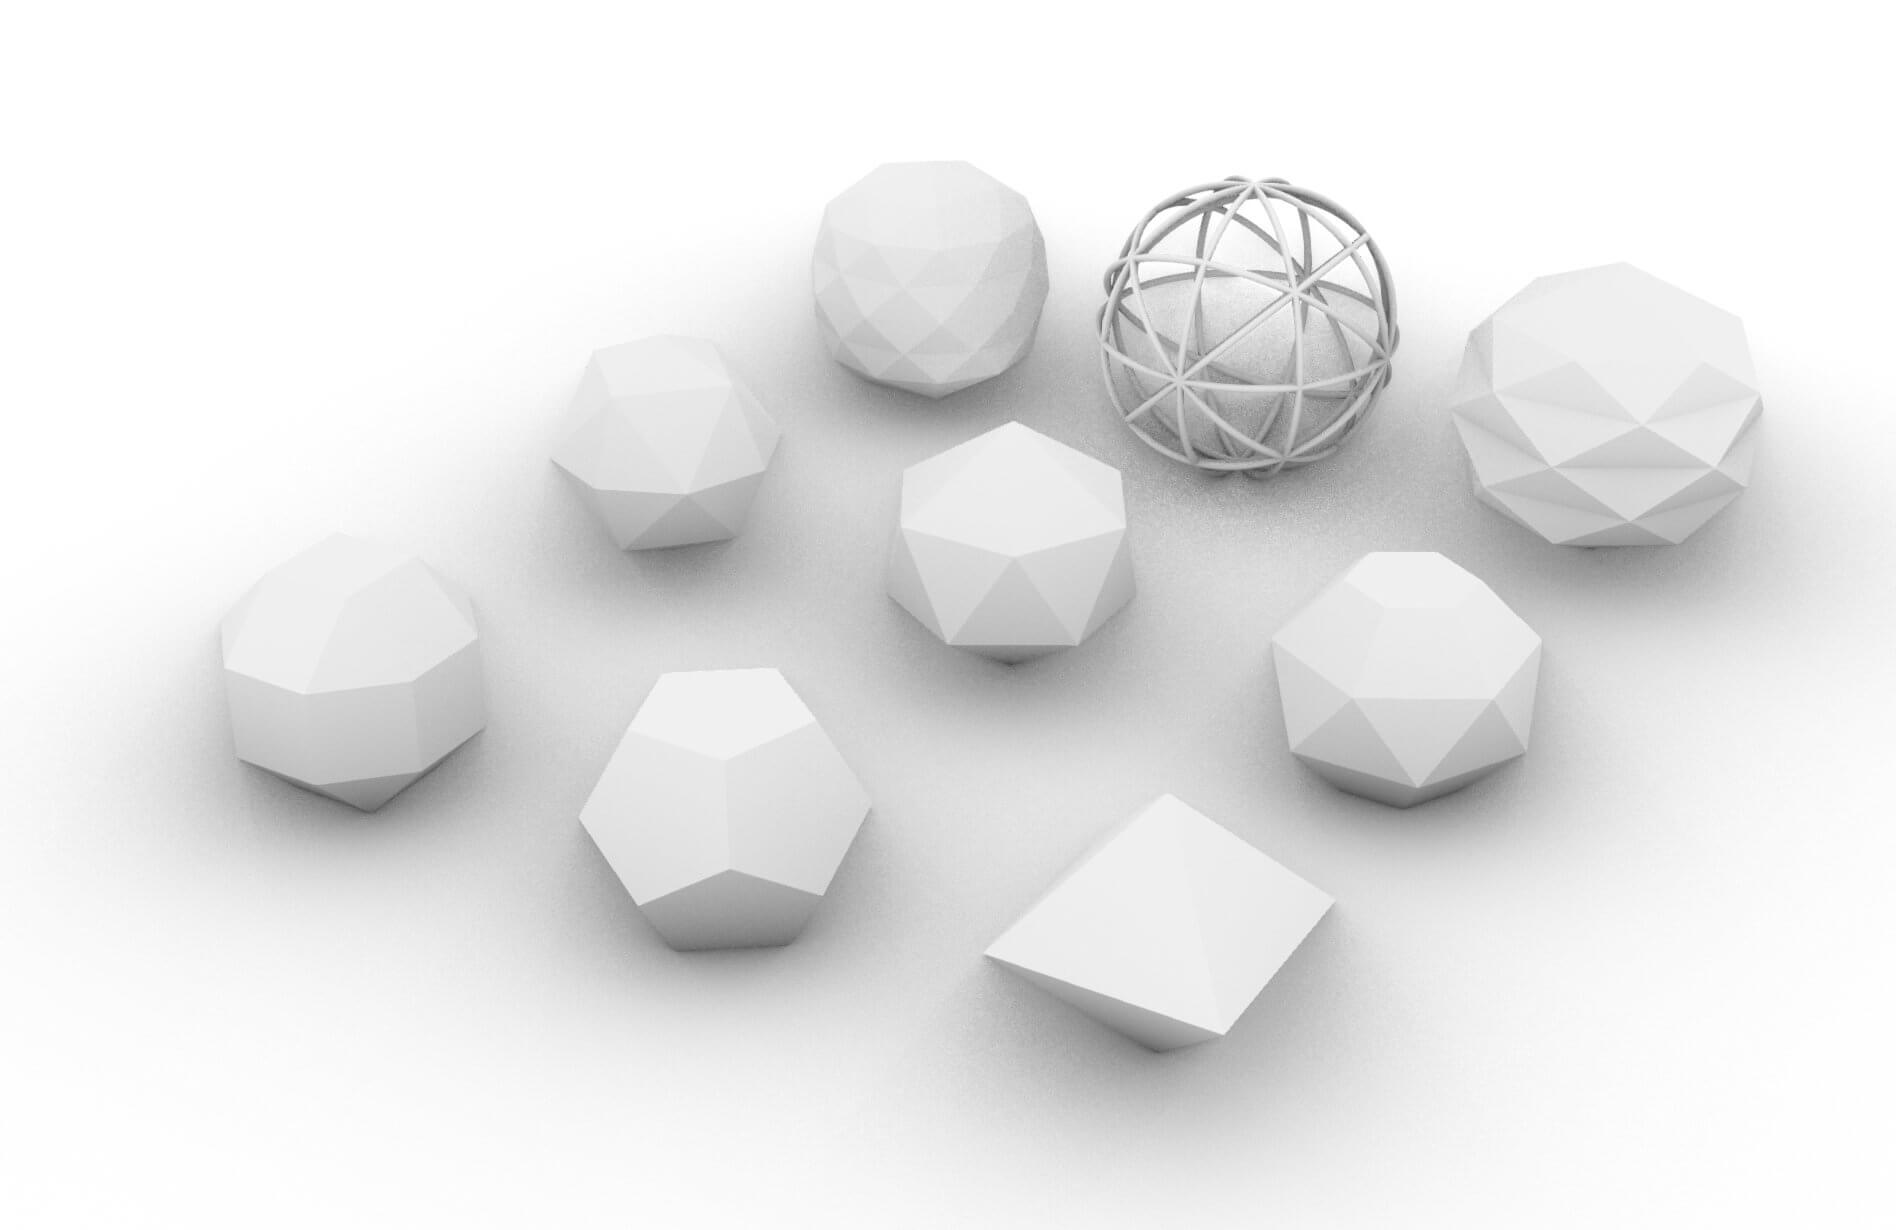
- Start with Basic Shapes: Familiarize yourself with the software interface and tools by starting with basic shapes. Create cubes, spheres, and cylinders to understand how to manipulate objects in 3D space. Focus on navigating the viewport, selecting and transforming objects, and understanding the coordinate system.
- Practice, Practice, Practice: The key to mastering 3D modeling is practice. Gradually move on to more complex objects and experiment with different techniques. Challenge yourself by recreating real-world objects or creating your own unique designs. The more you practice, the more comfortable you’ll become with the software and the various tools at your disposal.
Remember, 3D modeling is a skill that takes time and dedication to develop. Don’t get discouraged if your initial models don’t meet your expectations. With each project, you’ll learn new techniques, improve your skills, and enhance your understanding of the software.
Additionally, consider joining online communities or forums dedicated to 3D modeling. Interacting with fellow artists, sharing your work, and receiving feedback can provide valuable insights and motivation to keep improving.
Now that you have the basic steps to get started, it’s time to delve deeper into the different types of 3D modeling and explore their unique characteristics and applications.
Understanding Different Types of 3D Modeling
3D modeling encompasses a wide range of techniques and methods, each suited for different purposes and industries. Let’s take a closer look at some of the most common types of 3D modeling:
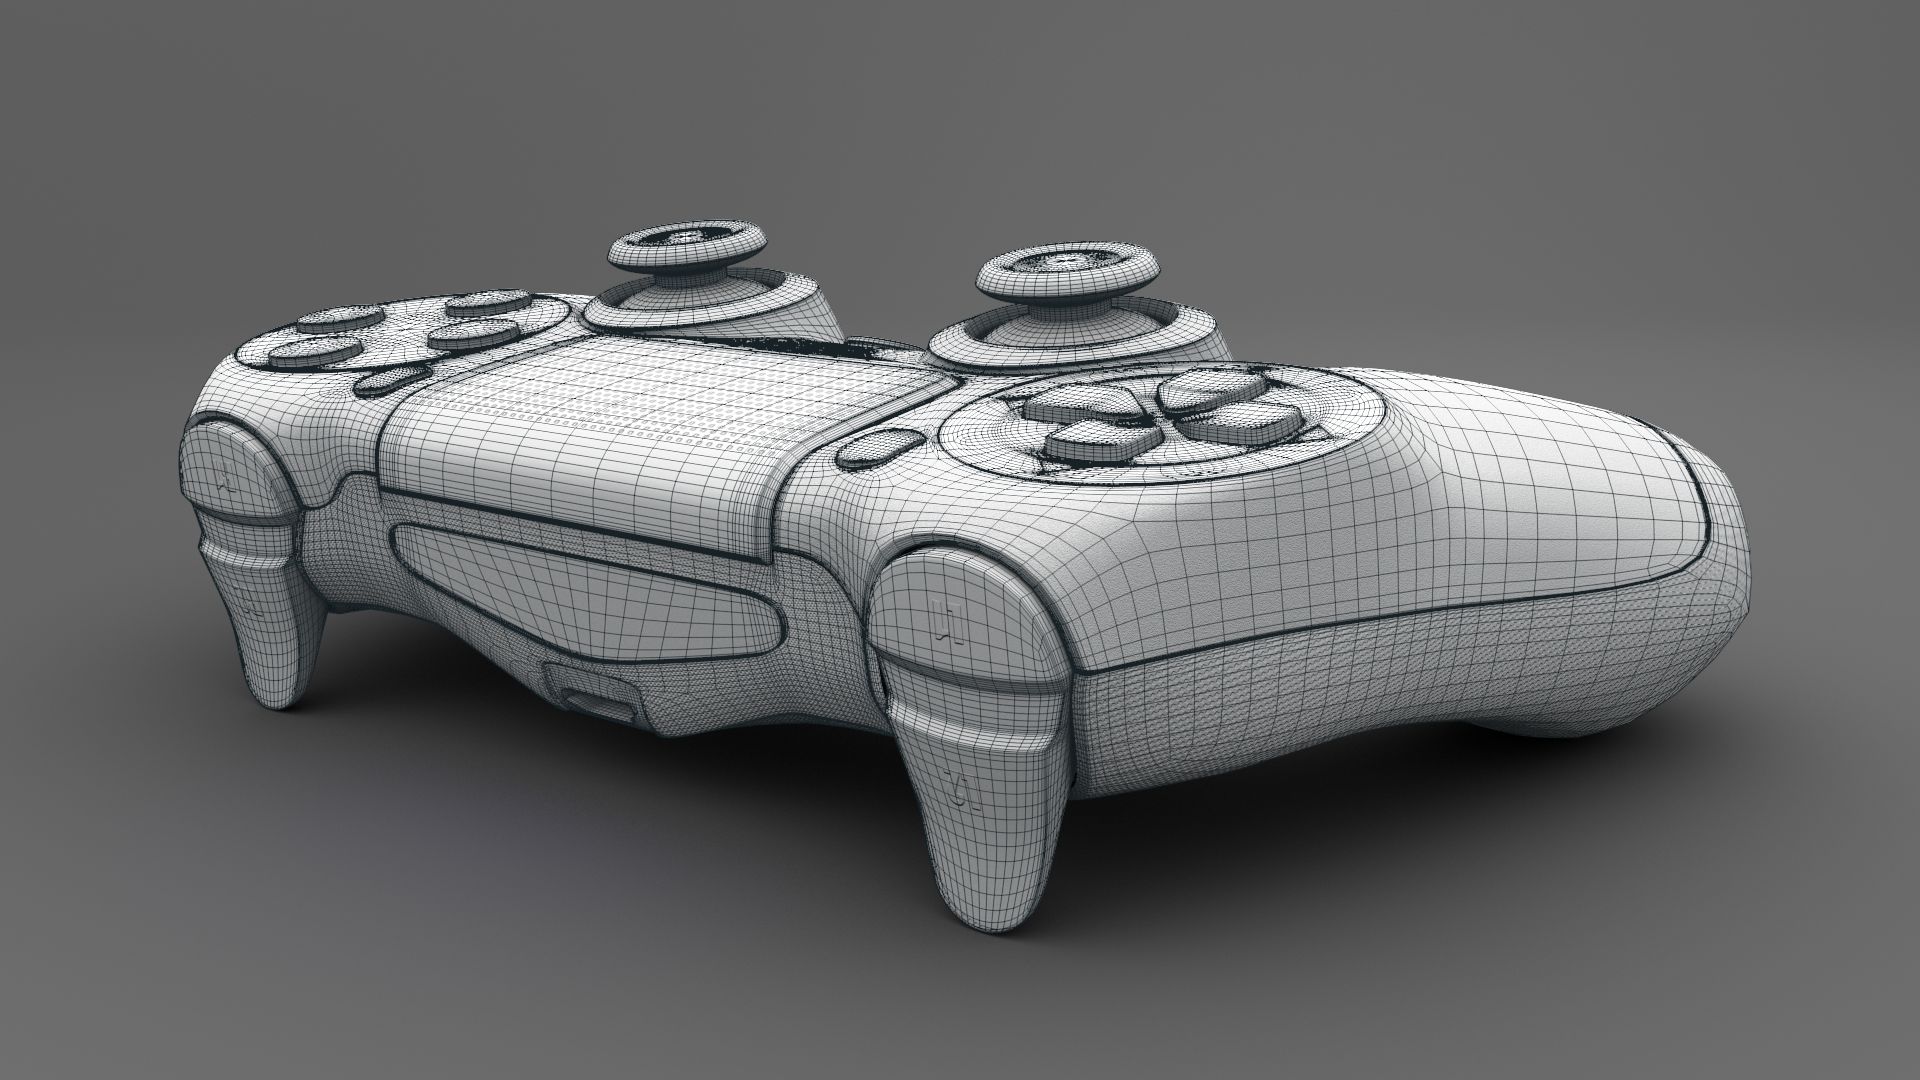
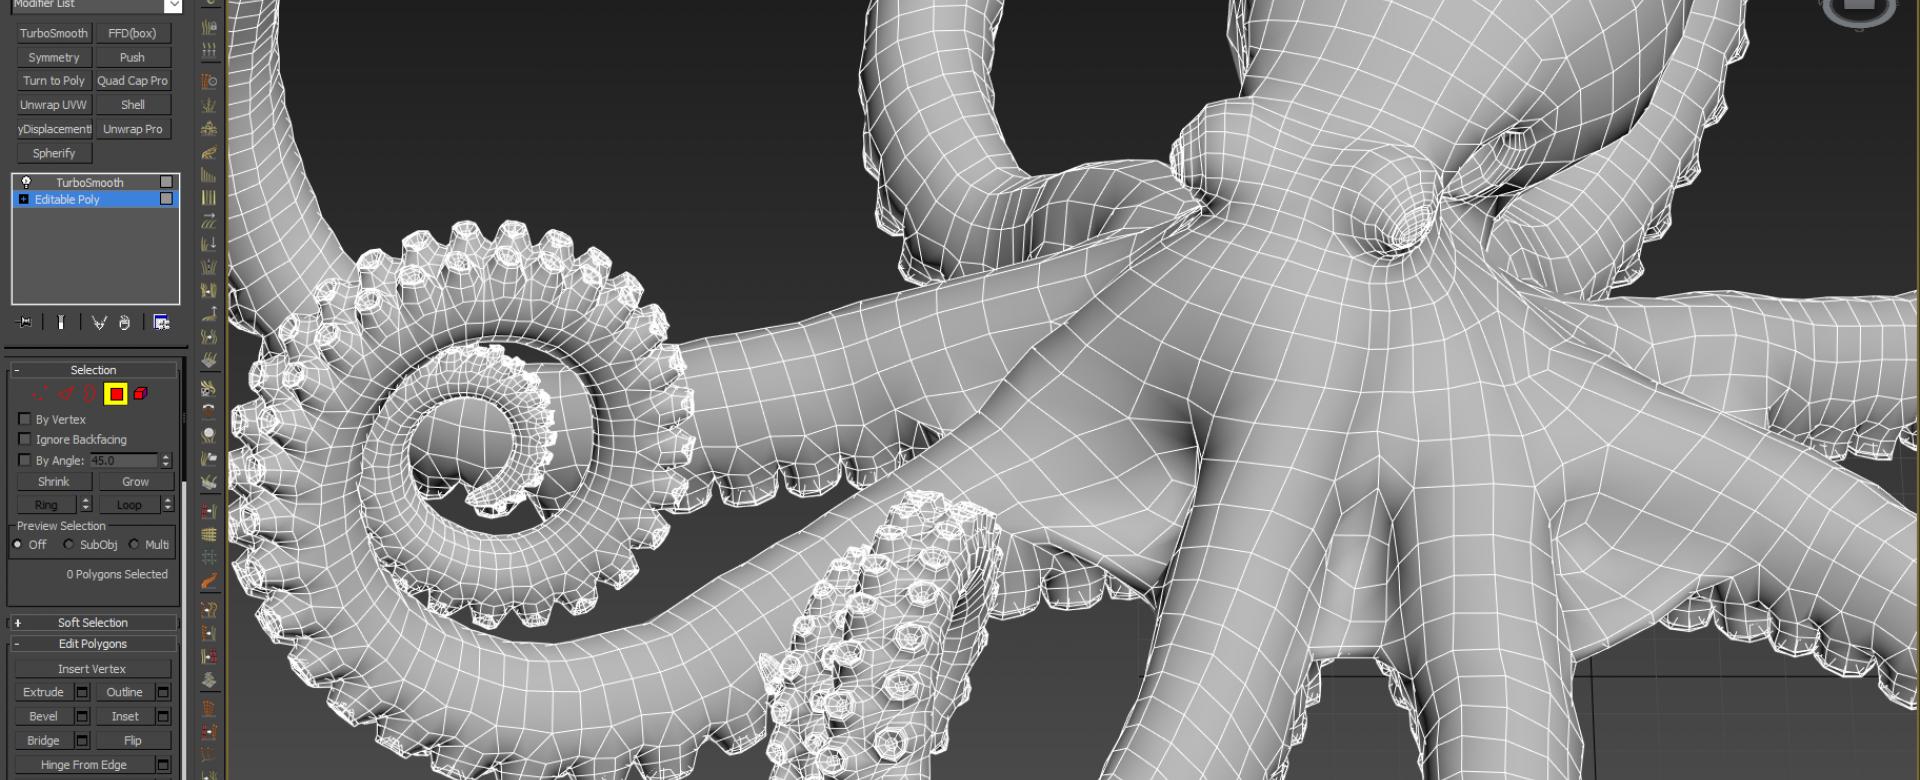
- Polygonal Modeling: Polygonal modeling, also known as mesh modeling, is the most commonly used type of 3D modeling. It involves creating objects using interconnected polygons, typically triangles or quadrilaterals. This technique allows for precise control over the shape and detail of the model. Polygonal modeling is ideal for architectural visualization, character modeling, and environmental design.
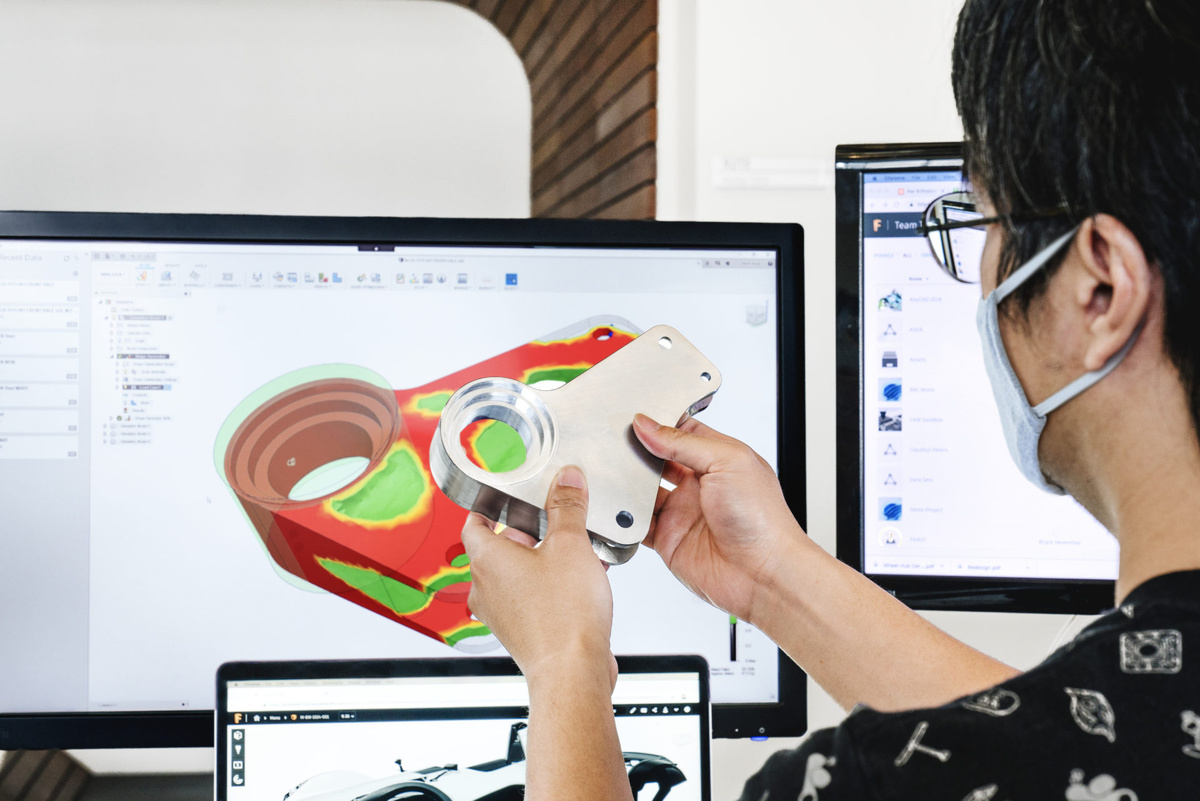
- NURBS Modeling: NURBS (Non-Uniform Rational B-Splines) modeling uses mathematical equations to create smooth and curved surfaces. It is commonly used in product design, automotive design, and industrial design. NURBS modeling offers precise control over the shape and curvature of objects and is particularly useful when working with organic shapes.
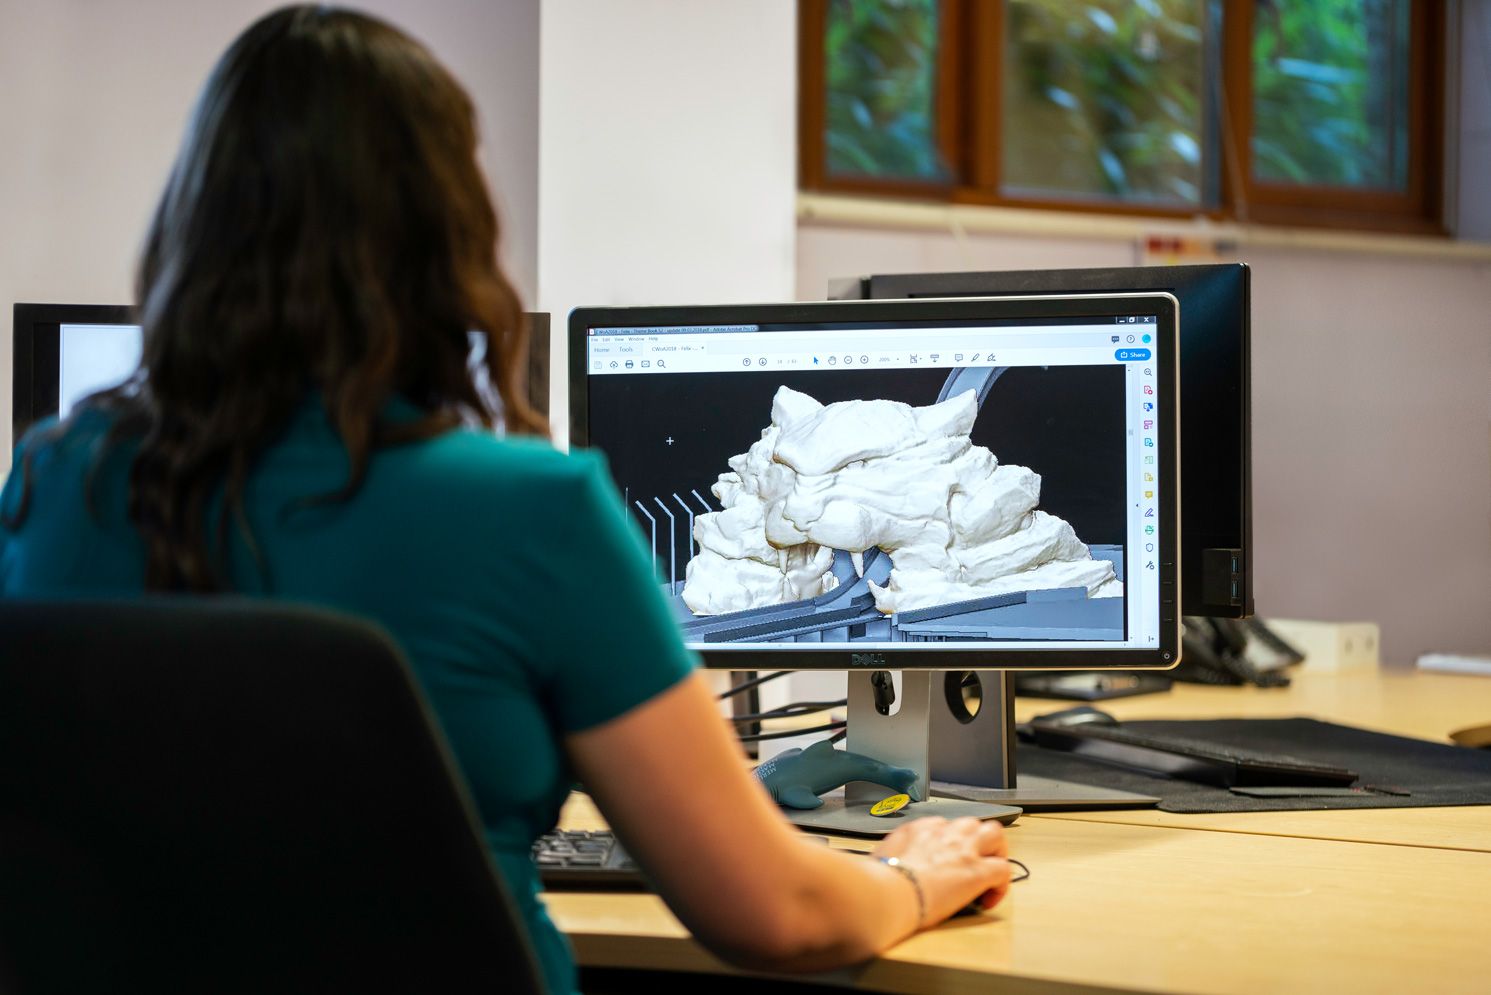
- Sculpting Techniques: Sculpting allows artists to manipulate a digital model as if they were working with clay. Artists can add or remove virtual clay to shape organic forms and create intricate details. Sculpting is widely used in character modeling, creature design, and digital sculpting for 3D printing. Popular sculpting software includes ZBrush and Mudbox.
- Parametric Modeling: Parametric modeling involves creating objects based on predefined parameters and constraints. It allows for the quick and easy modification of models by adjusting the parameters. Parametric modeling is commonly used in product design and engineering, enabling designers to make iterative changes and variations to their designs conveniently.
- Procedural Modeling: Procedural modeling involves using algorithms and rules to generate complex and detailed models. It is commonly used for creating natural landscapes, cityscapes, and intricate patterns. Procedural modeling allows for quick iteration and variation, making it ideal for creating large-scale environments.
Each type of 3D modeling technique has its own advantages and applications. It’s important to understand the strengths of each method and choose the one that best suits your project requirements.
Now that we’ve explored the different types of 3D modeling, in the next section, we’ll discuss how to choose the right software and tools to bring your 3D models to life.
Choosing the Right Software and Tools
When it comes to 3D modeling, having the right software and tools is crucial. The software you choose will depend on your specific needs, budget, and the type of projects you plan to work on. Here are some considerations to keep in mind when selecting your software and tools:
- Budget: Determine your budget for 3D modeling software. While there are free options available, such as Blender, which is a powerful open-source software, there are also commercial software like Autodesk Maya or 3ds Max that come with a price tag. Consider the features and capabilities offered by each software and weigh them against your budget.
- Industry Standard: If you have aspirations of working in a specific industry, it’s important to consider the industry-standard software used in that field. For example, if you’re interested in game development, becoming proficient in software like Unreal Engine or Unity along with a 3D modeling tool like Blender or Maya would be beneficial.
- Ease of Use: Consider the learning curve of the software. Some applications may be more beginner-friendly and offer user-friendly interfaces and workflows, while others may require more time and effort to become proficient. Choose software that aligns with your skill level and allows for growth as you progress.
- Features and Capabilities: Evaluate the features and capabilities of the software. Look for tools that will enable you to achieve the desired level of detail, realism, and complexity in your models. Consider features such as sculpting tools, UV mapping capabilities, animation capabilities, and rendering options.
- Compatibility: Consider the compatibility of the software with other tools and workflows. Some software may have integration with other applications, making it easier to transfer files and work seamlessly across different stages of the production pipeline.
- Community and Support: Look for software that has an active community and support resources. This will enable you to connect with fellow artists, participate in forums, seek help when facing challenges, and have access to tutorials and documentation that can assist you in mastering the software.
- Trial Versions: Many software packages offer trial versions or free demos. Take advantage of these to test out the software and assess its suitability for your needs. Play around with the features, try out different workflows, and evaluate how well the software aligns with your goals.
Remember that the software is just a tool, and ultimately, your creativity and skills will drive your success in 3D modeling. It’s the artist, not the software, that brings life to the digital creations.
Once you’ve chosen the right software for your needs, it’s time to dive into the basic concepts of 3D modeling. In the next section, we’ll explore the fundamental principles that will lay the groundwork for your 3D modeling journey.
Basic Concepts of 3D Modeling
Before you start creating detailed 3D models, it’s important to grasp some fundamental concepts that will serve as a foundation for your 3D modeling journey. Here are some key concepts to familiarize yourself with:
- Vertices, Edges, and Faces: A 3D model is made up of vertices (points in 3D space), edges (lines connecting vertices), and faces (polygons formed by connecting edges). Understanding how these elements work together is essential for shaping and manipulating your models.
- Coordinate System: 3D models exist in a three-dimensional coordinate system, consisting of X (left to right), Y (up and down), and Z (back and front) axes. Understanding the coordinate system will help you position, scale, and rotate your models accurately.
- Modeling Techniques: Different modeling techniques are used to create and modify objects. These techniques include extrusion (creating geometry by extending faces), subdivision (refining geometry by adding more vertices and edges), and boolean operations (combining or subtracting geometry).
- Modifiers: Modifiers are tools or operations applied to objects to achieve specific effects. They can be used to add smoothness, add or remove details, apply deformations, and more. Common modifiers include subdivision surface, bevel, mirror, and array.
- Materials and Textures: Materials and textures bring realism and visual appeal to your models. Materials determine how light interacts with the surface of an object, while textures add detailed patterns, colors, and other visual enhancements.
- UV Mapping: UV mapping is the process of projecting a 2D texture onto a 3D model. It involves unwrapping the model’s surface and creating a 2D representation of its shape. UV mapping is essential for applying textures accurately and is a fundamental skill in 3D modeling.
- Lighting and Rendering: Lighting plays a crucial role in 3D modeling, as it defines how objects in a scene are illuminated. Understanding different lighting techniques and settings can greatly enhance the realism of your models. Rendering is the process of converting your 3D models into 2D images or animations, taking into account lighting, materials, textures, and other visual effects.
- File Formats: Familiarize yourself with common file formats used in 3D modeling, such as .obj, .fbx, and .stl. Understanding these file formats will help you export and share your models with others, as well as import models from other software or sources.
These basic concepts will provide a solid understanding of the principles that govern 3D modeling. As you progress, you will continue to learn and refine your skills, gaining a deeper understanding of the intricacies of 3D modeling.
Now that you have a grasp of the basic concepts, let’s delve into one of the most widely used 3D modeling techniques: polygonal modeling.
Read more: How Hard Is 3D Modeling
Learning Polygonal Modeling
Polygonal modeling is one of the most commonly used techniques in 3D modeling. It involves creating and manipulating objects using interconnected polygons. Polygonal modeling offers precise control over shapes and details and is widely used in various industries such as gaming, animation, and product design. Here are some essential steps to start learning polygonal modeling:
- Mastering the Interface: Familiarize yourself with the user interface of your chosen 3D modeling software. Understand how to navigate the viewport, access the various tools and menus, and modify the workspace to suit your preferences. A solid understanding of the software interface will make your modeling workflow smoother.
- Creating Basic Shapes: Start with simple objects like cubes, spheres, and cylinders. Practice creating and manipulating these basic shapes using the modeling tools available in your software. Learn how to resize, rotate, and move objects in 3D space.
- Modeling Techniques: Learn different modeling techniques like extrusion, beveling, and splitting edges. These techniques allow you to add or remove geometry and refine the shape of your models. Practice combining these techniques to create more complex objects.
- Topology and Edge Flow: Understanding topology is crucial in polygonal modeling. Topology refers to the organization and flow of edges, which determines the shape and smoothness of a model. Study proper edge flow and practice creating clean and efficient topology to achieve better results in your models.
- Detailing and Refining: Practice adding details to your models using the appropriate tools and techniques. This can include creating surface details, adding bevels, chamfers, or fillets, and refining the overall shape and form. Aim for clean and precise details while maintaining good topology.
- Reference Images: Utilize reference images to guide your modeling process. Collect reference images from various angles and use them as a visual guide to accurately recreate objects or characters. This will help you achieve better accuracy and realism in your models.
- Practice Projects: Enhance your polygonal modeling skills by taking on small projects that challenge you. Choose objects or characters with varying levels of complexity and recreate them in your 3D modeling software. The more you practice, the better you’ll become at modeling different types of objects.
- Learn from Tutorials and Resources: Take advantage of online tutorials, courses, and resources dedicated to polygonal modeling. Follow along with step-by-step tutorials that cover a range of modeling techniques and exercises. This will help you learn new methods and gain insights from experienced artists.
Remember that practicing regularly and continuously pushing yourself to learn new techniques and expand your skills is essential in mastering polygonal modeling. As you gain more experience, don’t be afraid to experiment and develop your own unique style of modeling.
Now that you have a solid understanding of polygonal modeling, let’s explore another important technique in 3D modeling: NURBS modeling.
Mastering NURBS Modeling
NURBS (Non-Uniform Rational B-Splines) modeling is a technique widely used in 3D modeling, particularly for creating smooth and organic shapes. NURBS surfaces are defined mathematically, allowing for precise control over the curvature and continuity of the surfaces. Here are some steps to help you master NURBS modeling:
- Understanding NURBS Basics: Familiarize yourself with the fundamental concepts of NURBS modeling. Recognize the main components, such as control points, knots, and weights. Understand how these elements influence the shape of the NURBS surface.
- Mastering Curve Creation: In NURBS modeling, curves play a crucial role in defining the shape of surfaces. Learn how to create NURBS curves and practice manipulating them using the available modeling tools. Understand how to control the curvature and smoothness of the curves to achieve desired results.
- NURBS Surface Creation: Practice creating NURBS surfaces by lofting or sweeping curves. Experiment with different combinations of curves and explore the different options available in your 3D modeling software. Understand how to adjust control points and manipulate the surface to achieve the desired shape.
- Refining and Editing Surfaces: Learn how to refine and edit NURBS surfaces. Practice adding or removing control points, adjusting weights, and manipulating the surface to achieve smooth and precise results. Develop an understanding of how modifying the control points and surface structure affects the final shape.
- Patch Modeling Techniques: NURBS modeling often involves creating separate patches or surface patches and joining them together to create complex shapes. Practice creating and connecting patches to build models with intricate details. Experiment with trim tools, surface stitching, and blending techniques to achieve seamless connections.
- Surface Analysis and Evaluation: Develop the ability to analyze and evaluate NURBS surfaces. Understand concepts such as curvature analysis, tangent continuity, and surface quality. Use evaluation tools available in your software to identify and resolve surface issues, ensuring smooth and accurate results.
- Practice Realistic Form Design: NURBS modeling is commonly used for designing products, vehicle exteriors, and architectural elements. Practice creating realistic forms by studying reference images and understanding the flow of curves and surfaces. Pay attention to details, proportions, and surface continuity to achieve professional-looking results.
- Learn from Advanced Tutorials and Projects: As you become comfortable with NURBS modeling, challenge yourself by tackling advanced tutorials and projects. Work on modeling complex objects or characters that require precise control over the surfaces. Push yourself to experiment and explore advanced techniques that stretch your skills.
Remember that NURBS modeling requires patience, attention to detail, and a willingness to experiment. It may take time to master this technique, but with practice and dedication, you can achieve stunning and realistic results in your NURBS models.
Now that you have a solid understanding of both polygonal modeling and NURBS modeling, let’s explore another fascinating technique in 3D modeling: sculpting.
Start by learning the basics of a 3D modeling software such as Blender or Autodesk Maya. There are plenty of online tutorials and courses available to help you get started. Practice regularly to improve your skills.
Exploring Sculpting Techniques
Sculpting is a powerful technique in 3D modeling that allows artists to create detailed and organic shapes by manipulating a digital sculpting tool. It is commonly used in character modeling, creature design, and digital sculpting for 3D printing. Here are some steps to help you explore and master sculpting techniques:
- Choose the Right Sculpting Software: Select a sculpting software that suits your needs and preferences. Popular options include ZBrush, Mudbox, and Blender, which offer a wide range of tools and features. Take time to familiarize yourself with the software’s interface and sculpting brushes.
- Learn about Sculpting Brushes: Sculpting brushes are the primary tools used in the sculpting process. Each brush has a unique effect on the sculpted surface, such as adding or subtracting material, smoothing the surface, or creating textures. Experiment with different brushes and understand their functions to achieve the desired sculpting effect.
- Study Anatomy and Form: Before diving into sculpting, study human and animal anatomy to understand the underlying structures and proportions. This knowledge will help you create more realistic and convincing sculpts. Practice observing and replicating different forms and shapes in your sculpting projects.
- Start with Basic Shapes: Begin by sculpting simple shapes and forms to practice different techniques. Create spheres, cubes, or cylinders and experiment with manipulating and refining their surfaces. This will help you become familiar with the sculpting tools and build confidence in your sculpting skills.
- Refine with DynaMesh or DynaTopology: DynaMesh or DynaTopology are powerful features available in sculpting software that allow you to add or remove geometry dynamically. These tools help you refine your sculpt by adding more detail or changing the overall shape. Experiment with DynaMesh or DynaTopology to achieve smoother and more precise results.
- Add Surface Details: Sculpting enables you to add intricate details to your models. Experiment with different brush techniques such as creating wrinkles, scales, pores, or muscle definition. Pay close attention to the overall form and surface flow of the sculpt to achieve a harmonious and realistic result.
- Use Reference Images: Utilize reference images to guide your sculpting process. Gather references from different angles and perspectives to ensure accurate proportions and details. Referencing real-life objects or photographs will add authenticity and enhance the realism of your sculptures.
- Experiment with Sculpting Materials: Most sculpting software allows you to apply different materials to your sculpts. Explore the various material options available and experiment with different shaders and textures to give your sculpt the desired look and feel.
- Practice Sculpting Projects: Improve your sculpting skills by taking on specific projects or challenges. Choose subjects that interest you, such as character designs or creature sculpts, and focus on refining your techniques and capturing the essence of the subject. Regularly challenge yourself and push the boundaries of your sculpting abilities.
- Join Sculpting Communities and Seek Feedback: Engage with online sculpting communities to connect with fellow artists and seek feedback on your work. Participate in sculpting challenges, share your progress, and learn from the experiences and expertise of others. Feedback from the community can help you improve your sculpting skills and gain fresh perspectives.
Sculpting is a versatile and expressive technique that allows you to unleash your creativity and bring your imagination to life. With time, practice, and dedication, you can become proficient in sculpting and create stunning and realistic 3D sculptures.
Now that you have explored sculpting techniques, let’s move on to another important aspect of 3D modeling: texturing and UV mapping.
Texturing and UV Mapping
Texturing and UV mapping are essential processes in 3D modeling that add visual details and realism to your models. Textures provide color, patterns, and surface characteristics that make your models visually appealing, while UV mapping ensures accurate placement of textures onto the model’s surface. Here’s a step-by-step guide to texturing and UV mapping:
- Create or Find Textures: Begin by creating your own textures or finding pre-made textures that suit your project. Textures can be images or patterns that simulate different materials, such as wood, metal, fabric, or skin. There are numerous online resources and texture libraries available to source textures from.
- Unwrap the UVs: UV mapping is the process of unwrapping the 3D model’s surface into a 2D space. This allows you to accurately apply textures to specific parts of the model. Start by selecting the model’s faces and generating a UV map. Use the UV mapping tools in your 3D modeling software to unfold and arrange the UVs in a way that minimizes distortion and maximizes texture resolution.
- Organize the UV Layout: Arrange the UVs in the UV editor to optimize texture space and make them more manageable. This involves scaling and positioning the UVs to make efficient use of the available texture resolution. Aim to spread out the UVs evenly across the UV space while maintaining proper proportions.
- Assign Materials and Textures: Apply materials to your model’s surfaces and assign textures to the corresponding material slots. Each material can have specific textures applied, such as diffuse, specular, normal, or displacement maps. Connect the textures to the appropriate channels in the material editor to control how they influence the surface appearance.
- Paint or Layer Textures: Some 3D modeling software allows you to directly paint textures onto the model’s surface using specialized painting tools. This is particularly useful for adding details like scratches, dirt, or hand-painted elements. Alternatively, you can layer textures on top of each other to achieve more complex and realistic effects.
- Create Bump and Normal Maps: Bump and normal maps add the illusion of surface details without adding additional geometry. Generate these maps from high-resolution sculpted models or use texture-based techniques to create depth and surface irregularities. Apply these maps to enhance the overall realism and detail of your textures.
- Test and Refine: Regularly test your textures on the model to check for any visual anomalies, stretching, or issues caused by the UV layout. Make adjustments to the UVs if needed to ensure a seamless and uniform texture application. Continuously refine and tweak the textures until you achieve the desired look and feel.
- Optimize for Rendering: Optimize your textures and UVs to achieve efficient rendering. This can involve reducing texture resolution for distant objects, utilizing texture atlas techniques to merge multiple textures into one, or baking textures to optimize rendering speed and resource usage.
- Document and Archive Textures: Keep a record of your textures by organizing and archiving them properly. Maintain a clear folder structure and proper naming conventions to ensure easy access and management of your textures for future projects.
- Continuously Improve: Texturing and UV mapping are skills that require practice and experimentation. Continuously seek inspiration, study real-world materials, and explore advanced texturing techniques. Experiment with different software and tools to expand your knowledge and capabilities in texturing and UV mapping.
Remember that texturing and UV mapping play a crucial role in enhancing the visual realism and appeal of your 3D models. By mastering these techniques, you can bring your models to life and create stunning visual compositions.
Now that you have a solid understanding of texturing and UV mapping, let’s move on to another important aspect of 3D modeling: lighting and rendering techniques.
Lighting and Rendering Techniques
Lighting and rendering are crucial aspects of 3D modeling that bring your models to life by creating realistic illumination and generating the final images or animations. Effective lighting helps in setting the mood, highlighting details, and creating a sense of depth in your scenes. Here are some essential lighting and rendering techniques to consider:
- Understanding Lighting Types: Familiarize yourself with different lighting types, such as ambient, directional, point, and spot lights. Each type offers a distinct lighting effect and is suitable for different scenarios. Experiment with different lighting setups to achieve the desired mood and atmosphere in your scenes.
- Adding Light Sources: Place light sources strategically to illuminate your 3D scene. Consider the position, intensity, and color of each light source to achieve the desired effect. Experiment with the placement of lights from various angles to create interesting shadows and highlights.
- Using Light Falloff and Attenuation: Adjust the falloff and attenuation settings of your light sources to control how light diminishes over distance. These settings can affect the intensity and spread of light, helping you achieve more realistic and natural lighting results.
- Creating Shadows: Shadows add depth and realism to your scenes. Experiment with casting and receiving shadows to achieve the desired effect. Use area lights or soft shadows to create soft, realistic shadows, or use spotlights for crisp, defined shadows.
- Global Illumination: Global Illumination (GI) techniques simulate the interaction of light between objects in your scene. GI adds indirect light reflections and bounce light, resulting in more realistic and natural lighting. Experiment with different GI algorithms, such as radiosity or photon mapping, to achieve realistic global illumination effects.
- Using HDR and Environment Maps: Incorporating High Dynamic Range (HDR) images or environment maps can enhance the lighting and reflections in your scenes. HDR images provide a more extensive range of luminosity, allowing you to capture more realistic lighting conditions. Environment maps can simulate reflections and the surrounding environment, adding depth and realism to your models.
- Understanding Material Properties: Different materials react differently to lighting conditions. Understand how materials reflect, refract, or absorb light. Adjust material properties, such as diffuse, specular, and transparency, to achieve the desired visual effect in your scenes.
- Using Render Engines: Explore different rendering engines available in your 3D software or external renderers. Each engine offers different capabilities and features. Experiment with rendering settings and parameters to optimize rendering times and achieve high-quality results.
- Baking Textures and Lighting: Baking textures and lighting can optimize rendering and provide more control over the final result. Bake complex lighting and shading information into texture maps, such as ambient occlusion, global illumination, or light maps. This technique can significantly reduce rendering time and improve performance.
- Post-Processing and Compositing: Post-processing and compositing techniques can enhance the final look of your rendered images or animations. Utilize features like color correction, depth of field, motion blur, and lens effects to add visual impact and refine the overall aesthetic of your scenes.
Mastering lighting and rendering techniques takes time and practice. Experiment with different lighting setups, shading models, and render settings to achieve your desired results. Continuously study real-world lighting scenarios, observe lighting in films or photographs, and seek inspiration from other artists’ work to improve your skills in this aspect of 3D modeling.
Now that you have explored lighting and rendering techniques, let’s move on to another essential aspect of 3D modeling: animation and rigging basics.
Animation and Rigging Basics
Animation brings your 3D models to life by adding movement and dynamics. Rigging is the process of creating a skeleton-like structure within the model that allows for realistic movement and deformation. Understanding animation and rigging basics is essential for creating captivating and dynamic 3D content. Here are some fundamental steps to get started:
- Planning Your Animation: Before diving into animation, start by planning the desired movement or action. Determine the purpose, timing, and flow of your animation. Storyboarding and sketching out key poses or frames can help you visualize the motion sequence.
- Creating a Rig: Rigging involves building a skeletal structure and controls within your 3D model. This structure enables the movement and deformation of the model’s components, such as limbs or facial expressions. Familiarize yourself with rigging tools and techniques available in your chosen 3D software.
- Understanding Joint Hierarchies: Joint hierarchies determine the parent-child relationships between joints and bones in the rig. Establish a logical hierarchy that allows for natural and intuitive movement. Understand concepts such as inverse kinematics (IK) and forward kinematics (FK) to achieve desired control over the rig.
- Weight Painting: Weight painting is the process of assigning influence to different parts of the model’s surface based on the movement of joints. Learn how to adjust weight values to ensure smooth and realistic deformation when the rig is animated. Refine weight painting to minimize undesired distortion or clipping.
- Keyframe Animation: Keyframe animation involves setting specific poses or positions at key points in the animation timeline. Learn how to set keyframes for the rig controls, manipulating the model’s movement and rotation at different frames. Experiment with different interpolation methods and easing functions to achieve smooth and convincing motion.
- Animation Curves and the Graph Editor: Understand animation curves and how they control the movement of the rig over time. The graph editor allows for precise control and manipulation of animation curves, enabling you to fine-tune the timing, speed, and acceleration of movement. Practice using the graph editor to create more natural and appealing animations.
- Secondary Animation: Secondary animation refers to elements that naturally follow the primary motion, such as hair, clothing, or loose objects. Learn how to add secondary animation to enhance the realism and dynamics of your characters or objects, using techniques like cloth simulation, soft bodies, or dynamic constraints.
- Facial Animation: Mastering facial animation adds depth and expressiveness to your characters. Study facial anatomy and understand how different muscles and features contribute to facial expressions. Practice animating facial movements, such as blinking, smiling, or talking, with a focus on capturing realistic and believable expressions.
- Animating Objects and Cameras: Animation is not confined to characters alone. Learn how to animate objects, such as vehicles, props, or environments, to create dynamic scenes. Experiment with different camera movements and angles to enhance storytelling and visual impact.
- Rendering and Playback: Set up the proper render settings to output your animated sequences. Decide on the desired resolution, frame rate, and file format for rendering. Preview your animation in real-time or create render previews to ensure the desired outcome before final rendering.
Remember, animation and rigging require patience and practice. Start with simple movements and gradually progress to more complex actions. Continuously observe real-life motion, study animation principles, and seek inspiration from other animators’ work to improve your skills and create compelling animated sequences.
Now that you have a grasp of animation and rigging basics, let’s explore some tips for efficient workflow in your 3D modeling process.
Tips for Efficient Workflow
An efficient workflow is key to maximizing productivity and achieving optimal results in your 3D modeling projects. Here are some valuable tips to help streamline your workflow and enhance your overall efficiency:
- Organize Your Files: Establish a well-structured file organization system. Create separate folders for assets, references, textures, and project files. Use clear and consistent naming conventions to easily locate and manage your files.
- Use Hotkeys and Custom Shortcuts: Familiarize yourself with the hotkeys and custom shortcut options in your 3D modeling software. Customize shortcuts for frequently used tools or actions to speed up your workflow and reduce repetitive tasks.
- Create Custom UI Layouts: Take advantage of customizable user interfaces offered by your software. Design custom UI layouts that suit your working style and optimize your workspace, grouping tools and panels in an intuitive and efficient manner.
- Utilize Templates and Presets: Create templates or presets for commonly used settings, such as rendering configurations, material setups, or lighting setups. Utilize these templates to save time and maintain consistency across your projects.
- Use Libraries and Asset Managers: Build a library of pre-made models, textures, materials, or effects that you frequently utilize. Employ asset management software to efficiently organize and access your assets, enabling quick integration into your scenes.
- Employ Procedural Workflows: Whenever possible, utilize procedural workflows, such as parametric or procedural modeling techniques. Procedural workflows allow for quick iteration, easy modifications, and efficient updates throughout the modeling process.
- Automate Repetitive Tasks: Identify repetitive tasks and consider automation options. Utilize scripting or macro capabilities available in your software to automate actions or create custom tools that simplify and accelerate your workflow.
- Focus on Optimization: Optimize your models and scenes for better performance. Remove unnecessary geometry, optimize texture resolutions, and simplify complex rigs or animations to ensure smooth playback and rendering.
- Backup Your Work: Regularly back up your files to prevent data loss. Use cloud storage or external drives to create multiple copies of your work. Implement version control systems to track and manage revisions of your projects.
- Continuously Learn and Improve: Stay up to date with the latest techniques, tools, and trends in the 3D modeling industry. Participate in online forums, attend webinars, workshops, or conferences to expand your knowledge and refine your skills.
Implementing these tips will help you optimize your workflow, save time, and achieve more efficient results in your 3D modeling projects. Experiment with different techniques and find what works best for you. Remember, continuous learning and improvement are essential for staying at the forefront of 3D modeling.
Now that you have a solid foundation of knowledge, it’s time to explore additional resources that can further enhance your 3D modeling skills and provide opportunities for practice and growth.
Resources for Further Learning and Practice
To further enhance your 3D modeling skills and expand your knowledge, here are some valuable resources and platforms that provide learning opportunities and avenues for practice:
- Online Tutorials and Courses: Numerous online platforms offer tutorials and courses dedicated to 3D modeling. Websites like Udemy, Coursera, and LinkedIn Learning provide step-by-step instructional videos and comprehensive learning programs taught by industry professionals.
- YouTube Channels: YouTube is a treasure trove of 3D modeling tutorials, tips, and demonstrations. Channels such as Blender Guru, FlippedNormals, and Pixologic ZClassroom offer a wealth of free resources, ranging from basic tutorials to advanced techniques.
- Online Communities and Forums: Joining online communities and forums dedicated to 3D modeling allows you to connect with fellow artists, seek advice, and share your work. Websites like Polycount and CGSociety provide platforms where you can showcase your skills, receive feedback, and learn from the experiences and expertise of others.
- Books and Documentation: Books dedicated to 3D modeling and computer graphics offer in-depth knowledge and serve as valuable references. “The Art of 3D Computer Animation and Effects” by Isaac Kerlow and “Polygonal Modeling: Basic and Advanced Techniques” by Mario Russo are just a few examples of insightful books in this field.
- Software Documentation and User Forums: Explore the official documentation and user forums of the software you use for 3D modeling. Software websites often provide comprehensive documentation that covers various aspects of the software. User forums are a great platform to seek help, troubleshoot issues, and connect with artists who use the same software.
- Practice Projects and Challenges: Engage in practice projects and challenges to apply and refine your skills. Websites like ArtStation, Sketchfab, and CGTrader offer art challenges, which provide opportunities to showcase your work, gain exposure, and receive feedback from the community.
- Industry Events and Conferences: Attend industry events, conferences, and workshops dedicated to 3D modeling and computer graphics. These events often feature informative talks, workshops, and networking opportunities. SIGGRAPH, Blend, and THU (Trojan Horse Was a Unicorn) are some renowned events in the industry.
- Online Portfolios and Art Communities: Create an online portfolio to showcase your 3D modeling work. Websites like ArtStation, Behance, and DeviantArt provide platforms to share your portfolio, gain visibility, and receive feedback from professionals and fellow artists.
- Experiment and Collaborate: Don’t shy away from exploring new techniques and experimenting with different styles. Collaborate with other artists to learn from their approaches and gain fresh perspectives. Participate in group projects or collaborations to expand your skills and network.
- Software-Specific Learning Resources: Take advantage of software-specific learning resources. Many software companies offer official training programs, webinars, and workshops. Explore the official websites, blogs, and resource libraries of the software you use for additional learning materials.
Remember, continuous learning and practice are key to mastering 3D modeling. Stay curious, challenge yourself, and seek inspiration from both inside and outside the industry. With dedication and perseverance, you can refine your skills and excel in the exciting world of 3D modeling.
Now that you have an extensive list of resources, it’s time to apply your knowledge and embark on your 3D modeling journey. Good luck and enjoy the process of bringing your imagination to life!
Read more: Who Invented 3D Modeling
Conclusion
Congratulations on completing this comprehensive guide to learning 3D modeling! You have taken an exciting step into the world of digital creation, where imagination knows no bounds. Throughout this article, we have explored various aspects of 3D modeling, from getting started and understanding different techniques to choosing the right software and tools. We delved into the basic concepts of 3D modeling, such as polygons, UV mapping, and materials, and explored specialized techniques like sculpting and animation.
Remember that mastering 3D modeling requires practice, dedication, and a willingness to continually learn and improve. As you progress on your journey, keep experimenting with different techniques, seek feedback from the community, and stay up to date with the latest industry trends and tools. Embrace challenges and approach each project with curiosity and creativity.
Utilize the wide range of resources available, such as online tutorials, courses, and communities, to enhance your skills and expand your knowledge. Don’t be afraid to push boundaries and explore your own unique style in 3D modeling.
Always remember that 3D modeling is a form of artistic expression. Don’t limit yourself to mere technicalities; infuse your work with your own creativity, style, and storytelling. Let your imagination guide your creations, and have fun in the process!
Now that you have the tools, knowledge, and resources, it’s time to set out on your own 3D modeling adventures. Embrace the challenges, celebrate the successes, and continuously evolve as an artist. The world of 3D modeling awaits your unique vision and talent.
So, grab your modeling software, embark on your creative journey, and let your imagination soar in the limitless realm of 3D modeling!
Frequently Asked Questions about How To Start Learning 3D Modeling
Was this page helpful?
At Storables.com, we guarantee accurate and reliable information. Our content, validated by Expert Board Contributors, is crafted following stringent Editorial Policies. We're committed to providing you with well-researched, expert-backed insights for all your informational needs.

0 thoughts on “How To Start Learning 3D Modeling”