Home>diy>Architecture & Design>How To Make A 3D CAD Model
Architecture & Design
How To Make A 3D CAD Model
Modified: January 9, 2024
Learn how to create stunning 3D CAD models with our comprehensive guide on architecture design. Enhance your skills and bring your designs to life.
(Many of the links in this article redirect to a specific reviewed product. Your purchase of these products through affiliate links helps to generate commission for Storables.com, at no extra cost. Learn more)
Introduction:
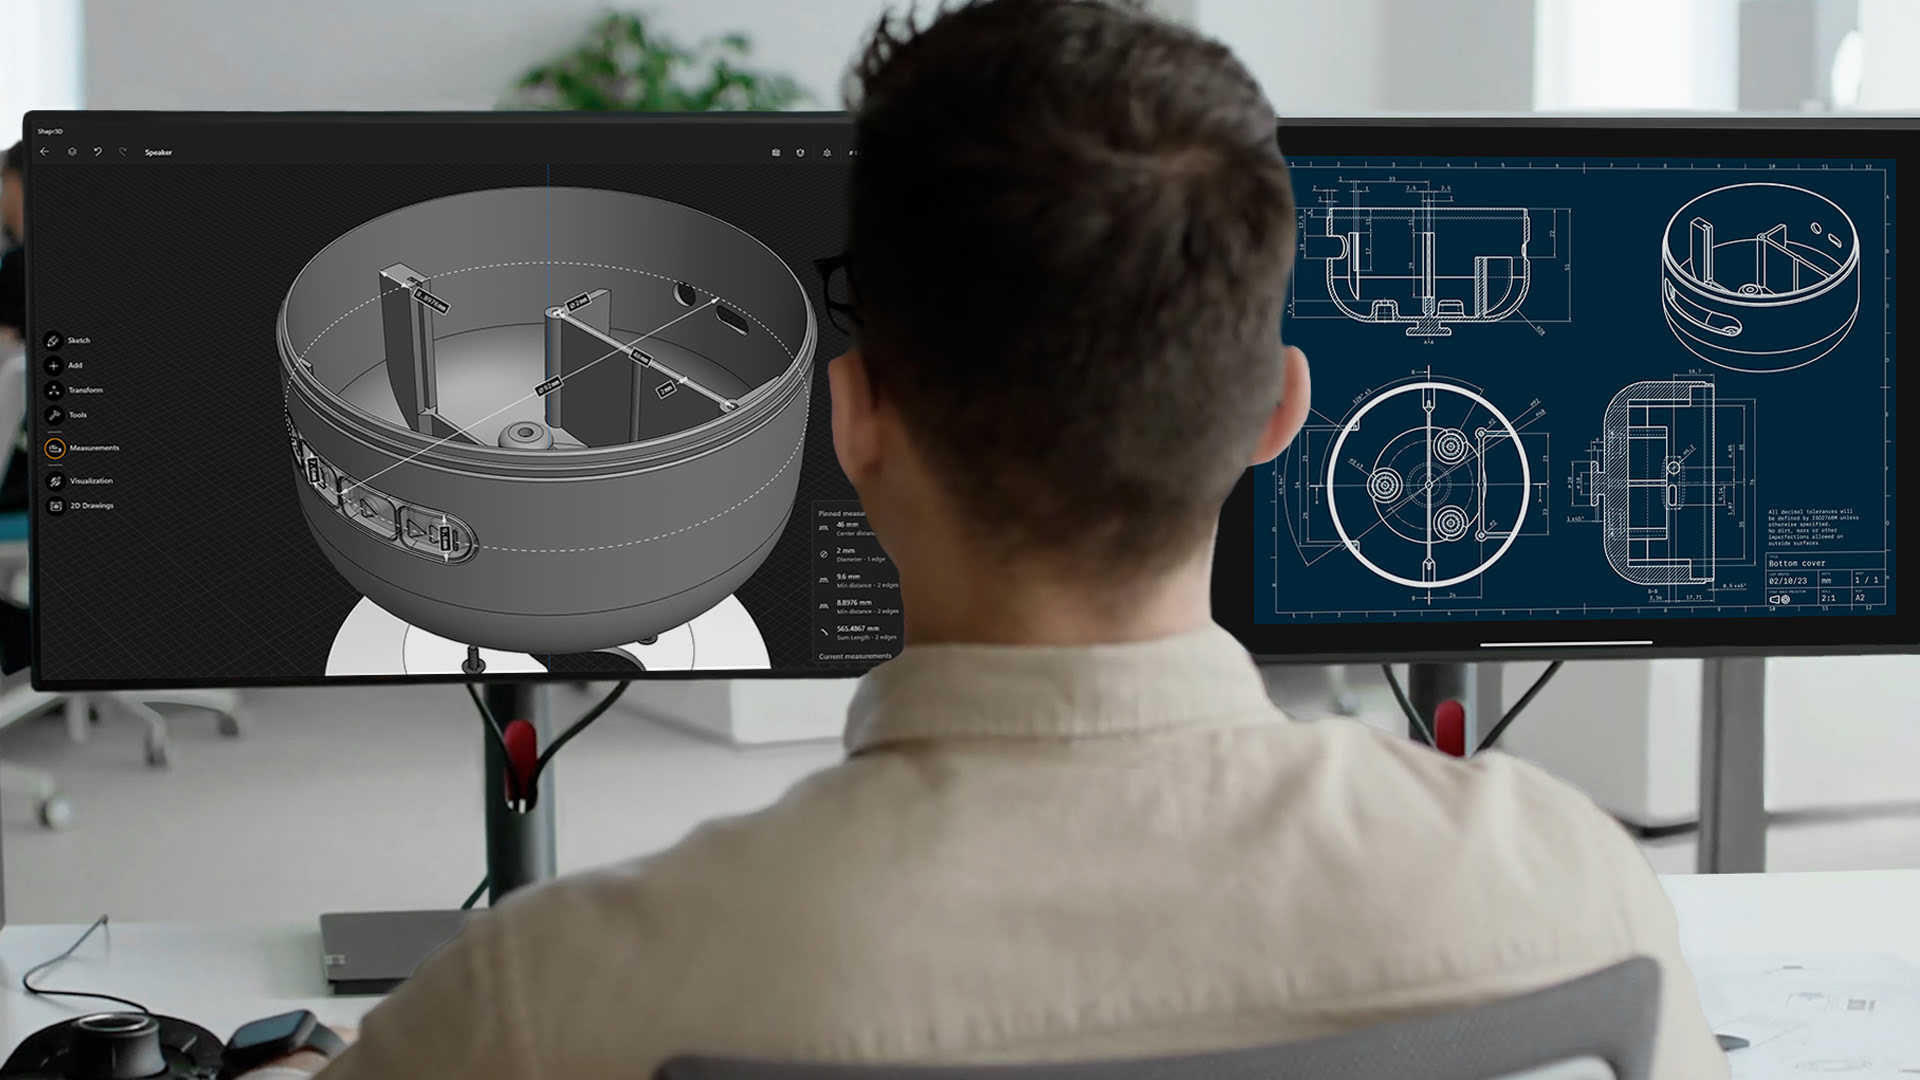
Creating a 3D CAD model is an essential step in the design process for architects, engineers, and designers. CAD (Computer-Aided Design) software allows professionals to transform their ideas into digital models that can be visualized, analyzed, and modified with ease. Whether you are designing a building, a product, or any other complex structure, a well-executed 3D CAD model is crucial to accurately depict the final product.
In this article, we will guide you through the process of creating a 3D CAD model. We will cover everything from gathering requirements and choosing the right software to refining the model and exporting it for further use. So, whether you are a beginner or an experienced professional looking to brush up on your skills, this article will provide you with the necessary steps to create a stunning 3D CAD model.
Before diving into the technical aspects, let’s take a moment to understand the importance of a 3D CAD model. A 3D CAD model serves as a virtual representation of a physical object or structure. It allows designers to visualize their ideas, test different design options, and identify any potential flaws or limitations before moving forward with the actual construction or manufacturing process.
By creating a 3D CAD model, designers can explore various design alternatives without incurring the costs and time associated with physical prototypes. This enables them to make informed decisions, optimize designs, and ensure the feasibility and functionality of their creations. Additionally, a 3D CAD model can be easily shared with team members, clients, and stakeholders for feedback and collaboration, streamlining the design process and minimizing errors.
Now that we have a clear understanding of the importance of a 3D CAD model, let’s proceed to the first step in creating one, which is gathering the requirements and materials.
Key Takeaways:
- Master the art of 3D CAD modeling by following a comprehensive process that covers gathering requirements, choosing the right software, refining the model, and adding intricate details to bring your designs to life.
- Embrace the power of 3D CAD modeling to unleash your creativity and bring your design visions to life. Follow the step-by-step guide to create impressive and impactful CAD models that leave a lasting impression.
Read more: How To Make Money With 3D Modeling
Step 1: Gathering Requirements and Materials
Before you begin creating a 3D CAD model, it is crucial to gather all the necessary requirements and materials. This step involves understanding the project or design objectives, gathering any reference materials or sketches, and determining the specific dimensions, constraints, and features required for the model.
Start by discussing the project requirements with your client, team members, or stakeholders. Understand their vision, expectations, and any specific functional or aesthetic requirements for the design. Take note of any specific dimensions, angles, curves, or features that need to be incorporated into the model. If possible, gather reference materials such as photographs, drawings, or existing CAD models that can serve as a basis for your design.
Next, determine the scale at which you need to create the model. Consider the intended purpose of the model and the size constraints you may have. If you are working on a product design, you may need to consider the ergonomics and user experience. If it is a building or architectural design, consider the size of the site and the surrounding environment.
Once you have gathered all the requirements and materials, it is helpful to create a comprehensive design brief or specification document. This document will serve as a roadmap for your design process and will ensure that you stay focused and aligned with the project objectives.
It is also important to gather the necessary software and hardware materials for your CAD modeling. Ensure that you have a computer with suitable specifications to handle the CAD software requirements. Additionally, familiarize yourself with the specific CAD software you will be using for the project. Each software has its own interface, tools, and capabilities, so it is essential to have a good understanding of how to use it effectively.
By taking the time to gather all the requirements and materials, you set a strong foundation for creating your 3D CAD model. This step ensures that you have a clear understanding of the project objectives, constraints, and design specifications, which will ultimately help you create a more accurate and successful model.
Now that you have gathered the requirements and materials, it’s time to move on to step 2: choosing a CAD software.
Step 2: Choosing a CAD Software
Choosing the right CAD software is crucial for creating a 3D CAD model that meets your design requirements and your level of expertise. There are numerous CAD software options available in the market, each with its own set of features, capabilities, and learning curves. Here are some factors to consider when selecting a CAD software:
1. Functionality and Features: Evaluate the features and tools offered by the CAD software. Consider whether it provides the necessary functionalities for your specific design requirements. Look for features such as solid modeling, parametric modeling, surface modeling, 2D drafting, rendering, and simulation capabilities.
2. User-Friendliness: Consider the ease of use and the user interface of the software. Look for software with intuitive navigation, clear menus, and easy-to-understand commands. If you are a beginner, opt for software that offers tutorials or training materials to help you get started.
3. Compatibility: Ensure that the CAD software is compatible with your computer operating system and hardware specifications. Also, check if it supports the file formats you need to import or export for collaboration or integration with other tools.
4. Industry Standards: Consider the prevalence and adoption of the CAD software in your specific industry. Opting for a software widely used by professionals in your field can provide better compatibility, support, and a larger community of users to seek assistance or share resources.
5. Budget: Evaluate the cost of the CAD software and determine if it aligns with your budget. Some CAD software offers free or trial versions with limited features, while others require a subscription or one-time purchase. Consider your long-term needs and evaluate if the cost is justified by the capabilities and benefits offered by the software.
6. Training and Support: Consider the availability of training resources, documentation, and technical support offered by the CAD software provider. Adequate support can help you troubleshoot issues, learn advanced techniques, and maximize the potential of the software.
Take your time to research and compare different CAD software options. Consider consulting with experienced colleagues, reading user reviews, and exploring online forums or communities to gather insights and recommendations.
Remember, the CAD software you choose will significantly impact your workflow, productivity, and the quality of your 3D CAD models. Therefore, invest time in selecting the best fit for your needs.
Now that you have chosen the CAD software, it’s time to move on to step 3: setting up the CAD environment.
Step 3: Setting Up the CAD Environment
Before diving into creating your 3D CAD model, it is important to properly set up your CAD environment. This step involves configuring the software and workspace to optimize your workflow and ensure a smooth design process. Here are some key aspects to consider when setting up the CAD environment:
1. Customize Preferences: Take the time to explore the preferences/settings menu of your CAD software. Customize settings such as unit measurements, grid spacing, snap options, display settings, and default file locations to align with your project requirements and personal preferences. Adjusting these settings upfront will save you time and effort during the modeling process.
2. Organize File Structure: Create a well-organized file structure to store your CAD projects, reference files, and any additional resources. Establish a logical hierarchy of folders and subfolders to easily locate and manage your files. This will help you stay organized and minimize the chances of losing or misplacing important design files.
3. Learn Keyboard Shortcuts: Familiarize yourself with the keyboard shortcuts available in the CAD software. Keyboard shortcuts can significantly improve your efficiency and speed up your modeling process. Take the time to learn and practice the commonly used shortcuts for tools, commands, and navigation.
4. Workspaces and Toolbars: Most CAD software allows you to customize the workspace layout and toolbar arrangement. Consider arranging your toolbars and menus in a way that suits your workflow and maximizes the accessibility of frequently used commands. You can save different configurations for different tasks or create custom workspaces for specific projects.
5. Create Templates: Utilize the template functionality provided by the CAD software. Create custom templates with predefined settings, layers, and blocks to streamline your design process. Templates can save you time by providing a consistent starting point for your projects and ensuring that you adhere to specific design standards or company guidelines.
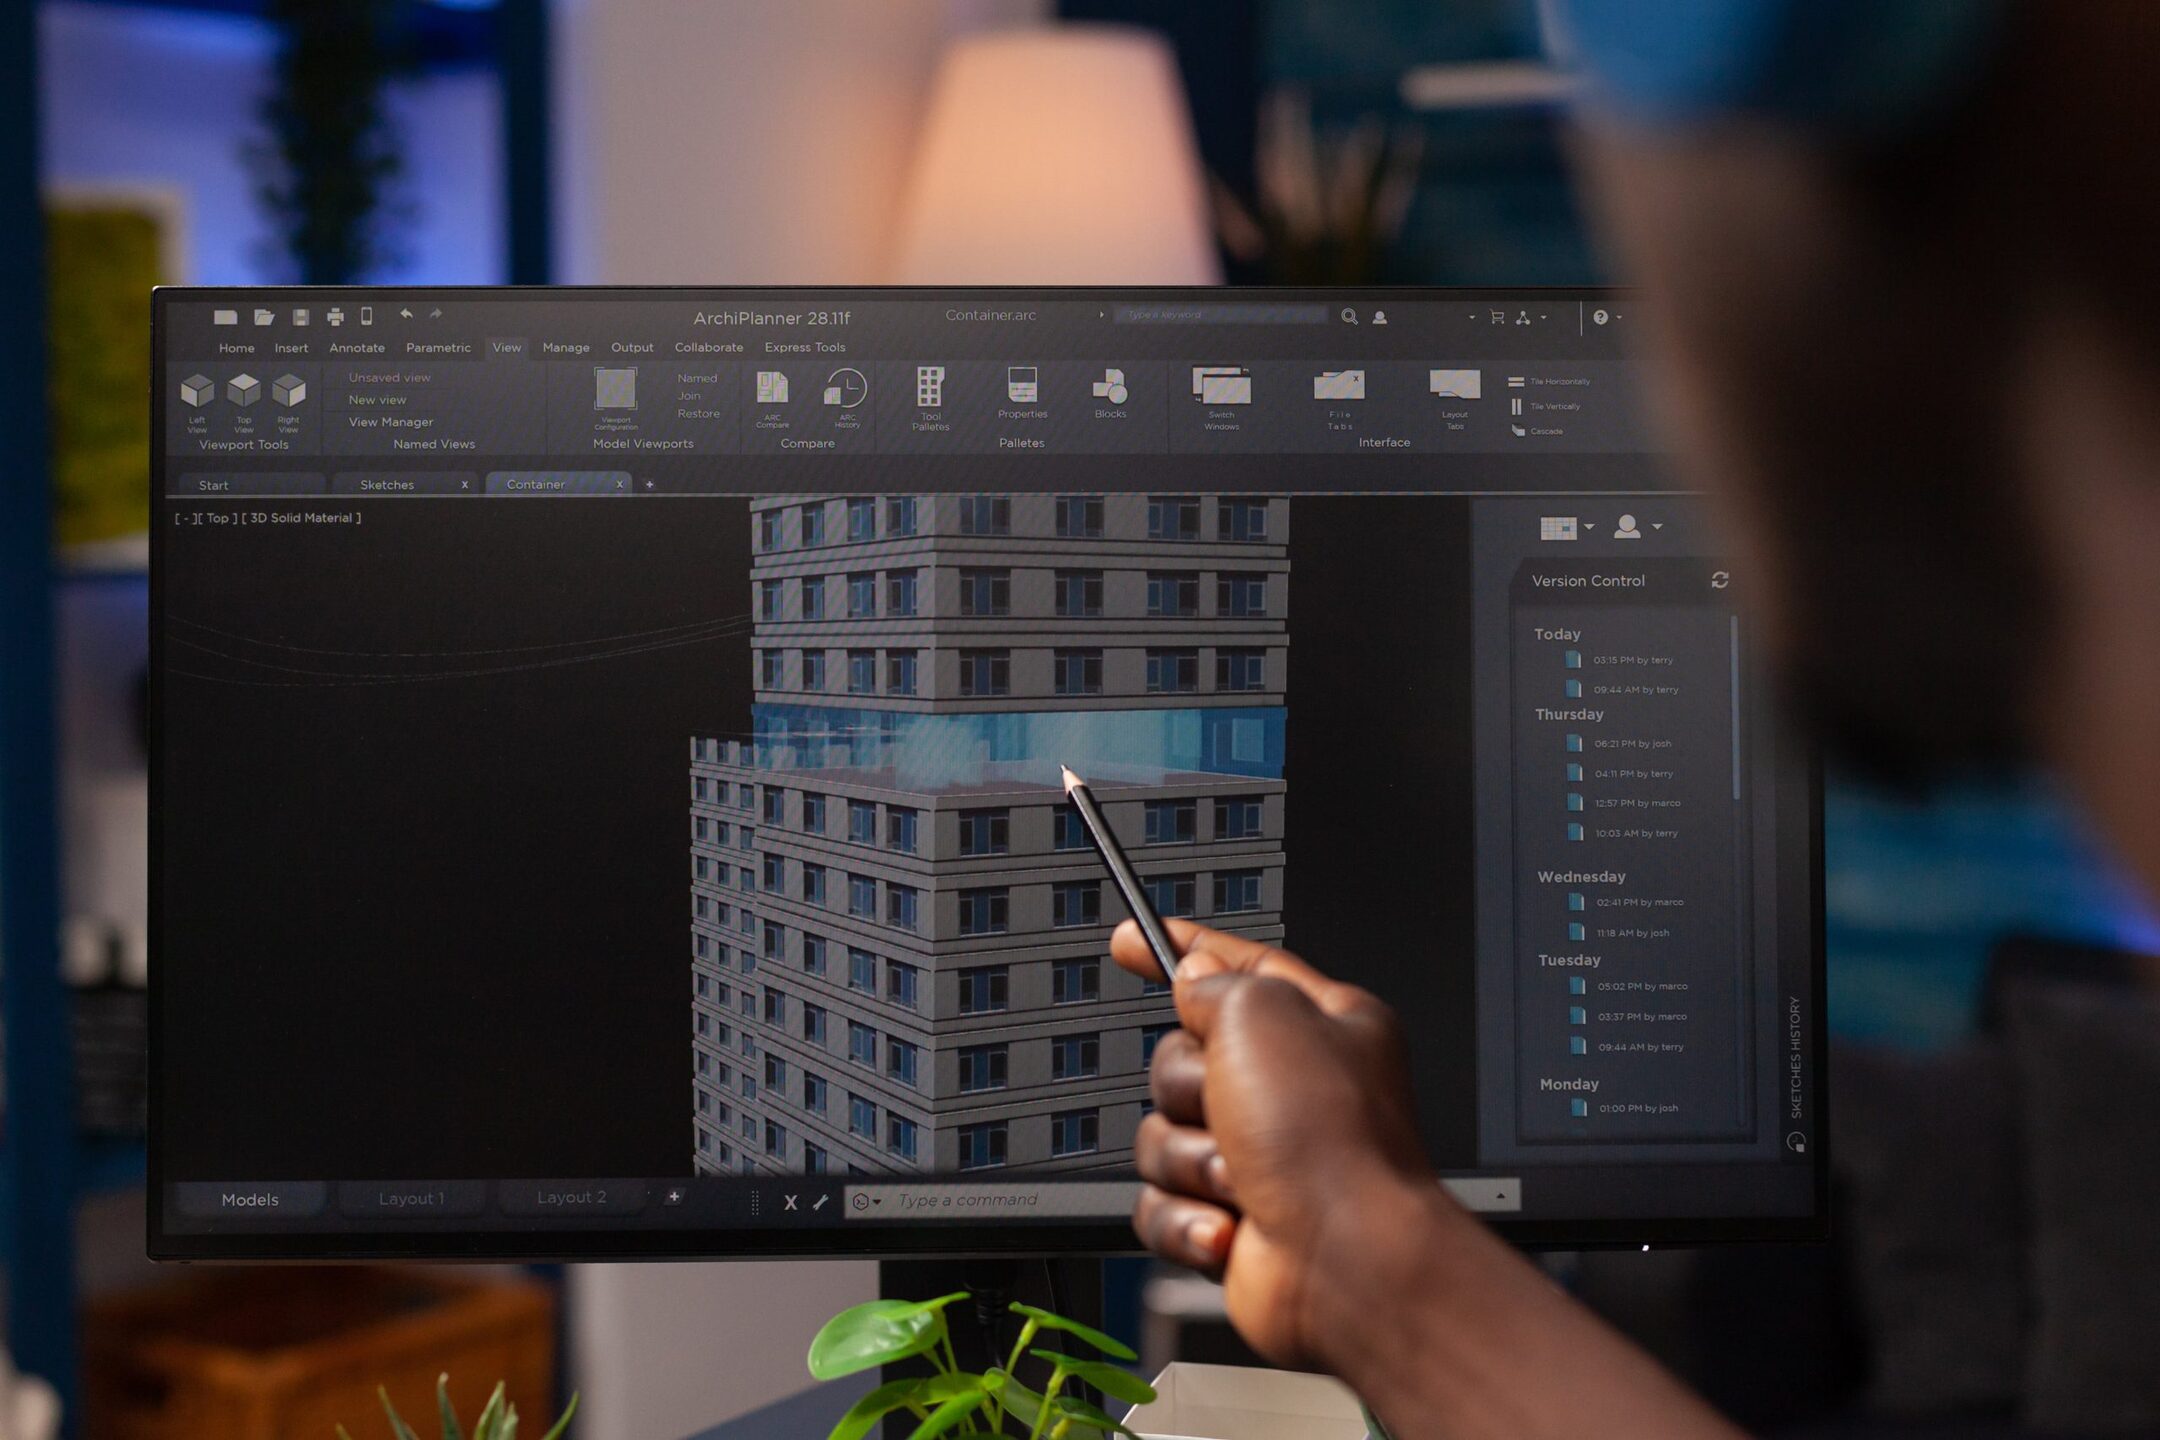
6. Backup and Version Control: Implement a backup system for your CAD files to avoid the risk of losing your work due to hardware failure or other unforeseen circumstances. Regularly back up your files to an external hard drive, cloud storage, or other reliable backup solutions. Additionally, consider implementing version control mechanisms to keep track of changes and revisions made to your CAD models.
By taking the time to properly set up your CAD environment, you can create an optimized workspace that aligns with your preferences and enhances your productivity. An organized and tailored CAD environment will help you focus on the design process and enable you to create high-quality 3D CAD models.
Now that your CAD environment is set up, it’s time to move on to step 4: creating the basic shape of your CAD model.
Step 4: Creating the Basic Shape
With your CAD environment properly configured, you can now begin the exciting process of creating the basic shape of your 3D CAD model. This step involves using the appropriate tools and techniques to build the foundation of your design. Here’s how you can create the basic shape:
1. Select the Drawing Plane: Determine the appropriate drawing plane for your model. This could be a specific 2D plane, such as the XY, XZ, or YZ plane, or a custom plane aligned with a specific feature or constraint of your design.
2. Use Sketching Tools: Depending on the CAD software you are using, utilize the sketching tools to draw the outline or profile of your desired shape on the selected drawing plane. These tools typically include lines, arcs, circles, splines, and various other geometric shapes. Pay attention to the dimensions and proportions as you sketch the basic shape.
3. Apply Constraints: Apply constraints to your sketch to ensure that it adheres to the desired design specifications. Constraints can include dimensions, angles, relationships, and symmetry. These constraints help maintain the accuracy and consistency of your basic shape.
4. Create Extrusions or Revolves: After sketching the basic shape, use the extrusion or revolve tool to convert the 2D sketch into a 3D form. Extrusion involves pulling or pushing the sketch along a specific direction to give it thickness or depth. Revolve involves rotating the sketch around an axis to create a solid shape.
5. Modify the Basic Shape: Once the basic shape is created, use editing tools to modify and refine it further. This can involve adding or removing material, adjusting dimensions, or changing the shape by manipulating control points or modifying parameters.
6. Use Reference Objects: Utilize reference objects or sketches to aid in creating additional features or details of your basic shape. These references can help ensure consistency, alignment, and accuracy in your design.
7. Keep it Simple initially: Focus on creating a simple basic shape initially and gradually add complexity as you progress. This allows you to establish a solid foundation for your model and makes it easier to tackle more intricate details in later steps.
Remember to save your progress at regular intervals to avoid losing any changes you make to your basic shape. Take your time in creating the basic shape, as it serves as the building block for the rest of your 3D CAD model. Pay attention to details, dimensions, and the overall aesthetics of your design.
Now that the basic shape of your 3D CAD model is in place, it’s time to move on to step 5: refining the model and adding more details to bring your design to life.
When making a 3D CAD model, start by sketching out your design on paper to plan the dimensions and features before starting the digital modeling process. This will help you visualize the final product and make the modeling process more efficient.
Read more: What Is 3D Modeling?
Step 5: Refining the Model
With the basic shape of your 3D CAD model created, it’s time to focus on refining the design and adding more details. This step is crucial in bringing your design to life and making it visually appealing and functional. Here are some key steps to follow when refining your CAD model:
1. Smooth Out Edges and Surfaces: Use appropriate tools in the CAD software to smooth out any rough edges and surfaces of your model. This can involve using fillets or chamfers to round off sharp corners or adding blends between different surfaces. Smoothing out these elements enhances the aesthetics and improves the functionality of the design.
2. Add Detail Features: Include additional features and components to enhance the realism and functionality of your model. This could involve adding intricate patterns, surface textures, engraved details, or embossed logos. Consider the purpose and functionality of your design and add features accordingly.
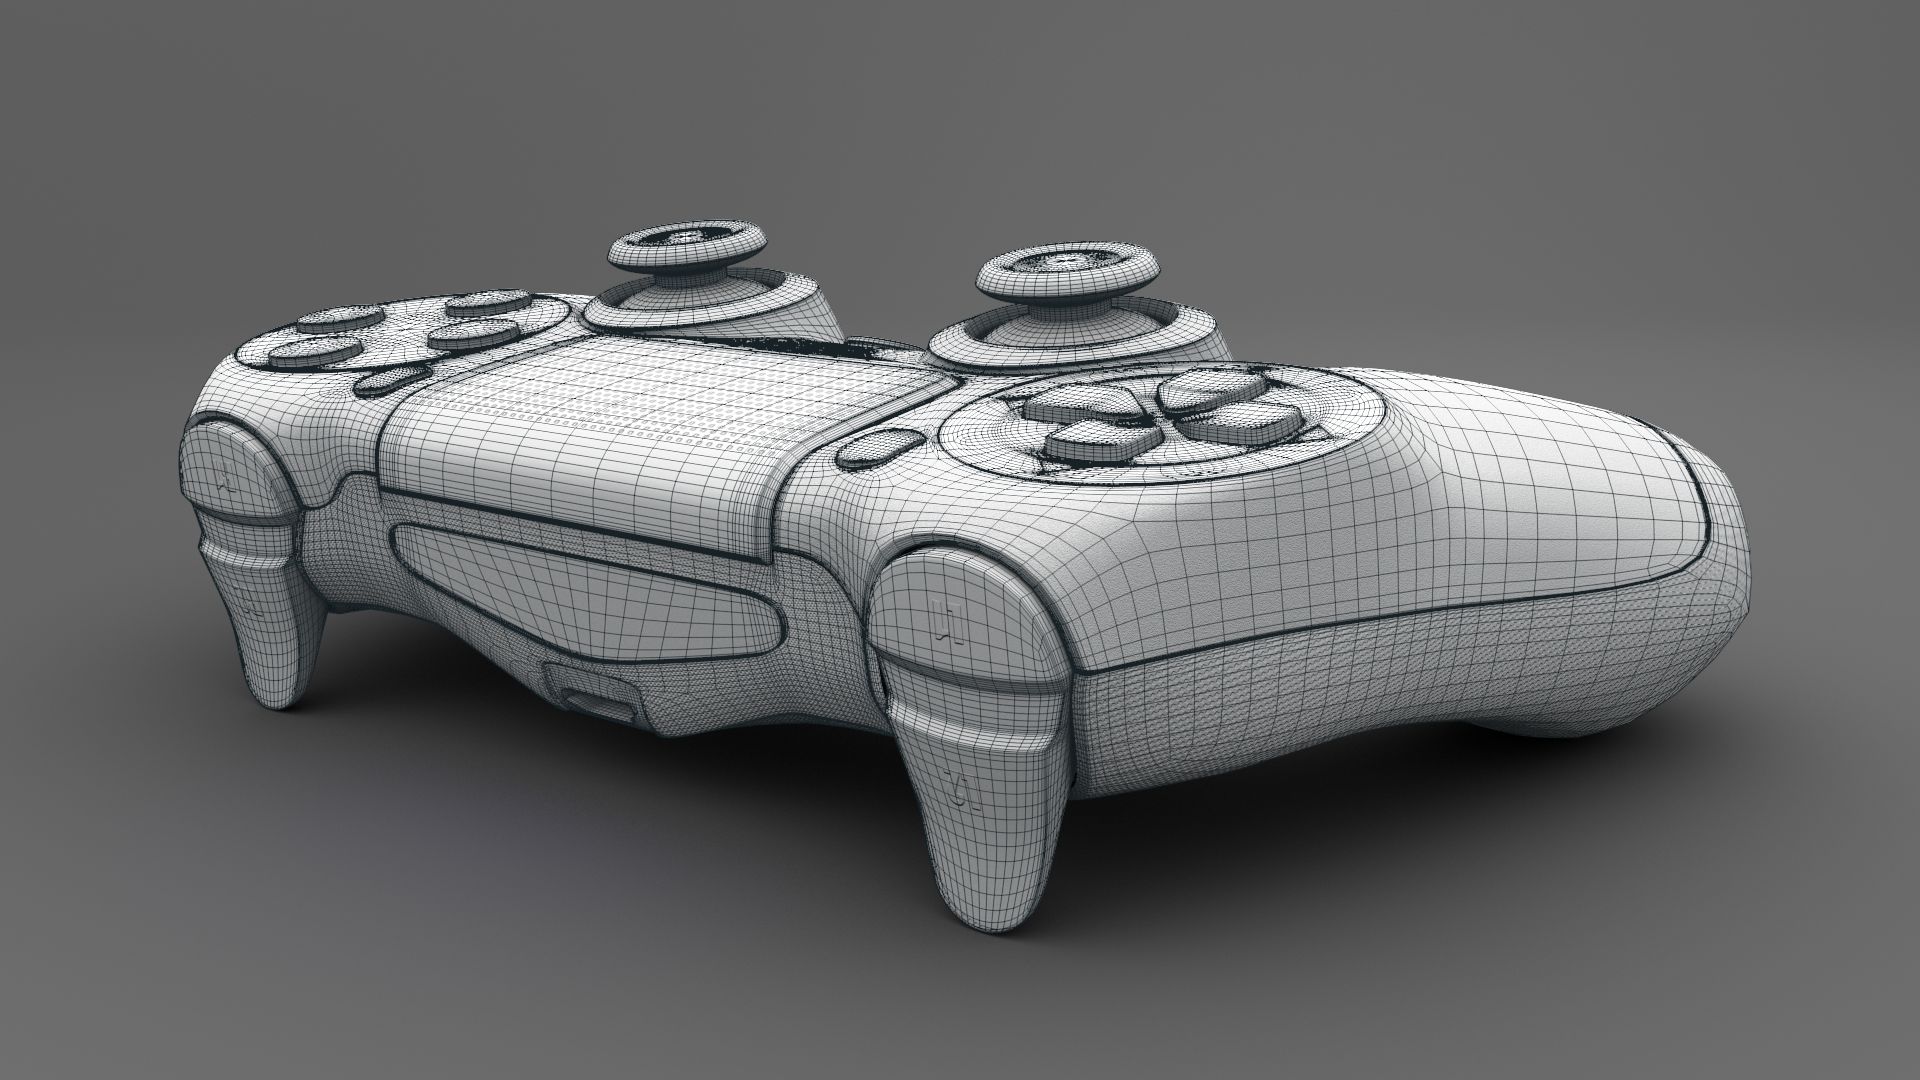
3. Create Complex Shapes: If your design requires complex shapes or curves, utilize advanced modeling techniques provided by the CAD software. This could involve using spline curves, lofting, sweeping, or surface modeling tools to create intricate forms. Pay attention to the smoothness and continuity of the surfaces as you refine the shape.
4. Refine Dimensions: Review and fine-tune the dimensions of your model to ensure accuracy and proportionality. Make adjustments as necessary to align with the design requirements and any specific constraints. Pay attention to critical dimensions that dictate functional aspects or mating with other components.
5. Consider Material Properties: If your model represents a physical object, consider the material properties and reflect them in your CAD model. Adjust reflectance, transparency, or other visual properties to simulate the appearance of the real-world material. This will give you a better idea of how your design will look when fabricated.
6. Review for Compatibility and Assembly: If your design consists of multiple components that need to fit together or be assembled, review the model for compatibility and ease of assembly. Check for interferences, clashes, or misalignments that may hinder the assembly process. Make any necessary adjustments to ensure a smooth fit and assembly.
7. Optimize for Performance: Consider optimizing your CAD model for performance, especially if it will be used in simulations, analysis, or 3D printing. Simplify complex geometry, reduce unnecessary detail, or apply thickness to thin-walled sections to ensure better performance in these applications.
Remember to save your progress regularly and make use of the undo/redo functionality of your CAD software as you refine the model. Take your time in this step to ensure that your design meets the desired standards of quality, functionality, and aesthetics.
Now that the model is refined, it’s time to move on to step 6: adding more details and features to enhance your CAD model further.
Step 6: Adding Details and Features
At this stage of creating your 3D CAD model, you have a solid foundation and have refined the overall shape. Now, it’s time to elevate your design by adding intricate details and features that make it visually appealing and functional. Here are some key steps to follow when adding details and features to your CAD model:
1. Surface Finishing: Pay attention to the surface finishes of your model. Use appropriate tools and techniques to create different surface textures, such as smooth, rough, polished, or brushed finishes. These details can add realism to your design and make it visually interesting.
2. Decals and Logos: Consider adding decals, labels, or logos to your model. These elements can be used to represent branding or add informative labels. Pay attention to the size, placement, and accuracy of these details to maintain a professional look.
3. Engravings and Embossing: If your design includes text, numbers, or symbols, utilize the engraving or embossing tools in your CAD software to add these details. Ensure that the engravings or embossing are clear, legible, and aligned properly with the design.
4. Internal Features: If your model has internal components or features, consider adding them to enhance the functionality and realism of your design. This could include adding internal mechanisms, gears, or connectors. Pay attention to the clearances and interfaces to ensure the proper function of these internal features.
5. Hardware and Fasteners: If your design includes hardware components like screws, bolts, or fasteners, add them to your model. Ensure that the sizes and types of hardware match the design requirements. This attention to detail adds authenticity to the model and helps in visualizing the assembly process.
6. Textures and Patterns: Apply textures or patterns to different surfaces of your model to enhance its appearance. This could involve adding wood grain, metal textures, or other surface patterns to simulate real-world materials. Consider the scale and orientation of the textures to achieve a realistic look.
7. Lighting and Shadows: Utilize lighting and shading techniques to enhance the visualization of your CAD model. Adjust the lighting properties and incorporate shadows to simulate the effect of real-world lighting conditions. This can help in evaluating the design from different angles and perspectives.
8. Functional Features: If your design has functional aspects, ensure that you incorporate them into your CAD model. This could involve adding mechanisms, hinges, movable parts, or any other components that contribute to the intended functionality of your design. Verify their operation and make any necessary adjustments to ensure smooth functioning.
Remember to regularly save your progress and make use of the undo/redo functionality as you add details and features to your CAD model. Take your time to carefully integrate these elements, ensuring that they enhance the overall design and serve the intended purpose.
With the details and features added, it’s time to move on to step 7: checking for errors and ensuring the integrity of your CAD model.
Step 7: Checking for Errors
After investing time and effort into creating a detailed 3D CAD model, it’s essential to thoroughly check for any errors or inconsistencies before finalizing the design. This step involves reviewing the model, performing various checks, and ensuring the integrity of your CAD model. Here are some key steps to follow when checking for errors:
1. Geometry Validation: Use the geometry validation tools provided by your CAD software to identify any geometric errors. These tools can help you detect issues such as gaps, overlaps, or self-intersections in your model. Fix any geometry-related issues to ensure a watertight and solid model.
2. Dimension Verification: Review and verify the dimensions of your model against the design specifications or reference materials. Ensure that critical dimensions are accurate and in line with the project requirements. Make any necessary adjustments to maintain dimensional integrity throughout the design.
3. Check for Interferences: Perform interference checks to ensure that different components or features of your model do not overlap or interfere with each other. Detect and resolve any clashes or misalignments that can impact the functionality or assembly of the design.
4. Validate Clearances: If your design involves moving parts or assemblies, validate the clearances between various components. Ensure that there is sufficient space for movement and that the tolerances are within acceptable limits. Adjust clearances as necessary to avoid any binding or interference issues.
5. Review Edge Cases: Consider edge cases or extreme scenarios that your design may encounter. Assess the performance, integrity, and safety of your model under these conditions. Make any necessary adjustments to handle these edge cases effectively.
6. Perform Simulation or Analysis: Depending on the nature of your design, consider performing simulations or analysis to evaluate its behavior under different conditions. This could include stress analysis, fluid flow simulations, or thermal analysis. Identify any areas of concern and make necessary design modifications based on the simulation results.
7. Collaborate and Seek Feedback: Share your CAD model with colleagues, clients, or experts in the field for their feedback and input. Others may catch errors or provide valuable suggestions that improve the design. Incorporate their feedback and iterate on your model to enhance its quality and functionality.
8. Document and Save Revisions: Keep a record of any changes or revisions made during the error-checking process. Maintain organized documentation that highlights the modifications made, the reasoning behind them, and any validated analysis or simulation results. This documentation will be valuable for future reference or communication with stakeholders.
By diligently checking for errors, you can ensure that your 3D CAD model is accurate, functional, and ready for the next steps in the design process. Taking the time to review the model and fix any issues will help avoid costly mistakes and ensure the robustness of your design.
With the errors checked and resolved, it’s time to move on to step 8: exporting the CAD model for further use or collaboration.
Step 8: Exporting the CAD Model
Once you have completed the design process of your 3D CAD model, it’s time to export it in a format that can be utilized for further use or collaboration. The process of exporting the CAD model involves converting the digital design into a file format compatible with other software or manufacturing processes. Here are some key steps to follow when exporting your CAD model:
1. Select the Export Format: Determine the appropriate file format for exporting your CAD model. Consider the intended use of the model and the requirements of the receiving party or software. Some common file formats used for CAD models include STEP, IGES, DWG, STL, or OBJ. Each format has its own advantages and limitations, so choose the one that best suits your needs.
2. Configure Export Settings: In your CAD software, configure the export settings to ensure that the exported model preserves the desired level of detail, accuracy, and compatibility. Specify options such as unit measurements, file resolution, level of tessellation, or level of compression based on the requirements of the receiving software or manufacturing process.
3. Validate for Compatibility: Check the exported model in another software or viewer to verify that it is compatible and can be properly visualized or utilized by the intended recipients. Ensure that the geometry, textures, and other features are transferred accurately in the exported file. Make any necessary adjustments or conversions if compatibility issues arise.
4. Consider Intellectual Property Rights: If your CAD model contains sensitive or proprietary information, consider protecting your intellectual property rights during the export process. Explore options such as password-protected files, nondisclosure agreements, or watermarking to safeguard your design and prevent unauthorized use or reproduction.
5. Communicate with Collaborators: If you are exporting the CAD model for collaboration purposes, communicate with your collaborators and provide clear instructions on how to utilize the exported file. Share any specific requirements, setup instructions, or reference materials to ensure that your design is accurately understood and utilized by others.
6. Archive and Version Control: Maintain a backup of the exported CAD model and establish a robust version control system. This allows you to track the evolution of your design and retrieve previous versions if needed. Proper archiving and version control provide peace of mind and facilitate future modifications or iterations of the design.
7. Document Export Details: Create documentation that outlines the export details, including the file format, software versions used, and any specific settings or considerations. This documentation will be helpful for future reference, re-exporting, or sharing with others who may need to access or modify the CAD model.
By following these steps, you can export your 3D CAD model efficiently and ensure that it can be effectively utilized by others or integrated into various downstream processes such as manufacturing, prototyping, or visualization.
Congratulations! You have successfully completed all the steps from gathering requirements and materials to exporting your 3D CAD model. Your model is now ready to be utilized for further analysis, visualization, or production.
Remember, the process of creating a 3D CAD model is iterative, and continuous improvement is key. As you gain experience and encounter new design challenges, refine your skills and explore additional techniques to enhance your CAD modeling abilities.
Embrace the creativity and limitless possibilities that CAD modeling offers, and continue pushing the boundaries of design with your newfound knowledge and expertise.
Happy modeling!
Read more: How Hard Is 3D Modeling
Conclusion:
Creating a 3D CAD model requires a combination of technical skills, creativity, and attention to detail. By following the comprehensive steps outlined in this guide, you can successfully navigate the process and create impressive CAD models that accurately represent your design visions.
Gathering requirements and materials sets the foundation for your project, ensuring that you understand the objectives and constraints. Choosing the right CAD software is crucial for executing your design effectively and efficiently, while setting up the CAD environment optimizes your workflow and enhances productivity.
Creating the basic shape of your CAD model is a significant step, as it establishes the primary structure upon which you’ll build the design. Refining the model adds depth and intricacy, making it visually appealing and functional.
Adding details and features elevates the design to a higher level, infusing it with realism and personality. Checking for errors and ensuring the integrity of the CAD model is essential to maintain accuracy and functionality.
Finally, exporting the CAD model allows for further collaboration, manufacturing, or visualization. By following these steps, you will be able to harness the full potential of 3D CAD modeling and bring your ideas to life.
Remember to continuously refine your skills, stay updated with the latest CAD software advancements, and seek inspiration from other designers and innovators in the field. The world of CAD modeling is constantly evolving, and there is always something new to learn.
So, whether you are an aspiring designer, an engineer, an architect, or a creative professional, embrace the power of 3D CAD modeling and let your imagination soar. Through skillful execution, careful attention to detail, and continuous learning, you can create captivating and impactful CAD models that leave a lasting impression.
Now, go forth and unleash your creativity in the world of 3D CAD modeling!
Frequently Asked Questions about How To Make A 3D CAD Model
Was this page helpful?
At Storables.com, we guarantee accurate and reliable information. Our content, validated by Expert Board Contributors, is crafted following stringent Editorial Policies. We're committed to providing you with well-researched, expert-backed insights for all your informational needs.


0 thoughts on “How To Make A 3D CAD Model”