Home>diy>Building & Construction>How To Build A Crawl Space Foundation
Building & Construction
How To Build A Crawl Space Foundation
Modified: October 20, 2024
Learn how to build a crawl space foundation for your building construction project. Expert tips and step-by-step guide provided.
(Many of the links in this article redirect to a specific reviewed product. Your purchase of these products through affiliate links helps to generate commission for Storables.com, at no extra cost. Learn more)
Introduction
Welcome to the world of construction! If you’re planning to build your own home or embark on a construction project, one essential consideration is the foundation. A crawl space foundation is a common choice that provides a range of benefits. In this article, we will explore the basics of building a crawl space foundation and guide you through the process.
A crawl space foundation is a type of foundation that elevates the main living area of a building above the ground level. It typically consists of perimeter walls, support beams, and joists, and provides easy access to utilities and maintenance. This type of foundation is suitable for areas with moderate climates and where the ground conditions may not be ideal for a basement or slab foundation.
Building a crawl space foundation requires careful planning and execution to ensure a sturdy and durable structure. It involves several steps, including site assessment, excavation, construction of perimeter walls, installation of support beams and joists, laying the vapor barrier and insulation, addressing ventilation and moisture control, and adding finishing touches. Let’s dive into each step in detail.
Key Takeaways:
- Building a crawl space foundation involves thorough site assessment, precise excavation, sturdy perimeter walls, and effective moisture control measures. Proper planning and attention to detail are crucial for a durable and reliable foundation.
- From installing support beams and joists to laying vapor barriers and insulation, every step in constructing a crawl space foundation contributes to creating a controlled, energy-efficient, and long-lasting environment. Regular maintenance and professional guidance ensure optimal functionality.
Read more: What Is A Crawl Space Foundation
Understanding the Basics of a Crawl Space Foundation
Before we delve into the details of building a crawl space foundation, it’s important to have a solid understanding of its basic components and their functions.
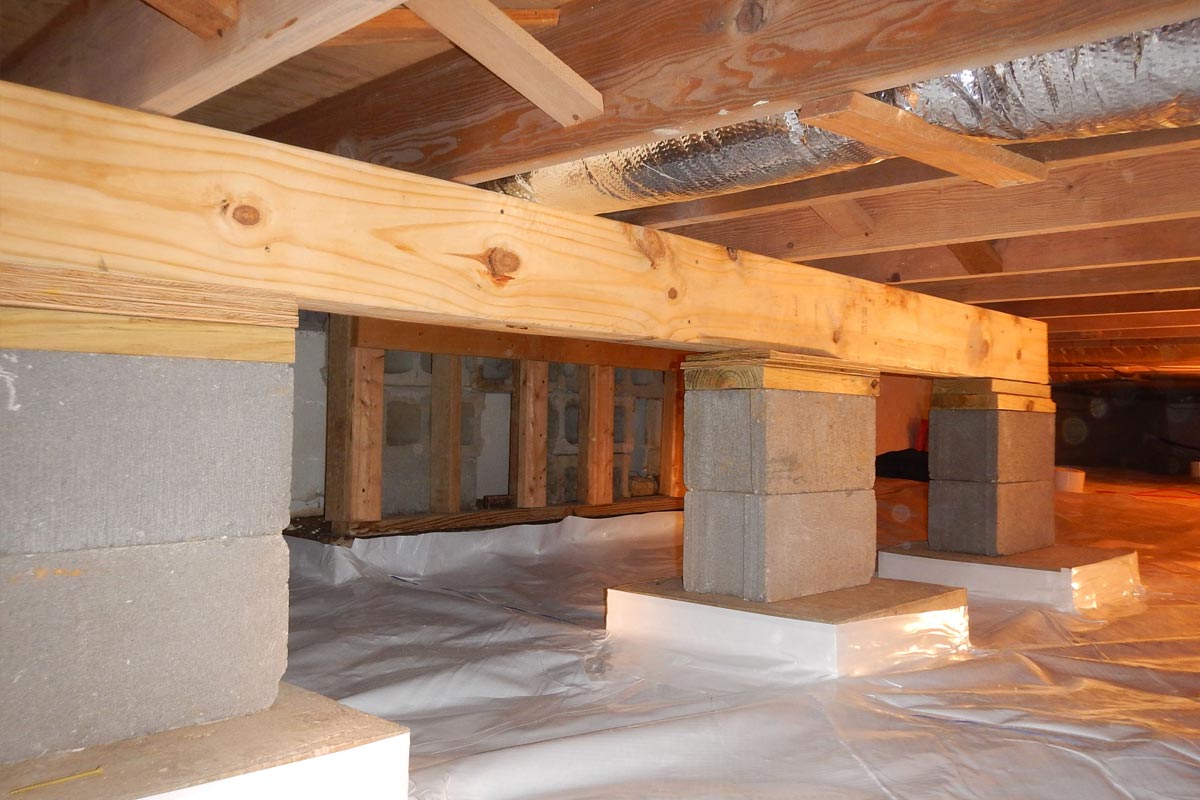
A crawl space foundation is a raised platform that creates a space between the ground and the bottom of the building. It typically has a height of about 1.5 to 3 feet, providing enough space for a person to crawl and access utilities, such as plumbing and electrical systems. The foundation rests on footings, which are reinforced concrete pads that distribute the weight of the structure evenly to the soil.
The perimeter walls of a crawl space foundation are constructed using materials like concrete blocks, poured concrete, or treated lumber. These walls provide structural support and serve as a barrier to moisture and pests. They are usually reinforced with steel bars and connected to the footings for stability.
Support beams and joists form the skeletal structure of the crawl space foundation. The beams are typically made of treated lumber and are placed perpendicular to the perimeter walls. They distribute the weight of the above structure and transfer it to the footings. Joists, on the other hand, are horizontal elements that run parallel to the support beams. They provide a sturdy surface for the subfloor and help distribute the weight of the building evenly.
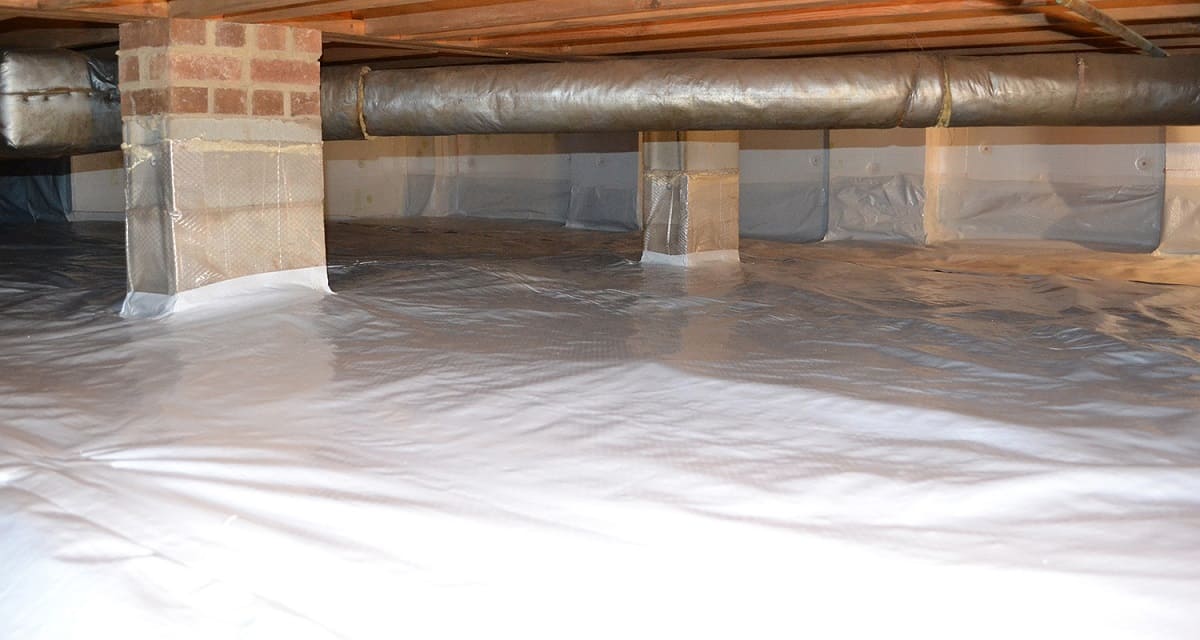
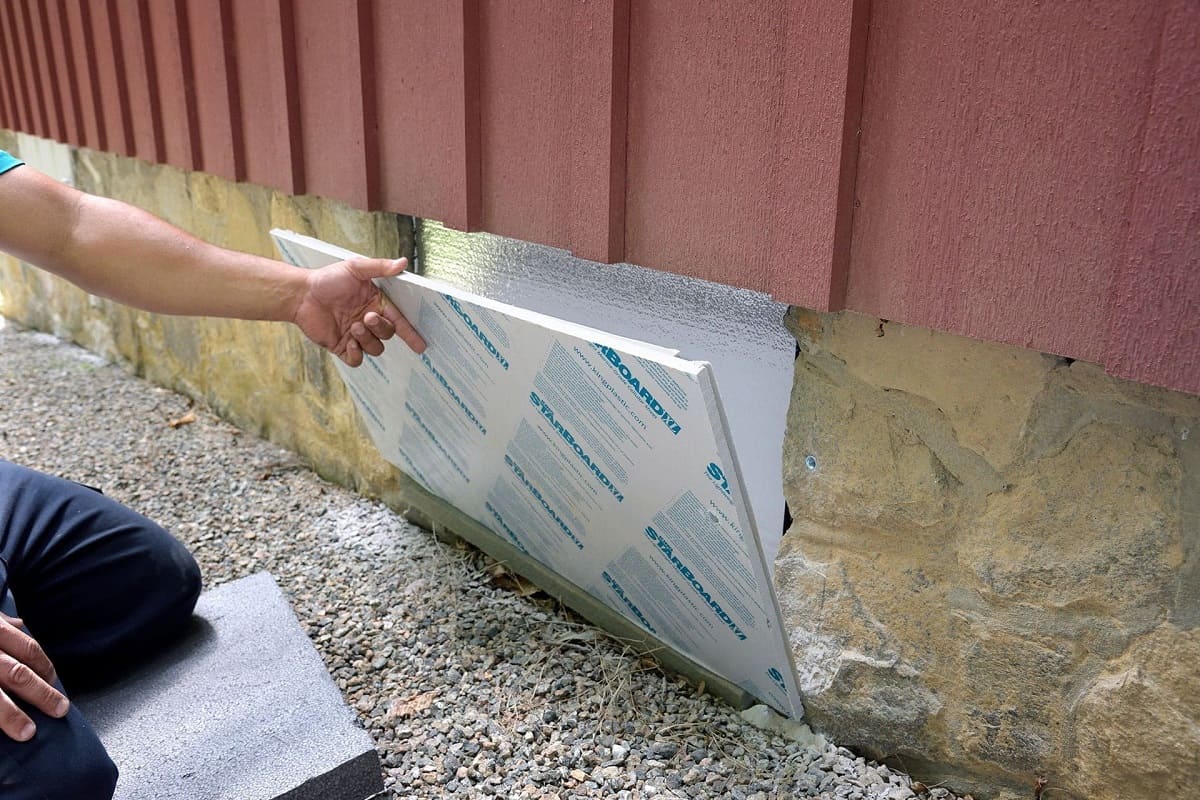
A crucial aspect of a crawl space foundation is the installation of a vapor barrier and insulation. The vapor barrier, usually made of polyethylene, helps prevent moisture from entering the crawl space. It is placed on the ground and attached to the perimeter walls to create a sealed environment. Insulation is also added to the perimeter walls and under the subfloor to improve energy efficiency and mitigate temperature fluctuations.
In addition to these components, proper ventilation and moisture control are essential for a crawl space foundation. Vents are strategically placed along the perimeter walls to allow air circulation and reduce humidity levels. This helps prevent mold, wood rot, and other issues caused by excess moisture. Additionally, a sump pump or a dehumidifier may be installed to further control moisture levels in areas prone to heavy rainfall or high groundwater.
Now that we have a solid understanding of the basics, let’s move on to the next step: assessing the site and preparing for construction.
Assessing the Site and Preparing for Construction
When it comes to building a crawl space foundation, proper site assessment and preparation are critical for a successful construction process. Here are the key steps involved in this phase:
1. Surveying the Site: Before beginning the construction process, conduct a thorough survey of the site to evaluate the soil conditions, slope, drainage patterns, and any potential obstructions. This will help determine if the site is suitable for a crawl space foundation and identify any necessary modifications.
2. Obtaining Permits and Clearing the Area: Check with your local building department to determine the required permits and regulations for constructing a crawl space foundation. Once you have the necessary permits, clear the construction area, removing any vegetation, debris, or existing structures.
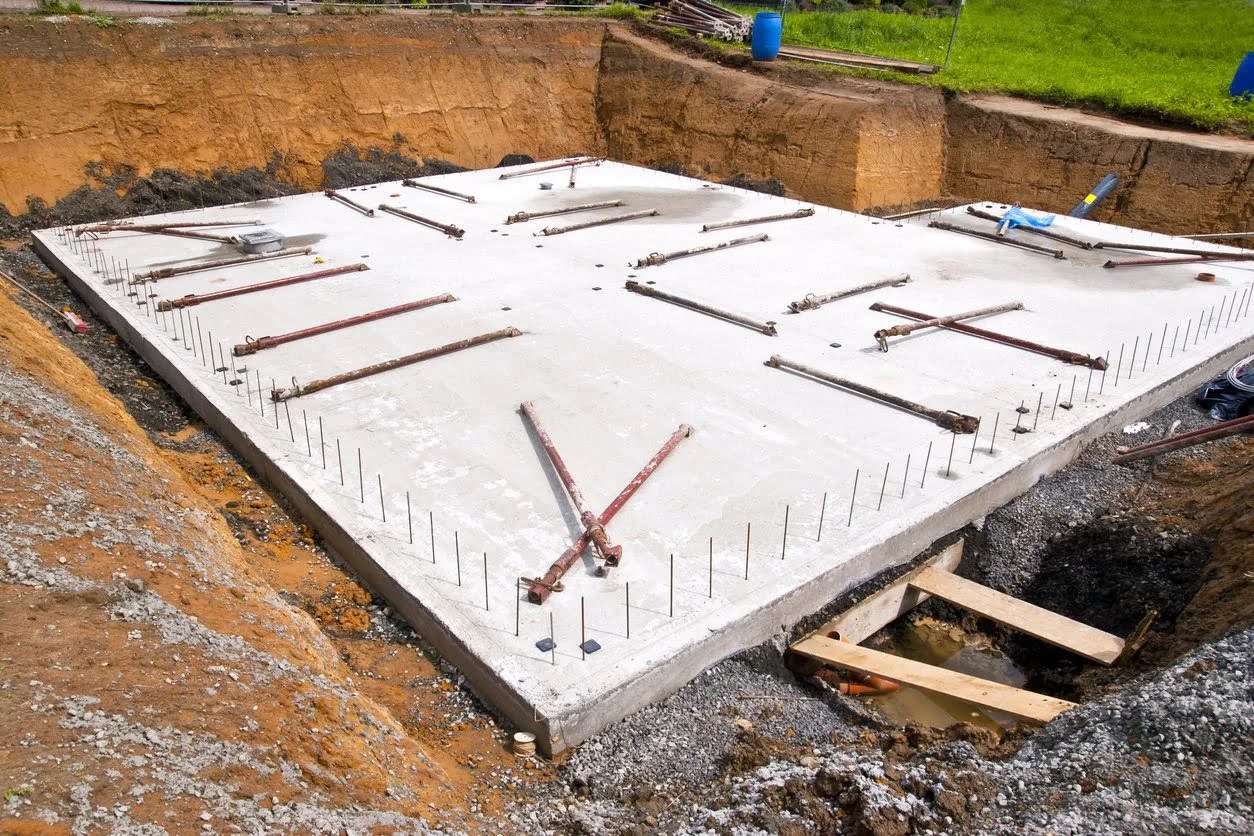
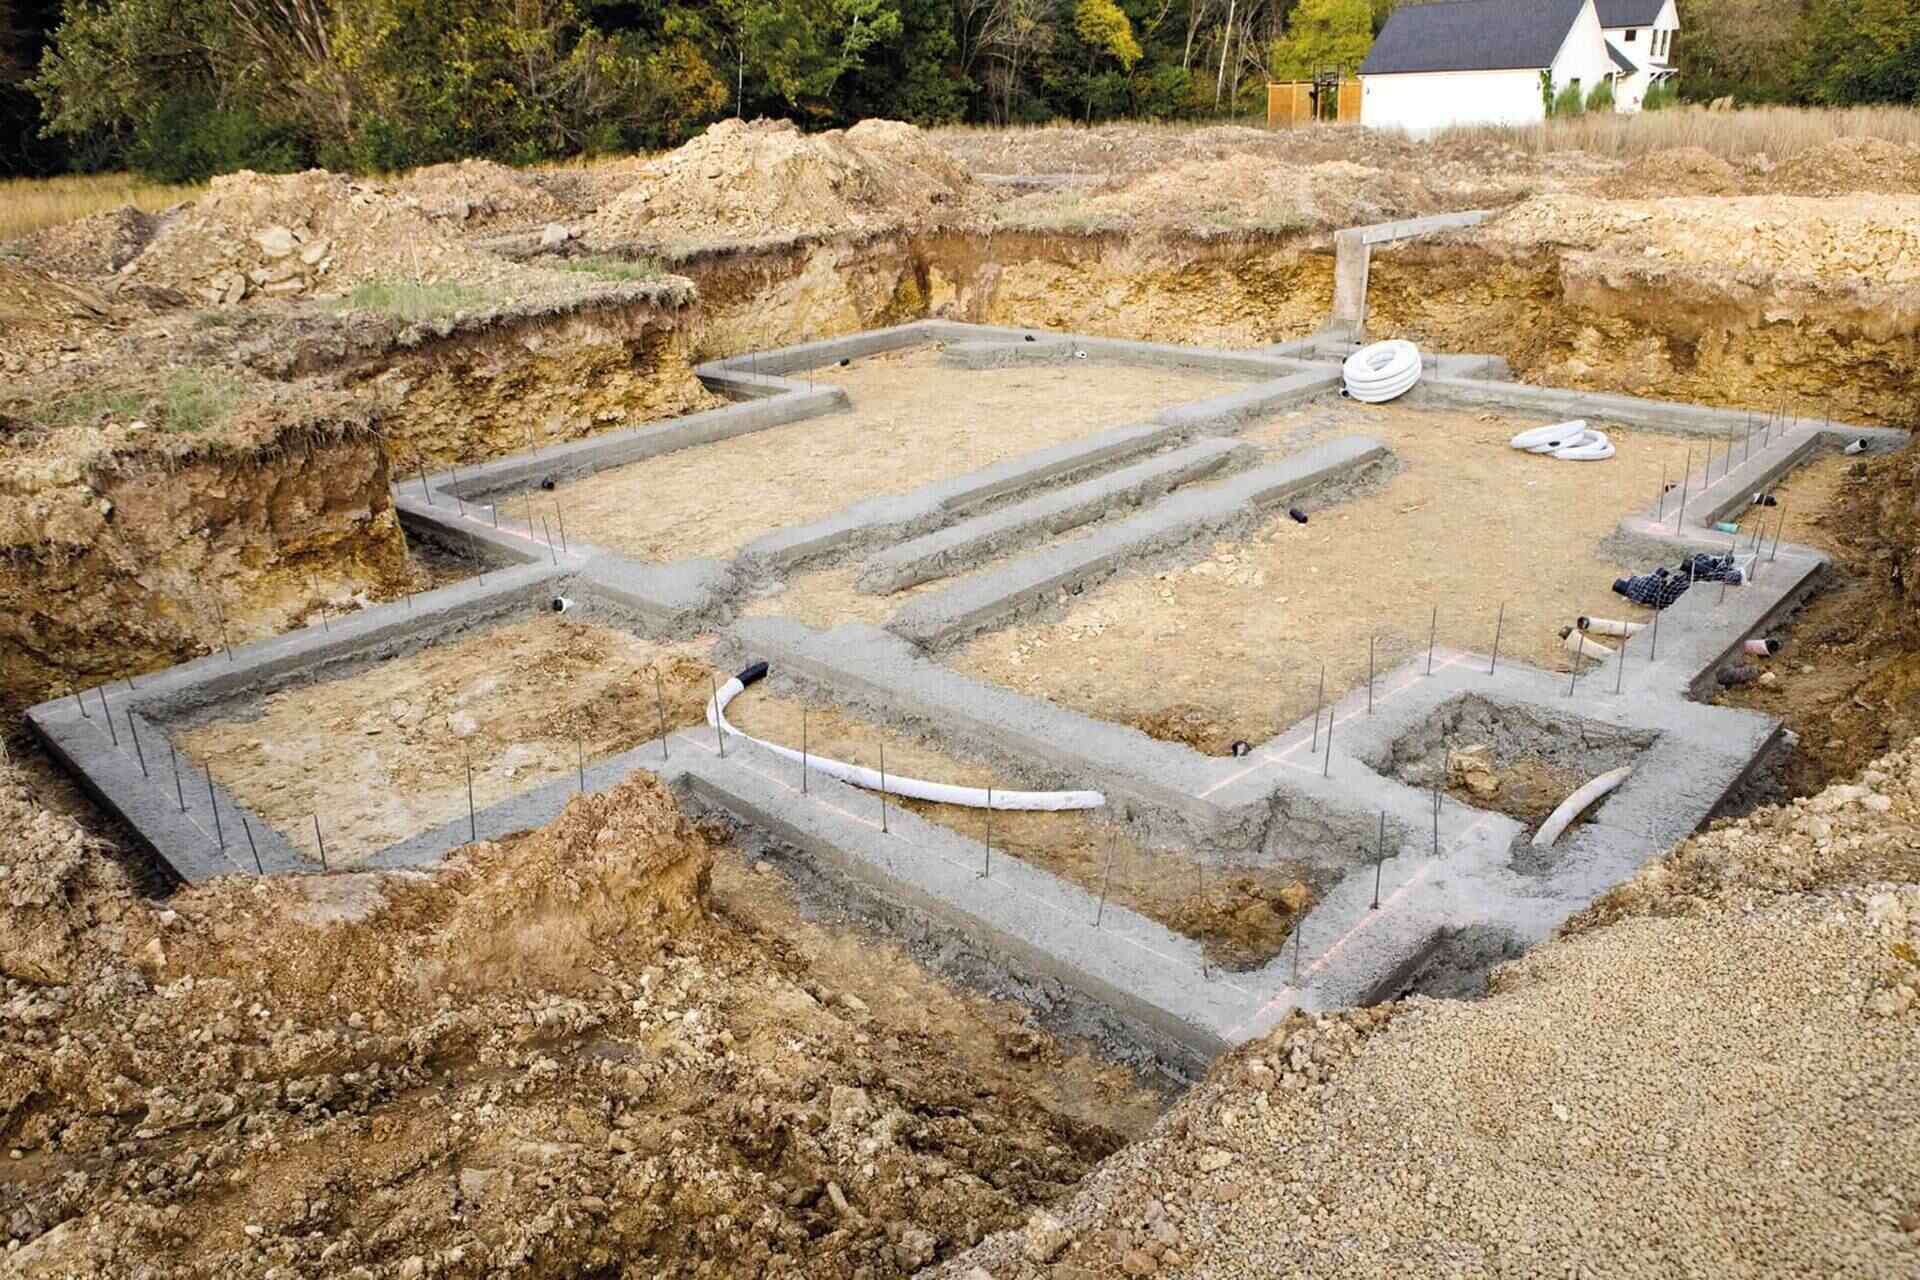
3. Excavating the Area: Excavation is a crucial step in the crawl space foundation construction process. It involves digging a trench around the perimeter of the building footprint and removing the soil to the required depth. The depth of the crawl space will depend on factors such as local building codes and site-specific conditions.
4. Leveling and Compacting the Soil: After excavation, the soil needs to be properly leveled and compacted to ensure stability. This helps prevent settlement and uneven settling of the foundation. A plate compactor or a similar heavy-duty machine can be used for this purpose.
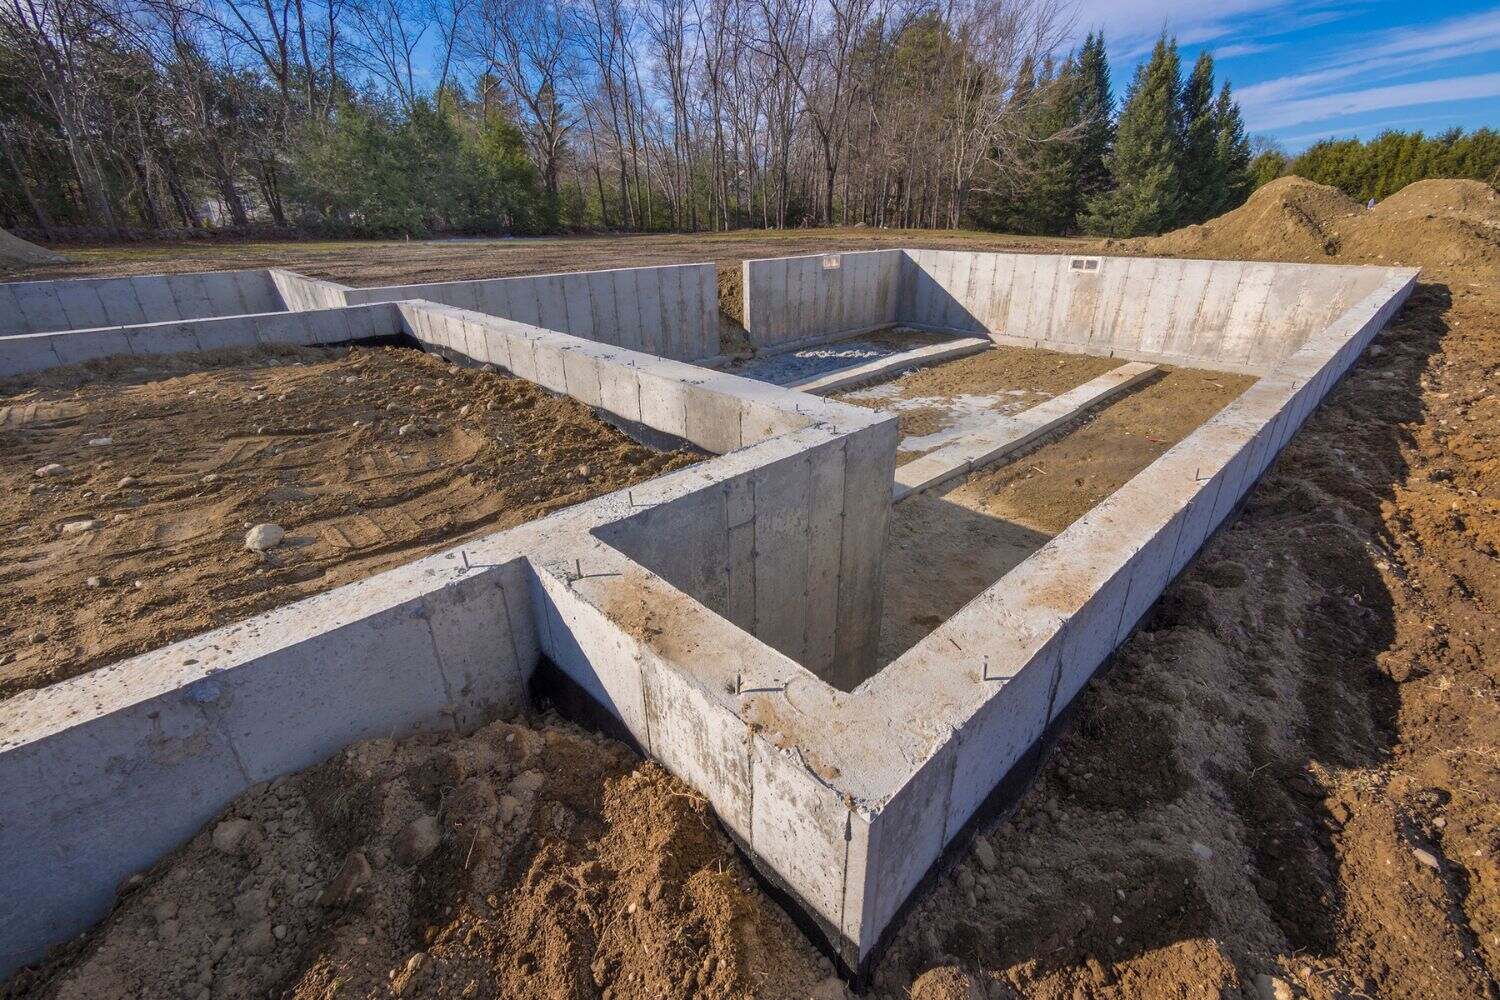
5. Installing Footings: Footings provide a solid base for the crawl space foundation. They are typically made of reinforced concrete and are poured into trenches along the perimeter walls. The size and depth of the footings will depend on the load-bearing capacity required for the structure.
6. Treating the Soil: Depending on the soil conditions, it may be necessary to treat the soil to prevent issues such as termite infestation or excessive moisture. Chemical treatments, moisture barriers, or other appropriate methods can be employed to ensure the integrity and longevity of the foundation.
7. Establishing Layout and Dimensions: Once the footings are in place, establish the layout and dimensions of the crawl space foundation. This includes determining the locations of internal support beams, ventilation openings, and access points.
By thoroughly assessing the site and properly preparing the construction area, you set a solid foundation for the subsequent steps in building your crawl space foundation. The next step is excavating the area, which we will cover in detail in the following section.
Excavating the Area for the Crawl Space
Excavating the area is a crucial step in building a crawl space foundation. This process involves carefully digging a trench around the perimeter of the building footprint to create space for the foundation. Here’s a detailed look at the steps involved:
1. Marking the Perimeter: Before excavation, use stakes and string to mark the exact perimeter of the crawl space foundation. This will serve as a guide for the digging process and ensure accurate dimensions.
2. Gathering the Necessary Equipment: Prepare the required equipment and tools for excavation, including an excavator or a backhoe. These machines can significantly speed up the process and make it more efficient.
3. Digging the Trench: Start digging the trench along the marked perimeter, ensuring that the depth is sufficient to accommodate the desired height of the crawl space foundation. The depth will depend on factors such as local building codes and the specific site conditions.
4. Removing Excavated Soil: As the soil is excavated from the trench, it needs to be properly removed and disposed of. It’s important to set up a designated area for soil disposal or make arrangements for its proper disposal as per local regulations.
5. Smoothing and Leveling the Trench: As the excavation progresses, regularly check the depth and ensure it remains consistent throughout the trench. Use a level to ensure the trench floor is even and free of any irregularities. This will provide a stable base for the foundation.
6. Creating a Slope for Drainage: Depending on the site conditions and local regulations, you may need to create a slight slope within the trench to ensure proper drainage. This slope will direct water away from the crawl space and prevent potential water pooling issues.
7. Inspecting and Testing the Trench: Once the excavation is complete, thoroughly inspect the trench for any inconsistencies or potential issues. Ensure that the trench is free of debris, rocks, or other objects that may obstruct the foundation installation. Consider conducting soil tests to assess the soil’s bearing capacity and make any necessary modifications.
Excavating the area for the crawl space foundation requires precision and attention to detail. It’s important to carefully follow local building codes and regulations and employ professional guidance if needed. Once the excavation is complete, the next step is to build the perimeter walls of the foundation, which we will explore in the following section.
Building the Perimeter Walls of the Foundation
After excavating the area for the crawl space foundation, the next step is to build the perimeter walls. These walls provide structural support and serve as a barrier against moisture and pests. Here is a detailed guide on how to construct the perimeter walls:
1. Material Selection: Choose the appropriate material for your perimeter walls, considering factors such as durability, cost, and local building codes. Common options include concrete blocks, poured concrete, or treated lumber.
2. Establishing the Layout: Use measurements obtained during the site assessment phase to mark the locations of the walls. Ensure that the corners are square and the walls are aligned with the building’s layout.
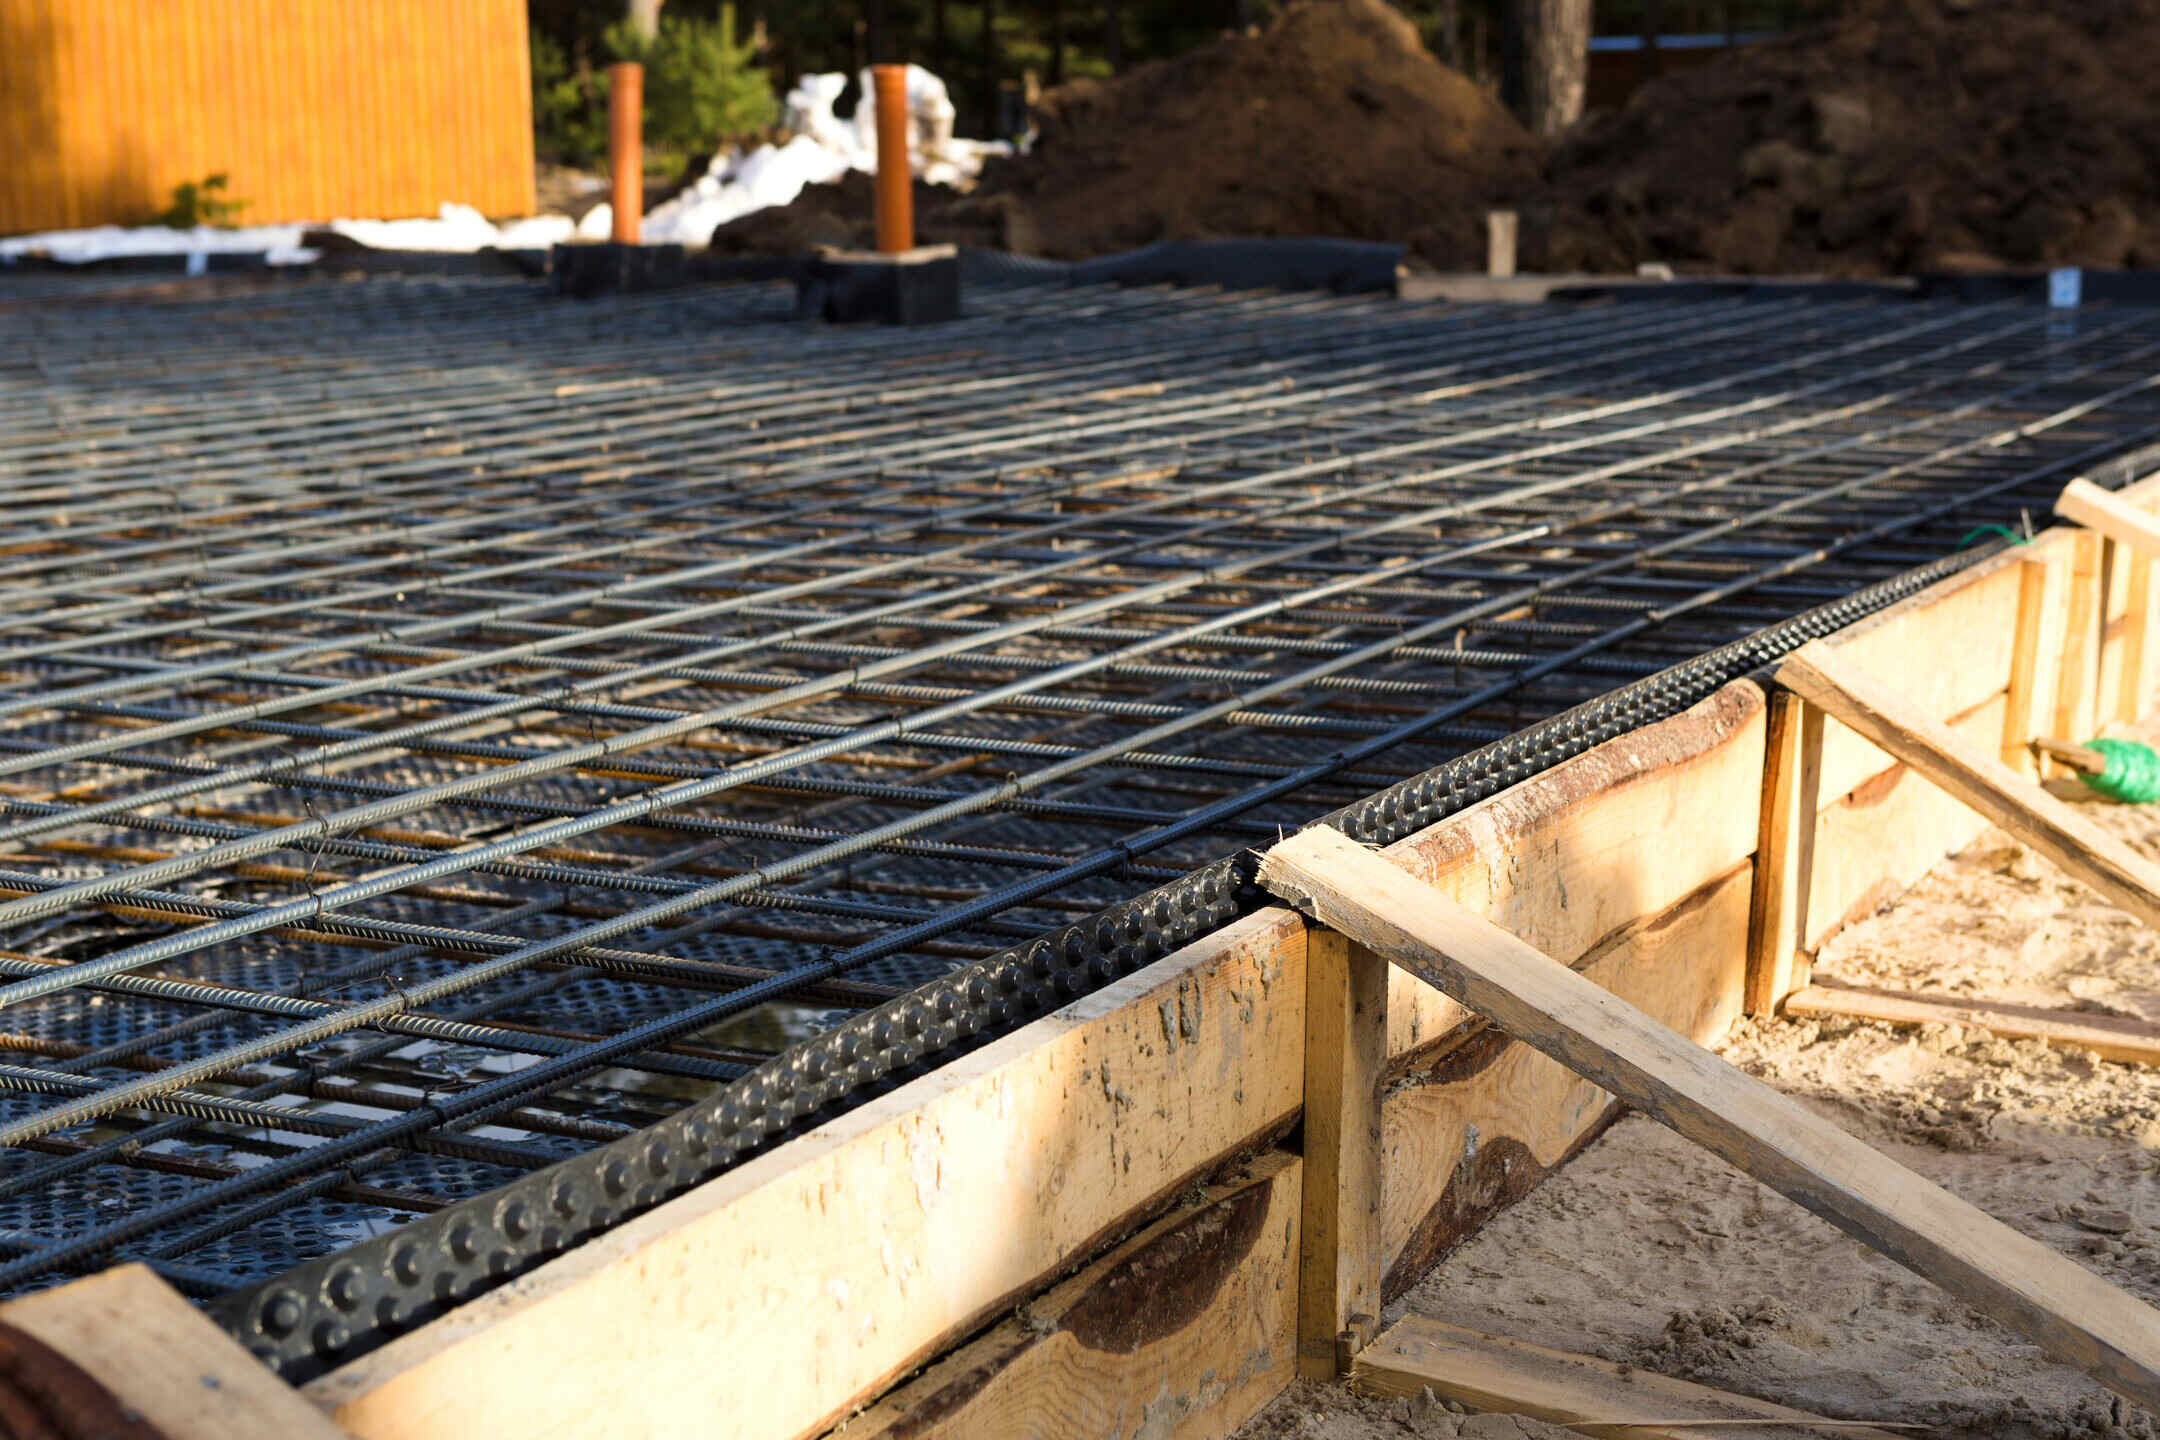
3. Setting the Footers: Begin by placing concrete footings along the marked perimeter. These footings provide support and distribute the weight of the walls evenly. Ensure that the footings are level and aligned with the layout plan.
4. Laying the First Course: Lay the first course of blocks or place the first layer of poured concrete. Use a level to ensure that the walls are straight and plumb. Properly align and connect the blocks or reinforce the poured concrete with rebar for stability.
5. Building Up the Walls: Continue building the walls course by course, using mortar to secure the blocks or pouring concrete for solid walls. Apply mortar evenly between each block, ensuring a tight bond. Frequently check for plumbness and levelness as you progress.
6. Reinforcing the Walls: Depending on local building codes and structural requirements, consider adding steel reinforcement bars (rebar) into the walls. This provides additional strength and stability, especially in areas prone to seismic activity or other hazards.
7. Installing Openings and Vents: Plan for openings in the walls to accommodate access points, windows, and ventilation. Install window frames and ensure proper sealing to prevent air and moisture infiltration. Strategically place vents to promote airflow and prevent moisture buildup within the crawl space.
8. Applying Waterproofing and Insulation: Once the walls are constructed, apply a waterproofing coating to the exterior side of the walls. This helps prevent moisture penetration and protects the foundation. Additionally, consider adding insulation to the interior side of the walls for energy efficiency and climate control.
9. Inspecting and Completing the Walls: Thoroughly inspect the walls for any cracks, gaps, or structural issues. Make any necessary repairs or adjustments before proceeding to the next phase of construction.
By following these steps, you can construct sturdy and reliable perimeter walls for your crawl space foundation. The next step is to install the support beams and joists, which we will delve into in the following section.
Make sure to properly grade the soil around the crawl space to ensure proper drainage and prevent water from pooling around the foundation.
Read more: How To Build A Crawl Space Door
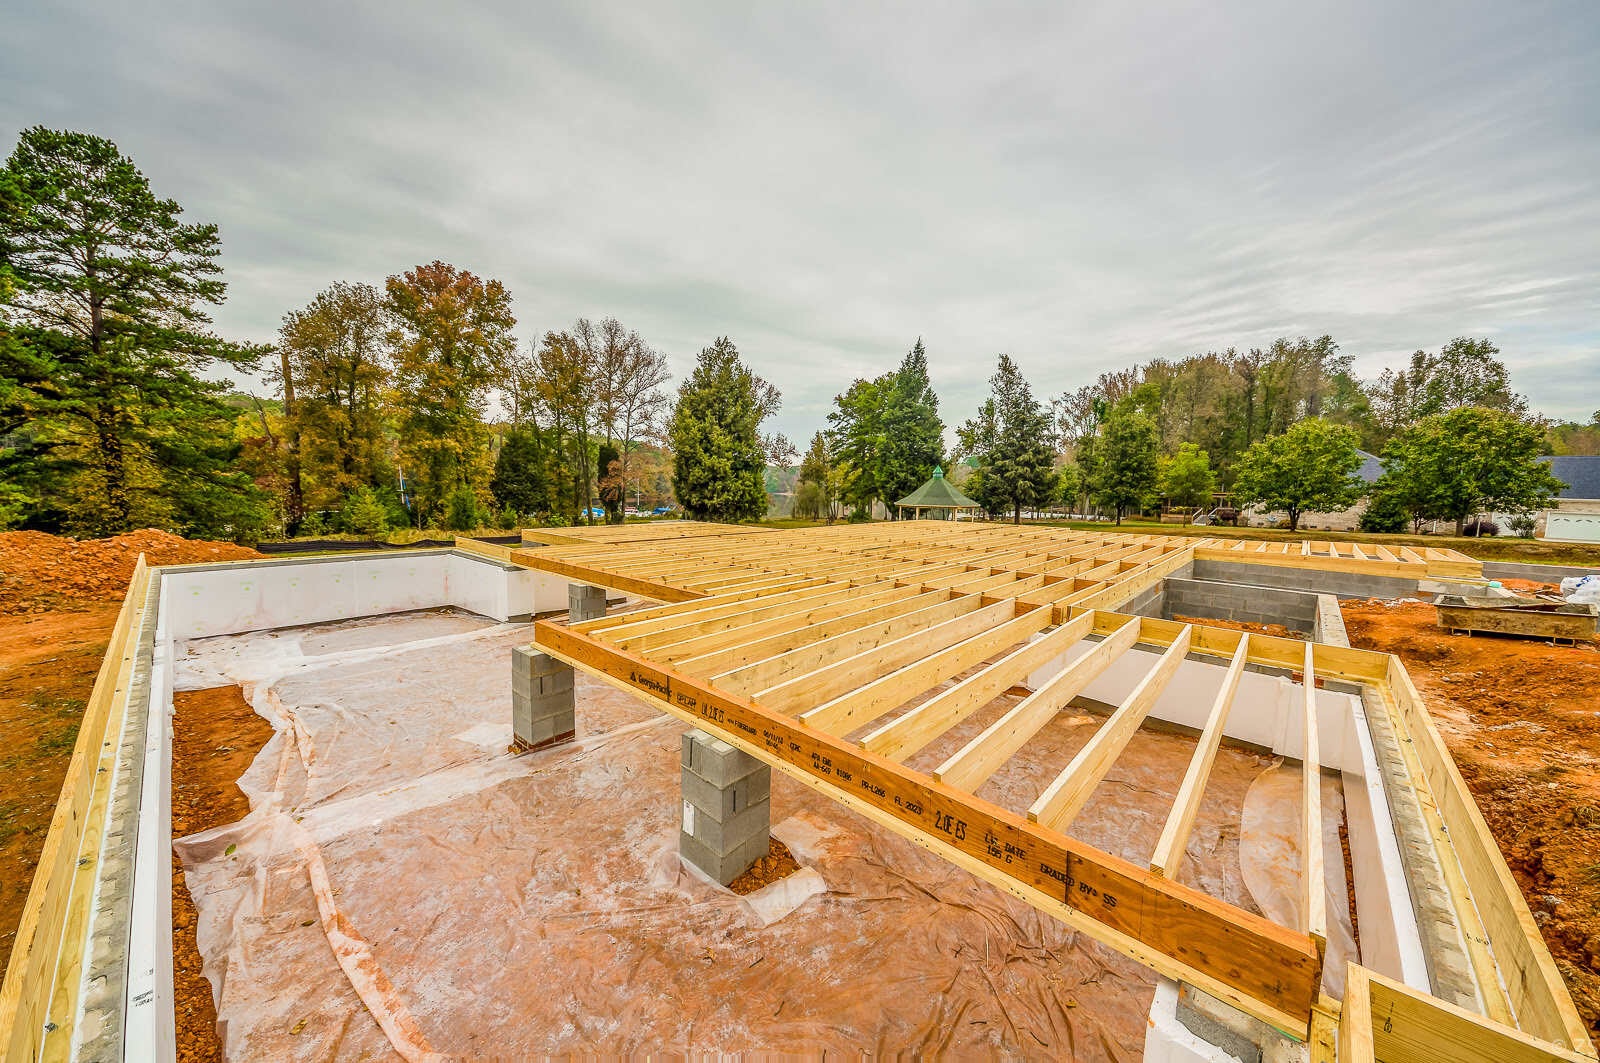
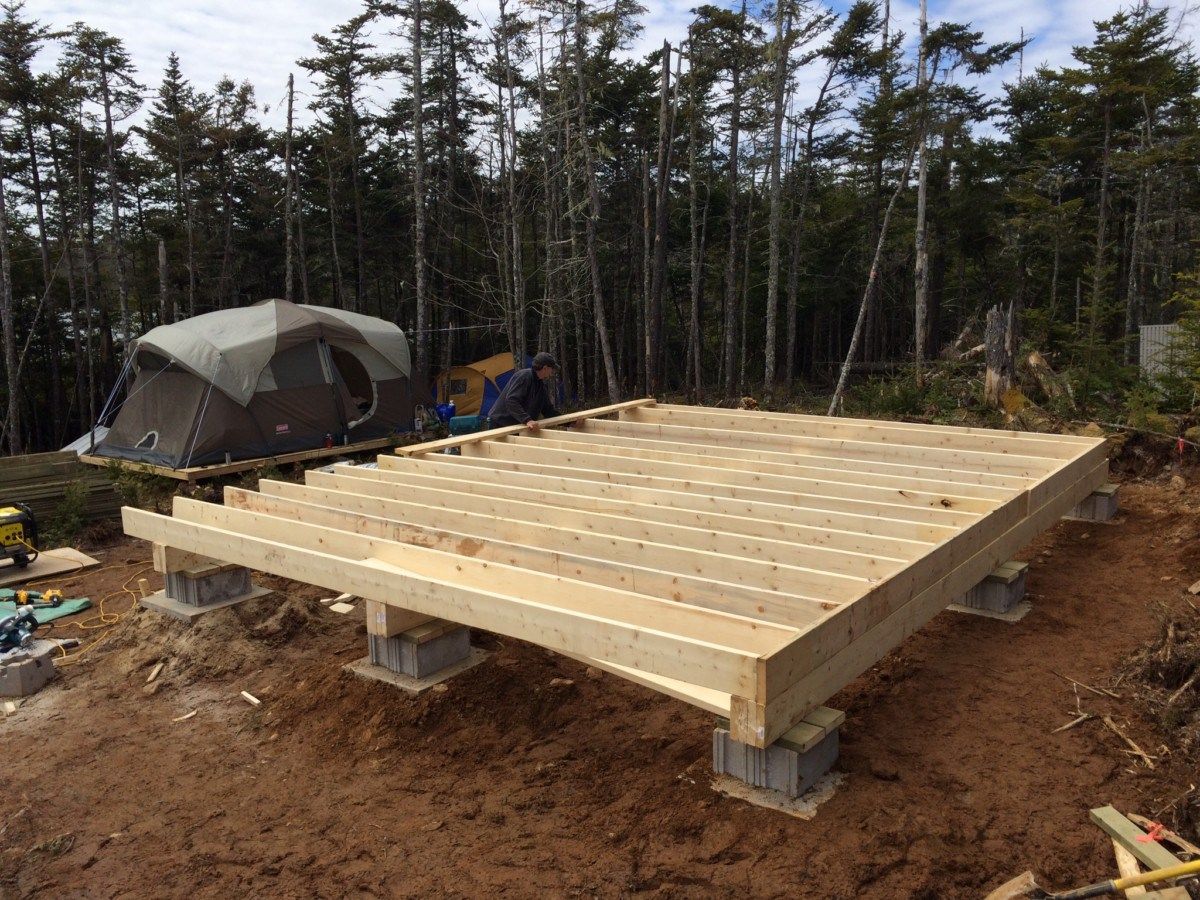
Installing Support Beams and Joists
Once the perimeter walls of your crawl space foundation are built, the next essential step is to install the support beams and joists. These elements form the skeletal structure of the foundation and provide crucial support for the above structure. Here’s a detailed guide on how to install support beams and joists:
1. Determine Beam Placement: Measure and mark the locations where the support beams will be placed. Typically, they are installed perpendicular to the perimeter walls, evenly spaced depending on the design and load-bearing requirements.
2. Choose the Right Materials: Select treated lumber appropriate for supporting the weight of the structure. The size and type of lumber will depend on factors such as the span between walls, local building codes, and the design of the building.
3. Install Support Beams: Begin by placing the first support beam at one end of the crawl space. Ensure it is level and secure it to the perimeter walls using appropriate connectors such as metal brackets or anchor bolts. Repeat this process for the remaining support beams along the designated locations.
4. Attach Joist Hangers: Install joist hangers at regular intervals along the length of the support beams. Joist hangers are metal brackets that securely hold the joists in place. Ensure that they are properly aligned and securely attached to the support beams.
5. Cut and Install Joists: Measure, cut, and install the joists into the joist hangers. The joists should be cut to match the length between the support beams, ensuring a snug fit. Nail or screw the joists into the joist hangers, making sure they are level and evenly spaced.
6. Consider Cross Bridging: In some cases, it may be necessary to install cross bridging between the joists for added stability. Cross bridging consists of diagonal pieces of lumber that are installed between the joists to prevent them from twisting or moving under load.
7. Check for Levelness and Stability: Regularly check the levelness and stability of the support beams and joists as you install them. Utilize a level to ensure that the beams are plumb, and the joists are level. This will ensure the integrity and durability of the foundation structure.
8. Reinforce as Needed: Depending on the design and load-bearing requirements, consider adding additional support beams or joists for added strength and stability. Consult with a structural engineer or building professional if you have any concerns.
By following these steps, you can properly install the support beams and joists, providing a solid foundation structure for your crawl space. The next step is to lay the vapor barrier and insulation, which we will explore in the following section.
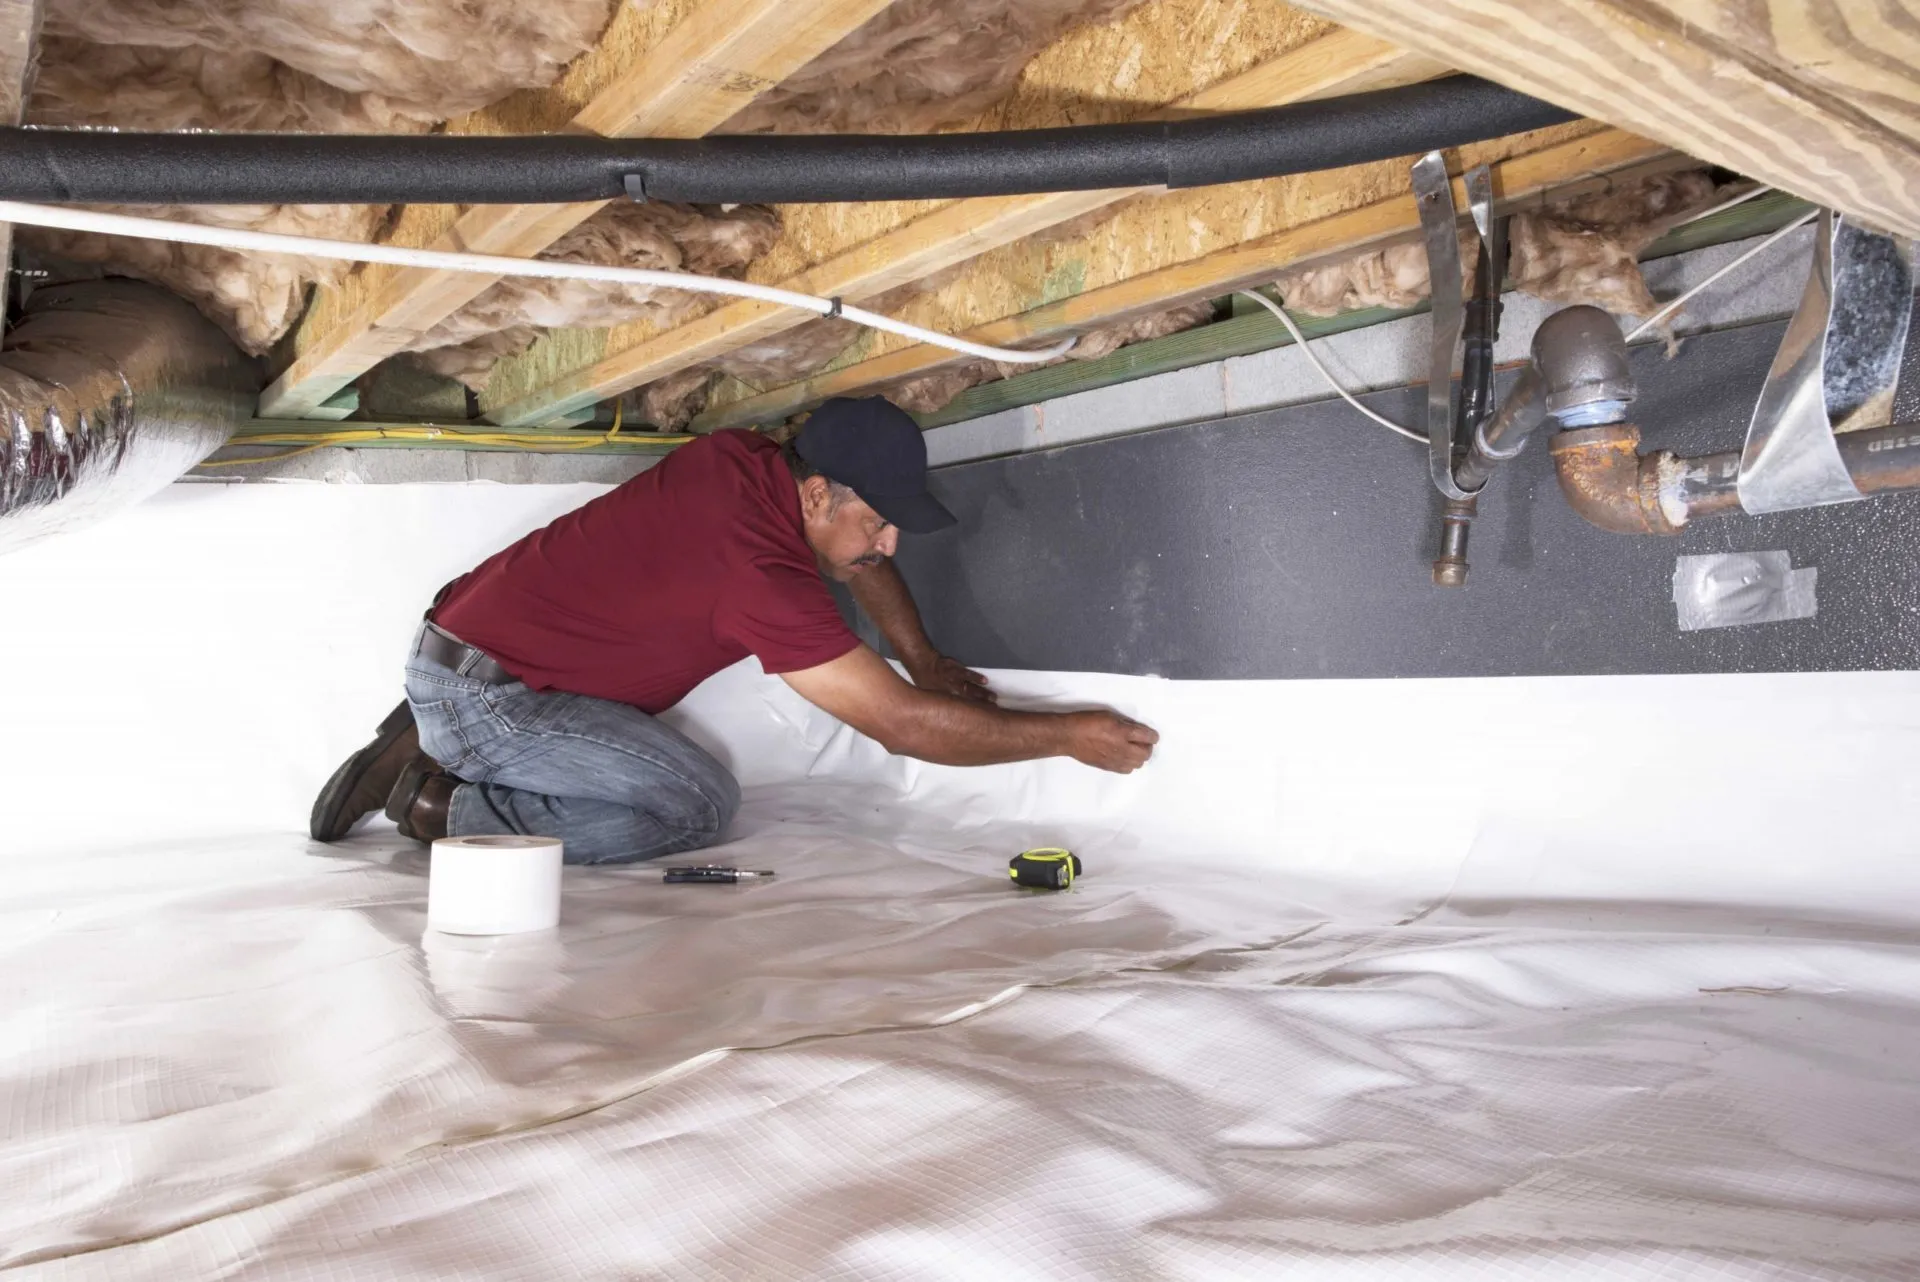
Laying the Vapor Barrier and Insulation
After installing the support beams and joists in your crawl space foundation, the next important step is to lay the vapor barrier and insulation. These components play a crucial role in maintaining a controlled environment within the crawl space. Here’s a detailed guide on how to properly lay the vapor barrier and insulation:
1. Prepare the Crawl Space: Before laying the vapor barrier and insulation, ensure that the crawl space is clean and free of any debris. Remove any sharp objects or protrusions that may damage the material or cause it to tear.
2. Install the Vapor Barrier: The vapor barrier is a sheet of polyethylene plastic that serves as a moisture barrier, preventing moisture from seeping into the crawl space. Roll out the vapor barrier on the crawl space floor, covering the entire area. Overlap the seams and seal them with vapor barrier tape to create a continuous barrier.
3. Secure the Vapor Barrier: To secure the vapor barrier in place, attach it to the walls using fasteners such as construction adhesive or masonry nails. Ensure that the barrier is taut and properly secured to create an airtight seal. Trim off any excess material along the edges if necessary.
4. Insulate the Perimeter Walls: Insulating the perimeter walls helps improve energy efficiency and temperature control within the crawl space. Install insulation panels or batts against the interior side of the walls, making sure they fit snugly between the support beams and joists. Use insulation fasteners or adhesive to keep the insulation in place.
5. Insulate the Subfloor: Insulating the subfloor above the crawl space further enhances energy efficiency and comfort. Install insulation batts or panels between the joists, ensuring a proper fit and coverage. Use insulation hangers or wire to secure the insulation to the joists and prevent sagging.
6. Seal Gaps and Joints: Inspect the crawl space for any gaps, joints, or openings where air or moisture may enter. Seal these gaps using spray foam insulation, caulk, or airtight tape. Pay close attention to areas around plumbing penetrations, electrical conduit, and vents.
7. Consider Crawlspace Ventilation: Depending on local building codes and climate conditions, you may need to install vents in the crawl space to promote airflow and prevent moisture buildup. Follow the recommended guidelines for vent placement and size to ensure proper ventilation.
By following these steps, you can effectively lay the vapor barrier and insulation in your crawl space, creating a controlled and energy-efficient environment. The next step is to address ventilation and moisture control, which we will explore in the next section.
Ventilation and Moisture Control
Proper ventilation and moisture control are crucial for maintaining a healthy and functional crawl space. Inadequate ventilation can lead to excess moisture, which can cause mold growth, rotting, and other structural problems. Here’s a guide on how to effectively address ventilation and moisture control in your crawl space:
1. Designing the Ventilation System: Depending on your climate and local building codes, determine the appropriate number and size of vents for your crawl space. Vents should be strategically placed along the perimeter walls to allow for cross ventilation. As a general rule, aim for 1 square foot of vent area for every 150 square feet of crawl space.
2. Installing Vents: Cut openings in the crawl space walls for the vents, ensuring they are placed in low-lying areas where moisture tends to accumulate. Install vent wells or screens to protect the vents from debris and pests. Use vent covers to regulate airflow and prevent unwanted drafts.
3. Consider Encapsulating the Crawl Space: In areas with high humidity or prone to moisture issues, encapsulating the crawl space may be necessary. This involves covering the entire crawl space floor and walls with a thick vapor barrier, sealing it completely. This method eliminates the need for vents and greatly reduces moisture infiltration.
4. Installing a Dehumidifier: If your crawl space experiences high humidity levels, consider installing a dehumidifier. This appliance helps remove excess moisture from the air, reducing the risk of mold growth and creating a more favorable environment.
5. Addressing Water Drainage: Ensure that proper drainage is in place to direct water away from the crawl space. Grade the surrounding land away from the foundation, install gutters and downspouts to divert roof runoff, and consider implementing French drains or a sump pump system if necessary.
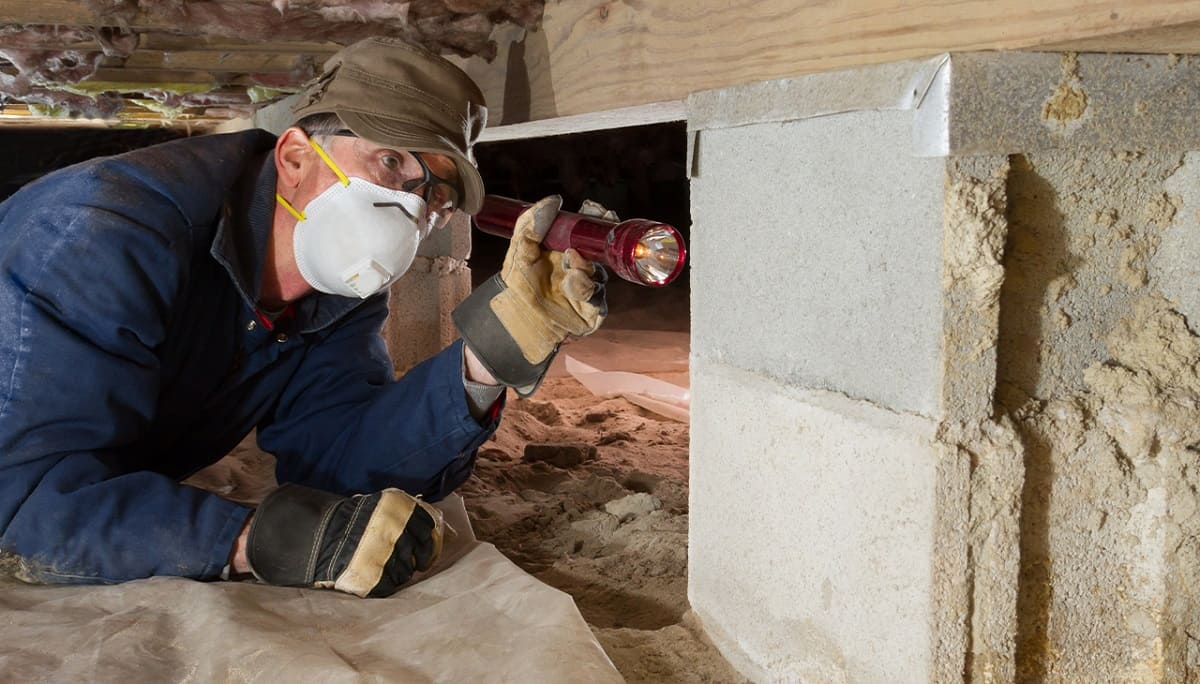
6. Regular Inspections: Regularly inspect the crawl space for signs of moisture, such as dampness, mold, or water stains. Address any leaks or plumbing issues promptly to prevent further moisture-related problems.
7. Monitoring Moisture Levels: Use a moisture meter to periodically check the moisture levels within the crawl space. Keep the levels within an acceptable range and take corrective measures if they exceed recommended levels.
By effectively addressing ventilation and moisture control in your crawl space, you can create a healthier and more durable environment. These measures help prevent structural damage, improve indoor air quality, and prolong the lifespan of your foundation. The next section will cover the finishing touches and additional considerations for your crawl space foundation.
Finishing Touches and Considerations
As you near the completion of your crawl space foundation, there are a few finishing touches and additional considerations that will help ensure the success and longevity of your construction project. Here’s what you need to know:
1. Access Points: Install access doors or hatches to provide easy entry into the crawl space. These should be located in convenient areas for maintenance and utility access. Ensure the access points are properly sealed to maintain the integrity of the vapor barrier and insulation.
2. Inspect for Any Remaining Gaps: Thoroughly inspect the crawl space for any remaining gaps, cracks, or openings. Seal these areas with appropriate materials, such as caulk or expanding foam, to prevent air leakage and pest infiltration.
3. Consider Pest Control Measures: Implement pest control measures to protect your crawl space from unwanted critters. Apply insecticides or consider installing pest barriers to deter pests from entering the crawl space.
4. Monitor and Maintain: Regularly monitor the crawl space for signs of moisture, mold, or other issues. Perform routine maintenance checks, inspecting the vapor barrier, insulation, and ventilation components. Address any problems promptly to prevent further damage or deterioration.
5. Consider Energy Efficiency: Implement additional energy-efficient features, such as LED lighting or smart thermostats, to optimize energy usage and reduce utility costs. This will contribute to the overall efficiency and sustainability of your home.
6. Consult with Professionals: If you are unsure about any aspect of the crawl space foundation construction or encounter complex issues, it’s advisable to seek the expertise of professionals. Consult with contractors, structural engineers, or building inspectors to ensure compliance with local building codes and best practices.
7. Maintain Proper Drainage Around the Exterior: Ensure that the surrounding landscape is properly graded to divert water away from the foundation. Regularly clean gutters and downspouts and ensure they are directing water away from the crawl space. Implement appropriate drainage solutions, such as French drains or swales, if needed.
By addressing these finishing touches and considering the important aspects outlined above, you can complete your crawl space foundation construction with confidence. A well-built crawl space will provide a solid foundation for your home, ensuring its longevity and structural integrity for years to come.
Remember to regularly inspect and maintain your crawl space foundation to address any potential issues early on. Proper care and maintenance will contribute to the overall health and durability of your home.
Now that you have completed the construction of your crawl space foundation, you can move forward with your construction project, confident in the strength and quality of your foundation.
Read more: How To Build A Deck Foundation
Conclusion
Congratulations! You have reached the end of your journey in building a crawl space foundation. By understanding the basics, assessing the site, excavating the area, constructing the perimeter walls, installing support beams and joists, laying the vapor barrier and insulation, addressing ventilation and moisture control, and adding finishing touches, you have successfully created a solid foundation for your building project.
A crawl space foundation offers numerous benefits, such as easy access to utilities, improved insulation, and protection against moisture and pests. It is important to follow proper construction techniques and adhere to local building codes to ensure the durability and longevity of your crawl space foundation.
Throughout the construction process, you have learned about the importance of site assessment, proper excavation, sturdy perimeter walls, the installation of support beams and joists, and effective moisture control measures. These steps are critical in creating a safe and stable environment for your home or building.
Remember to regularly inspect and maintain your crawl space foundation to address any potential issues that may arise. This includes monitoring moisture levels, inspecting for cracks or gaps, and maintaining proper ventilation and drainage. By taking proactive measures, you can prevent moisture-related problems, protect against pests, and promote a healthy living environment.
Building a crawl space foundation requires careful planning, attention to detail, and the use of appropriate materials. If you are unsure about any step or encounter complex issues, do not hesitate to seek the advice of professionals, such as contractors or structural engineers. Their expertise will ensure that your crawl space foundation is constructed to the highest standards.
With a well-built crawl space foundation, you can move forward with confidence in your construction project. Whether it’s a residential home or a commercial building, the stability and durability provided by a crawl space foundation form a solid base for the structure above.
Once again, congratulations on completing the construction of your crawl space foundation. Now, it’s time to continue with your building project and enjoy the comfort and peace of mind that a well-constructed foundation provides.
Now that you're equipped with the know-how to construct a crawl space foundation, why stop there? Dive deeper into the essentials of home foundations with our engaging article on the very core of what a crawl space entails. Whether you're a seasoned constructor or a curious homeowner, understanding the crucial aspects of this type of space will surely bolster your knowledge, ensuring every part of your building stands firm and functional.
Frequently Asked Questions about How To Build A Crawl Space Foundation
Was this page helpful?
At Storables.com, we guarantee accurate and reliable information. Our content, validated by Expert Board Contributors, is crafted following stringent Editorial Policies. We're committed to providing you with well-researched, expert-backed insights for all your informational needs.

0 thoughts on “How To Build A Crawl Space Foundation”