Home>diy>Building & Construction>How To Build A Deck Foundation
Building & Construction
How To Build A Deck Foundation
Modified: August 27, 2024
Learn the step-by-step process of building a deck foundation in this comprehensive guide. Get expert tips and advice for successful building construction.
(Many of the links in this article redirect to a specific reviewed product. Your purchase of these products through affiliate links helps to generate commission for Storables.com, at no extra cost. Learn more)
Introduction
Building a deck is a fantastic way to enhance the outdoor living space of your home. Whether you want a cozy spot to relax and enjoy the sunshine or a space to entertain friends and family, a deck can provide the perfect solution. However, before you start hammering nails and sawing lumber, it’s crucial to lay a solid foundation for your deck. A properly constructed deck foundation is essential for maintaining the structural integrity and stability of your deck.
In this article, we will guide you through the step-by-step process of building a deck foundation. We will cover everything from choosing the ideal location to securing the decking boards. By following these instructions, you’ll be well on your way to creating a beautiful and functional deck.
Before we dive into the construction process, it’s essential to consider a few factors. First, check your local building codes and regulations. Depending on where you live, you may need to obtain permits or adhere to specific guidelines when constructing a deck. Make sure you comply with all legal requirements to ensure a safe and hassle-free building experience.
Additionally, it’s crucial to take into account the condition of the soil in the area where you plan to build your deck. The soil should be stable and able to support the weight of the deck. If you have any concerns about the soil quality, it’s wise to consult with a professional engineer or building inspector.
Now that we’ve covered the pre-requisites, let’s move on to the first step: choosing the location for your deck foundation.
Key Takeaways:
- Building a sturdy deck foundation involves careful planning, precise construction, and adherence to local regulations. From choosing the location to securing the decking boards, each step contributes to the safety and longevity of the deck.
- Attention to detail, proper spacing, and quality materials are essential for creating a beautiful and functional deck. Incorporating finishing touches such as lighting, seating, and maintenance ensures a welcoming outdoor space for relaxation and entertainment.
Read more: How To Build A Raised Foundation
Step 1: Choosing the Location
When selecting the location for your deck foundation, there are a few factors to consider. First and foremost, think about how you want to use your deck. Do you want it to be an extension of your living space, an area for outdoor dining, or a place for relaxation?
Take into account the amount of sunlight your proposed deck location will receive throughout the day. If you enjoy basking in the sun, a spot that gets plenty of sunlight may be ideal. On the other hand, if you prefer a shaded area, consider positioning your deck in a spot that is naturally shaded by trees or other structures.
Furthermore, consider the accessibility of the location. Determine if it’s easily accessible from your home, making it convenient for indoor-outdoor flow. Pay attention to any obstructions, such as trees or utility lines, which may affect the design and layout of the deck.
In addition to these considerations, evaluate the terrain of the proposed deck location. If the area is sloped, you may need to level the ground or consider building a multi-level deck. Keep in mind that building on uneven terrain may require additional planning and construction methods to ensure stability.
Lastly, consider the views that the deck will offer. If you have a picturesque backyard or a stunning view, position the deck in a way that maximizes those features. Creating a beautiful and inviting outdoor space will enhance your overall enjoyment of the deck.
Once you have assessed these factors, mark the proposed deck location using stakes and string. This will help you visualize the size of the deck and its relationship to the surrounding area. With the location chosen, you can move on to the next step: gathering the materials and tools you’ll need for the deck foundation.
Step 2: Gathering Materials and Tools
Before you begin building your deck foundation, it’s important to gather all the necessary materials and tools. This will ensure that you have everything you need on hand and can complete the job efficiently.
Here is a list of the materials you will typically need for building a deck foundation:
- Pressure-treated lumber for beams, joists, and decking material
- Concrete footing tubes or precast concrete deck blocks
- Galvanized metal brackets and connectors
- Galvanized nails, screws, and bolts
- Post anchors or brackets
- Gravel or crushed stone for drainage
- Waterproofing membrane or flashing
- Construction adhesive
- Decking boards
- Concrete mix for footings (if required)
It’s important to use pressure-treated lumber for the structural components of your deck foundation as they will be in direct contact with the ground. This type of lumber is treated to resist decay and insect damage, ensuring the longevity and durability of your deck.
In addition to materials, you’ll need a variety of tools to complete the construction process. Here are the essential tools you’ll need:
- Tape measure
- Level
- Power drill
- Saw (circular saw or miter saw)
- Hammer
- Socket set
- Post hole digger or auger
- Shovel
- Safety goggles and gloves
Having these tools readily available will make the building process smoother and more efficient. Make sure to double-check your tool inventory and ensure they are in good working condition before starting the construction.
Now that you have all the necessary materials and tools, you’re ready to move on to the next step: checking for permits and regulations.
Step 3: Checking for Permits and Regulations
Before you start constructing your deck foundation, it’s crucial to check for any permits or regulations that may apply to your location. Building codes and regulations vary depending on where you live, and failing to comply with them can result in costly fines or having to tear down and rebuild your deck.
Start by contacting your local building department or municipality to inquire about the necessary permits for building a deck. They will provide you with the specific requirements and guidelines you need to follow. Some common permits you may need include a building permit and a zoning permit.
When applying for permits, you will likely need to submit a detailed deck plan with dimensions, materials, and an outline of the proposed project. Make sure to include any additional structures such as stairs or railings in your plan.
Once you have obtained the necessary permits, it’s important to adhere to all building codes and regulations in your area. These codes are in place to ensure the safety and structural integrity of your deck.
Here are a few common regulations to keep in mind:
- Minimum setback requirements from property lines
- Maximum allowable deck height or overall size
- Required railing height, spacing, and strength
- Specific requirements for stair dimensions and tread depth
- Load-bearing capacity of the deck’s foundation
In addition to permits and regulations, it’s crucial to notify utility companies of your planned excavation. Make sure there are no underground utilities or cables in the proposed deck area that could be affected during construction.
By checking for permits and adhering to regulations, you can ensure that your deck is legal, safe, and built to code. Now that you have the necessary permits and knowledge of the regulations, you can move on to the next step: clearing the area and marking the layout.
Step 4: Clearing the Area and Marking the Layout
With all the necessary permits and regulations in place, it’s time to prepare the area where you will be building your deck foundation. This step involves clearing the space and marking the layout to ensure accurate construction.
Start by removing any plants, shrubs, or debris from the area where your deck will be located. Clearing the space will provide a clean slate for the construction process.
Next, use stakes and string to mark the boundaries of your deck. Measure and mark the desired dimensions of your deck, ensuring accuracy and precision. Use a level to make sure the markings are straight and level.
Consider the placement of your deck in relation to the existing structure. If you plan to attach your deck to the house, ensure that the ledger board is properly positioned and level. The ledger board will provide support and stability for the deck.
As part of marking the layout, it’s important to consider any features that you want to incorporate into your deck, such as stairs or ramps. Determine their locations in relation to the deck’s overall layout and mark their positions accordingly.
While marking the layout, take into account any obstacles or obstructions such as trees, utility lines, or drainage systems. Adjust the position of the deck, if necessary, to avoid these obstacles while still enhancing the functionality and aesthetic appeal of your outdoor space.
Once you’re satisfied with the layout and have marked all the necessary positions, step back and review the overall design. This is a good time to make any adjustments or fine-tune your plan before proceeding to the next step.
Clearing the area and marking the layout is a crucial step in ensuring a smooth and accurate deck construction process. Now that you have a clear and marked space, you’re ready to move on to the next step: excavating and leveling the ground.
Read more: How To Build A Basement Foundation
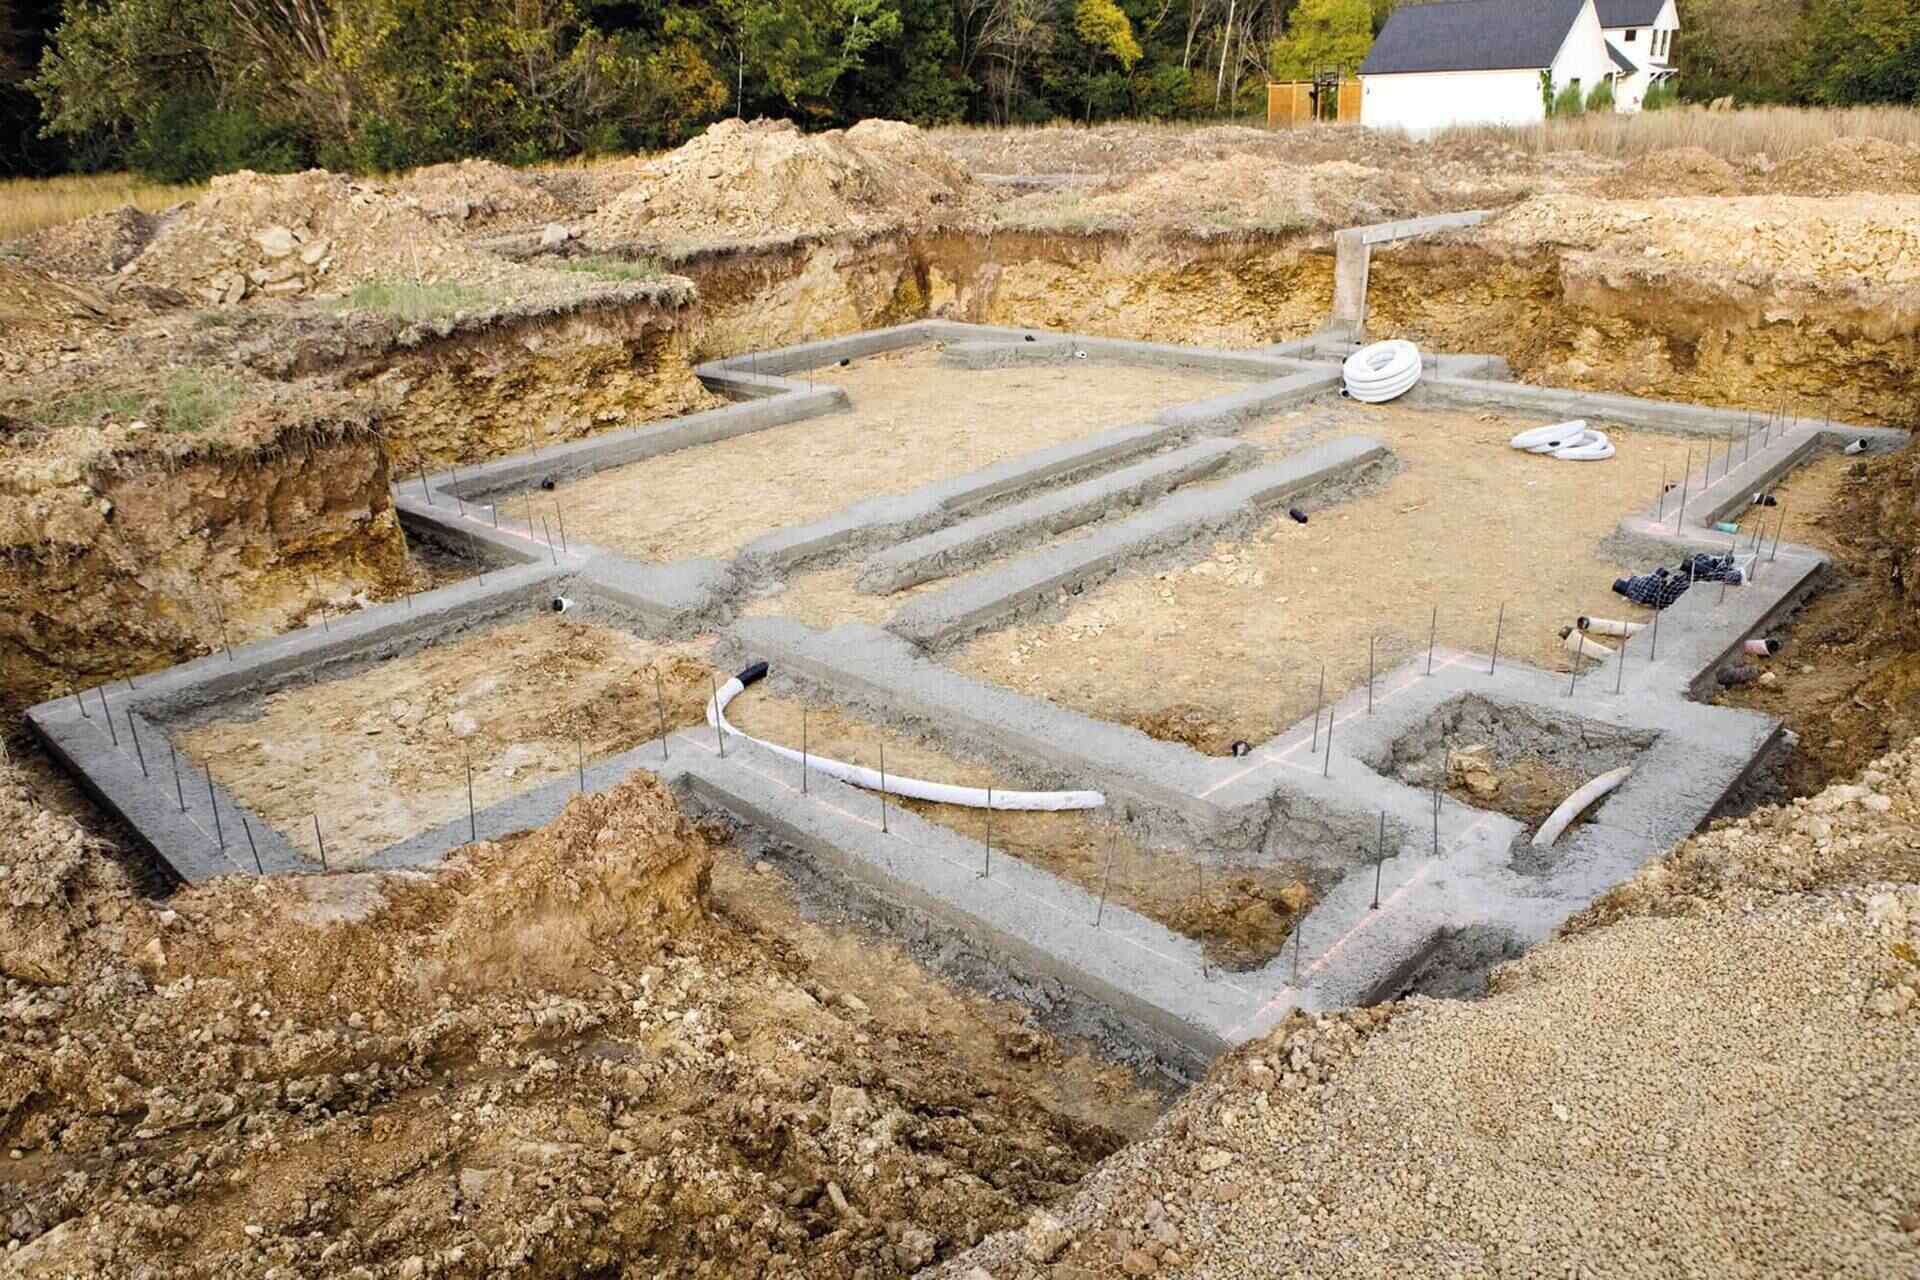
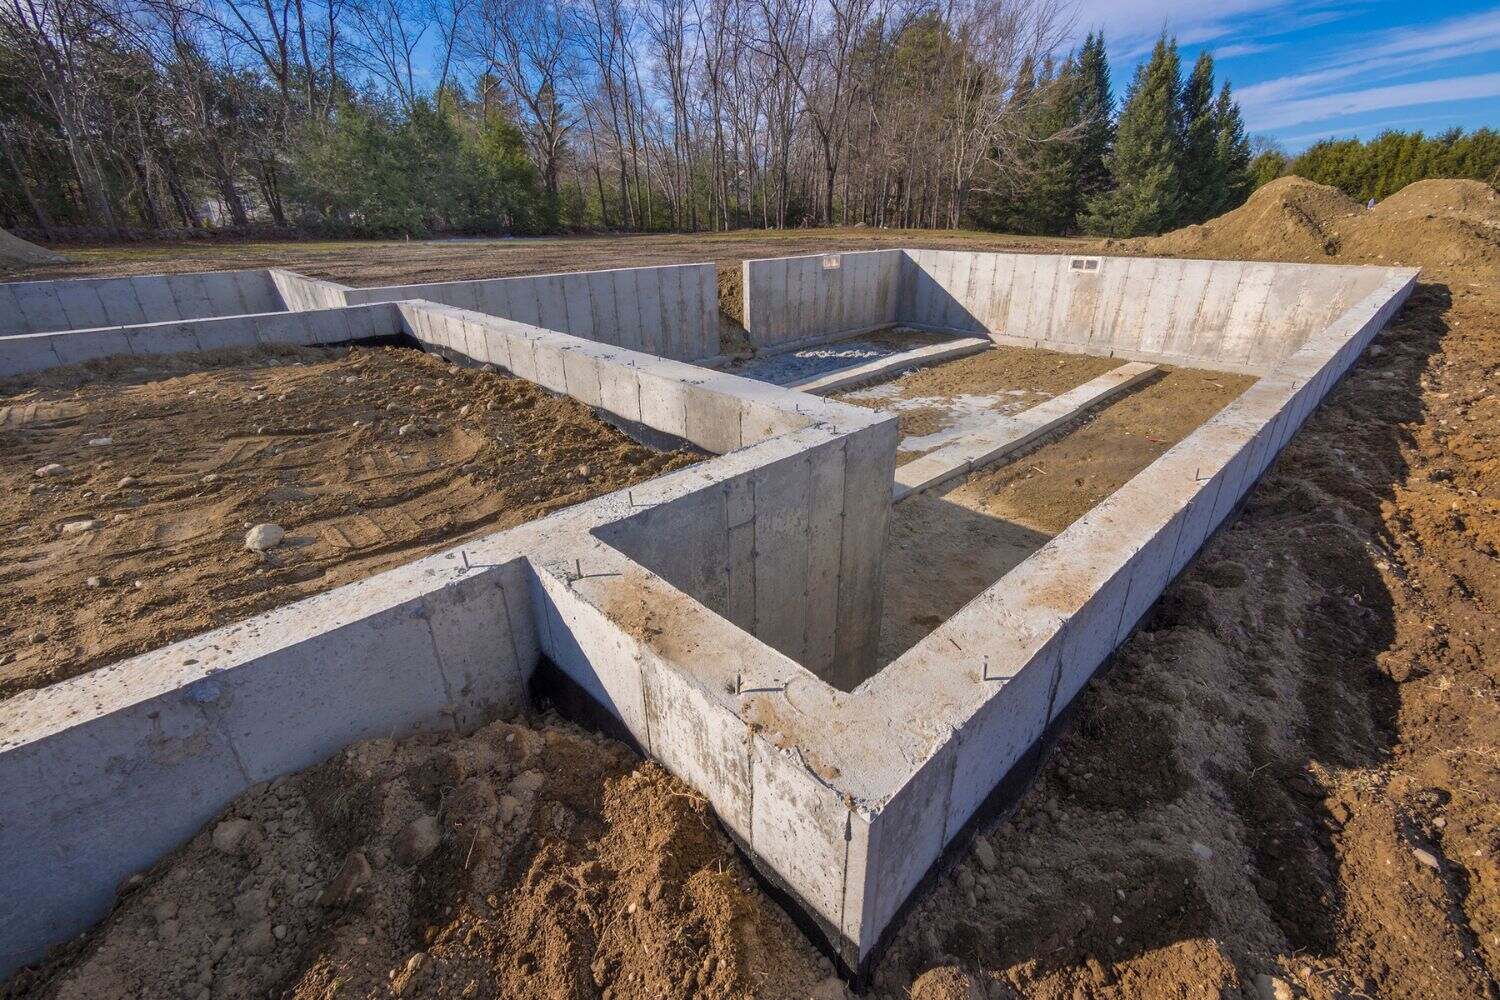
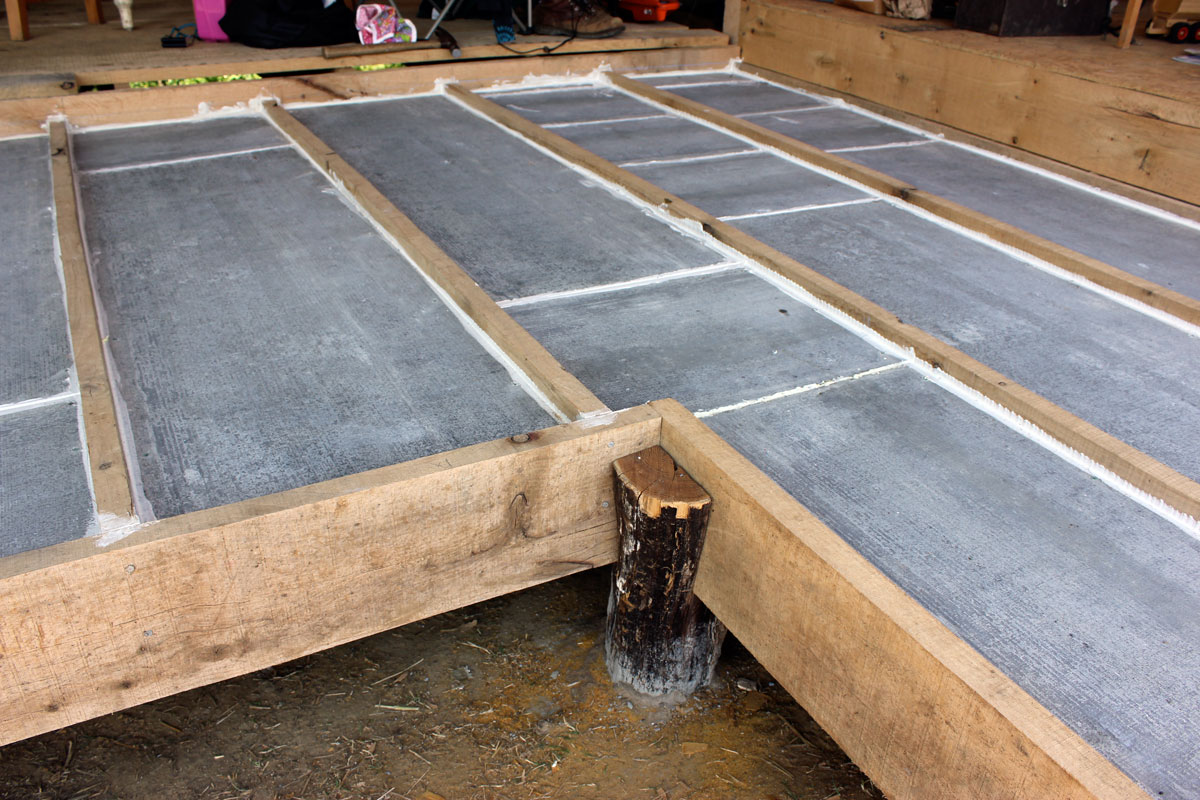
Step 5: Excavating and Leveling the Ground
Now that you have cleared the area and marked the layout for your deck, it’s time to prepare the ground by excavating and leveling the area. This step ensures that the foundation of your deck is stable and provides a flat surface for construction.
Start by excavating the ground within the marked boundaries of your deck. The depth of excavation depends on the type of foundation you will be using. If you plan to use concrete footing tubes, dig holes that are deep enough to accommodate the tubes alongside any required frost depth requirements. If using precast concrete deck blocks, dig a shallow hole to ensure proper placement and stability.
Remove any rocks, roots, or debris from the excavated area. It’s important to have a clean and even surface for the foundation.
Next, use a level and a tamper to ensure the ground is level and compacted. Compact the soil by gently tamping it down to create a solid base for your deck foundation. This will help prevent settling and shifting of the deck over time.
If the ground is not level, you may need to add or remove soil to achieve a flat surface. Use a rake or shovel to distribute soil as needed, checking the level periodically to ensure an even grade.
Once the ground is properly excavated and leveled, it’s important to consider drainage. Ensure that the ground slopes away from the foundation of your house, allowing water to drain properly. This will prevent water from pooling around your deck’s foundation and potentially causing damage.
Take the time to thoroughly inspect the excavated area, checking for any remaining debris or potential obstructions. Removing these obstacles now will save you time and effort later in the construction process.
By excavating and leveling the ground, you are setting the foundation for a stable and long-lasting deck. With the ground properly prepared, we can now move on to the next step: installing ground level beams.
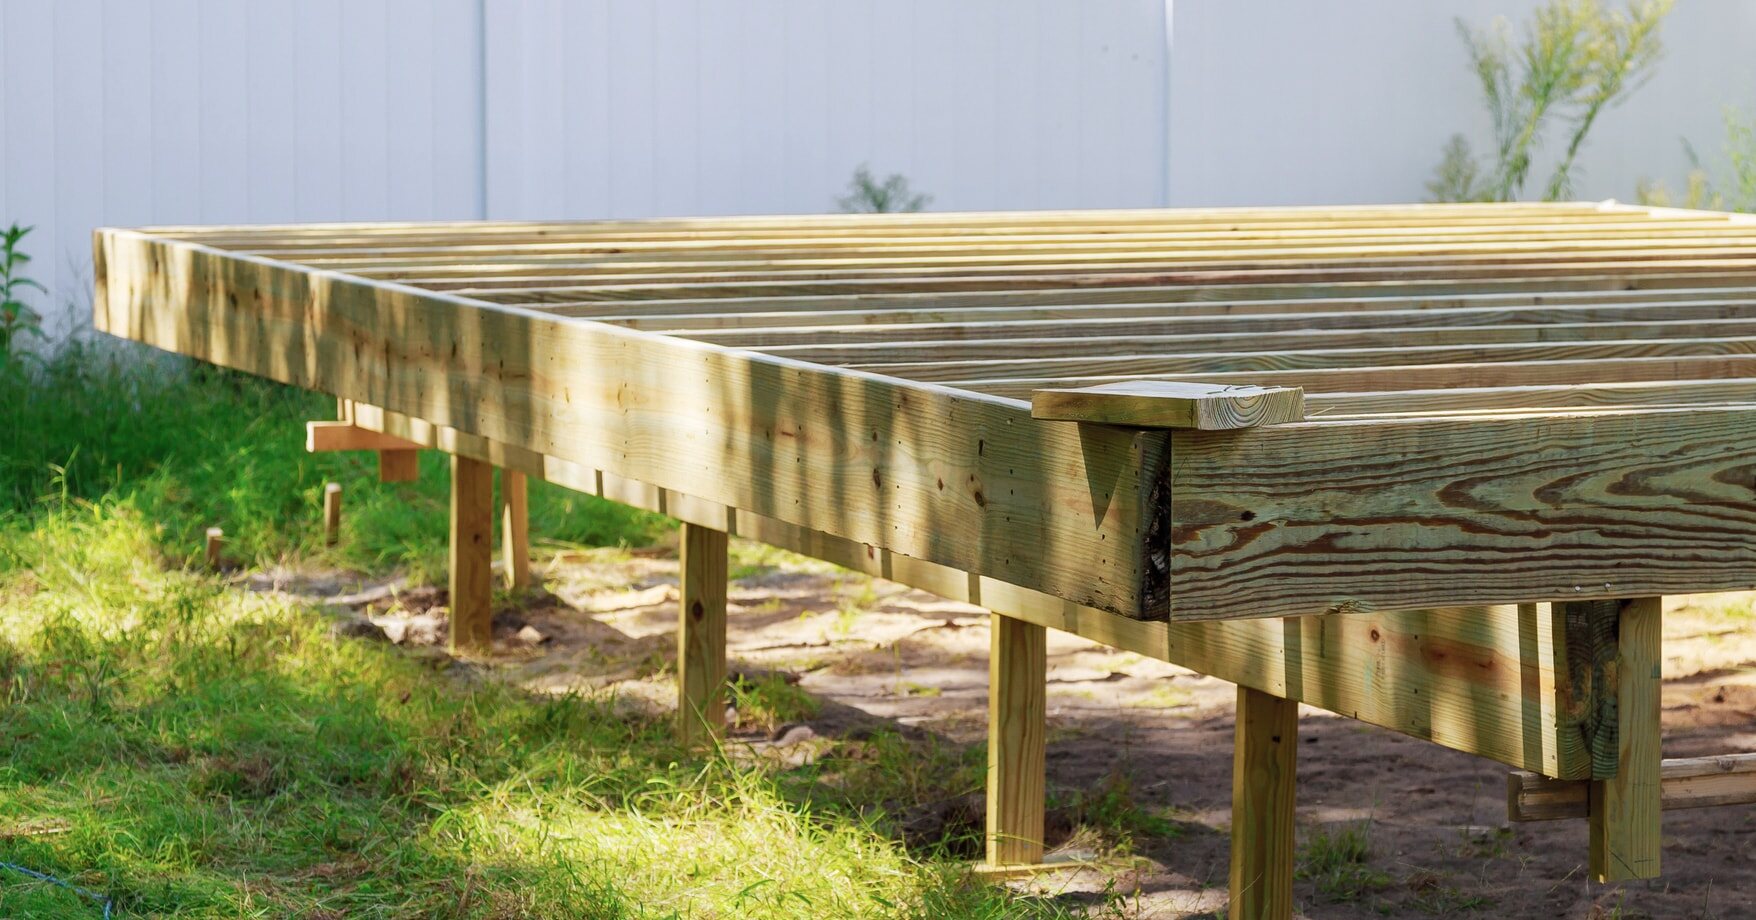
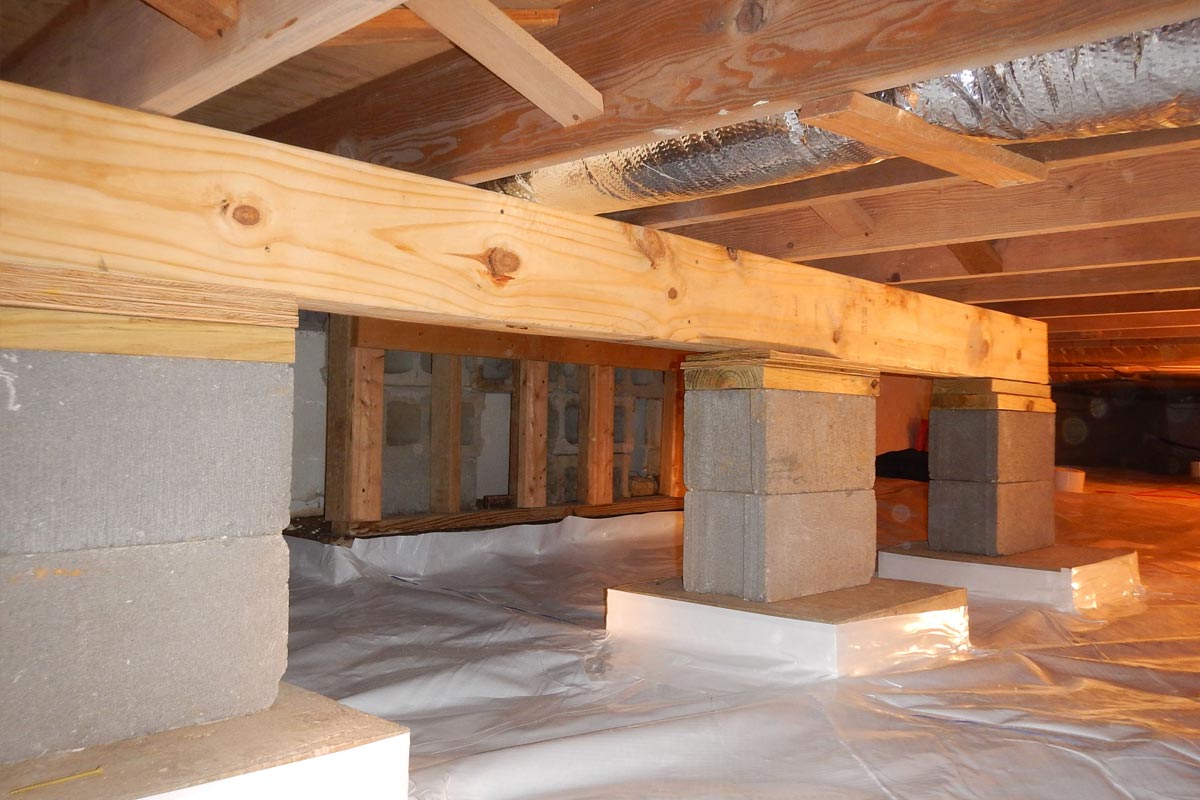
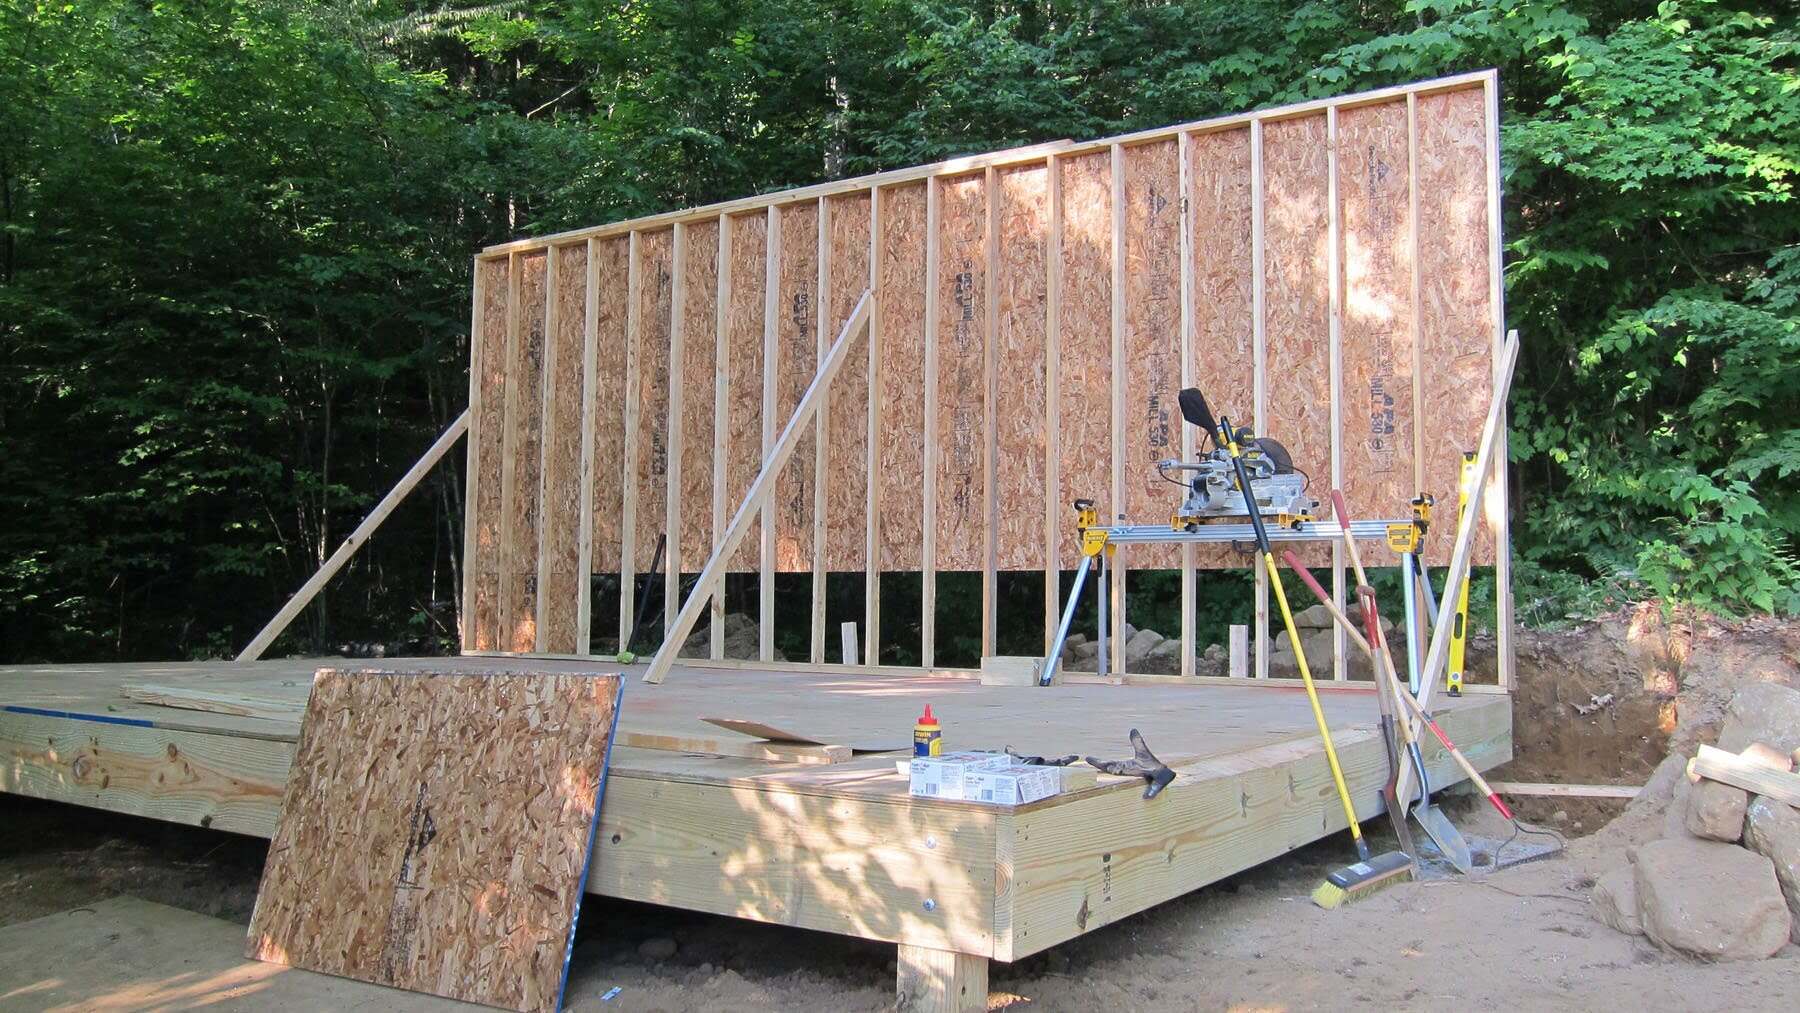
Step 6: Installing Ground Level Beams
With the ground excavated and leveled, it’s time to move on to installing the ground level beams for your deck foundation. These beams provide support and stability for the entire structure.
Start by determining the height and position of the beams based on your deck design and the desired level of your deck. Measure and mark the locations for the beams using a tape measure and a level.
Next, cut pressure-treated lumber to the appropriate length for the beams. Use a circular saw or a miter saw to make clean and precise cuts.
Place the beams in the marked positions, ensuring they are aligned and level. Attach the beams to the house using galvanized metal brackets or connectors, following the manufacturer’s instructions.
Secure the beams to the ground by attaching them to the support piers. Use post anchors or brackets to connect the beams to the piers, ensuring a sturdy connection.
Check the level of the beams as you attach them to the piers, making any necessary adjustments to ensure an even and stable foundation.
Additionally, ensure that the beams are properly spaced according to your deck design and local building codes. This will ensure structural integrity and support for the decking material.
Finally, secure the beams in place by driving galvanized nails or screws through the brackets or connectors. Make sure the beams are securely fastened to provide a strong foundation for your deck.
Take the time to double-check the levelness and stability of the ground level beams before proceeding to the next step. Making any adjustments now will save you time and effort later in the construction process.
With the ground level beams in place, your deck foundation is starting to take shape. The next step is setting the support piers, which will provide additional stability and support for your deck structure.
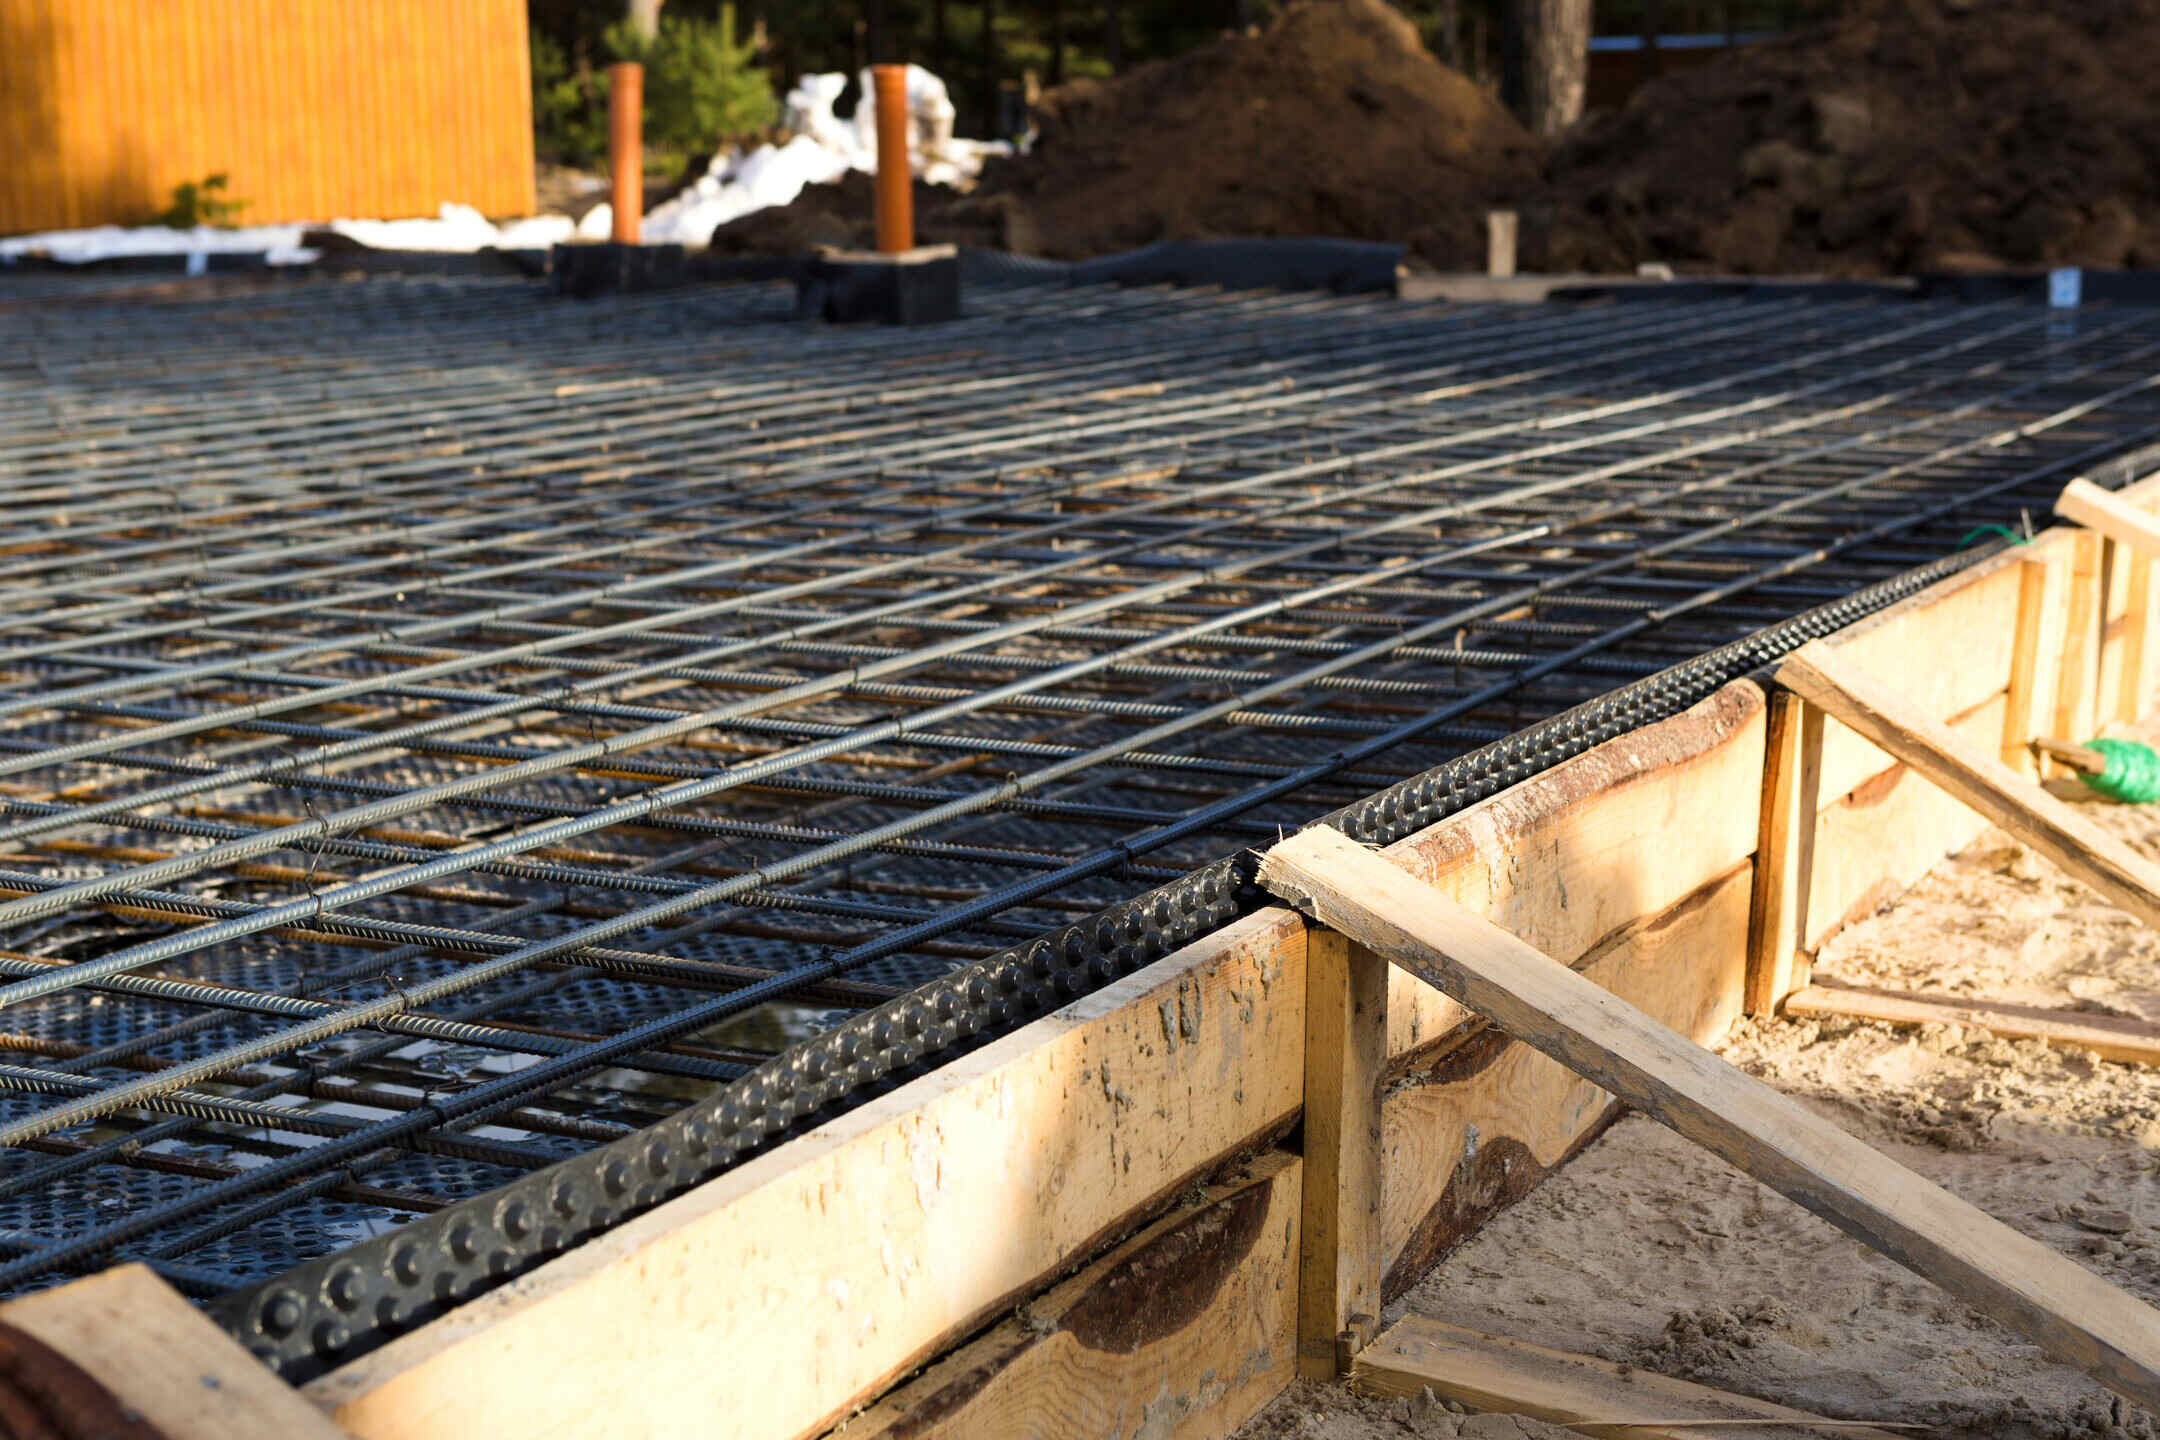
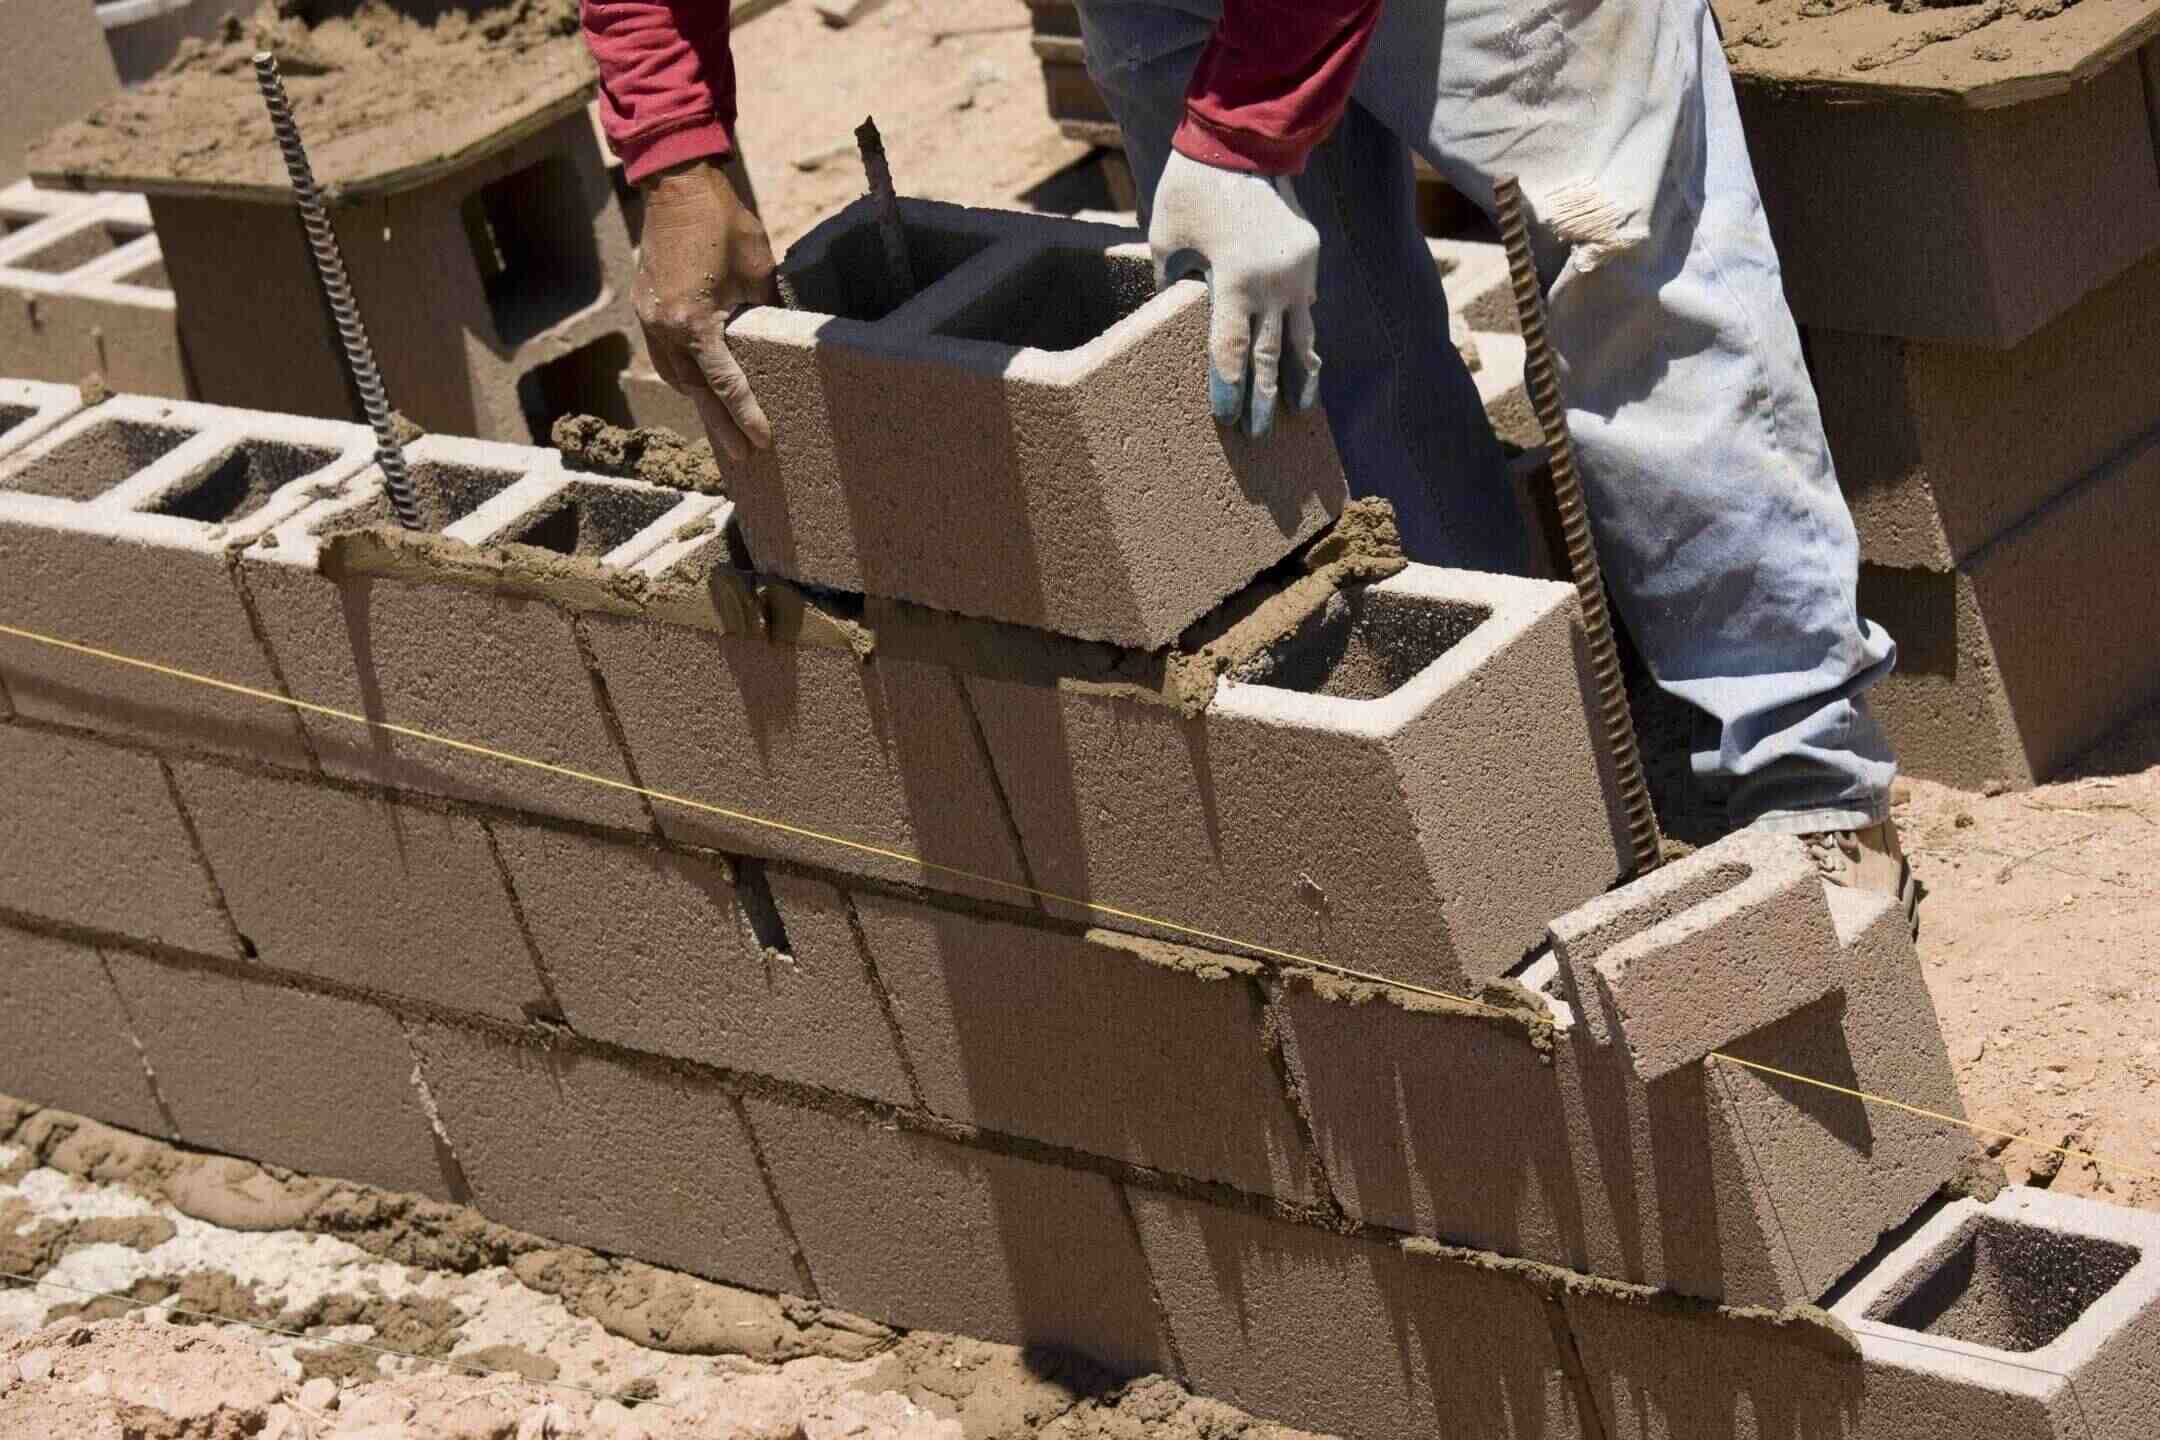
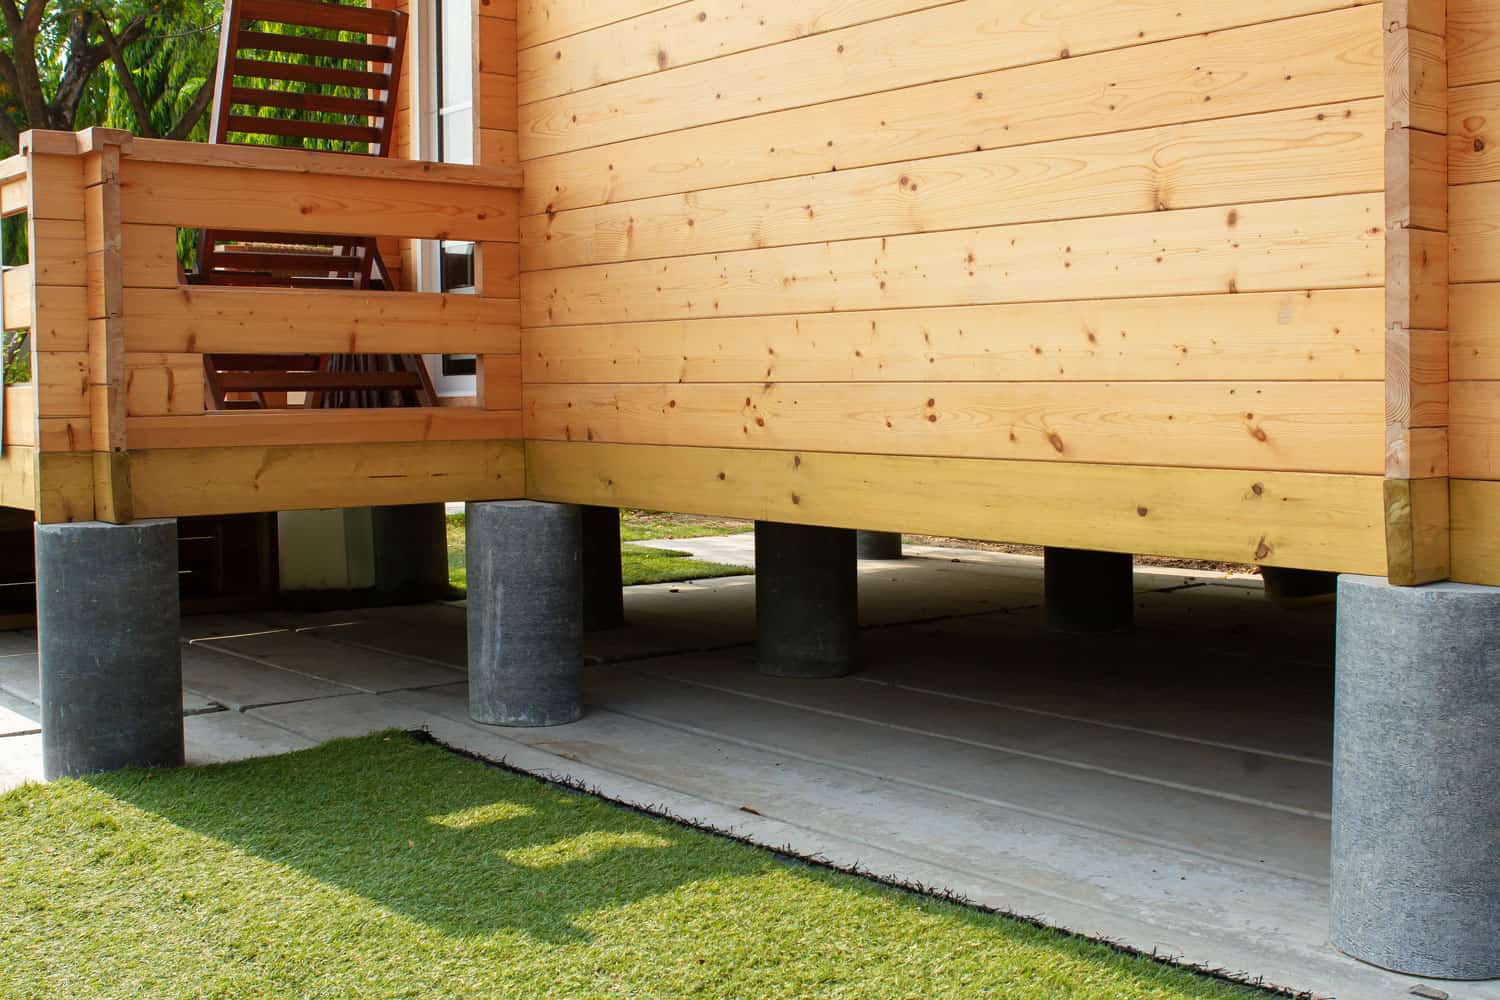
Step 7: Setting the Support Piers
With the ground level beams in place, it’s time to move on to setting the support piers for your deck foundation. These piers will provide additional stability and support the weight of the deck structure.
Start by determining the number of piers you will need based on the size and layout of your deck. The spacing of the piers will depend on the load-bearing capacity of the soil and the local building codes. Typically, piers are placed every 4-6 feet along the length of the beams.
Using a post hole digger or an auger, dig holes for the support piers. The depth of the holes will depend on the frost depth requirements in your area and the recommendations of your local building codes. Typically, the holes should be deep enough to go below the frost line to prevent frost heave.
Place a precast concrete deck block in each hole and use a level to ensure they are positioned correctly and are level both vertically and horizontally.
If you are using concrete footing tubes instead of precast deck blocks, follow the manufacturer’s instructions to set the tubes in the holes. Make sure the tubes are properly aligned and level.
Next, mix and pour concrete into the holes, filling them around the deck blocks or footing tubes. Use a shovel to pack the concrete and remove any air pockets.
While the concrete is still wet, double-check the levelness and alignment of the piers, making any necessary adjustments. Allow the concrete to dry and cure according to the manufacturer’s instructions before proceeding.
Once the concrete has cured, attach post anchors or brackets to the piers, ensuring a secure connection with the ground level beams. This will provide added stability to the foundation.
It’s important to ensure that the support piers are evenly spaced and aligned with the ground level beams, providing a solid and stable foundation for your deck.
With the support piers properly set, your deck foundation is almost complete. The next step is attaching the ledger board to the house, which will help secure your deck to the existing structure.
When building a deck foundation, make sure to properly prepare the ground by clearing away any vegetation and debris, and then compact the soil to create a stable base for your deck.
Step 8: Attaching the Ledger Board
With the support piers in place, it’s time to move on to attaching the ledger board to the house. The ledger board provides a secure connection between your deck and the existing structure, ensuring stability and structural integrity.
Start by determining the desired height and position of the ledger board. Measure and mark the location using a tape measure and a level.
Next, cut pressure-treated lumber to the appropriate length for the ledger board. Make sure the ledger board is long enough to span the length of the deck and provide enough support.
Position the ledger board against the house, aligning it with the marked location. Make sure the top of the ledger board is level with the top of the ground level beams.
Using a power drill and galvanized lag screws or bolts, attach the ledger board to the structure. Make sure to drive the screws or bolts into the studs or other structural support within the house.
Ensure that the ledger board is securely fastened, and there is no movement or flexing. This will provide a strong connection between the deck and the house.
Consider using construction adhesive between the ledger board and the house for added strength and stability. Apply the adhesive to the backside of the ledger board before attaching it to the house.
As you attach the ledger board, periodically check its levelness and alignment using a level. Make any necessary adjustments to ensure a straight and level installation.
Inspect the ledger board to ensure there are no gaps or uneven areas between the board and the house. An even and tight fit will provide a solid connection.
Finally, check the ledger board for any signs of water damage or rot. If you notice any issues, address them before proceeding with the deck construction.
With the ledger board securely attached, your deck foundation is nearly complete. The next step is to create the deck frame, which will provide the structure and support for the decking material.
Read more: How To Build A Cabin Foundation
Step 9: Creating the Deck Frame
With the ledger board in place, it’s time to move on to creating the deck frame. The deck frame provides the structure and support for the decking material, ensuring a sturdy and stable deck foundation.
Start by measuring and cutting pressure-treated lumber to create the frame joists. These joists will run perpendicular to the ledger board and provide support for the decking boards.
Attach the frame joists to the ledger board using joist hangers and galvanized nails or screws. Make sure the joists are evenly spaced and aligned with the marked layout of your deck.
Next, cut and install beams perpendicular to the frame joists. These beams will provide additional support and help distribute the weight evenly across the deck.
Attach the beams to the support piers using post anchors or brackets. Ensure that the beams are level and properly aligned with the frame joists.
If your deck design includes any additional framing elements, such as angled corners or diagonal bracing, now is the time to incorporate them into the deck frame. Follow your deck plan and guidelines to accurately measure, cut, and install these elements.
As you create the deck frame, double-check for levelness and alignment at each step. This will ensure a strong and stable foundation for your deck.
It’s important to space the frame joists and beams according to your deck plan and local building codes. Proper spacing will provide sufficient support for the decking material and prevent sagging or bowing over time.
Make sure to wear safety goggles and gloves when cutting and handling the lumber. Take precautions to prevent split ends or other damage to the wood.
To further enhance the frame’s durability and protect it against moisture, consider applying a waterproofing membrane or flashing between the ledger board and the frame.
By creating a solid deck frame, you are establishing a strong base for your deck construction. The next step is adding the joists and beams that will support the decking material.
Step 10: Adding Joists and Beams
With the deck frame in place, it’s time to move on to adding the joists and beams that will provide support for the decking material. These components play a crucial role in the structural integrity and stability of your deck.
Start by measuring and cutting pressure-treated lumber to the appropriate length for the joists. These joists will run parallel to the frame joists and provide the main support for the decking boards.
Position the joists on top of the frame joists, evenly spacing them according to your deck plan. Attach the joists to the frame using joist hangers and galvanized nails or screws.
Ensure that the joists are level and properly aligned with the frame and beams. Use a level to make any necessary adjustments before securing them in place.
Next, cut and install beams perpendicular to the joists, providing additional support and stability to the deck structure. Attach the beams to the support piers using post anchors or brackets.
Make sure the beams are level and properly aligned with the joists and frame. This will help distribute the weight evenly across the deck.
As you add the joists and beams, it’s important to ensure that they are securely fastened. Use galvanized nails or screws to secure the components, providing a strong and stable deck foundation.
Check for any signs of deflection or sagging in the joists. If any issues are noticed, reinforce the area with additional supports or braces to prevent future problems.
Make sure to follow your deck plan and local building codes for proper spacing and placement of the joists and beams. This will ensure the structural integrity and longevity of your deck.
Take the time to inspect the joists and beams for any signs of rot, damage, or excessive knots. Replace any compromised pieces to maintain a sturdy deck foundation.
By adding the joists and beams, you are solidifying the structure of your deck. The next step is installing the decking material, which will give your deck its distinct look and functionality.
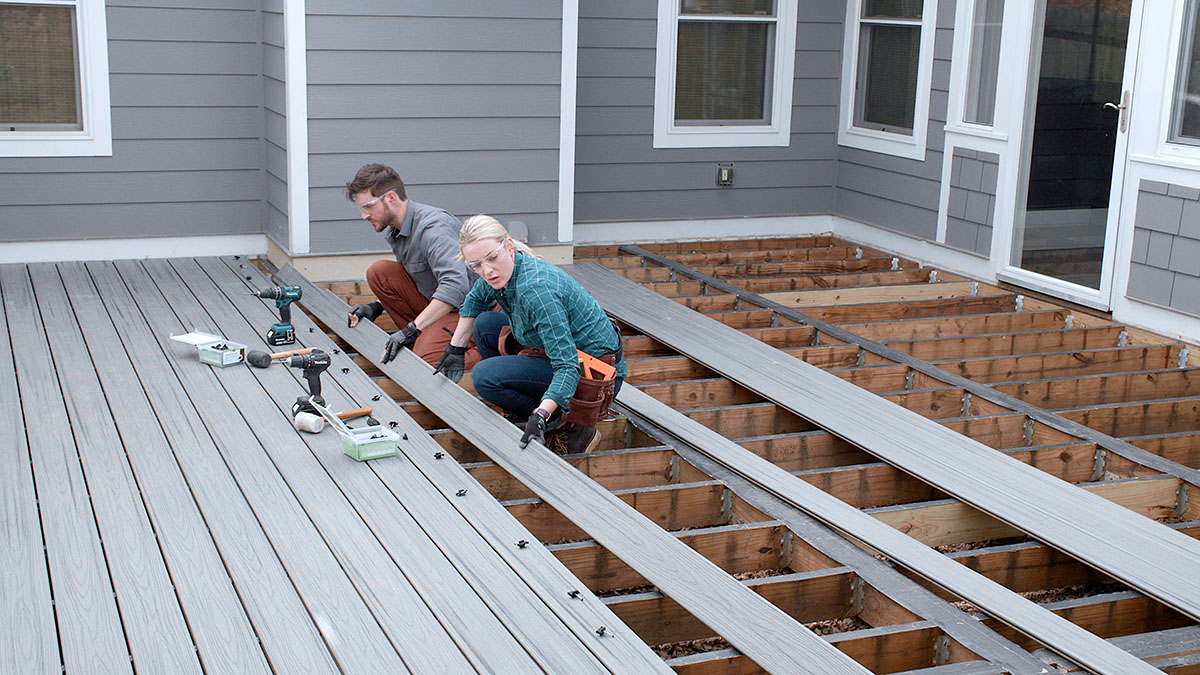
Step 11: Installing Decking Material
With the framework of your deck complete, it’s time to move on to installing the decking material. This step will give your deck its distinct appearance and provide a functional surface for sitting, walking, and enjoying your outdoor space.
Start by measuring and cutting the first piece of decking material to fit along the perimeter of your deck. Ensure that it is properly aligned with the frame and joists.
Secure the first piece of decking material to the frame using galvanized decking screws or nails. Place the fasteners at regular intervals, making sure they penetrate the decking material and secure it firmly to the frame.
Continue installing the decking material, working your way from one end of the deck to the other. Leave an appropriate gap, typically about 1/8 inch, between each board to allow for expansion and contraction due to weather changes.
To maintain a consistent appearance and ensure straight alignment, use a chalk line or a straightedge to guide the installation process.
If your deck design includes angled or patterned sections, carefully measure and cut the decking material to fit accordingly. Take your time to ensure precise cuts and a clean finish.
As you install the decking material, periodically check for levelness and alignment. Make any necessary adjustments to ensure a smooth and even installation.
If you’re using composite decking material, follow the manufacturer’s guidelines for installation. Composite decking often requires specific fasteners and spacing to ensure proper performance and longevity.
Consider using stainless steel or composite decking screws for a more secure and durable installation. These screws are resistant to rust and corrosion, enhancing the overall lifespan of your deck.
Take extra care when working with pressure-treated lumber, as it may contain chemicals that can be harmful if inhaled or ingested. Wear gloves and a dust mask to protect yourself during installation.
Once all the decking material is installed, take a moment to walk across the deck and ensure that it feels sturdy and even. If you notice any loose boards or uneven areas, make the necessary adjustments and secure them before proceeding.
By installing the decking material, you are transforming the frame into a functional and visually appealing deck. The next step is securing the decking boards to ensure they stay in place for years to come.
Step 12: Securing the Decking Boards
After installing the decking material, it’s important to secure the boards to ensure they stay in place and maintain the integrity of your deck. Properly securing the decking boards will prevent movement, warping, and potential safety hazards.
Start by checking each decking board to ensure it is properly aligned and flush with the adjacent boards. Use a straight edge or a level to verify the alignment.
To secure the decking boards, use galvanized decking screws or nails. Place the fasteners near the edges of the boards, making sure to penetrate the joists or beams below.
For composite decking, refer to the manufacturer’s guidelines for the appropriate fasteners. Composite boards often require specific screws or clips for an optimal installation.
When installing the fasteners, be mindful of the spacing between the boards. Follow the guidelines provided by the manufacturer or local building codes to ensure a secure and visually appealing result.
Take care not to overtighten the fasteners, as this may cause the boards to split or crack. Use a suitable screwdriver or drill to achieve the desired tightness.
Pay attention to any areas where two boards meet end-to-end. Use a brace or blocking to provide additional support and minimize any potential gaps or movement.
Periodically step back and inspect the overall appearance and alignment of the decking boards. Make any necessary adjustments to ensure a consistent and uniform look.
Consider applying a wood preservative or sealant to protect the decking boards from moisture, UV rays, and other environmental factors. Follow the manufacturer’s instructions for proper application.
It’s important to note that some decking materials, such as composite or PVC, may not require sealing or staining. Refer to the manufacturer’s recommendations for maintenance and care.
Finally, give your deck a thorough walk-through to check for any loose boards, excessive gaps, or potential hazards. Replace any damaged or weakened boards to maintain the safety and longevity of your deck.
By properly securing the decking boards, you are ensuring a stable and durable deck surface for years of enjoyment. The next step is to build stairs or ramps if your deck design requires it.
Read more: How To Build A Slab Foundation
Step 13: Building Stairs or Ramps
If your deck design includes a change in elevation or requires access to the ground, building stairs or ramps is necessary. Properly constructed stairs or ramps ensure safe and convenient entry and exit from your deck. Follow these steps to build stairs or ramps for your deck:
1. Determine the Number of Steps or Length of Ramp: Measure the height of the deck platform to the ground and calculate the number of steps needed or the length of ramp required. Consider local building codes for specific guidelines on step height, tread depth, and ramp slope.
2. Design the Stair or Ramp Layout: Sketch out the layout of the stairs or ramp, determining the width, rise (vertical height), run (horizontal depth), and the angle of the stairs or the gradual slope of the ramp.
3. Cut the Stringers: For stairs, cut the stringers, the diagonal supports that will hold the steps in place. Ensure the stringers are level and evenly spaced, following building code requirements. For ramps, cut the necessary framing supports.
4. Construct the Stair or Ramp Frame: Attach the stringers to the deck platform or support posts using braces and appropriate hardware. For ramps, use framing materials to create a strong and stable base.
5. Install the Treads: For stairs, cut and install the stair treads, ensuring they are level and secure on the stringers. Use weather-resistant and durable materials such as pressure-treated wood, composite decking, or non-slip materials. For ramps, create a smooth and even surface with appropriate decking material.
6. Add Handrails and Balusters: Install handrails and balusters on both sides of the stairs or ramp, providing necessary support and safety. Follow local building codes for guidelines on handrail height and spacing between balusters.
7. Check for Stability and Safety: Test the stairs or ramp for stability, ensuring there are no loose connections or wobbly components. Make sure the stairs or ramp have sufficient grip and a solid footing to prevent slips and falls. Double-check all measurements and alignments.
8. Apply Finishing Touches: Sand any rough edges, apply a protective coating or stain to the stairs or ramp, and inspect the entire structure for any necessary touch-ups or adjustments.
Remember to consult your local building codes and regulations for specific requirements on stair or ramp construction, as they may vary depending on your location. Building stairs or ramps requires precision and attention to detail to ensure safety and accessibility for your deck.
Once the stairs or ramps are constructed, you can proceed to the final step: applying the finishing touches to complete your deck project.
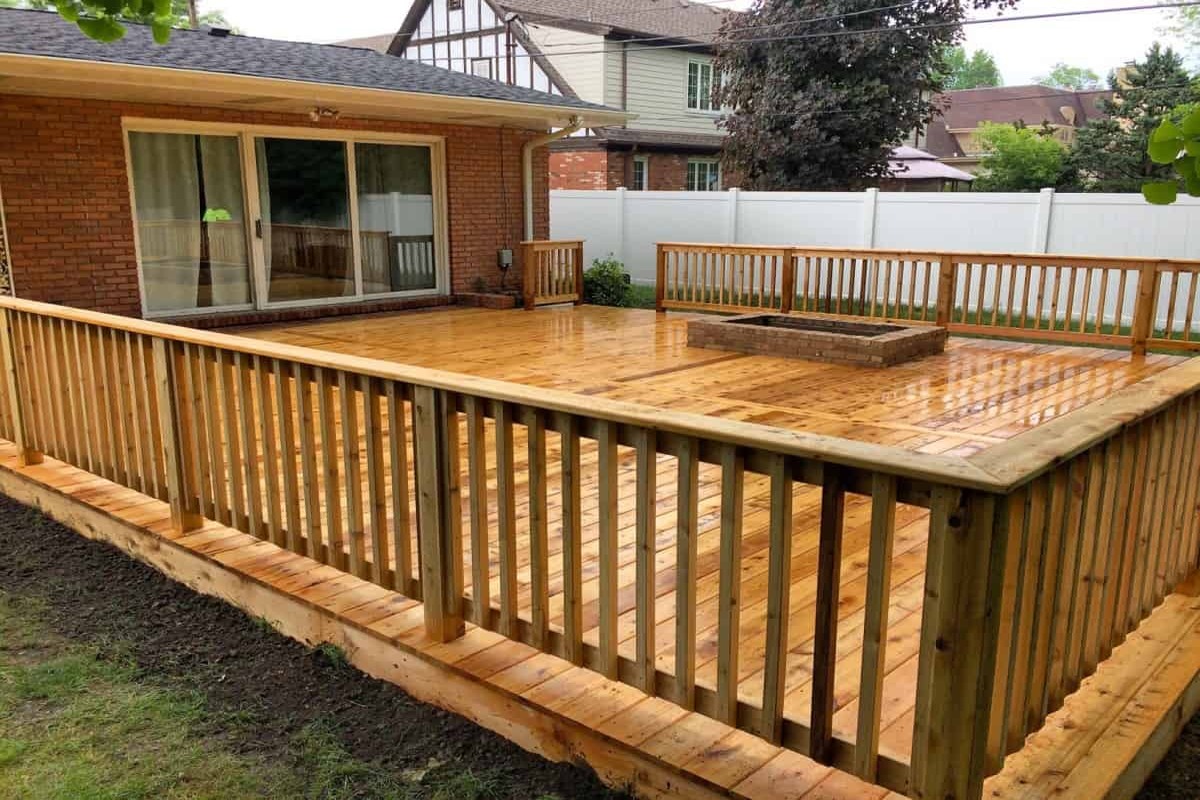
Step 14: Applying Finishing Touches
After completing the construction of your deck foundation, stairs, ramps, and decking, it’s time to add the finishing touches that will enhance the aesthetic appeal and functionality of your deck. These final touches will transform your deck into a beautiful and inviting outdoor space.
1. Sand and Smooth the Surfaces: Use a sander to smooth any rough edges or surfaces on the deck. This will create a comfortable and safe space for walking barefoot and prevent splinters.
2. Stain or Seal the Deck: Apply a protective stain or sealant to the decking material. This will enhance the beauty of the wood, protect it from moisture and UV damage, and extend its lifespan. Follow the manufacturer’s instructions for the specific product you choose.
3. Add Lighting: Install deck lighting to create ambiance and allow for enjoyment of your deck during the evening hours. Choose from a variety of options, including post cap lights, recessed deck lights, or string lights.
4. Install Railings: Install sturdy railings if required by local building codes or if you desire an additional safety measure. Railings come in various styles and materials, such as wood, metal, or composite, and can greatly enhance the aesthetics of your deck.
5. Incorporate Seating and Furniture: Add comfortable and stylish outdoor furniture, such as chairs, tables, and loungers, to create a relaxing space for outdoor activities and entertaining.
6. Integrate Planters and Greenery: Bring life and beauty to your deck by incorporating planters filled with flowers, herbs, or greenery. Choose plants that can thrive in your climate and provide privacy, shade, or a pleasant aroma.
7. Install Features and Accessories: Consider adding additional features and accessories to personalize your deck, such as a pergola, awning, built-in benches, or a fire pit. These elements can enhance the functionality and visual appeal of your outdoor space.
8. Regular Maintenance: Keep your deck looking pristine by maintaining it regularly. Clean the deck surface regularly and remove any debris or stains promptly. Inspect for any loose boards, hardware, or signs of damage, and address them promptly to prevent further deterioration.
By attending to these finishing touches, you can create a deck that reflects your style and meets your outdoor living needs. Enjoy the process of transforming your deck into a space where you can relax, entertain, and create lasting memories for years to come.
With the completion of Step 14, your deck project is now finished. Take a step back and admire your hard work and dedication in creating a beautiful and functional deck foundation. Enjoy the outdoor space and make lasting memories with family and friends. Cheers to your successful deck-building endeavor!
Conclusion
Building a deck foundation is a rewarding endeavor that allows you to create an inviting outdoor space for relaxation, entertaining, and enjoying the beauty of nature. By following the steps outlined in this guide, you can confidently tackle the construction process and create a sturdy and long-lasting deck foundation.
From choosing the ideal location and gathering the necessary materials to securing the decking boards and adding the finishing touches, each step plays a crucial role in the construction of your deck. Adhering to local building codes and regulations, ensuring proper spacing and alignment, and using quality materials will contribute to the stability, safety, and overall aesthetic appeal of your deck.
Throughout the process, always prioritize safety by wearing protective gear and taking caution when working with tools and materials. Double-check each step, make necessary adjustments, and consult with professionals or local authorities when needed to ensure compliance and proper execution.
Once your deck foundation is complete, take the time to enjoy and maintain it. Regular cleaning, inspections, and appropriate maintenance will prolong the life of your deck and keep it looking its best for years to come.
Remember, a well-constructed deck foundation serves as the solid groundwork for your outdoor oasis. From relaxing in the sun to hosting barbecues or simply enjoying quiet moments under the stars, your deck will be a space where cherished memories are made and shared with loved ones.
Now, armed with the knowledge and confidence to build a deck foundation, it’s time to embark on your construction journey. Embrace the process, put your building skills to work, and watch as your vision for a beautiful and functional outdoor space becomes a reality. Happy building!
Frequently Asked Questions about How To Build A Deck Foundation
Was this page helpful?
At Storables.com, we guarantee accurate and reliable information. Our content, validated by Expert Board Contributors, is crafted following stringent Editorial Policies. We're committed to providing you with well-researched, expert-backed insights for all your informational needs.

0 thoughts on “How To Build A Deck Foundation”