Home>diy>Building & Construction>How To Build A Slab Foundation
Building & Construction
How To Build A Slab Foundation
Modified: December 7, 2023
Learn the step-by-step process of building a strong and durable slab foundation in your construction project. Expert tips and techniques for building construction.
(Many of the links in this article redirect to a specific reviewed product. Your purchase of these products through affiliate links helps to generate commission for Storables.com, at no extra cost. Learn more)
Introduction
Welcome to our comprehensive guide on how to build a slab foundation. Whether you are constructing a residential home, commercial building, or any other structure, a solid foundation is essential. A slab foundation is a popular choice due to its durability, cost-effectiveness, and ease of construction.
In this article, we will take you through the step-by-step process of building a slab foundation. From site preparation to finishing touches, we will cover everything you need to know to successfully complete this crucial stage of construction. So, let’s get started!
Before we dive into the details, it’s important to understand what a slab foundation is. A slab foundation is a concrete slab that is poured directly on the ground to support the weight of the structure above. It provides a level and stable surface for building and offers excellent resistance to soil movement, making it suitable for a variety of soil conditions.
Building a slab foundation requires careful planning, precise execution, and adherence to local building codes and regulations. It is also crucial to have the necessary tools, materials, and equipment on hand before you begin. So, make sure you have everything ready to go.
Now that we have a basic understanding let’s move on to the first step of the process – site preparation.
Key Takeaways:
- Building a slab foundation involves crucial steps such as site preparation, proper excavation, and careful compaction of soil. Attention to detail and adherence to local regulations are essential for a successful construction project.
- The finishing touches, including surface smoothing, applying sealant, and installing drainage systems, are vital for enhancing the longevity and functionality of a slab foundation. Consulting professionals and following best practices ensure a robust and well-constructed foundation.
Read more: How To Repair Slab Foundation Cracks
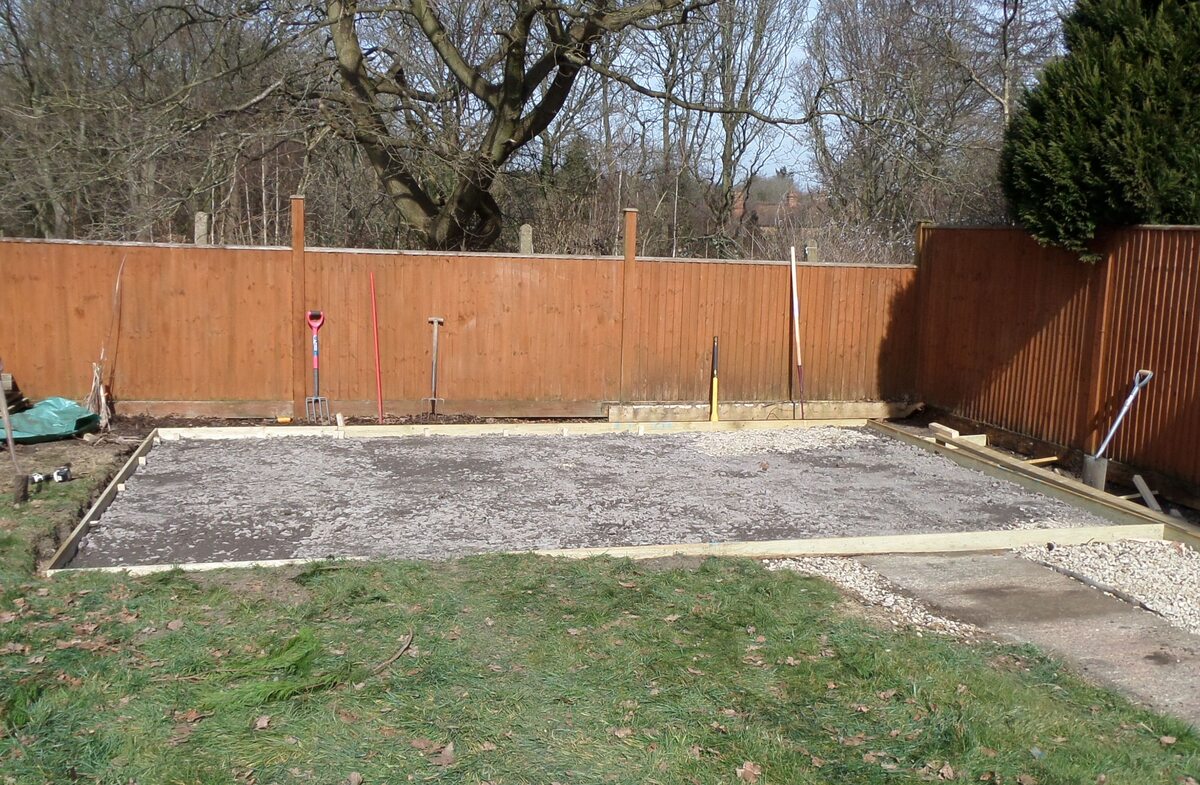
Step 1: Site Preparation
Before you start constructing a slab foundation, proper site preparation is crucial. This step sets the stage for a strong and stable foundation. Here are the key steps involved in site preparation:
- Survey the Site: Begin by surveying the site to determine the boundaries and identify any potential obstacles or hazards that may interfere with the construction process. This will help you plan the layout of the foundation.
- Clear the Area: Remove any vegetation, rocks, debris, and other unwanted materials from the construction site. This will create a clean and level surface for the foundation.
- Excavation: If necessary, perform excavation to remove excess soil or to create a level surface. This may involve the use of heavy machinery, such as excavators or bulldozers.
- Check for Proper Drainage: Ensure that the site has proper drainage to prevent water accumulation near the foundation. This can be achieved by sloping the ground away from the foundation or installing drainage systems.
- Observe Local Regulations: Familiarize yourself with local building codes and regulations related to site preparation. This may include obtaining permits or approvals from the appropriate authorities.
By following these steps, you can ensure that the construction site is well-prepared for building the slab foundation. Once the site is ready, you can proceed to the next step – excavation.
Step 2: Excavation
Excavation is a critical step in the construction of a slab foundation. It involves digging and removing the soil to create a space for the foundation to be poured. Follow these steps for proper excavation:
- Mark Foundation Dimensions: Use stakes and string lines to mark the dimensions of the foundation on the ground. This will serve as a guide during excavation.
- Dig the Trench: Use an excavator or shovel to dig the trench along the marked lines. The depth of the trench will depend on the design and specifications of the foundation.
- Check for Levelness: Use a level or laser level to ensure that the bottom of the trench is level. This is important for a stable and even foundation.
- Remove Excess Soil: Remove any excess soil from the trench to achieve the desired depth. The soil can be temporarily stockpiled or removed from the site, depending on local regulations.
During excavation, it’s crucial to avoid damaging any existing underground utilities, such as water pipes or electrical lines. If there are utility lines in the excavation area, contact the appropriate authorities or utility companies for guidance and assistance.
Once the trench is excavated to the required depth, the next step is to compact the soil in the bottom of the trench to ensure stability. This will be covered in the next step – compacting the soil.
Step 3: Compacting the Soil
After the excavation is complete, it’s essential to properly compact the soil at the bottom of the trench. Compaction ensures that the soil is dense and stable, providing a solid base for the foundation. Here’s how to effectively compact the soil:
- Clear the Trench: Remove any loose soil, rocks, or debris from the bottom of the trench before compacting.
- Moisten the Soil: If the soil is dry, lightly moisten it with water. This will help improve compaction.
- Use a Plate Compactor: Utilize a plate compactor, which is a heavy machine with a vibrating plate, to compact the soil. Slowly move the compactor across the entire area of the trench, ensuring even compaction.
- Check for Proper Compaction: Periodically check the soil’s density using a soil compaction test. This test measures the soil’s moisture content and compaction level, ensuring it meets the required specifications.
Properly compacted soil provides a stable base for the foundation, reducing the risk of settlement or structural issues in the future.
Once the soil is compacted, it’s time to move on to the next step – building the formwork, which will shape the foundation and hold the concrete in place. We will discuss this in detail in the next step.
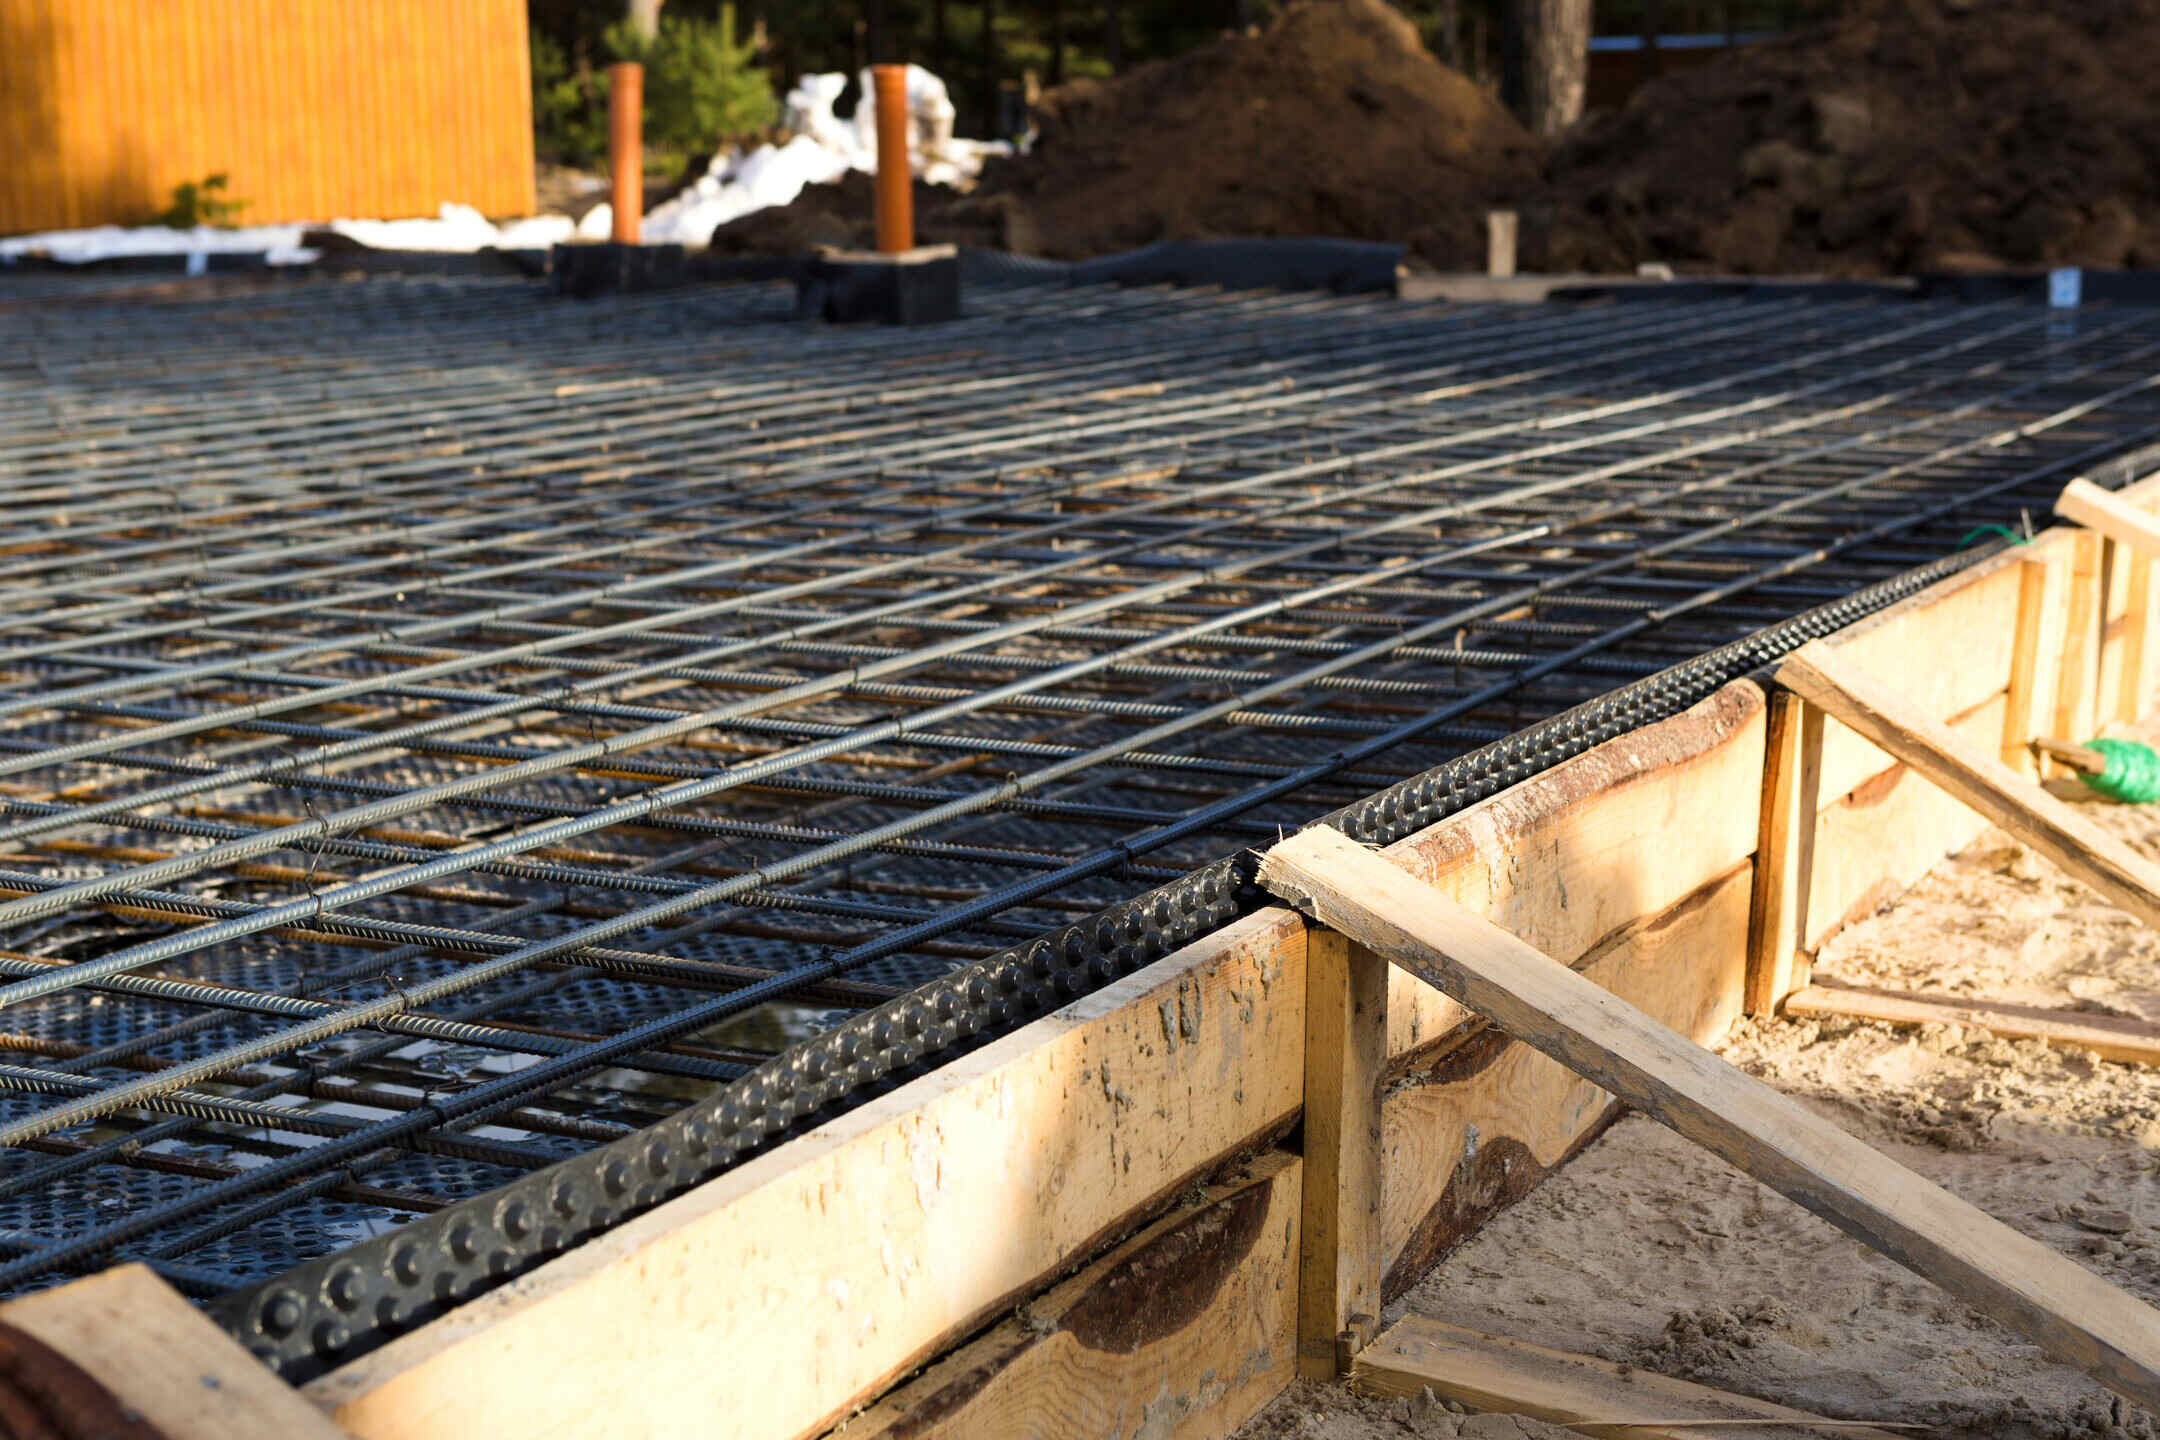
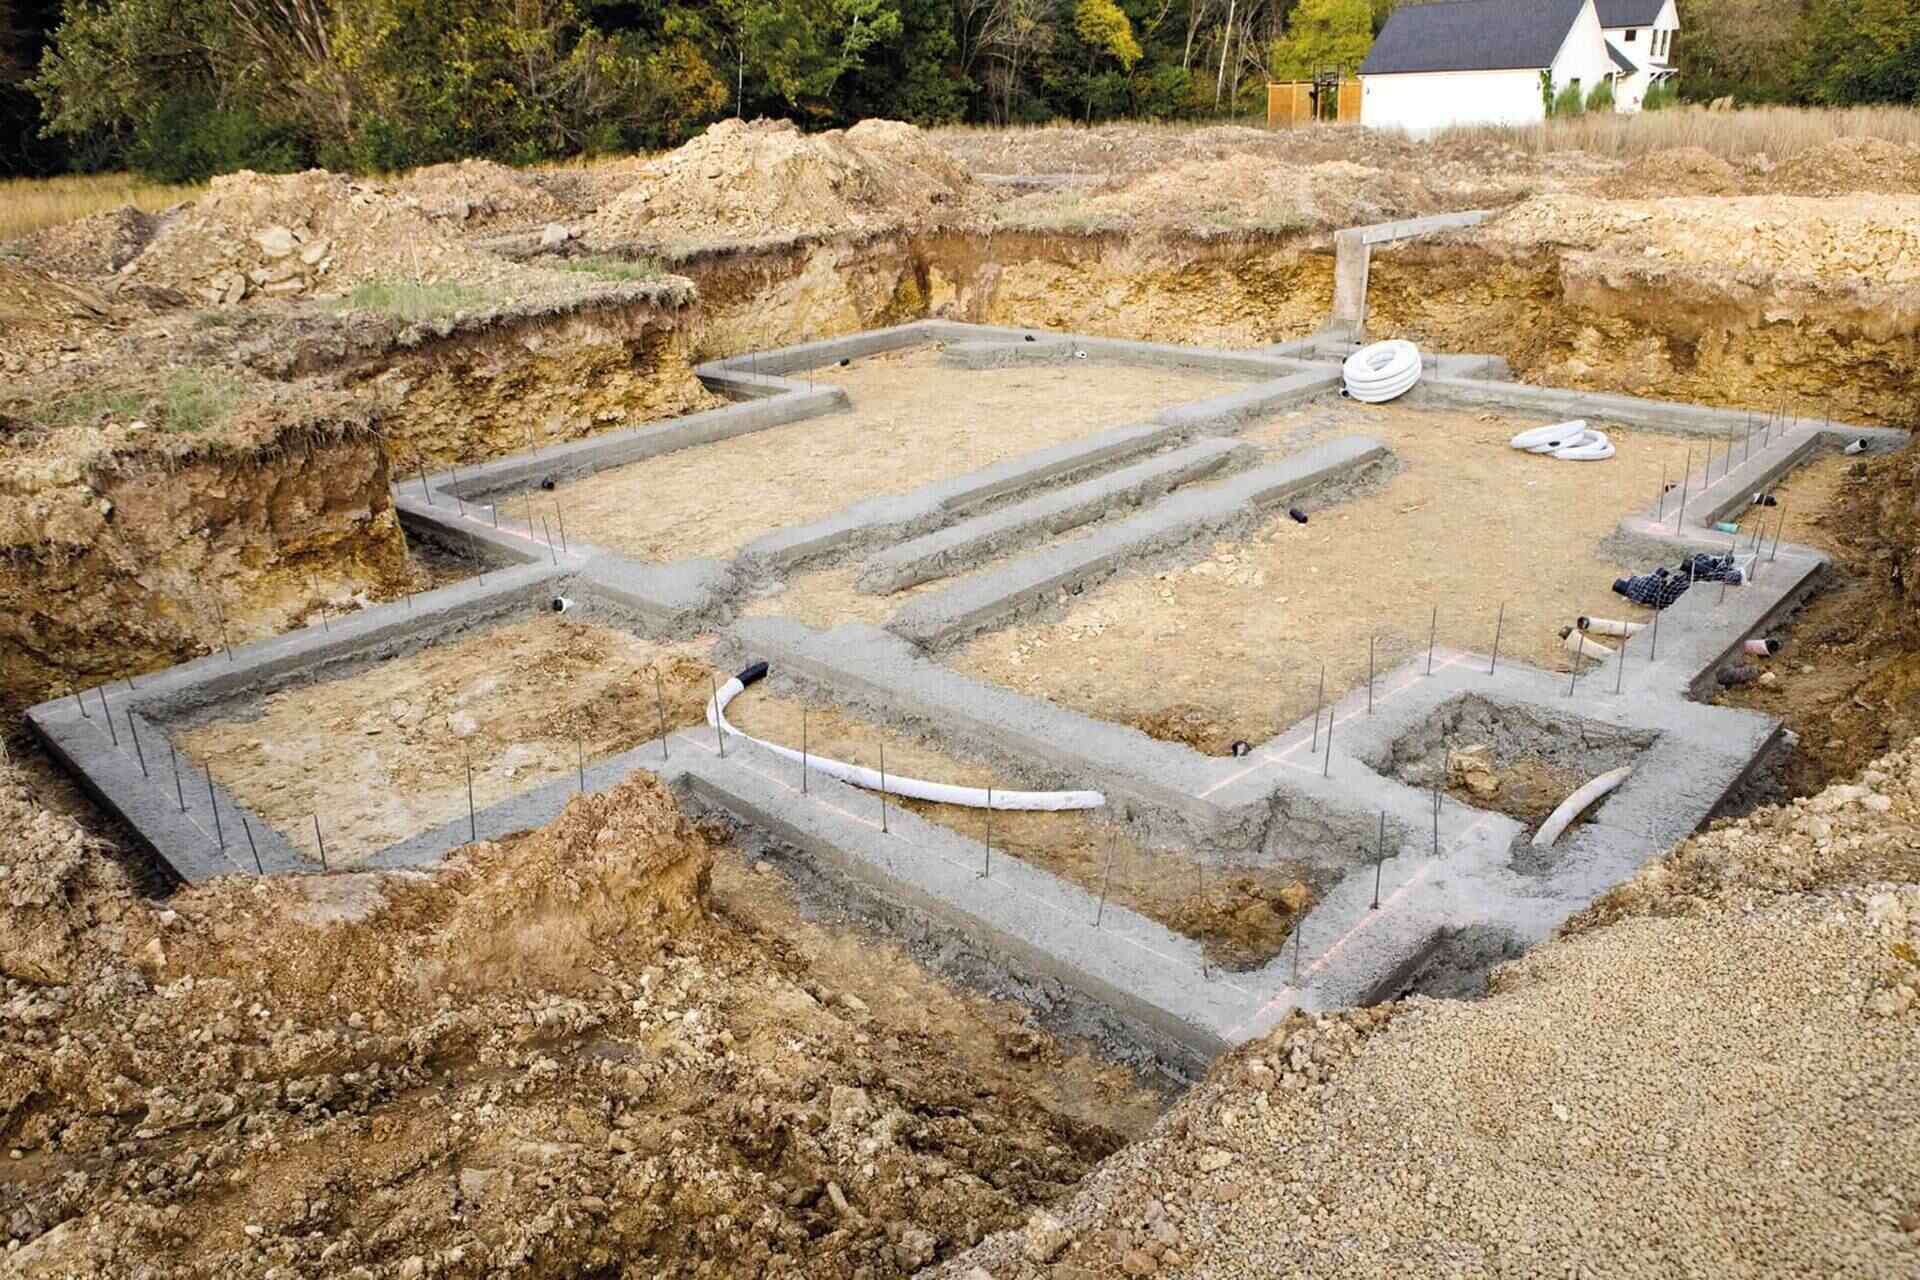
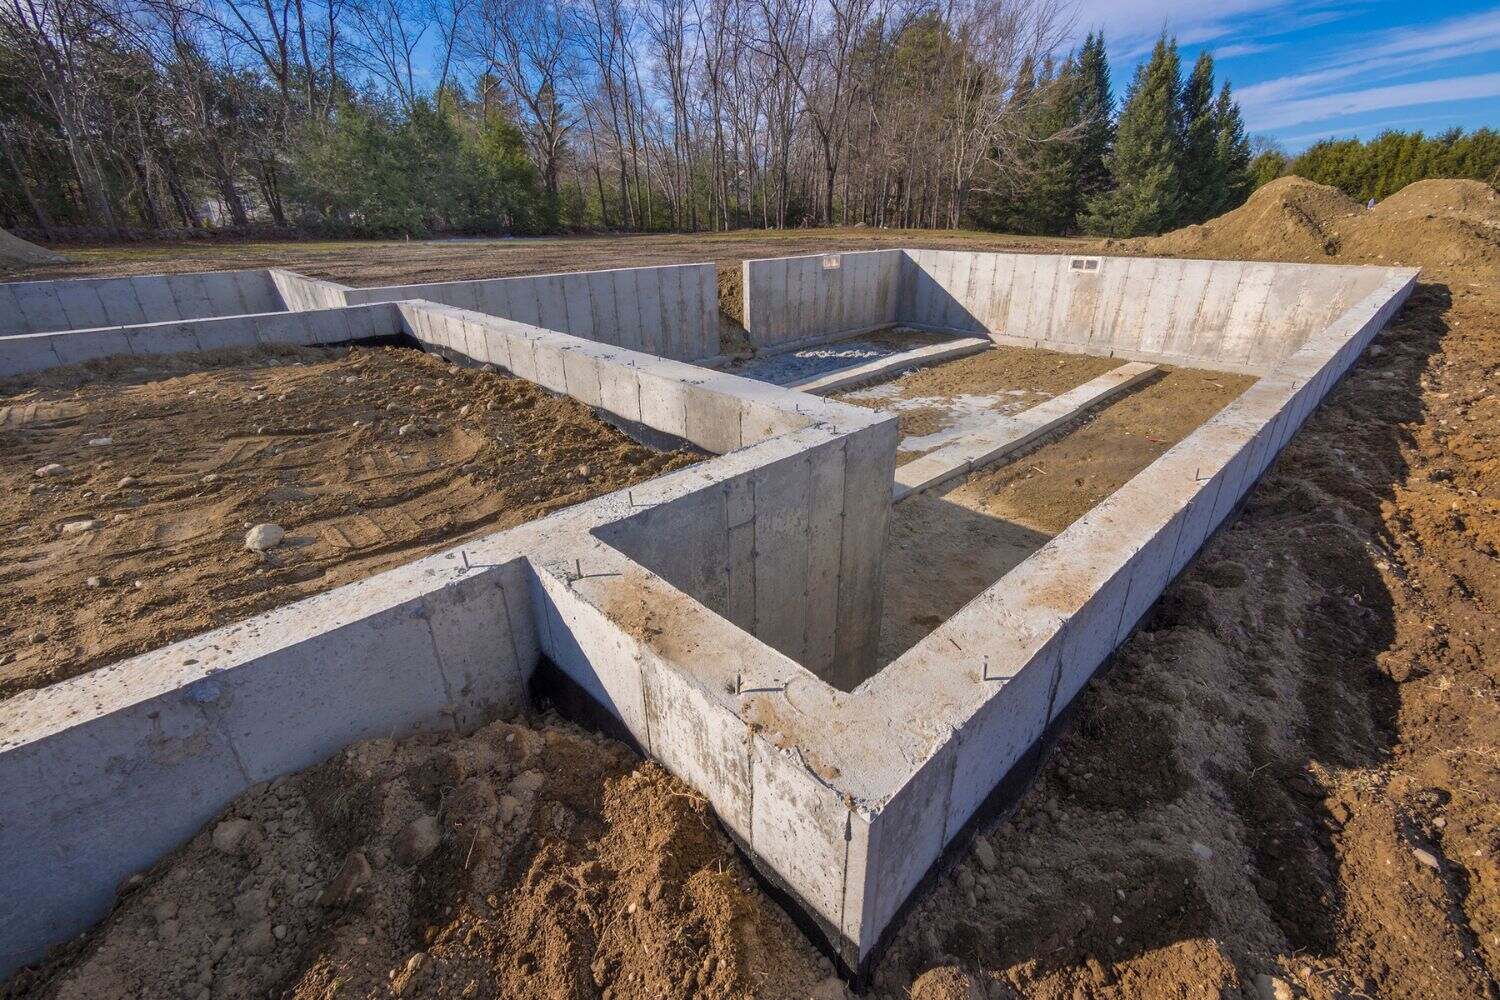
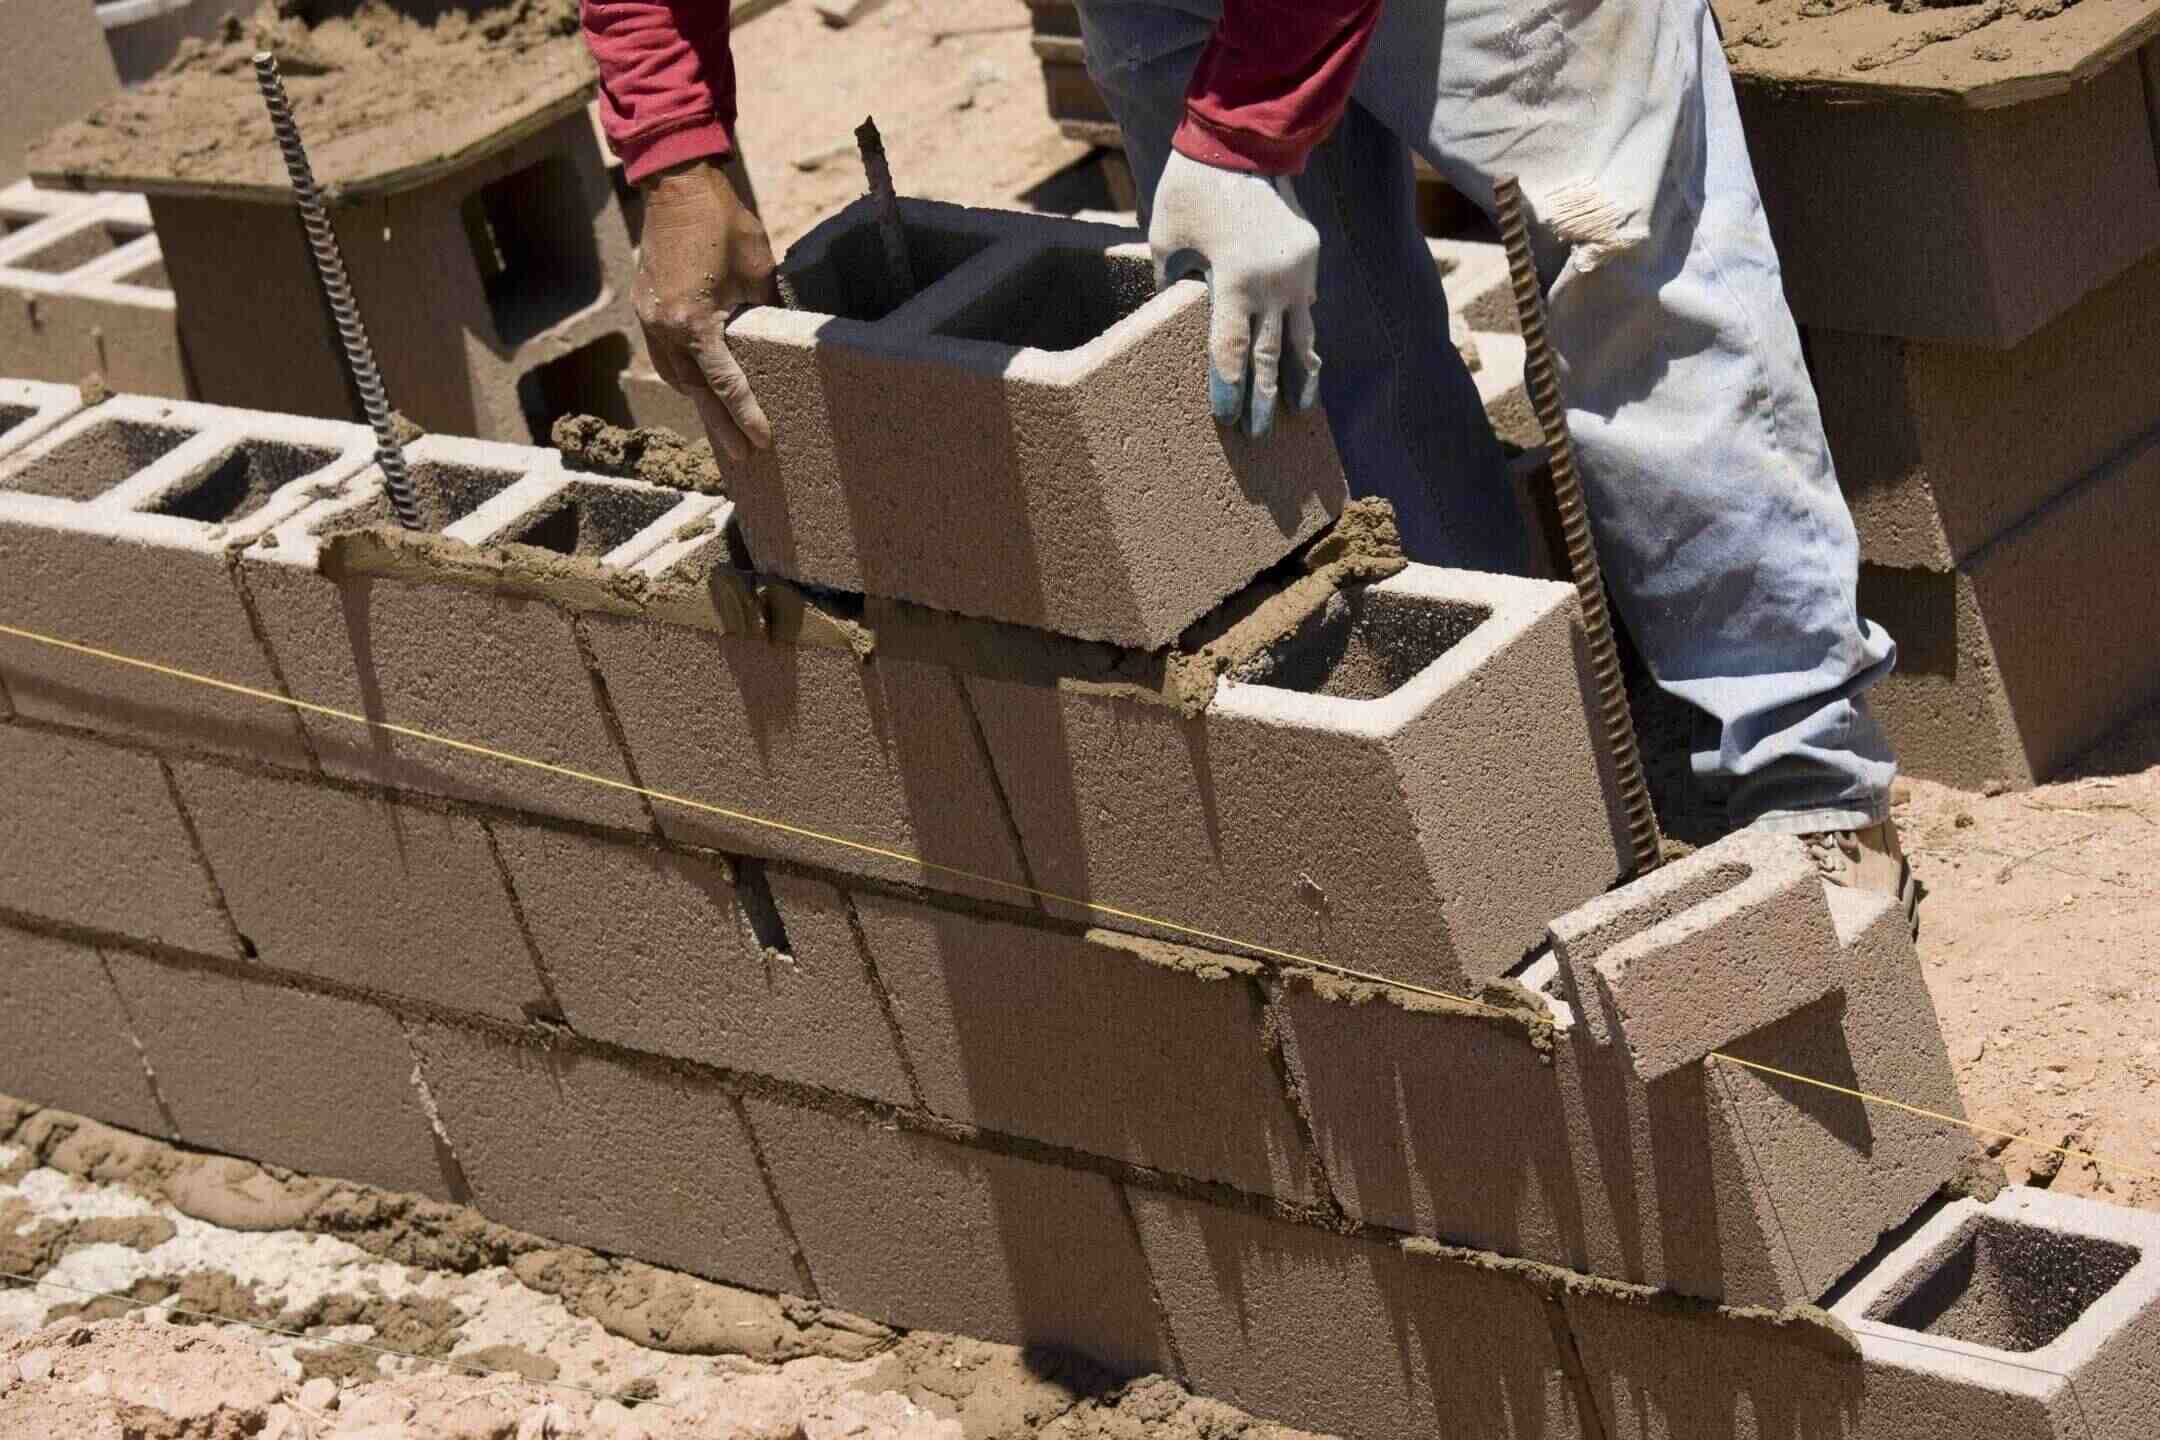
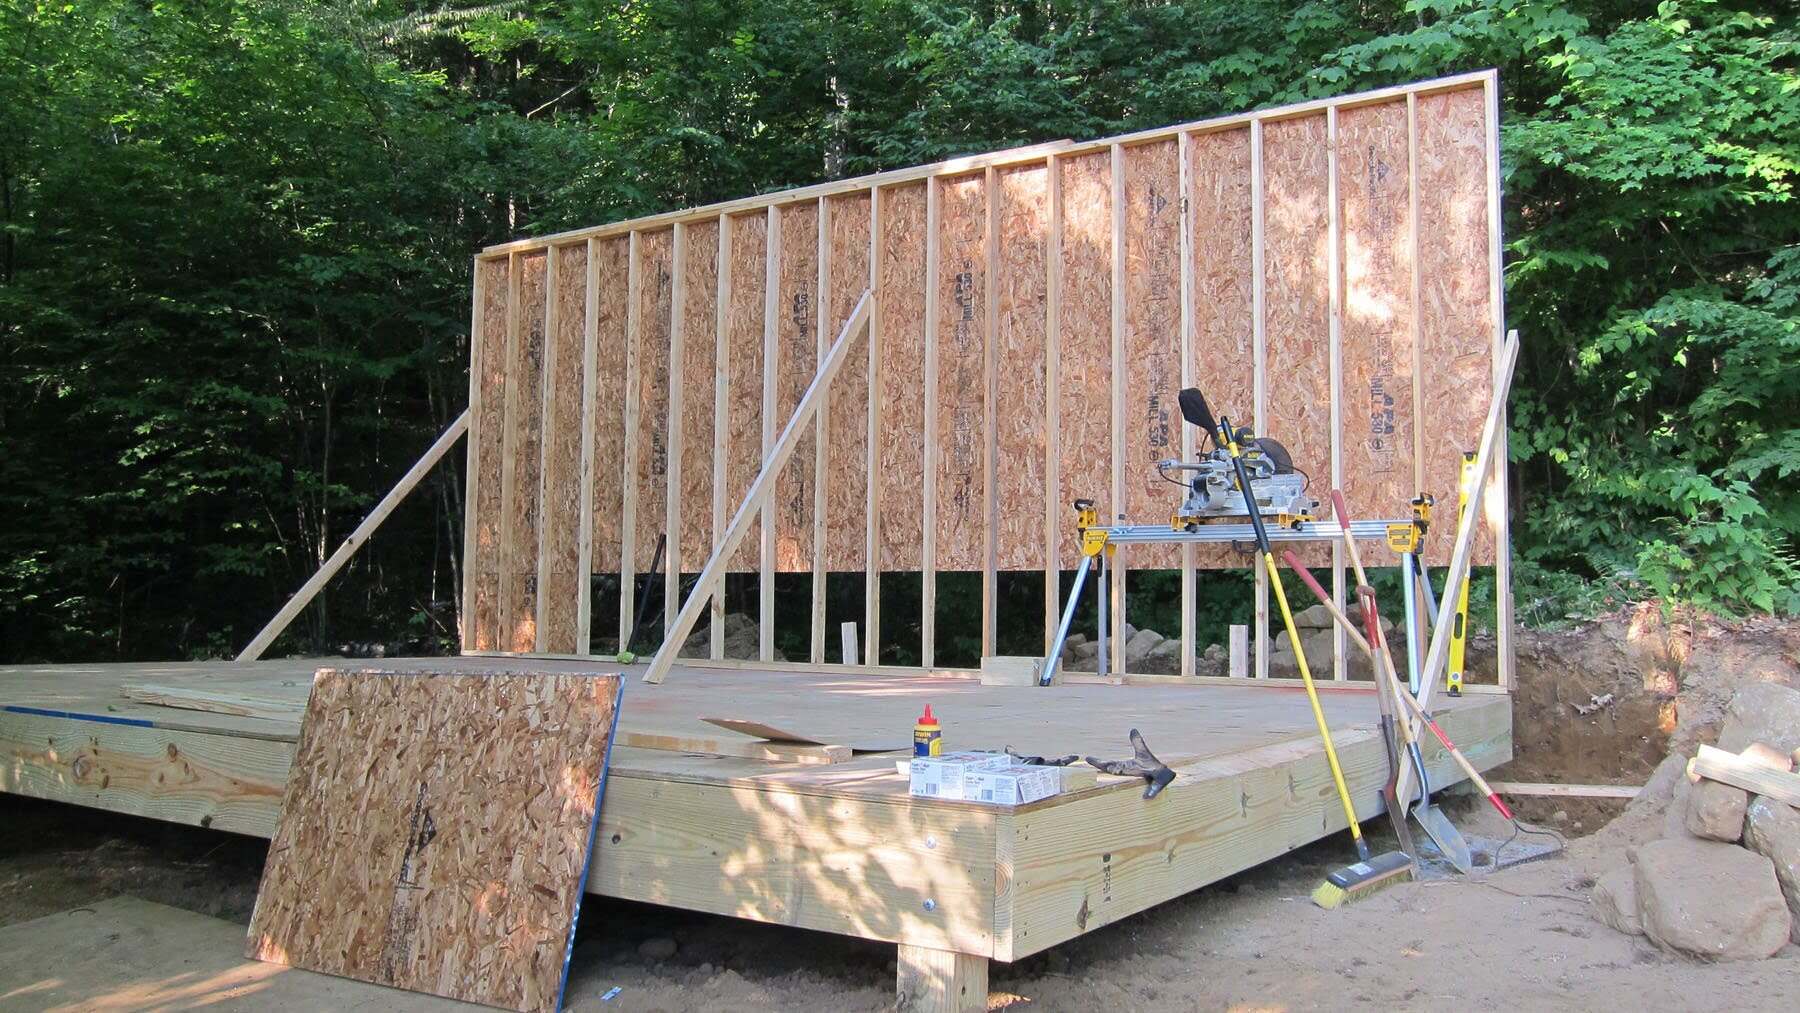
Step 4: Building the Formwork
Formwork is the temporary structure that shapes the concrete slab foundation and holds the concrete in place until it sets. Building the formwork accurately is crucial for ensuring the proper shape and dimensions of the foundation. Follow these steps to build the formwork:
- Measure and Cut the Formwork Boards: Measure the dimensions of the foundation and cut the formwork boards accordingly. Use sturdy materials such as plywood or timber boards.
- Place the Formwork Boards: Set the formwork boards along the edges of the excavation trench, ensuring they are level and properly aligned. Secure the boards to the ground using stakes or screws.
- Install Formwork Braces: Place braces diagonally across the formwork to provide stability and prevent it from shifting during the concrete pouring process.
- Check for Levelness: Use a level to ensure that the formwork is level and properly aligned. This is important for achieving a level and even foundation.
- Seal the Joints: Seal any gaps or joints in the formwork using caulk or duct tape to prevent leakage of concrete during pouring.
When building the formwork, it is crucial to follow the design and layout specifications to ensure the foundation meets the required dimensions and alignment. Taking the time to carefully construct the formwork will contribute to the overall quality and longevity of the slab foundation.
Now that the formwork is in place, we can move on to the next step – installing reinforcement steel, which provides additional strength to the foundation. We will discuss this in detail in the following step.
Read more: How To Build A Deck Foundation
Step 5: Installing Reinforcement Steel
Reinforcement steel, also known as rebar, is a vital component in a slab foundation. It provides additional strength and helps to prevent cracks and structural issues. Here’s a step-by-step guide on how to install reinforcement steel:
- Review Design Specifications: Consult the construction plans and design specifications to determine the required rebar size, spacing, and placement.
- Prepare the Rebar: Cut the rebar to the appropriate lengths using a rebar cutter and bender. Make sure to wear protective gloves and goggles during this process.
- Place the Rebar: Lay the cut rebar in the formwork according to the design specifications. Ensure proper spacing and alignment between the bars.
- Tie the Rebar: Secure the rebar in place by tying it with wire at intersecting points and along the length of the bars. Use pliers to twist the wire tightly for a secure connection.
- Use Chairs or Spacers: Place small concrete blocks or plastic chairs under the rebar to lift it off the ground, ensuring it remains centered within the concrete slab.
Installing reinforcement steel is crucial as it strengthens the foundation and helps to distribute loads evenly. It also improves the resistance of the slab to cracks caused by shrinkage or external forces.
With the reinforcement steel securely in place, we can move on to the next step – pouring the concrete. This is a critical step that requires careful attention to detail, as the concrete will form the actual foundation. We will explore this step in detail in the following section.
Make sure the ground is properly compacted before pouring the concrete for the slab foundation. This will help prevent settling and cracking in the future.
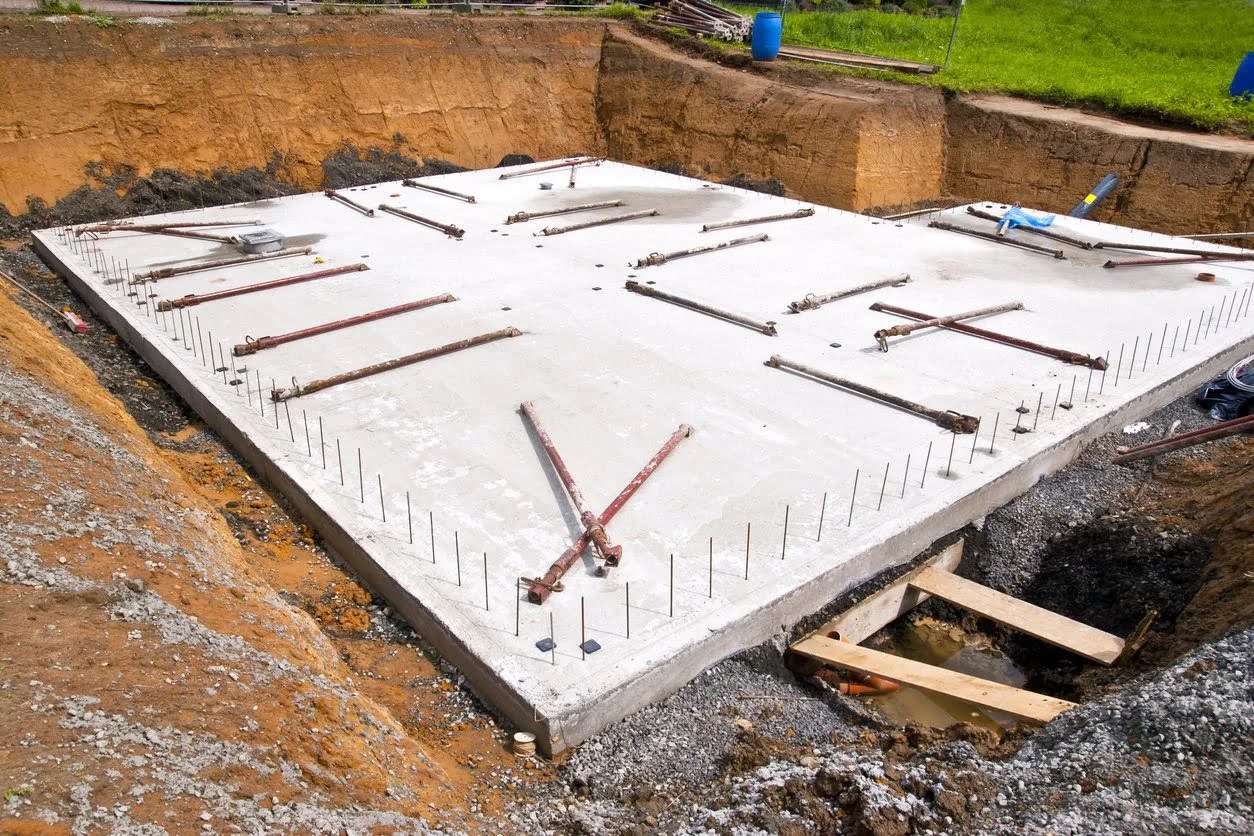
Step 6: Pouring the Concrete
Pouring the concrete is a major milestone in the construction of a slab foundation. It involves carefully pouring and spreading the concrete mixture to create a solid and durable foundation. Here’s a step-by-step guide on how to pour the concrete:
- Prepare the Concrete Mixture: Follow the instructions on the concrete mix bags to prepare the right proportions of cement, sand, aggregate, and water. Use a concrete mixer or a wheelbarrow and shovel to mix the ingredients thoroughly.
- Start Pouring: Begin pouring the concrete into the formwork, starting from one end and working your way to the other. Ensure an even and consistent flow of concrete.
- Use a Vibrator: As you pour the concrete, use a concrete vibrator to eliminate air pockets and ensure proper compaction. Insert the vibrator at different points throughout the pour to achieve optimal consolidation.
- Level the Concrete: Use a screed board or bull float to level the surface of the concrete. Move the screed board in a back-and-forth motion across the formwork to create a smooth and even surface.
- Smooth and Finish the Surface: Once the concrete is level, use a trowel to smooth and finish the surface. This will remove any imperfections and create a polished, professional look.
It’s important to monitor the concrete pour closely and work efficiently to prevent the mixture from drying out or becoming uneven. Also, ensure that the height of the concrete is in line with the formwork’s desired thickness.
After pouring the concrete, it needs time to cure and gain strength. This process typically takes several days, during which the concrete should be protected from extreme weather conditions and excessive moisture. Curing is essential for the long-term durability and stability of the foundation.
With the concrete poured, the next step is to move on to the curing process. We will discuss this crucial step in the following section.
Step 7: Curing the Slab
Curing is a critical step in the construction of a slab foundation as it ensures the concrete reaches its maximum strength and durability. Proper curing allows the concrete to dry slowly and evenly, reducing the risk of cracks and improving its overall quality. Here’s how to effectively cure the slab:
- Cover the Slab: Immediately after pouring the concrete, cover the slab with a plastic sheet or curing compound to prevent moisture loss. This helps to maintain the optimal moisture content for curing.
- Keep the Slab Moist: Regularly wet the concrete slab by spraying it with water or by using wet burlap or curing blankets. This prevents the concrete from drying out too quickly and promotes hydration.
- Avoid Rapid Temperature Changes: Minimize exposure to extreme temperature changes during the curing period. Protect the slab from direct sunlight, strong winds, and freezing temperatures, as these can negatively impact the curing process.
- Cure for Sufficient Time: Allow the concrete to cure for at least seven days, although specific curing times may vary depending on the concrete mix, weather conditions, and project requirements. Follow the recommendations of the concrete manufacturer or consulting engineer for the best results.
Proper curing significantly enhances the strength and durability of the slab foundation, ensuring its long-term performance and minimizing the risk of cracking or other structural issues.
Once the curing period is complete, the next step is to remove the formwork. We will discuss this in detail in the following step.
Step 8: Removing the Formwork
With the concrete slab adequately cured and strong enough to support its weight, it’s time to remove the formwork. Removing the formwork is an important step that allows you to inspect the slab’s surface and prepare it for any necessary finishing touches. Here’s a step-by-step guide on how to remove the formwork:
- Check the Concrete Strength: Before removing the formwork, ensure that the concrete has reached the required strength. Refer to the curing time recommended by the concrete manufacturer or consulting engineer.
- Start at the Top: Begin removing the formwork from the top section, working your way down. Use protective gloves and tools like a hammer or pry bar to carefully release the formwork from the concrete.
- Inspect the Surface: As you remove the formwork, inspect the concrete slab’s surface for any imperfections, such as air bubbles or irregularities. These can be addressed and repaired during the next step.
- Clean the Formwork: As you dismantle the formwork, clean and remove any debris, concrete residue, or sticking materials from the boards. This ensures their readiness for future use or storage.
- Protect the Exposed Edges: Apply a protective coat or sealant to the exposed edges of the concrete slab to prevent moisture penetration and potential damage.
Removing the formwork requires caution to prevent any damage to the cured concrete. Take your time and carefully release the formwork to preserve the integrity and aesthetics of the slab.
Once the formwork is removed and the concrete surface is inspected, it’s time to move on to the final step – adding the finishing touches to the slab foundation.
Read more: How To Build A Raised Foundation
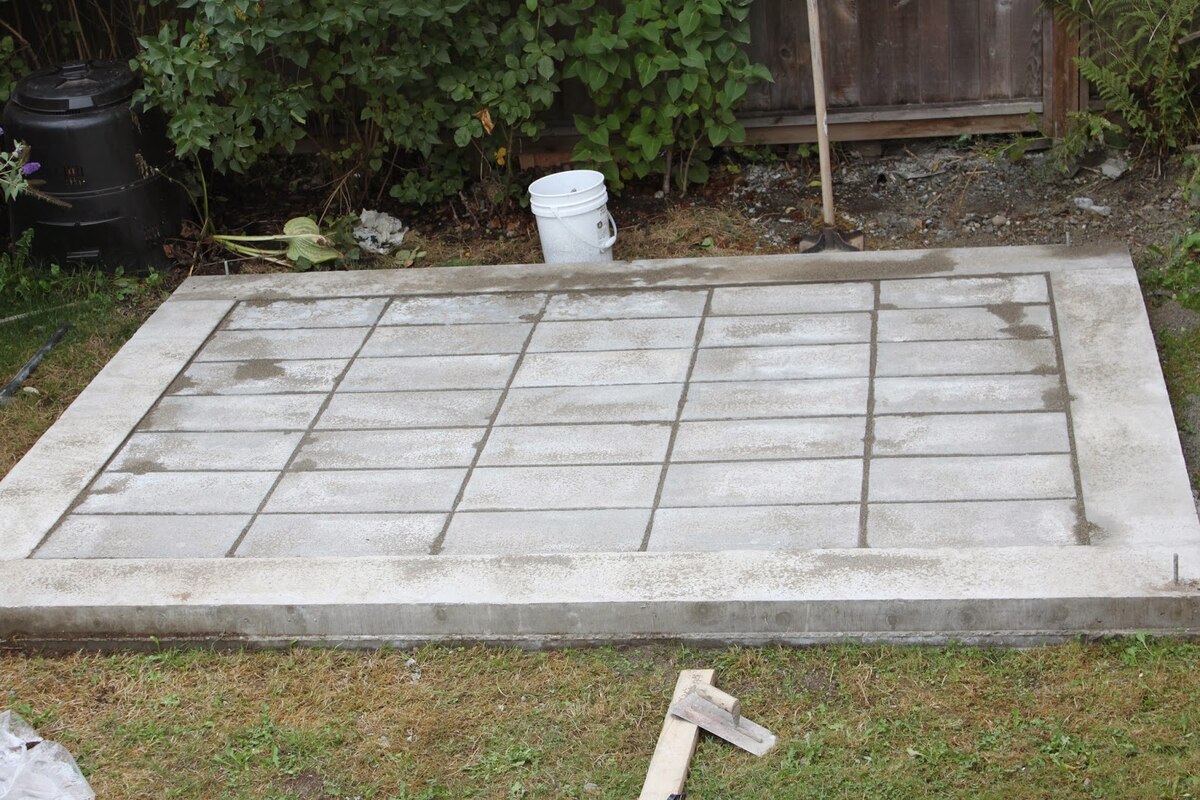
Step 9: Finishing Touches
The finishing touches are the final steps to complete the construction of a slab foundation. These steps focus on enhancing the appearance and functionality of the foundation. Here’s what you need to do for the finishing touches:
- Smooth the Surface: Use a concrete float or trowel to smooth out any minor imperfections or rough spots on the surface of the slab. This will create a more visually appealing and polished finish.
- Apply Surface Sealant: To protect the concrete and improve its durability, consider applying a surface sealant or curing compound. The sealant helps to prevent moisture penetration, staining, and damage caused by external elements.
- Add Expansion Joints: Install expansion joints in the slab to allow for natural movement and prevent cracking. Expansion joints should be placed according to the design specifications or local building codes.
- Install Drainage Systems: If necessary, install drainage systems around the perimeter of the slab to ensure proper water management and prevention of water accumulation around the foundation.
- Maintain Proper Grading: Ensure that the soil around the foundation is properly graded to direct water away from the slab. This helps to prevent water from pooling near the foundation, which can lead to potential issues in the future.
By paying attention to these finishing touches, you can enhance the longevity, functionality, and aesthetics of your slab foundation.
With the completion of the finishing touches, the construction of the slab foundation is now complete. It’s time to move forward with the next phase of your building project, whether it’s constructing the walls, framing, or proceeding with any other necessary steps.
Congratulations on successfully building a robust and well-constructed slab foundation!
Conclusion
Building a slab foundation is a crucial step in the construction process, providing a solid and stable base for any structure. By following the step-by-step process outlined in this guide, you can ensure a successful construction project and a strong foundation that will stand the test of time.
From site preparation to pouring the concrete and adding the finishing touches, each step plays a vital role in creating a durable and reliable foundation. Attention to detail, adherence to local building codes, and the use of proper tools and materials are key factors for achieving a high-quality result.
Remember, it’s essential to consult with professionals, such as architects, engineers, and local authorities, to ensure your slab foundation meets safety regulations and suits the specific requirements of your project.
By investing time and effort in building a well-constructed slab foundation, you provide a solid base for the rest of your building or construction project. A strong foundation not only ensures the structural integrity of your building but also sets the stage for the future success and longevity of the structure.
We hope this comprehensive guide has provided you with the knowledge and understanding needed to confidently embark on the construction of a slab foundation. Remember to prioritize safety, follow best practices, and consult experts when necessary. With careful planning and execution, your slab foundation will serve as a solid base for your dreams and creations for years to come.
Frequently Asked Questions about How To Build A Slab Foundation
Was this page helpful?
At Storables.com, we guarantee accurate and reliable information. Our content, validated by Expert Board Contributors, is crafted following stringent Editorial Policies. We're committed to providing you with well-researched, expert-backed insights for all your informational needs.

0 thoughts on “How To Build A Slab Foundation”