Home>diy>Building & Construction>How To Build A Foundation For An Addition
Building & Construction
How To Build A Foundation For An Addition
Modified: January 23, 2024
Learn how to build a strong foundation for your addition with expert tips and techniques in building construction. Ensure a solid base for your project.
(Many of the links in this article redirect to a specific reviewed product. Your purchase of these products through affiliate links helps to generate commission for Storables.com, at no extra cost. Learn more)
Introduction
Welcome to the world of building construction! If you’re considering adding an addition to your home or property, you’re in for an exciting journey. Building an addition allows you to expand your living space, increase the value of your property, and create a customized space that meets your unique needs and preferences.
However, before you embark on this project, it’s important to understand the process involved in constructing a solid foundation. The foundation is the backbone of any structure, providing support and stability. A well-constructed foundation is essential for the long-term durability and safety of your addition.
In this article, we will guide you through the process of building a foundation for your addition. We will cover everything from assessing the feasibility of your project to obtaining permits, creating a design plan, and executing the construction phase. So, let’s get started!
Key Takeaways:
- Building a solid foundation for an addition involves assessing feasibility, obtaining permits, creating a design plan, and executing construction phases. Thorough planning and adherence to regulations are crucial for a successful project.
- Proper drainage, waterproofing, and soil backfilling are essential for protecting the integrity of the addition. Consulting professionals and investing in a solid foundation ensure a durable and beautiful living space.
Read more: Building Regulations For Home Additions
Determining the Feasibility of an Addition
Before diving into the construction process, it’s important to assess the feasibility of adding an addition to your property. There are several factors to consider to ensure that your project is both practical and within your budget.
The first step is to evaluate the available space on your property. Do you have enough room to accommodate the addition without compromising the functionality and aesthetic appeal of your existing space? It’s crucial to take accurate measurements and consider any potential restrictions, such as setbacks, easements, or zoning regulations.
Next, you’ll need to determine if your property can support the additional weight of the new structure. Engage the services of a structural engineer who can assess the soil conditions and perform load calculations to ensure that the foundation can adequately support the addition.
Financial feasibility is another aspect to consider. Set a realistic budget for your project, taking into account the cost of materials, labor, permits, and any unexpected expenses that may arise. It’s also advisable to obtain multiple quotes from contractors to compare prices and choose the most reasonable option.
Another important consideration is the impact of your addition on the overall aesthetics of your property and neighborhood. Will the new structure blend in seamlessly with the existing architecture? Will it enhance the curb appeal or detract from it? These visual aspects are crucial, as you want your addition to harmonize with its surroundings.
Finally, consider the long-term implications of the addition. Will it add value to your property? Will it meet your current and future needs? Assessing the feasibility of an addition involves not only practical considerations but also a thoughtful analysis of your lifestyle and future plans.
Once you have evaluated these factors and determined that an addition is feasible, you can move forward with the next steps in the construction process. Remember, thorough planning and careful consideration will set a solid foundation for a successful addition to your property.
Assessing Building Regulations and Permits
When it comes to building an addition, it’s essential to familiarize yourself with the building regulations and obtain the necessary permits. Building codes and regulations ensure that structures are constructed safely and meet specific standards.
The first step is to research and understand the building codes and regulations in your area. Each jurisdiction may have different requirements, so it’s crucial to consult with your local building department or hire a professional who is knowledgeable in the local regulations.
Typically, you will need to submit a permit application that includes detailed plans and specifications of your proposed addition. These plans will outline the size, design, materials, and structural details of the foundation. The permit application process can take time, so it’s important to start early and gather all the necessary documents.
Building regulations also cover other aspects, such as electrical and plumbing work. Depending on the scope of your addition, you may need separate permits for these trades. It’s important to coordinate with licensed professionals to ensure compliance with all the necessary codes.
During the construction phase, building inspectors will visit your property at various stages to ensure that the work is being carried out according to the approved plans and meets all the relevant building codes. It’s important to communicate with the inspector and address any issues or concerns that may arise during the inspection process.
Failure to obtain permits or comply with building regulations can result in fines, delays, or even legal consequences. It’s important not to cut corners or bypass the permit process, as it protects not only your safety but also the value and integrity of your property.
In addition to building permits, you may also need to consider other permits or approvals, such as zoning permits, environmental permits, or homeowner association approvals. These requirements vary depending on your location and specific circumstances, so it’s important to research and fulfill all the necessary obligations.
By assessing and adhering to building regulations and obtaining the required permits, you ensure that your addition is constructed safely and legally. It may require some effort and paperwork, but the peace of mind and compliance with the law will be well worth it.
Creating a Design Plan
Once you have determined the feasibility of your addition and obtained the necessary permits, the next step is to create a design plan. A well-thought-out design plan will serve as a roadmap for your construction project and help bring your vision to life.
Start by identifying your specific needs and goals for the addition. Consider the purpose of the space, whether it’s an extra bedroom, a home office, or a family room. Think about the size and layout that will best serve your needs and complement your existing home.
Take into account the architectural style and aesthetics of your current property. The design of the addition should harmonize with the existing structure to create a cohesive and visually appealing look. This can be achieved through similar materials, rooflines, window styles, and exterior finishes.
Consult with an architect or a professional designer to help translate your ideas into a detailed plan. They will assess your property, take precise measurements, and create drawings that depict the proposed addition. This will include floor plans, elevations, and construction details.
Consider the flow and functionality of the space. Ensure that the design allows for easy movement between the addition and the existing areas of your home. Think about storage needs, natural light, and ventilation. Don’t forget to factor in any specific requirements, such as accessibility features or energy-efficient measures.
During the design phase, it’s also important to anticipate potential challenges or constraints. For example, if you have a sloping yard, you may need to incorporate elements such as retaining walls or stepped foundations. By addressing these considerations early on, you can avoid costly surprises during construction.
Don’t forget to take landscaping into account when creating your design plan. Consider how the addition will affect the outdoor space and plan accordingly. This may involve repositioning existing landscaping features or creating new ones to complement the addition.
Once you have finalized the design plan, review it with your architect or designer and make any necessary revisions. Ensure that the plan aligns with your budget, meets all building code requirements, and fulfills your specific needs and preferences.
A comprehensive design plan will be invaluable during the construction phase. It will serve as a guide for contractors, suppliers, and other professionals involved in the project. It will help ensure that everyone is on the same page and working towards the same end goal.
By investing time and effort into creating a well-thought-out design plan, you increase the chances of a successful and satisfying addition to your home or property.
Preparing the Construction Site
Before construction on your addition can begin, it’s essential to properly prepare the construction site. This stage involves clearing the area, ensuring access to utilities, and making necessary accommodations to facilitate a smooth construction process.
The first step is to clear the site of any obstacles or debris. This includes removing vegetation, rocks, and any other obstructions that may hinder the construction process. Clearing the site creates a clean and safe space for the construction crew to work.
Next, it’s important to assess the accessibility of utilities such as water, electricity, and sewer lines. Consult with utility companies to identify the location of underground lines and ensure that they won’t be disturbed during construction. If necessary, arrange for temporary utilities or make accommodations to work around existing lines.
Temporary fencing or barriers may also be needed to secure the construction site. This helps protect both the workers and the surrounding property from potential hazards. It also establishes boundaries and ensures that unauthorized individuals do not enter the construction area.
Depending on the size and complexity of the addition, temporary facilities such as portable toilets or storage containers may need to be set up on the site. These facilities provide essential amenities and storage space for materials, tools, and equipment.
Prior to construction, it’s crucial to establish a clear line of communication with the construction team. Make sure that everyone involved is aware of the project timeline, safety protocols, and specific requirements. This will help streamline the construction process and minimize any potential delays or misunderstandings.
Weather conditions should also be taken into consideration during site preparation. Inclement weather, such as heavy rain or snow, can complicate construction activities and may require additional precautions or rescheduling. Plan accordingly and monitor weather forecasts to avoid unnecessary disruptions.
Finally, it’s important to consider the impact of construction activities on nearby neighbors. Inform them in advance about the upcoming construction and discuss any potential concerns or inconveniences. Maintaining open communication and being considerate of their needs can help foster good relations throughout the construction phase.
Properly preparing the construction site sets the stage for a successful and efficient construction process. It ensures that the necessary infrastructure and accommodations are in place, allowing the construction team to work safely and effectively.
By paying attention to these site preparation details, you’ll be one step closer to realizing your addition and creating the home of your dreams.
Read more: Expert Advice For Building An Addition
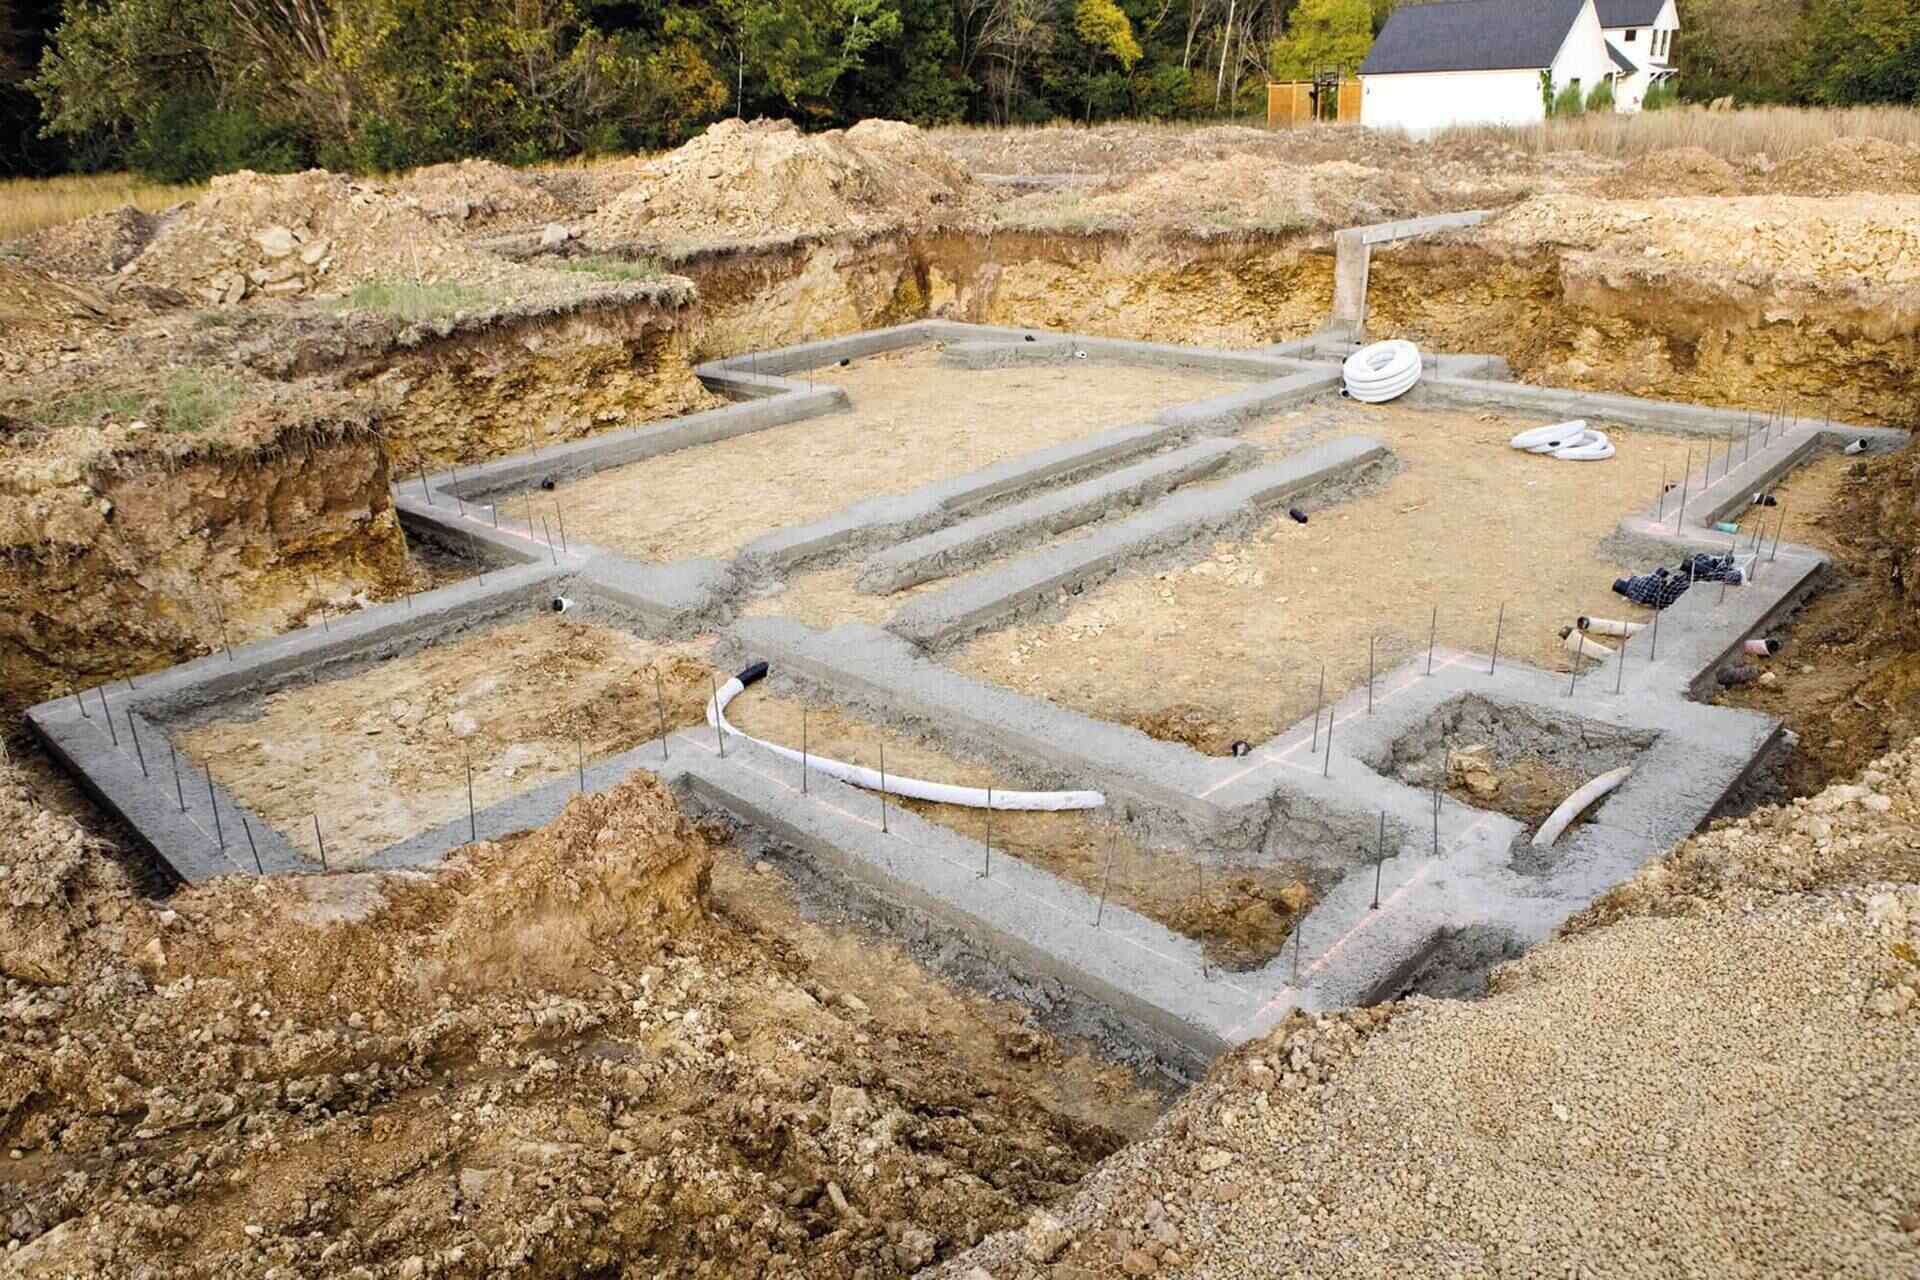
Excavating and Pouring the Foundation
Excavating and pouring the foundation is a critical step in the construction process of your addition. This stage involves preparing the site, excavating the area for the foundation, and pouring the concrete to create a solid base for the structure.
The first step is to mark and stake out the area where the foundation will be constructed. This ensures accuracy and helps guide the excavation process. Professional surveyors or contractors can assist in this stage to ensure precise measurements and alignment with the design plan.
Excavation involves removing the topsoil and digging down to the required depth for the foundation. Heavy machinery, such as excavators and backhoes, are commonly used to safely and efficiently excavate the area. It’s important to follow proper safety protocols and to have an experienced operator perform the excavation.
During the excavation process, it’s crucial to check for any potential issues, such as underground utilities, tree roots, or other obstructions. These should be addressed and removed if necessary before moving forward with the foundation work.
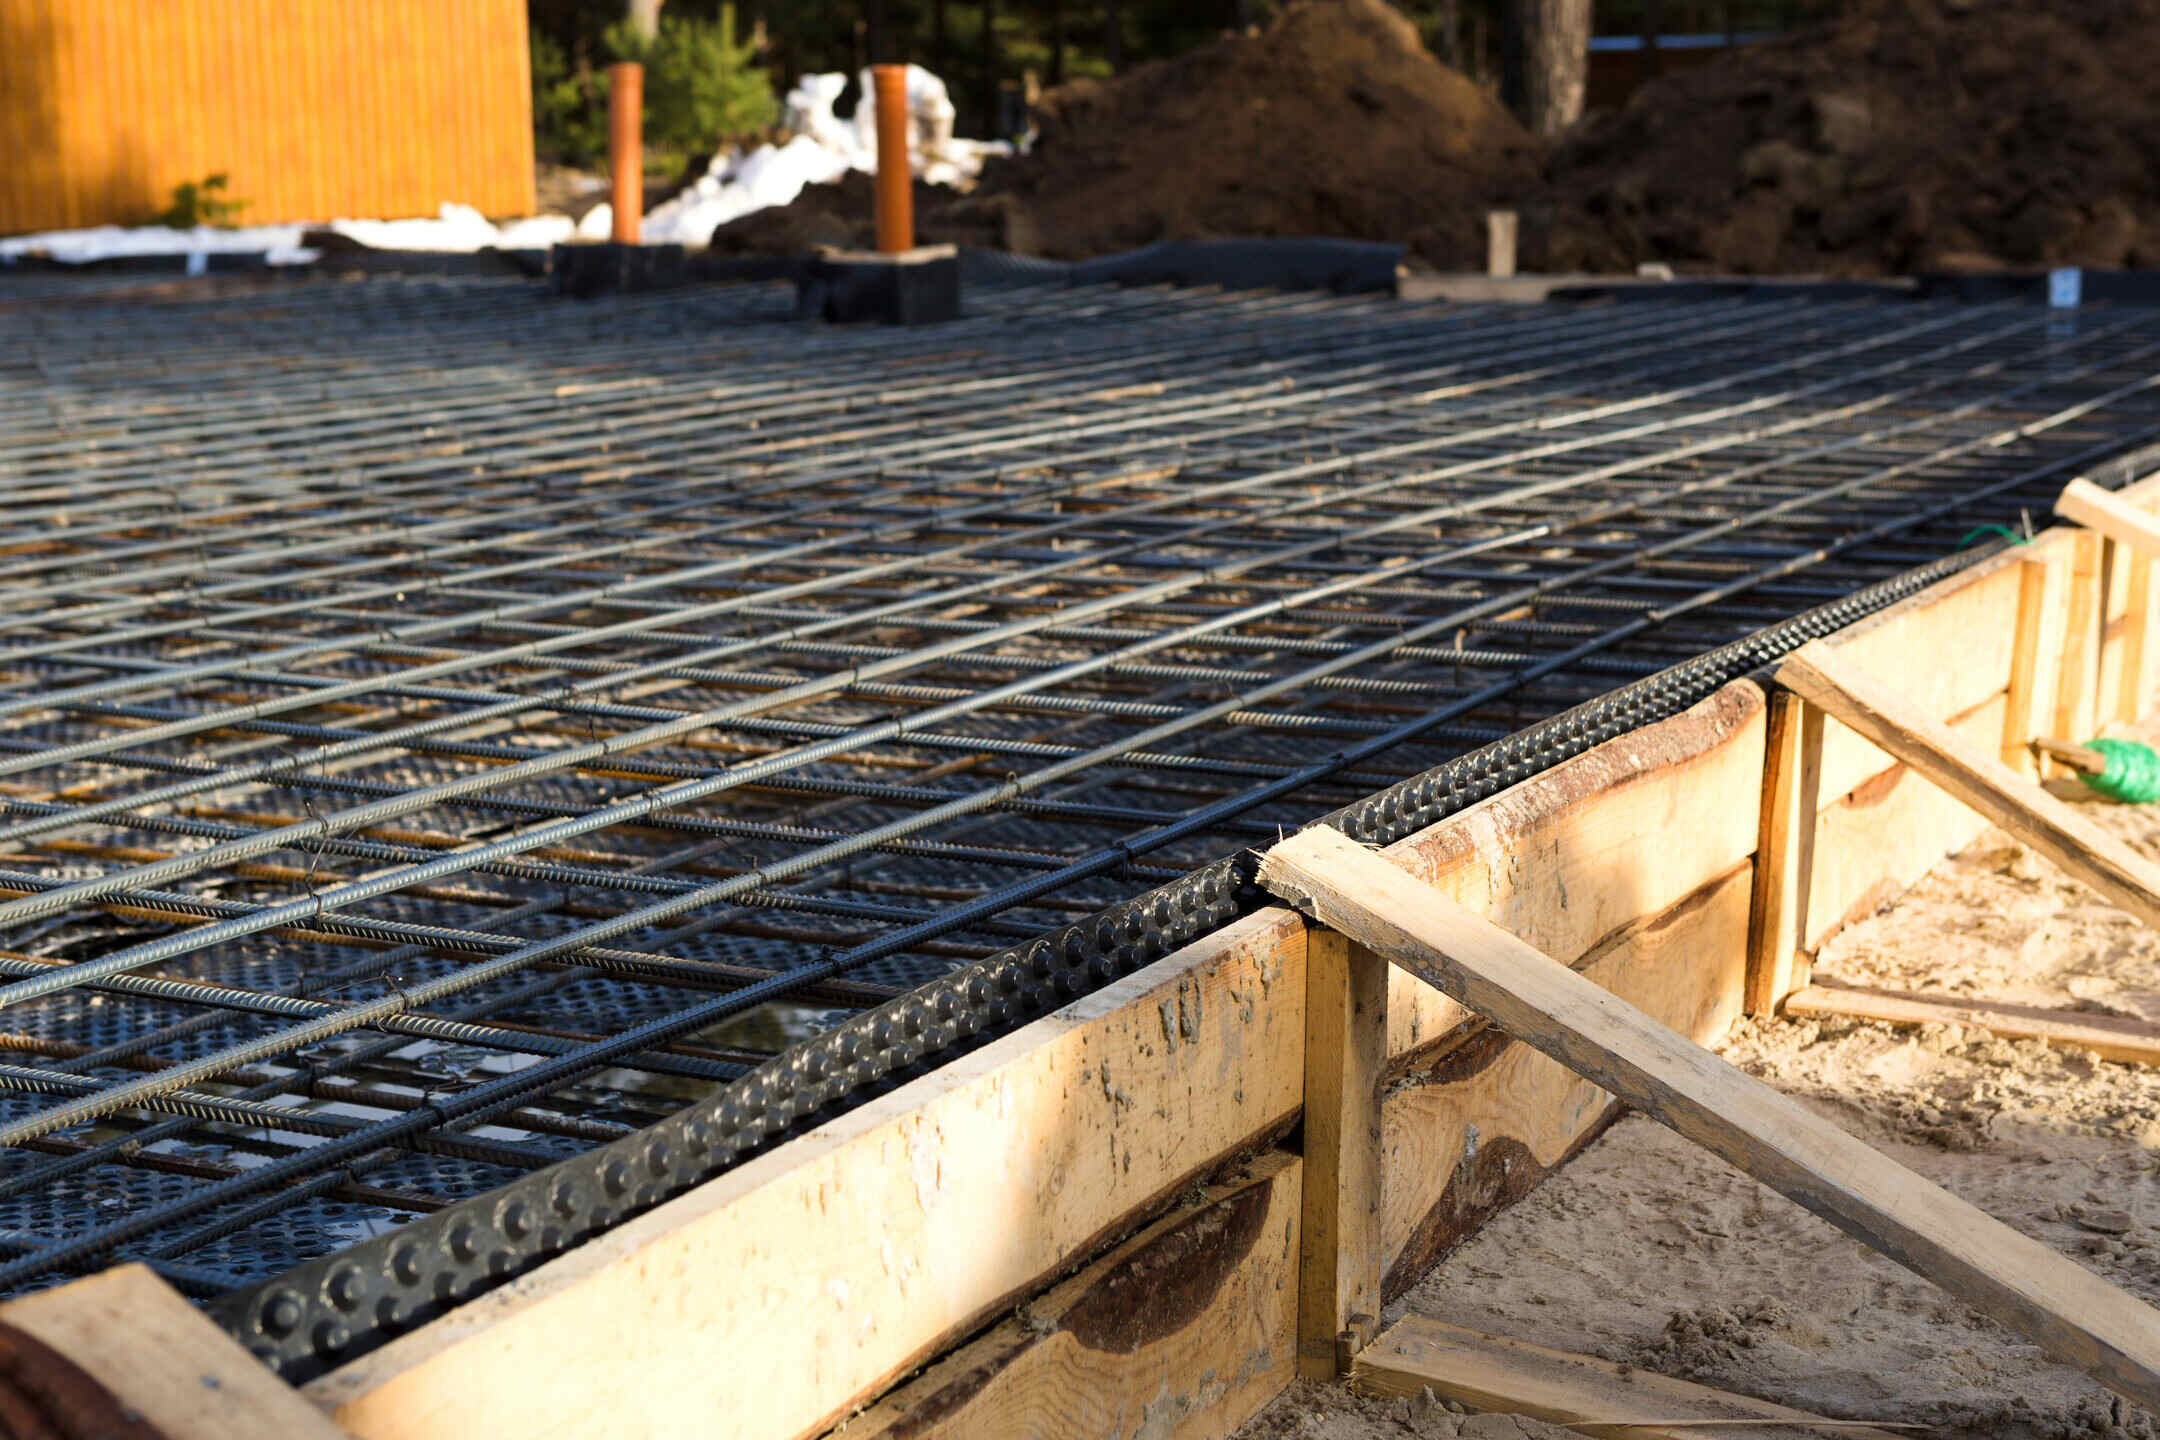
Once the excavation is complete, the foundation can be prepared for pouring. This involves creating forms or molds that will contain the concrete and define the shape and dimensions of the foundation. Forms are typically made from wood, metal, or plastic and are securely placed on the excavated area.
Prior to pouring the concrete, it’s important to ensure proper reinforcement. This includes placing steel rebar or wire mesh within the forms to add strength and stability to the foundation. The reinforcement helps to prevent cracking and ensures the longevity of the structure.
The next step is mixing and pouring the concrete. The concrete is typically mixed on-site or delivered by a concrete truck. It’s important to follow the specific guidelines provided by the concrete supplier to achieve the appropriate consistency and strength.
During the pouring process, skilled workers carefully fill the forms with the concrete mixture. They use tools to ensure that the concrete is evenly distributed and properly compacted. Proper compaction is crucial to eliminate air pockets and ensure a solid foundation.
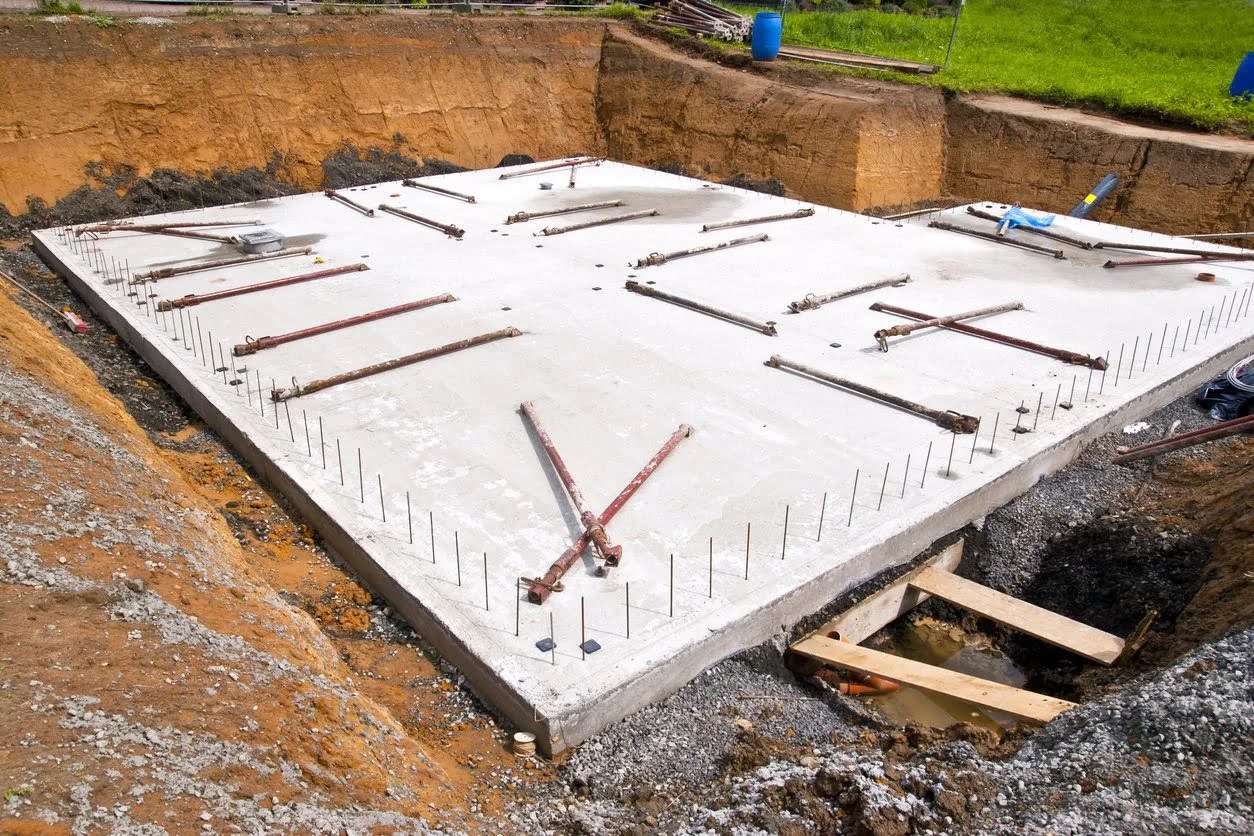
After the concrete has been poured, it undergoes a curing process. This involves allowing the concrete to harden and gain strength over time. It’s important to provide the necessary curing conditions, such as sufficient moisture and temperature control, to promote optimal curing and prevent cracking.
Once the concrete has cured, the forms can be removed, revealing the finished foundation. At this stage, it’s important to inspect the foundation for any defects or imperfections. Any issues should be addressed promptly to maintain the integrity of the structure.
Excavating and pouring the foundation is a critical step that lays the groundwork for your addition. It requires precision, proper planning, and adherence to industry standards. By investing time and attention to this stage, you set the foundation for a successful and stable addition to your property.
Before starting an addition, ensure the existing foundation can support the new structure. Consult a structural engineer to assess the foundation’s capacity and make any necessary reinforcements.
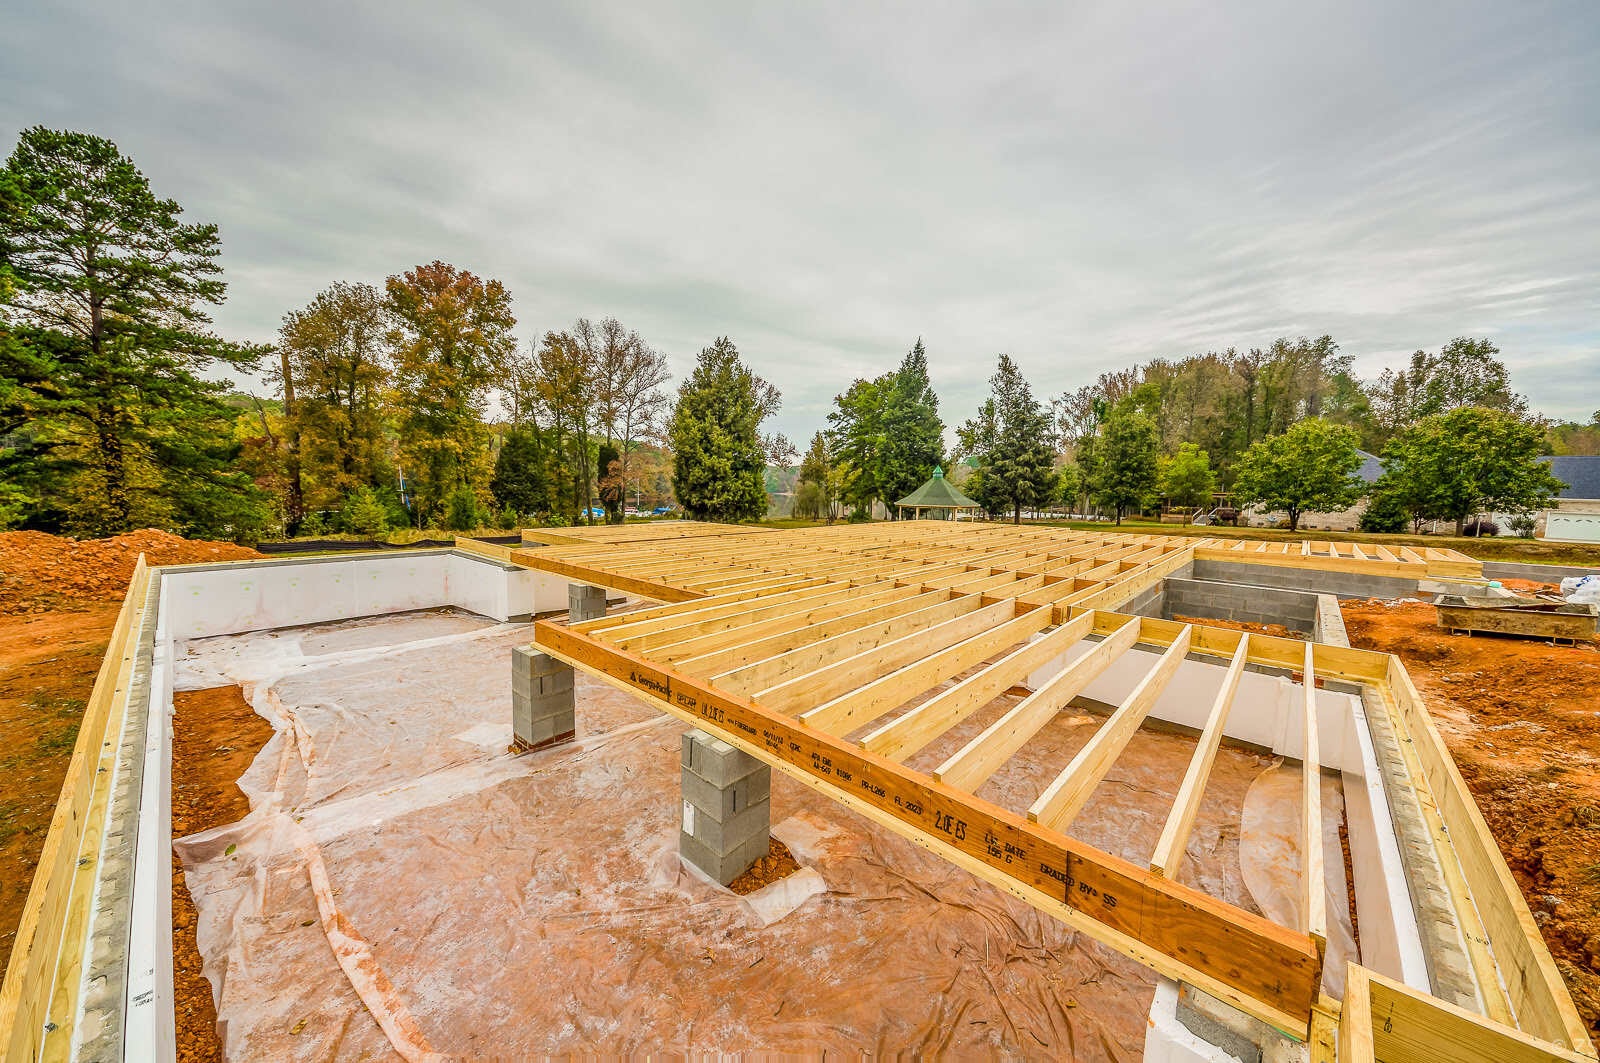
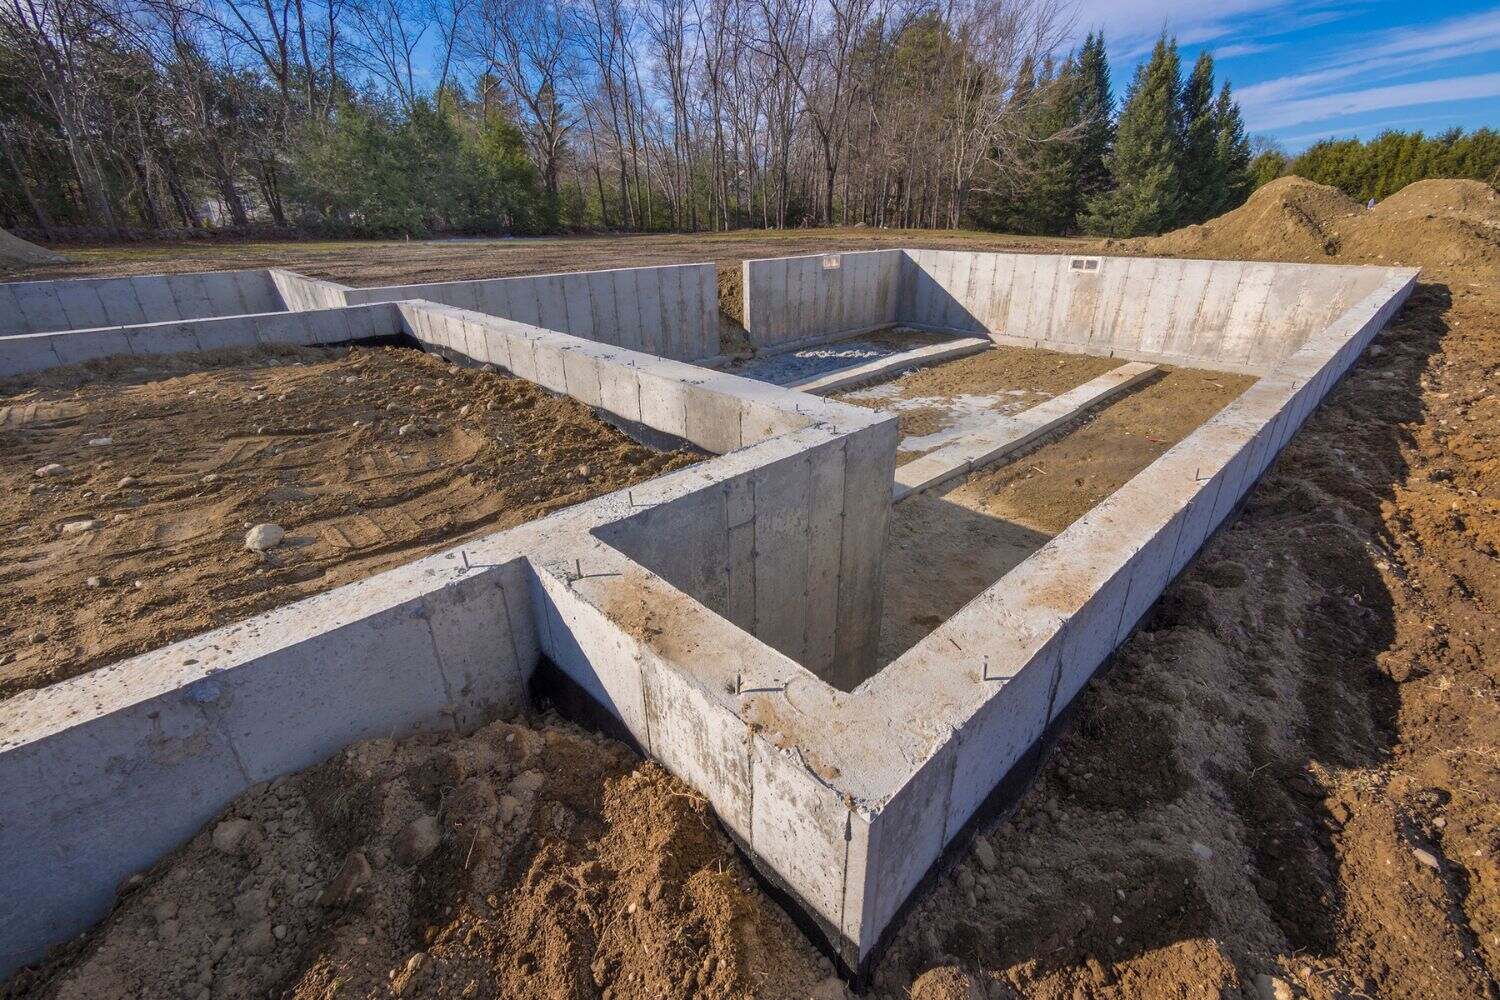
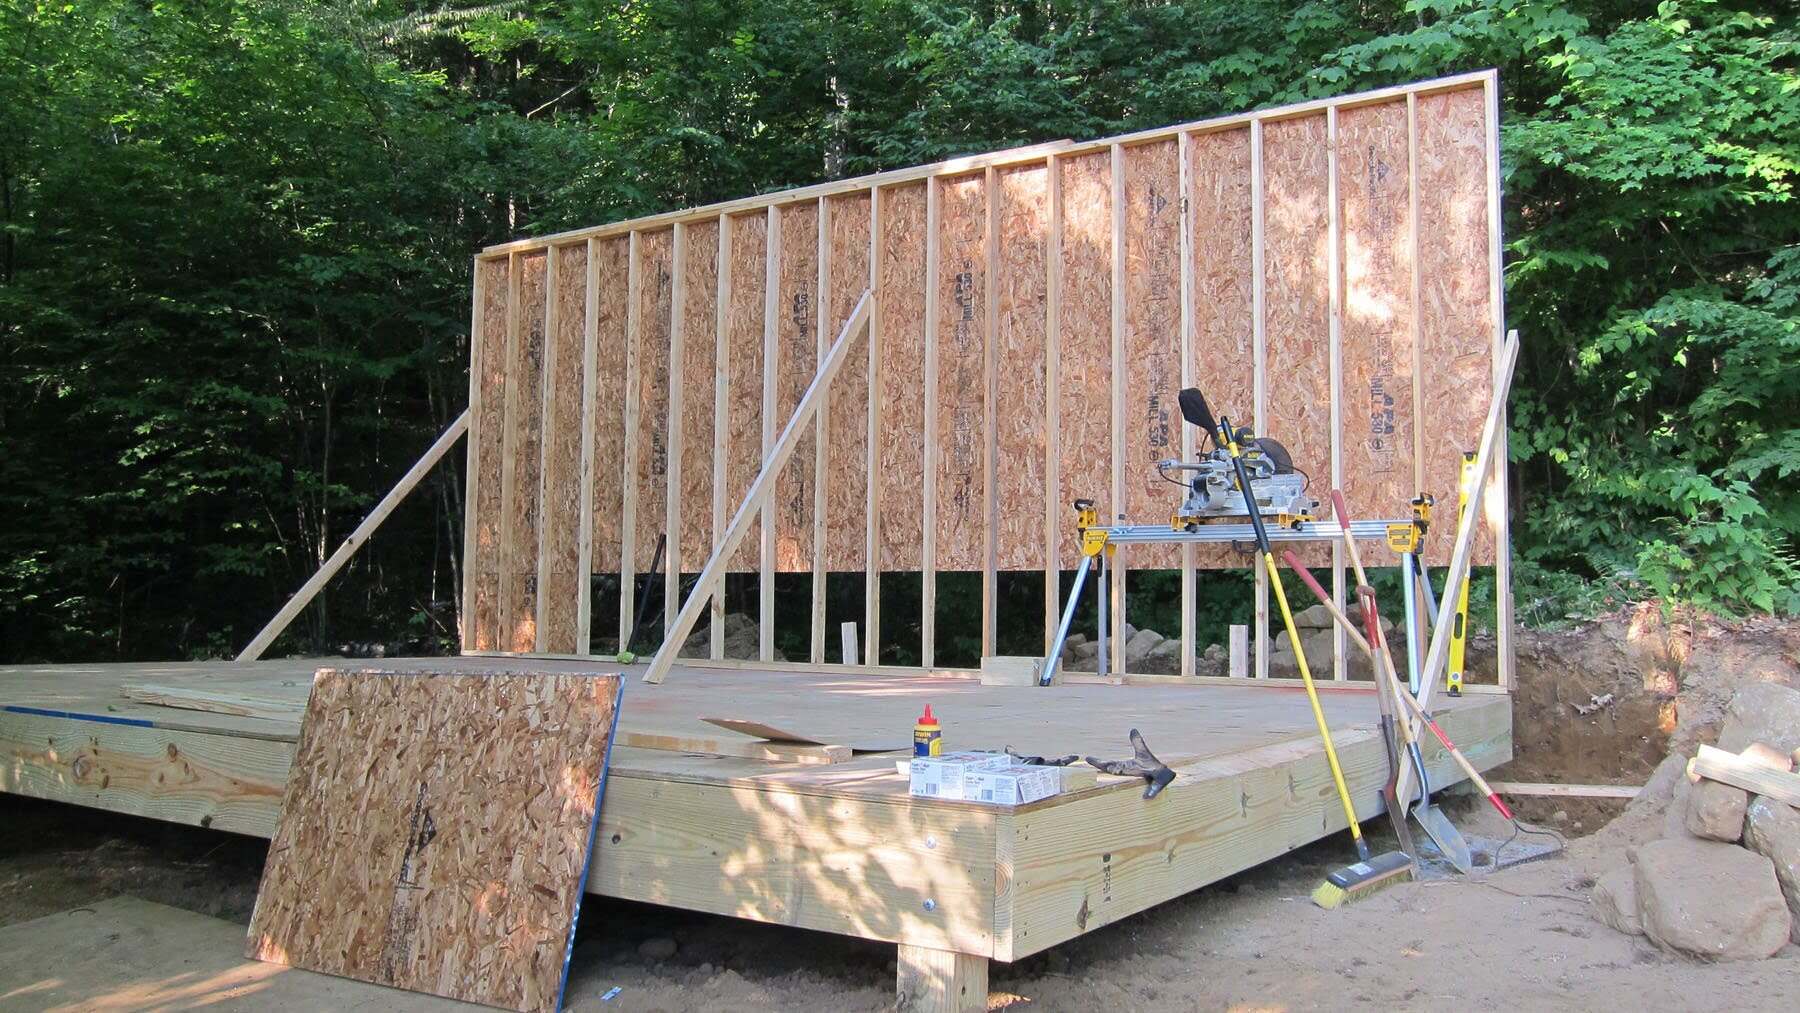
Constructing the Foundation Walls
Once the foundation has been poured and cured, it’s time to move on to the construction of the foundation walls. The foundation walls provide structural support and help create the boundaries of your addition.
The first step in constructing the foundation walls is to prepare the surface. Ensure that the cured foundation is clean, free of any debris or contaminants, and structurally sound. If necessary, any minor imperfections or unevenness should be addressed before proceeding.
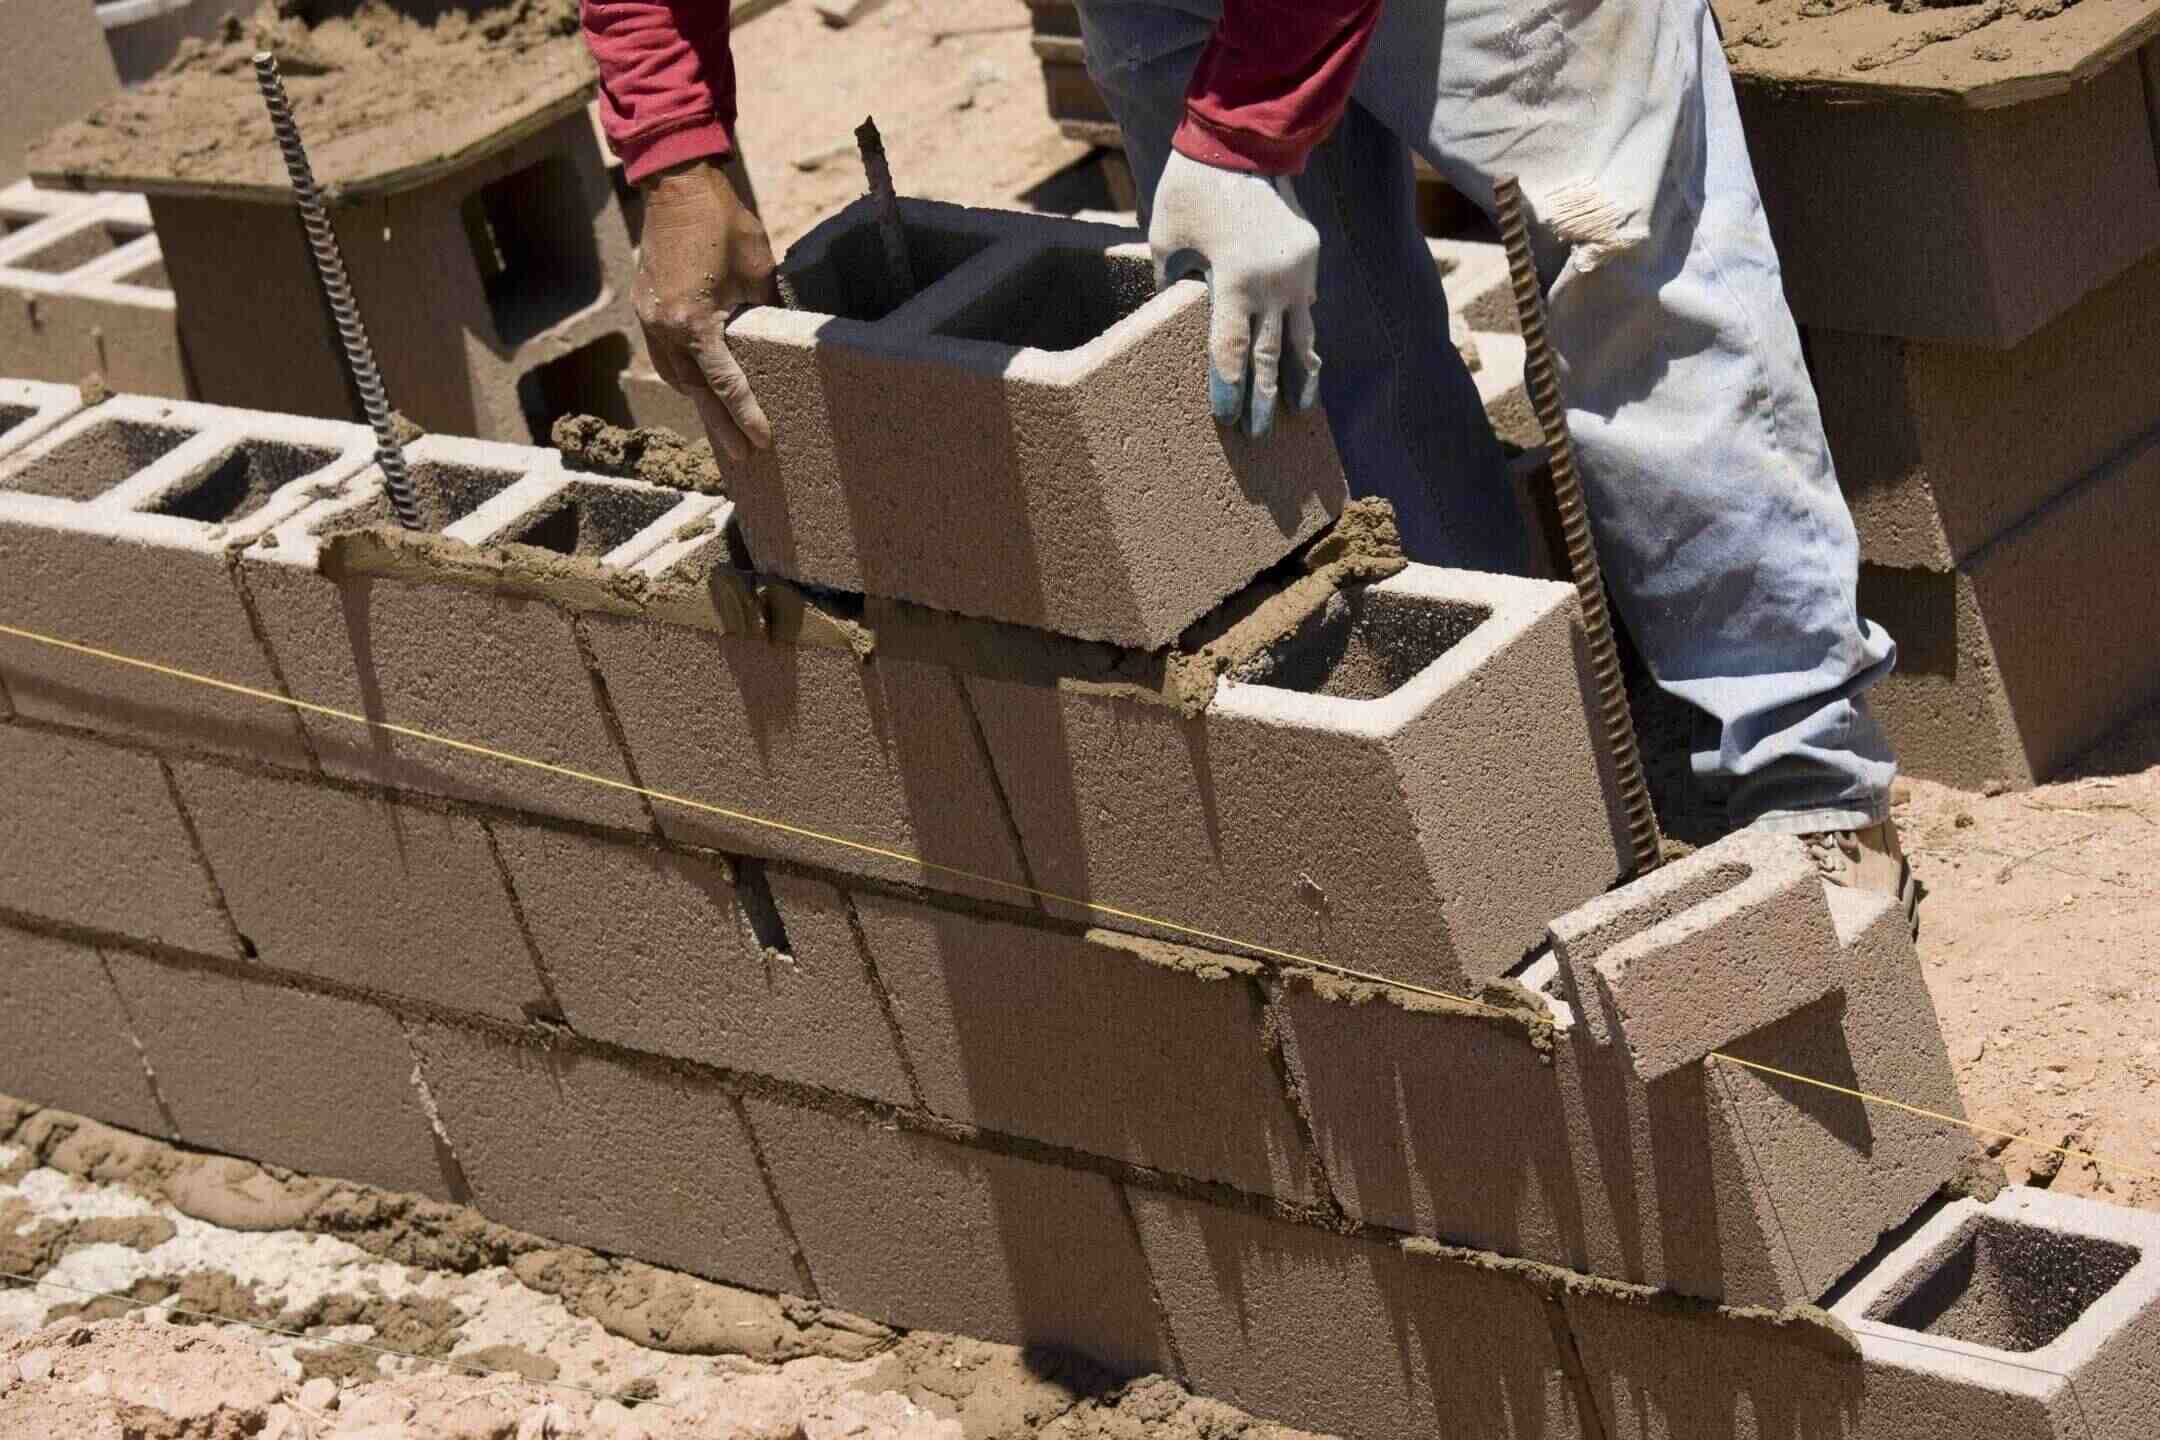
The construction of foundation walls can be done using various materials, such as concrete blocks, poured concrete, or insulated concrete forms (ICFs). The choice of material depends on factors such as design requirements, budget, and local building codes.
If you are using concrete blocks, the walls are constructed by stacking and bonding the blocks using mortar or an adhesive. Each block is carefully placed, leveled, and aligned to ensure a sturdy and straight wall. Reinforcing steel bars may also be integrated within the walls for added strength and stability.
When working with poured concrete, formwork is typically used to create the shape and structure of the walls. Horizontal and vertical formwork is set up, and concrete is poured into the forms. Skilled workers will use tools to smooth the surface and ensure uniformity. As with the foundation, proper curing measures should be followed to promote strength and durability.
Insulated concrete forms (ICFs) are another option for constructing foundation walls. These forms consist of interlocking panels or blocks made of insulating materials, such as foam. The ICF blocks are stacked and filled with concrete, creating a strong and energy-efficient wall system.
Throughout the construction of the foundation walls, it’s crucial to take precautions to maintain proper waterproofing and moisture control. This may include applying a waterproof membrane or coating to the exterior of the walls, ensuring adequate drainage systems, and addressing any potential areas prone to water infiltration.
Once the walls are constructed, it’s important to inspect them for any cracks, voids, or other defects. These should be promptly repaired or addressed, as the foundation walls serve as the backbone of your addition and any structural issues can compromise the integrity of the entire structure.
Constructing the foundation walls requires skilled labor and attention to detail. It’s important to work with experienced professionals who can ensure that the walls are constructed according to the design plans, building codes, and industry best practices.
By constructing solid and properly reinforced foundation walls, you ensure the stability and longevity of your addition. The foundation walls set the stage for the next phases of construction, bringing you one step closer to completing your dream space.
Installing Drainage Systems
When constructing an addition, proper drainage is crucial to prevent water damage and maintain the integrity of the structure. Installing effective drainage systems around and beneath the foundation is an essential step in the construction process.
The purpose of a drainage system is to redirect water away from the foundation, preventing water accumulation that can lead to moisture-related problems such as mold, mildew, and foundation damage. Here are some key considerations for installing drainage systems:
1. Exterior Drainage: One crucial component of a drainage system is the installation of exterior drainage features. This typically includes installing a perimeter drain or French drain system around the foundation. Perforated pipes are placed in a bed of gravel or stone and may be covered with a geotextile fabric to prevent clogging. These pipes collect and redirect excess water away from the foundation, keeping the soil around the foundation dry.
2. Downspout Extensions: Properly extending downspouts away from the foundation is essential to prevent water from pooling near the structure. Downspout extensions should direct water at least 6 feet away from the foundation to ensure adequate drainage. This can be done using flexible extensions or underground pipes to carry water away from the building.
3. Sump Pump Installation: In some cases, especially if the addition is built in an area with a high water table or is prone to flooding, a sump pump may be necessary. A sump pump collects excess water from a pit or sump basin and pumps it away from the foundation. It is vital to ensure that the sump pump is properly installed and regularly maintained to prevent basement flooding and water damage.
4. Grading and Landscaping: Proper grading of the surrounding land is crucial in directing water away from the foundation. The soil should slope away from the building to encourage water runoff. Additionally, landscaping features such as swales or retention ponds can help manage excess water by providing a natural drainage path.
During the installation of drainage systems, it’s important to work with experienced professionals who understand local building codes and have expertise in drainage solutions. They can assess the specific requirements of your property and recommend the most suitable drainage methods.
Regular maintenance of drainage systems is also crucial to ensure their effectiveness. Periodically inspect the system for any clogs, damage, or signs of water accumulation. Clear debris from gutters and downspouts, and keep the drainage paths clear of obstructions to maintain proper water flow.
By installing effective drainage systems, you can protect your addition from water damage and maintain its structural integrity. Proper drainage ensures that water is safely diverted away from the foundation, providing a dry and stable environment for many years to come.
Waterproofing the Foundation
Waterproofing the foundation is a crucial step in protecting your addition from water intrusion and potential damage. A properly waterproofed foundation prevents water from seeping through the walls, protecting the integrity of the structure and ensuring a dry and comfortable living space.
There are several methods and products available for waterproofing foundations. Here are some key considerations:
1. Exterior Waterproofing: Exterior waterproofing involves applying a waterproof membrane or coating to the exterior surface of the foundation walls. This barrier creates a protective layer that prevents water from penetrating the walls. It’s essential to apply the waterproofing material according to the manufacturer’s instructions and to ensure that all areas of the foundation are covered.
2. Interior Waterproofing: Interior waterproofing is another method to protect the foundation from water intrusion. This typically involves the installation of a drainage system on the interior side of the foundation walls. This system collects any water that may penetrate the walls and redirects it to a sump pump or drainage system to be safely pumped out.
3. Foundation Sealants: Foundation sealants, such as silicone or polyurethane-based sealants, can be applied to fill any cracks or gaps in the foundation walls. These sealants create a watertight barrier, preventing water from seeping through. It’s important to thoroughly clean and prepare the surface before applying the sealant for optimal adhesion.
4. Proper Drainage: In addition to waterproofing the foundation walls, it’s crucial to ensure proper drainage around the perimeter of the foundation. This includes installing or maintaining a well-designed exterior drainage system, as mentioned earlier. Adequate slope and grading of the surrounding landscape are also important to direct water away from the foundation and prevent pooling or water accumulation near the structure.
5. Professional Installation: It’s recommended to hire experienced professionals for waterproofing the foundation. They have the knowledge and expertise to assess the specific needs of your property and recommend the best waterproofing methods and products. Professional installation ensures that the job is done correctly and effectively, minimizing the risk of water damage in the future.
Regular inspection and maintenance are essential to ensure the ongoing effectiveness of the foundation waterproofing. Periodically check for any signs of water seepage, cracks, or deterioration in the waterproofing materials. Address any issues promptly to prevent further damage and ensure that your foundation remains protected.
Waterproofing the foundation is a crucial investment in the longevity and durability of your addition. By implementing proper waterproofing measures, you create a safe and dry living environment, protecting your investment for years to come.
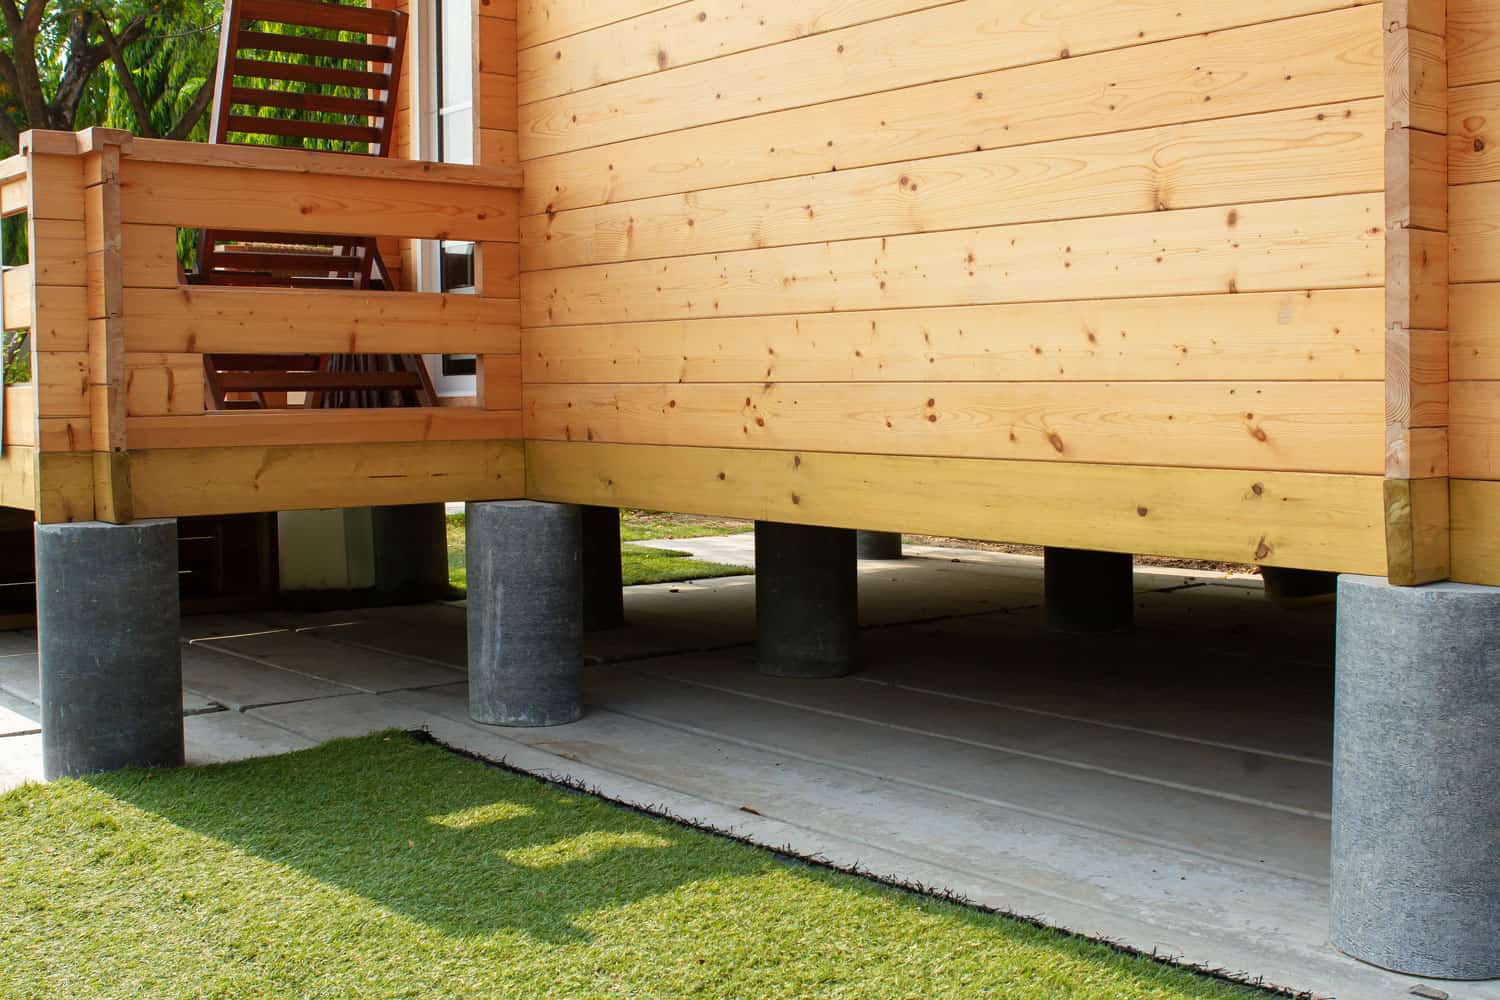
Read more: How To Build A Deck Foundation
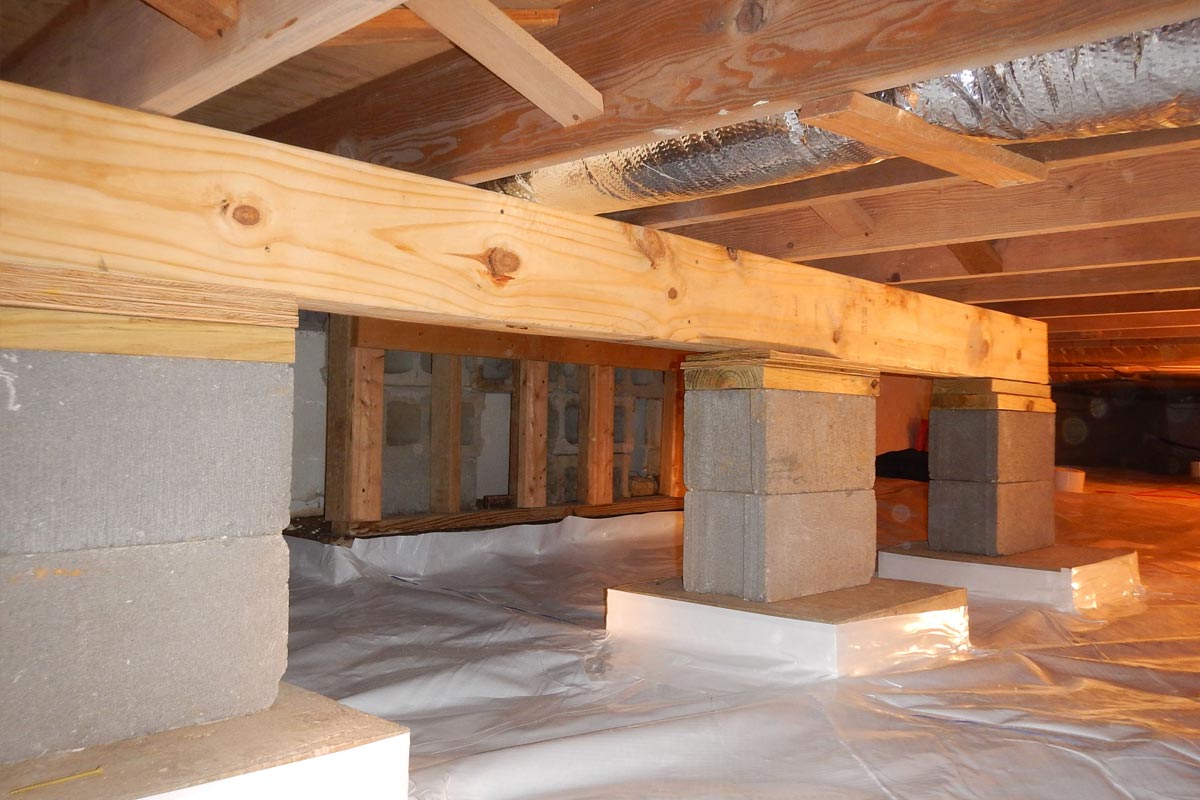
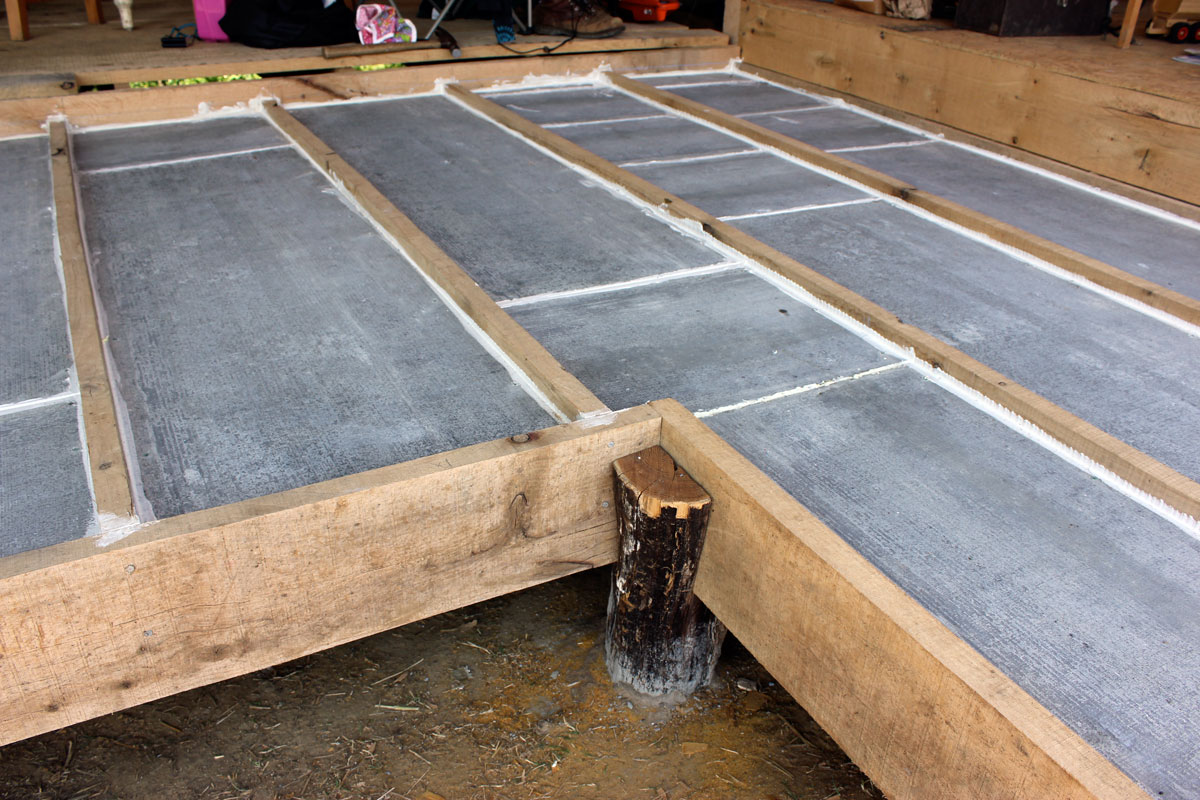
Backfilling and Compacting Soil
After the foundation walls have been constructed and waterproofing measures are in place, the next step in the construction process of your addition is backfilling and compacting the soil around the foundation. This process involves filling the space between the foundation walls and the excavated area, followed by compaction to ensure stable ground support.
The first step in backfilling is to carefully remove any temporary supports or bracing from the foundation walls. These supports were necessary during the construction phase but are no longer needed once the walls are fully hardened and cured.
The backfill material used should be suitable for the purpose and meet local building code requirements. Clean gravel or crushed stone is commonly used as backfill due to its excellent drainage properties and stability. The backfill material should be free of organic matter, debris, and large rocks that could create voids or instability.
The backfilling process starts by adding the backfill material in layers around the foundation walls. Each layer should be compacted using appropriate compaction equipment, such as a vibratory plate compactor or a smooth drum roller. Compact the backfill material in small lifts, typically around 6 inches at a time, ensuring even distribution and thorough compaction.
Compaction is crucial to eliminate air pockets, increase density, and provide adequate support for the foundation. Proper compaction ensures that the soil is stable and reduces the risk of settlement or shifting, which can cause structural issues in the future.
Pay attention to the backfilling process near the foundation walls. Take care to avoid excessive pressure against the walls, as this can cause stress and potential damage. Use appropriate equipment and techniques to minimize any potential impact on the integrity of the foundation walls.
It’s important to consider the proper grading and slope of the backfilled soil. The grading should promote water drainage away from the foundation. The slope of the surrounding ground should ideally be away from the structure to prevent water from pooling against the foundation walls.
After the backfilling and compaction process is complete, it’s essential to inspect the surrounding area for any signs of settling or shifting. Monitor the backfilled soil periodically, especially during the first few months, to ensure that it remains stable and evenly compacted. Fill in any settling areas with additional backfill material as needed.
Backfilling and compacting the soil around the foundation is a critical step in completing the construction of your addition. Proper backfilling provides stability and support to the foundation, ensuring the long-term integrity of the structure. By following the necessary steps and guidelines, you can create a solid foundation for your addition and enjoy a safe and durable living space.
Conclusion
Congratulations! You have reached the end of this comprehensive guide on building a foundation for an addition. Constructing a solid foundation is a crucial step in the construction process, laying the groundwork for a successful and enduring addition to your property.
Throughout this article, we have covered various aspects, from assessing the feasibility of your project to obtaining permits, creating a design plan, and executing the construction phases. Each step is vital in ensuring that your addition is structurally sound, aesthetically pleasing, and meets all regulatory requirements.
We discussed the importance of determining the feasibility of an addition, considering factors such as available space, property support, and financial feasibility. Assessing building regulations and obtaining the necessary permits is crucial to ensure compliance and avoid legal or financial consequences.
Creating a detailed design plan that aligns with your needs, preferences, and the existing architecture of your home is essential for a successful addition. Properly preparing the construction site, excavating and pouring the foundation, and constructing the foundation walls are critical stages that lay the foundation for your project.
We also covered the installation of drainage systems, which are vital for redirecting water away from the foundation. Waterproofing the foundation ensures protection against water intrusion, helping to maintain the structural integrity of your addition.
Lastly, we discussed the backfilling and compaction of soil, which ensures stable ground support around the foundation. This step is crucial for avoiding settlement or shifting of the structure in the future.
As you embark on your own addition project, we encourage you to consult with professionals, such as architects, designers, contractors, and structural engineers. Their expertise and guidance will contribute to the success of your project and help you navigate through any challenges that may arise along the way.
Remember, constructing a foundation for an addition is an intricate process that requires thorough planning, attention to detail, and adherence to building codes and regulations. By investing time, effort, and resources into building a solid foundation, you are setting the stage for a beautiful and long-lasting addition to your home.
Good luck with your project, and enjoy the process of creating a space that brings your vision to life!
Frequently Asked Questions about How To Build A Foundation For An Addition
Was this page helpful?
At Storables.com, we guarantee accurate and reliable information. Our content, validated by Expert Board Contributors, is crafted following stringent Editorial Policies. We're committed to providing you with well-researched, expert-backed insights for all your informational needs.

0 thoughts on “How To Build A Foundation For An Addition”