Home>diy>Building & Construction>How To Build A Raised Foundation
Building & Construction
How To Build A Raised Foundation
Modified: October 31, 2024
Learn the steps and techniques for building a raised foundation in this comprehensive guide. From site preparation to construction, discover the best practices for building construction.
(Many of the links in this article redirect to a specific reviewed product. Your purchase of these products through affiliate links helps to generate commission for Storables.com, at no extra cost. Learn more)
Introduction
Building a raised foundation is an essential step in constructing a sturdy and durable structure. Whether you are building a home, a shed, or any other building, a solid foundation is crucial for its stability and longevity. In this article, we will guide you through the process of building a raised foundation, covering everything from site preparation to finishing touches.
Having a raised foundation has several advantages. It provides elevation, protecting your structure from moisture and potential water damage. It also allows for better ventilation and insulation, which can result in energy efficiency. Additionally, a raised foundation provides a stable base for your building, ensuring it can withstand the test of time.
Before we dive into the step-by-step process, let’s discuss the materials and tools you’ll need for building a raised foundation. These include:
– Concrete blocks or bricks: These will serve as the building blocks for your foundation walls.
– Rebar: Used to reinforce the foundation walls and increase their strength.
– Mortar mix: This is used to bond the concrete blocks together.
– Floor joists: These are horizontal beams that support the floor of your building.
– Subflooring material: Typically plywood or oriented strand board (OSB) that sits on top of the floor joists.
– Insulation and moisture barrier: These help regulate temperature and prevent moisture from entering the structure.
– Various tools: Including a measuring tape, level, circular saw, hammer, drill, and safety equipment like gloves and goggles.
Now that you have an idea of the materials and tools needed, let’s move on to the step-by-step process of building a raised foundation.
Key Takeaways:
- Building a raised foundation requires meticulous site preparation, precise block laying, and careful wall construction. Attention to detail, adherence to building codes, and proper insulation and moisture barrier installation are essential for a sturdy and durable foundation.
- The finishing touches, such as floor sheathing, air sealing, and pest prevention, are crucial for the long-term integrity of a raised foundation. Regular maintenance, compliance with regulations, and professional consultation contribute to a successful construction project.
Read more: How To Build A Deck Foundation
Materials and Tools Needed
Before embarking on the project of building a raised foundation, it’s important to gather all the necessary materials and tools. Having everything prepared ahead of time will make the construction process smoother and more efficient. Here are the materials and tools you will need:
1. Concrete blocks or bricks: These will serve as the primary building blocks for your foundation walls. Choose high-quality blocks that are designed for structural use.
2. Rebar: Reinforcing bars, commonly known as rebar, are essential for strengthening the foundation walls. The rebar should be cut into appropriate lengths and placed within the mortar joints to add extra support.
3. Mortar mix: Mortar is used to bind the concrete blocks together and create a strong foundation structure. It is crucial to choose a mortar mix that is suitable for structural applications.
4. Floor joists: Floor joists provide support for the flooring of your building. These beams run parallel to each other and are spaced at regular intervals. The size and spacing of the joists will depend on the specific requirements of your building.
5. Subflooring material: The subfloor sits on top of the floor joists and provides a solid base for the finished flooring. Common subfloor materials include plywood or oriented strand board (OSB). Ensure that the subfloor material is sturdy and of adequate thickness to support the anticipated load.
6. Insulation and moisture barrier: Insulation helps regulate the temperature inside your building, improving energy efficiency. A moisture barrier prevents moisture from seeping into the structure, protecting it from potential damage. Consider using insulation and a moisture barrier specifically designed for subfloor applications.
7. Measuring tape and level: Accurate measurements are crucial for ensuring the alignment and levelness of the foundation walls and floor joists. A measuring tape and level will be essential tools for this task.
8. Circular saw: A circular saw is necessary for cutting the concrete blocks or bricks to the desired lengths. It is essential to have a sharp and properly functioning saw for clean cuts.
9. Hammer and drill: These tools will be needed for tasks such as driving nails, securing the floor joists, and drilling holes for anchor bolts if required.
10. Safety equipment: Safety should always be a priority during any construction project. It is essential to have protective gear such as gloves, goggles, and sturdy footwear to ensure personal safety.
Now that you have a comprehensive list of the materials and tools needed, you are ready to move on to the next step: site preparation. Ensure that you have all the necessary items before beginning construction to avoid any delays or interruptions in the process.
Step 1: Site Preparation
Before you start building the raised foundation, proper site preparation is crucial for the success of your project. Here are the steps involved in site preparation:
1. Clear the area: Remove any vegetation, debris, or obstructions from the site where the raised foundation will be constructed. This includes rocks, roots, and any other objects that could interfere with the foundation’s stability.
2. Level the ground: Ensure that the ground is level and even. Use a shovel, rake, or a compacting machine to remove any high spots and fill in any depressions. A level surface is essential to ensure the stability and uniformity of the foundation.
3. Mark the foundation boundaries: Use stakes and string to mark the boundaries of the raised foundation. This will provide a visual guide for the layout of the foundation walls and help you ensure accurate dimensions.
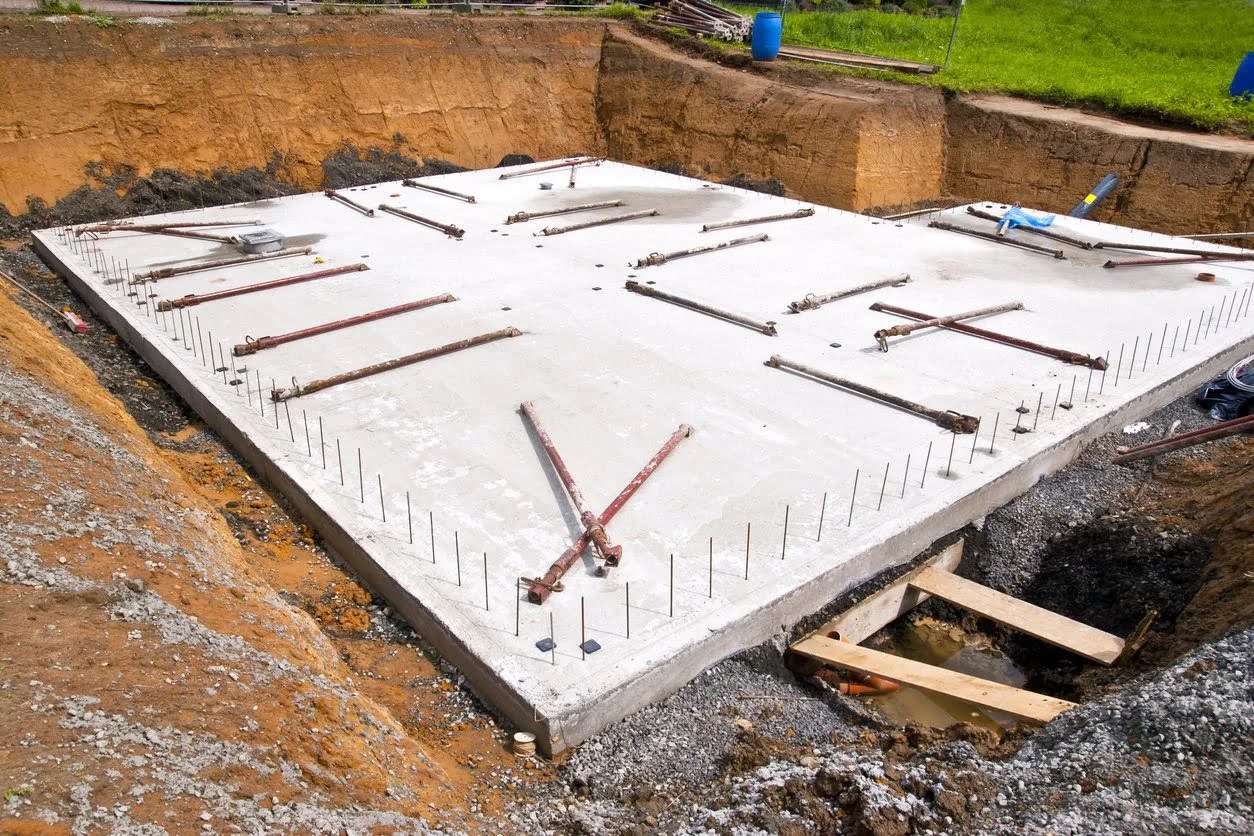
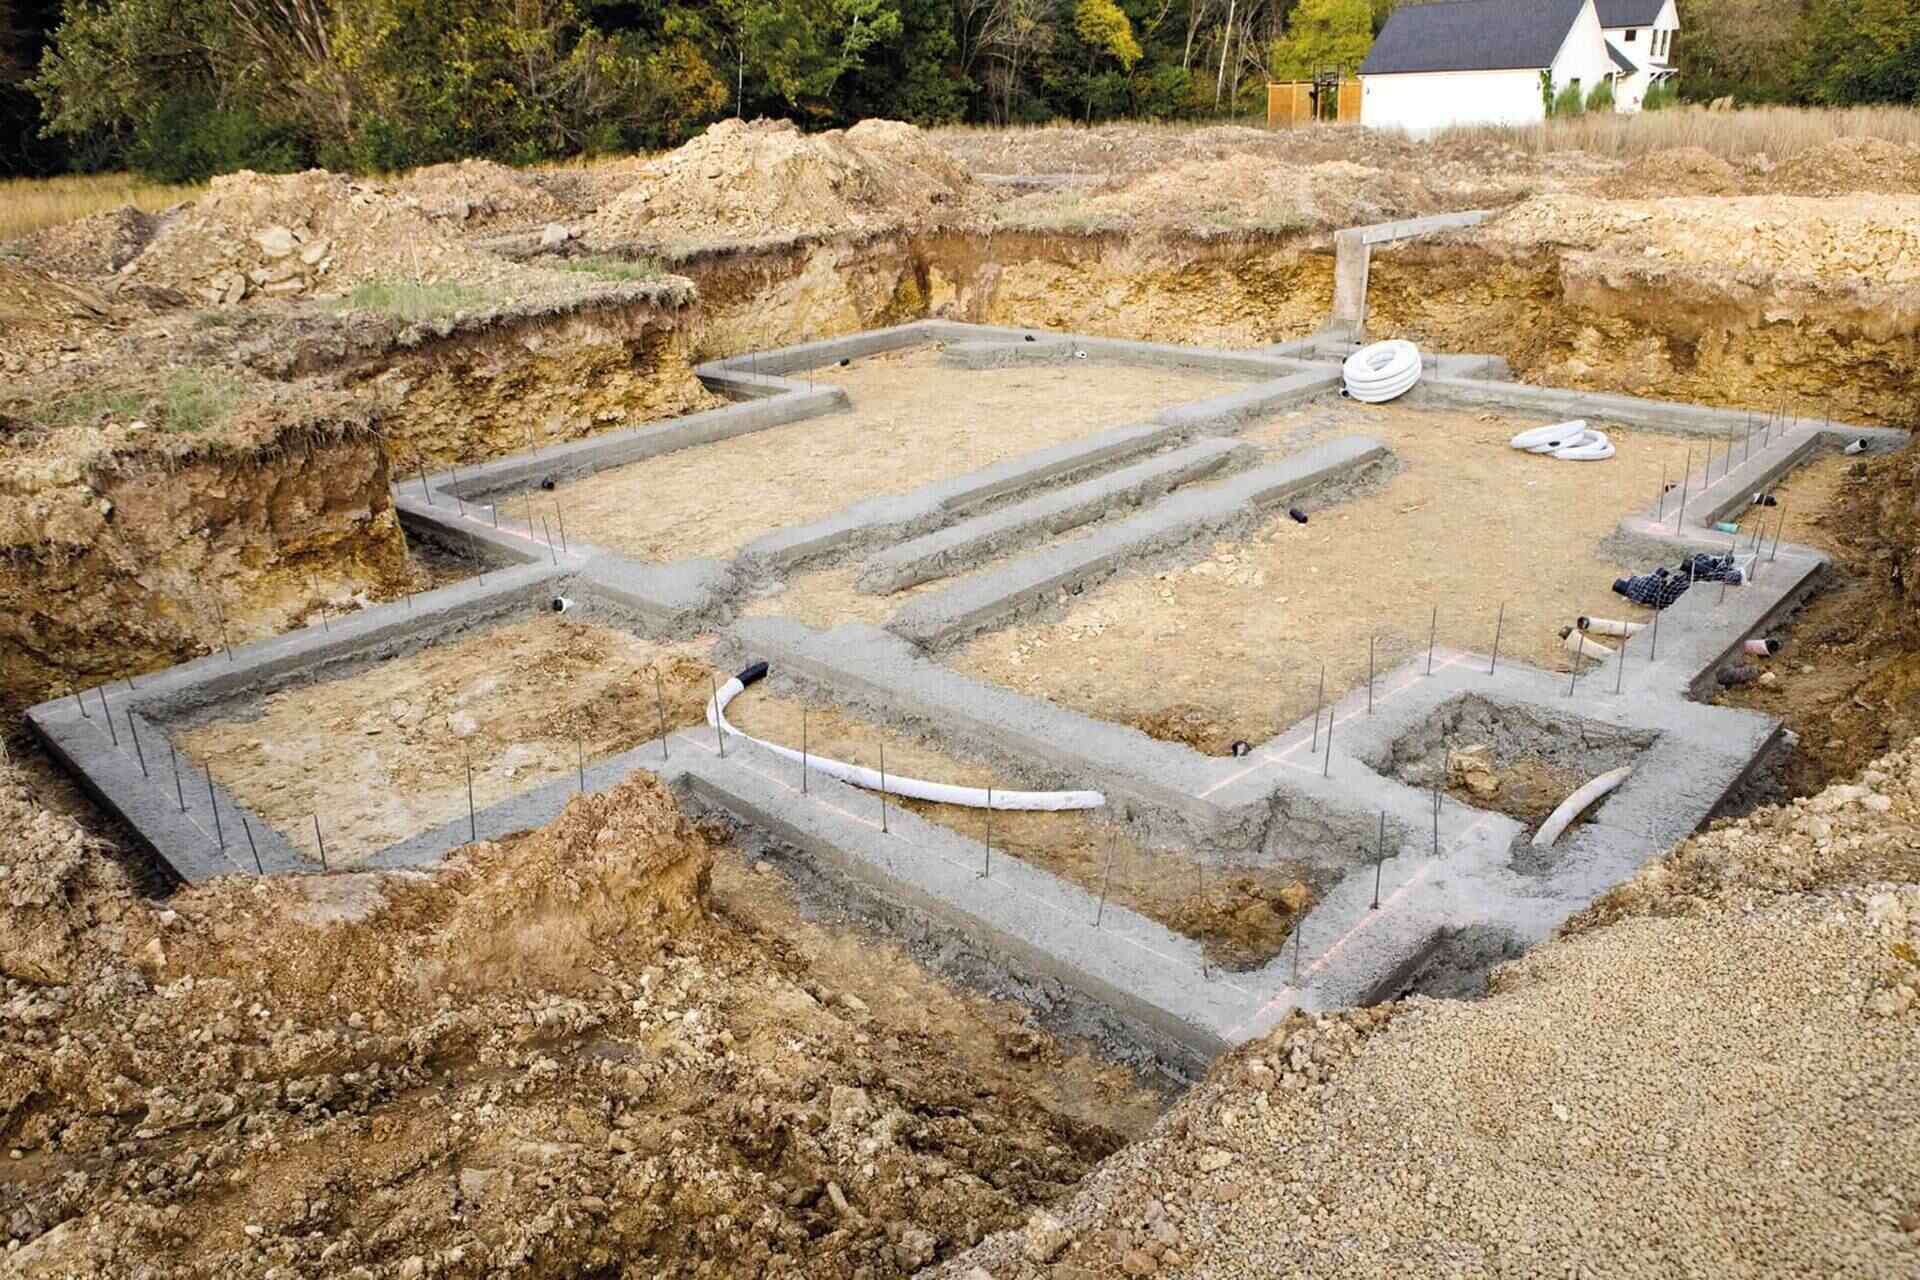
4. Excavation: Dig a trench along the marked boundaries, typically around 12 inches deep and wider than the width of the concrete blocks or bricks you are using. The depth may vary depending on the specific requirements of your building plans and local building codes.
5. Compact the soil: Once the trench is excavated, use a compactor or tamper to compact the soil at the bottom of the trench. This will provide a solid base for the foundation walls and help prevent future settling.
6. Install a layer of gravel: For added stability and drainage, it is recommended to lay a layer of crushed gravel at the bottom of the trench. This will help with water drainage and prevent the soil from shifting over time.
7. Building permits and inspections: Before proceeding, check with your local building department to ensure you have the necessary permits for construction. It is important to schedule any required inspections to ensure compliance with building codes.
By properly preparing the site, you are setting a solid foundation for the construction process. Taking the time to clear the area, level the ground, mark boundaries, excavate trenches, compact the soil, and install a layer of gravel will ensure that your raised foundation is built on a stable and secure base. Once the site preparation is complete, you can move on to the next step: laying the foundation blocks.
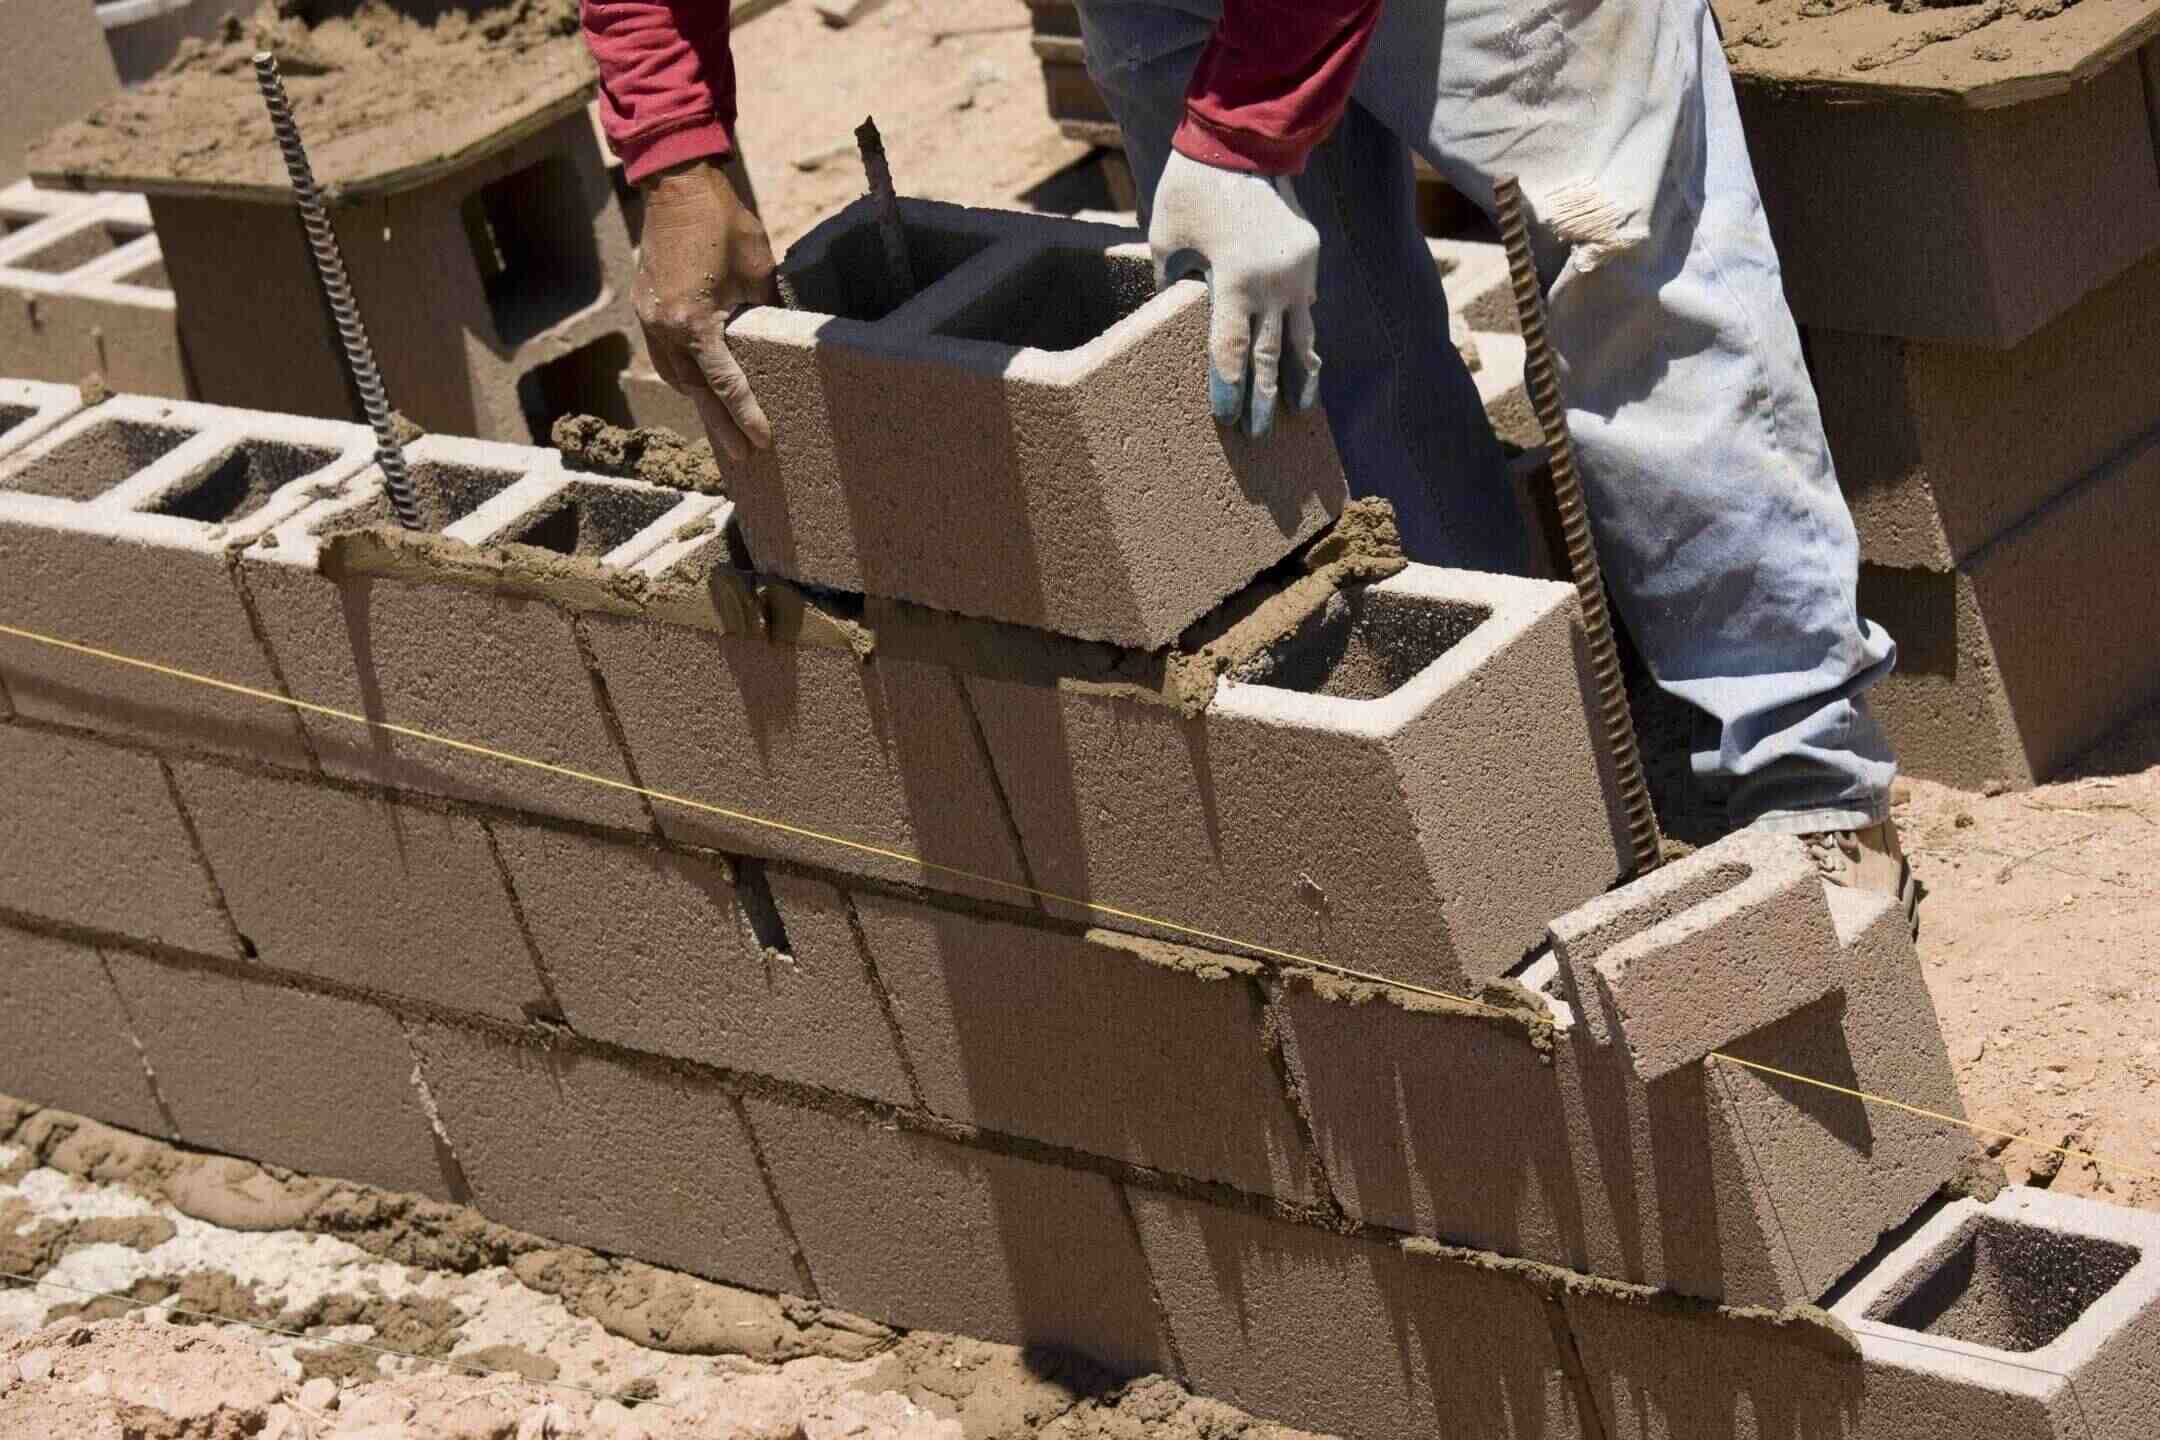
Step 2: Laying the Foundation Blocks
Now that the site has been properly prepared, it’s time to start building the foundation walls by laying the concrete blocks or bricks. Follow these steps to ensure a sturdy and even foundation:
1. Mix the mortar: Prepare the mortar mix according to the manufacturer’s instructions. Use a mixing container and a trowel to mix the dry mortar with water until you achieve a smooth and workable consistency.
2. Start at a corner: Begin laying the foundation blocks at one corner of the trench. Apply a layer of mortar to the bottom of the trench, ensuring it covers the width of the block.
3. Position the first block: Place the first block into the trench, pressing it firmly into the mortar. Use a level to ensure that the block is level both horizontally and vertically.
4. Add mortar for subsequent blocks: Apply mortar to the side of the first block where the next block will be placed. Ensure that the mortar is evenly spread and covers the entire surface area where the blocks will meet.
5. Stack subsequent blocks: Place the next block on top of the first block, aligning it with the guidelines marked on the ground. Press it firmly into the mortar, making sure it is level and flush with the previous block.
6. Continue laying blocks: Repeat the process of adding mortar and stacking blocks, working your way along the foundation walls. Use a trowel to smooth excess mortar and maintain even joints between the blocks.
7. Check alignment and levelness: Periodically check the alignment and levelness of the blocks using a level. Adjust as necessary to ensure that the walls are straight and plumb.
8. Install rebar for reinforcement: As you lay each course of blocks, insert pieces of rebar vertically into the mortar joints at regular intervals. This will help strengthen the foundation walls.
9. Fill mortar gaps: Once all the blocks are laid, fill any gaps between the blocks with additional mortar. Use a pointing trowel to carefully apply the mortar, ensuring a neat and uniform look.
10. Allow the mortar to cure: Give the mortar sufficient time to cure and harden before proceeding to the next step. Follow the manufacturer’s instructions for the recommended curing time.
By following these steps, you can ensure that your foundation blocks are securely placed and properly aligned. Taking the time to lay the blocks accurately will create a strong and stable foundation for your raised structure. Once the blocks are in place, you can proceed to the next step: building the raised foundation walls.
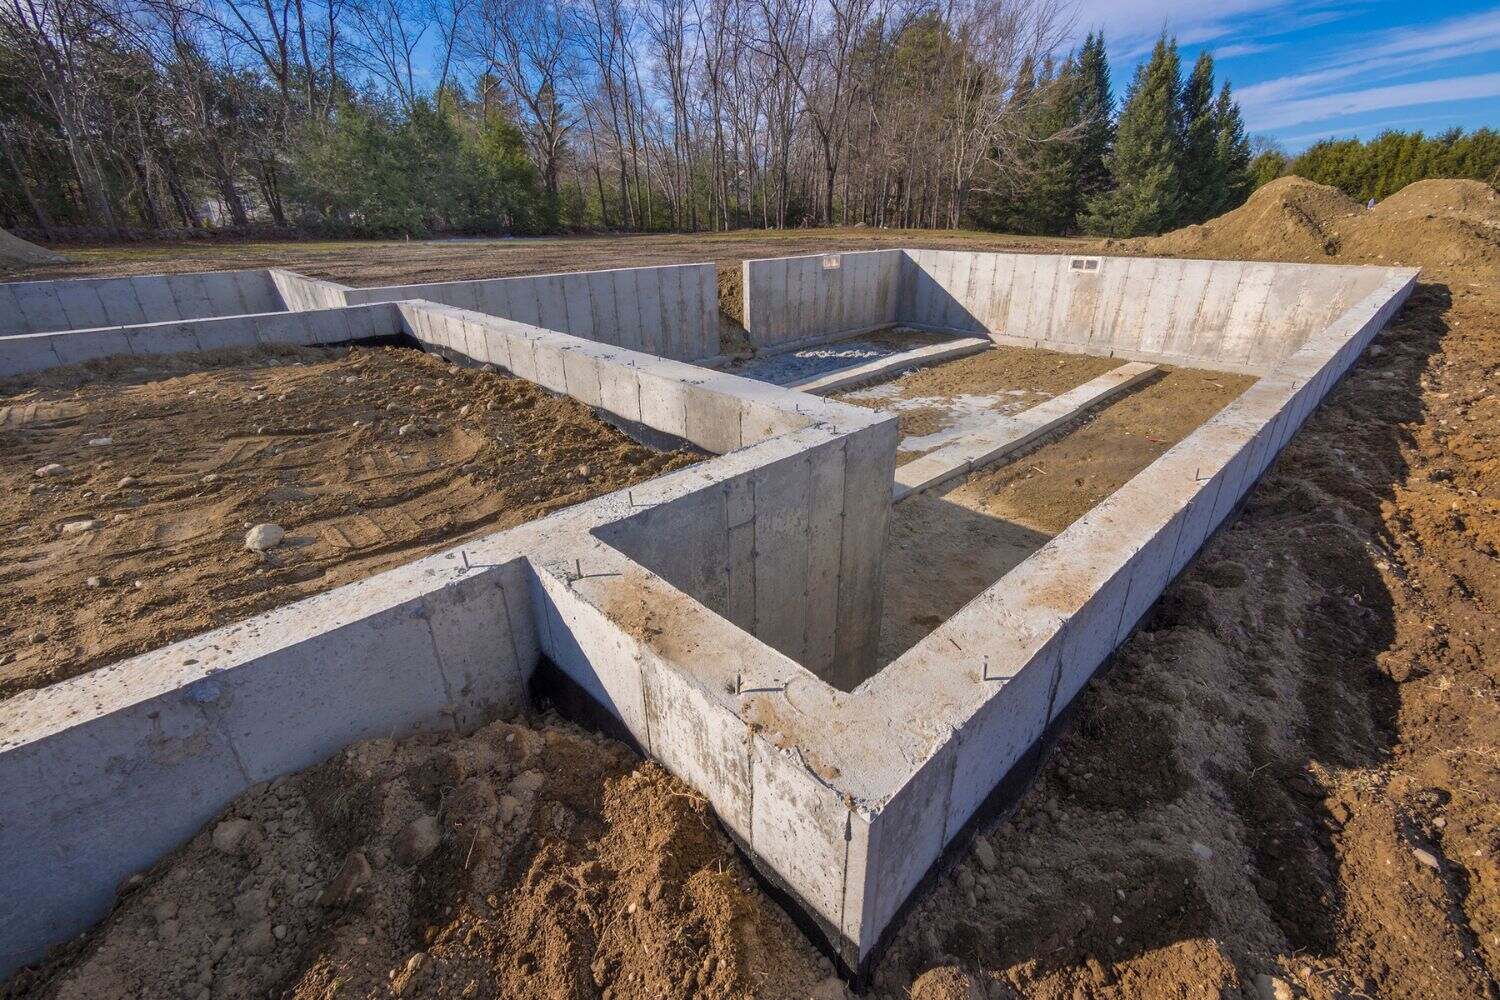
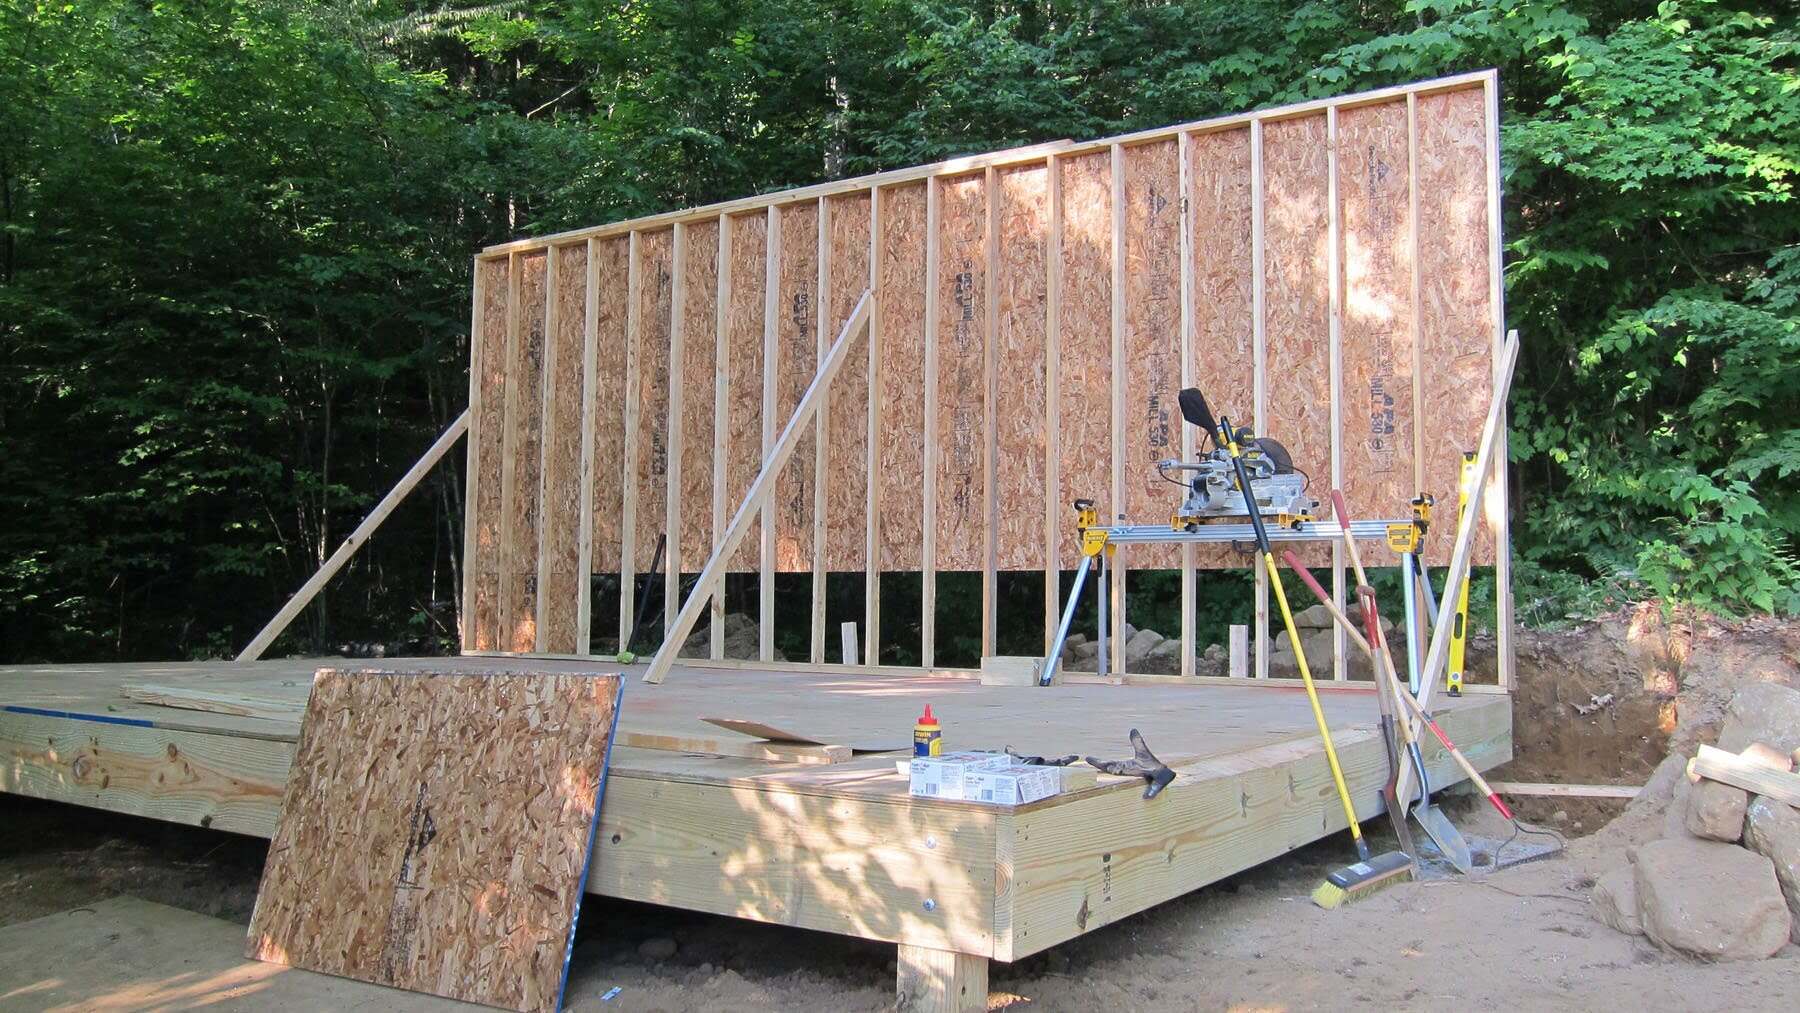
Step 3: Building the Raised Foundation Walls
With the foundation blocks in place, it’s time to build the raised foundation walls. These walls provide the structure and support for the building above. Follow these steps to construct the walls for your raised foundation:
1. Prepare the mortar: Mix the mortar according to the manufacturer’s instructions. Ensure the mortar has the correct consistency for building the walls. It should be thick enough to hold its shape but also spreadable.
2. Lay the first course: Apply a layer of mortar along the top surface of the foundation blocks. This will act as the bonding agent for the first course of the raised foundation walls. Place the first block onto the mortar and press it firmly, ensuring it is level and aligned with the guidelines marked on the ground.
3. Continue laying the blocks: Apply mortar to the side of the first block and to the top surface of the previous block. Place the next block on top, aligning it with the guidelines and ensuring levelness. Repeat this process, adding mortar and stacking blocks, until the first course is complete.
4. Check alignment and levelness: Use a level to check the alignment and levelness of the blocks as you build the walls. Adjust as needed by adding or removing mortar to achieve straight and level walls.
5. Building subsequent courses: After the first course is complete, continue building the walls by adding subsequent courses. Apply mortar to the top surface of the previous course and the sides of the blocks. Stack the blocks on top, staggering the seams for added stability. Ensure that each course is level and plumb before moving on to the next.
6. Reinforce with rebar: Insert pieces of rebar vertically into the mortar joints as you build each course. This will provide additional strength and stability to the raised foundation walls.
7. Clean excess mortar: As you work, periodically clean any excess mortar from the face of the blocks using a trowel. This will help maintain a clean and professional appearance.
8. Leave space for windows and openings: If your design includes windows or other openings, leave space for them as you build the walls. Install lintels or headers above these openings to provide support.
9. Secure corners and ends: To ensure structural integrity, reinforce the corners and ends of the raised foundation walls. Use metal reinforcement, such as masonry ties or corner blocks, to securely join the blocks together.
10. Allow the mortar to cure: Once the raised foundation walls are complete, allow the mortar to cure for the recommended time period. This will ensure that the walls have fully hardened and are ready to support the weight of the building.
By following these steps, you can construct strong and stable raised foundation walls. Take care to align and level each block, reinforce with rebar, and properly cure the mortar. Building solid walls is essential for the overall stability and durability of your raised foundation. Once the walls have cured, you can move on to the next step: installing the floor joists.
When building a raised foundation, make sure to properly compact the soil before pouring the concrete footings to ensure stability and prevent settling over time.
Read more: How To Build A Basement Foundation
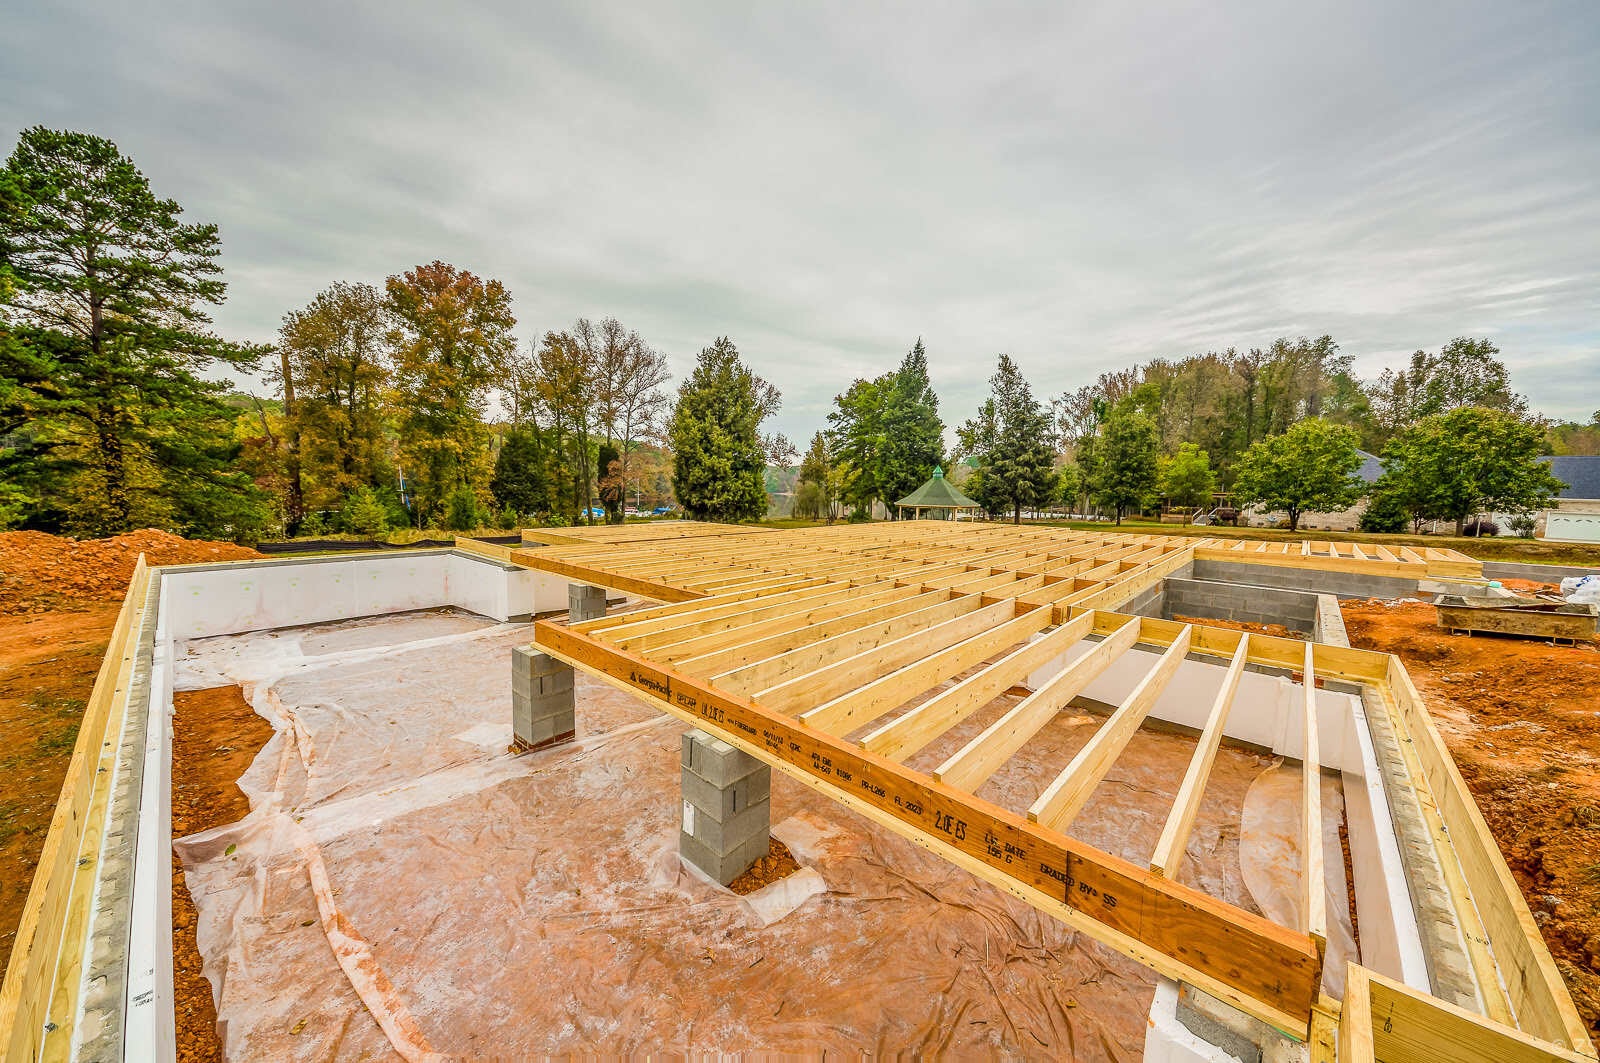
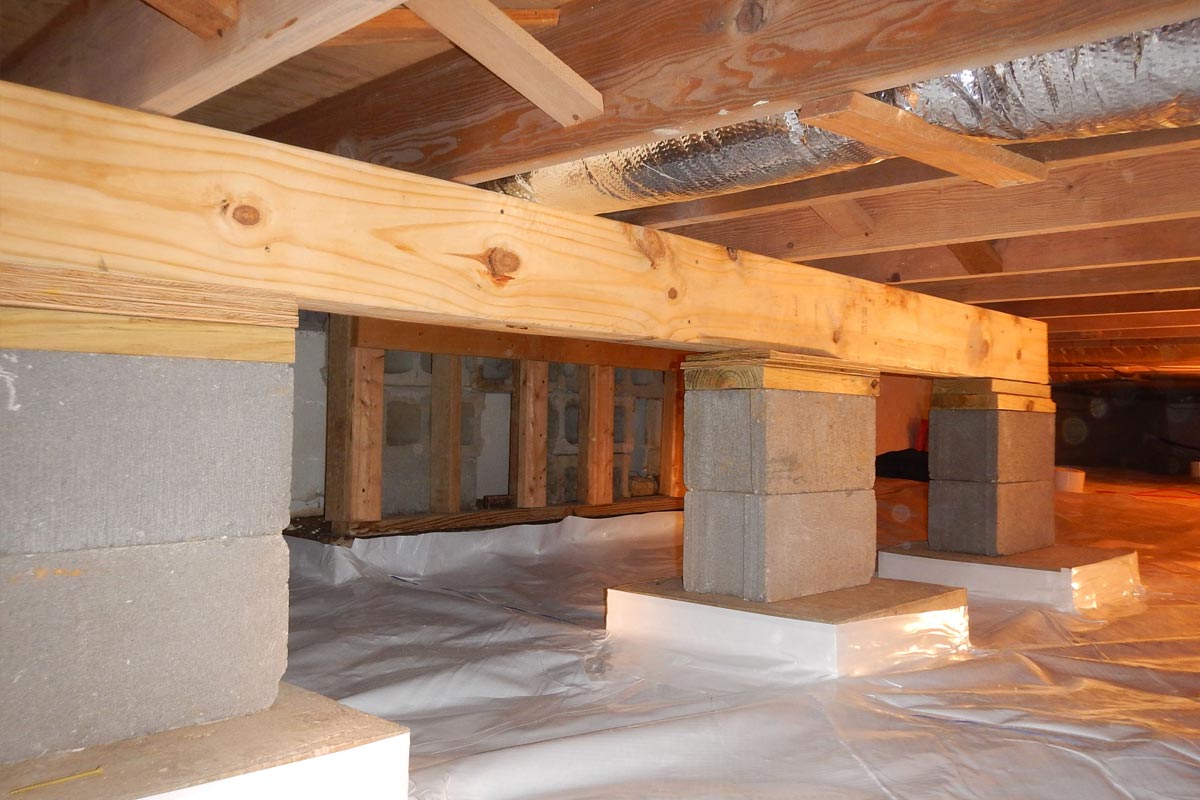
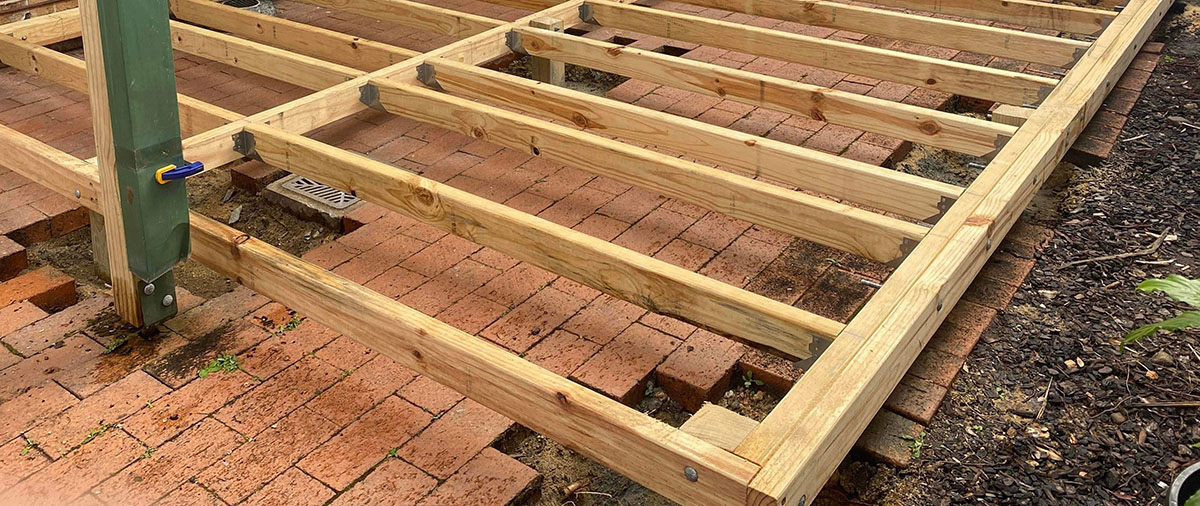
Step 4: Installing the Floor Joists
Now that the raised foundation walls are in place, it’s time to install the floor joists. These horizontal beams will provide support for the flooring of your building. Follow these steps to properly install the floor joists for your raised foundation:
1. Determine joist spacing: Consult your building plans or local building codes to determine the appropriate spacing for your floor joists. Typically, the spacing is 16 inches on center, but it may vary depending on the size and load requirements of your structure.
2. Measure and mark the joist layout: Use a measuring tape and pencil to mark the location of each floor joist on the top surface of the foundation walls. Start at one end of the foundation and work your way across, ensuring that the marks are evenly spaced according to the determined joist spacing.
3. Cut joists to length: Measure the distance between the two foundation walls and cut the floor joists to the appropriate length. Use a circular saw or other suitable cutting tool to achieve clean and accurate cuts.
4. Install rim joists: Install the rim joists along each end of the foundation walls. These are larger beams that will run perpendicular to the floor joists, providing additional support and strength to the structure. Attach the rim joists securely to the foundation walls using nails or appropriate fasteners.
5. Position and attach the floor joists: Begin by placing the first floor joist in position, aligning it with the marks on the foundation walls. Use a level to ensure it is level and straight. Nail or screw the joist in place, securing it to the rim joists at each end. Continue installing the remaining floor joists, working from one end to the other.
6. Check for levelness and spacing: As you install each floor joist, use a level to check for levelness and adjust as necessary. Also, double-check that the spacing between the joists aligns with the determined spacing requirements.
7. Reinforce with joist hangers: In areas where a floor joist intersects with the rim joist or where additional support is needed, use joist hangers. These metal brackets are designed to provide extra strength and stability to the joists. Install the hangers according to the manufacturer’s instructions, attaching them securely to the joists and the rim joists.
8. Install blocking or bridging: Depending on the size and design of your building, you may need to install blocking or bridging between the floor joists. This additional support helps to prevent the joists from twisting or sagging. Cut and install the blocking or bridging between the joists as required.
9. Double-check for levelness and stability: Once all the floor joists are installed, thoroughly check that they are level and secure. Make any necessary adjustments to ensure the joists are properly aligned and provide a stable base for the flooring.
10. Take necessary precautions: During the installation of floor joists, it is important to follow all safety precautions. Utilize appropriate safety equipment, such as gloves and safety glasses, and work carefully to avoid any accidents or injuries.
By following these steps, you can successfully install the floor joists for your raised foundation. Take your time to ensure that the joists are level, properly spaced, and securely attached to the foundation walls. The floor joists form an essential part of your raised foundation structure and provide the necessary support for the flooring above. Once the floor joists are in place, you can move on to the next step: adding insulation and a moisture barrier.
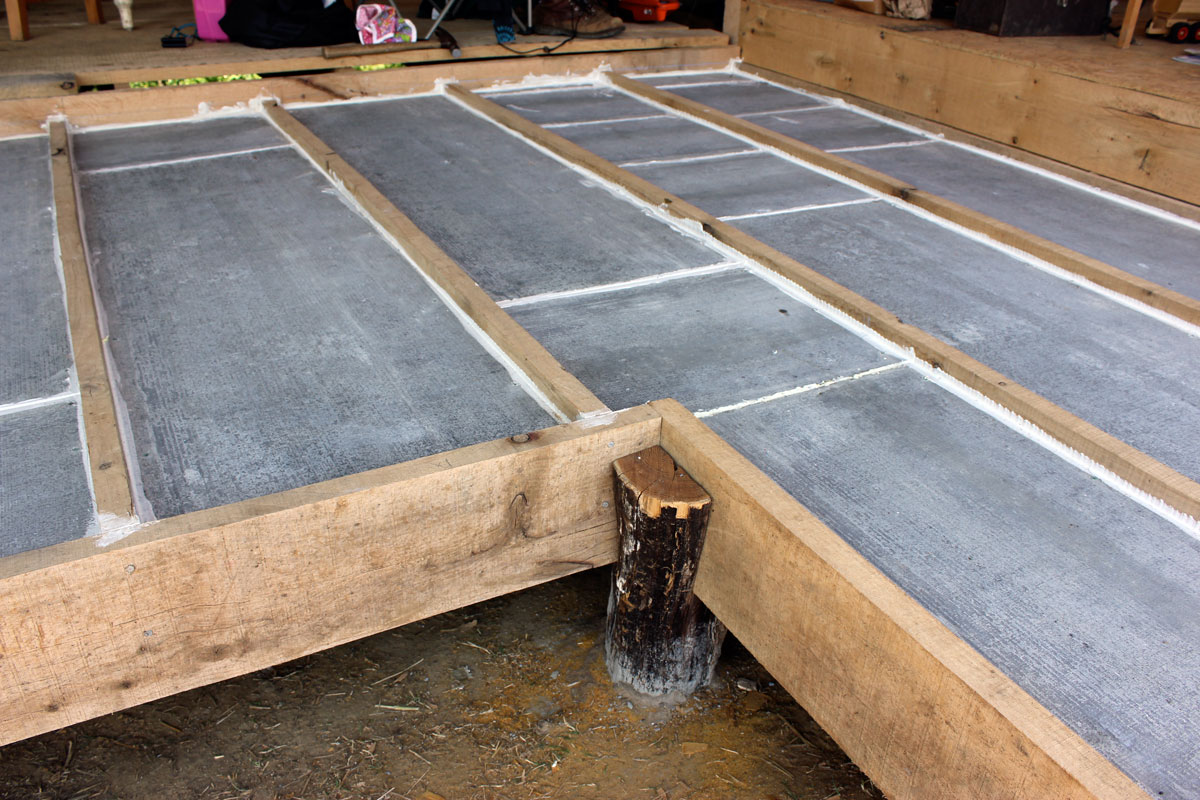
Step 5: Adding Insulation and Moisture Barrier
To maximize energy efficiency and protect your building from moisture damage, it is important to add insulation and a moisture barrier to your raised foundation. Follow these steps to properly install insulation and a moisture barrier:
1. Determine the insulation type: Consider the climate and specific needs of your building when choosing insulation. Common options include fiberglass batts, spray foam insulation, or rigid foam insulation.
2. Measure and cut the insulation: Measure the spaces between the floor joists and cut the insulation to fit. Leave a small gap around the edges to allow for expansion. Ensure a snug fit without compressing the insulation.
3. Install the insulation: Place the insulation between each of the floor joists, ensuring it is flush with the bottom of the joists. Use staples or specially designed insulation hangers to secure the insulation in place.
4. Install a vapor retarder or moisture barrier: A vapor retarder or moisture barrier helps prevent the penetration of moisture from the ground. Lay a plastic or foil sheet over the insulation, ensuring it covers the entire area between the floor joists. Overlap the seams of the sheets and tape them securely to create an airtight seal.
5. Seal gaps and penetrations: Use caulk or spray foam insulation to seal any gaps or penetrations in the vapor retarder or moisture barrier. This will further enhance its effectiveness in preventing moisture infiltration.
6. Consider perimeter insulation: Depending on your climate and the specific requirements of your building, you may also need to add perimeter insulation. This involves insulating the exterior foundation walls below ground level to reduce heat loss and improve energy efficiency.
7. Follow local building codes: Ensure that you adhere to local building codes and regulations when selecting and installing insulation and moisture barrier. Compliance with these codes will help ensure energy efficiency, prevent moisture-related issues, and maintain a safe and comfortable environment.
8. Inspect for gaps or damages: Once the insulation and moisture barrier are in place, inspect the entire area for any gaps, damages, or areas of concern. Repair or replace any compromised materials to maintain the effectiveness of the insulation and moisture barrier.
9. Consider professional consultation: If you are unsure about the proper insulation and moisture barrier installation or if you are dealing with unique building challenges, it may be beneficial to consult a professional. They can provide expert advice and ensure that the insulation and moisture barrier are installed correctly.
Adding insulation and a moisture barrier to your raised foundation will improve energy efficiency, regulate temperature, and protect against moisture-related issues. Following these steps will help create a more comfortable and durable space within your building. Once the insulation and moisture barrier are installed, you can move on to the next step: installing the subfloor.
Step 6: Installing the Subfloor
Installing the subfloor is a crucial step in the construction of a raised foundation. The subfloor provides a stable and even surface for the finished flooring. Follow these steps to properly install the subfloor:
1. Choose the subflooring material: Select a suitable subflooring material such as plywood or oriented strand board (OSB). Consider factors such as the anticipated load, moisture resistance, and local building codes when making your choice.
2. Measure and cut the subfloor panels: Measure the distance between the floor joists and cut the subfloor panels to fit. Leave a small gap around the edges of the panels to allow for expansion. Ensure a snug fit without compressing the panels.
3. Lay the first subfloor panel: Start at one corner of the raised foundation and lay the first subfloor panel perpendicular to the floor joists. Align the panel with the joists and ensure it is flush with the edges of the foundation walls.
4. Secure the first subfloor panel: Use screws or nails to secure the first subfloor panel to the floor joists. Place fasteners every 6 to 8 inches along the edges and every 12 inches along the joists. Take care not to overdrive the fasteners, as this can cause the subfloor to warp or buckle.
5. Continue installing subfloor panels: Lay the subsequent subfloor panels, ensuring they are tightly butted against each other. Stagger the seams between panels to increase structural integrity. Secure each panel to the floor joists with screws or nails, as done with the first panel.
6. Check for levelness and stability: Use a level to check the flatness and levelness of the subfloor as you install each panel. Make any necessary adjustments to maintain a smooth and even surface.
7. Reinforce with blocking: Install blocking between the joists if required by building codes or for added support. This can help to prevent joist deflection and enhance the stability of the subfloor.
8. Install additional layers (if needed): In some cases, additional layers of subflooring may be necessary, such as for specific floor finishes or to achieve a higher level of structural strength. Follow manufacturer recommendations and local building codes for the installation of additional layers.
9. Patch and repair any gaps or damages: Inspect the installed subfloor for any gaps, damages, or areas of concern. Fill any gaps or imperfections with wood filler or a suitable patching compound and sand the surface to ensure a smooth and level subfloor.
10. Verify stability and quality: Once the subfloor installation is complete, walk across the surface to check for any squeaks or flexing. Ensure that the subfloor feels sturdy and secure.
By following these steps, you can successfully install the subfloor for your raised foundation. Taking the time to properly measure, cut, and secure the subfloor panels will result in a solid and durable foundation for the finished flooring. Once the subfloor is installed, you can proceed with other finishing touches and considerations to complete your raised foundation project.
Step 7: Finishing Touches and Considerations
With the major components of your raised foundation in place, it’s time to focus on the finishing touches and considerations that will complete the project. Follow these steps to add the final touches and ensure a successful outcome:
1. Floor insulation: Consider installing additional insulation between the floor joists to further improve energy efficiency and thermal comfort within your building. This can help maintain a consistent temperature and reduce heating or cooling costs.
2. Air sealing: Inspect the perimeter of the raised foundation and seal any gaps or cracks where air could potentially leak in or out. Use caulk, weatherstripping, or foam sealant to create an airtight seal, improving energy efficiency and preventing the intrusion of pests or moisture.
3. Floor sheathing: Install the appropriate floor sheathing material on top of the subfloor, such as plywood or engineered wood. Ensure that the sheathing is properly secured to the subfloor, providing a smooth and stable surface for the finished flooring.
4. Consider floor heating options: If desired, explore the possibility of installing radiant floor heating systems. This can provide efficient and comfortable heating for your building, particularly in colder climates.
5. Pest prevention: Take proactive measures to prevent pests from entering your raised foundation. Install pest barriers or screens to keep out unwanted insects or small animals. Ensure that all entry points, such as gaps around plumbing or electrical penetrations, are properly sealed.
6. Waterproofing: Consider applying a waterproofing material or membrane to the exterior of the raised foundation walls. This can help protect against water intrusion and potential damage, particularly in areas prone to high moisture levels or heavy rainfall.
7. Consider drainage systems: Evaluate the need for a proper drainage system around the raised foundation. This may involve installing gutters, downspouts, and appropriate grading to direct water away from the foundation. Adequate drainage is essential for preventing water accumulation and potential foundation issues.
8. Building codes and inspections: Throughout the construction process, ensure that you comply with all applicable building codes and regulations. Schedule any necessary inspections to ensure that your raised foundation meets the required standards and is safe for occupancy.
9. Professional consultation: If you are unsure about any specific aspects of the finishing touches or considerations, seek professional guidance. Consulting with experts in the field can provide valuable insights and ensure that your raised foundation is completed effectively and efficiently.
10. Regular maintenance and inspections: Once the raised foundation is complete, establish a regular maintenance schedule to keep the structure in optimal condition. This may include inspecting for any signs of damage, monitoring moisture levels, and addressing any potential issues promptly.
By following these steps and considering these important aspects, you can complete the finishing touches on your raised foundation project. Paying attention to details, addressing potential challenges, and ensuring compliance with regulations will ultimately result in a strong, durable, and long-lasting foundation for your building. With the project complete, you can now enjoy the benefits of a well-constructed raised foundation.
Read more: How To Build A Cabin Foundation
Conclusion
Building a raised foundation is a significant undertaking that requires careful planning, attention to detail, and a solid understanding of the construction process. By following the step-by-step guidelines provided in this article, you can confidently construct a sturdy and durable foundation for your building.
From site preparation to adding finishing touches, each step plays a crucial role in the overall success of your project. Clearing and leveling the site, laying the foundation blocks with precision, and building the raised foundation walls with care are essential for creating a solid base. Installing the floor joists, adding insulation and a moisture barrier, and completing the subfloor provide stability, energy efficiency, and protection against moisture damage.
Throughout the process, it is important to adhere to local building codes, obtain necessary permits, and schedule inspections as required. Safety should always be a priority, and proper safety equipment should be used when handling tools and materials.
Additionally, considering factors such as pest prevention, drainage systems, waterproofing, and regular maintenance will ensure the longevity and functionality of your raised foundation.
Remember that seeking professional guidance and consultation can be beneficial, especially if you encounter unfamiliar or challenging aspects during the construction process. Their expertise can help you navigate complexities and ensure that your raised foundation is built to the highest standards.
Building a raised foundation requires patience, attention to detail, and a commitment to quality. With proper planning and execution, you can create a strong and stable foundation that will support your building for years to come.
Taking the time to construct a well-built raised foundation is an investment in the long-term durability, stability, and comfort of your structure. So roll up your sleeves, gather your tools, and embark on the journey of building a raised foundation that will serve as a solid base for your building dreams.
Frequently Asked Questions about How To Build A Raised Foundation
Was this page helpful?
At Storables.com, we guarantee accurate and reliable information. Our content, validated by Expert Board Contributors, is crafted following stringent Editorial Policies. We're committed to providing you with well-researched, expert-backed insights for all your informational needs.


0 thoughts on “How To Build A Raised Foundation”