Home>diy>Building & Construction>How To Build A Wood Foundation For A Shed
Building & Construction
How To Build A Wood Foundation For A Shed
Modified: October 20, 2024
Learn how to build a sturdy wood foundation for your shed with our step-by-step guide. Master the art of building construction and create a durable base for your shed.
(Many of the links in this article redirect to a specific reviewed product. Your purchase of these products through affiliate links helps to generate commission for Storables.com, at no extra cost. Learn more)
Introduction
Welcome to the world of building construction! In this article, we will guide you through the process of constructing a wood foundation for a shed. A solid and well-built foundation is essential for the stability and longevity of any structure. Whether you’re a DIY enthusiast or a beginner in the world of construction, this step-by-step guide will provide you with the knowledge and confidence to construct a strong foundation for your shed.
Before we dive into the construction process, it is important to emphasize the significance of proper planning and preparation. This will ensure that you have all the necessary materials and tools, as well as a clear understanding of the steps involved.
Now, let’s get started on building a wood foundation that will provide stability and support for your shed for years to come.
Key Takeaways:
- Proper planning, preparation, and attention to detail are crucial for constructing a sturdy wood foundation for a shed. From choosing the right location to adding finishing touches, each step contributes to the stability and longevity of the structure.
- Building a wood foundation for a shed requires precision and care at every stage, from clearing and leveling the ground to attaching the walls and installing the roof. Attention to detail and adherence to local regulations are essential for a successful construction project.
Read more: How To Build A Wood Shed
Planning and Preparation
Before you begin building a wood foundation for your shed, it’s important to have a solid plan in place. This will help you stay organized and ensure that you have all the necessary materials and tools on hand. Here are some key steps in the planning and preparation process:
- Determine the size and type of shed: Start by deciding how big of a shed you want and what type of structure would best suit your needs. Consider factors such as storage space, accessibility, and aesthetic preferences. This will help you determine the dimensions and design of your foundation.
- Check local building codes: Before proceeding with any construction project, it’s crucial to check local building codes and regulations. Different areas may have specific requirements for shed foundations, such as setbacks and maximum heights. Make sure you comply with these regulations to avoid any legal issues down the line.
- Gather necessary permits: Depending on your location and the size of your shed, you may need to obtain building permits. Check with your local municipality or building department to determine what permits are required and how to obtain them. This step is essential to ensure that your construction is legal and meets safety standards.
- Create a detailed plan: Sketch out a detailed plan that includes the dimensions and layout of the foundation. This will serve as a blueprint for your construction project and help you stay on track during the building process. Include measurements, as well as any additional features such as windows, doors, and ventilation.
- Prepare the site: Clear the area where your shed will be located, removing any debris, plants, or obstacles. Ensure that the ground is level and free from any obstructions that could interfere with the construction process. A level surface is essential for a stable foundation.
- Calculate the materials and tools needed: Based on your plan, calculate the quantity of materials required for the foundation. This typically includes pressure-treated lumber for the frame, plywood for the flooring, and fasteners such as screws or nails. Additionally, gather the necessary tools, including a circular saw, a drill, a level, measuring tape, and safety equipment such as goggles and gloves.
By carefully planning and preparing for your shed foundation project, you’ll be setting yourself up for success. Taking the time to understand local regulations, create a comprehensive plan, and gather the necessary materials and tools will ensure a smoother construction process. Now that you’ve completed the planning phase, it’s time to move on to the next step: choosing the right location for your shed foundation.
Choosing the Right Location
The location of your shed foundation is an important decision that can impact the usability and longevity of your shed. Here are some key factors to consider when choosing the right location:
- Accessibility: Select a location that allows for easy access to your shed. Consider how you will be using the shed and what items you will be storing inside. If you plan on frequently accessing tools or equipment, it’s best to choose a location that is convenient and easily reachable.
- Ground stability: Ensure that the ground is stable and capable of supporting the weight of your shed. Avoid areas with soft or marshy soil, as this can lead to settling and instability over time. Instead, opt for a location with firm ground that won’t shift or sink, providing a solid base for your foundation.
- Sunlight and shade: Take into account the amount of sunlight your shed will receive throughout the day. If you plan on using the shed for gardening or as a workshop, consider a location that receives ample sunlight. On the other hand, if you’re concerned about excessive heat, choose a spot with natural shade or the option to provide shade through external means.
- Drainage: Adequate drainage is crucial to prevent water damage and ensure the longevity of your shed. Avoid low-lying areas that are prone to flooding or areas where water tends to accumulate. Instead, choose a location that encourages natural drainage and allows water to flow away from your shed.
- Aesthetics: Consider the overall aesthetics of your property when selecting a shed location. Choose a spot that blends well with the surrounding landscape and doesn’t obstruct any views or disrupt the flow of your outdoor space. A visually appealing location will enhance the overall appeal of your property.
- Privacy and noise: Depending on your preferences, you may prioritize privacy or minimizing noise. Take into account the proximity to neighbors or busy roads and choose a location that provides the level of privacy and tranquility you desire.
Once you have considered these factors, mark the chosen location for your shed foundation. This will serve as a reference point during the construction process. Remember to consult any restrictions or regulations set by your local building codes or homeowners’ association before finalizing the location.
Choosing the right location for your shed foundation is an essential step in the construction process. By considering accessibility, ground stability, sunlight, drainage, aesthetics, and privacy, you’ll ensure that your shed is situated in an optimal location that meets your needs and enhances the overall functionality and appearance of your property.
Gathering the Materials and Tools
Before you begin building your wood foundation for the shed, it’s important to gather all the necessary materials and tools. Having everything prepared and organized in advance will make the construction process much smoother. Here is a list of the materials and tools you will need:
Materials:
- Pressure-treated lumber: This is the main material for the foundation frame. Choose lumber that is suitable for ground contact and resistant to rot and insect damage.
- Plywood: This will be used for the flooring of the shed. Opt for exterior-grade plywood that is durable and moisture-resistant.
- Fasteners: Select the appropriate screws or nails for securing the lumber and plywood together. Make sure they are corrosion-resistant for long-lasting results.
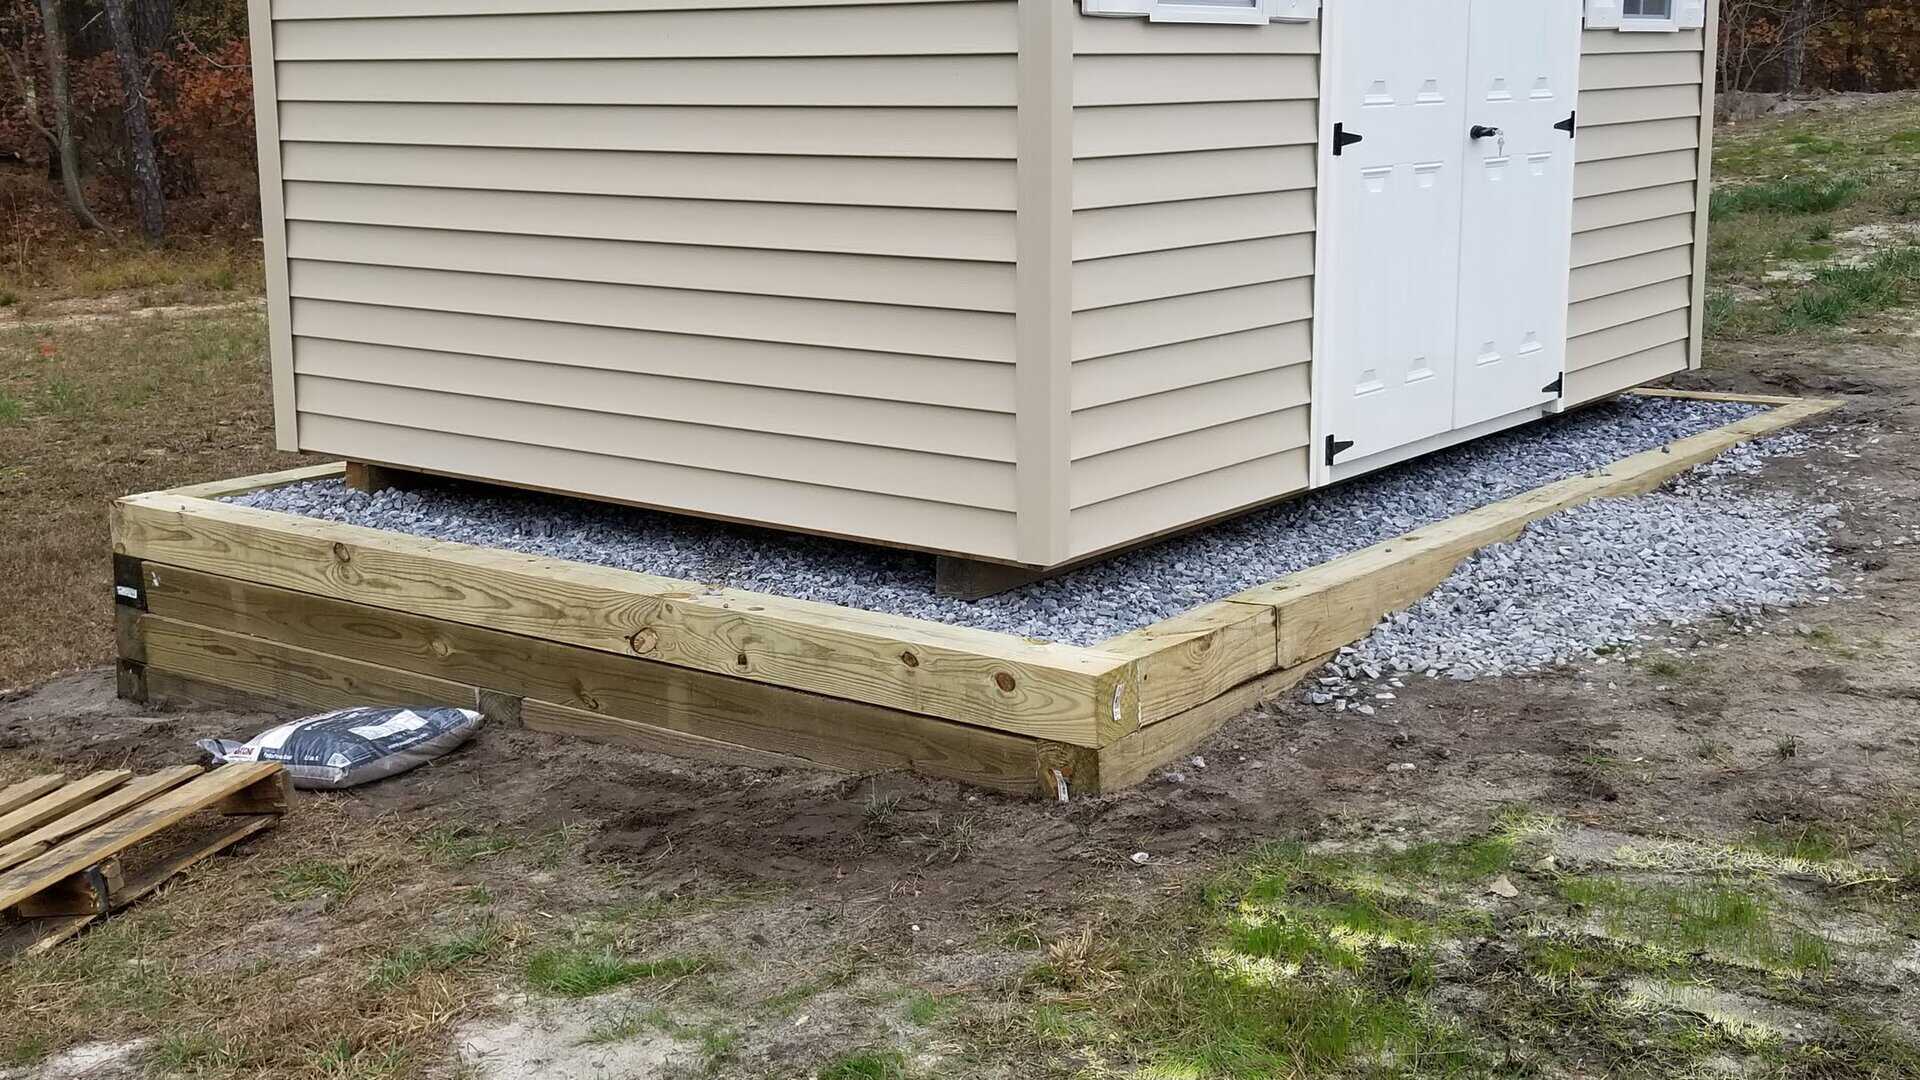
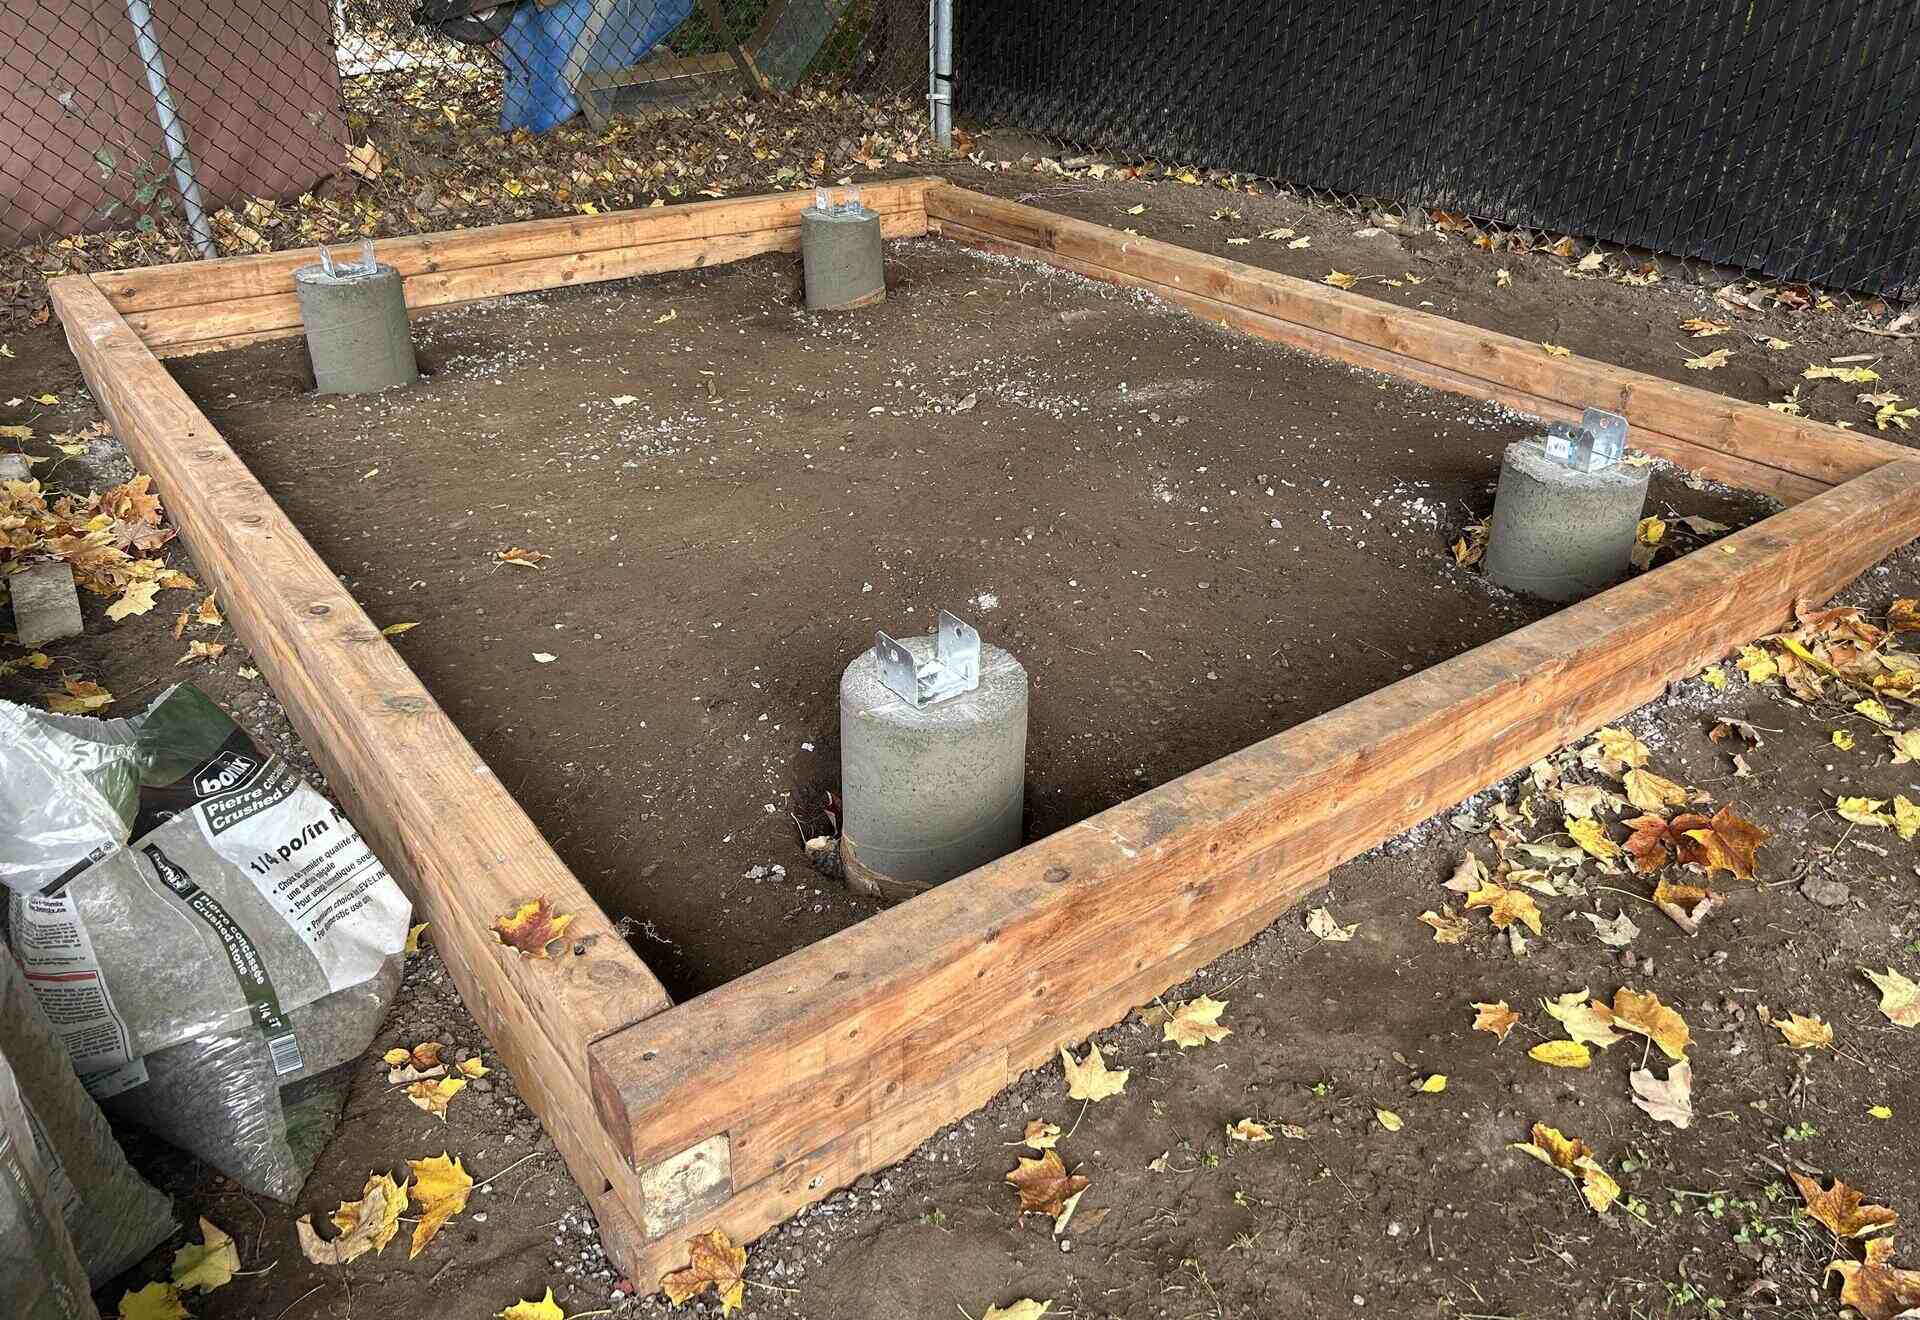
- Concrete blocks or piers: These will provide the support and stability for your foundation. Choose blocks or piers that are suitable for the size and weight of your shed.
- Gravel or crushed stone: This will be used as a base for the foundation. It helps with drainage and prevents the wood from direct contact with the ground.
- Weatherproofing materials: Depending on your climate, you may need to consider weatherproofing measures such as a vapor barrier or waterproofing compound.
- Shims: These are used to level and adjust the foundation as needed.
Tools:
- Circular saw: This will be used to cut the lumber and plywood to the desired dimensions.
- Drill: You’ll need a drill for pre-drilling holes and driving screws or nails into the wood.
- Level: A level is essential for ensuring that the foundation is straight and level.
- Measuring tape: Use this to measure and mark the dimensions of the foundation and other components.
- Hammer: A hammer is useful for driving nails into the wood if you choose to use nails instead of screws.
- Safety equipment: Wear goggles and gloves to protect yourself while working with power tools and handling materials.
Once you have gathered all the necessary materials and tools, make sure they are organized and easily accessible. This will save you time and effort during the construction process. It’s also a good idea to double-check your materials list against your plan to ensure that you have everything you need.
By being prepared and having all the materials and tools ready, you’ll be able to tackle the construction of your shed foundation with confidence and efficiency. Take the time to gather everything you need before starting, and you’ll be one step closer to completing your project successfully.
Clearing and Leveling the Ground
Once you have selected the location for your shed foundation, the next step is to clear and level the ground. This is a crucial step that will ensure a stable and properly constructed foundation. Here’s how to clear and level the ground:
- Remove any obstacles: Begin by removing any plants, rocks, or debris from the area. Clearing the ground will provide you with a clean and even surface to work with.
- Evaluate the slope: Use a level or a transit to evaluate the slope of the ground. Ideally, you want the foundation to be placed on a level surface. If the ground has a significant slope, you may need to consider leveling it or making adjustments to ensure the shed sits properly.
- Excavate high spots: Use a shovel or an excavator to remove excess dirt from high spots. This will help you achieve a level ground. Make sure to dig up enough soil to accommodate the foundation depth and any additional base material you’ll be using.
- Fill low spots: If there are any low spots in the ground, fill them with compacted soil or gravel. This will help in achieving a level surface and prevent water from pooling around the foundation.
- Compact the ground: Once the ground is cleared and any necessary adjustments have been made, use a tamper or a plate compactor to compact the soil. This will provide a firm and solid base for your foundation.
- Check for levelness: Use a level to ensure that the ground is level in all directions. Place the level on different spots across the site to check for any unevenness. Adjust as needed by adding or removing soil until the ground is level.
- Add a layer of gravel: To further aid in drainage and stability, consider adding a layer of gravel or crushed stone over the leveled ground. This will help prevent water from pooling under the foundation and provide additional support.
Clearing and leveling the ground is a critical step in the construction process. It ensures that your shed foundation will be built on a stable and even surface, which is essential for the structural integrity of your shed. Taking the time to properly prepare the ground will help prevent future issues such as settling or water damage.
Now that you’ve cleared and leveled the ground, you’re ready to move on to the next phase of construction: building the basic frame of the wood foundation.
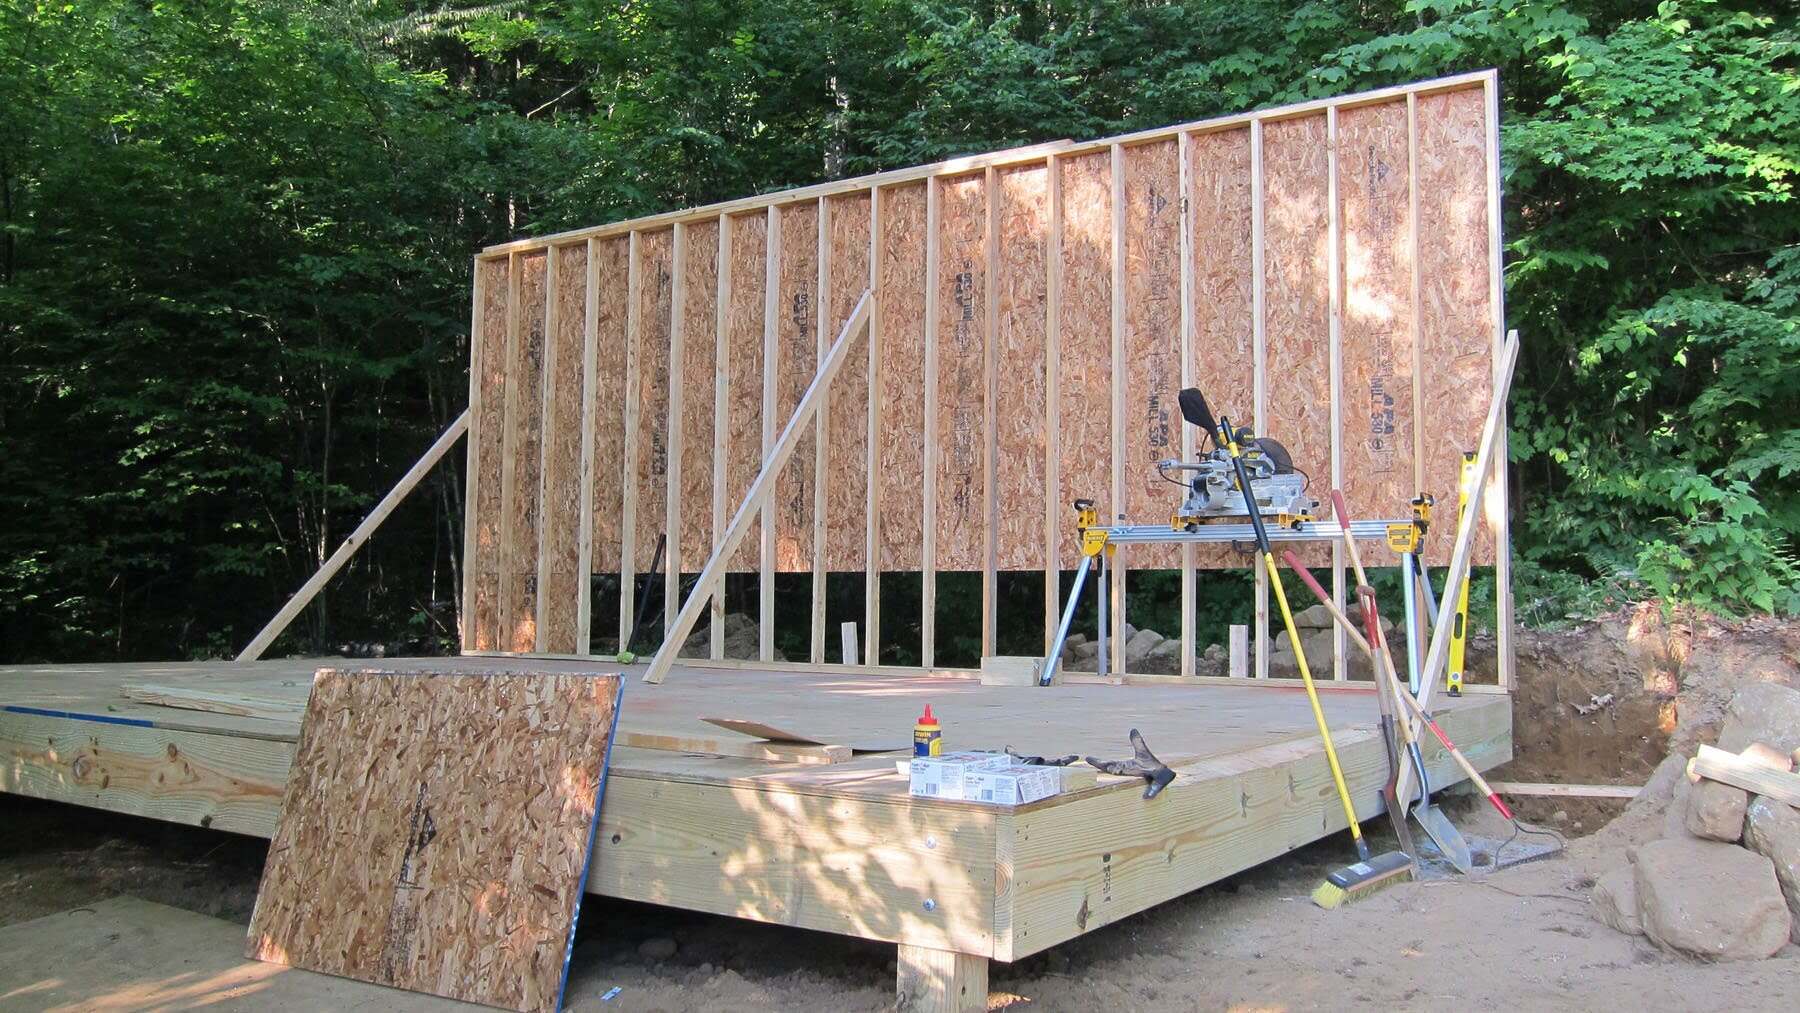
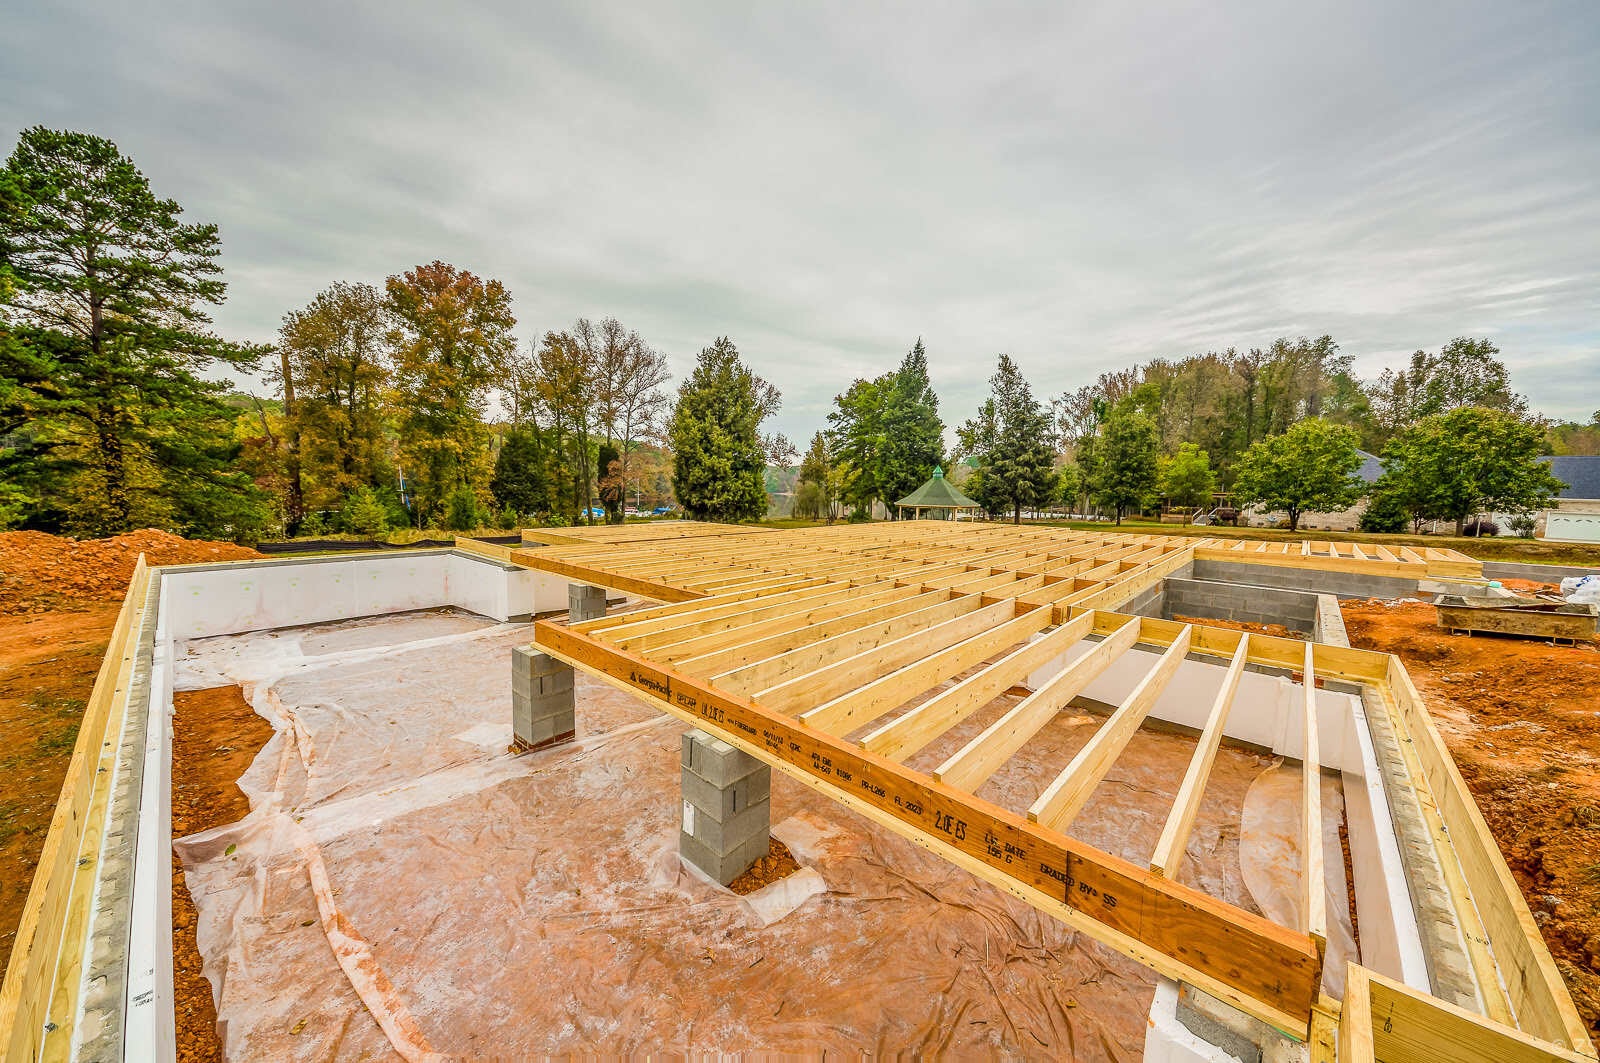
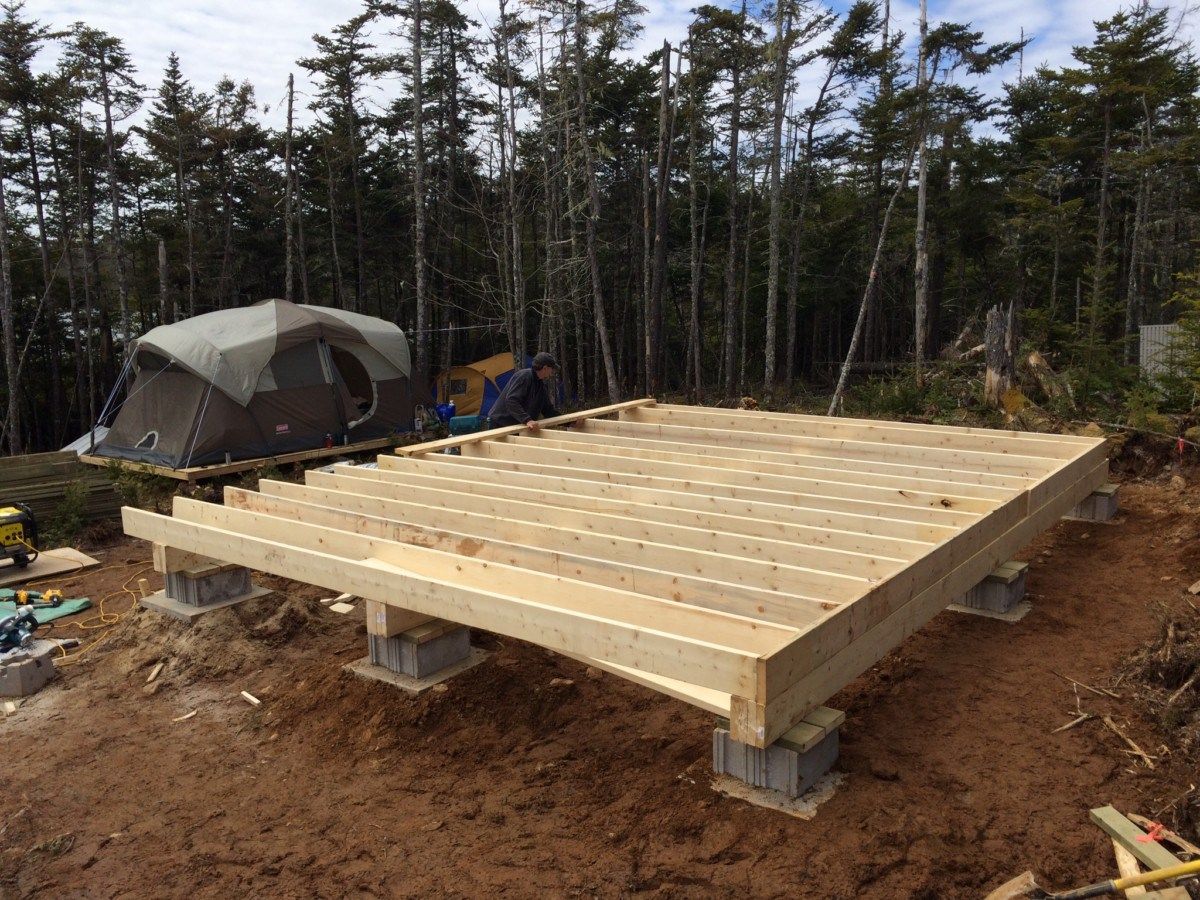
Building the Basic Frame
With the ground cleared and leveled, it’s time to start building the basic frame of your wood foundation. The frame will provide the structure and support for your shed. Here’s a step-by-step guide on how to build the basic frame:
- Measure and mark: Using your plan as a reference, measure and mark the dimensions of the foundation on the ground. This will serve as a guide for placing the frame.
- Place pressure-treated lumber: Begin by placing the pressure-treated lumber boards along the marked lines to form the outline of the foundation. Make sure the boards are flush with each other and properly aligned.
- Connect the corners: Once the boards are in position, connect the corners by using corner brackets or mending plates. This will provide additional stability and ensure the frame remains square.
- Attach the boards: Secure the boards together by drilling pilot holes and using screws or nails. Make sure to fasten the boards at regular intervals along the length. This will ensure a sturdy frame.
- Add additional support: Depending on the size of your shed and the recommendation of your plan, you may need to add additional support beams or crossbars within the frame. This will help distribute the weight evenly and provide extra strength.
- Level the frame: Use a level to ensure the frame is level in all directions. Adjust the height of the frame by adding or removing gravel or shims as needed. A level frame is crucial for the proper installation of flooring and the overall stability of your shed.
- Check for squareness: Confirm that the frame is square by measuring the diagonals. The measurements should be equal. If not, adjust the frame until it is square.
Building the basic frame forms the foundation of your shed. It is essential to take the time to correctly measure, align, and secure the pressure-treated lumber boards. A solid and properly constructed frame will ensure the stability and longevity of your shed.
Now that the basic frame is built, you’re ready to move on to the next step: installing the floor joists to further reinforce the foundation.
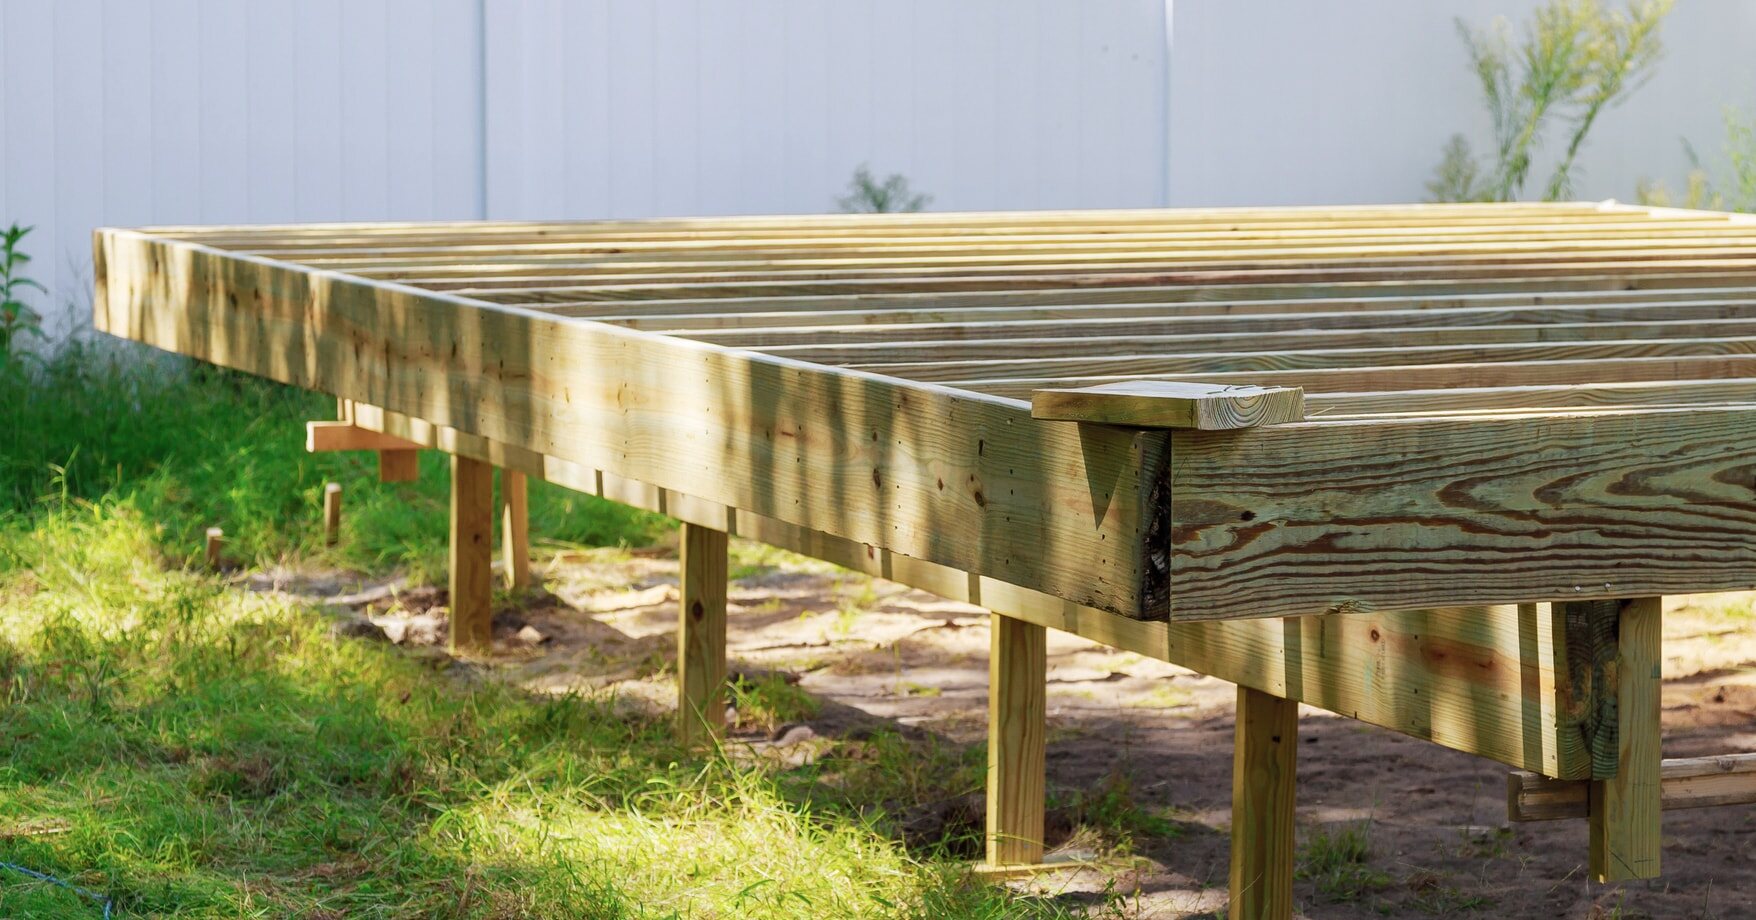
Installing the Floor Joists
After completing the basic frame of your shed foundation, the next step is to install the floor joists. The floor joists provide additional support and create the framework for the shed’s flooring. Here’s a step-by-step guide on how to install the floor joists:
- Measure and mark: Determine the spacing and dimensions of the floor joists according to your plan. Mark these measurements on the top of the foundation frame.
- Cut the joists: Using a saw, cut the pressure-treated lumber boards according to the marked measurements for the floor joists. Make sure to cut them at a length that will fit within the boundaries of the foundation frame.
- Position the joists: Place the cut floor joists on top of the frame, aligning them with the marked measurements. Make sure they are spaced evenly and parallel to each other.
- Attach the joists: Secure the floor joists to the frame by drilling pilot holes and using screws or nails. Attach them at regular intervals along the length of the joist. This will ensure a sturdy and well-supported flooring system.
- Check for levelness and squareness: Use a level to ensure that the floor joists are level in all directions. Adjust the height of the joists by adding shims as needed. Additionally, check for squareness by measuring the diagonals of the frame. Adjust the position of the joists if necessary.
- Secure the joists: To further reinforce the floor joists, consider adding joist hangers at each end. Joist hangers are metal brackets that provide additional support and increase the stability of the flooring system.
Installing the floor joists is a crucial step in the construction process, as they provide the framework for the shed’s flooring. It is important to accurately measure, align, and secure the joists to ensure a level and sturdy foundation for your shed.
Once the floor joists are installed, you’re ready to move on to the next step: adding the plywood flooring to complete the foundation.
Read more: How To Build A Simple Wood Shed
Adding the Plywood Flooring
Now that the floor joists are in place, it’s time to add the plywood flooring to complete the foundation of your shed. The plywood flooring provides a stable and durable surface for your shed’s interior. Here’s a step-by-step guide on how to add the plywood flooring:
- Measure and cut the plywood: Measure the dimensions of the floor area and mark them on the plywood sheets. Use a circular saw to cut the plywood according to the marked measurements. Ensure that the plywood sheets fit within the boundaries of the floor joists.
- Position the plywood: Place the cut plywood sheets on top of the floor joists, aligning them with the edges of the foundation frame. Make sure the plywood sheets are placed tightly together without gaps between them.
- Attach the plywood: Secure the plywood to the floor joists by using screws or nails. Use a drill to pre-drill holes to prevent the plywood from splitting. Fasten the plywood at regular intervals along each joist to ensure a secure attachment.
- Space and secure the edges: Leave a small gap, about 1/8 inch, between each plywood sheet to allow for natural expansion. Additionally, secure the outer edges of the plywood sheets to the foundation frame using screws or nails. This will provide extra stability and prevent the edges from lifting.
- Check for levelness: Use a level to ensure that the plywood flooring is level in all directions. Make any necessary adjustments by adding shims or sanding down high spots. A level flooring surface is essential for the proper installation of walls and the overall stability of your shed.
Adding the plywood flooring completes the foundation of your shed, providing a solid and sturdy surface for the interior. It’s crucial to accurately measure, cut, and secure the plywood sheets to ensure a level and durable flooring system.
Now that the plywood flooring is in place, you’re ready to move on to the next phase of construction: building the wall frames to enclose your shed.
Building the Wall Frames
With the foundation and flooring in place, it’s time to start building the wall frames for your shed. The wall frames will provide the structure and enclosure for your shed’s interior. Here’s a step-by-step guide on how to build the wall frames:
- Measure and mark: Refer to your shed plan to determine the dimensions of the wall frames. Measure and mark these dimensions on the pressure-treated lumber that will make up the wall studs.
- Cut the lumber: Use a saw to cut the pressure-treated lumber according to the marked measurements for the wall studs. Cut enough pieces to create the desired height and width of each wall frame.
- Assemble the wall frames: Lay out the cut wall studs on a flat surface, spaced evenly according to your shed plan. Attach a top plate and a bottom plate to the wall studs using screws or nails. This will form the basic structure of the wall frame.
- Add additional supports: Depending on the size of your shed and the strength required, consider adding additional vertical supports and horizontal bracing within the wall frame. This will provide extra stability and strength to the structure.
- Check for squareness: Measure the diagonals of each wall frame to ensure they are equal in length. Adjust the position of the wall studs if necessary to achieve a square frame.
- Repeat for each wall: Follow the same steps to build the wall frames for each wall of your shed. Ensure that all wall frames are constructed with precision and accuracy.
Building the wall frames is a crucial step in the construction process, as they form the structure of your shed. It is important to accurately measure, cut, and assemble the wall studs to ensure a sturdy and level framework for your shed.
Once the wall frames are built, you’re ready to move on to the next step: attaching the walls to the foundation and securing the frames in place.
When building a wood foundation for a shed, make sure to use pressure-treated lumber to prevent rot and decay. Additionally, use a level to ensure the foundation is even and stable.
Attaching the Walls to the Foundation
After building the wall frames for your shed, the next step is to attach them securely to the foundation. This ensures stability and structural integrity. Here’s a step-by-step guide on how to attach the walls to the foundation:
- Position the walls: With the help of a friend or a helper, carefully lift the wall frames and position them on top of the foundation. Ensure that the walls are aligned with the edges and corners of the foundation frame.
- Secure the walls: Using masonry screws or anchor bolts, secure the bottom plates of the wall frames to the foundation. Drive the screws or insert the bolts through the pre-drilled holes in the bottom plates, ensuring a tight connection between the walls and the foundation.
- Check for levelness: Use a level to ensure that the walls are plumb and level in all directions. Make any necessary adjustments by adding shims between the wall frames and the foundation, as needed. A level and straight wall alignment is crucial for the proper installation of the remaining components.
- Secure the corners: Install metal corner brackets or angle braces at the corners of the walls. These brackets provide additional stability and reinforcement to the structure. Secure them using screws or nails.
- Secure the walls to each other: Once the walls are attached to the foundation, use screws or nails to secure the adjacent wall frames together at the corners. This will further strengthen the overall structure of your shed.
- Repeat for remaining walls: Follow the same steps to attach the remaining walls to the foundation, ensuring proper alignment, levelness, and secure fastening. Take your time to ensure that all walls are securely attached before proceeding to the next step.
Attaching the walls to the foundation is a critical step in the construction process since it provides stability and ensures structural integrity. It is essential to accurately position the walls, secure them to the foundation, and ensure levelness and alignment for a strong and secure framework.
Now that the walls are firmly attached to the foundation, you’re ready to move on to the next phase of construction: installing the roof rafters to complete the framework of your shed.
Installing the Roof Rafters
Once the walls are securely in place, it’s time to install the roof rafters, which will provide the framework for your shed’s roof. The roof rafters play a crucial role in supporting the roof structure and ensuring its stability. Here’s a step-by-step guide on how to install the roof rafters:
- Measure and mark: Refer to your shed plan to determine the spacing and dimensions of the roof rafters. Measure and mark these measurements on the top plates of your wall frames. This will indicate the position and angle at which the rafters will be installed.
- Cut the rafters: Use a saw to cut the rafters based on the marked measurements. Consider the desired pitch and overhang of your roof as specified in your shed plan. It’s essential to ensure accurate cuts for a properly aligned and supported roof.
- Install the ridge board: Place the ridge board, which is a horizontal beam that runs along the peak of the roof, on top of the wall frames. Align it with the marked measurements and secure it to the wall frames using screws or nails. The ridge board will provide stability and support for the rafters.
- Attach the rafters: Position the rafters on the top plates of the wall frames, one at a time, following the marked measurements. Secure each rafter to the top plate and the ridge board using metal rafter connectors or framing nails. Make sure the rafters are evenly spaced and aligned properly.
- Check for plumb and levelness: Use a level to ensure that the rafters are plumb (vertical) and level (horizontal). Make any necessary adjustments by adding shims or adjusting the connectors/nails. A properly aligned and correctly installed roof rafter system is crucial for the stability and functionality of your shed.
- Install additional supports: Depending on the size and design of your shed, you might need additional supports such as collar ties or cross braces between the rafters. These supports enhance the stability and strength of the roof structure. Install them as necessary based on your shed plan.
Installing the roof rafters is a significant step in the construction process, as it shapes and supports the roof of your shed. It’s important to accurately measure, cut, and install the rafters for a secure and stable roof framework.
With the roof rafters installed, you’re ready to move on to the next step: adding the roof sheathing to complete the roof structure of your shed.
Read more: How To Build A Wood Base For A Shed
Adding the Roof Sheathing
After installing the roof rafters, the next step in constructing your shed is to add the roof sheathing. The roof sheathing provides structural support and forms the base for the roof covering. Here’s a step-by-step guide on how to add the roof sheathing:
- Measure and cut the sheathing: Measure the dimensions of the roof area and mark them on the plywood or oriented strand board (OSB) sheets. Use a circular saw to cut the sheathing according to the marked measurements. Ensure that the sheathing fits within the boundaries of the roof rafters.
- Position the first sheet: Begin by positioning the first sheet of sheathing at one corner of the roof, aligning it with the edge of the rafters. Leave a small gap, typically 1/8 inch, between the sheathing sheets to allow for natural expansion. This gap will prevent buckling or warping due to changes in temperature and moisture.
- Secure the sheathing: Starting from one corner, secure the sheathing to the rafters by using screws or nails. Drive the fasteners through the sheathing and into the rafters at regular intervals. Follow the manufacturer’s guidelines for recommended spacing and fastener length.
- Continue with the remaining sheets: Position the next sheet of sheathing adjacent to the first one, making sure to align the edges. Secure it to the rafters using the same method as before. Repeat this process for the remaining sheets of sheathing across the entire roof.
- Overlapping the sheathing: For additional strength and protection against moisture, overlap the edges of the sheathing sheets. Typically, a 6-inch overlap is recommended. Secure the overlapping sections using screws or nails.
- Check for evenness: Use a level or a straight edge to ensure that the sheathing is even and level across the roof. Make any necessary adjustments by adding shims or making slight modifications to achieve a smooth and even surface.
- Weatherproofing: Depending on your shed’s design and climate, you may need to apply a weatherproofing material, such as roofing felt or a synthetic underlayment, over the sheathing. This helps to protect the structure from water intrusion and prevents damage to the roof and interior.
Adding the roof sheathing completes the framework of your shed’s roof. It provides structural integrity, stability, and serves as a base for the final roof covering. Take your time to accurately measure, cut, and secure the sheathing to ensure a solid and reliable roof structure for your shed.
Now that the roof sheathing is in place, you’re ready to move on to the next step: building the shed doors to provide access to the interior.
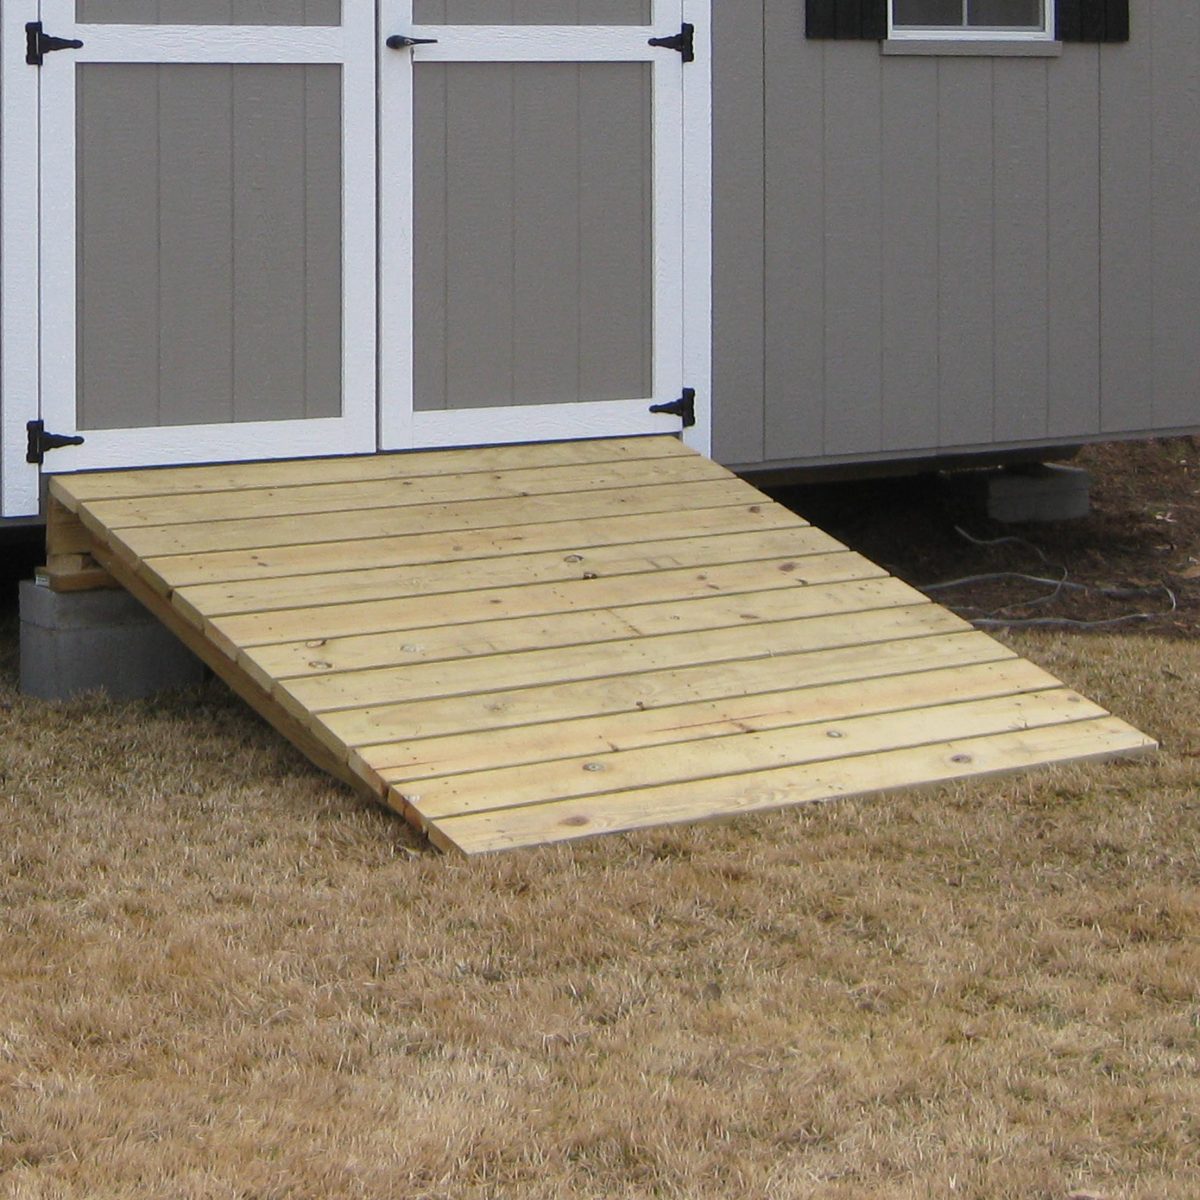
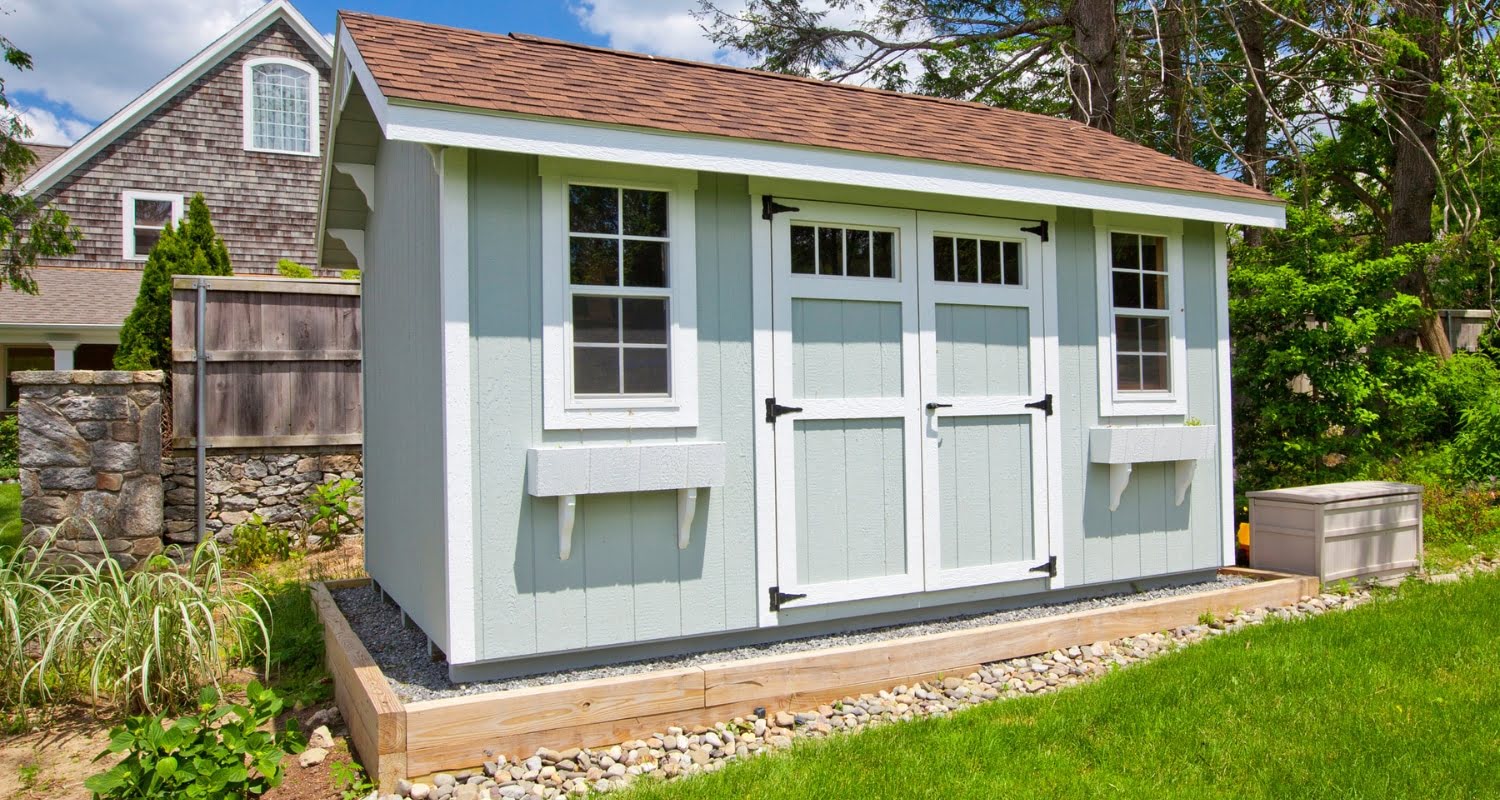
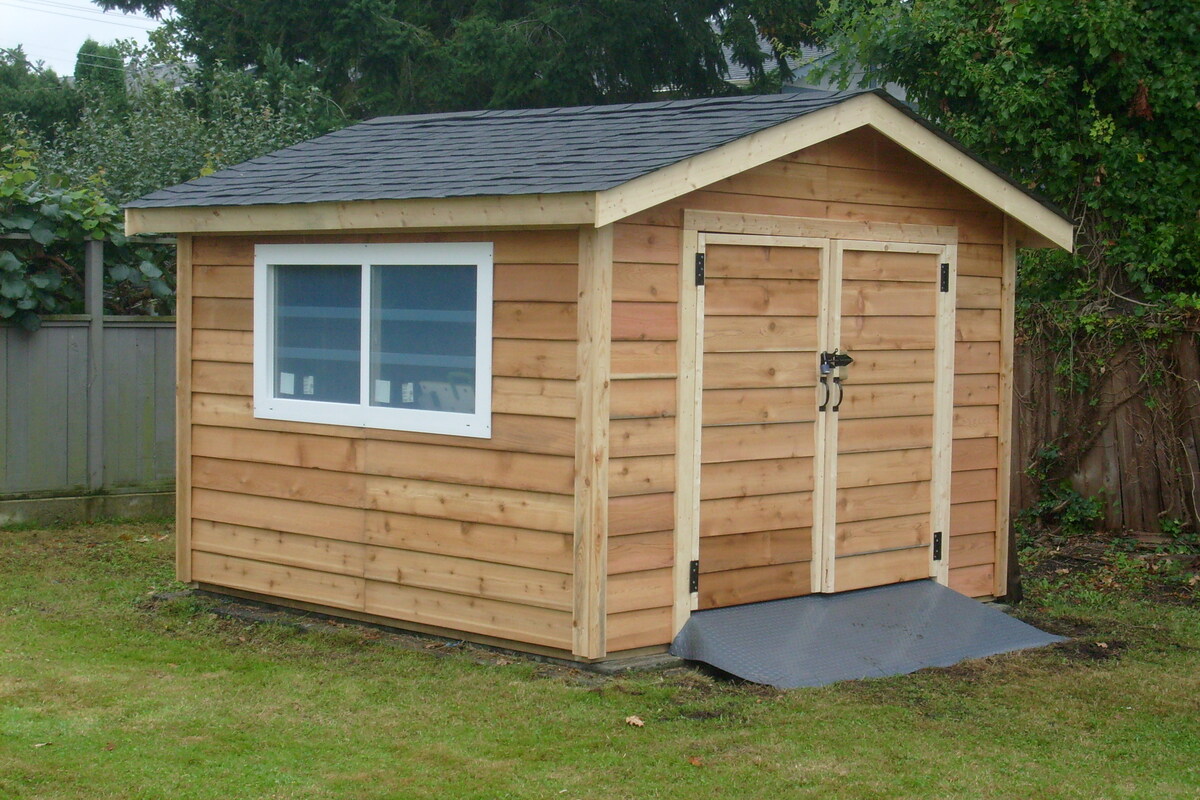
Building the Shed Doors
The shed doors not only provide access to the interior but also contribute to the overall aesthetics and functionality of your shed. Building sturdy and well-designed doors is essential for security and ease of use. Here’s a step-by-step guide on how to build the shed doors:
- Measure and plan: Measure the opening for your shed doors to determine the dimensions of each door panel. Consider factors such as the desired width, height, and style of the doors. Plan whether you want a single door or double doors for your shed.
- Cut the door panels: Using a saw, cut the lumber or plywood panels according to the measured dimensions. Each panel should fit within the opening of the shed, accounting for any desired gap between the panels.
- Assemble the door panels: Lay out the cut panels on a flat surface and attach horizontal support boards, also known as rails, to the top and bottom edges of each panel. Additionally, attach vertical support boards, also known as stiles, to the sides of each panel. This creates a frame for each door.
- Add diagonal bracing: For added stability, consider adding diagonal bracing inside the door panels. Measure and cut diagonal boards that span from one corner to another within the door frame. Attach the braces securely using screws or nails.
- Attach the hinges: Place the doors in position against the shed frame and mark the locations for the hinges. Attach the hinges to the door frame and then attach the other side of each hinge to the corresponding door panel. Make sure the hinges are properly aligned to allow smooth opening and closing of the doors.
- Install the door handles and locks: Depending on your preference and security needs, install a door handle and lock mechanism on each door panel. This will provide added security and ease of use for your shed doors.
- Check for proper alignment and operation: Carefully test the operation of the doors, ensuring they open and close smoothly without any obstructions or misalignment. Make any necessary adjustments to the hinges, latch, or door frame to achieve proper alignment and smooth operation.
Building the shed doors is a crucial step in completing the construction of your shed. It’s important to accurately measure, cut, and assemble the door panels to ensure sturdy, secure, and properly functioning doors. Take your time during the construction process to ensure a high-quality finished product.
Now that the shed doors are built and installed, you can focus on adding finishing touches to complete your shed construction project.
Applying Finishing Touches
With the main components of your shed construction complete, it’s time to add the finishing touches that will enhance the appearance, functionality, and longevity of your shed. Here are some key finishing touches to consider:
- Exterior finishes: Apply an exterior paint or stain to protect the wood from weather damage and add a visually appealing finish. Choose a color and finish that complements your surroundings and personal taste.
- Roof covering: Install the roof covering material of your choice, such as shingles, metal panels, or corrugated sheets. Ensure proper installation to prevent water leakage and provide sufficient protection from the elements.
- Window installation: If your shed design includes windows, install the window frames and secure them properly. Choose windows that match the style of your shed and allow sufficient natural light inside.
- Ventilation: Consider adding vents or louvers to promote airflow and prevent moisture buildup inside the shed. Proper ventilation helps to prevent mold, mildew, and other moisture-related issues.
- Interior finishes: Depending on your shed’s purpose, consider adding shelves, hooks, or other storage solutions to optimize the interior space. Paint or stain the interior walls for a finished look.
- Electrical and lighting: If you plan to use your shed for tasks that require electricity, consult a licensed electrician to install proper wiring, outlets, and lighting fixtures. This will ensure safety and convenience.
- Security measures: Install a secure lock system on your shed doors and consider additional security measures such as motion sensor lights or an alarm system to protect your belongings.
- Landscaping: Surround your shed with landscaping elements such as flower beds, shrubs, or a gravel pathway to enhance its overall aesthetics and integration with the surrounding environment.
Applying these finishing touches will not only enhance the visual appeal of your shed but also improve its functionality and durability. Don’t overlook these details, as they contribute to the overall usability and enjoyment of your shed for years to come.
With the finishing touches complete, step back and admire your beautifully constructed shed. You can now fully enjoy the benefits of having a well-built and functional space for storage, hobbies, or any other purpose you intended your shed for.
Conclusion
Congratulations on completing the construction of your wood foundation for a shed! By following this comprehensive guide, you have learned how to plan, prepare, and construct a sturdy and reliable foundation. Building a solid foundation is essential for the stability and longevity of any structure, and your shed is no exception.
We started by emphasizing the importance of planning and preparation, ensuring that you have a clear understanding of your shed’s size, location, and the necessary materials and tools. Then, we discussed how to choose the right location, clearing and leveling the ground to create a stable base.
The construction process continued with building the basic frame, installing the floor joists, adding the plywood flooring, building the wall frames, attaching the walls to the foundation, installing the roof rafters, and adding the roof sheathing. Each step was carefully outlined to guide you through the process and ensure proper construction techniques.
Finally, we covered important finishing touches such as exterior finishes, roof coverings, window installations, ventilation, interior finishes, electrical and lighting, security measures, and landscaping. These final touches will not only enhance the appearance of your shed but also improve its functionality and usability.
Remember to always consult local building codes and regulations, obtain necessary permits, and prioritize safety throughout the construction process. If you have any doubts or concerns, don’t hesitate to seek professional advice or assistance.
Now that your shed construction is complete, it’s time to enjoy the benefits of having a dedicated space for storage, hobbies, or any other use you envisioned for your shed. Take pride in your accomplishment and make the most of your well-built wood foundation for years to come!
Now that you've got the hang of building a wood foundation, why not take your DIY skills further? From small improvements to big builds, mastering DIY Projects can transform your home and garden. Keen on creating more with your hands? Delve into Woodworking to discover exciting projects perfect for 2024. If outdoor living spaces are your passion, designing Outdoor Structures could be your next great venture. Each guide offers practical tips to enhance your crafting journey.
Frequently Asked Questions about How To Build A Wood Foundation For A Shed
Was this page helpful?
At Storables.com, we guarantee accurate and reliable information. Our content, validated by Expert Board Contributors, is crafted following stringent Editorial Policies. We're committed to providing you with well-researched, expert-backed insights for all your informational needs.


0 thoughts on “How To Build A Wood Foundation For A Shed”