Home>diy>Building & Construction>How To Build A Gravel Foundation For A Shed
Building & Construction
How To Build A Gravel Foundation For A Shed
Modified: January 6, 2024
Learn how to build a sturdy gravel foundation for your shed with expert tips and step-by-step instructions in this comprehensive guide on building construction.
(Many of the links in this article redirect to a specific reviewed product. Your purchase of these products through affiliate links helps to generate commission for Storables.com, at no extra cost. Learn more)
Introduction
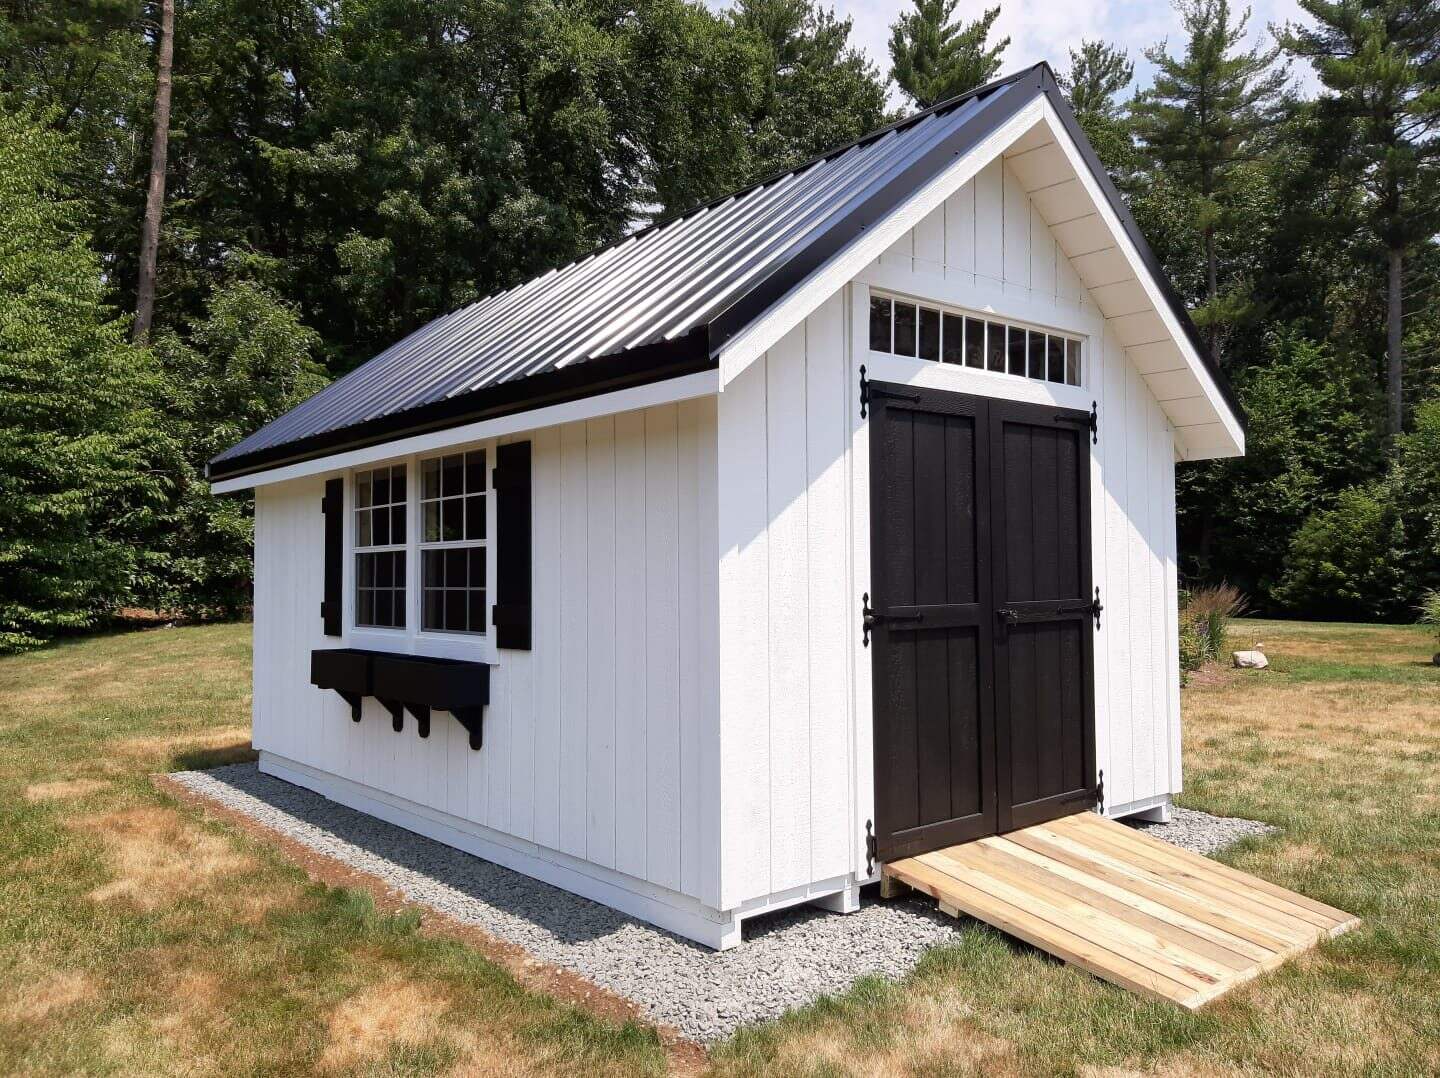
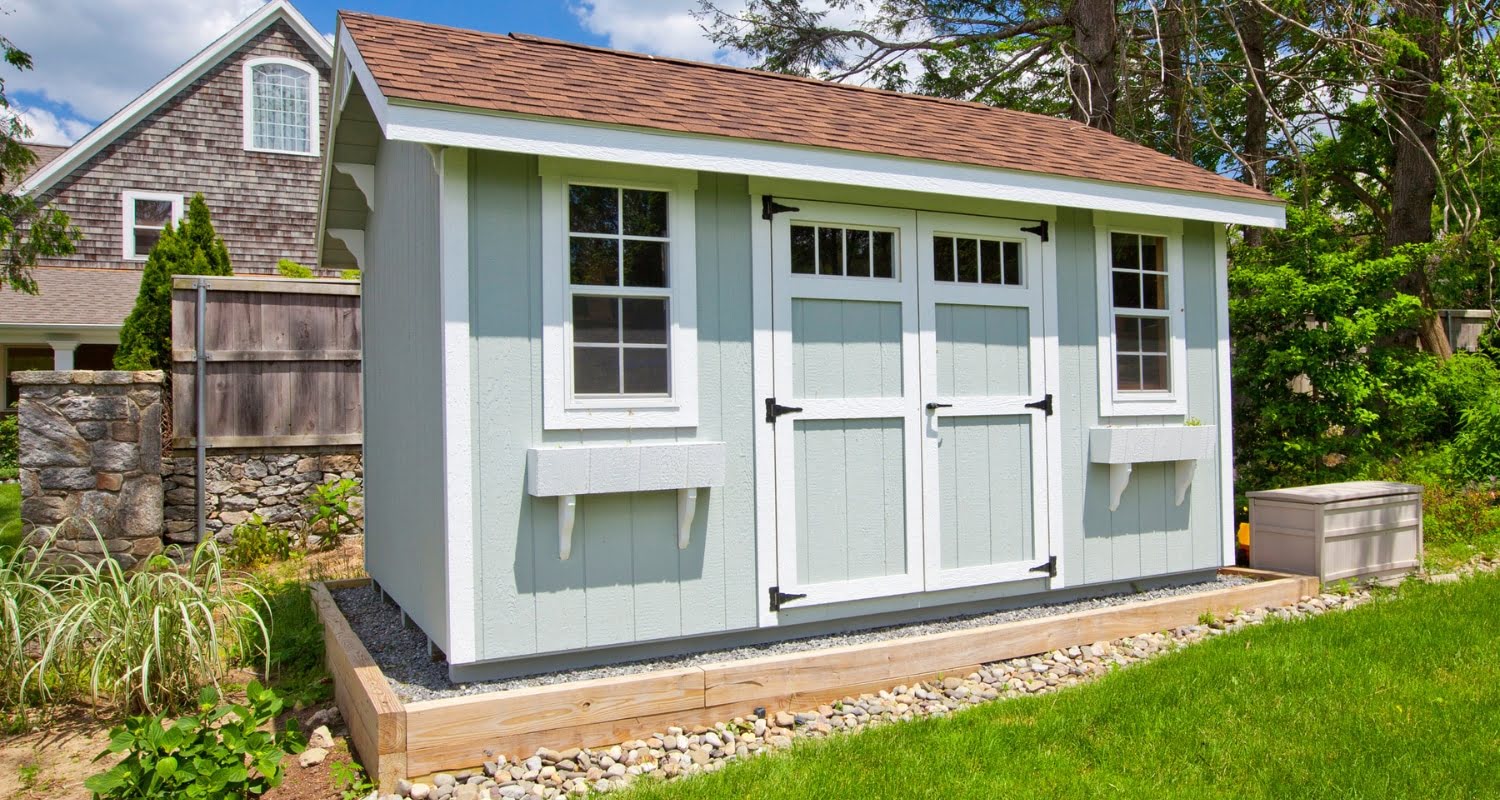
Building a gravel foundation for a shed is a cost-effective and practical solution to ensure stability and durability. Whether you’re planning to install a garden shed, a storage shed, or even a small workshop, a well-constructed gravel foundation will provide a solid base for your structure.
When it comes to constructing a gravel foundation, it’s essential to follow the right steps to ensure proper drainage, prevent settling, and maintain the structural integrity of the shed. In this article, we will guide you through the process of building a gravel foundation for your shed, providing you with the knowledge and expertise to complete the project successfully.
From gathering the necessary materials to securing the shed to the foundation, we will cover each step in detail, providing you with tips and insights along the way. By following our guide, you’ll be able to create a sturdy and reliable foundation that will support your shed for years to come.
Before we dive into the construction process, let’s discuss why a gravel foundation is an excellent choice for shed installations. Gravel provides excellent drainage, allowing water to flow away from the shed and preventing moisture from seeping into the ground. This helps to prevent rotting and extend the lifespan of the shed.
Additionally, gravel is readily available and relatively inexpensive compared to other foundation options like concrete or pavers. It is also easy to level and adjust, allowing for fine-tuning during the installation process. Moreover, a gravel foundation is generally easier to install and requires fewer tools, making it a feasible DIY project for many homeowners.
Now that we understand the benefits of a gravel foundation let’s move on to the first step – gathering the necessary materials.
Key Takeaways:
- Building a gravel foundation for a shed provides stability, durability, and proper drainage. It’s a cost-effective and practical DIY solution for homeowners, offering accessibility and low-maintenance benefits.
- From gathering materials to securing the shed, each step is crucial for a successful construction process. Gravel foundations are versatile, offering excellent drainage and cost-effectiveness for shed installations.
Read more: How To Build A Gravel Pad For A Shed
Step 1: Gather the Necessary Materials
Before you begin constructing your gravel foundation, it’s important to gather all the required materials. Here’s a list of items you’ll need to complete the project:
- Gravel: Choose a high-quality gravel with a diameter of ¾ inch or smaller. You’ll need enough to create a layer that is at least 4 inches thick.
- Landscape Fabric: This fabric will help prevent weeds and vegetation from growing through the gravel. Ensure you have enough to cover the entire area of your foundation.
- Tape Measure: A tape measure will allow you to accurately measure the dimensions of your shed and determine the size of your foundation.
- Shovel: A sturdy shovel will be necessary for clearing the area and digging the foundation.
- Rake: A rake will help you level the ground and spread the gravel evenly.
- Wheelbarrow: Having a wheelbarrow will make it easier to transport and distribute the gravel throughout the foundation area.
- Level: A level tool is essential for ensuring that the foundation is perfectly flat and level.
- Stakes and String: These will be useful for marking the boundaries of the foundation area and keeping the edges straight.
- Hammer: You’ll need a hammer to secure the stakes in place.
- Polymeric Sand: If you plan to secure your shed to the foundation using anchor bolts, polymeric sand can be used to fill the gaps between the gravel and the shed.
Make sure you have all of these materials on hand before you start the project. It’s always better to be fully prepared and organized to ensure a smooth construction process.
Now that you have all the necessary materials ready, it’s time to choose the ideal location for your gravel foundation. This will be your next step in the construction process.
Step 2: Choose the Location for Your Gravel Foundation
Choosing the right location for your gravel foundation is crucial for the overall stability and functionality of your shed. Here are some factors to consider when selecting the ideal spot:
- Accessibility: Ensure that the location is easily accessible for both construction and future use of the shed. Consider the path to the foundation, as well as any obstacles or obstructions that may hinder access.
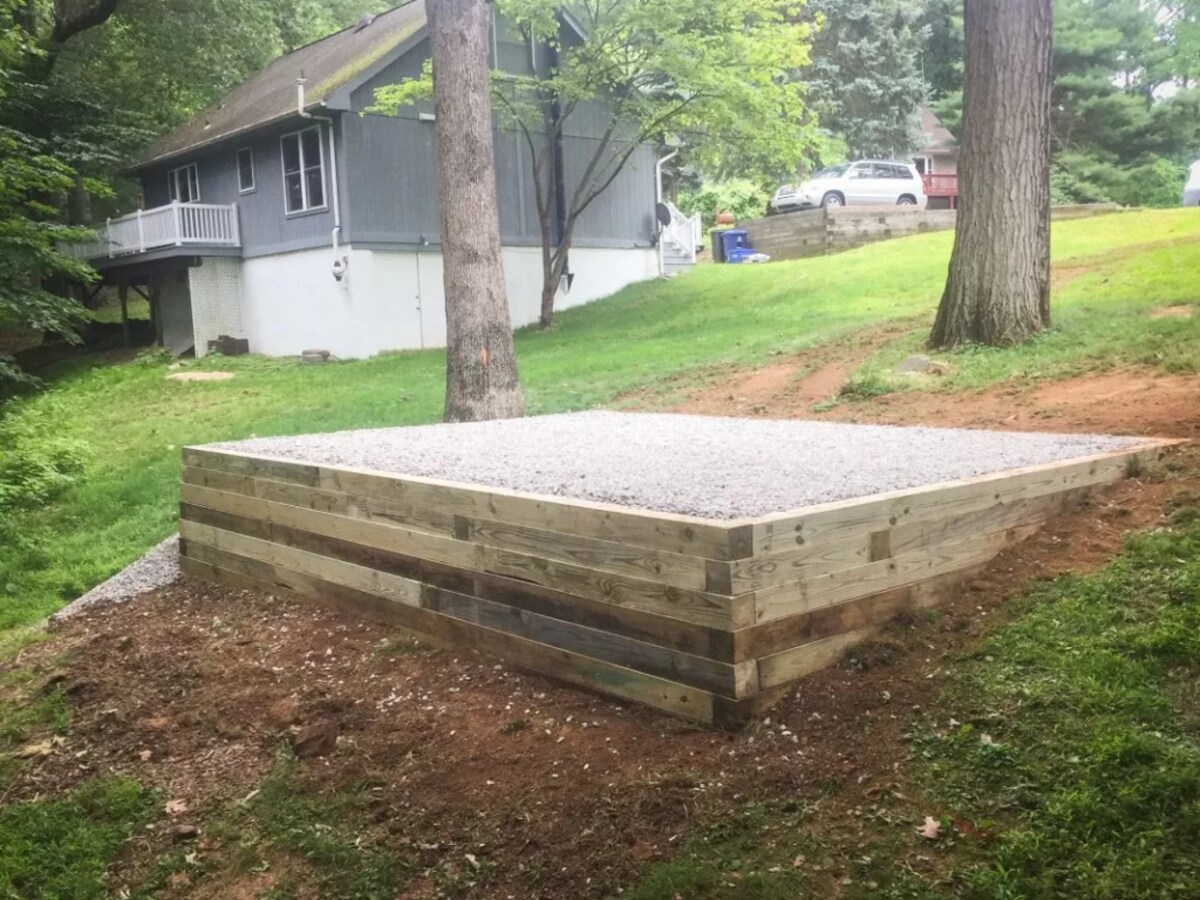
- Ground Slope: Look for a relatively flat area to minimize the amount of leveling required. If the ground has a slight slope, you may need to level it manually or consider building a retaining wall.
- Drainage: Locate the foundation away from areas that are prone to excessive water accumulation. Avoid low-lying spots where water tends to pool, as this can lead to potential water damage to your shed.
- Sunlight: Consider the amount of sunlight the location receives throughout the day. Proper sunlight exposure is essential if you plan to use the shed for activities that require natural light.
- Proximity to Utilities: If you plan to have electricity or water supply in your shed, choose a location that is close to existing utility connections. This will make it easier to install and connect the necessary utilities.
Once you’ve considered these factors, mark the boundaries of your foundation area using stakes and string. This will help you visualize the space and ensure that the shed will fit properly.
Remember to check with your local building codes and regulations to ensure compliance with any specific requirements regarding shed placement. Some municipalities may have restrictions on setback distances from property lines or other structures.
Now that you have selected the location for your gravel foundation, it’s time to move on to the preparatory steps to clear the area and prepare the ground.
Step 3: Clear the Area and Prepare the Ground
Before you can start constructing your gravel foundation, it’s important to clear the area and prepare the ground properly. Here are the steps to follow:
- Remove any vegetation: Start by clearing the area of any grass, weeds, or plants. Use a shovel or a garden hoe to remove the vegetation, ensuring that the area is free from any obstructions.
- Excavate the site: Use a shovel or a small excavator to dig out the top layer of soil within the marked boundaries of your foundation. Aim to remove around 4 to 6 inches of soil to allow for the gravel layer and ensure a stable base.
- Level the ground: Use a rake or a shovel to level the excavated area. Remove any high spots and fill in any depressions to create a smooth and even surface for your foundation.
- Compact the soil: To enhance stability and prevent settling, compact the soil using a hand tamp or a vibrating plate compactor. This will help ensure a solid base for your gravel foundation.
During this process, it’s important to periodically check the level of the ground using a spirit level or a laser level to ensure that it is even. This will help prevent any potential issues with the shed installation.
Once the area is cleared and the ground is level and compacted, you’re ready to move on to the next step – creating a level base for your gravel foundation.
Remember to exercise caution and follow safe digging practices. If you encounter any underground utilities, such as gas or water lines, stop digging immediately and contact the appropriate utility company for guidance.
Now that the area is cleared and the ground is prepared, let’s proceed to the next step: creating a level base for your gravel foundation.
Step 4: Create a Level Base
Creating a level base is essential for the stability and proper installation of your gravel foundation. Here’s how to create a level base:
- Measure and mark the desired height: Use a tape measure to determine the desired height of your gravel foundation. Mark this height on the surrounding stakes.
- Set up guide boards: To ensure a consistently level base, set up guide boards along the perimeter of the marked area. These boards should be placed at the desired height and secured to the stakes.
- Check for levelness: Use a spirit level or a laser level to check that the guide boards are perfectly level. Make any necessary adjustments by raising or lowering the guide boards until they are level.
- Fill low spots: If you notice any low spots within the marked area, use additional soil or gravel to fill them in. Compact the soil or gravel and recheck for levelness.
Creating a level base is crucial to ensure the stability and proper alignment of your shed. It will also help distribute the weight of the shed evenly, reducing the risk of sagging or structural damage over time.
Once you have achieved a level base, you’re ready to move on to the next step: determining the size of your foundation. This step is important for accurately calculating the amount of gravel you’ll need for the project.
Remember to take your time during this step to ensure that the base is perfectly level. Even slight discrepancies can lead to issues with the installation and long-term stability of the shed.
With the level base in place, we can now proceed to the next step: determining the size of your foundation.
Read more: How To Build A Foundation For A Tool Shed
Step 5: Determine the Size of Your Foundation
Determining the size of your gravel foundation is a crucial step in the construction process. It ensures that your shed will fit properly and that you will have enough space for the desired use. Here’s how to determine the size of your foundation:
- Measure the dimensions of your shed: Use a tape measure to measure the length and width of your shed. These measurements will serve as the basis for determining the size of your foundation.
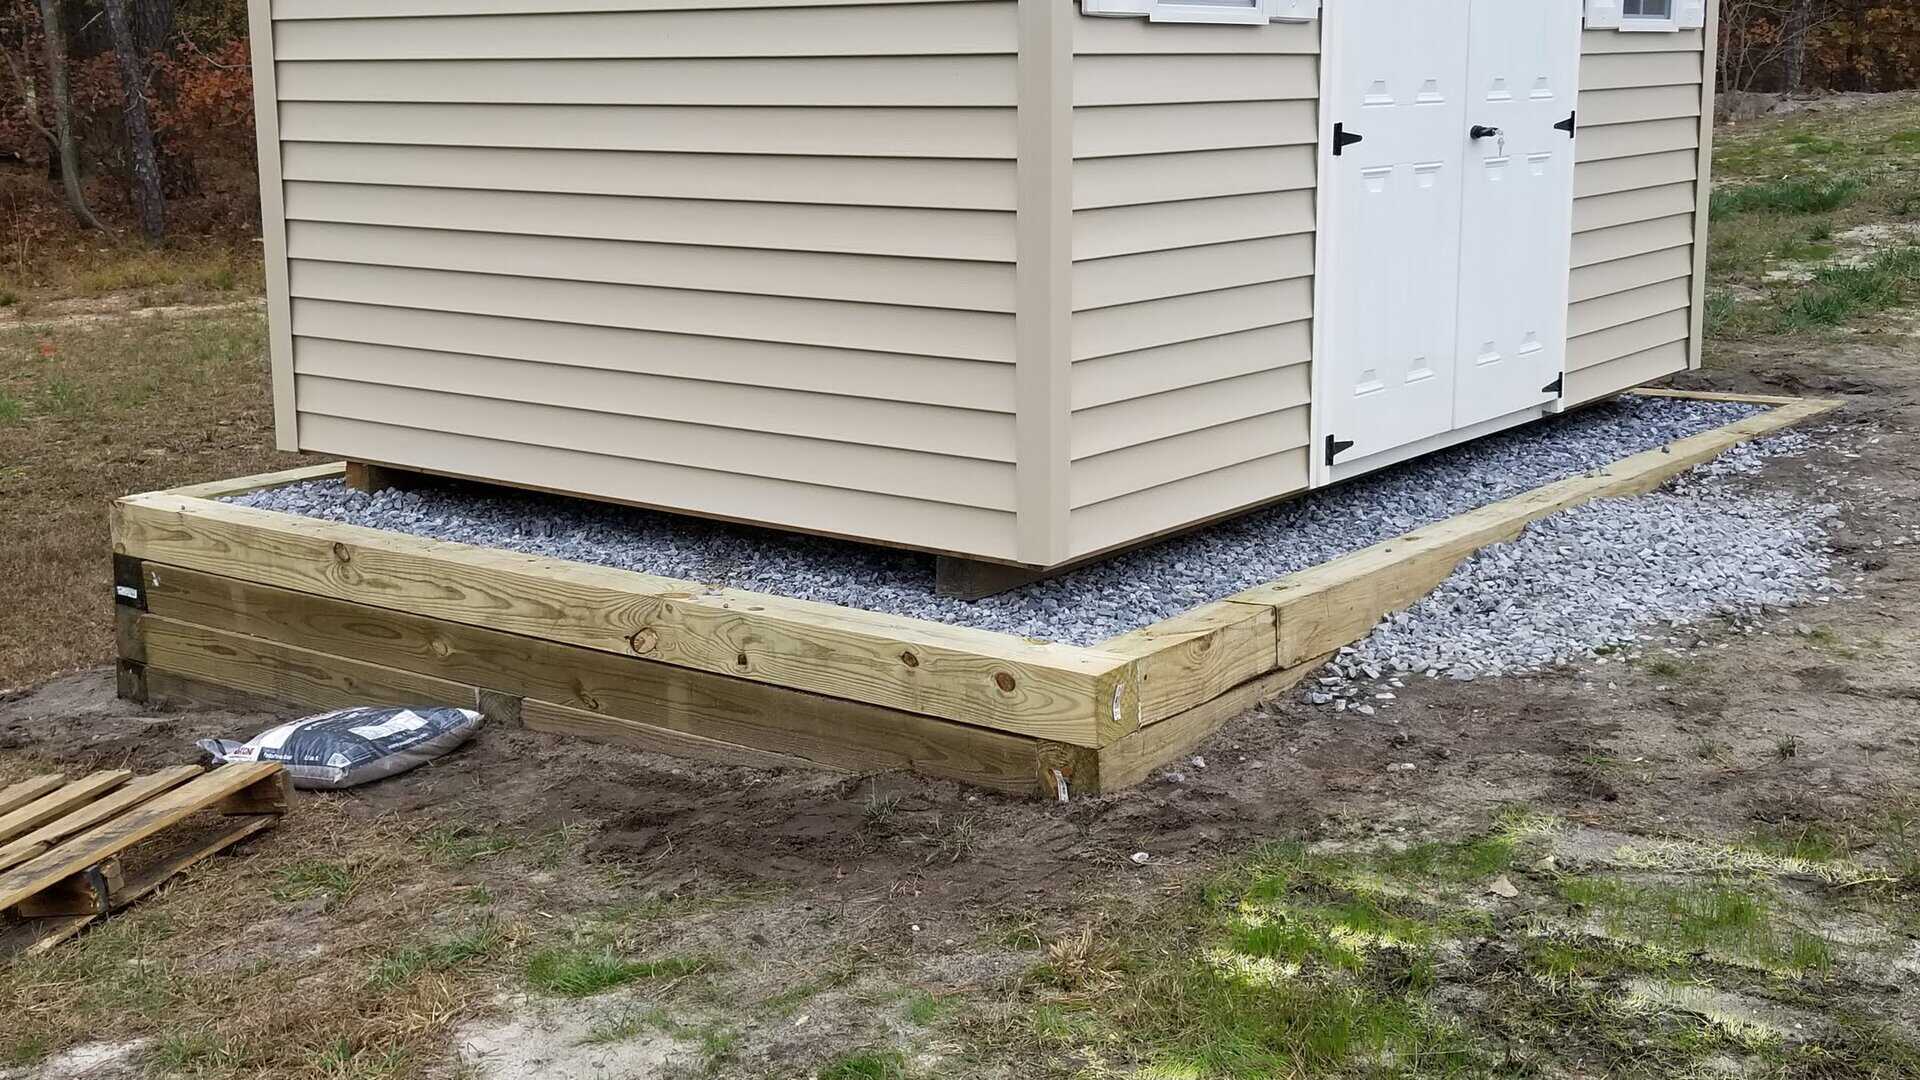
- Add extra space for clearance: Add at least 12 inches to each side of the shed to allow for proper clearance. This extra space will make it easier to access the shed for maintenance and repairs in the future.
- Consider the slope of the ground: If the ground has a slight slope, you may need to adjust the dimensions of the foundation to compensate for the slope. Ensure that the foundation provides a level surface for the shed.
It’s important to note that the dimensions of your foundation should be larger than the shed itself to ensure proper support and stability. This additional space around the shed acts as a buffer and helps prevent any potential water damage or shifting of the structure.
By accurately determining the size of your foundation, you’ll be able to calculate the correct amount of gravel needed for the project. This will ensure that you have enough material to create a solid and stable foundation.
Once you have determined the size of your foundation, you can move on to the next step: calculating the amount of gravel needed. This step will help you estimate the quantity of gravel required for your specific foundation dimensions.
Take your time during this step to ensure that you have the correct measurements. Proper planning and accurate calculations will contribute to the success of your gravel foundation construction.
Now that you know the size of your foundation, let’s proceed to the next step: calculating the amount of gravel needed.
Step 6: Calculate the Amount of Gravel Needed
To build a sturdy and stable gravel foundation, it’s crucial to calculate the correct amount of gravel needed. Here’s how to calculate the quantity of gravel required for your project:
- Calculate the volume: Start by multiplying the length, width, and depth of your foundation to calculate the volume in cubic feet. For example, if your foundation measures 10 feet long, 8 feet wide, and you want a gravel depth of 4 inches, the calculation would be: 10′ x 8′ x (4″/12′) = 26.7 cubic feet.
- Convert to cubic yards: Since gravel is typically sold by the cubic yard, divide the cubic feet by 27 to convert to cubic yards. Using the previous example, 26.7 cubic feet ÷ 27 = 0.99 cubic yards of gravel.
- Add extra material: It’s a good idea to add an additional 10-20% to account for compaction and potential settling. This means that if you calculated 0.99 cubic yards, you might consider purchasing 1.1-1.2 cubic yards of gravel.
Remember that these calculations are based on a level foundation with a consistent depth of gravel. If your foundation has varying depths or slopes, you may need to adjust the calculations accordingly by calculating the volume for each section separately.
It’s also important to consider the specific type of gravel you will be using. Different types of gravel have varying densities, so it’s a good idea to consult with your local supplier to determine the appropriate volume needed based on the type of gravel you choose.
By accurately calculating the amount of gravel needed, you can ensure that you have enough material to complete the foundation with the proper depth and compaction. This will result in a stable and durable base for your shed.
Now that you have calculated the amount of gravel required, you’re ready to move on to the next step: laying landscape fabric. This step will help prevent weeds and vegetation from growing through the gravel and causing potential issues in the future.
Take your time during this step to ensure that you have accurate measurements and calculations. Proper planning and preparation will contribute to the success of your gravel foundation construction.
Now, let’s proceed to the next step: laying landscape fabric.
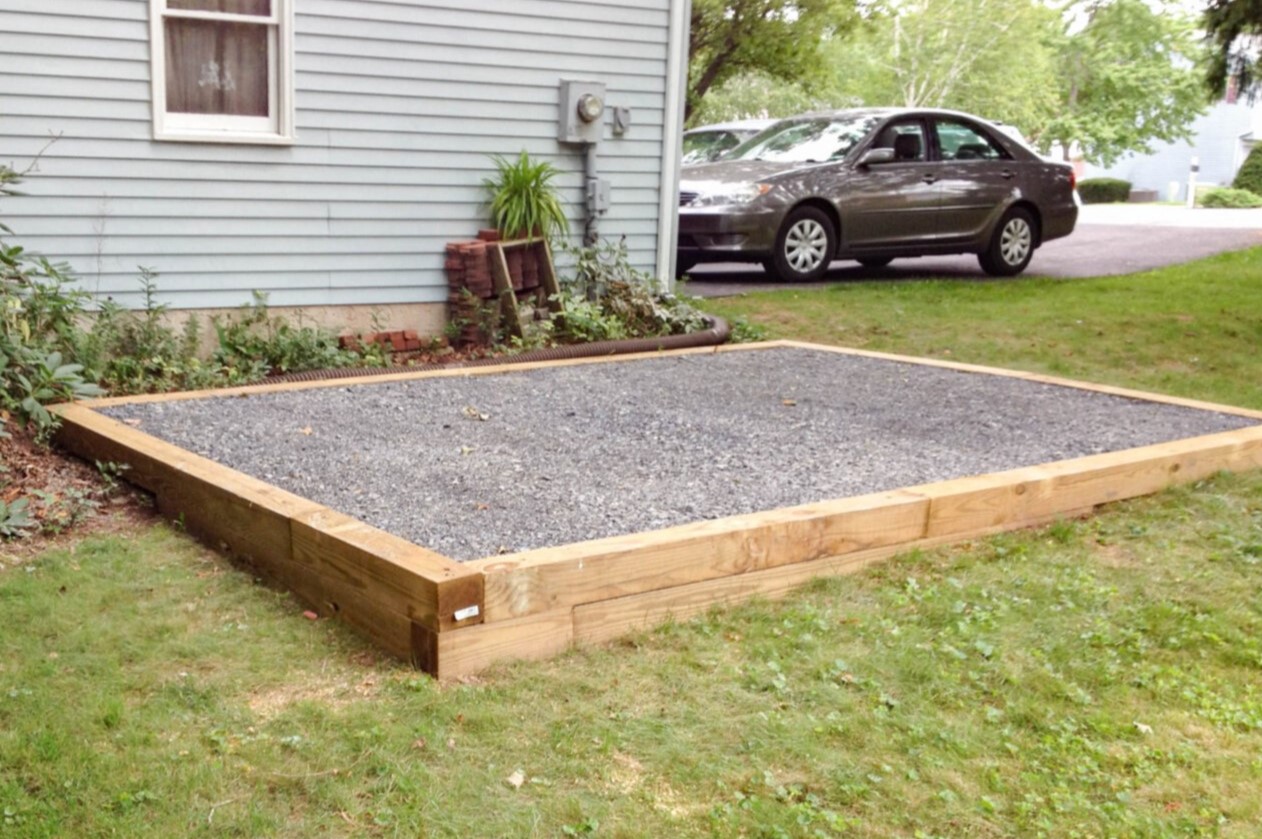
When building a gravel foundation for a shed, make sure to clear the area of any vegetation and level the ground before adding a layer of landscape fabric to prevent weeds from growing through the gravel. This will provide a stable base for your shed.
Step 7: Lay Landscape Fabric
Laying landscape fabric is an important step in building a gravel foundation for your shed. The landscape fabric helps to prevent weeds and vegetation from growing through the gravel, ensuring a tidy and low-maintenance foundation. Here’s how to lay landscape fabric:
- Cut the fabric: Measure the dimensions of your foundation and cut the landscape fabric to fit the area. Make sure to add a few extra inches on each side to ensure full coverage.
- Clear the area: Remove any debris or rocks from the foundation area. This will create a clean surface for laying the landscape fabric.
- Unroll the fabric: Start at one end of the foundation and unroll the landscape fabric across the entire area. Smooth out any wrinkles or folds to ensure even coverage.
- Overlap seams: If necessary, overlap the seams of the landscape fabric by a few inches. This will help prevent any gaps where weeds could potentially grow through.
- Secure the fabric: Use landscape fabric pins or staples to secure the fabric to the ground. Place the pins or staples every few feet along the edges and at the seams to hold the fabric in place.
Laying landscape fabric is a simple yet effective step to help maintain the integrity of your gravel foundation. It acts as a barrier between the gravel and the soil, reducing the likelihood of weed growth and ensuring long-term stability.
When selecting landscape fabric, choose a high-quality, durable material that is permeable to allow for proper drainage. This will help water flow through the fabric and prevent water accumulation beneath the foundation.
With the landscape fabric securely in place, you’re ready to move on to the next step: spreading the gravel evenly. This step will provide the necessary foundation for your shed and ensure proper drainage.
Take your time during this step to ensure that the landscape fabric is properly installed. Proper preparation will contribute to the success of your gravel foundation construction.
Now, let’s proceed to the next step: spreading the gravel evenly.
Step 8: Spread the Gravel Evenly
Once you have laid the landscape fabric, it’s time to spread the gravel evenly over the foundation area. This step is crucial for creating a sturdy and level surface for your shed. Here’s how to spread the gravel evenly:
- Start at one corner: Begin spreading the gravel at one corner of the foundation area. This will help in maintaining a consistent and even distribution of gravel.
- Use a shovel or rake: Use a shovel or rake to spread the gravel across the foundation. Work in small sections at a time, ensuring that the layer is even and level.
- Aim for a consistent depth: Aim for a gravel depth of about 4 inches throughout the entire foundation area. Use a tape measure or other measuring tool to ensure consistency as you spread the gravel.
- Rake and smooth: After spreading the gravel, use a rake to even out the surface and smooth any uneven areas. This will help create a level base for your shed.
- Pay attention to the edges: Be sure to spread gravel evenly along the edges of the foundation, ensuring a seamless transition from the center to the boundaries.
Spreading the gravel evenly is essential to prevent any uneven surfaces or potential shifting of the shed. An even layer of gravel will provide a solid foundation and promote proper drainage, reducing the risk of water damage or erosion.
During this step, it’s important to take your time and pay attention to detail. Ensure that the gravel is evenly distributed and leveled, as this will affect the overall stability and appearance of the foundation.
Now that the gravel has been evenly spread, it’s time to move on to the next step: compacting the gravel. This step will help further stabilize the foundation and provide a solid base for your shed.
Take your time during this step to ensure that the gravel is evenly spread and leveled. Proper preparation will contribute to the success of your gravel foundation construction.
Now, let’s proceed to the next step: compacting the gravel.
Read more: How To Build A Wood Foundation For A Shed
Step 9: Compact the Gravel
Compacting the gravel is a crucial step in building a gravel foundation. This process helps to ensure stability, minimize settling, and create a solid base for your shed. Here’s how to compact the gravel:
- Use a compactor: Rent or borrow a plate compactor or a hand tamper designed for compacting gravel.
- Start at the edges: Begin compacting the gravel at the edges of the foundation, working your way towards the center.
- Overlap each pass: Make sure to overlap each pass of the compactor to ensure even compaction across the entire foundation.
- Vary directions: Change the direction in which you run the compactor to ensure thorough and uniform compaction.
- Work in sections: Divide the foundation into manageable sections and compact each section individually. This will help you achieve consistent compaction throughout the entire foundation area.
- Continue until firm: Continue compacting the gravel until it becomes firm and stable. You should not be able to push a shovel into the compacted gravel.
Proper compaction is crucial to prevent the gravel from shifting or settling over time. It helps to create a solid base that can withstand the weight of your shed and provides a stable surface for the structure.
During the compaction process, be mindful of any low spots or uneven areas. Add additional gravel as needed to fill in any depressions and ensure an even foundation.
Once the gravel is compacted, you’re ready to move on to the next step: checking for levelness. This step will ensure that your shed will be installed on a level and stable foundation.
Take your time during this step to ensure thorough compaction. Pay attention to any areas that might require extra attention and make sure the entire foundation is properly compacted.
Now, let’s proceed to the next step: checking for levelness.
Step 10: Check for Levelness
Checking for levelness is a crucial step in ensuring that your shed will be properly installed on a stable and even foundation. Here’s how to check for levelness:
- Use a level tool: Place a long level tool, such as a carpenter’s level, across the surface of the foundation.
- Check in multiple directions: Check the levelness of the foundation in both the lengthwise and widthwise directions. This will give you a comprehensive assessment of the overall levelness.
- Adjust as necessary: If you notice any areas that are not level, you can make adjustments by adding or removing gravel. Use a rake or shovel to make the necessary changes to achieve an even and level surface.
- Double-check the corners: Pay special attention to the corners of the foundation, as these areas are critical for proper alignment and stability of your shed.
Ensuring that the foundation is level is crucial for the installation of your shed. A level foundation helps to distribute the weight of the shed evenly, reducing the risk of sagging or structural damage over time.
During this step, take your time and be thorough. Double-check the levelness in multiple directions and make any necessary adjustments to achieve the desired level foundation.
Once you have confirmed that the foundation is level, you’re ready to move on to the final step: securing the shed to the gravel foundation. This step will provide additional stability and security to your shed.
Take your time during this step to ensure that the foundation is perfectly level. Even slight discrepancies can lead to issues with the installation and long-term stability of the shed.
Now, let’s proceed to the final step: securing the shed to the gravel foundation.
Step 11: Secure the Shed to the Gravel Foundation
Securing your shed to the gravel foundation is the final step in ensuring its stability and longevity. By properly securing the shed, you can prevent it from shifting or being damaged by strong winds or other external forces. Here’s how to secure your shed to the gravel foundation:
- Drill anchor holes: Determine the appropriate locations for anchor holes along the bottom edges of your shed. These holes will be used to secure the shed to the foundation.
- Place anchor bolts: Insert anchor bolts into the pre-drilled holes, making sure they extend into the gravel foundation.
- Fill gaps with polymeric sand: If there are any gaps between the shed and the gravel foundation, fill them with polymeric sand. This will help provide a secure and stable connection.
- Tighten nuts onto anchor bolts: Place washers and nuts onto the anchor bolts and tighten them with a wrench. This will secure the shed in place, preventing it from shifting or being lifted by strong winds.
Securing your shed to the gravel foundation is crucial, especially in areas prone to strong winds or other inclement weather conditions. It provides added stability, ensuring that your shed remains securely in place.
If you live in an area with high wind gusts, you might consider using additional anchoring methods, such as hurricane straps or tie-downs, for extra reinforcement.
Once the shed is securely fastened to the foundation, you can begin using your new space for storage, a workshop, or any other purpose you have in mind.
Congratulations! You have successfully built a gravel foundation for your shed. By following the steps outlined in this guide, you have created a strong and durable base that will support your shed for many years to come.
Remember to regularly inspect the foundation and make any necessary adjustments or repairs as needed. Additionally, take proper care of your shed to ensure its longevity and maintain its structural integrity.
Now that you have completed the construction of your gravel foundation, it’s time to enjoy the benefits of having a secure and stable base for your shed. Whether it’s a garden shed, a storage shed, or a workshop, you can have peace of mind knowing that your structure is built on a solid foundation.
Thank you for following this step-by-step guide to building a gravel foundation for your shed. We hope this article has been helpful and that your shed serves you well for years to come.
Conclusion
Building a gravel foundation for your shed is a practical and cost-effective solution that provides stability, durability, and proper drainage. By following the steps outlined in this guide, you have learned how to create a solid and level base for your shed using gravel.
From gathering the necessary materials to securing the shed to the foundation, each step is essential in ensuring a successful construction process. By taking the time to properly clear the area, prepare the ground, create a level base, and spread and compact the gravel, you have built a foundation that will support your shed for years to come.
The process of determining the size of the foundation, calculating the amount of gravel needed, and laying landscape fabric has helped you create a stable and low-maintenance foundation. Check for levelness and securing the shed to the gravel foundation further ensure its stability and security.
Remember, maintaining your gravel foundation is key to its longevity. Regularly inspecting and making any necessary adjustments or repairs will help keep your shed stable and secure over time. Additionally, taking proper care of your shed will ensure its continued functionality and aesthetics.
By choosing a gravel foundation, you have opted for a versatile and practical option that offers excellent drainage, accessibility, and cost-effectiveness. Gravel foundations are especially beneficial for those who want a DIY-friendly project that does not require extensive skills or specialized tools.
We hope this comprehensive guide has provided you with the necessary knowledge to successfully build a gravel foundation for your shed. As you enjoy your newly built space, take pride in knowing that you have created a strong and durable foundation that will protect your belongings and serve your needs for years to come.
Thank you for choosing this guide, and best of luck with your shed construction project!
Frequently Asked Questions about How To Build A Gravel Foundation For A Shed
Was this page helpful?
At Storables.com, we guarantee accurate and reliable information. Our content, validated by Expert Board Contributors, is crafted following stringent Editorial Policies. We're committed to providing you with well-researched, expert-backed insights for all your informational needs.


0 thoughts on “How To Build A Gravel Foundation For A Shed”