Home>diy>Building & Construction>How To Do A Retaining Wall Construction
Building & Construction
How To Do A Retaining Wall Construction
Modified: January 9, 2024
Learn how to do a durable retaining wall construction with our step-by-step guide. Expert tips, tools, and techniques for building-construction.
(Many of the links in this article redirect to a specific reviewed product. Your purchase of these products through affiliate links helps to generate commission for Storables.com, at no extra cost. Learn more)
Introduction
Building a retaining wall is an essential aspect of construction when it comes to creating functional and visually appealing outdoor spaces. Whether you want to level out a sloping yard, prevent soil erosion, or add terraces to your landscape, a well-constructed retaining wall is the key to achieving these goals. In this article, we will dive into the process of building a retaining wall, from planning and design to the finishing touches.
Constructing a retaining wall requires careful planning, proper design, and precise execution. It is crucial to understand the principles involved to ensure the structural integrity and longevity of the wall. Additionally, having the right tools and materials at your disposal is essential for a successful construction project. Through step-by-step instructions and expert tips, we will guide you on how to build a retaining wall that is both functional and aesthetically pleasing.
Before we delve into the specifics, let’s briefly touch on the importance of a retaining wall. Retaining walls not only provide structural support to hold back soil and prevent erosion but also add beauty and definition to any landscape. Whether you are creating terraced gardens, constructing a patio, or leveling out a yard, a well-designed retaining wall can transform your outdoor space into a stunning showcase.
Whether you are a seasoned DIY enthusiast or a professional contractor, this comprehensive guide will equip you with the knowledge and skills to tackle a retaining wall construction project. So, let’s get started with the planning and designing phase, where you will learn how to assess your site, determine the wall’s purpose and size, and select the appropriate materials for your project.
Key Takeaways:
- Proper planning, site preparation, and foundation preparation are crucial for building a stable and visually appealing retaining wall. Attention to detail and precision during construction ensure longevity and structural integrity.
- Incorporating a well-designed drainage system, proper backfilling, and attention to finishing touches such as sealant application and decorative elements are essential for enhancing the functionality and aesthetics of a retaining wall. Regular maintenance is key to preserving its integrity over time.
Read more: How To Build Stairs In A Retaining Wall
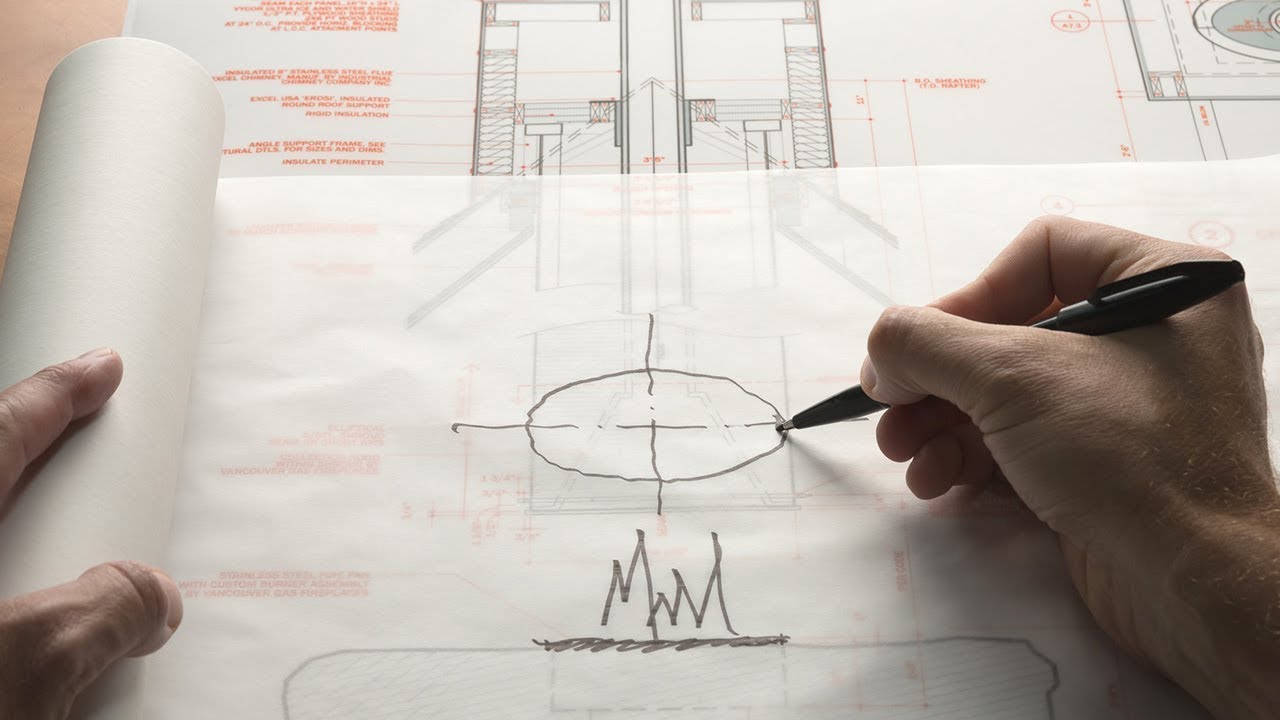
Planning and Designing
The first step in building a retaining wall is careful planning and designing. This phase is crucial as it sets the foundation for the entire project. Here are the key considerations to keep in mind:
- Assess the Site: Start by assessing your site to determine the purpose and location of the retaining wall. Look for areas prone to soil erosion or where you need to create level ground. Identify any potential obstacles or drainage issues that may affect the construction.
- Determine the Purpose and Size: Next, define the purpose of the retaining wall. Are you looking to create a terraced garden, build a patio, or simply level out a sloping yard? This will help you determine the size and height of the wall.
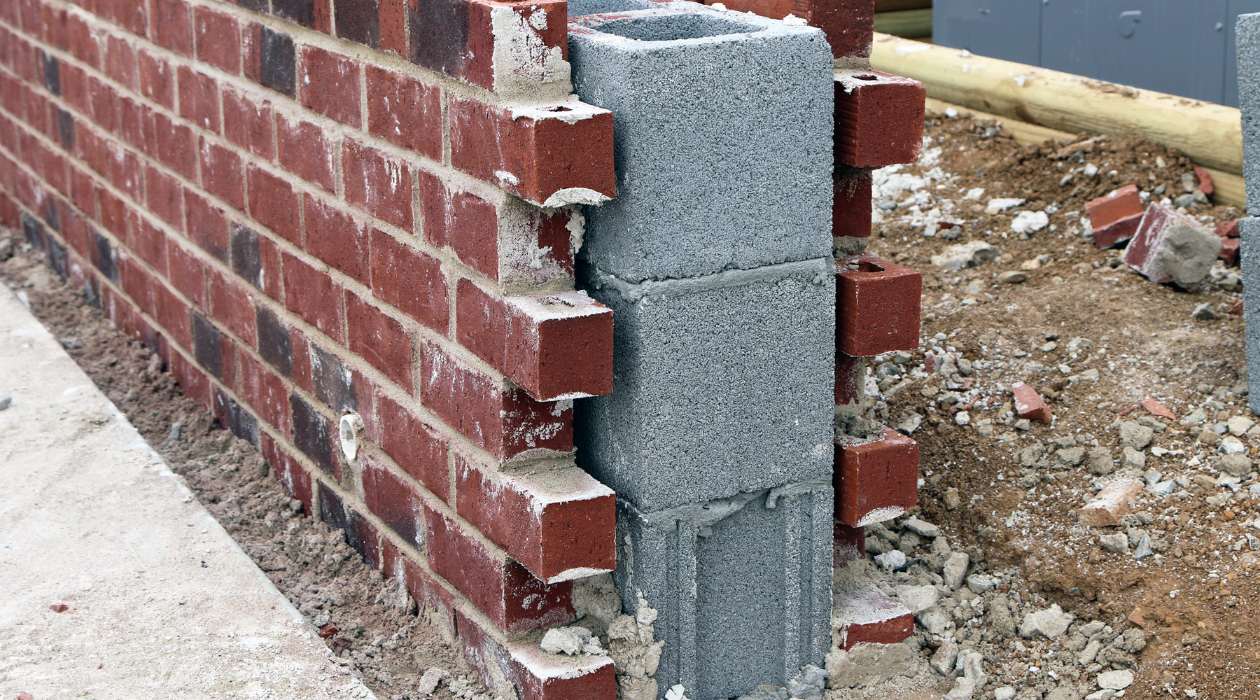
- Select the Right Materials: Choose the materials that best suit your project’s needs and complement the overall aesthetic of your landscape. Common options include concrete blocks, natural stone, timber, or brick.
- Consider Drainage: Proper drainage is essential to prevent water buildup behind the wall, which can cause damage and instability. Incorporate a drainage system into the wall’s design to redirect water away from the structure.
- Obtain Necessary Permits: Check with your local building authorities to determine if any permits are required for constructing a retaining wall. Compliance with regulations ensures safety and avoids potential legal issues down the line.
- Seek Professional Advice: If you are unsure about any aspect of the planning and designing process, it is wise to consult with a professional engineer or contractor. Their expertise and experience will help ensure a successful and structurally sound retaining wall.
Once you have completed the planning and designing phase, you are ready to move on to the next step: site preparation. This crucial stage involves clearing the area, marking the boundaries, and making necessary adjustments to the terrain to ensure a stable foundation for the wall construction. Continue reading to learn more about site preparation in building a retaining wall.
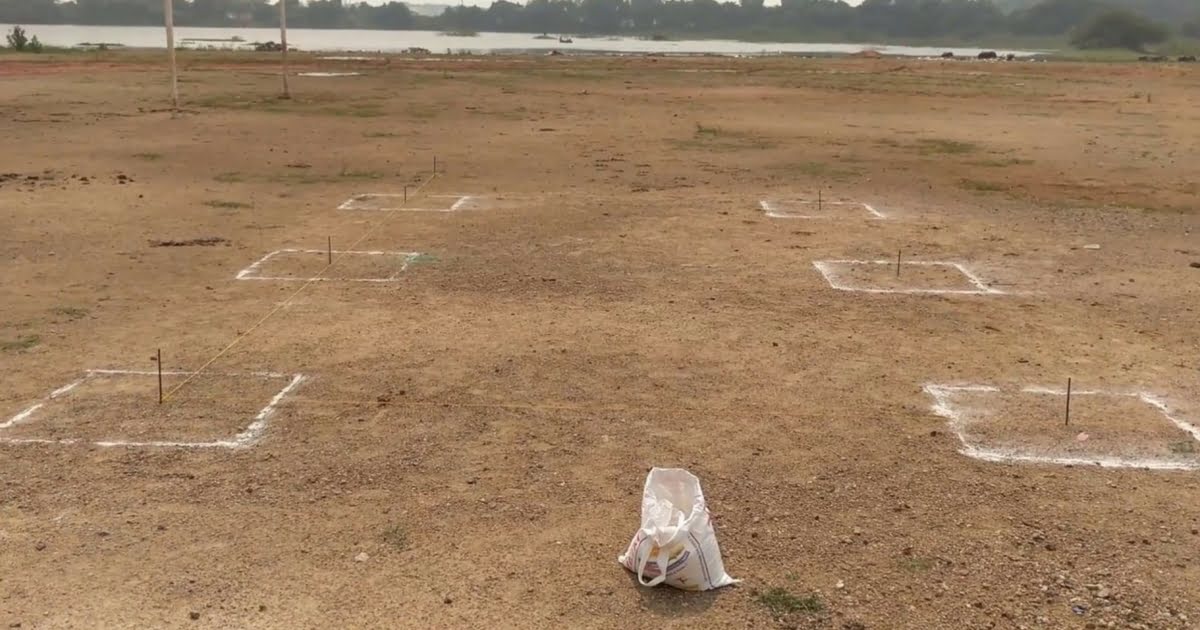
Site Preparation
Site preparation is a critical step in the construction of a retaining wall. Properly preparing the site ensures a stable foundation and sets the stage for a successful project. Here are the key steps involved in site preparation:
- Clear the Area: Begin by removing any vegetation, debris, or obstacles from the construction area. This includes plants, rocks, tree roots, and any other items that could interfere with the wall’s construction or stability.
- Mark Boundaries: Use marking paint or stakes and string to clearly define the boundaries of the retaining wall. This helps guide the excavation process and ensures the wall is constructed within the desired parameters.
- Excavate: Excavate the site according to the design specifications. This involves removing the existing soil to create a level base for the wall. Pay attention to any slopes or contours in the terrain and make adjustments as necessary.
- Grade the Area: After excavation, use a rake or shovel to grade and level the soil. This will help create a smooth and even surface for the foundation of the retaining wall.
- Compact the Soil: Use a compactor or tamper to compact the soil in the excavation area. This ensures a firm and stable base for the wall construction, minimizing the risk of settling or shifting over time.
- Check for Proper Slope: Use a level and measuring tape to ensure the site has the correct slope for drainage purposes. Ideally, the slope should be approximately 1 inch of drop per foot of wall height.
- Inspect Utility Lines: Before proceeding with the wall construction, it is crucial to identify and mark the location of any utility lines (such as water, gas, or electrical lines) that may be buried in the site. This prevents accidental damage during excavation or construction.
Once the site is properly prepared, you are ready to gather the necessary materials and tools for the construction of the retaining wall. The choice of materials and the availability of the right tools will greatly influence the quality and efficiency of the construction process. Continue reading to learn more about the required materials and tools for building a retaining wall.
Materials and Tools
Before starting the construction of a retaining wall, it is essential to have the appropriate materials and tools for the project. Having the right supplies at hand will ensure smooth progress and a successful outcome. Here is a list of the commonly used materials and tools for building a retaining wall:
Materials:
- Retaining Wall Blocks: Choose the appropriate type of blocks for your project, such as concrete blocks, natural stone, or timber. Consider factors like durability, aesthetic appeal, and ease of installation.
- Drainage Pipe: Use a perforated drainage pipe to provide proper drainage behind the wall and prevent water buildup.
- Gravel: Use a layer of gravel behind the drainage pipe to enhance drainage and prevent soil erosion.
- Geotextile Fabric: Place a geotextile fabric between the gravel and soil to prevent the soil from clogging the drainage system.
- Rebar or Wall Pins: Use rebar or wall pins to reinforce the stability of the wall by anchoring it to the ground.
- Mortar or Adhesive: Depending on the type of blocks used, you may need mortar or adhesive to secure the blocks in place.
- Backfill Material: Choose appropriate backfill material, such as gravel or compactable soil, to fill behind the wall for added stability.
- Topsoil: Use good quality topsoil to fill in the space behind the wall once construction is complete.
Read more: How To Build A Brick Retaining Wall
Tools:
- Shovel: A sturdy shovel is a must-have tool for digging, excavating, and moving soil.
- Level: Use a level to ensure the wall is straight and level during construction.
- Tape Measure: Measure and mark the dimensions accurately using a tape measure.
- Rubber Mallet: A rubber mallet is useful for gently tapping the blocks into place.
- Hand Tamper or Compactor: Use a hand tamper or compactor to compact the soil and create a stable base.
- Circular Saw or Block Splitter: Depending on the type of blocks used, you may need a circular saw or block splitter to cut the blocks to the desired size.
- Safety Gear: Always prioritize safety and wear protective gear, including gloves, safety glasses, and sturdy footwear.
Having all the necessary materials and tools will make the construction process more efficient and enjoyable. With these preparations complete, it’s time to move on to the next steps in building a retaining wall, including excavation, foundation preparation, and wall construction.
Excavation and Leveling
Excavation and leveling are crucial steps in the construction of a retaining wall. Properly excavating the site and creating a level base will ensure the stability and functionality of the wall. Here is a step-by-step guide on how to perform these tasks:
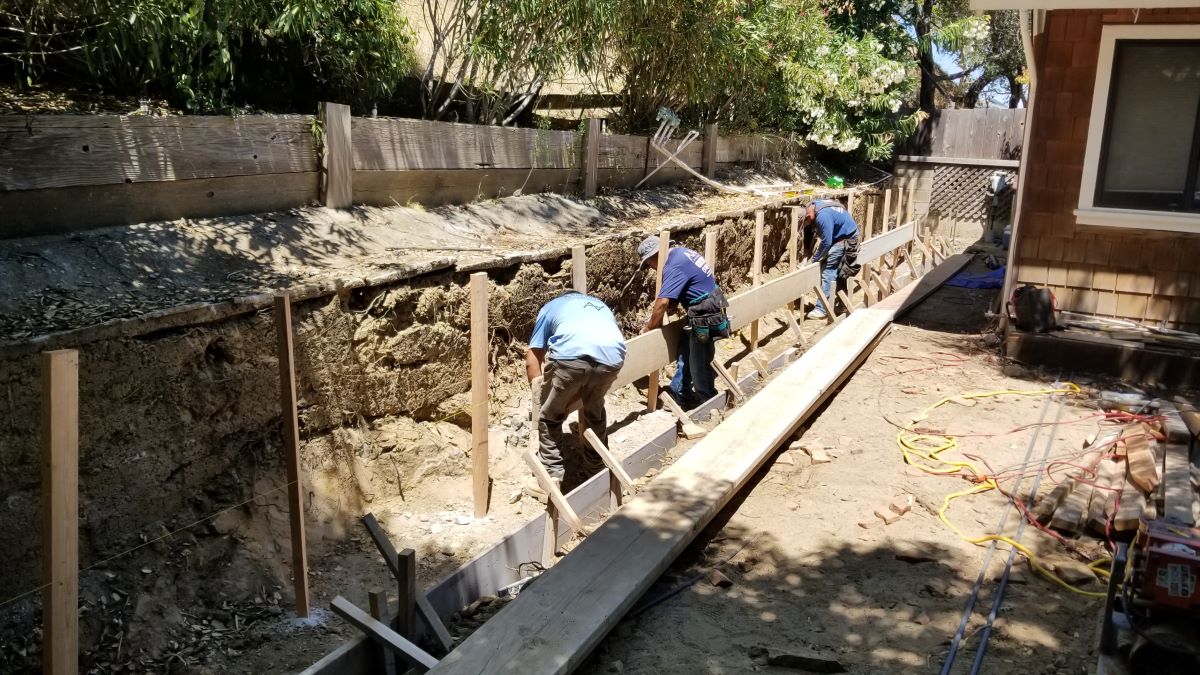
- Mark the Excavation Area: Use stakes and string to mark the boundaries of the area to be excavated. This will serve as a guide during the digging process.
- Dig the Trench: Use a shovel or an excavator to dig a trench along the marked area. The depth and width of the trench will depend on the design specifications and the type of retaining wall being built. Ensure that the trench is wide enough to accommodate the base width of the wall blocks and the required amount of backfill material.
- Check for Level: Use a level to ensure that the trench is level from end to end. Adjust the depth or add soil as needed to achieve a uniform level base.
- Compact the Trench: Use a hand tamper or a compactor to compact the soil at the bottom of the trench. This will create a solid and stable foundation for the retaining wall.
- Add a Layer of Gravel: Spread a layer of gravel at the bottom of the trench. This will enhance drainage behind the wall and prevent water accumulation.
- Compact the Gravel: Compact the layer of gravel using a hand tamper or a compactor. This step ensures that the gravel is tightly packed and provides a sturdy base for the wall.
- Check for Level Again: Use a level to verify that the base of the trench is still level after adding the gravel. Make any necessary adjustments to ensure accuracy.
Excavation and leveling are critical to creating a strong and stable foundation for your retaining wall. Taking the time to properly excavate and level the site will help prevent future issues such as settling or shifting of the wall. Next, we will discuss the preparation of the foundation, which is another important aspect of the retaining wall construction process.
Foundation Preparation
The foundation of a retaining wall plays a crucial role in its stability and longevity. Properly preparing the foundation ensures that the wall can withstand the pressure exerted by the soil and maintain its structural integrity over time. Here are the steps involved in preparing the foundation for a retaining wall:
- Compact the Trench: Before proceeding with the foundation preparation, ensure that the trench is compacted and level. Use a hand tamper or a compactor to achieve a solid base.
- Install a Layer of Geotextile Fabric: Place a layer of geotextile fabric over the compacted trench. This fabric prevents the soil from infiltrating the gravel layer, helping to maintain efficient drainage.
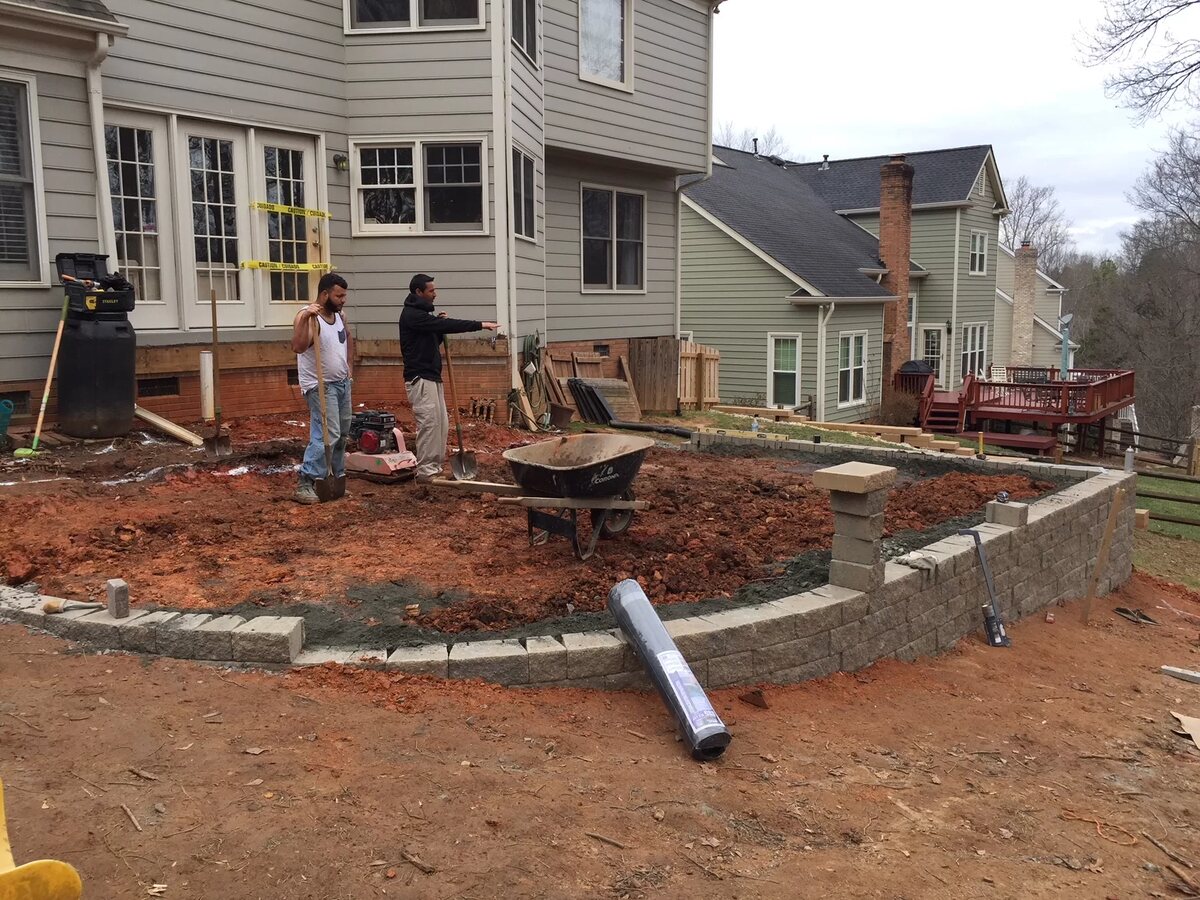
- Add the First Course of Wall Blocks: Begin the foundation by placing the first course of wall blocks on top of the geotextile fabric. Ensure that they are correctly aligned and levelled using a level.
- Check for Alignment: Continuously check the alignment and levelness of the wall blocks as you build the foundation. It’s essential to maintain accuracy and prevent any deviation from the intended design.
- Backfill the Foundation: As you progress, backfill the space behind the wall blocks with compactable soil or gravel. This helps provide additional stability and support for the foundation.
- Tamp the Backfill: Use a hand tamper or compactor to tamp down the backfill material firmly. This compaction eliminates air gaps and ensures a solid foundation for the retaining wall.
Creating a strong and well-prepared foundation is crucial for the stability of the retaining wall. Take the time to properly compact the trench, install geotextile fabric, and build the foundation with precision. These steps will enhance the overall strength and longevity of the wall.
Now that the foundation preparation is complete, we can move on to the next stage: the construction of the retaining wall itself. In the following section, we will guide you through the process of building the wall using proper techniques and maintaining structural integrity.
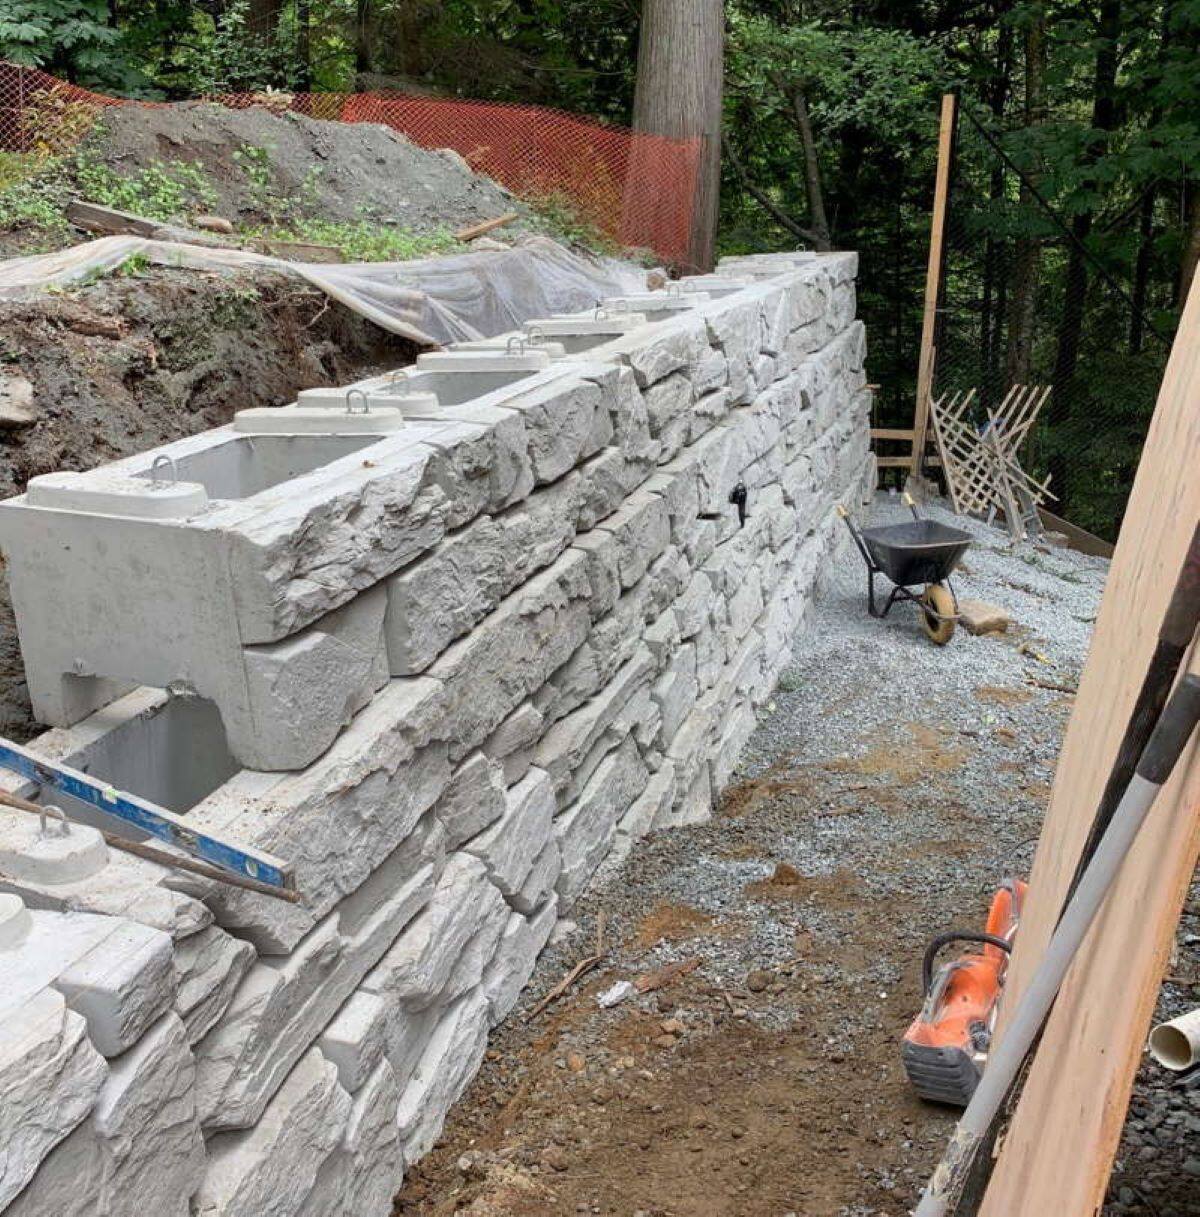
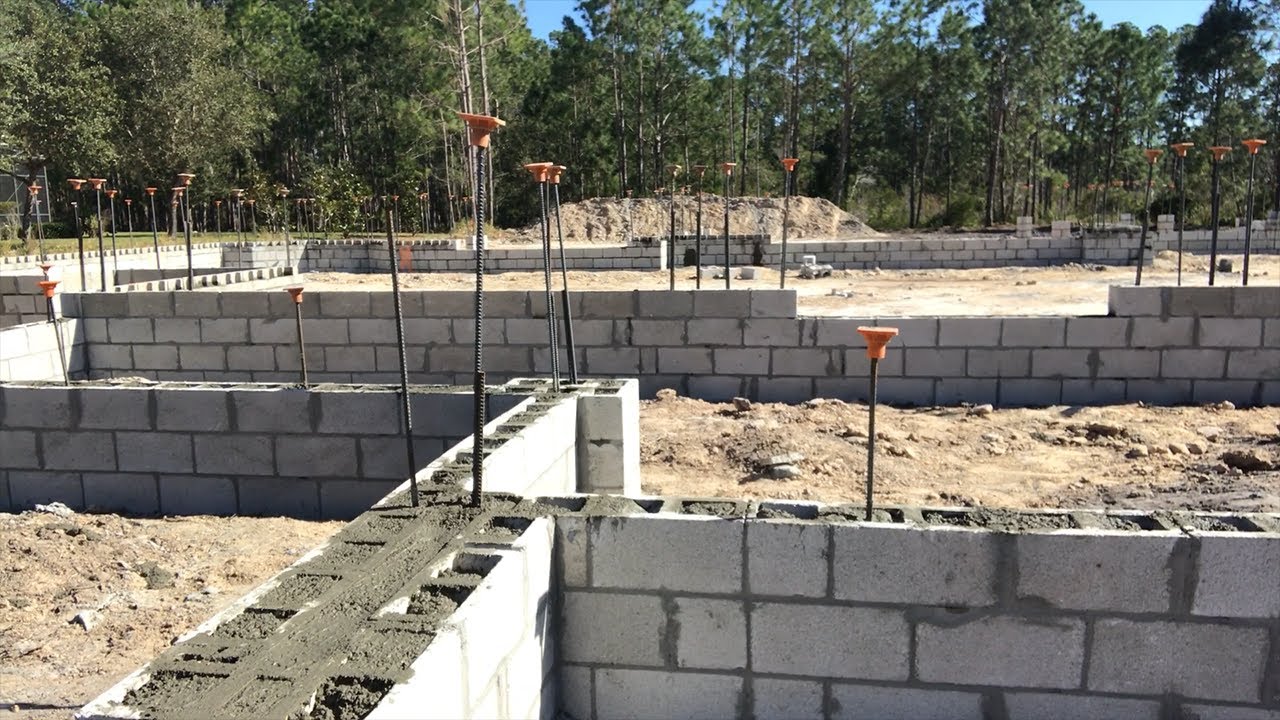
Wall Construction
The construction phase of a retaining wall is where the project starts to take shape. This is when you will begin stacking the wall blocks and creating the actual structure. Follow these steps to ensure a successful and sturdy wall construction:
- Start with the Second Course: Begin building the wall by adding the second course of blocks on top of the first course. Make sure the blocks are properly aligned and levelled using a level and a rubber mallet.
- Use Adhesive or Mortar: Depending on the type of wall blocks, you may need to use adhesive or mortar to secure the blocks together. Follow the manufacturer’s instructions for proper application.
- Stagger the Joints: As you stack the blocks, make sure to stagger the joints between each successive course. This provides additional strength and stability to the wall.
- Check for Levelness and Alignment: Continuously check the levelness and alignment of the wall as you build each course. Adjust the blocks as needed to maintain accuracy.
- Backfill Behind the Wall: As you progress in building the wall, backfill the space behind the wall with compactable soil or gravel. This helps to provide additional support and stability.
- Insert Reinforcements: For added stability, insert rebar or wall pins through the pre-drilled holes or slots in the blocks. This anchors the wall to the ground and prevents shifting or tilting.
- Continue Building Courses: Repeat the process of stacking the blocks, checking for levelness, and backfilling behind the wall until you reach the desired height.
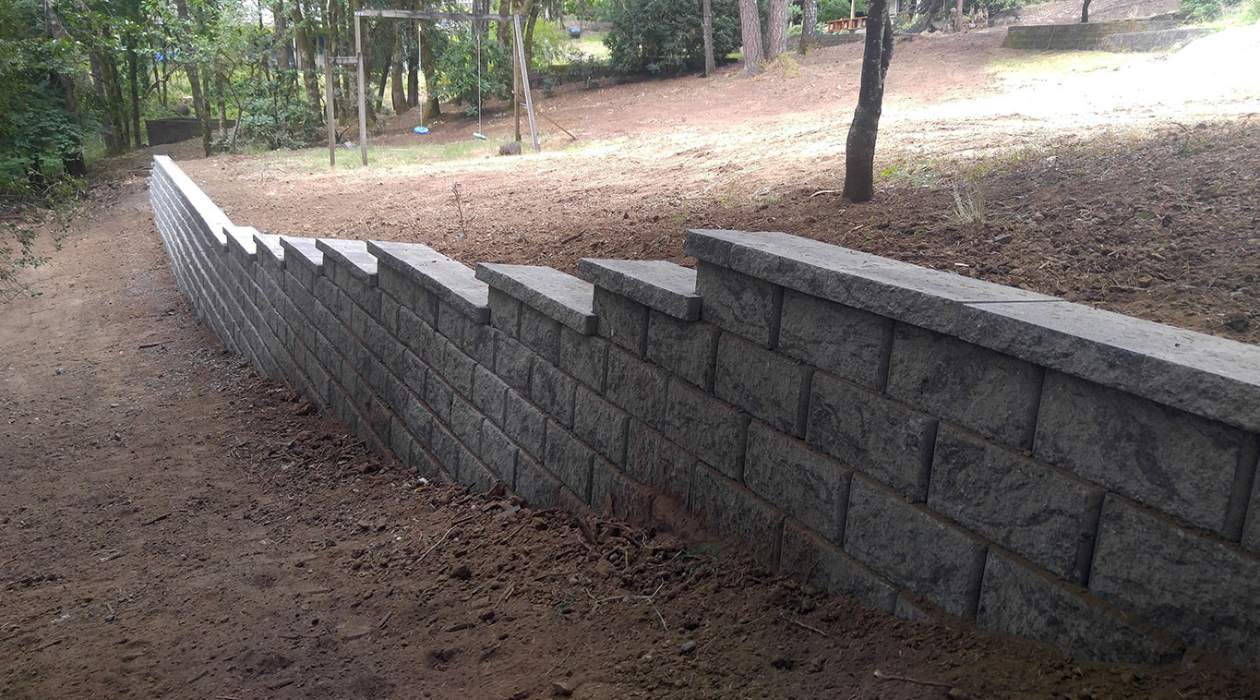
- Cap the Wall: Finish off the retaining wall by adding a capstone or coping stone to provide a finished look and added protection.
Throughout the construction process, be diligent about maintaining proper alignment, levelness, and stability. Take your time to ensure that each block is securely in place and that the wall remains structurally sound. By following these steps, you will have a well-built and durable retaining wall.
With the construction of the wall complete, the next critical step is the installation of a drainage system. Building a proper drainage system will help prevent water buildup behind the wall and protect its integrity. Read on to learn how to incorporate a drainage system into your retaining wall construction project.
When constructing a retaining wall, make sure to properly compact the soil behind the wall to prevent future settlement and potential wall failure.
Read more: How To Build A Retaining Wall For A Driveway
Drainage System Installation
A well-designed drainage system is essential for a retaining wall. It helps prevent water buildup behind the wall, which can lead to erosion, pressure, and structural damage. Follow these steps to install an effective drainage system:
- Create a Trench: Dig a trench at the base of the retaining wall, a few inches behind the front face. The trench should extend the entire length of the wall.
- Position the Drainage Pipe: Lay a perforated drainage pipe in the trench, making sure it runs parallel to the wall and has a slight slope for proper water flow. Connect the pipe sections securely.
- Fill with Gravel: Fill the trench around the drainage pipe with a layer of gravel. This will provide additional drainage capacity and help filter out debris.
- Cover with Geotextile Fabric: Place a layer of geotextile fabric over the gravel to prevent soil from entering the drain and clogging it. Secure the fabric in place.
- Backfill the Trench: Backfill the remaining space in the trench with compactable soil or gravel, ensuring that it slopes away from the wall to facilitate proper drainage.
- Add a Draining Outlet: Depending on the design and location, you may need to install a draining outlet, such as a catch basin or a downspout, to direct water away from the wall and prevent overflow.
- Inspect and Test: Once the drainage system is installed, check for any blockages, leaks, or system malfunctions. Make any necessary adjustments before completing the project.
By incorporating a well-designed drainage system, you can protect your retaining wall from the damaging effects of water accumulation. Proper drainage ensures the longevity and stability of the wall, preventing issues like erosion or hydrostatic pressure.
With the drainage system in place, the next step is to backfill the space behind the wall and ensure proper compaction. This will provide additional support and stability to the retaining wall construction. Keep reading to learn more about backfilling and compaction.
Backfilling and Compaction
Backfilling and compaction are vital steps in the construction of a retaining wall. Properly backfilling the space behind the wall and compacting the soil or gravel ensures stability, minimizes settling, and enhances the overall performance of the wall. Follow these steps for effective backfilling and compaction:
- Start Backfilling: Begin by adding a layer of backfill material, such as compactable soil or gravel, directly behind the wall. This layer should be a few inches thick.
- Compact the Backfill: Use a hand tamper or compactor to compact the backfill material. Start from the base of the wall and work your way up, ensuring that each layer is compacted thoroughly.
- Add Backfill Gradually: Gradually add more backfill material in layers, compacting each layer before adding the next. This helps prevent excessive pressure against the wall and ensures uniform compaction.
- Backfill Behind Drainage Pipe: As you backfill, pay special attention to the area behind the drainage pipe. Carefully add backfill material around it, ensuring that it remains in place and is not disturbed.
- Check for Levelness and Alignment: Regularly check the levelness and alignment of the retaining wall as you backfill and compact. Adjust the blocks or backfill as necessary to maintain the desired alignment and wall integrity.
- Pay Attention to Drainage: Ensure that the backfill material is properly graded to facilitate water drainage away from the wall. This helps prevent saturation and potential damage due to excess moisture.
- Fill the Remaining Space: Continue adding backfill material and compacting until the entire space behind the wall is filled. Avoid overfilling, which can exert unnecessary pressure on the wall.
- Leave Room for Topsoil: Keep in mind that you will need to leave space at the top for a layer of topsoil, which will allow vegetation or landscaping to be added for a finished look.
By properly backfilling and compacting the space behind the retaining wall, you ensure the stability and longevity of the structure. This step reduces the risk of settling, shifting, or damage caused by improper compaction or backfill material placement. Once the backfilling and compaction are completed, you’re ready to add the finishing touches to your retaining wall construction.
In the final section, we will discuss the essential finishing touches that will enhance the appearance and functionality of your retaining wall.
Finishing Touches
Adding the finishing touches to your retaining wall construction not only improves its aesthetics but also enhances its functionality and durability. Here are some essential finishing touches to consider:
- Apply a Protective Sealant: Depending on the type of wall blocks used, applying a protective sealant can help safeguard the wall against weathering, staining, and water damage. Follow the manufacturer’s instructions for proper application.
- Add Decorative Elements: Consider adding decorative elements such as capstones, coping stones, or pavers to enhance the appearance of the retaining wall. These elements can also provide a smooth and comfortable seating surface.
- Install Lighting: Illuminate your retaining wall with outdoor lighting fixtures. This not only enhances safety and security but also adds a dramatic effect to your landscaping during the evening hours.
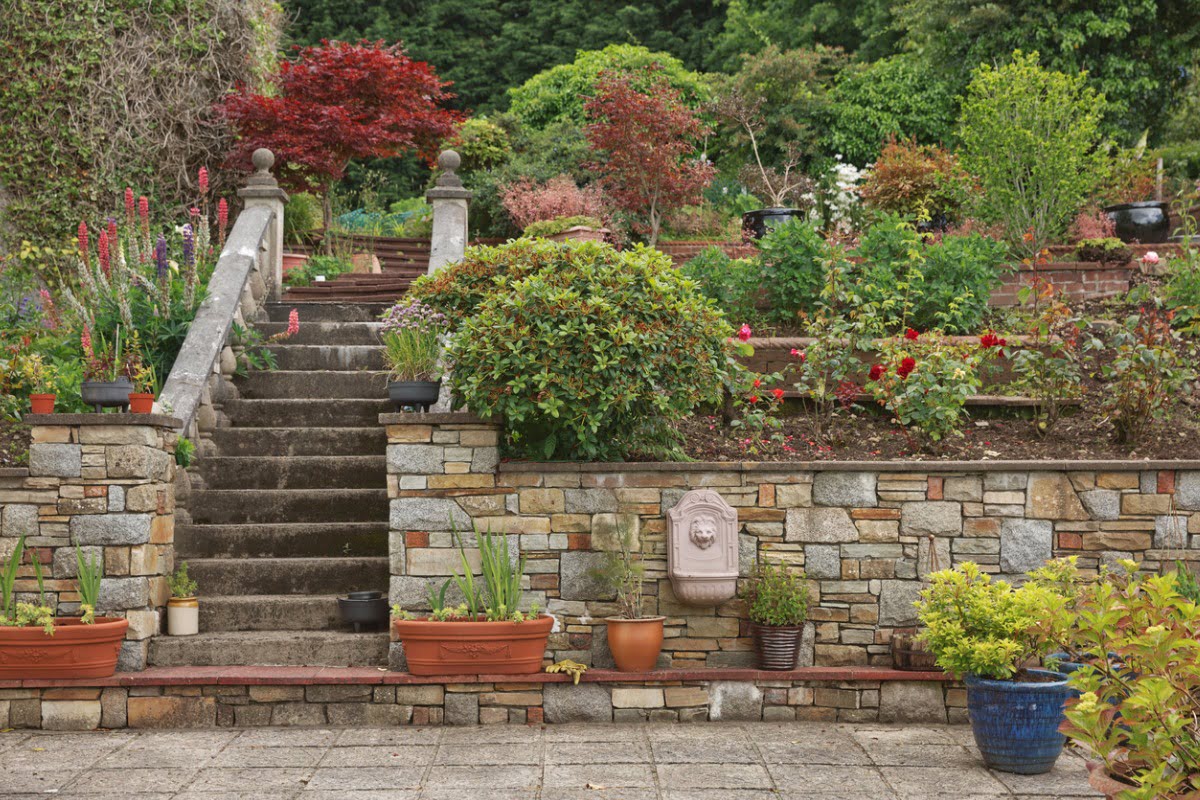
- Create Planting Pockets: Incorporate planting pockets or gaps in the wall to add vegetation or colorful flowers. This softens the look of the wall and creates a more inviting and natural ambiance.
- Build Steps or Stairs: If your retaining wall is taller or if you want to create easy access to different levels of your landscape, consider incorporating steps or stairs within the wall design. This adds both functionality and aesthetics.
- Use Landscaping Fabric: To prevent weeds from growing between the wall blocks, consider using landscaping fabric. Install it behind the wall before backfilling to minimize maintenance and keep the area looking neat.
- Add Drainage Outlets: In addition to the drainage system behind the wall, consider installing additional drainage outlets such as downspouts or channels to redirect water away from the wall and prevent potential water damage.
- Maintain Regular Inspections and Maintenance: Once your retaining wall is complete, make it a habit to regularly inspect and maintain it. Check for any signs of damage, such as cracks, leaning, or erosion, and take prompt action to repair or reinforce the wall as needed.
By paying attention to the finishing touches, you can transform your retaining wall into a visually pleasing and functional feature of your landscape. These small details not only enhance the overall appearance but also contribute to the longevity and performance of the wall.
With the completion of the finishing touches, congratulations on successfully constructing your retaining wall! By following the steps outlined in this guide, you have created a structurally sound and visually appealing addition to your outdoor space. Enjoy the beauty and functionality of your new retaining wall for years to come.
If you need assistance with any other construction-related topics or have any questions, feel free to reach out. Happy building!
Conclusion
Constructing a retaining wall is a rewarding project that can transform your outdoor space. From leveling a sloping yard to creating terraced gardens or building a functional patio, a well-designed and properly constructed retaining wall adds both beauty and functionality to your landscape. Throughout this guide, we have covered the essential steps involved in building a retaining wall, from planning and design to the finishing touches.
By carefully assessing your site, determining the purpose and size of the wall, and selecting the right materials and tools, you set the foundation for a successful construction project. Proper excavation and leveling, along with thorough foundation preparation, ensure a stable base for the wall. Building the wall with precision, incorporating a drainage system, and backfilling and compacting properly contribute to its longevity and stability.
Adding the finishing touches, such as sealant application, decorative elements, and proper lighting, enhances the visual appeal of the wall while also optimizing its functionality. Regular inspections and maintenance will help preserve the integrity of your retaining wall and address any issues that may arise over time.
Remember, safety should always be your top priority during the construction process. Wear protective gear, follow proper techniques, and consult with professionals if needed. Additionally, be mindful of local building codes and regulations to ensure compliance and avoid any potential legal issues.
Building a retaining wall may require time, effort, and attention to detail, but the end result is a beautiful and functional addition to your outdoor space. Whether you are a seasoned DIY enthusiast or working with a professional contractor, this comprehensive guide has provided you with the knowledge and skills to tackle a retaining wall construction project successfully.
Now that you are equipped with the necessary information, it’s time to start planning and building your dream retaining wall. Enjoy the process and the satisfaction of creating a long-lasting and visually appealing feature that will enhance your landscape for years to come.
If you have any more questions or need further assistance, don’t hesitate to reach out. Happy building!
Frequently Asked Questions about How To Do A Retaining Wall Construction
Was this page helpful?
At Storables.com, we guarantee accurate and reliable information. Our content, validated by Expert Board Contributors, is crafted following stringent Editorial Policies. We're committed to providing you with well-researched, expert-backed insights for all your informational needs.


0 thoughts on “How To Do A Retaining Wall Construction”