Home>Construction & Tools>Building Materials>How To Build A Brick Retaining Wall
Building Materials
How To Build A Brick Retaining Wall
Modified: August 17, 2024
Learn how to build a sturdy brick retaining wall using high-quality building materials. Follow our step-by-step guide for a durable and attractive structure.
(Many of the links in this article redirect to a specific reviewed product. Your purchase of these products through affiliate links helps to generate commission for Storables.com, at no extra cost. Learn more)
**
Introduction
**
Building a brick retaining wall can add both functionality and aesthetic appeal to your outdoor space. Whether you're looking to prevent soil erosion, create a terraced garden, or enhance the visual appeal of your landscape, a well-constructed brick retaining wall can serve as an enduring and eye-catching feature.
In this comprehensive guide, we'll walk you through the step-by-step process of building a brick retaining wall, from planning and preparation to the finishing touches. Along the way, we'll provide valuable insights and tips to ensure that your project is a resounding success.
Whether you're a seasoned DIY enthusiast or a novice looking to embark on your first major outdoor project, this guide will equip you with the knowledge and confidence to tackle the construction of a brick retaining wall. So, roll up your sleeves, gather your tools, and let's dive into the rewarding journey of creating a sturdy and visually appealing brick retaining wall for your outdoor space.
**
Key Takeaways:
- Planning and preparation are crucial for building a sturdy brick retaining wall. Consider the wall’s purpose, local regulations, materials, and equipment to ensure a successful and visually appealing outcome.
- Building a brick retaining wall involves meticulous steps, including excavation, laying the foundation, and adding finishing touches. Attention to detail and proper alignment are essential for creating a durable and beautiful outdoor feature.
Read more: How To Build Stairs In A Retaining Wall
Planning and Preparation
**
Before embarking on the construction of a brick retaining wall, meticulous planning and thorough preparation are essential for a successful outcome. Here are the key steps to consider:
Assessing the Purpose:
First and foremost, determine the primary purpose of your retaining wall. Are you aiming to prevent soil erosion, create terraced levels for planting, or enhance the visual appeal of your landscape? Understanding the intended function will guide the design and construction process.
Checking Local Regulations:
Prior to commencing any construction, it’s crucial to check local building codes and regulations regarding the construction of retaining walls. Some areas may have specific requirements or permits for structures exceeding a certain height. Adhering to these regulations will ensure compliance and avoid potential legal issues.
Determining Wall Height and Length:
Measure the height and length of the wall, as these dimensions will influence the materials required and the overall construction process. Additionally, consider the slope of the terrain and the amount of soil that the wall needs to retain.
Selecting Suitable Materials:
Choose high-quality bricks specifically designed for retaining walls. Consider factors such as durability, weather resistance, and aesthetic appeal. Additionally, gather essential tools including a shovel, level, rubber mallet, string line, and a wheelbarrow for mixing mortar.
Creating a Detailed Plan:
Sketch a detailed plan for your retaining wall, including precise measurements, the layout of the bricks, and the required excavation. This plan will serve as a valuable reference throughout the construction process, ensuring accuracy and cohesion in the final structure.
Securing Necessary Equipment:
Ensure that you have all the necessary equipment and safety gear before commencing the project. This includes personal protective equipment such as gloves and safety goggles, as well as any heavy machinery required for excavation.
By meticulously planning and preparing for the construction of your brick retaining wall, you’ll establish a solid foundation for a successful and visually appealing outdoor feature. With these crucial preparatory steps in place, you’re ready to move on to the next phase: choosing the right location for your wall.
Choosing the Right Location
When it comes to building a brick retaining wall, selecting the optimal location is pivotal to its effectiveness and visual impact. Here’s what you need to consider:
Assessing the Terrain:
Survey the terrain where the retaining wall will be constructed. Take note of any slopes, uneven ground, or potential drainage issues. Understanding the natural features of the landscape will help determine the most suitable location for the wall.
Identifying Soil Composition:
Evaluate the composition of the soil in the intended location. Different soil types have varying drainage properties and compaction levels, which can influence the design and construction of the retaining wall. For instance, clay-rich soil retains more water and requires proper drainage considerations.
Considering Drainage Needs:
Assess the drainage requirements of the area where the wall will be situated. Proper drainage is essential for preventing water buildup behind the wall, which can exert excessive pressure and compromise its stability. Incorporating drainage features, such as gravel backfill and weep holes, may be necessary depending on the site’s drainage characteristics.
Accounting for Aesthetic Appeal:
Consider the visual impact of the retaining wall within the overall landscape. Determine how the wall will complement the surrounding elements, such as gardens, pathways, or outdoor living spaces. Additionally, assess the wall’s visibility from different vantage points to ensure it enhances the aesthetic appeal of the outdoor environment.
Ensuring Structural Integrity:
Evaluate the structural requirements based on the intended function of the retaining wall. If it’s intended to hold back a significant amount of soil or create terraced levels, the location should provide ample space for the wall’s foundation and proper anchoring into the ground.
By carefully considering these factors, you can identify the most suitable location for your brick retaining wall, ensuring that it not only serves its practical purpose but also enhances the overall beauty and functionality of your outdoor space. With the location chosen, the next step is to gather the necessary materials and tools for the construction process.
Gathering Materials and Tools
Before diving into the construction of your brick retaining wall, it’s essential to gather the necessary materials and tools to ensure a smooth and efficient building process. Here’s a comprehensive list of what you’ll need:
Materials:
- High-quality retaining wall bricks: Select bricks specifically designed for retaining walls, ensuring durability and weather resistance.
- Mortar: Choose a high-strength mortar mix suitable for bonding the bricks and providing structural integrity.
- Gravel: Utilize gravel for backfilling behind the wall to facilitate drainage and minimize soil pressure.
- Landscape fabric: Use landscape fabric to prevent weed growth behind the wall and maintain proper drainage.
- Weep holes: Incorporate weep holes to allow water drainage from behind the wall, reducing hydrostatic pressure.
- Concrete footing (if required): Depending on the wall’s height and local regulations, a concrete footing may be necessary for added stability.
Tools:
- Shovel: Essential for excavating the foundation and backfilling behind the wall.
- Level: Use a level to ensure the horizontal alignment of the wall’s courses for a sturdy and visually appealing result.
- Rubber mallet: A rubber mallet is indispensable for tapping the bricks into place with precision while maintaining their integrity.
- String line: Employ a string line to maintain straight and level courses as you build the wall, ensuring uniformity and structural stability.
- Wheelbarrow: Use a wheelbarrow for mixing mortar and transporting materials, providing convenience and efficiency during construction.
- Trowel: A trowel is essential for applying mortar to the bricks and achieving proper adhesion.
- Masonry saw (if needed): If adjustments to the brick size are necessary, a masonry saw will facilitate precise cutting.
By ensuring that you have all the required materials and tools at your disposal, you’ll be well-equipped to proceed with the construction of your brick retaining wall. With these essentials in hand, you’re ready to move on to the next phase: excavation and laying the foundation.
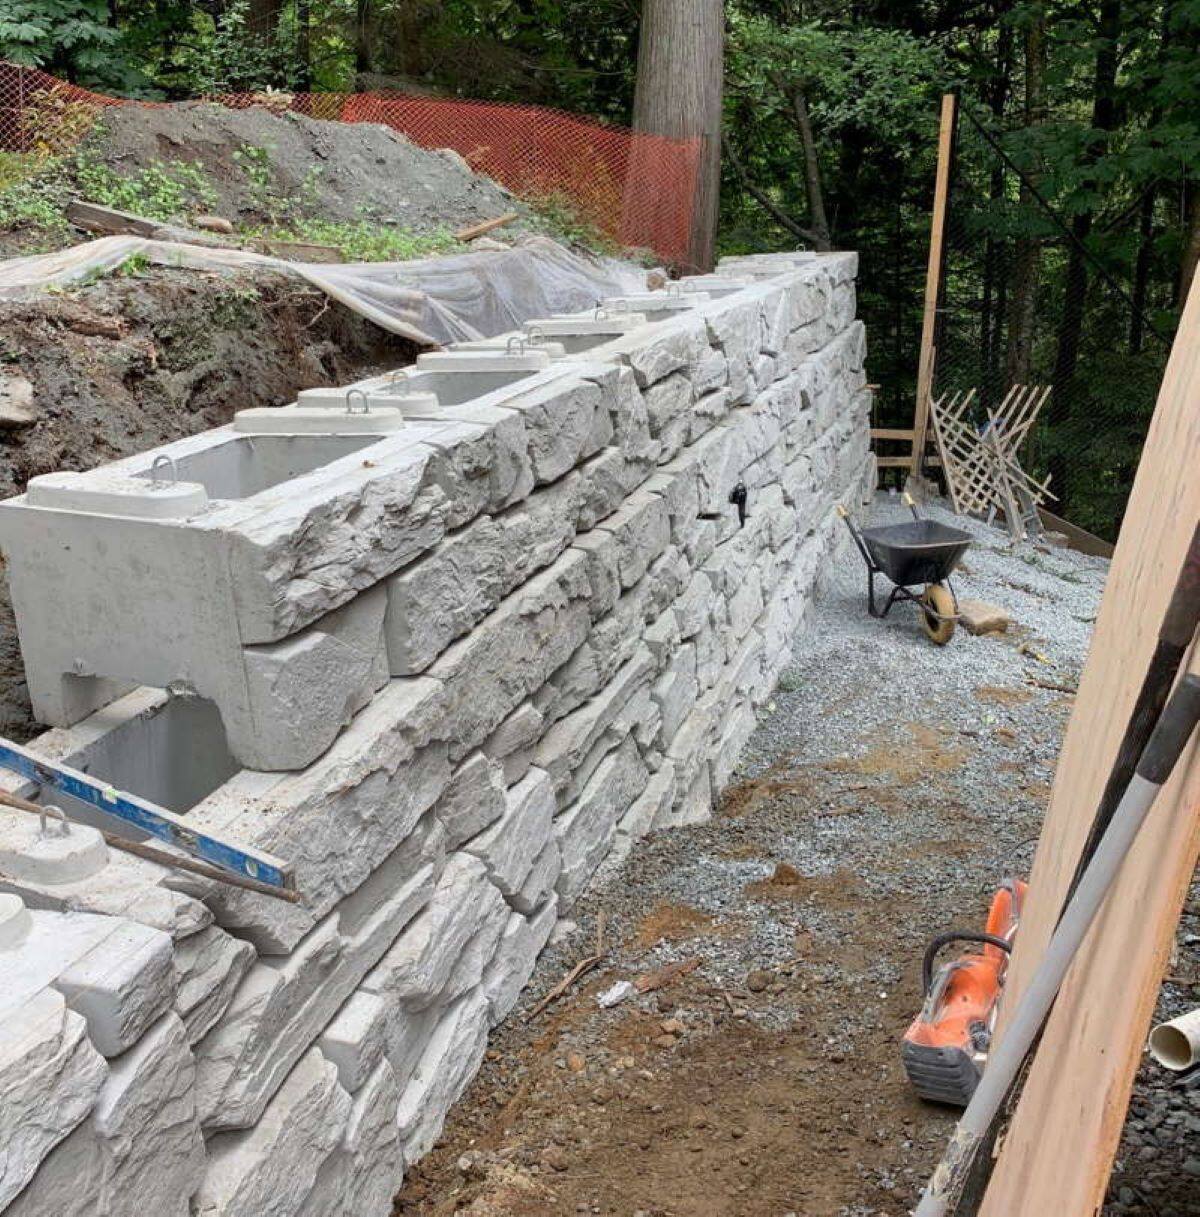
Excavation and Foundation
As you embark on the construction of your brick retaining wall, the excavation and foundation-laying phase sets the stage for a sturdy and long-lasting structure. Here’s a step-by-step guide to this crucial phase:
Marking the Layout:
Begin by marking the layout of the wall using stakes and string lines. This will delineate the precise location and dimensions of the wall, providing a clear guide for excavation.
Excavation Process:
Using a shovel, excavate the area to the depth required for the foundation. The depth will depend on the height of the wall and any additional requirements, such as a concrete footing. Ensure that the excavation is uniform and level to accommodate the foundation evenly.
Creating a Solid Base:
Compact the excavated area using a hand tamper or a mechanical compactor to create a solid and level base for the foundation. This step is crucial for ensuring the stability and integrity of the wall over time.
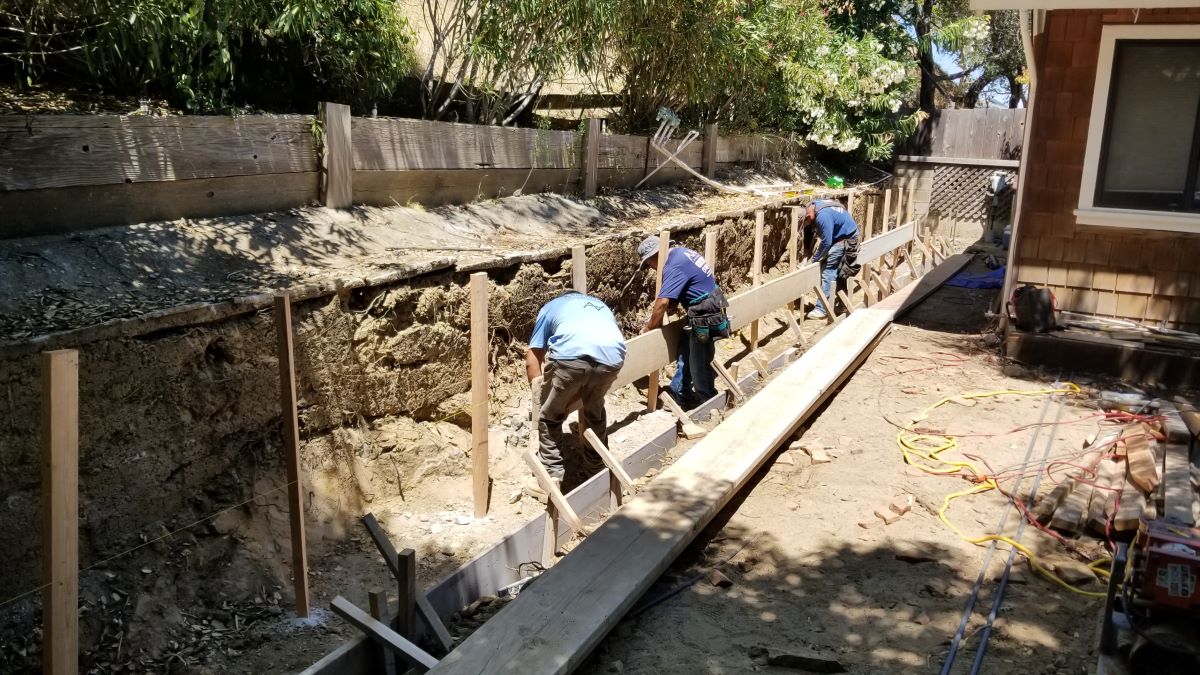
Building the Foundation:
If a concrete footing is necessary, prepare the concrete mix according to the manufacturer’s instructions and pour it into the excavated trench. Use a trowel to level the surface of the footing, ensuring uniform thickness and a smooth finish.
Installing Drainage and Landscape Fabric:
Before laying the first course of bricks, place a layer of gravel at the base of the excavated trench to facilitate drainage. Additionally, install landscape fabric to prevent weed growth and maintain proper soil compaction behind the wall.
By meticulously executing the excavation and foundation-laying process, you’ll establish a solid base for the construction of your brick retaining wall. With the foundation in place, you’re ready to progress to the next phase: laying the first course of bricks.
When building a brick retaining wall, make sure to properly prepare the base by compacting the soil and using a layer of gravel for drainage. This will help prevent shifting and settling over time.
Read more: How To Build A Retaining Wall For A Driveway
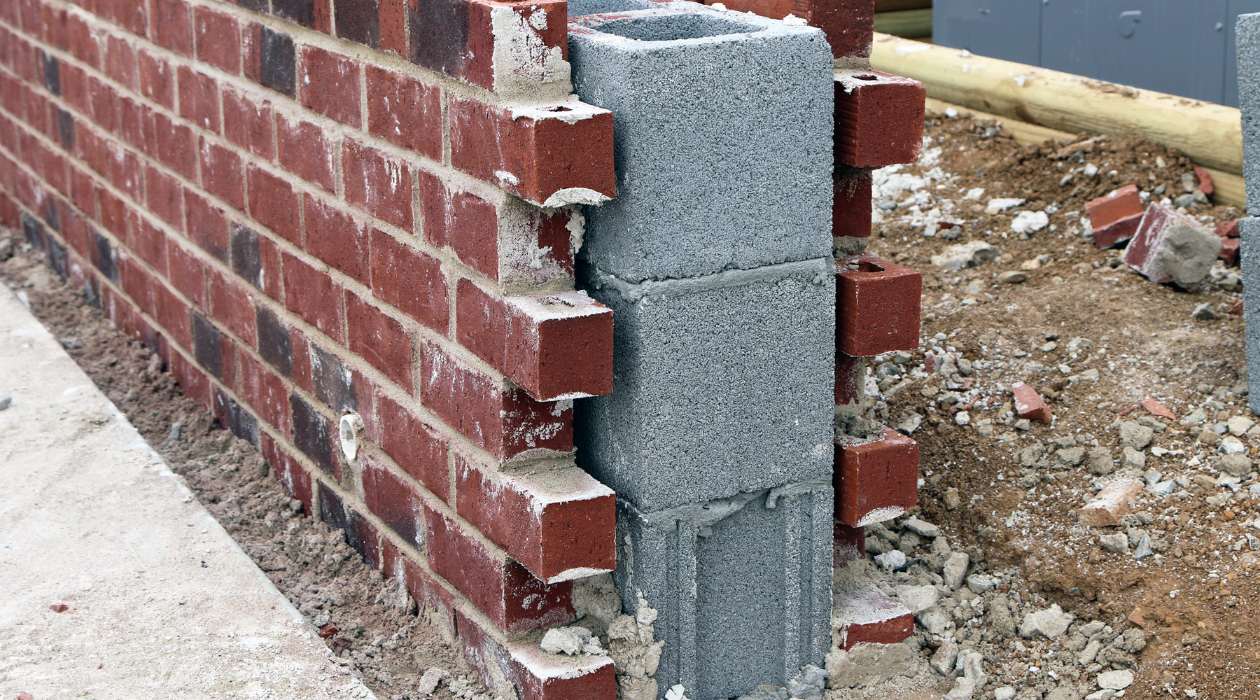
Laying the First Course
As you transition into the construction phase of your brick retaining wall, laying the first course of bricks is a critical step that sets the alignment and stability for the entire structure. Here’s a detailed guide to this pivotal phase:
Preparing the Mortar:
Begin by preparing the mortar according to the manufacturer’s instructions. Achieving the right consistency is crucial for ensuring proper adhesion and structural integrity.
Applying Mortar to the Foundation:
Using a trowel, apply a layer of mortar along the prepared foundation where the first course of bricks will be laid. Ensure that the mortar bed is even and of uniform thickness to support the bricks securely.
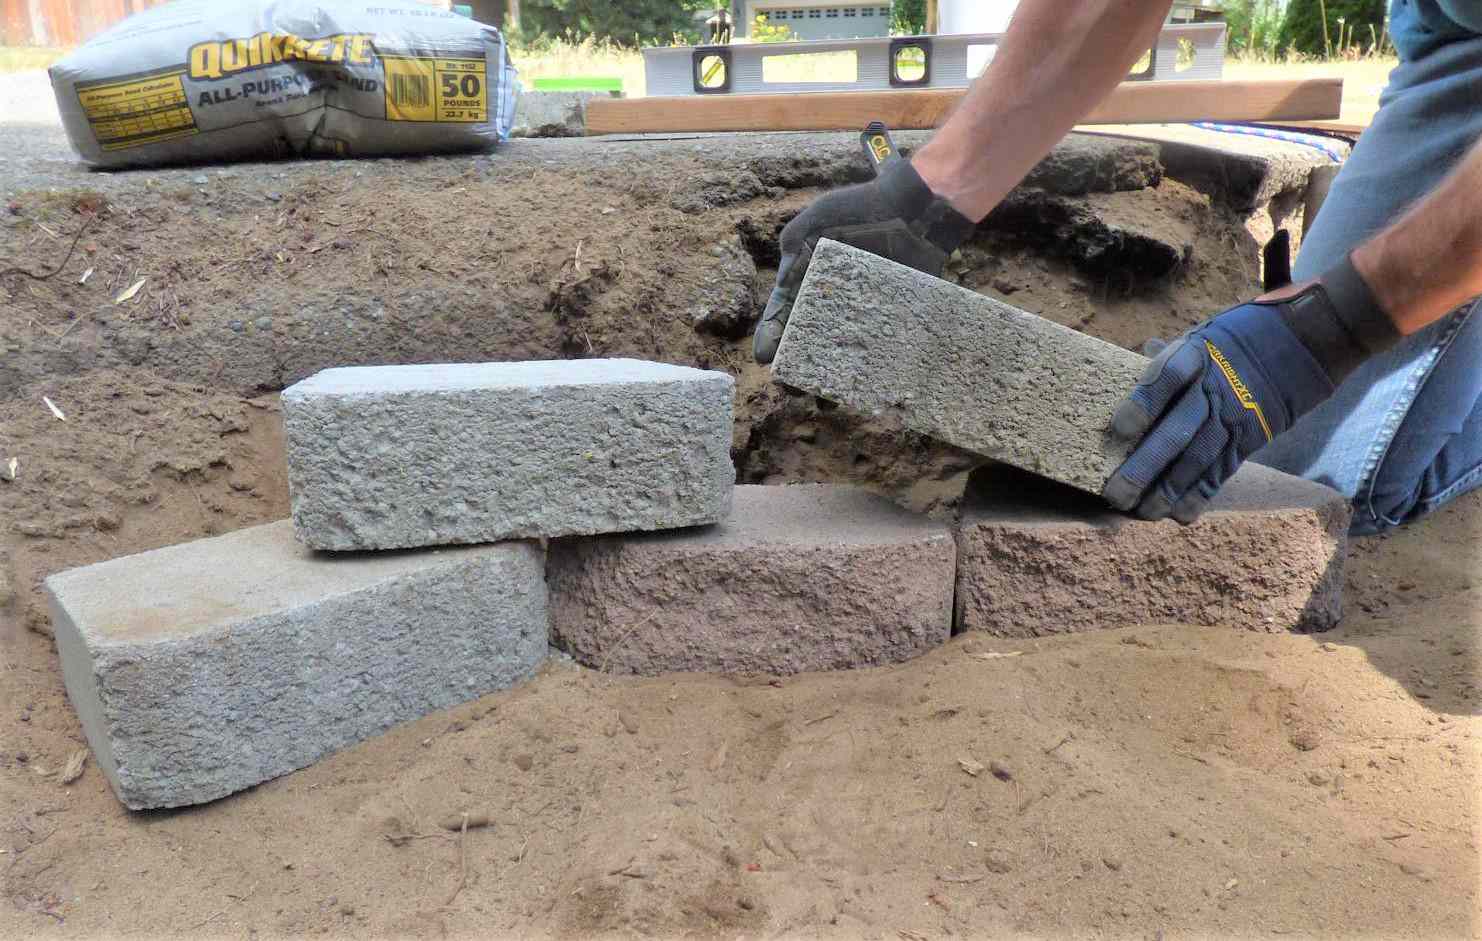
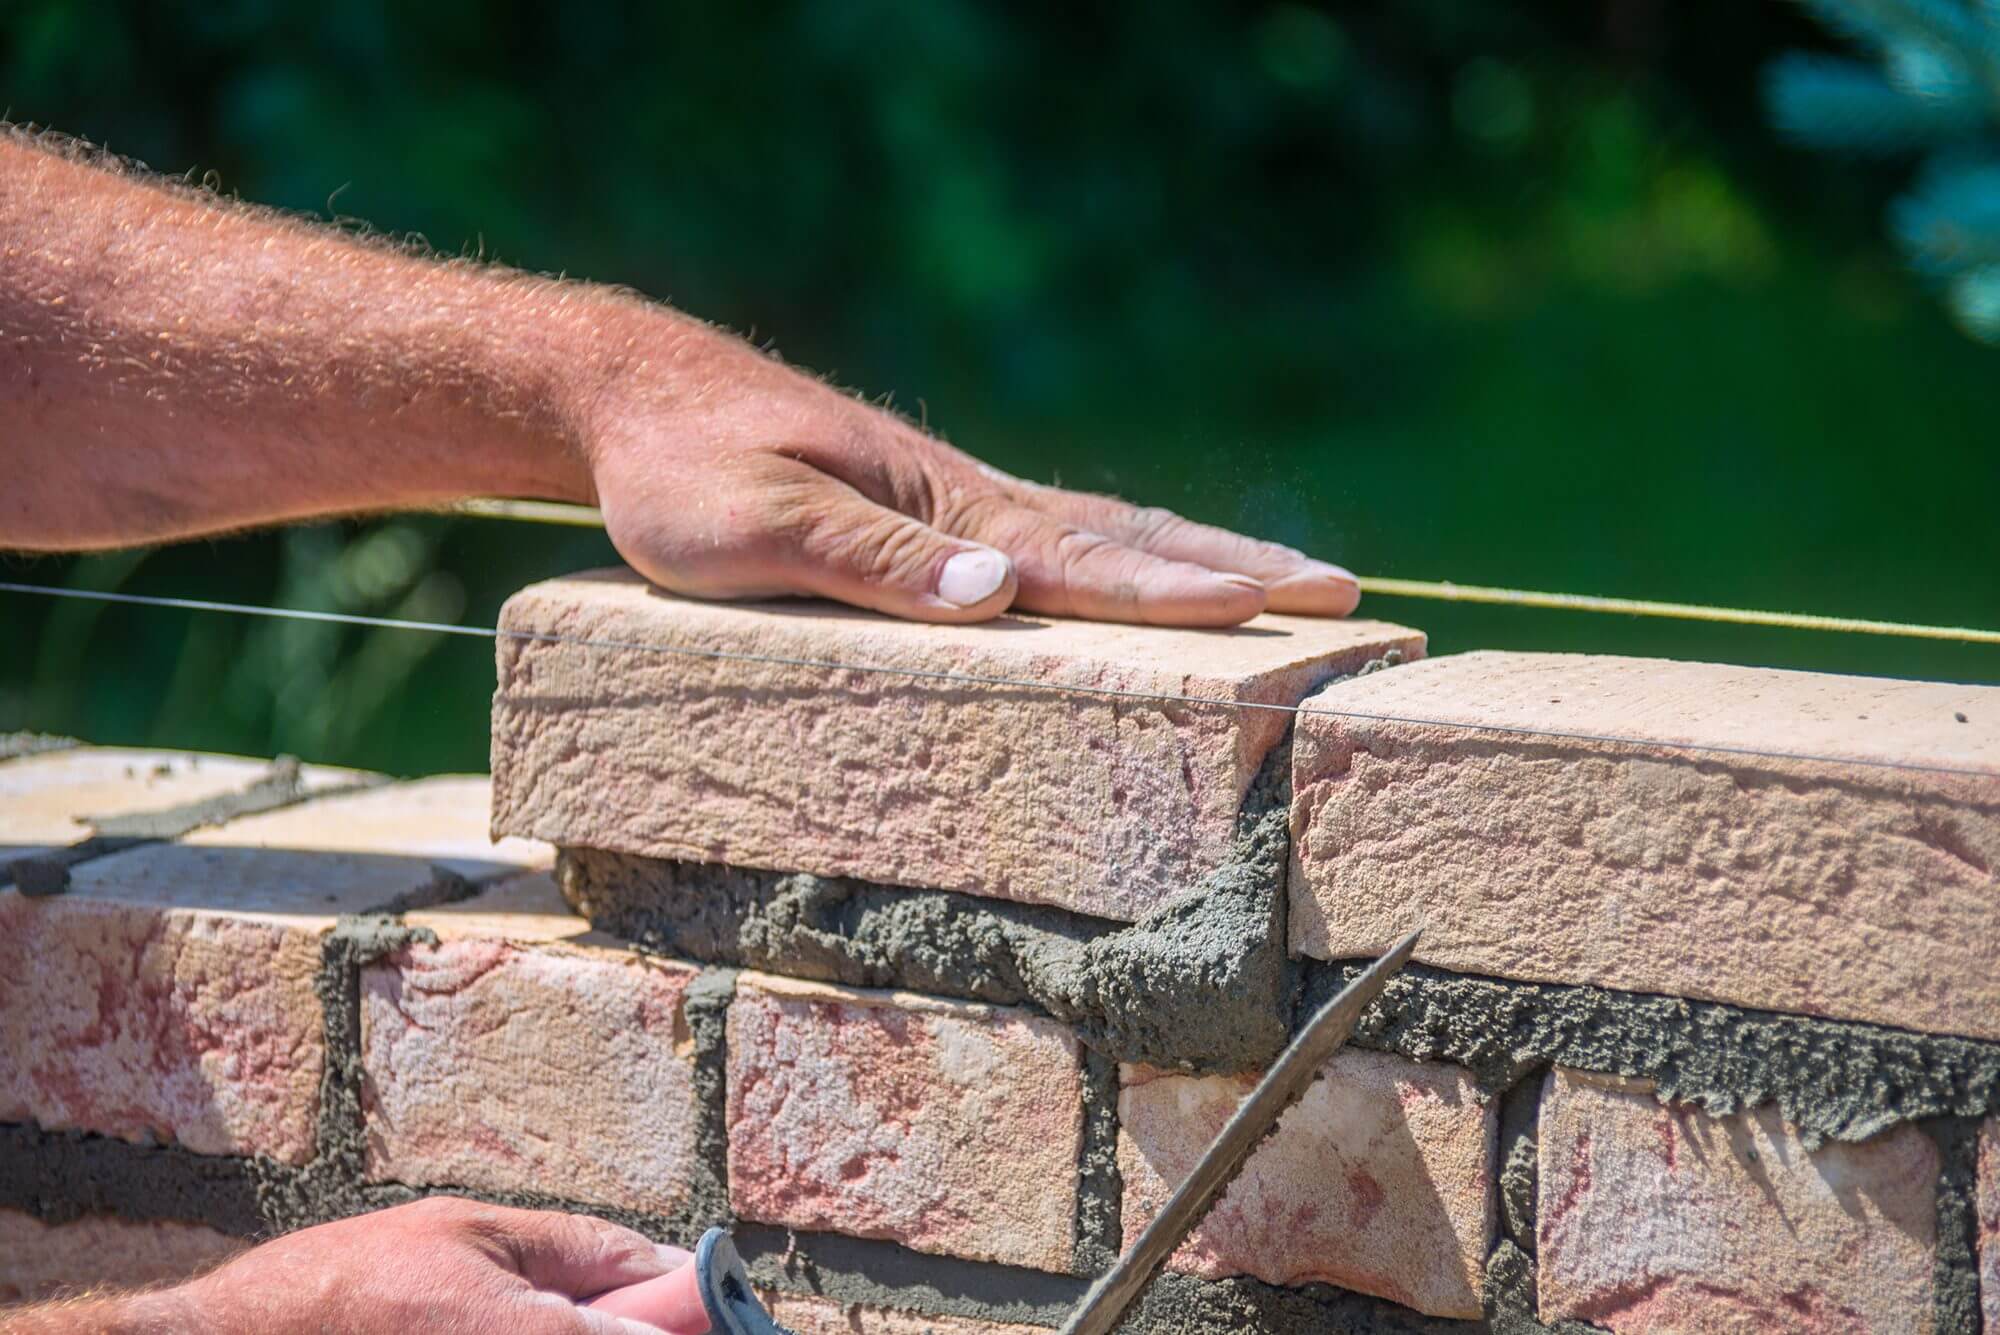
Setting the Bricks:
Place the first row of bricks onto the mortar bed, ensuring a snug fit without any gaps. Use a level to check the horizontal alignment and adjust the position of the bricks as needed to maintain a straight and level course.
Tapping the Bricks:
Using a rubber mallet, gently tap each brick into place to ensure proper adhesion to the mortar bed. This process helps to seat the bricks securely and maintain a uniform surface for subsequent courses.
Checking for Level and Alignment:
Regularly use a level to verify the horizontal alignment and a string line to ensure the straightness of the first course. This meticulous attention to detail will establish a solid foundation for the rest of the wall.
Applying Mortar Joints:
Once the bricks are in place, use the trowel to fill the vertical joints between the bricks with mortar. Ensure that the joints are properly filled and tooled for a clean and professional finish.
By methodically laying the first course of bricks with precision and attention to detail, you’ll establish a solid and level base for the subsequent courses, setting the stage for the vertical construction of your brick retaining wall. With the first course in place, you’re ready to progress to the next phase: building the wall upward.
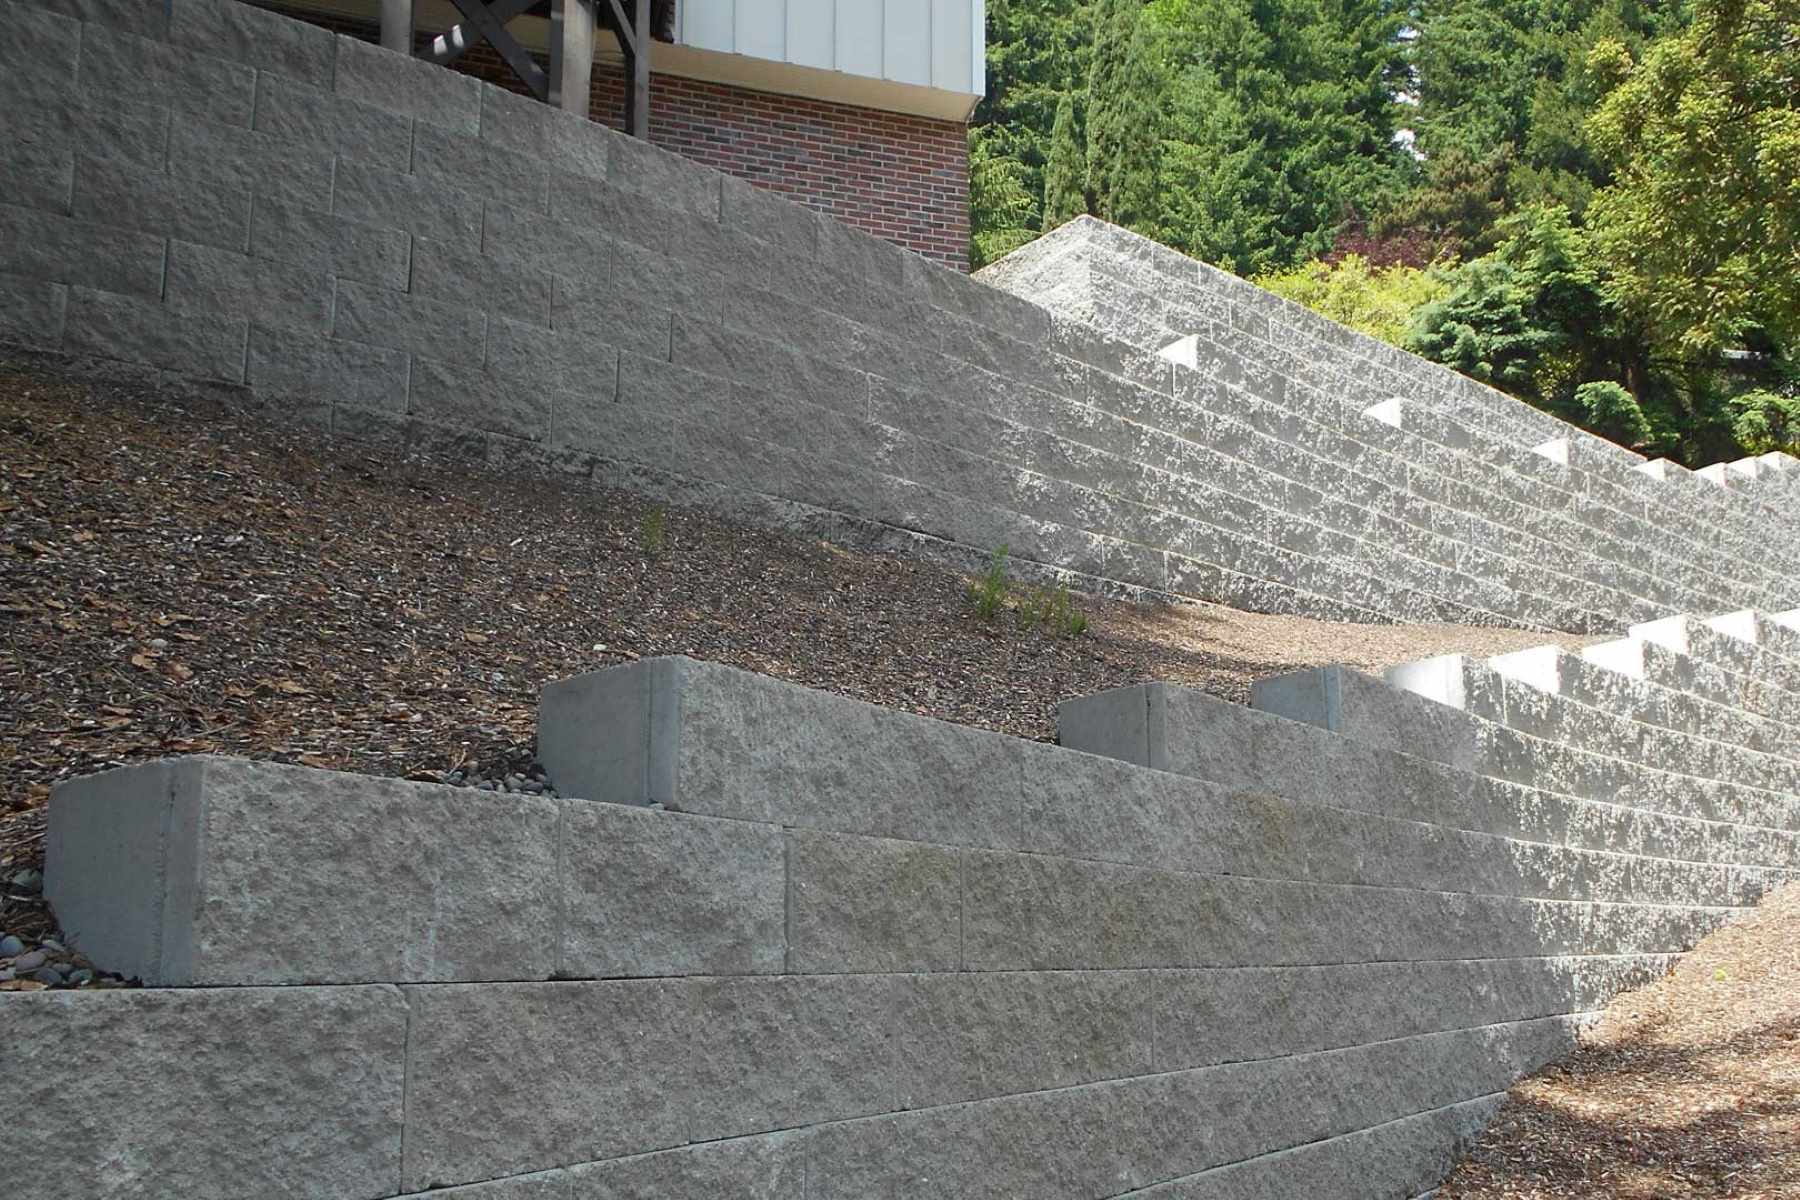
Building the Wall
As you move forward with the construction of your brick retaining wall, the process of building the wall itself involves layering the bricks to achieve the desired height and structural stability. Here’s a comprehensive guide to this pivotal phase:
Laying Additional Courses:
After the first course is in place, continue laying subsequent courses of bricks, ensuring that each layer is offset from the one below it. This staggered pattern, known as “running bond,” enhances the stability and visual appeal of the wall.
Checking Alignment and Level:
Regularly use a level to verify the horizontal alignment of each course, adjusting the position of the bricks as needed to maintain a straight and level wall. Additionally, ensure that the wall remains plumb (vertically straight) as it rises.
Applying Mortar and Tapping Bricks:
As you lay each course, apply a consistent layer of mortar and use a rubber mallet to tap the bricks into place, ensuring proper adhesion and structural integrity. This process creates a secure and stable bond between the bricks and the mortar bed.
Installing Reinforcement:
For taller retaining walls, consider incorporating reinforcement such as steel bars or geogrid within the wall structure to enhance its stability and resistance to soil pressure. Follow manufacturer guidelines for proper installation.
Creating Terraced Levels:
If your wall is designed to create terraced levels for planting or landscaping, ensure that each level is properly supported and backfilled to prevent soil erosion and maintain stability.
Incorporating Drainage Features:
As the wall rises, incorporate drainage features such as weep holes and gravel backfill to facilitate proper drainage and minimize hydrostatic pressure behind the wall. This is crucial for long-term stability and performance.
By methodically layering the bricks and ensuring proper alignment, level, and structural integrity, you’ll gradually build a sturdy and visually appealing brick retaining wall. With each course meticulously laid, your wall will steadily rise to its intended height, serving its practical purpose while enhancing the beauty of your outdoor space. With the wall taking shape, the next phase involves adding the finishing touches to complete the construction process.
Finishing Touches
As the construction of your brick retaining wall nears completion, the addition of finishing touches enhances its functionality, durability, and aesthetic appeal. Here’s a detailed overview of the essential finishing touches:
Tooling Mortar Joints:
After the wall is built, carefully inspect the mortar joints and use a jointing tool to create a clean and uniform finish. This step not only enhances the visual appeal of the wall but also contributes to the overall structural integrity.
Sealing the Wall (optional):
Consider applying a protective sealant to the exterior of the wall to enhance its weather resistance and longevity. This is particularly beneficial for retaining walls exposed to the elements and can help prevent moisture penetration and surface deterioration.
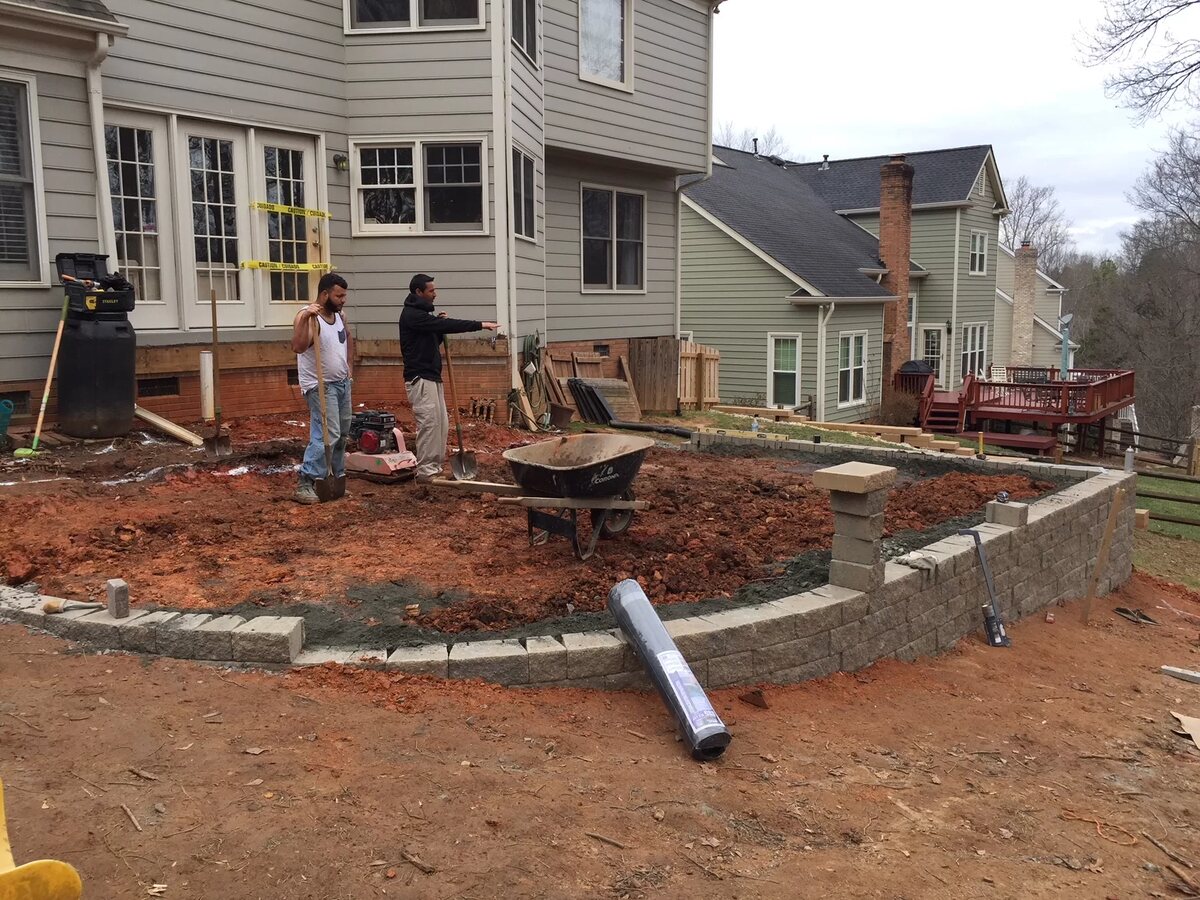
Backfilling and Compaction:
Once the wall is constructed, properly backfill the area behind the wall with gravel or suitable backfill material. Compact the backfill in layers to ensure proper compaction and minimize settling over time.
Landscaping and Planting:
If the retaining wall is part of a terraced garden or landscaping design, proceed with planting and landscaping the areas adjacent to the wall. Select suitable plants and ground cover to enhance the visual appeal and blend harmoniously with the wall.
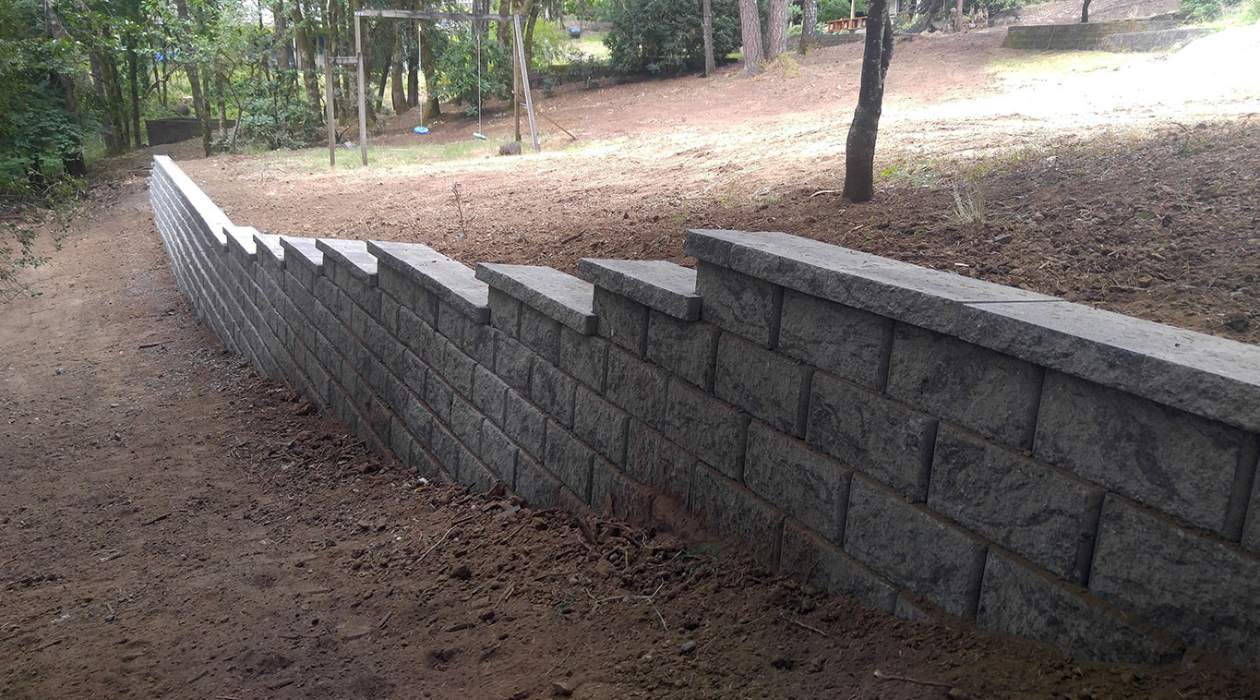
Installing Capstones (if desired):
Consider adding capstones to the top of the wall to provide a finished edge and added protection. Capstones not only enhance the aesthetic appeal of the wall but also help protect the top course of bricks from moisture and wear.
Inspecting for Quality and Stability:
Thoroughly inspect the completed wall for any signs of instability, mortar defects, or misaligned bricks. Address any issues promptly to ensure that the wall meets the highest standards of quality and performance.
Maintaining the Wall:
Establish a maintenance plan for the retaining wall, including regular inspections, cleaning, and addressing any signs of wear or damage. Proper maintenance will preserve the wall’s integrity and visual appeal over the long term.
By meticulously attending to these finishing touches, you’ll ensure that your brick retaining wall not only serves its practical purpose but also stands as a visually striking and enduring feature in your outdoor space. With the completion of these final steps, your brick retaining wall is ready to enhance the functionality and beauty of your landscape for years to come.
Conclusion
Congratulations on completing the construction of your brick retaining wall! Throughout this journey, you’ve embarked on a rewarding and transformative project that has enhanced the functionality and visual appeal of your outdoor space. As you reflect on the process and the impressive result, it’s essential to recognize the significance of this achievement.
By meticulously planning and preparing, choosing the right location, gathering the necessary materials and tools, excavating and laying the foundation, and methodically building the wall, you’ve demonstrated a remarkable dedication to craftsmanship and attention to detail. Your commitment to creating a sturdy and visually appealing retaining wall has undoubtedly enriched your outdoor environment.
As you admire the finished wall, take pride in the knowledge that it not only serves a practical purpose, such as preventing soil erosion or creating terraced levels, but also stands as a testament to your creativity and determination. The enduring beauty and functionality of the brick retaining wall will continue to enrich your outdoor space for years to come.
Furthermore, the skills and insights gained from this project will undoubtedly serve you well in future endeavors, whether it’s tackling additional landscaping projects, honing your masonry skills, or simply enjoying the satisfaction of a job well done. The process of constructing a brick retaining wall has provided valuable lessons in patience, precision, and the art of transforming a vision into a tangible reality.
As you bask in the sense of accomplishment that comes with completing this significant project, remember that your brick retaining wall stands as a testament to your creativity, perseverance, and commitment to enhancing your outdoor living space. Embrace the beauty and functionality it adds to your landscape, and take pride in the craftsmanship and dedication that have brought this project to fruition.
With the completion of your brick retaining wall, you’ve not only created a lasting and impactful addition to your outdoor environment but also cultivated a sense of fulfillment and pride in your ability to bring your vision to life. As you enjoy the beauty and functionality of your new retaining wall, may it serve as a constant reminder of the remarkable achievements that can result from passion, dedication, and the pursuit of excellence.
Frequently Asked Questions about How To Build A Brick Retaining Wall
Was this page helpful?
At Storables.com, we guarantee accurate and reliable information. Our content, validated by Expert Board Contributors, is crafted following stringent Editorial Policies. We're committed to providing you with well-researched, expert-backed insights for all your informational needs.


0 thoughts on “How To Build A Brick Retaining Wall”