Articles
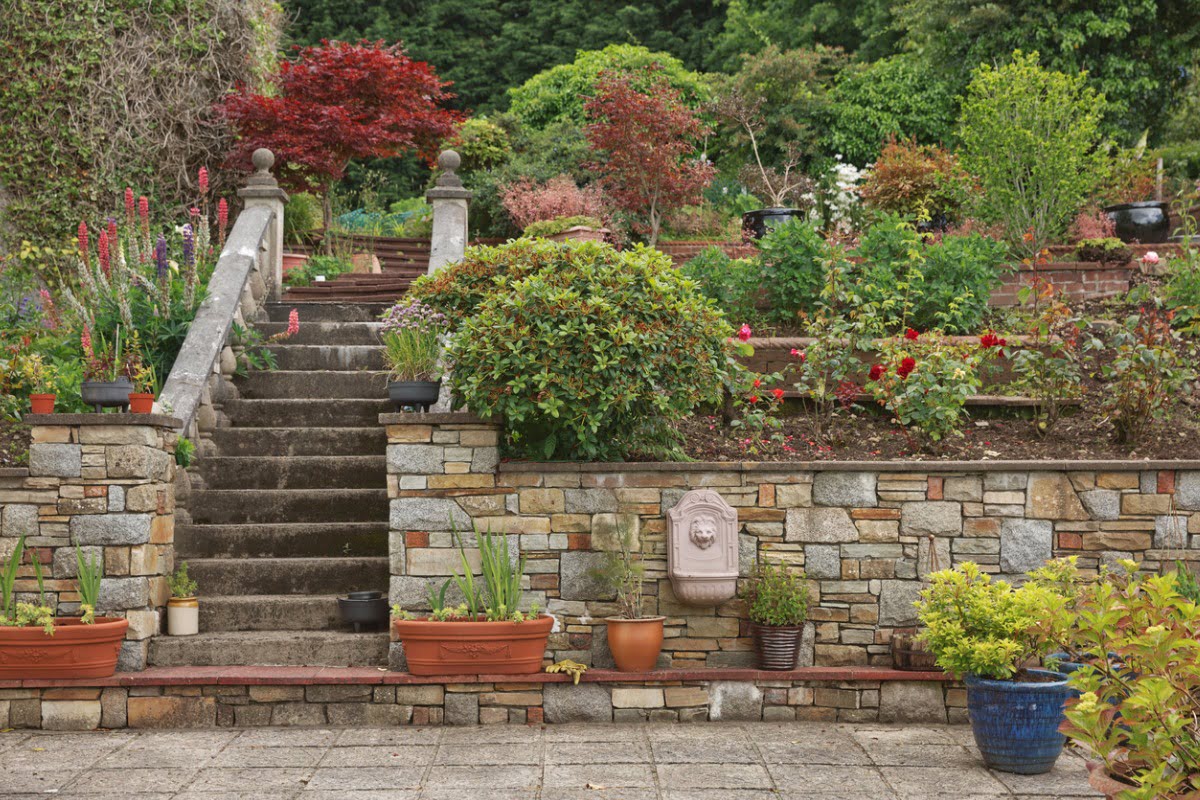
How To Build A Retaining Wall For A Driveway
Modified: August 27, 2024
Learn the step-by-step process of building a sturdy and durable retaining wall for your driveway with our informative articles.
(Many of the links in this article redirect to a specific reviewed product. Your purchase of these products through affiliate links helps to generate commission for Storables.com, at no extra cost. Learn more)
Introduction
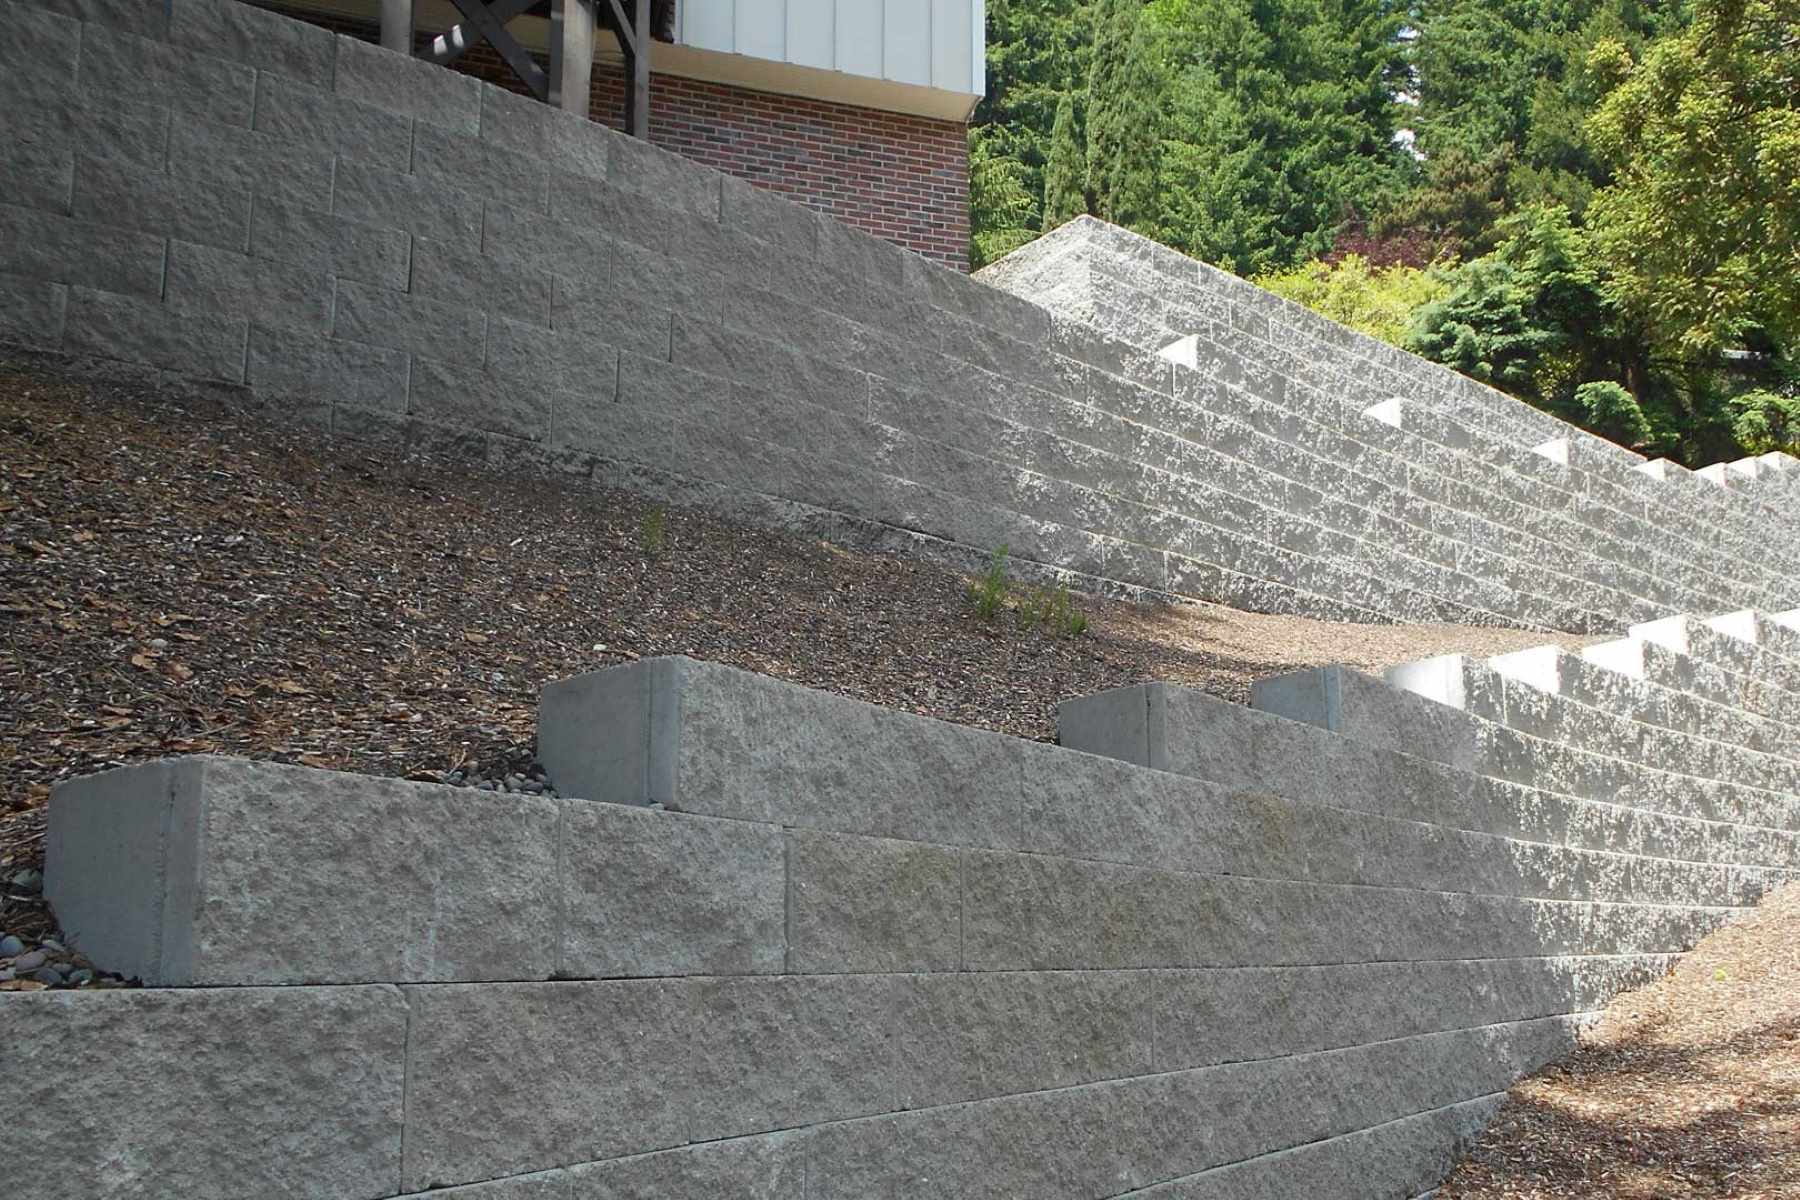
Building a retaining wall for a driveway is not only a practical solution for stabilizing the ground, but it can also add aesthetic appeal to your property. Whether you are dealing with a sloping driveway, erosion issues, or simply want to create a defined and attractive driveway entrance, a retaining wall can help you achieve your goals.
In this comprehensive guide, we will take you through the step-by-step process of building a retaining wall for a driveway. We will cover everything from site preparation to finishing touches, providing you with the knowledge and assistance you need to successfully complete this project.
Retaining walls not only serve as a barrier against soil movement but also provide structural support to prevent erosion and keep your driveway intact. Therefore, having a well-built and properly constructed retaining wall is crucial for long-term durability and stability.
Before diving into the nitty-gritty details, it is essential to familiarize yourself with the local building codes and regulations. These regulations may vary depending on your location, so ensure you obtain the necessary permits and approvals before starting the project.
Now, let’s get started with the first step: site preparation.
Key Takeaways:
- Proper site preparation, gathering essential materials, and meticulous construction are crucial for building a durable and visually appealing retaining wall for your driveway. Follow the step-by-step guide to ensure a successful project.
- Backfilling, compacting, and optional drainage system installation are vital for maintaining stability and effective water management behind the retaining wall. Add finishing touches for a visually pleasing and long-lasting structure.
Read more: How To Build Stairs In A Retaining Wall
Step 1: Preparing the Site
Before you begin constructing your retaining wall for the driveway, it is crucial to properly prepare the site. Here’s what you need to do:
- Clear the area: Start by removing any obstacles, debris, or vegetation from the site where the retaining wall will be built. Use a shovel, rake, or landscaping tools to ensure the area is clear.
- Measure and mark: Use measuring tape and stakes to mark the edges of the driveway and the desired location and dimensions of the retaining wall. Make sure to account for any necessary setbacks and consider the slope and grade of the driveway.
- Call utility companies: Before digging, contact your local utility companies to mark the location of any underground utility lines. This will help you avoid damaging any pipes or cables during excavation.
- Excavate the area: Use machinery like an excavator or a shovel to dig the trench for the retaining wall. The depth will depend on the dimensions and design of your wall, but it is typically advised to dig down below the frost line to prevent potential frost heave.
Once you have completed these steps, you will have a clear and properly excavated site ready for the construction of your retaining wall. The next step is to gather the necessary materials and tools.
Step 2: Gathering Materials and Tools
Now that you have prepared the site for your retaining wall, it’s time to gather the materials and tools you’ll need for the construction process. Here’s a list of the essentials:
- Retaining wall blocks: Choose blocks that are specifically designed for retaining walls. They should be sturdy, durable, and able to withstand the pressure exerted by the soil.
- Gravel: This will be used for the base and backfill of the retaining wall. Ensure you have enough gravel to create a solid foundation and backfill behind the wall for proper drainage.
- Geotextile fabric: This fabric is placed between the soil and the gravel to prevent soil erosion and maintain the stability of the retaining wall.
- Drainage pipe (optional): If you anticipate excess water buildup behind the retaining wall, you may want to consider installing a drainage system. Get the necessary drainage pipe and fittings for effective water management.
- Concrete mix: It’s essential to have a quality concrete mix to secure the base and the first row of blocks for added stability.
- Shovel: You’ll need a shovel for digging, moving gravel, and mixing concrete.
- Level: A level will help ensure that the retaining wall is properly aligned and straight during construction.
- Mallet or rubber mallet: A mallet is useful for fitting the blocks snugly and securely in place.
- Tamping tool: This tool will help you compact the gravel and soil during the backfilling process.
- Safety gear: Don’t forget to wear gloves, safety glasses, and sturdy footwear to protect yourself during construction.
Make sure you have all the required materials and tools before starting the construction process. This will save you time and ensure a smooth workflow. Once you have everything ready, you can move on to the next step: excavating the area for the retaining wall.
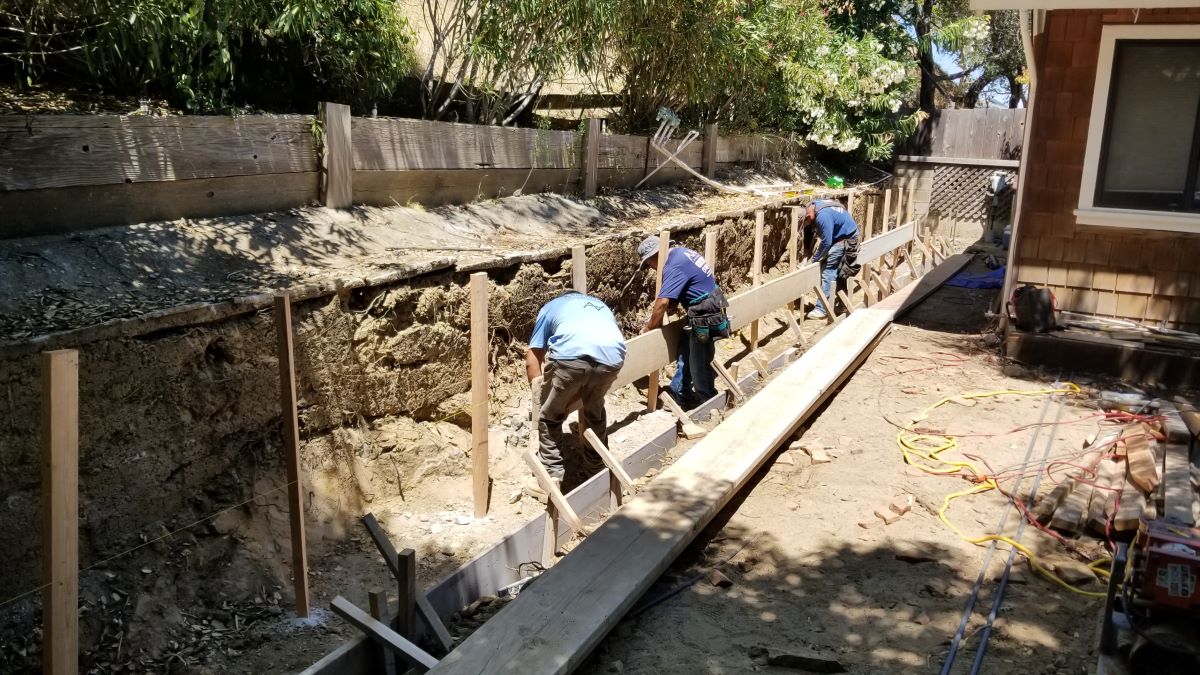
Step 3: Excavating the Area
With the necessary materials and tools in hand, it’s time to move on to excavating the area for your retaining wall. Proper excavation is crucial for creating a stable foundation and ensuring the overall integrity of the structure. Follow these steps to complete this phase:
- Use a shovel or an excavator to dig a trench along the marked lines for your retaining wall. The width of the trench should be slightly wider than the width of the retaining wall blocks.
- The depth of the trench will depend on the height of your retaining wall. As a general rule, for every one foot of wall height, dig a trench that is six inches deep. However, refer to the manufacturer’s guidelines for specific depth requirements of your chosen retaining wall blocks.
- As you excavate, ensure that the trench has a uniform bottom and is level. This is essential for the stability and alignment of the retaining wall.
- Remove any rocks, roots, or debris from the trench to create a smooth and even surface.
- Use a hand tamper or a plate compactor to compact the soil in the bottom of the trench. This will help provide a solid and stable base for the retaining wall blocks.
By following these steps, you will have a properly excavated trench that is ready for the next phase of construction: building the foundation for your retaining wall.
Step 4: Building the Foundation
With the excavation complete, it’s time to lay the foundation for your retaining wall. The foundation is a crucial element that provides stability and support to the wall. Follow these steps to build a solid foundation:
- Start by filling the excavated trench with a layer of gravel. This layer will serve as the base for the retaining wall blocks.
- Spread the gravel evenly and use a rake or a shovel to level it. Ensure that the layer is compacted and firm.
- Use a hand tamper or a plate compactor to further compact the gravel layer. This will help create a stable and solid foundation.
- Check the levelness of the gravel layer using a level. Adjust as necessary to ensure that it is perfectly level from front to back and side to side.
- For added stability, consider adding a layer of geotextile fabric on top of the gravel layer. This fabric will aid in drainage and prevent the mixing of soil particles with the gravel.
- If required by the manufacturer, mix concrete and pour it along the edges of the gravel layer. This will create a solid and secure bond between the retaining wall blocks and the foundation.
- Once the concrete has cured or if it is not needed, you can proceed to the next step: installing the first row of retaining wall blocks.
By following these steps, you will have a strong and stable foundation for your retaining wall, ensuring its durability and longevity. It’s time to move on to the next phase: installing the first row of blocks.
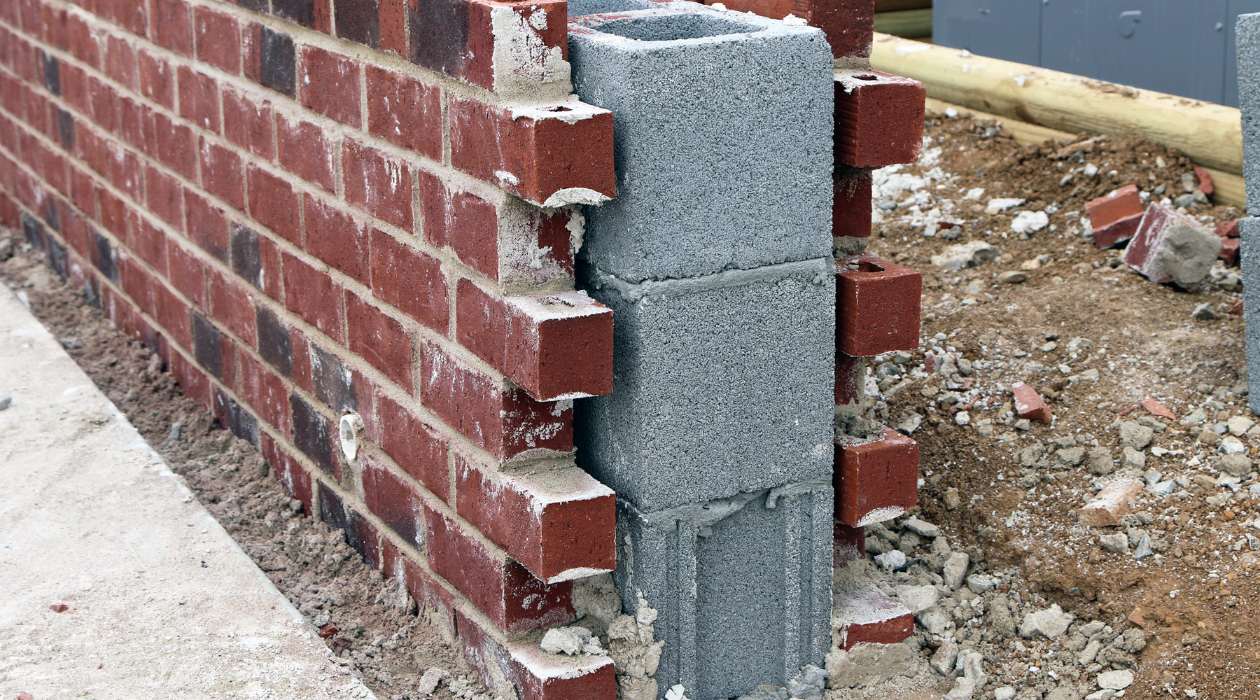
Read more: How To Build A Brick Retaining Wall
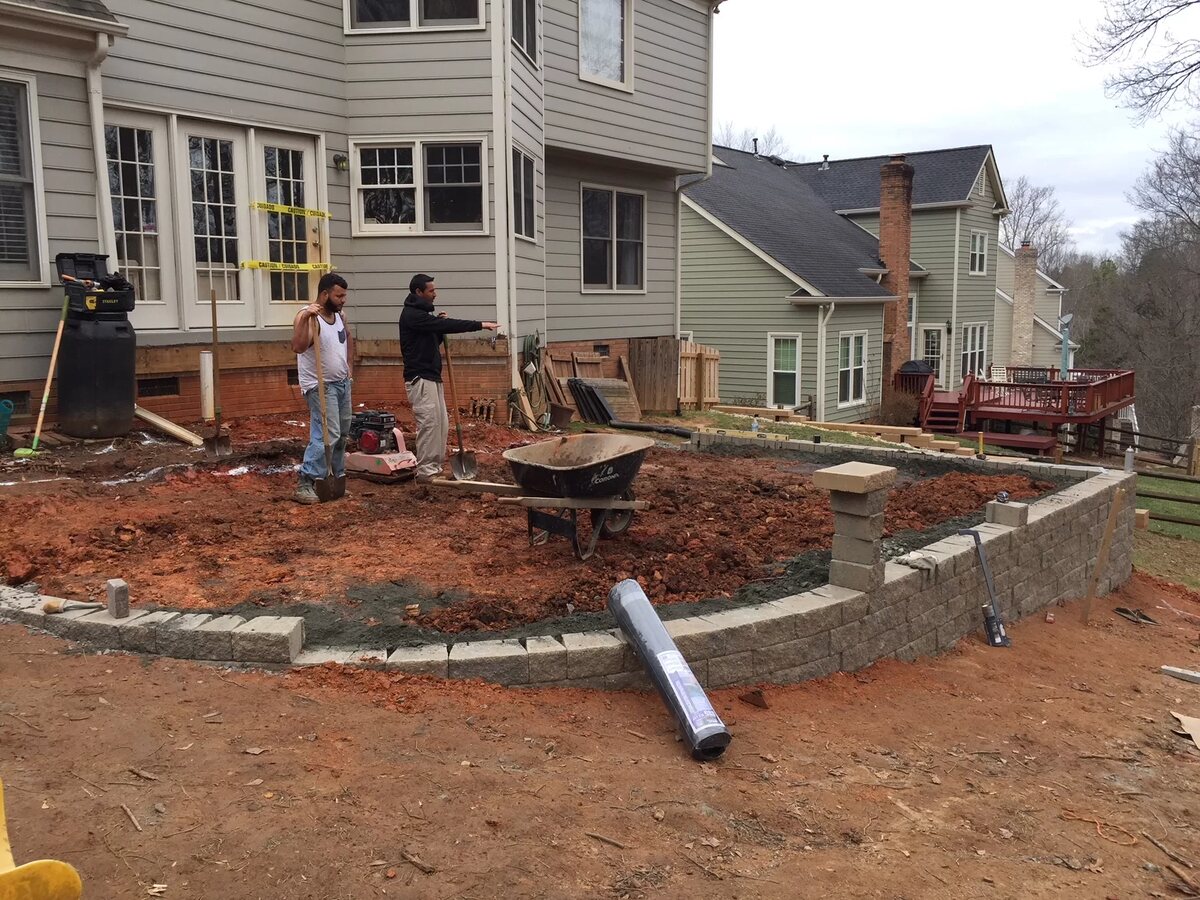
Step 5: Installing the First Row of Blocks
Now that you have built a solid foundation, it’s time to start constructing the retaining wall. The first row of blocks is crucial as it sets the foundation for the rest of the wall. Follow these steps to install the first row of blocks:
- Start at one end of the trench and place the first block in position. Make sure it is snug against the edge of the trench and aligned with your markings.
- Use a level to ensure that the block is perfectly level from front to back and side to side. Adjust the position as needed.
- Place the second block next to the first one, leaving a small gap for proper drainage. Check the levelness and alignment, adjusting as necessary.
- Continue placing the remaining blocks along the first row, making sure each block is level and aligned with the previous one.
- If needed, use a mallet or a rubber mallet to tap the blocks into place, ensuring a secure fit.
- Check the levelness of the entire row. Adjust the blocks as needed to ensure a uniformly level row.
- Fill any gaps or spaces between the blocks with gravel or small stones. This will promote proper drainage behind the retaining wall.
By following these steps, you will have successfully installed the first row of blocks. This forms the foundation for the rest of the retaining wall. Now, it’s time to move on to the next step: building the rest of the retaining wall.
When building a retaining wall for a driveway, make sure to use proper drainage behind the wall to prevent water buildup and potential damage. This can be achieved by using gravel or a perforated pipe.
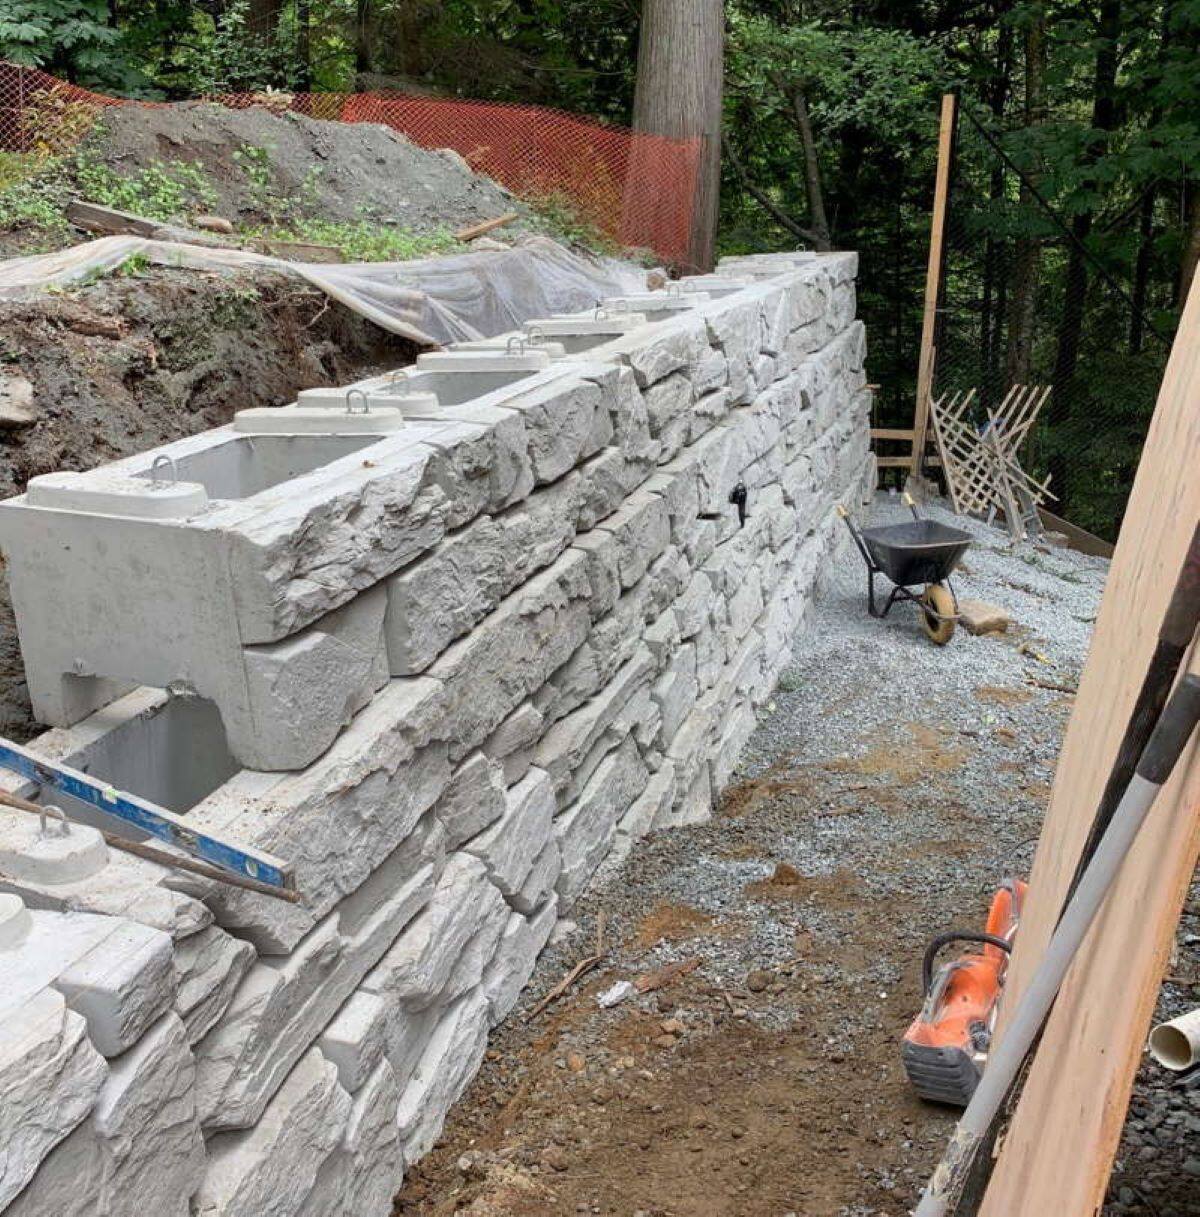
Step 6: Building the Rest of the Retaining Wall
With the first row of blocks in place, you can now proceed with building the rest of the retaining wall. Follow these steps to complete the construction:
- Start by applying a layer of adhesive or mortar to the top of the first row of blocks. This will provide a strong bond between the first and second rows.
- Place the first block of the second row on top of the adhesive, making sure it is aligned with the previous row. Tap it gently with a mallet to secure it in place.
- Continue adding blocks to complete the second row, ensuring proper alignment and securing them with adhesive or mortar.
- Repeat the process for the subsequent rows, one at a time, until you reach the desired height for your retaining wall.
- As you build each row, use a level to ensure that the blocks are plumb vertically and aligned horizontally.
- If needed, cut blocks to fit at the ends or corners of the retaining wall using a saw or chisel.
- Continue layering blocks and applying adhesive or mortar until you reach the top of the retaining wall.
Throughout the process, regularly check for levelness and adjust the blocks as necessary. Take your time to ensure the wall is sturdy, straight, and well-built.
Remember to follow any specific instructions or recommendations provided by the manufacturer of the retaining wall blocks you are using.
By following these steps, you will successfully build the rest of the retaining wall and bring it to its desired height. The next step is to backfill and compact the area behind the wall.
Step 7: Backfilling and Compacting
After completing the construction of the retaining wall, the next crucial step is backfilling and compacting the area behind the wall. This step ensures stability and proper drainage. Follow these steps to effectively backfill and compact:
- Start by adding a layer of gravel or crushed stone behind the retaining wall. This layer will aid in drainage and help prevent soil erosion.
- Place the gravel or crushed stone behind the wall, making sure to fill any gaps or voids. Use a shovel or rake to evenly distribute the material.
- Next, use a hand tamper or a plate compactor to compact the backfill material. Start at the bottom and work your way up, applying firm and even pressure. This will help ensure that the backfill is compacted and stable.
- Continue adding more backfill material and compacting it, layer by layer, until the area behind the retaining wall is fully backfilled.
- Pay close attention to the space directly behind the retaining wall, as this is where the pressure from the soil will be the greatest. Proper compaction is vital to prevent any movement or collapse of the wall.
- Regularly check the levelness of the retaining wall as you backfill and compact. Adjust the wall if necessary to maintain its alignment and stability.
- Once the backfill is fully compacted, use a rake to smooth out the surface and remove any debris or excess material.
By following these steps, you will ensure that the area behind the retaining wall is properly backfilled and compacted. This will provide stability and help prevent any soil movement or erosion.
Next, if required, you may proceed to install a drainage system to effectively manage excess water behind the retaining wall. This step is optional but may be necessary in certain situations.
Step 8: Installing Drainage System (Optional)
Installing a drainage system behind the retaining wall can help prevent water buildup and potential damage to the structure. While this step is optional, it is recommended in areas prone to heavy rainfall or where drainage is a concern. Follow these steps to install a drainage system:
- Start by excavating a trench behind the retaining wall, parallel to its base. The trench should be a few inches wide and deep enough to accommodate the drainage pipe.
- Place a layer of gravel at the bottom of the trench to aid in drainage.
- Next, lay a perforated drainage pipe in the trench, with the perforations facing downwards. The pipe should run the entire length of the retaining wall and slope away from the wall to direct water away.
- Connect the drainage pipe to any existing drainage outlets or a suitable drainage system, ensuring proper water flow.
- Cover the drainage pipe with additional gravel, ensuring that it is well surrounded and supported.
- If desired, you can add a layer of geotextile fabric over the gravel to prevent clogging of the drainage system.
- Backfill the trench with soil, compacting it as you go to ensure stability.
- Finally, test the drainage system by pouring water into the trench and observing its flow. Make any necessary adjustments to ensure proper drainage away from the retaining wall.
Installing a drainage system can help prevent water pressure against the retaining wall and reduce the risk of damage caused by hydrostatic pressure. This is particularly important in areas where heavy rain or poor soil drainage is a concern.
However, if you don’t require a drainage system, you can proceed to the final step: adding the finishing touches to your retaining wall.
Read more: How To Build Retaining Wall On A Slope
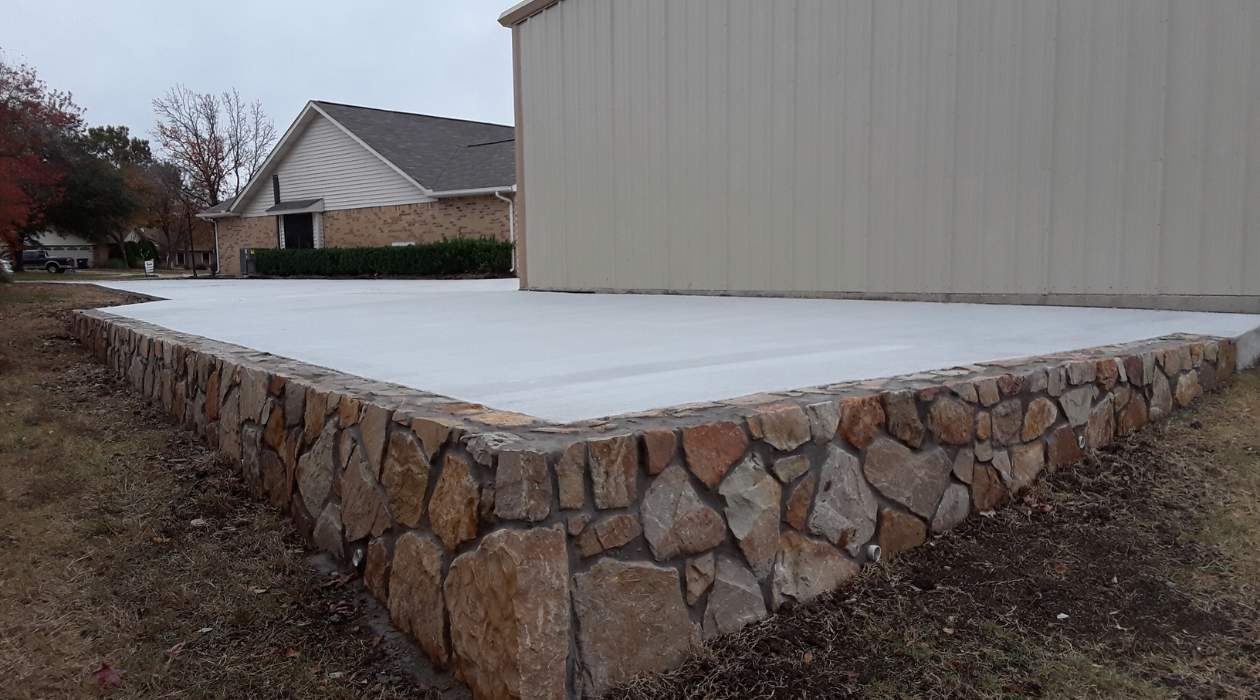
Step 9: Finishing Touches
After completing the construction of your retaining wall, it’s time to add the finishing touches to enhance its appearance and functionality. Follow these steps to complete the project:
- Inspect the retaining wall for any uneven blocks or gaps. Make any necessary adjustments to ensure a uniform and visually pleasing appearance.
- If desired, choose to cap the retaining wall with a decorative capstone. Capstones not only provide a finished look but also offer additional protection to the wall.
- Secure the capstones in place using a recommended adhesive or mortar, following the manufacturer’s instructions.
- Clean the surface of the retaining wall using a brush or a pressure washer to remove any dirt or debris.
- Consider adding landscaping elements such as plants, shrubs, or mulch in front of the retaining wall to enhance its visual appeal.
- Inspect the entire structure, checking for any signs of cracking or displacement. Address any issues promptly to ensure the longevity and stability of the retaining wall.
- Maintain the retaining wall by regularly inspecting for any vegetation overgrowth or soil erosion. Trim plants and ensure proper drainage to minimize any potential damage.
- Finally, step back and admire your completed retaining wall. Enjoy the functional benefits and the aesthetic enhancement it brings to your driveway.
By following these steps, you will add the finishing touches to your retaining wall project, creating a visually pleasing and functional structure. Proper maintenance and care will help extend the lifespan of the wall and keep it looking its best for years to come.
Congratulations on successfully building a retaining wall for your driveway! It is not only a practical construction but also a beautiful addition to your property.
Conclusion
Building a retaining wall for your driveway is a rewarding project that can enhance both the functionality and aesthetics of your property. By following the step-by-step process outlined in this guide, you can successfully construct a strong and durable retaining wall.
Starting with site preparation and excavation, you ensured a stable foundation for your wall. Gathering the necessary materials and tools allowed you to progress smoothly through the construction process. With each row of blocks carefully installed, you built a strong and secure wall.
Backfilling and compacting behind the retaining wall helped maintain stability and proper drainage, while the optional addition of a drainage system ensured effective water management. The finishing touches, such as capstones and landscaping, brought the project to completion.
Remember to consult local building codes and obtain necessary permits before starting your project. Always follow the manufacturer’s instructions and guidelines specific to the retaining wall blocks you choose.
With proper maintenance, your retaining wall will last for years, serving as a functional barrier against soil movement and erosion while adding curb appeal to your driveway.
Now that you have the knowledge and guidance to build a retaining wall, it’s time to put your skills into action. Plan your project, gather the materials, and enjoy the satisfaction of constructing a durable and visually appealing retaining wall for your driveway.
Good luck and happy building!
Now that you've mastered building a retaining wall, why not spruce up that garden fence next? Whether you're looking for privacy, style, or a bit of both, our article on the best garden fence ideas has you covered. From classic wooden designs to modern metal options, find inspiration to transform your outdoor space into a place of beauty and tranquility. Don't miss out on these creative and practical ideas to complement your landscaping efforts.
Frequently Asked Questions about How To Build A Retaining Wall For A Driveway
Was this page helpful?
At Storables.com, we guarantee accurate and reliable information. Our content, validated by Expert Board Contributors, is crafted following stringent Editorial Policies. We're committed to providing you with well-researched, expert-backed insights for all your informational needs.


0 thoughts on “How To Build A Retaining Wall For A Driveway”