Home>diy>Building & Construction>How To Repair A Crack In A Foundation
Building & Construction
How To Repair A Crack In A Foundation
Modified: January 9, 2024
Learn how to repair a crack in a foundation with expert tips for building construction. Strengthen your foundation and prevent further damage.
(Many of the links in this article redirect to a specific reviewed product. Your purchase of these products through affiliate links helps to generate commission for Storables.com, at no extra cost. Learn more)
Introduction
Welcome to our comprehensive guide on repairing cracks in a foundation. As a homeowner or building owner, dealing with foundation cracks can be a daunting task. Cracks in the foundation can lead to structural issues if left untreated, compromising the integrity of your building. However, fear not! With the right knowledge and tools, you can successfully repair cracks in your foundation and restore its stability.
In this article, we will take you through a step-by-step process on how to assess and repair cracks in your foundation. From gathering the necessary tools and materials to applying the appropriate repair method, we’ve got you covered. So, let’s get started on restoring your foundation and ensuring a safe and solid structure.
Please note that this guide is intended for minor cracks that are not indicative of severe foundation damage. If you are dealing with extensive cracks or suspect significant structural issues, it is recommended to consult with a professional engineer or foundation specialist.
So, without further ado, let’s dive into the world of foundation crack repair and bring back the stability your building deserves.
Key Takeaways:
- Ensure proper assessment of foundation cracks by examining size, location, and signs of movement or water leakage. Gather necessary tools, prepare the area, and follow manufacturer’s instructions for effective crack repair.
- Properly prepare the area by cleaning, drying, and widening the crack before applying the chosen repair method. Allow ample time for the repair material to dry and cure, and add finishing touches for a seamless and durable foundation repair.
Read more: How To Repair Slab Foundation Cracks
Step 1: Assessing the Crack
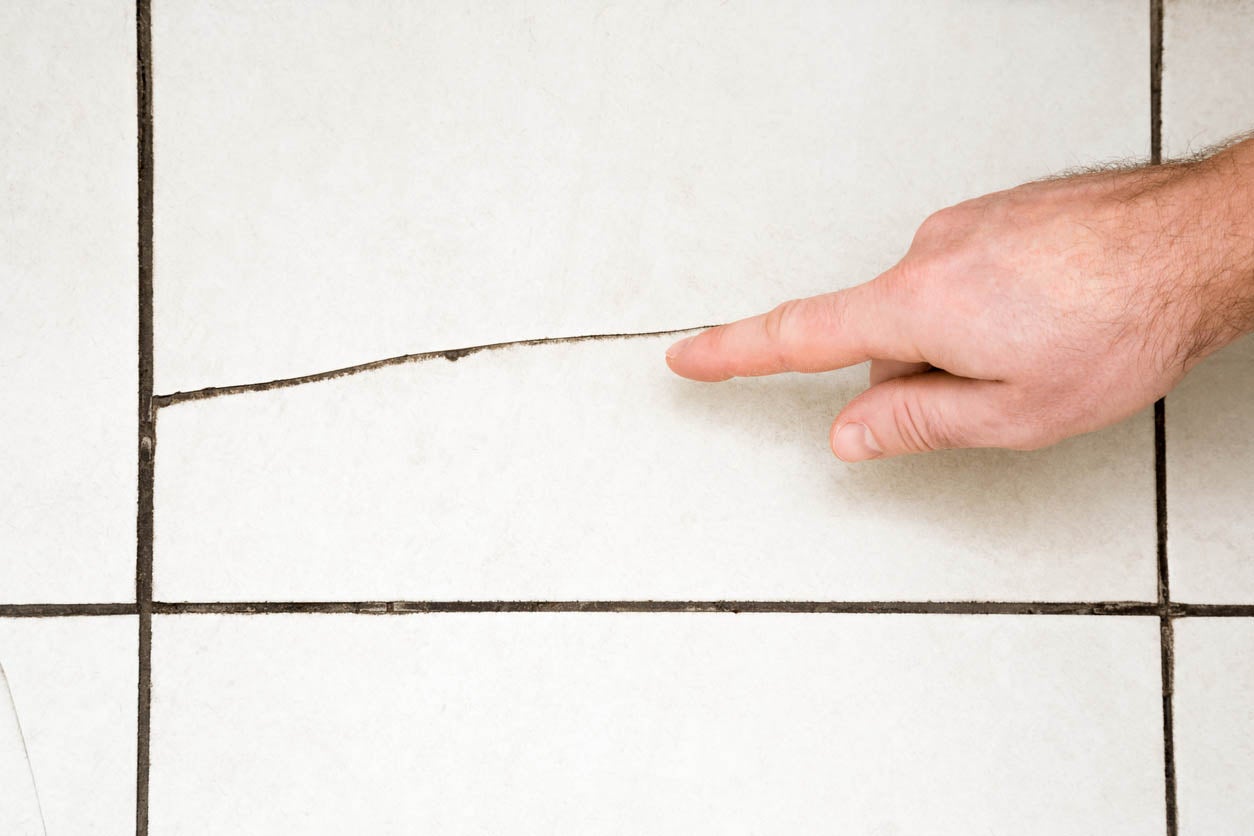
The first step in repairing a crack in the foundation is to assess its severity and determine the appropriate course of action. Understanding the nature of the crack will help you choose the right repair method and ensure a successful outcome.
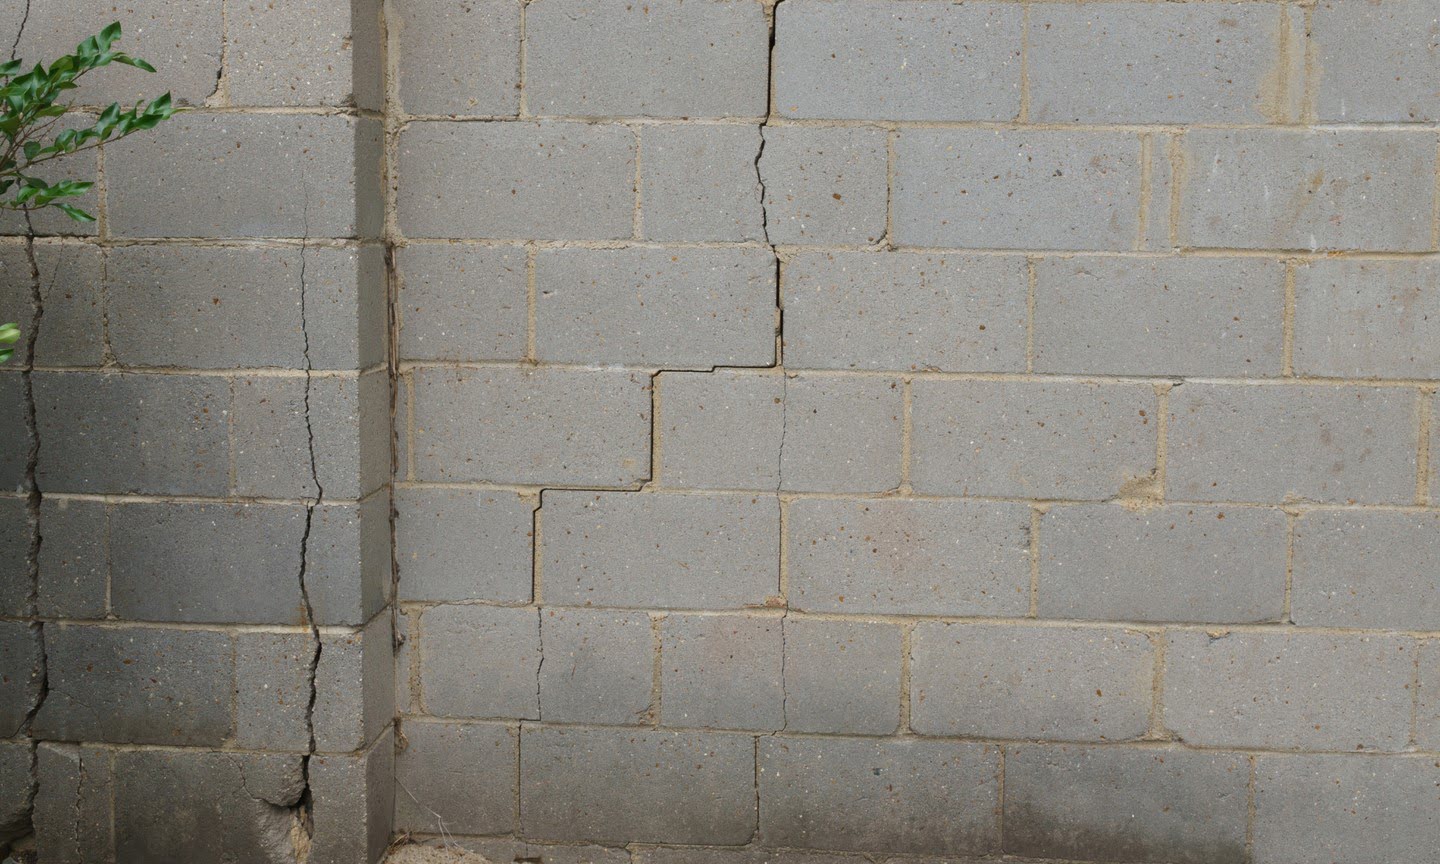
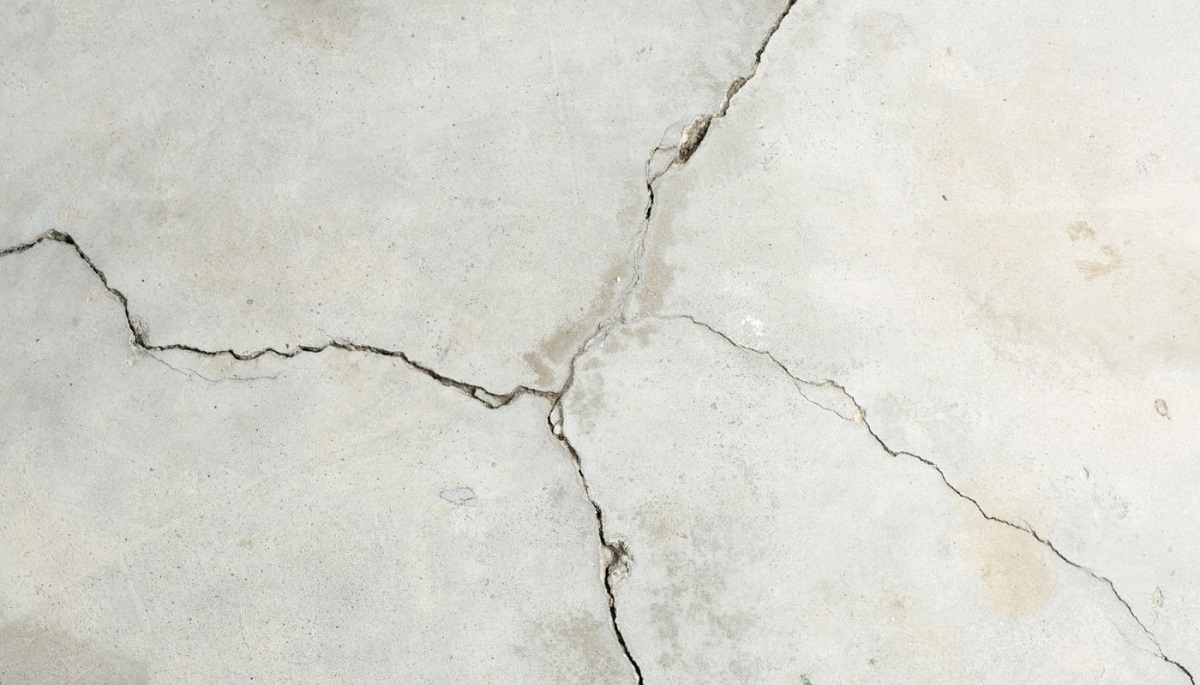
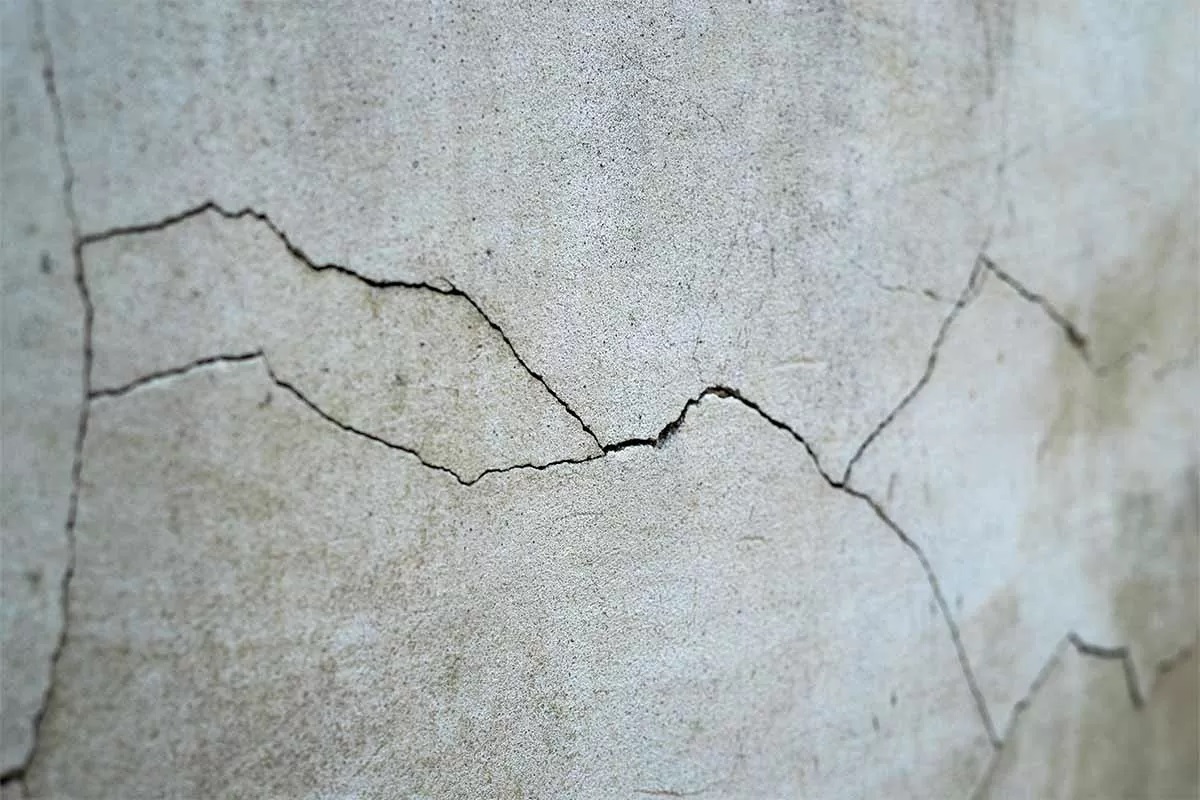
Start by examining the crack closely. Take note of its size, location, and direction. Cracks can vary in width and length, ranging from hairline cracks to wider gaps. They can also be vertical, horizontal, or diagonal. Understanding these details will help you determine the underlying cause of the crack and the best approach to fix it.
Additionally, it’s important to look for signs of movement in the crack. If the crack is still actively widening or if there are signs of displacement, it may indicate ongoing foundation settlement or other structural issues. In such cases, it is highly recommended to consult with a professional engineer to assess the extent of the problem and provide appropriate solutions.
Another aspect to consider during the assessment is the presence of water leakage. If the crack is accompanied by water seepage, it could indicate hydrostatic pressure or poor drainage around the foundation. Addressing these issues will be crucial in preventing further damage to the foundation.
After assessing the crack, make sure to document its characteristics with photographs or notes. This will help you track progress during the repair process and provide necessary information to professionals if needed.
Once you have a clear understanding of the crack, its severity, and any associated issues, you can move on to the next step: gathering the necessary tools and materials for the repair.
Step 2: Gathering the Necessary Tools and Materials
Before you begin the repair process, it’s important to gather all the necessary tools and materials. Having everything ready beforehand will save you time and ensure a smooth and efficient repair.
Here’s a list of tools and materials you’ll need:
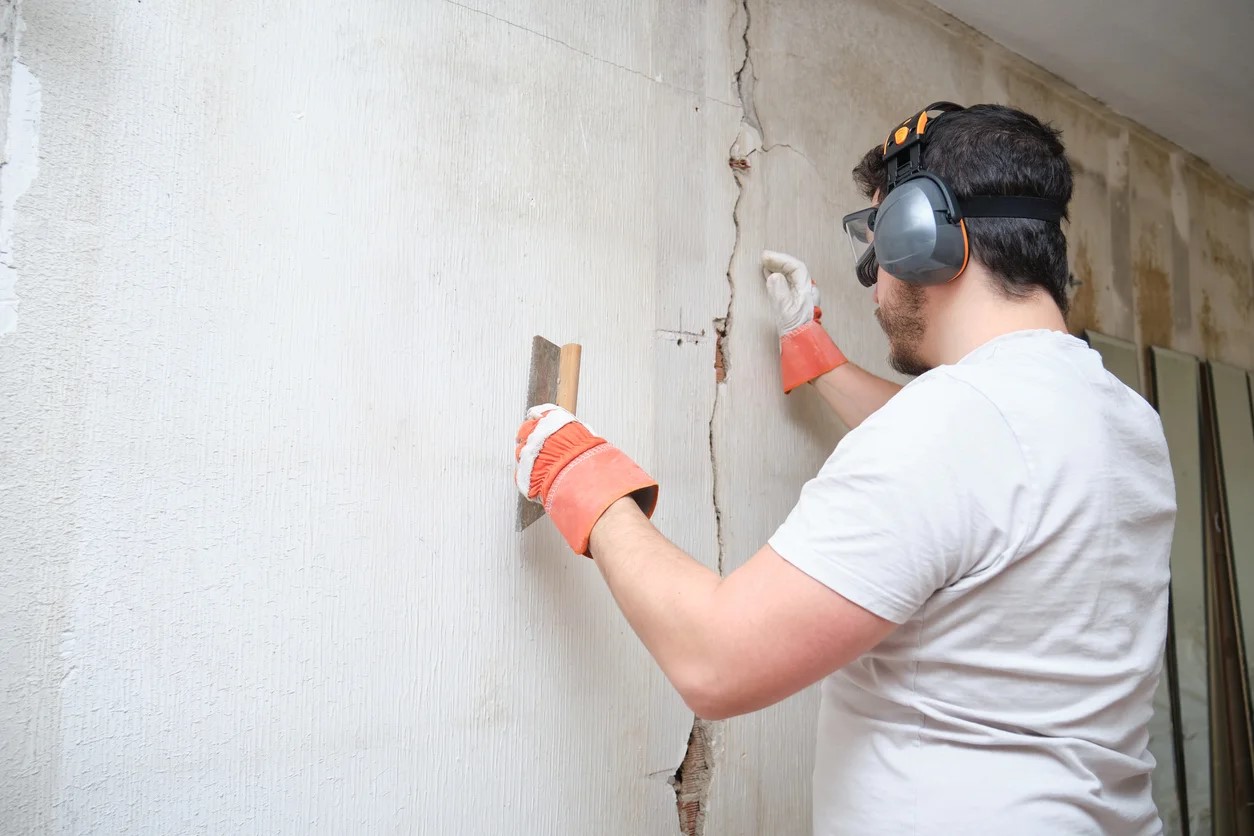
- Protective Gear: Safety should always be a top priority. Make sure to wear safety goggles, gloves, and a dust mask to protect yourself from any potential hazards.
- Cleaning Tools: You’ll need a wire brush, chisel, or grinder to clean the crack and remove any loose debris or old failing repair material. These tools will help create a clean and secure surface for the repair.
- Injection System: If you’re planning to use an injection method to repair the crack, you’ll need an injection system. This includes a cartridge gun or injection pump, along with appropriate injection materials such as epoxy or polyurethane.
- Crack Sealant: Depending on the type and size of the crack, you may need a suitable crack sealant. This could include epoxy-based crack sealants, polyurethane sealants, or specialized concrete repair products. Make sure to choose a product that is compatible with your specific crack and repair method.
- Caulking Gun: If you opt for a caulk-type sealant, have a caulking gun handy to apply the sealant smoothly and evenly.
- Concrete Patching Compound: In some cases, you may need a concrete patching compound to fill in larger cracks or damaged areas. This compound should match the composition and color of your existing concrete to achieve a seamless repair.
- Trowel or Putty Knife: To apply the sealant or patching compound, you’ll need a trowel or putty knife. These tools will help you spread the material evenly and ensure proper adhesion.
- Caulking or Masonry Sealant: For exterior cracks or gaps, you may need a caulking or masonry sealant to prevent water penetration and add an extra layer of protection.
Make sure to check the manufacturer’s instructions for each product and tool to ensure proper usage. Additionally, double-check that you have all the necessary safety equipment and precautions in place before starting the repair process.
Now that you have all the tools and materials ready, let’s proceed to the next step: preparing the area for repair.
Step 3: Preparing the Area
Before diving into the actual repair of the foundation crack, it’s crucial to prepare the area properly. This will ensure better adhesion of the repair material and improve the overall longevity and effectiveness of the repair.
Here’s how to prepare the area:
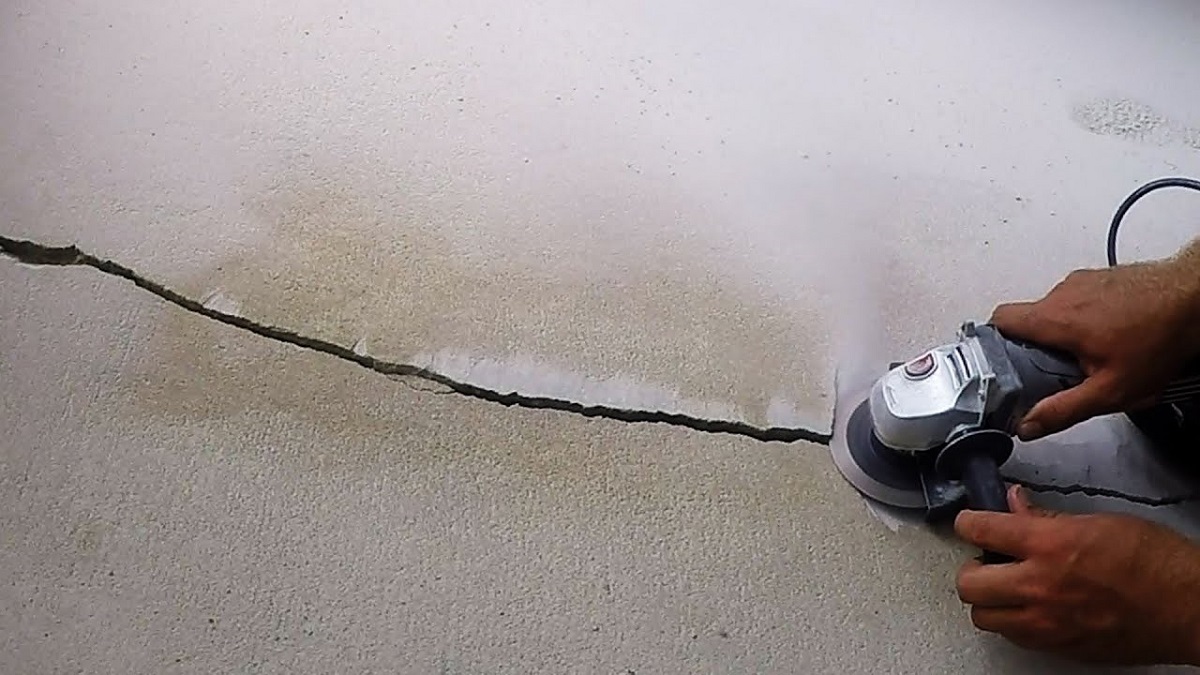
- Clean the Crack: Begin by cleaning the crack and removing any loose debris, dust, or old repair material. Use a wire brush, chisel, or grinder to thoroughly clean the crack and create a clean surface for the repair. This will help the sealant or patching compound adhere better to the concrete.
- Remove Excess Water: If there is any water present within the crack, make sure to dry it out completely. Excess moisture can compromise the effectiveness of the repair material and hinder its curing process. Use a hairdryer or allow the crack to dry naturally before proceeding.
- Open the Crack: For smaller cracks, it may be necessary to widen the crack slightly to create a V-shaped groove. This will provide a larger surface area for the sealant or patching compound and lead to a stronger bond. Use a chisel or grinder to carefully widen the crack, ensuring that it is wider at the base than at the surface.
- Remove Dust and Debris: After cleaning and opening the crack, use a brush or compressed air to remove any remaining dust or debris from the surface. Ensure that the crack is clear of any loose particles that could interfere with the repair process.
- Mask off Surrounding Area: If desired, mask off the surrounding area of the crack with painter’s tape or plastic sheeting. This will protect the adjacent surfaces from unintentional application of the repair material.
By properly preparing the area, you create an optimal environment for the repair material to adhere and cure effectively. Taking the time to complete this step will greatly enhance the longevity and durability of the repair.
With the area fully prepared, you’re now ready to move on to the next step: repairing the crack in the foundation.
Make sure to clean the crack thoroughly before applying any repair material. Use a wire brush or vacuum to remove any debris and ensure the surface is clean for the repair material to adhere properly.
Step 4: Repairing the Crack
Now that you have assessed the crack, gathered the necessary tools and materials, and prepared the area, it’s time to begin the actual repair process. This step will involve applying the chosen repair method or material to fix the crack in the foundation.
Follow these steps to repair the crack:
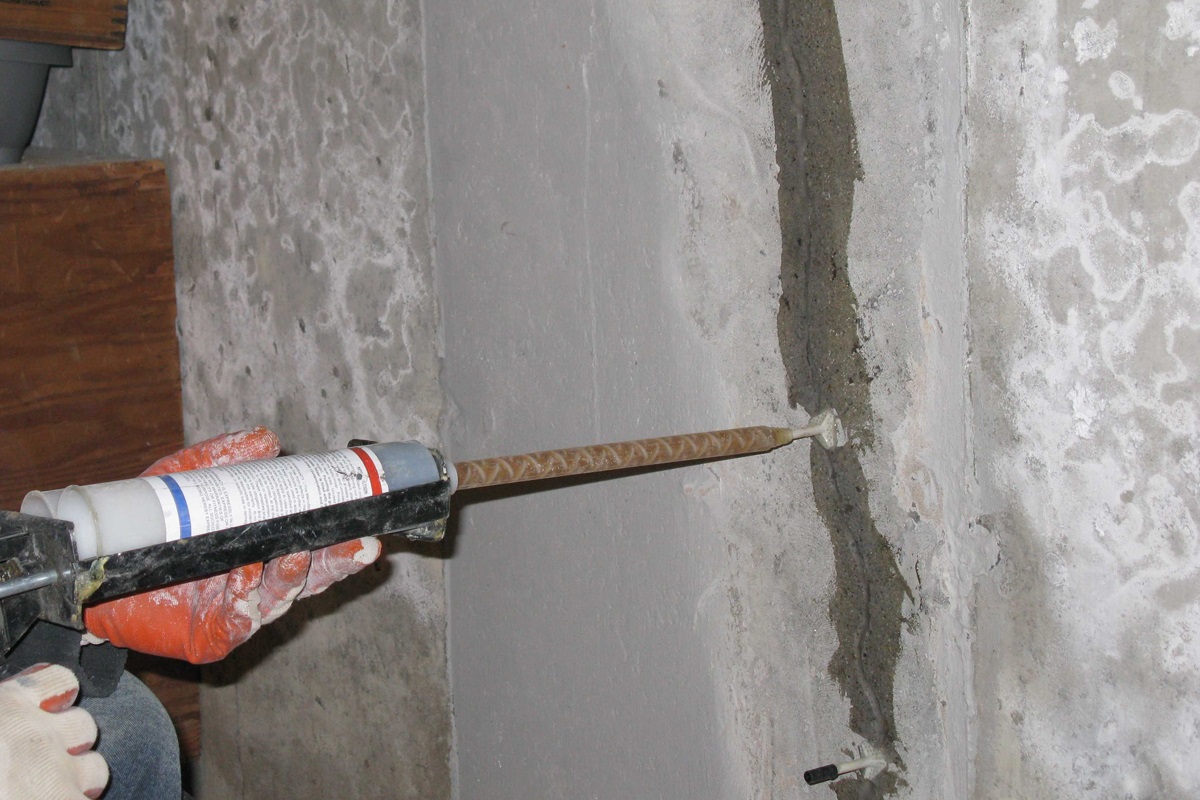
- If Using an Injection Method:
- Carefully read and follow the manufacturer’s instructions for your chosen injection system and materials.
- Load the injection material (epoxy or polyurethane) into the cartridge gun or injection pump, following the instructions provided.
- Starting from the lowest point of the crack, insert the injection nozzle or ports into the crack at regular intervals.
- Slowly pump the injection material into the crack, moving the nozzle or ports along the crack to ensure even coverage.
- Continue injecting the material until it fills the entire crack and starts to emerge from adjacent ports or openings.
- Allow the injected material to cure as recommended by the manufacturer before proceeding to the next step.
- If Using a Sealant or Patching Compound:
- Prepare the sealant or patching compound according to the manufacturer’s instructions.
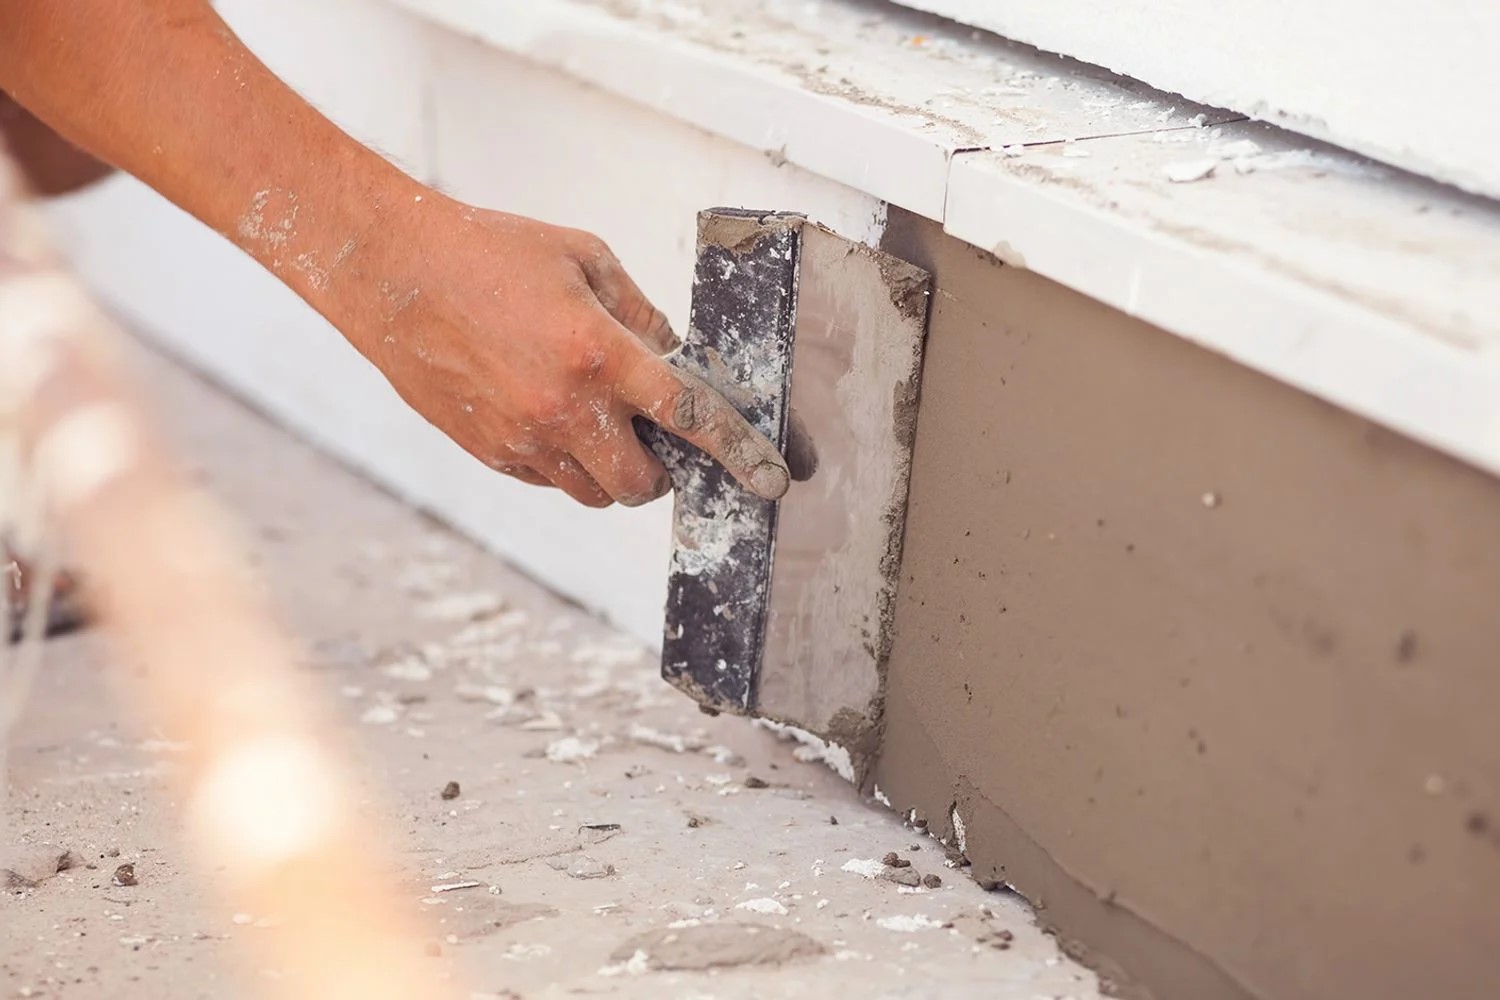
- Using a caulking gun (for caulk-type sealants), or a trowel/putty knife (for patching compounds), carefully apply the material into the crack.
- Ensure the crack is filled completely and that the material is evenly spread along the entire length of the crack.
- Smooth out the surface of the repair material to create a seamless finish.
- Allow the sealant or patching compound to cure as recommended, providing the necessary drying time.
Whether you choose the injection method or the sealant/patching compound method, be sure to follow the manufacturer’s instructions carefully. This will ensure proper application and optimal results.
During the repair process, it’s important to work efficiently and quickly, as some materials may have a limited working time before they cure or harden. Pay attention to any precautions or special considerations mentioned by the manufacturer.
Once the crack is repaired, it’s time to move on to the next step: allowing the repair to dry and cure.
Read more: How To Repair Cracked Foundation Wall
Step 5: Allowing the Repair to Dry and Cure
After completing the repair process, it is crucial to allow the repair material to dry and cure properly. Proper drying and curing will ensure the longevity and effectiveness of the repair, providing a strong and stable foundation.
Here are some important considerations for this step:
- Follow Manufacturer’s Instructions: Each repair material will have specific drying and curing times recommended by the manufacturer. It is important to adhere to these instructions to ensure optimal results.
- Provide Adequate Ventilation: Ensure that the repaired area has proper ventilation to facilitate drying and curing. Open windows or use fans to promote adequate air circulation.
- Protect the Repair Area: It’s essential to protect the repaired area from any foot traffic or accidental damage during the drying and curing process. Use caution tape or put up signs to alert others to avoid the area.
- Keep the Area Dry: Prevent any water or moisture exposure to the repaired area during the drying and curing process. This may require covering the area or avoiding activities that could introduce moisture.
- Monitor the Progress: Regularly check the repair area to track the drying and curing progress. Look for any signs of moisture or discoloration that may indicate improper curing.
- Be Patient: Depending on the repair material and the size of the crack, it may take several hours or even days for the repair to fully dry and cure. Exercise patience and allow the necessary time for the process to complete.
Remember, proper drying and curing are essential to the success of the repair. Rushing this step could compromise the integrity of the repair and lead to future issues. Take the time to ensure that the repair material has fully dried and cured before moving on to the final step.
Once the repair has dried and cured, it’s time to complete the process with some finishing touches.
Step 6: Finishing Touches
Now that the crack repair has dried and cured, it’s time to add the finishing touches to complete the process. These final steps will ensure that the repaired area blends seamlessly with the rest of the foundation and provides a polished, professional appearance.
Here are the key actions to take during this step:
- Smooth out the Surface: Using sandpaper or a concrete finishing tool, carefully smooth out any rough edges or uneven surfaces on the repaired area. This will create a uniform and cohesive look.
- Match the Finish: If the repaired area looks different from the surrounding foundation, you can use concrete paint or stain to match the color and texture. Apply the paint or stain following the manufacturer’s instructions, and blend it seamlessly with the existing surface.
- Inspect the Repair: Take a close look at the repaired area to ensure that it is structurally sound and visually pleasing. Check for any signs of cracking or separation and address any issues promptly.
- Maintain the Foundation: To prolong the lifespan of the repaired area and the overall foundation, practice regular maintenance. Keep the foundation clean, check for any signs of new cracks or damage, and address them promptly to prevent further issues.
- Document the Repair: Finally, document the crack repair process, including before and after photos. This will serve as a record and provide valuable information for future reference.
By ensuring that the repaired area is smooth, visually cohesive, and well-maintained, you can enjoy the benefits of a strong and stable foundation for years to come.
Remember, it’s crucial to address any new cracks or structural issues promptly to prevent further damage to your foundation. Regular inspections and proactive maintenance will help identify and resolve issues before they become major concerns.
With the finishing touches in place, you have successfully completed the process of repairing a crack in your foundation. Congratulations!
If you are unsure or uncomfortable with performing the crack repair yourself, it’s best to consult with a professional foundation specialist. They have the expertise and experience to accurately assess and repair foundation cracks, ensuring the long-term stability of your building.
Thank you for following this comprehensive guide. We hope it has provided valuable insights and guidance for your foundation crack repair journey. Here’s to a strong and solid foundation!
Conclusion
Repairing cracks in a foundation may seem like a daunting task, but armed with the right knowledge and tools, it is a manageable process that can help restore the stability and integrity of your building. By following the steps outlined in this guide, you can successfully assess, prepare, repair, and finish the crack repair to ensure a strong and solid foundation.
Remember, proper assessment of the crack, including its size, location, and any signs of movement or water leakage, is crucial in determining the appropriate repair method. Gathering the necessary tools and materials before starting the repair will save you time and ensure a smooth process. Preparing the area properly, including cleaning the crack, removing debris, and opening the crack if necessary, creates an optimal surface for the repair material to adhere to.
When it comes to repairing the crack itself, whether you choose an injection method or a sealant/patching compound, following the manufacturer’s instructions is key. Proper application and allowing the repair material to dry and cure fully will ensure long-lasting results. Be patient and give the repair ample time to cure before moving on to the finishing touches.
The finishing touches, such as smoothing the surface, matching the finish, and maintaining the foundation, add the final touches to the repair process. Regular maintenance and inspections of your foundation will help to identify and address any potential issues before they become major concerns.
If you are unsure or uncomfortable with performing the crack repair yourself, it is always recommended to consult with a professional foundation specialist. They have the expertise and experience to accurately assess and repair foundation cracks, ensuring the long-term stability of your building.
Thank you for joining us on this comprehensive guide to repairing cracks in a foundation. We hope it has provided you with valuable insights and guidance. Remember, a strong and solid foundation is the cornerstone of a safe and durable building.
Good luck with your foundation crack repair journey!
Frequently Asked Questions about How To Repair A Crack In A Foundation
Was this page helpful?
At Storables.com, we guarantee accurate and reliable information. Our content, validated by Expert Board Contributors, is crafted following stringent Editorial Policies. We're committed to providing you with well-researched, expert-backed insights for all your informational needs.


0 thoughts on “How To Repair A Crack In A Foundation”