Home>diy>Building & Construction>How To Repair Broken Concrete Foundation Corner
Building & Construction
How To Repair Broken Concrete Foundation Corner
Modified: August 28, 2024
Learn how to repair a broken concrete foundation corner with our step-by-step guide! Perfect for building construction projects.
(Many of the links in this article redirect to a specific reviewed product. Your purchase of these products through affiliate links helps to generate commission for Storables.com, at no extra cost. Learn more)
Introduction
When it comes to building construction, the foundation is a crucial element that provides stability and support to the entire structure. However, over time, the concrete foundation can develop issues, such as cracks or even complete breakage in the corners. This can be caused by factors such as soil movement, water damage, or poor construction techniques.
Repairing a broken concrete foundation corner is essential to maintain the structural integrity of the building. This not only prevents further damage but also ensures the safety of the occupants. In this comprehensive guide, we will walk you through the step-by-step process of repairing a broken concrete foundation corner.
Before we delve into the repair process, it’s important to note some tell-tale signs that indicate a broken foundation corner. These signs serve as an early warning system, allowing you to take prompt action in addressing the issue before it worsens. Let’s explore these signs in detail.
Key Takeaways:
- Repairing a broken concrete foundation corner is crucial for building stability. Identifying signs, proper preparation, and meticulous application of concrete patching compound are key for a successful repair.
- Investing time and effort into repairing a broken concrete foundation corner ensures long-term stability and safety. Proper assessment, preparation, and curing, along with professional expertise when needed, are essential for effective repairs.
Read more: How To Build A Concrete Block Foundation
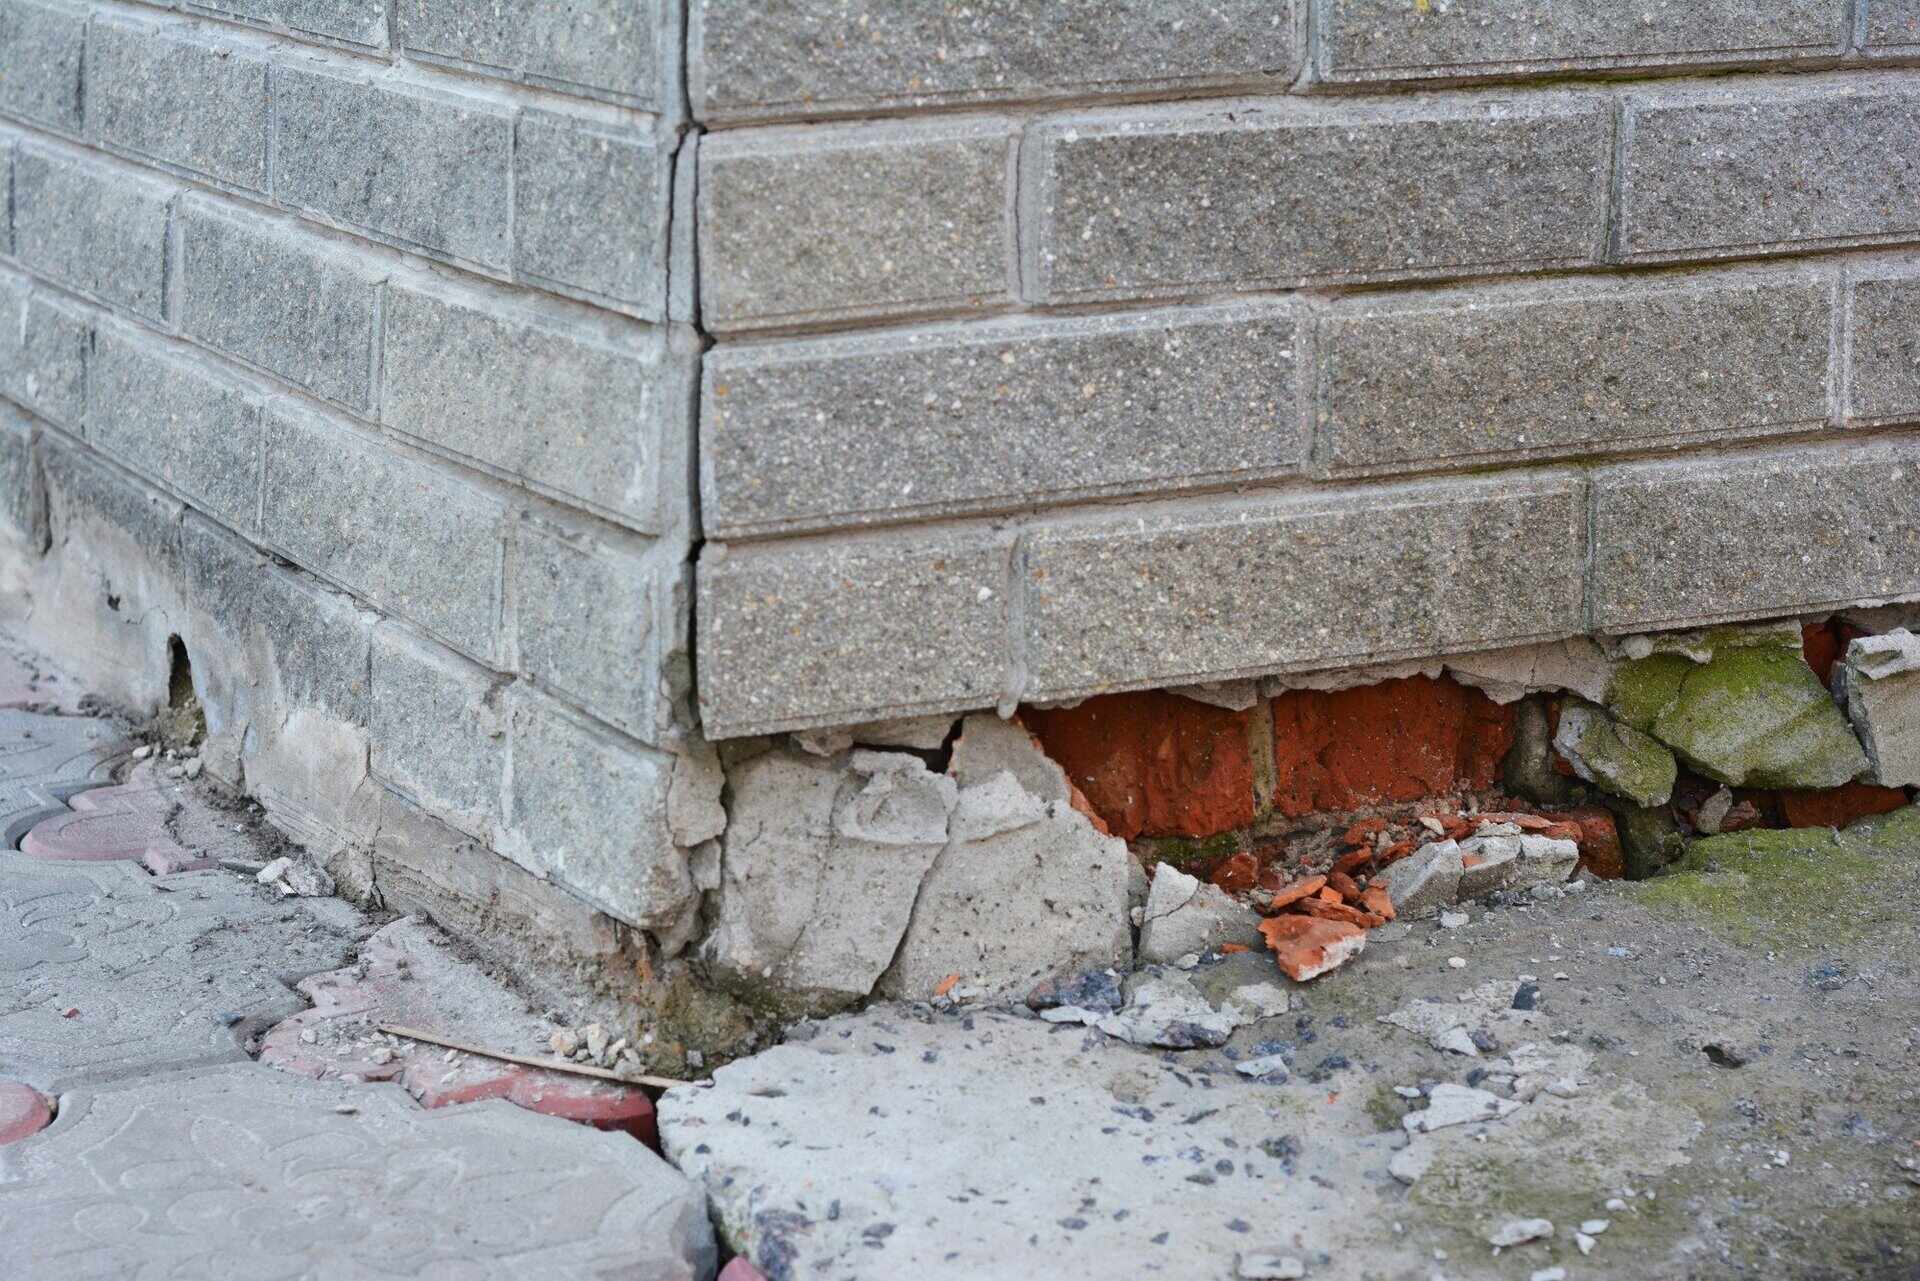
Signs of a Broken Concrete Foundation Corner
A broken concrete foundation corner can manifest in several ways. By knowing these signs, you can identify if your building’s foundation needs repair. Here are some common indicators:
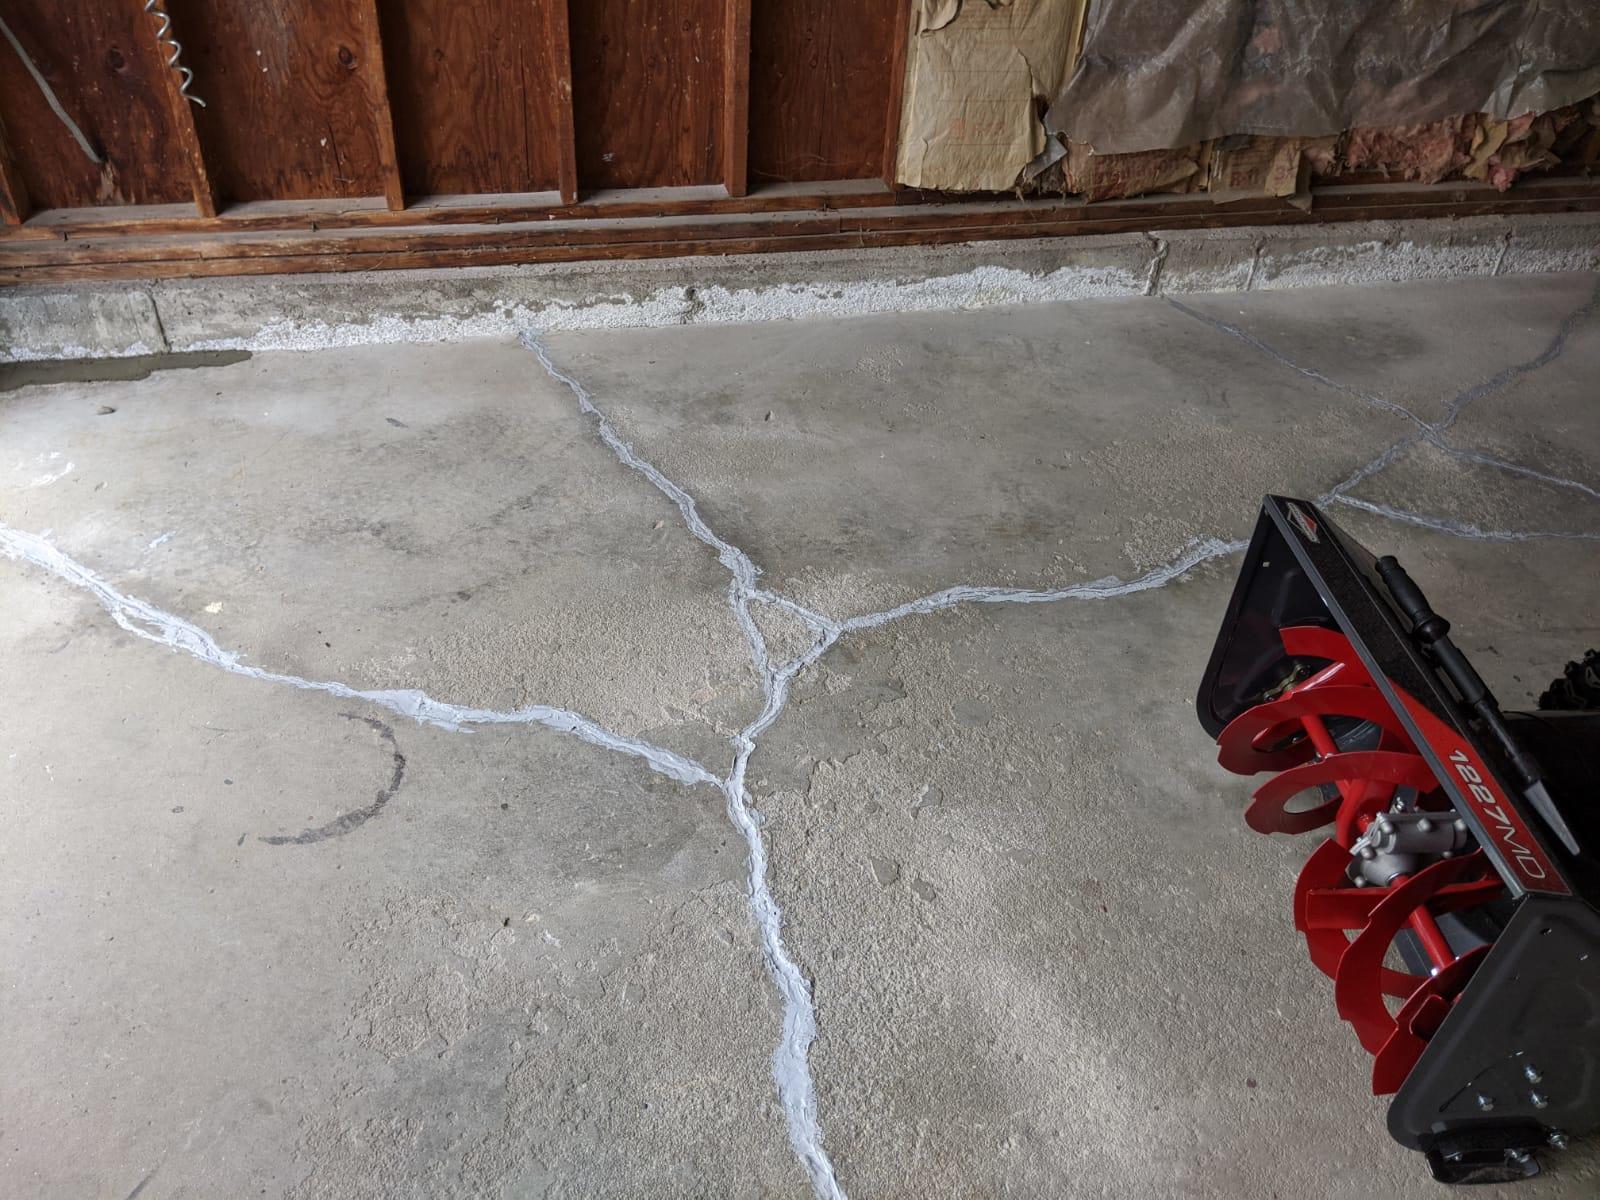
- Visible cracks: One of the most apparent signs of a broken foundation corner is the presence of cracks. These cracks can range from small hairline fractures to larger fissures that are easily visible. Pay close attention to the corners of your foundation, as cracks tend to form and propagate from these areas.
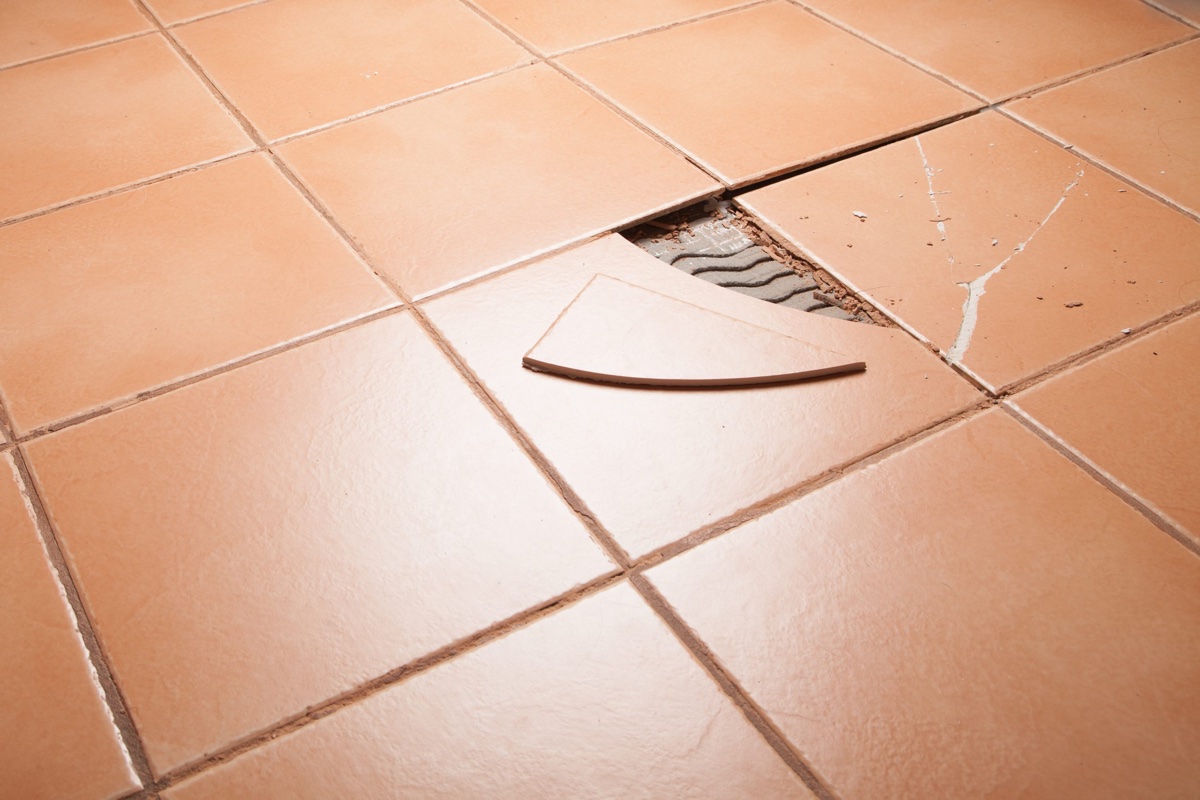
- Uneven floors: If you notice that the floors in your building appear to be sloping or uneven, it could be a sign of a compromised foundation. This can result from a corner of the foundation sinking or heaving, causing the floor to tilt or become unlevel. Take note of any noticeable changes or inconsistencies when walking around your building.
- Doors and windows sticking: Another telltale sign of a broken foundation corner is when doors and windows become difficult to open or close. You may notice that they stick or jam, requiring extra force to operate. This occurs because the shifting or settling of the foundation can affect the alignment of doors and windows.
- Gaps between walls and ceilings: A broken foundation corner can also lead to visible gaps between the walls and ceilings of your building. These gaps may appear as cracks or separations, indicating that the foundation has shifted or settled. Be mindful of any new or expanding gaps that you notice during routine inspections.
- Water leakage: If you observe water seeping or pooling near the corners of your foundation, it may indicate a broken corner that is allowing water to infiltrate. Water damage can further weaken the foundation and compromise its stability. Addressing water leakage promptly is crucial to prevent further damage and mold growth.
It’s important to remember that while these signs can indicate a broken concrete foundation corner, a professional inspection should be sought to accurately assess the extent of the damage and determine the appropriate repairs needed.
Tools and Materials Required
Before you embark on repairing a broken concrete foundation corner, it’s essential to gather the necessary tools and materials. Having everything prepared beforehand will make the repair process smoother and more efficient. Here’s a list of the tools and materials you will need:
Tools:
- Hammer
- Chisel
- Wire brush
- Masonry drill
- Angle grinder
- Trowel
- Concrete mixer or wheelbarrow for manual mixing
- Bucket
- Gloves
- Safety glasses
- Dust mask
Materials:
- Concrete patching compound
- Concrete bonding adhesive
- Water
- Rebar reinforcement (if necessary)
- Gravel or crushed stone (for foundation base)
- Concrete mix
- Concrete sealant
It’s important to ensure that you have all the necessary tools and materials before starting the repair process. This will save you time and avoid any interruptions during the repair. Additionally, make sure to wear the appropriate safety gear, such as gloves, safety glasses, and a dust mask, to protect yourself during the repair.
Read more: How Many Concrete Blocks For Shed Foundation
Step-by-Step Guide to Repairing a Broken Concrete Foundation Corner
Repairing a broken concrete foundation corner requires careful preparation and execution. Follow these step-by-step instructions to ensure a successful repair:
- Assess the extent of the damage: Begin by examining the broken corner of the foundation to determine the severity of the damage. Note the size and depth of the cracks or breakage, as this will help you plan the repair process accordingly.
- Remove loose debris: Use a hammer and chisel to remove any loose or damaged concrete in the broken corner. Be sure to wear safety gloves and goggles for protection. Thoroughly clean the area to ensure proper adhesion of the repair materials.
- Prepare the foundation corner: Use a wire brush or angle grinder to roughen the surface of the foundation corner. This will improve the bond between the existing concrete and the repair material. Remove any dust or debris left behind after sanding.
- Apply a bonding agent: Apply a concrete bonding adhesive to the prepared foundation corner. This adhesive helps create a strong bond between the existing concrete and the repair material, enhancing the overall durability of the repair.
- Mix the concrete patch: Follow the instructions on the concrete patching compound to mix it with water in a bucket or a concrete mixer. Ensure that the mixture has a thick yet workable consistency. You may need to use a trowel or a paddle mixer, depending on the size of the repair area.
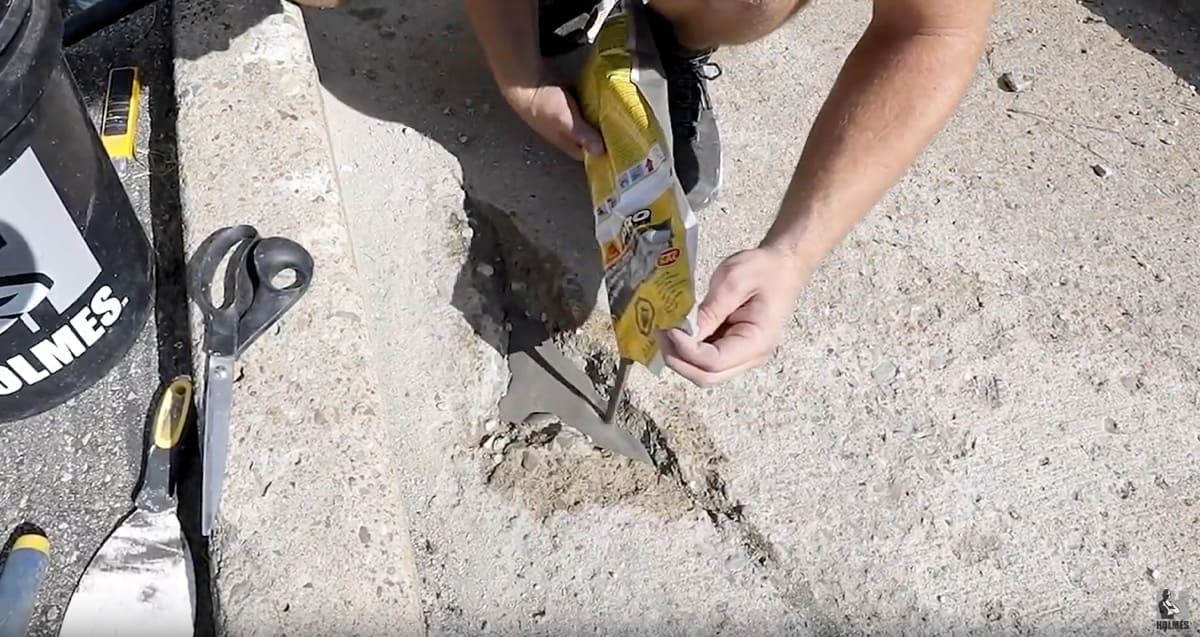
- Apply the concrete patch: Use a trowel to carefully apply the mixed concrete patch to the broken corner. Fill the cracks or gaps with the patching material, ensuring that it is level with the surrounding concrete surface. Smooth and shape the patch as desired using the trowel.
- Cure the repair: Allow the concrete patch to dry and cure according to the manufacturer’s instructions. This usually involves keeping the repaired area moist and protected from extreme temperatures for a specified period. Applying a concrete sealant after curing can help enhance the longevity and resilience of the repair.
Remember to follow all safety guidelines and wear protective gear throughout the repair process. It’s crucial to allow sufficient curing time before subjecting the repaired area to heavy loads or stress.
By following these step-by-step instructions, you can effectively repair a broken concrete foundation corner and restore the structural integrity of your building.
Preparing the Foundation Corner for Repair
Before you can begin the repair process for a broken concrete foundation corner, it’s essential to properly prepare the area. This will ensure that the repair materials adhere effectively and provide a long-lasting solution. Follow these steps to prepare the foundation corner:
- Safety first: Before you start any work, ensure that you have the necessary safety equipment, such as gloves, safety glasses, and a dust mask, to protect yourself from any potential hazards.
- Remove loose debris: Using a hammer and chisel, carefully remove any loose or damaged concrete from the broken corner. Be thorough in this step, as it will ensure that the repair material bonds securely with the existing foundation.
- Clean the area: Once the loose debris has been cleared, thoroughly clean the foundation corner. Use a wire brush or angle grinder to remove any dirt, dust, or debris. This will help create a clean surface for the repair materials to adhere to.
- Roughen the surface: To enhance the bond between the existing concrete and the repair material, roughen the surface of the foundation corner. This can be done using a wire brush or an angle grinder. Be sure to remove any loose particles or dust afterward.
- Moisten the surface: Before applying the repair material, moisten the surface of the foundation corner with water. This will prevent the existing concrete from absorbing moisture from the repair material too quickly. However, ensure that the surface is not overly saturated, as excessive water can weaken the bond.
- Apply a bonding agent: To further enhance adhesion, apply a concrete bonding agent to the prepared foundation corner. Follow the instructions on the bonding agent product and allow it to dry according to the specified timeframe. This will create a strong bond between the existing concrete and the repair material.
Properly preparing the foundation corner is essential for a successful repair. By following these steps, you can ensure that the repair materials adhere securely to the existing concrete, providing a durable and long-lasting solution.
Mixing the Concrete Patch
Before you can apply the concrete patch to the broken foundation corner, it’s important to properly mix the patching compound. The correct mixing ratio and consistency will ensure that the repaired area is strong and durable. Follow these steps to mix the concrete patch:
- Choose the right patching compound: Select a high-quality concrete patching compound that is compatible with the type of concrete used in your foundation. Read the instructions provided by the manufacturer to ensure you have the right product for your specific repair.
- Gather the necessary tools and materials: Ensure that you have all the required tools and materials on hand. This typically includes a bucket or a concrete mixer, water, the concrete patching compound, and appropriate mixing equipment like a trowel or a paddle mixer.
- Measure the patching compound: Follow the manufacturer’s instructions to determine the appropriate amount of patching compound needed for your repair. Measure and pour the required amount into your mixing container. It’s always better to mix a slightly larger quantity than you think you’ll need to avoid running out during the application process.
- Add water gradually: Slowly pour in the water while stirring or mixing the patching compound. Add water gradually to avoid making the mixture too runny. The ideal consistency is that of a thick yet workable paste. This can be achieved by adding water in small increments and continuously mixing until you reach the desired consistency.
- Continue mixing: Once you’ve achieved the desired consistency, continue to mix the patching compound thoroughly. Ensure that the mixture is homogeneous, with no lumps or dry pockets of compound. Use a trowel or a paddle mixer to achieve a smooth and uniform texture.
- Adjust the consistency if necessary: If the mixture is too dry, add small amounts of water and mix again until the desired consistency is reached. Conversely, if the mixture is too wet, gradually add more patching compound and continue mixing until you achieve the proper consistency.
- Check the working time: Take note of the working time specified by the manufacturer. This refers to the amount of time you have to work with the mixed patching compound before it starts to set. Be mindful of this timeframe and plan accordingly to ensure a smooth and efficient application process.
By following these steps, you can mix the concrete patch to the appropriate consistency, ensuring a strong and effective repair for your broken foundation corner. Remember to refer to the manufacturer’s instructions for specific guidelines regarding the mixing process and working time.+
Use a concrete patching compound to fill in the cracks and reinforce the corner with steel rebar for added strength. Make sure to follow the manufacturer’s instructions for proper application and curing.
Applying the Concrete Patch
After properly mixing the concrete patch, it’s time to apply it to the broken foundation corner. This step is crucial in restoring the integrity of the corner and ensuring a seamless repair. Follow these steps to apply the concrete patch:
- Prepare the repair area: Before applying the patch, make sure the prepared foundation corner is clean and moist. This will promote better adhesion between the existing concrete and the patching material. Use a misting bottle or a damp cloth to lightly moisten the surface.
- Begin the application: Using a trowel, scoop a generous amount of the mixed concrete patch onto the trowel. Start by filling the cracks or gaps in the broken corner with the patching material. Press it firmly into the cracks, ensuring that it completely fills the voids.
- Smooth the surface: Once the cracks are filled, use the trowel to smooth the surface of the patch. Feather the edges to blend it seamlessly with the surrounding concrete, creating a uniform appearance. Work methodically, focusing on one area at a time, to achieve the desired finish.
- Compact the patch: After smoothing the surface, gently tap the trowel or a wooden float against the patch to compact it and remove any air pockets. This will prevent future cracks or the development of weak spots in the repaired area.
- Continue the application: If necessary, repeat the previous steps to fill any remaining cracks or gaps in the foundation corner. Ensure that the patching material is level with the surrounding concrete surface, maintaining a uniform and even appearance.
- Clean up excess material: As you work, periodically clean any excess patching material from the trowel to avoid it drying on the tool. This will make it easier to achieve a smooth finish and prevent any unwanted buildup.
- Check for imperfections: After applying the concrete patch, inspect the repaired area for any imperfections or inconsistencies. If needed, touch up the patch by adding additional material and smoothing it with the trowel until the desired finish is achieved.
Keep in mind that working efficiently and swiftly is crucial when applying the concrete patch, as the material tends to dry and harden relatively quickly. Following these steps will ensure a successful application of the patch and restore the broken concrete foundation corner to its original strength.
Read more: How To Repair Broken Pipe Plumbing
Finishing Touches and Curing
After applying the concrete patch to the broken foundation corner, it’s important to complete a few finishing touches and allow proper curing time. These final steps will contribute to the overall success of the repair and ensure the longevity of the repaired area. Follow these guidelines for finishing touches and curing:
- Smooth the surface: Once the concrete patch is applied, use a trowel or a suitable finishing tool to smooth the surface. Blend the patch seamlessly with the surrounding concrete, ensuring a uniform appearance. This step will enhance the aesthetic appeal of the repair.
- Clean up: While the patch is still fresh, clean any excess patching material or spills from the surrounding area. Use a clean cloth or damp sponge to wipe away any unwanted residue. This will result in a clean and professional-looking repair.
- Curing time: Allow the concrete patch to cure according to the manufacturer’s instructions. This typically involves keeping the repaired area moist and protected for a specified period. Follow the recommended curing time to ensure optimal strength and durability.
- Moisture retention: To promote proper curing, it’s essential to keep the repaired area moist. Cover the patch with plastic sheeting or a damp cloth, and periodically mist or dampen the area with water. This helps prevent premature drying, which can lead to cracking and weakened strength.
- Protect from heavy loads: While the patch is curing, avoid placing heavy objects or applying excessive pressure on the repaired area. This can disrupt the curing process and compromise the final result. Exercise caution and protect the repaired corner until it has fully cured.
- Apply a concrete sealant: Once the concrete patch has cured, consider applying a concrete sealant to further protect the repaired area. A sealant will help prevent moisture penetration, cracking, and damage from environmental factors. Follow the instructions provided by the manufacturer for proper application.
By giving attention to these finishing touches and allowing sufficient curing time, you can ensure the longevity and durability of the repair. Remember to follow the manufacturer’s instructions and take necessary precautions during the curing process to achieve the best possible results.
Conclusion
Repairing a broken concrete foundation corner is a crucial task for maintaining the structural integrity of a building. By identifying the signs of a broken corner and taking prompt action, you can prevent further damage and ensure the safety of occupants.
In this comprehensive guide, we have provided a step-by-step process to help you effectively repair a broken concrete foundation corner. It is important to start by assessing the extent of the damage and preparing the area properly. Through the proper mixing and application of a high-quality concrete patching compound, you can restore the strength and stability of the corner.
Remember to follow all safety guidelines, wear protective gear, and gather the necessary tools and materials before beginning the repair. Taking the time to clean, roughen, and moisten the surface, while also applying a bonding agent, will ensure a strong bond between the existing concrete and the patching material.
After the concrete patch is applied, don’t forget to smooth the surface and clean up any excess material. Allow sufficient curing time as specified by the manufacturer, keeping the repaired area moist to prevent premature drying. Lastly, consider applying a concrete sealant to protect the repaired corner from potential damage.
By following these guidelines and using proper techniques, you can successfully repair a broken concrete foundation corner and restore the integrity of your building’s foundation. However, it’s important to remember that some repairs may require professional expertise. If you are unsure or the damage is extensive, it’s always recommended to consult with a qualified contractor or structural engineer.
Investing the time and effort into repairing a broken concrete foundation corner will provide long-term benefits. Not only will it ensure the stability of your building, but it will also help maintain its value and protect the safety of those within. Stay vigilant in monitoring the condition of your foundation, and address any issues promptly to keep your building strong and secure for years to come.
Frequently Asked Questions about How To Repair Broken Concrete Foundation Corner
Was this page helpful?
At Storables.com, we guarantee accurate and reliable information. Our content, validated by Expert Board Contributors, is crafted following stringent Editorial Policies. We're committed to providing you with well-researched, expert-backed insights for all your informational needs.


0 thoughts on “How To Repair Broken Concrete Foundation Corner”