Home>diy>Building & Construction>How To Repair Slab Foundation Cracks
Building & Construction
How To Repair Slab Foundation Cracks
Modified: October 18, 2024
Learn effective ways to repair slab foundation cracks in your building construction project. Find step-by-step instructions and expert tips to fix the issue.
(Many of the links in this article redirect to a specific reviewed product. Your purchase of these products through affiliate links helps to generate commission for Storables.com, at no extra cost. Learn more)
Introduction
Welcome to our comprehensive guide on how to repair slab foundation cracks. If you own a building or are in the construction industry, you know how crucial it is to prioritize the maintenance and repair of your foundation. Cracks in a slab foundation can be a common occurrence, and if left unattended, they can lead to serious structural issues and costly repairs down the line.
Understanding the causes, assessing the severity, and having the right tools and materials on hand are essential in successfully repairing slab foundation cracks. In this guide, we will walk you through the step-by-step process to repair cracks in your foundation, regardless of their size or depth. Whether you are a DIY enthusiast or a professional, this article will provide you with the knowledge and guidance you need to carry out effective repairs.
Before we dive into the repair process, let’s take a closer look at slab foundation cracks and the factors that contribute to their formation. By understanding the root causes, you will be better equipped to address the underlying issues and prevent future cracks from occurring.
Key Takeaways:
- Understanding the different types of slab foundation cracks and their severity is crucial for effective repair. From hairline cracks to stair-step cracks, each type requires specific attention and repair methods.
- Taking preventive measures, such as maintaining proper drainage and addressing soil settlement, can minimize the risk of future slab foundation cracks. Regular inspections and prompt repairs are essential for long-term stability.
Read more: How To Build A Slab Foundation
Understanding Slab Foundation Cracks
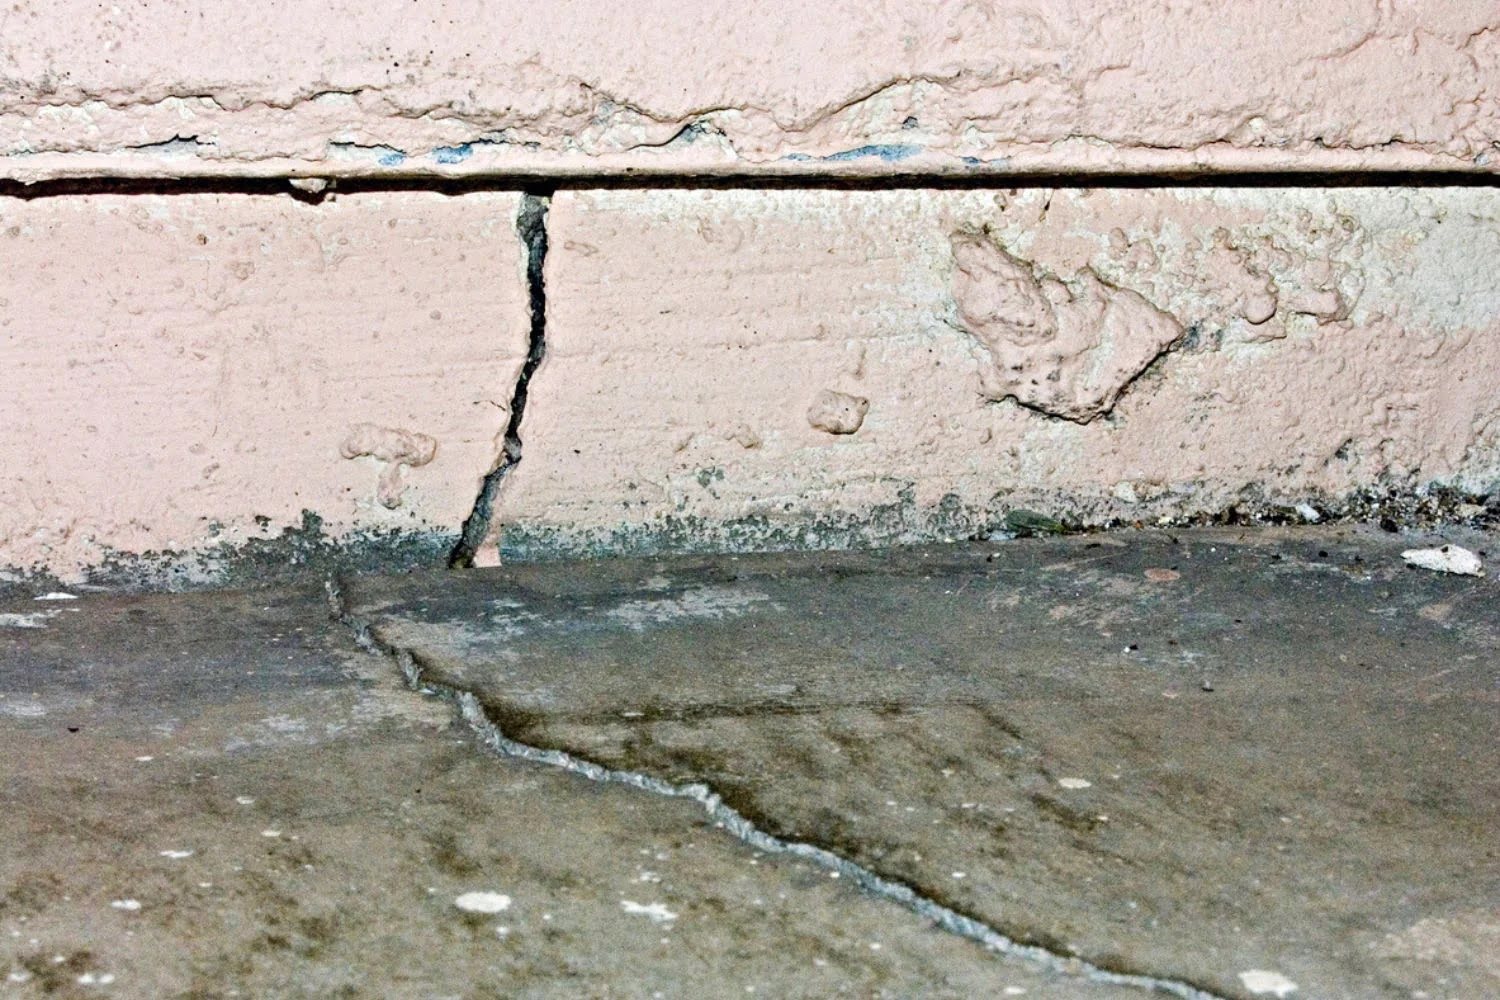
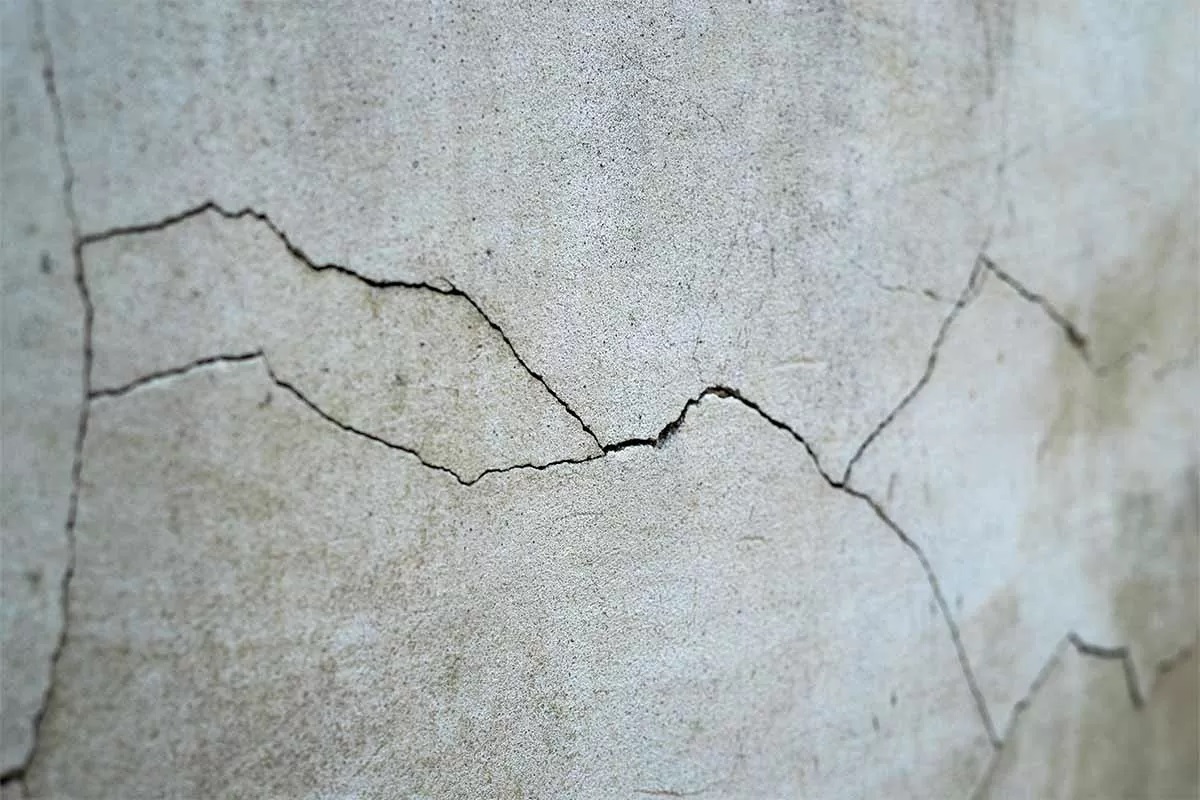
Slab foundation cracks can occur for various reasons, including natural settling of the soil, poor construction practices, or environmental factors such as changes in temperature and moisture levels. These cracks can manifest in different sizes and patterns, from small hairline cracks to larger and deeper ones.
It’s important to understand the different types of cracks that can appear in slab foundations:
- Hairline Cracks: These are very thin cracks that are typically less than 1/8 inch wide. Hairline cracks are usually superficial and do not pose immediate structural concerns. However, if left untreated, they can widen over time.
- Vertical Cracks: These cracks run vertically from top to bottom and are often caused by normal settling of the foundation. Vertical cracks that are less than 1/4 inch wide are generally not a cause for major concern but should still be monitored.
- Diagonal Cracks: These cracks typically appear at a 45-degree angle and can indicate more significant foundation movement or structural issues. Diagonal cracks wider than 1/4 inch should be addressed promptly to prevent further damage.
- Horizontal Cracks: Horizontal cracks signify severe foundation movement and warrant immediate attention. These cracks can indicate excessive pressure against the foundation, which can compromise the structural integrity of the building.
- Stair-Step Cracks: These cracks resemble a staircase pattern, often seen in brick or cinder block foundations. Stair-step cracks can indicate foundation settlement or shifting and should be evaluated by a professional.
By identifying the type and severity of the cracks, you will be better equipped to determine the appropriate repair method. Keep in mind that it’s always advisable to consult with a structural engineer or foundation repair specialist if you’re unsure about the extent of the damage.
Now that you have a better understanding of slab foundation cracks, let’s move on to the next step: assessing the severity of the cracks to determine the necessary course of action.
Assessing the Severity of Foundation Cracks
When it comes to repairing slab foundation cracks, it’s crucial to accurately assess the severity of the cracks before proceeding with any repairs. This assessment will help you determine if the cracks are merely cosmetic or if they indicate underlying structural issues that require immediate attention.
Here are some factors to consider when assessing the severity of foundation cracks:
- Width of the Crack: Measure the width of the crack using a ruler or measuring tape. Cracks that are less than 1/4 inch wide are generally considered minor cosmetic cracks, while wider cracks may indicate more significant structural issues.
- Length of the Crack: Measure the length of the crack to determine if it’s spreading or stable. Long cracks that extend across the entire foundation or multiple sections may indicate ongoing foundation movement or settling.
- Depth of the Crack: Assess the depth of the crack by inserting a blunt object, such as a screwdriver or putty knife, into the crack. Superficial cracks that do not penetrate deeply are typically less concerning than deep cracks that may affect the stability of the foundation.
- Crack Patterns: Take note of the pattern and direction of the cracks. Vertical and diagonal cracks are often caused by normal settling, whereas horizontal or stair-step cracks can be indicative of more severe foundation issues.
- Interior and Exterior Damage: Look for any signs of damage inside and outside the building, such as uneven floors, sticking doors or windows, or cracks in walls or ceilings. These symptoms may indicate ongoing foundation movement.
Once you have assessed the severity of the foundation cracks, you can determine the appropriate repair method. Minor cosmetic cracks may only require simple filling and cosmetic touch-ups, while more significant structural cracks may necessitate professional intervention and potentially extensive repairs.
It’s important to note that if you are unsure about the severity of the cracks or lack the necessary expertise, it’s best to consult with a qualified professional, such as a structural engineer or foundation repair specialist. They can provide a thorough evaluation of the foundation and recommend the most appropriate course of action to address the cracks.
Now that we have assessed the severity of the cracks, let’s move on to the next step: gathering the necessary tools and materials for repairing slab foundation cracks.
Necessary Tools and Materials
Before you begin the process of repairing slab foundation cracks, it’s essential to gather the necessary tools and materials. Having the right equipment on hand will ensure a smooth and successful repair process. Here are the tools and materials you’ll need:
Tools:
- Hammer: A hammer will be used to remove loose debris and create clean edges along the cracked area.
- Chisel: A chisel is essential for widening small cracks and creating a V-shaped groove for better adhesion of the repair material.
- Wire brush: A wire brush will help in cleaning the crack and removing any loose particles or debris.
- Vacuum: A vacuum cleaner with a hose attachment can be used to remove dust and loose materials from the crack.
- Safety Gear: To protect yourself while working, make sure to wear safety goggles, gloves, and a dust mask to prevent any potential hazards.
Read more: How To Repair Cracks In Basement Wall
Materials:
- Epoxy or Polyurethane Injection: Depending on the type and severity of the crack, you may need epoxy or polyurethane injection kits to fill and seal the cracks effectively.
- Crack Sealant: For small hairline cracks, a crack sealant specifically designed for masonry and concrete will be necessary.
- Concrete Patching Compound: For larger cracks, a concrete patching compound will be needed to repair and strengthen the damaged area.
- Concrete Bonding Agent: A concrete bonding agent is essential to ensure proper adhesion between the existing concrete and the repair material.
- Concrete Sealer: Once the cracks are repaired, a concrete sealer is recommended to protect the integrity of the repair and prevent future moisture damage.
Make sure to read and follow the manufacturer’s instructions for each product you use, as application methods may vary. It’s also a good idea to double-check that you have all the necessary tools and materials before starting the repair process to avoid unnecessary delays.
Now that you have gathered all the tools and materials, you are ready to move on to the step-by-step guide to repairing slab foundation cracks.
Step-by-Step Guide to Repairing Slab Foundation Cracks
Repairing slab foundation cracks may seem like a daunting task, but with the right approach and tools, it can be a manageable DIY project. Follow these step-by-step instructions to effectively repair the cracks in your slab foundation:
- Clean the Crack: Start by removing any loose debris, dust, or foreign objects from the crack. Use a wire brush and vacuum cleaner to ensure the crack is clean and free of any loose particles.
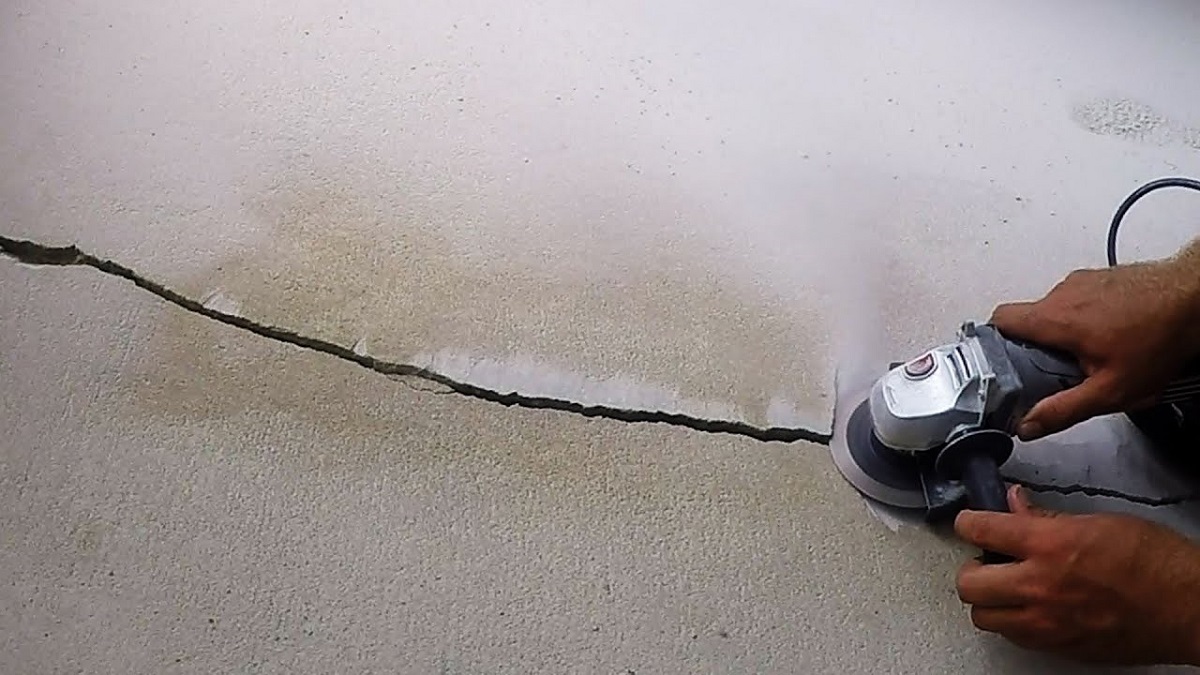
- Enlarge the Crack: For small hairline cracks, use a chisel and hammer to widen the crack slightly, creating a V-shaped groove. This will provide better adhesion for the repair material.
- Prepare the Crack: If the crack is deep, thoroughly dampen it with water using a spray bottle. For better adhesion, apply a concrete bonding agent to the crack according to the manufacturer’s instructions.
- Apply the Crack Sealant: For hairline cracks, use a crack sealant specifically designed for masonry or concrete. Fill the crack with the sealant using a caulk gun, making sure to completely fill the crack and smooth the surface with a putty knife.
- Inject Epoxy or Polyurethane: For wider cracks, use an epoxy or polyurethane injection kit. Follow the manufacturer’s instructions to mix the injection material and use a caulking gun to inject it into the crack. Fill the crack from the bottom up to ensure complete coverage.
- Allow the Repair to Cure: Give the repair material sufficient time to cure according to the manufacturer’s instructions. This may take a few hours or even several days, depending on the product used and the weather conditions.
- Smooth and Finish: After the repair material has cured, use a trowel or putty knife to smooth the surface and blend it with the surrounding concrete. Allow it to dry completely before proceeding to the next step.
- Apply Concrete Sealer: Once the repair is dry, apply a concrete sealer to protect the repaired area and prevent future moisture damage. Follow the manufacturer’s instructions for application and drying time.
Remember, it’s important to follow the specific instructions provided by the product manufacturer, as application methods and drying times can vary. Additionally, for more complex or extensive cracks, it’s recommended to consult with a professional to ensure proper repair and structural integrity.
Now that you have successfully repaired the cracks in your slab foundation, it’s important to take preventive measures to avoid future cracks and maintain the stability of your foundation.
Filling Small Hairline Cracks
Small hairline cracks in a slab foundation are common and often don’t pose immediate structural concerns. However, it’s important to address these cracks promptly to prevent them from widening over time. Here’s a step-by-step guide on how to fill small hairline cracks in your slab foundation:
- Prepare the Crack: Start by cleaning the crack thoroughly. Use a wire brush and vacuum cleaner to remove any loose debris, dust, or foreign objects from the crack.
- Apply Concrete Bonding Agent: Enhance the adhesion of the repair material by applying a concrete bonding agent to the crack. Follow the manufacturer’s instructions for application.
- Fill the Crack: Use a crack sealant specifically designed for masonry or concrete. Fill the crack with the sealant, ensuring it completely fills the crack from the bottom up.
- Smooth the Surface: Use a putty knife or trowel to smooth the surface of the crack and remove any excess sealant. Make sure the repaired area is level with the surrounding concrete.
- Allow to Cure: Give the sealant sufficient time to cure. Follow the manufacturer’s instructions for drying time, typically a few hours or longer depending on the product and weather conditions.
- Inspect and Touch up: Once the repair has cured, inspect the filled crack to ensure it is properly sealed. If needed, apply additional sealant and smooth the surface.
It’s important to note that hairline cracks may reappear over time due to ongoing settling or other factors. Regularly inspect your foundation for any new cracks or signs of movement, and address them promptly.
While filling small hairline cracks can be a manageable DIY task, it’s recommended to consult with a professional if you’re unsure about the extent of the damage or if the cracks continue to reappear.
Now that you’ve successfully filled the small hairline cracks, let’s move on to repairing medium-sized cracks in the slab foundation.
Tip: Use epoxy injection to repair slab foundation cracks. Clean the crack, fill with epoxy, and let it cure. This will provide a strong, durable repair.
Repairing Medium-Sized Cracks
Medium-sized cracks in a slab foundation require a slightly different approach than small hairline cracks. These cracks may be wider and deeper, requiring a more substantial repair method. Follow these steps to effectively repair medium-sized cracks in your slab foundation:
- Prepare the Crack: Clean the crack thoroughly, removing any loose debris, dust, or foreign objects. Use a wire brush and vacuum cleaner to ensure a clean surface.
- Widen the Crack: Use a chisel and hammer to widen the crack. Create a V-shaped groove along the length of the crack. This provides better adhesion for the repair material.
- Moisten the Crack: Dampen the crack with water using a spray bottle. This helps to improve the bond between the existing concrete and the repair material.
- Apply the Repair Material: Use a concrete patching compound to fill the crack. Press the compound firmly into the crack, ensuring it penetrates and fills all areas. Smooth the surface with a trowel or putty knife.
- Allow to Cure: Follow the manufacturer’s instructions for the curing time of the repair material. It may take several hours or even days for the compound to fully cure.
- Inspect and Touch up: Once the repair has cured, inspect the filled crack to ensure it is properly sealed. If needed, apply additional patching compound to fill any gaps or imperfections.
Medium-sized cracks may indicate more significant structural issues, so it’s important to monitor them closely. If the crack continues to widen or shows signs of movement even after repairs, it’s recommended to consult with a professional for a thorough evaluation of your foundation.
Additionally, it’s important to address any underlying factors that may have contributed to the formation of the crack, such as drainage issues or soil settling. Taking preventive measures can help minimize the risk of future cracks.
Now that you’ve successfully repaired medium-sized cracks, let’s move on to fixing large and deep cracks in your slab foundation.
Read more: How To Repair A Cracked Floor Tile
Fixing Large and Deep Cracks
Large and deep cracks in a slab foundation require a more extensive repair approach to ensure proper stability and structural integrity. Here’s a step-by-step guide on how to effectively fix large and deep cracks in your slab foundation:
- Assess the Crack: Before starting the repair, assess the crack’s width, length, and depth to determine the extent of the damage. If the crack is wider than 1/4 inch or extends through the entire foundation, it may require professional intervention.
- Prepare the Crack: Clean the crack thoroughly, removing any loose debris, dust, or foreign objects. Use a wire brush and vacuum cleaner to ensure a clean and stable surface.
- Fill the Crack: For larger cracks, use a concrete patching compound and trowel to fill the crack. Press the compound firmly into the crack, ensuring it completely fills all areas. Smooth the surface with a trowel or putty knife.
- Reinforce with Bonding Agent: For added strength, apply a concrete bonding agent to the filled crack. Follow the manufacturer’s instructions for application. This will help the repair material adhere better to the existing concrete.
- Apply Additional Layers: Depending on the size and depth of the crack, you may need to apply additional layers of the concrete patching compound. Allow each layer to dry before applying the next, following the manufacturer’s instructions.
- Finishing Touches: Once the repair has cured, inspect the filled crack to ensure it is properly sealed and level with the surrounding concrete. Use a trowel or putty knife to smooth the surface and blend it with the rest of the foundation.
While the above steps can help repair large and deep cracks, it’s important to note that these types of cracks may indicate more severe foundational issues. It’s highly recommended to consult with a professional, such as a structural engineer or foundation repair specialist, to assess the crack and determine the appropriate repair method.
By addressing large and deep cracks promptly and effectively, you can maintain the structural integrity of your slab foundation and prevent further damage or costly repairs in the future.
Now that you’ve learned how to fix large and deep cracks, let’s move on to discussing preventive measures to minimize the risk of future cracks in your slab foundation.
Preventive Measures for Future Cracks
Taking preventive measures can help minimize the risk of future cracks in your slab foundation. By addressing underlying issues and implementing proactive measures, you can maintain the stability and integrity of your foundation. Here are some preventive measures you can take:
- Maintain Proper Drainage: Ensure that your property has adequate drainage to prevent water from pooling around the foundation. Install gutters and downspouts to direct water away from the foundation and ensure proper grading to encourage water flow away from the building.
- Monitor and Control Moisture Levels: Regularly inspect and address any sources of excess moisture near the foundation. This can include fixing plumbing leaks, maintaining proper ventilation in crawl spaces, and using a dehumidifier in damp areas.
- Address Soil Settlement: If your property experiences significant soil settlement or uneven settling, consult with a professional to determine the cause and implement necessary measures, such as soil stabilization techniques or foundation underpinning.
- Perform Regular Foundation Inspections: Conduct routine inspections of your foundation to identify any signs of cracks or movement. Look for changes in wall or floor alignment, sticking doors or windows, or other indicators of potential foundation issues.
- Attend to Minor Cracks Promptly: Take immediate action to fill and repair small cracks as soon as they appear. This prevents them from expanding and causing more significant damage over time.
- Consult with Professionals: If you have concerns about your slab foundation, consider consulting with a structural engineer or foundation repair specialist. They can assess your foundation, provide expert advice, and recommend any necessary repairs or preventive measures.
By being proactive and attentive to the condition of your foundation, you can minimize the risk of future cracks and ensure the long-term stability of your building. Regular monitoring, maintenance, and addressing any issues promptly can save you time, effort, and potentially costly repairs in the future.
Now that you’ve learned about preventive measures, let’s wrap up this comprehensive guide on repairing slab foundation cracks.
Conclusion
Repairing slab foundation cracks is a critical aspect of building maintenance and can help preserve the structural integrity of your property. Whether you’re dealing with small hairline cracks or more significant cracks, addressing them promptly and effectively is essential to prevent further damage and costly repairs.
In this comprehensive guide, we covered various aspects of repairing slab foundation cracks. We discussed the different types of cracks, assessed their severity, and provided step-by-step instructions for repairing small hairline cracks, medium-sized cracks, and large and deep cracks.
We also highlighted the importance of taking preventive measures to minimize the risk of future cracks. Implementing proper drainage, controlling moisture levels, addressing soil settlement, and conducting routine inspections are vital in maintaining a stable foundation.
While this guide provides a solid foundation for repairing slab foundation cracks, it’s important to note that every situation is unique. It’s always advisable to consult with professionals if you’re unsure about the extent of the damage or if you encounter more complex or severe issues.
By following the guidelines provided here and seeking expert advice when necessary, you can effectively repair slab foundation cracks, ensure the stability of your building, and safeguard your investment for years to come.
Remember, regular maintenance and prompt repairs are key to preserving the integrity of your slab foundation and ensuring the long-term durability of your property.
We hope this guide has been informative and helpful to you. Good luck with your slab foundation crack repairs and ongoing maintenance efforts!
Frequently Asked Questions about How To Repair Slab Foundation Cracks
Was this page helpful?
At Storables.com, we guarantee accurate and reliable information. Our content, validated by Expert Board Contributors, is crafted following stringent Editorial Policies. We're committed to providing you with well-researched, expert-backed insights for all your informational needs.


0 thoughts on “How To Repair Slab Foundation Cracks”