Home>diy>Building & Construction>How To Repair Cracked Foundation Wall
Building & Construction
How To Repair Cracked Foundation Wall
Modified: January 9, 2024
Learn how to repair a cracked foundation wall with our comprehensive guide. Get expert tips and advice on building construction to ensure a stable and durable structure.
(Many of the links in this article redirect to a specific reviewed product. Your purchase of these products through affiliate links helps to generate commission for Storables.com, at no extra cost. Learn more)
Introduction
Cracks in foundation walls are a common problem that can occur in buildings of all types. Whether you own a residential property or a commercial establishment, a cracked foundation wall can be a cause for concern. Not only can it compromise the structural integrity of the building, but it can also lead to water leakage, pest infestations, and other related issues. Therefore, it is crucial to address these cracks and repair them as soon as possible.
In this comprehensive guide, we will walk you through the process of repairing cracked foundation walls. We will discuss the causes of foundation wall cracks, how to assess their severity, and the necessary steps to prepare for the repair process. Additionally, we will provide a detailed list of materials and tools you will need to have on hand. With our step-by-step guide, you will be equipped with the knowledge and skills to effectively repair cracked foundation walls.
It is essential to note that while this guide is designed to assist homeowners and building owners in DIY foundation wall repairs, there are instances when it is best to seek professional help. We will discuss these situations in detail to ensure you make the right decision for your specific circumstances.
So, let’s dive in and learn all about repairing cracked foundation walls. By the end of this guide, you will have the confidence and know-how to tackle this common construction issue and ensure the longevity and stability of your building.
Key Takeaways:
- Understanding the causes and types of foundation wall cracks, assessing their severity, and properly preparing for the repair process are crucial steps in effectively addressing this common construction issue.
- While DIY repairs are possible in many cases, recognizing when professional assistance is needed and implementing proper post-repair care and maintenance are essential for safeguarding the structural integrity of your building’s foundation.
Read more: How To Repair A Crack In A Foundation
Understanding Cracked Foundation Walls
Before diving into the repair process, it’s crucial to understand the causes and types of foundation wall cracks. By having a clear understanding of these factors, you can better assess the severity of the cracks and determine the appropriate repair method.
Foundation wall cracks can occur due to a variety of reasons, including:
- Settlement: Over time, soil movements and settling can exert pressure on the foundation walls, causing cracks to form.
- Hydrostatic pressure: If the area surrounding the foundation becomes saturated with water, the hydrostatic pressure can build up and lead to cracks in the walls.
- Freeze-thaw cycles: In regions with fluctuating temperatures, water can seep into tiny cracks in the foundation walls. When this water freezes and expands, it can cause the cracks to widen.
- Structural issues: Poor construction practices, inadequate reinforcement, or structural deficiencies can also contribute to foundation wall cracks.
Foundation wall cracks can be categorized into two main types:
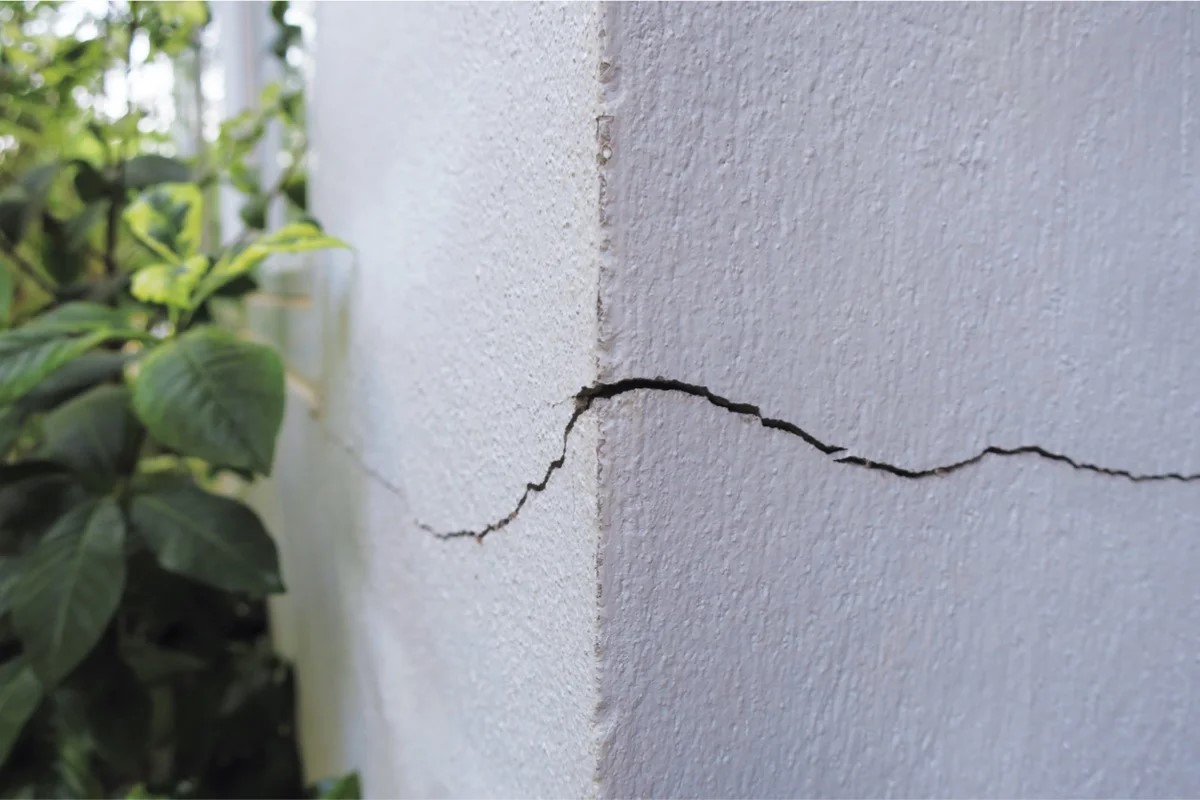
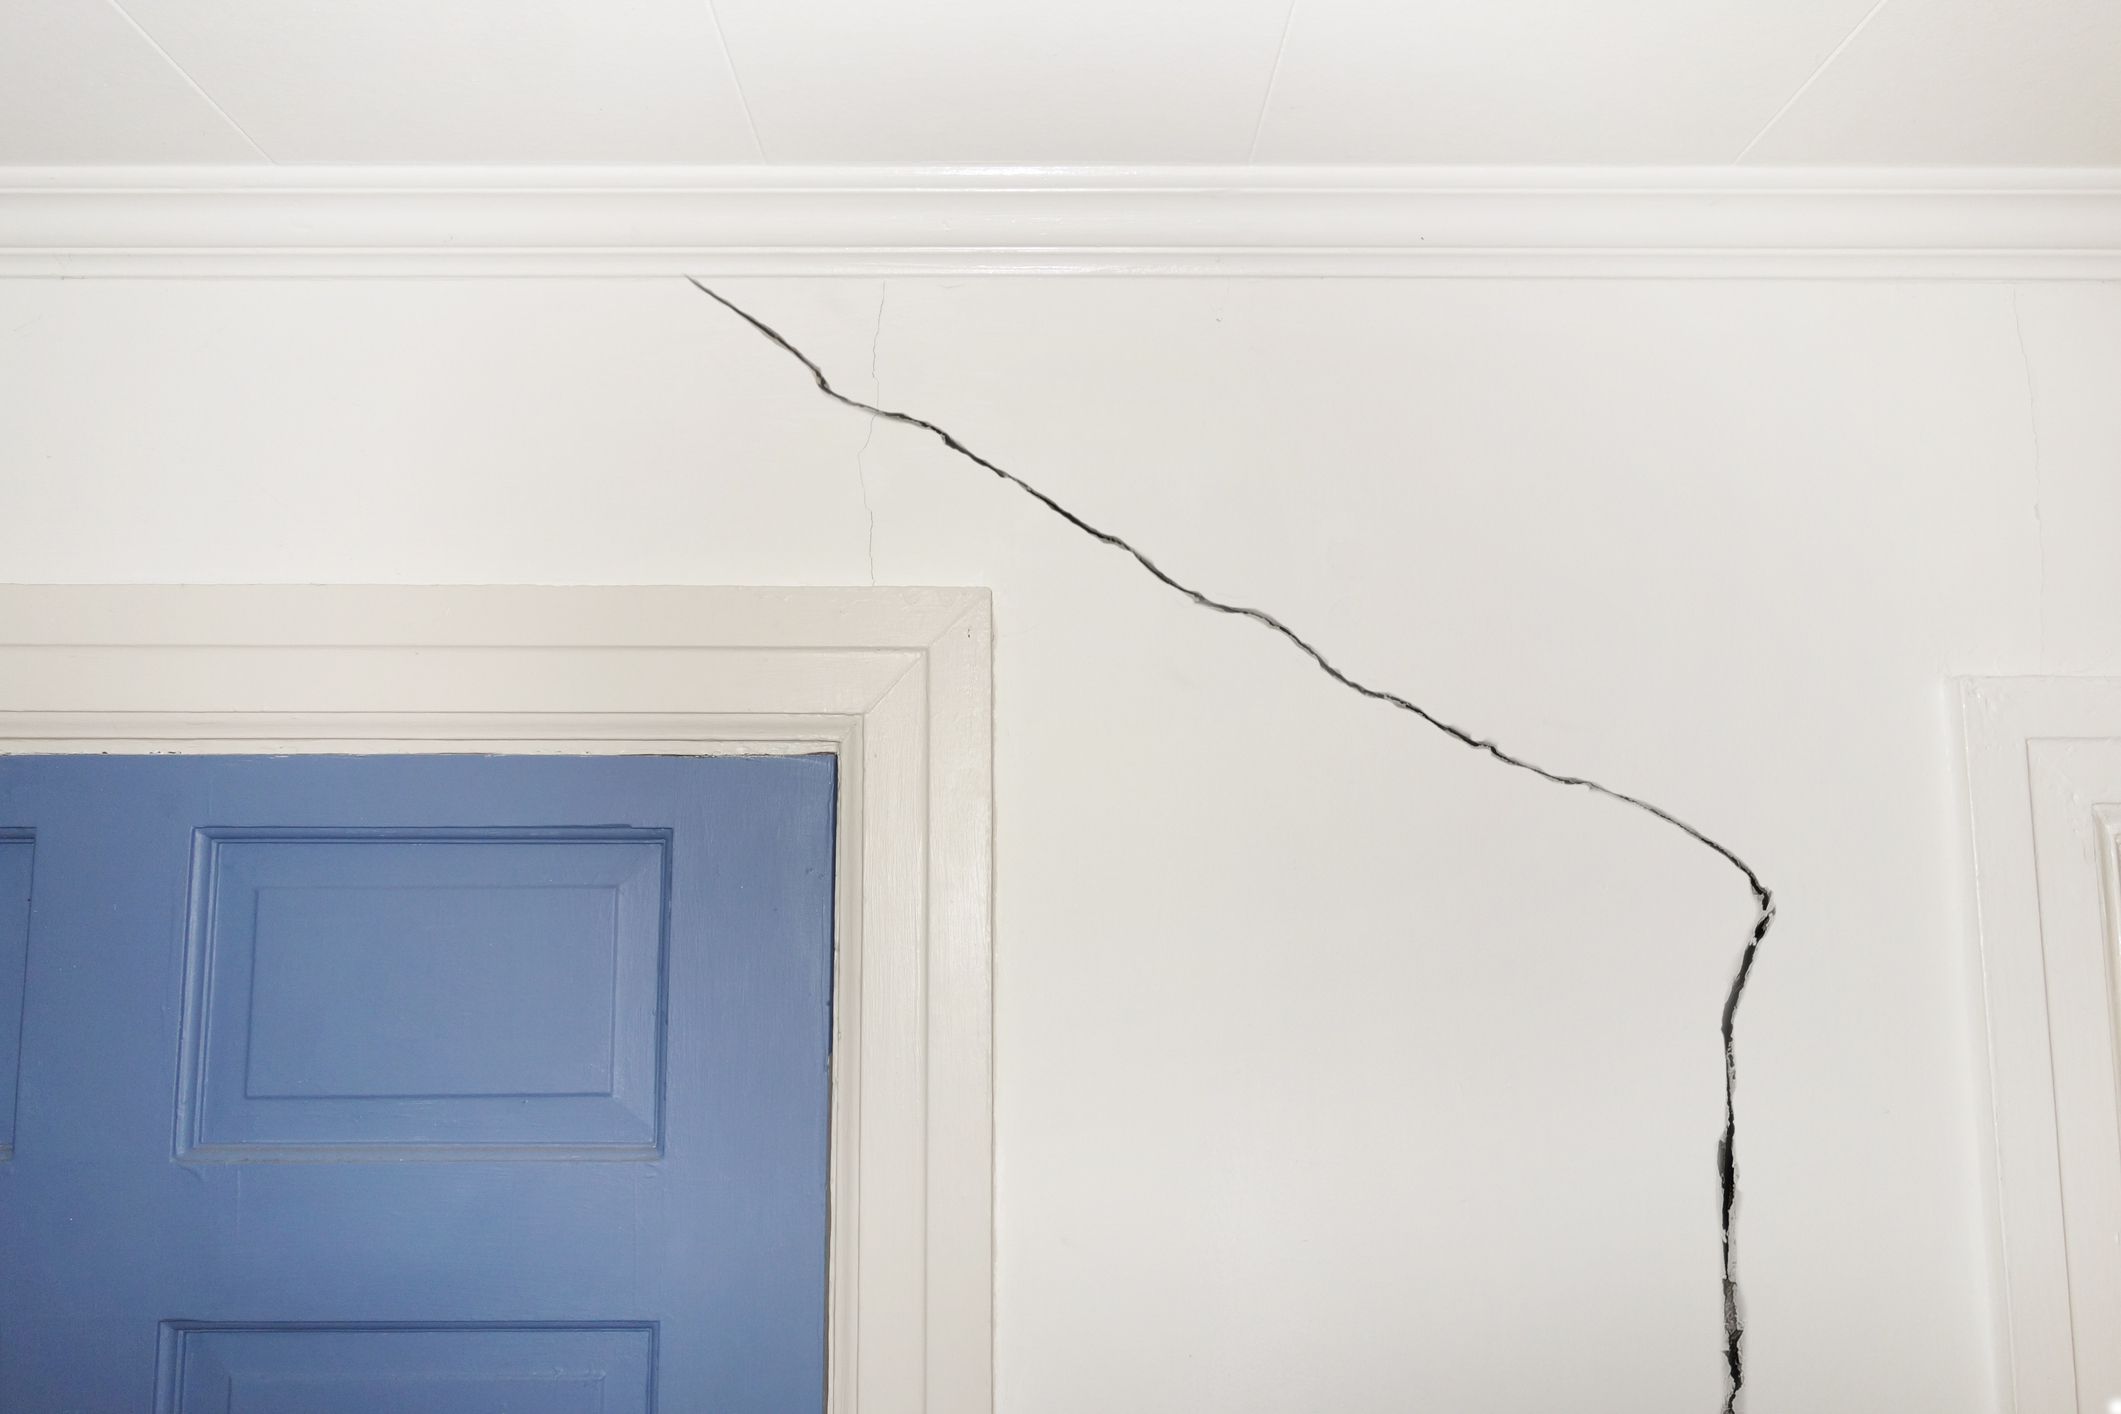
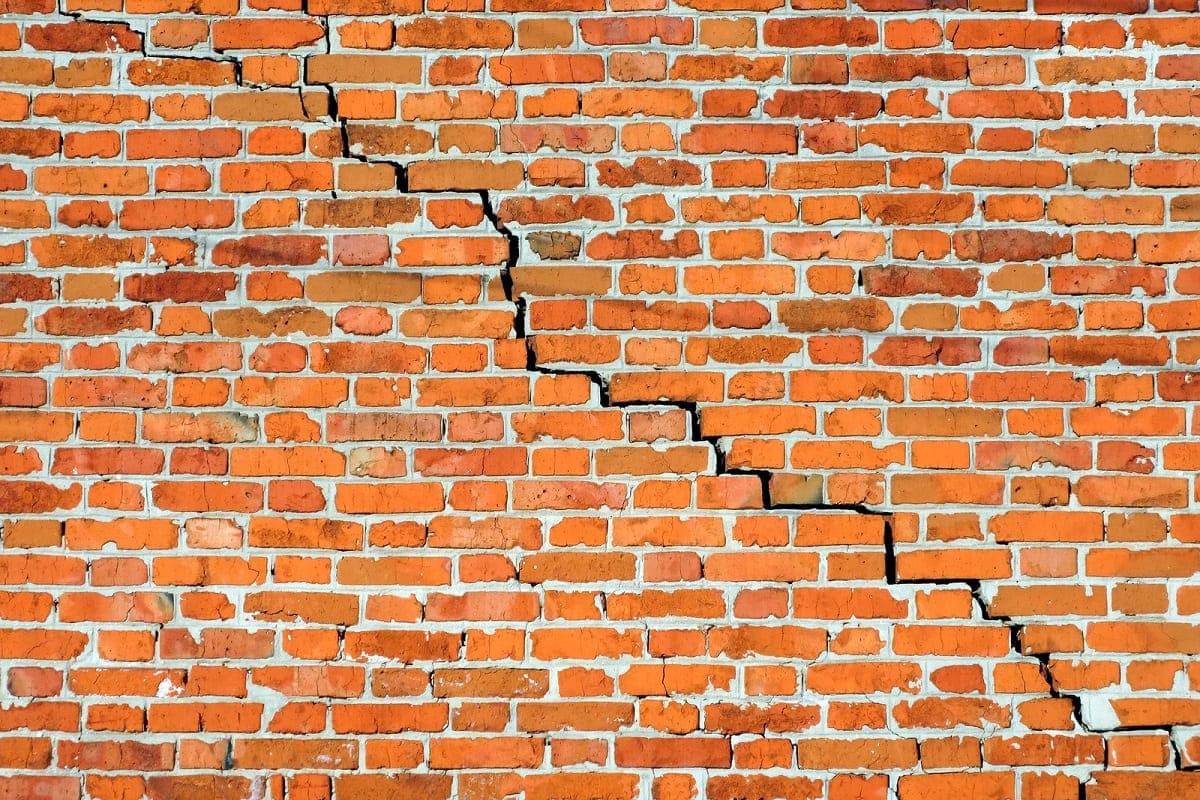
- Vertical cracks: These cracks typically run vertically from the top to the bottom of the foundation wall. They are often caused by settlement or hydrostatic pressure.
- Horizontal cracks: These cracks are more concerning as they can indicate significant structural issues. Horizontal cracks are commonly caused by excessive soil pressure against the foundation or foundation movement.
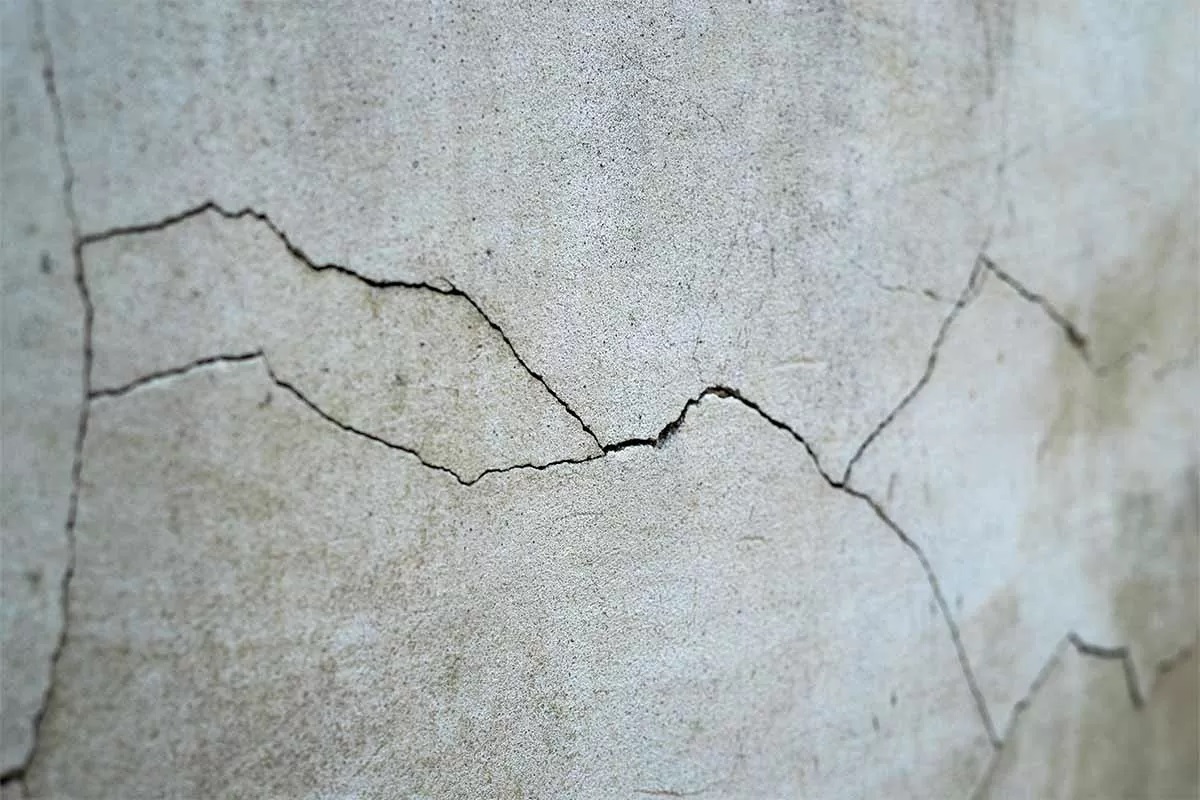
It’s important to note that while small hairline cracks are relatively common and may not require immediate attention, larger and wider cracks should not be ignored. These can indicate more significant underlying issues and may compromise the stability of the entire structure.
By understanding the causes and types of foundation wall cracks, you can assess the severity of the damage and determine the appropriate course of action. In the next section, we will discuss how to assess the severity of foundation cracks, allowing you to make an informed decision regarding the repair process.
Assessing the Severity of Foundation Cracks
When it comes to repairing cracked foundation walls, it’s crucial to assess the severity of the cracks before proceeding with any repair work. This assessment will help you determine whether the cracks can be effectively repaired through DIY methods or if professional assistance is necessary. Here are some steps to follow when assessing the severity of foundation cracks:
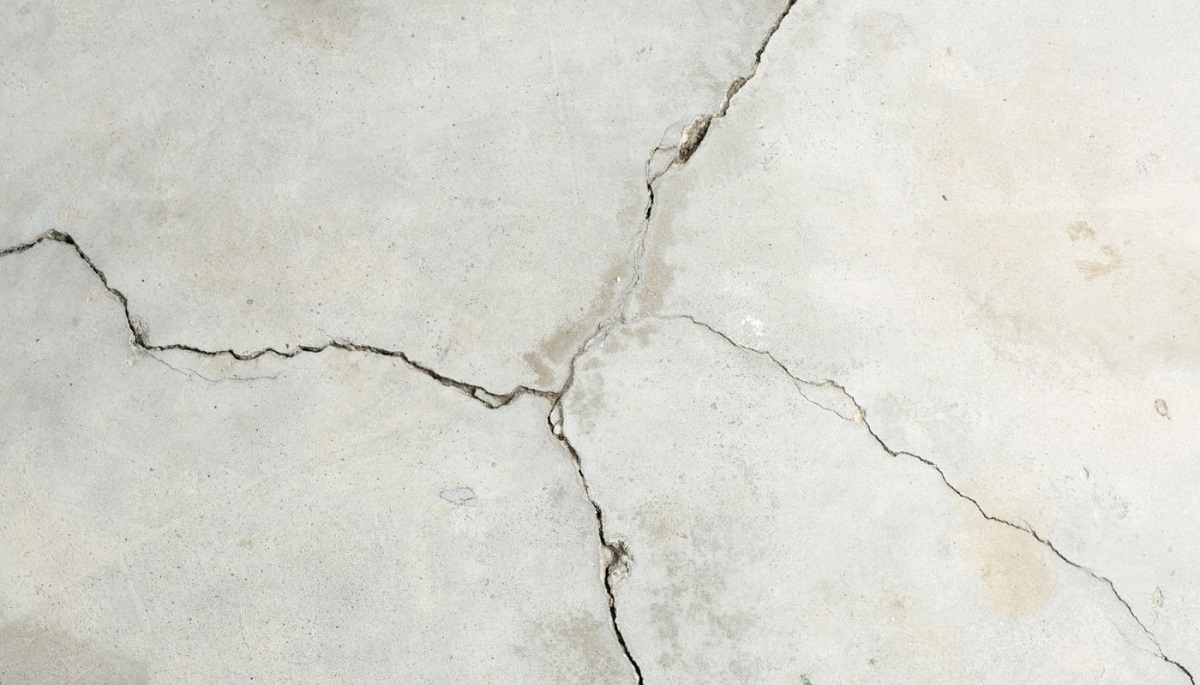
- Size of the crack: Examine the width of the crack. Hairline cracks, which are less than 1/8 inch wide, are typically not a cause for concern. However, if the crack is wider or expanding, it may indicate a more significant structural issue that requires immediate attention.
- Length and direction: Note the length and direction of the crack. Vertical cracks that are shorter in length are usually less concerning than longer cracks, especially if they are accompanied by horizontal cracks. Horizontal cracks, in particular, may suggest foundation movement and could indicate a more serious problem.
- Depth: Determine the depth of the crack. Superficial cracks that do not penetrate the full thickness of the foundation wall may be less severe. However, if the crack is deep and extends through the entire thickness of the wall, it may pose a greater risk to the structural integrity of the building.
- Structural movement: Look for signs of structural movement, such as shifting or bulging walls. If the crack is accompanied by these signs or if you notice uneven doors or windows, it may suggest ongoing foundation issues that should be addressed promptly.
- Water leakage: Pay attention to any water leakage through the cracks. If you notice water seeping into your basement or any signs of moisture, it indicates that the crack is not only compromising the structural integrity but also allowing water infiltration.
It’s important to mention that while assessing the severity of foundation cracks can provide a general understanding of the problem, it is not a substitute for professional inspection. If you have any doubts or if the cracks appear to be severe, it’s always recommended to consult a structural engineer or a foundation repair specialist. They have the expertise and knowledge to conduct a thorough examination and provide the most accurate assessment.
Taking the time to assess the severity of foundation cracks will help you make an informed decision on the best course of action. In the next section, we will discuss the necessary steps to prepare for the repair process, ensuring that you have everything you need before starting the repairs.
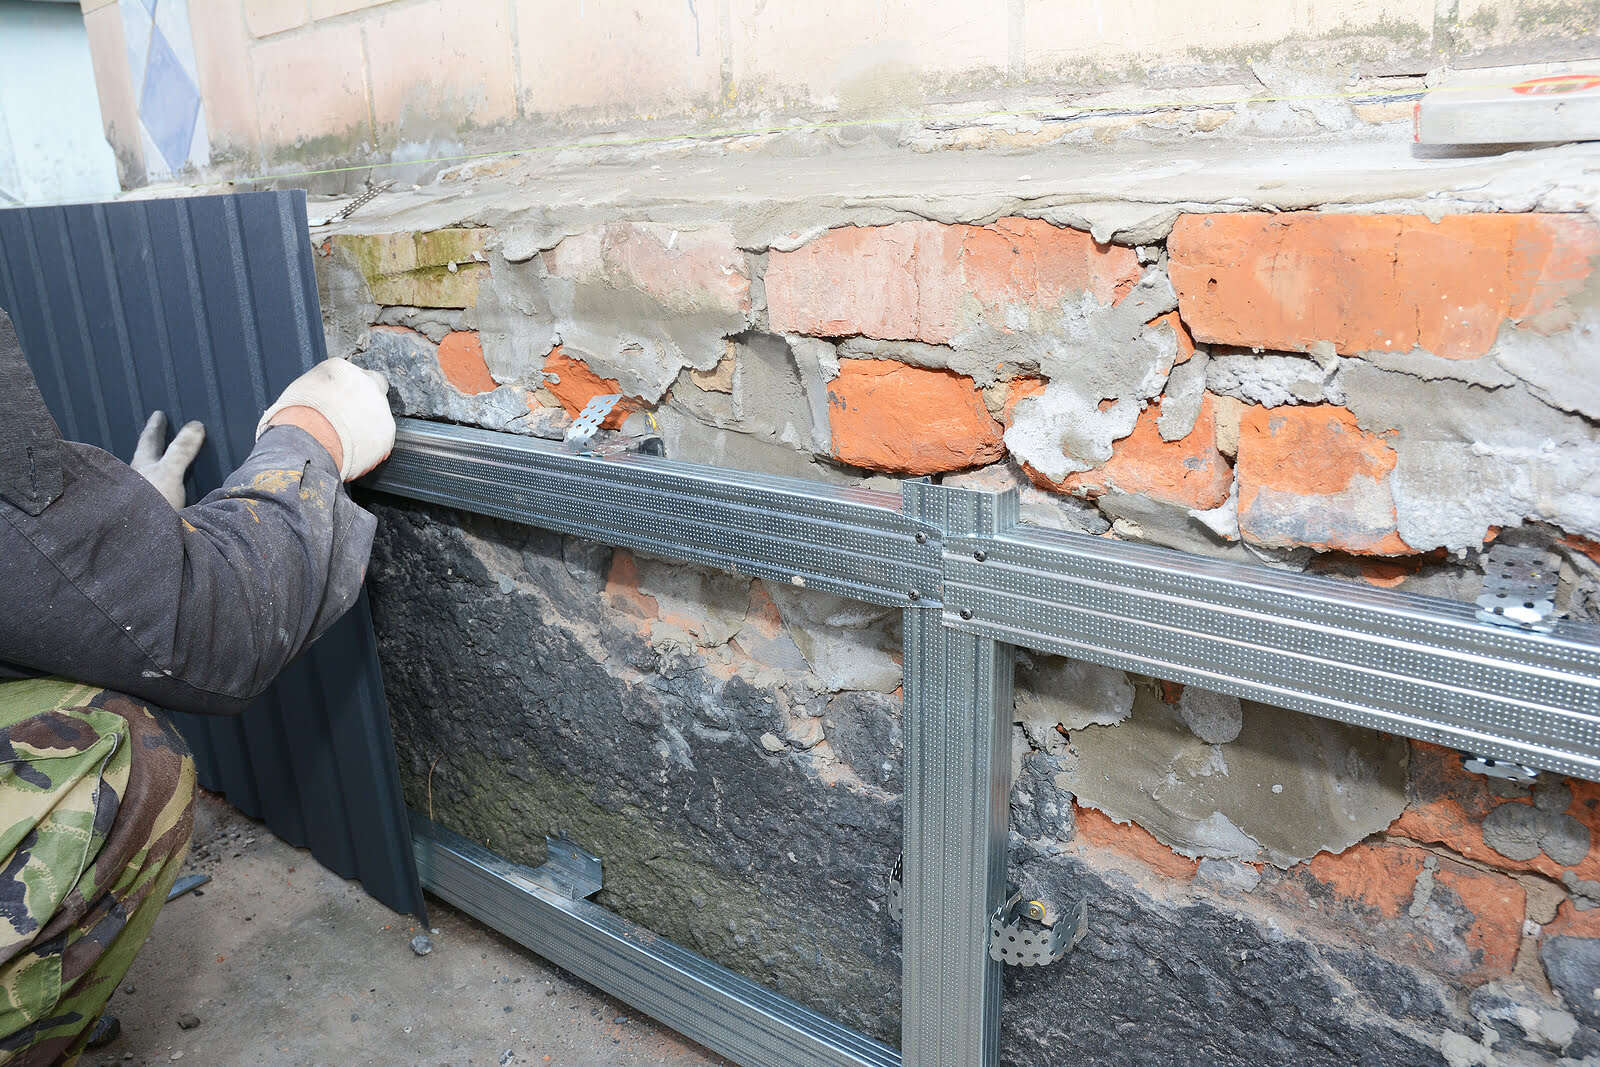
Preparing for the Repair Process
Before you begin repairing cracked foundation walls, it’s important to properly prepare for the repair process. Adequate preparation will ensure that you have the necessary tools and materials, as well as a clean and safe work environment. Here are the essential steps to follow when preparing for the repair process:
- Clear the area: Remove any obstructions or items near the cracked foundation walls. This will provide you with ample space to work and minimize the risk of damage to surrounding objects.
- Ensure safety: Wear appropriate personal protective equipment (PPE) such as safety goggles, gloves, and a dust mask to protect yourself from any potential debris or harmful substances during the repair process.
- Inspect for water leakage: Check for any signs of water leakage through the cracks. If you notice active water seepage, it is important to address this issue first before proceeding with the repairs. Applying sealants or waterproofing materials may be necessary to prevent further water infiltration.
- Gather the necessary tools and materials: Compile a list of the tools and materials you will need for the repair process. This may include items such as a masonry chisel, hammer, wire brush, safety glasses, concrete patching compound, and a trowel. Having all the required tools readily available will help streamline the repair process.
- Read the manufacturer’s instructions: If you are using specific products or materials for the repair, carefully read the manufacturer’s instructions and guidelines before starting. Following these instructions will ensure proper application and maximize the effectiveness of the repair.
- Prepare the foundation surface: Thoroughly clean the cracked area of the foundation wall by removing any loose debris or existing patching materials. Use a wire brush or scraper to eliminate any loose particles, ensuring a clean and solid surface for the repair.
- Consider weather conditions: Take into account the weather conditions for the duration of the repair process. Extreme temperatures or excessive humidity can affect the curing time of certain repair materials. It’s best to choose a suitable time when the weather is favorable for the repairs.
By following these preparation steps, you can ensure that you have everything you need and create an optimal environment for repairing your cracked foundation walls. Proper preparation will make the repair process more efficient and help achieve long-lasting results. In the next section, we will provide a comprehensive list of the materials and tools you will need for the repair process.
Materials and Tools Needed
When it comes to repairing cracked foundation walls, having the right materials and tools is essential for a successful and long-lasting repair. Here is a comprehensive list of the materials and tools you will need:
Materials:
- Concrete patching compound: Choose a high-quality, hydraulic cement-based patching material that is specifically designed for repairing foundation cracks.
- Waterproof sealant: Select a waterproof sealant that is compatible with the concrete patching compound. This will help prevent water penetration through the repaired cracks.
- Concrete bonding agent: Apply a concrete bonding agent to promote adhesion between the existing foundation wall and the patching material.
- Backer rods: Backer rods are flexible foam rods that are inserted into wide cracks to create a proper seal and allow for optimal filling of the crack.
- Crack injection materials (if applicable): For certain types of cracks, such as hairline or non-structural cracks, you may need to use specialized crack injection materials such as epoxy or polyurethane.
- Protective coatings (if necessary): In some cases, applying a protective coating over the repaired areas can further enhance the durability and longevity of the repair.
Tools:
- Masonry chisel: A masonry chisel is used to widen cracks and create a proper groove for the patching material.
- Hammer: Use a hammer alongside the chisel to carefully chip away any loose particles or weak sections of the crack.
- Wire brush: A wire brush is essential for cleaning the crack and removing loose debris and dust before applying the patching material.
- Safety glasses: Protect your eyes from potential debris and dust by wearing safety glasses during the repair process.
- Trowel: A trowel is used for applying and smoothing out the patching compound in the cracks.
- Caulking gun (if using sealant): If you are using sealant, a caulking gun will be needed to apply a controlled and even bead of sealant along the cracks.
- Bucket and mixing tools: Depending on the type of concrete patching compound you are using, you may need a bucket and mixing tools to properly mix and prepare the compound.
It’s important to note that the specific materials and tools required may vary depending on the extent and nature of the cracks in your foundation walls. Assess the situation carefully and consult product instructions and recommendations to ensure you have the appropriate materials and tools for your repairs.
Now that you’re well-equipped with the necessary materials and tools, let’s move on to the step-by-step guide for repairing cracked foundation walls.
Tip: Use epoxy or polyurethane injections to fill and seal the cracks in the foundation wall. This will help prevent water infiltration and further damage.
Read more: How To Repair Cracks In Basement Wall
Step-by-Step Guide to Repairing Cracked Foundation Walls
Repairing cracked foundation walls may seem daunting, but with the right approach, it can be a manageable DIY project. Follow these step-by-step instructions to effectively repair your cracked foundation walls:
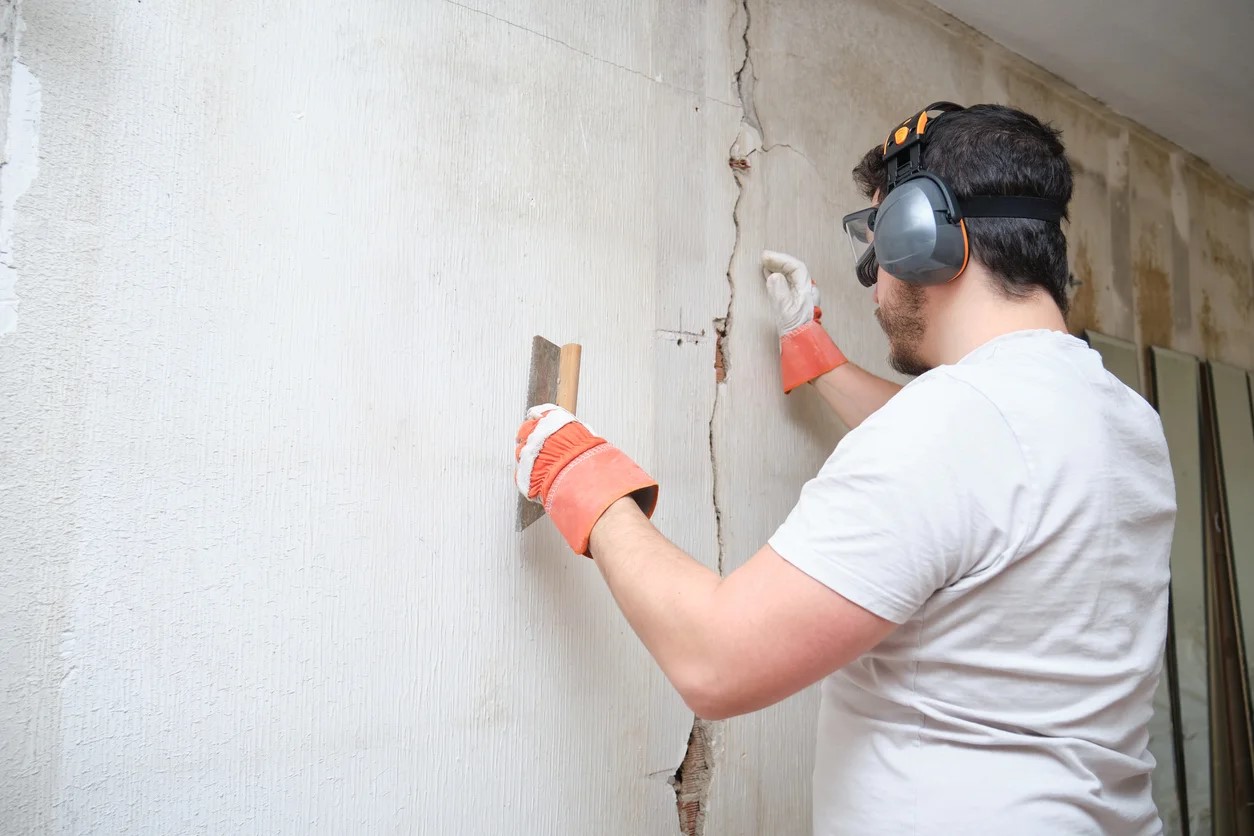
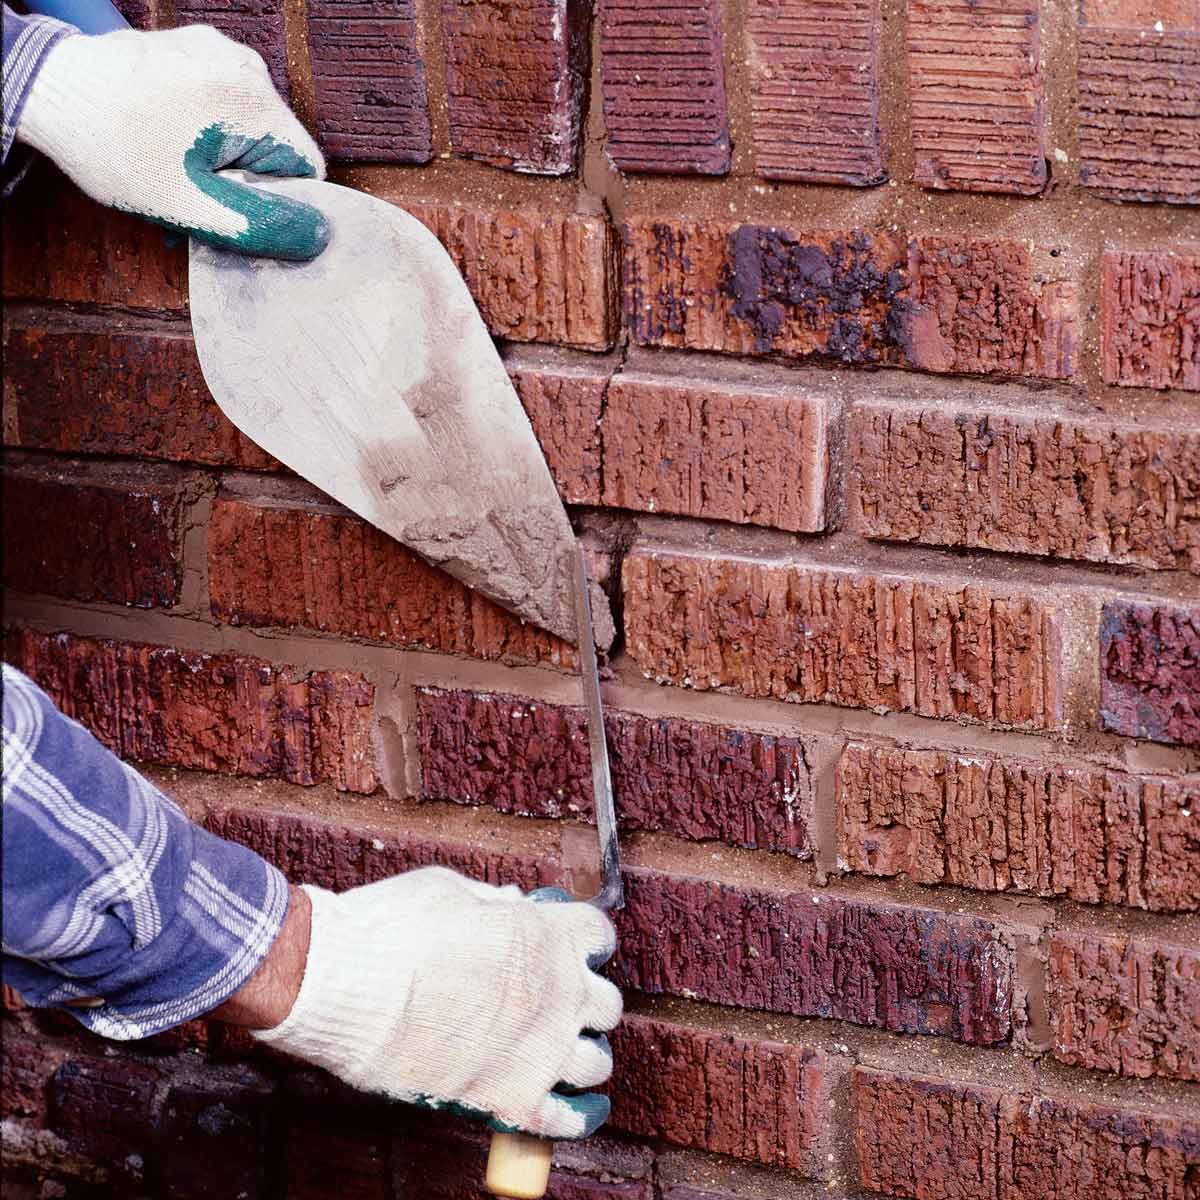
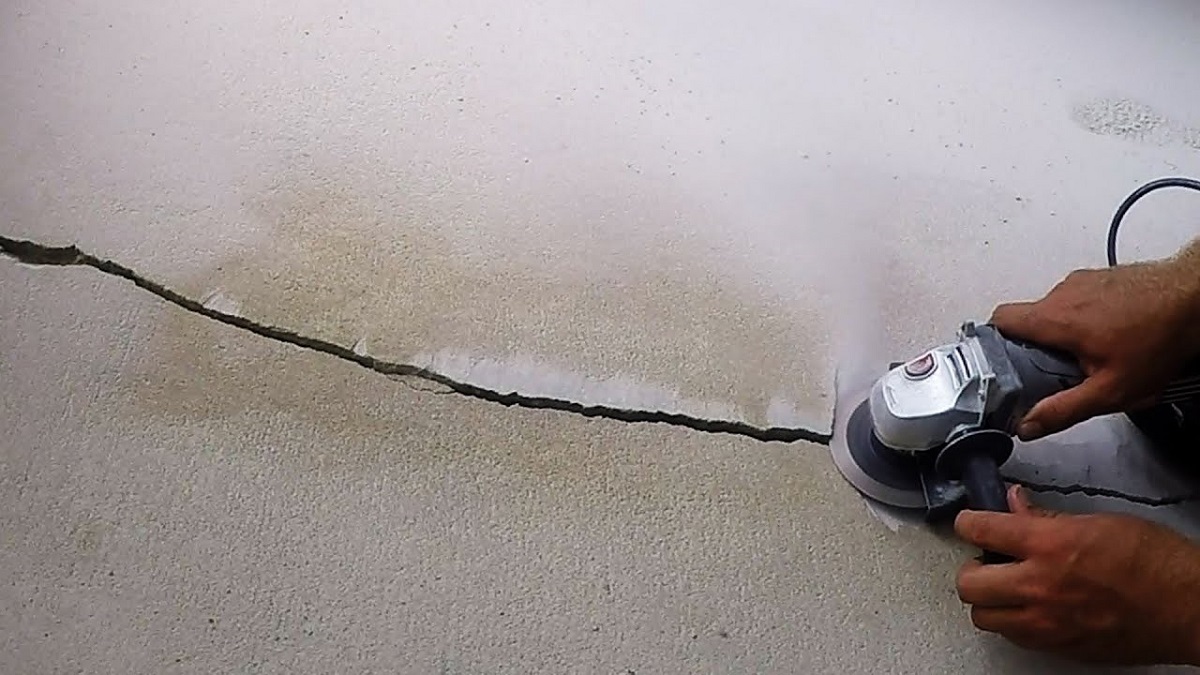
- Prepare the Crack: Start by widening the crack using a masonry chisel and hammer. Create a V-shaped groove along the length of the crack to provide a better surface for the patching compound. Be careful not to chip away too much of the surrounding concrete.
- Clean the Crack: Use a wire brush to remove any loose debris, dust, or old patching material from the crack. This will ensure good adhesion between the existing concrete and the patching compound.
- Apply Concrete Bonding Agent: Apply a concrete bonding agent to the cleaned crack. This will help promote adhesion between the existing concrete and the patching material, ensuring a strong and durable repair.
- Insert Backer Rods (if needed): In wider cracks, insert backer rods into the groove before applying the patching compound. This will help create a proper seal and prevent excessive shrinkage of the patching material.
- Prepare the Patching Compound: Follow the manufacturer’s instructions to mix the concrete patching compound. Use a bucket and mixing tools as needed. Ensure you achieve the right consistency for easy application and proper curing.
- Apply the Patching Compound: Using a trowel, carefully fill the crack with the mixed patching compound. Apply it generously, making sure to completely fill the crack and overfill slightly to allow for shrinkage. Smooth out the surface of the patching compound to match the surrounding area.
- Allow Curing Time: Follow the manufacturer’s recommended curing time for the patching compound. This may vary depending on the product used and the environmental conditions. Avoid touching or disturbing the repaired area during this time.
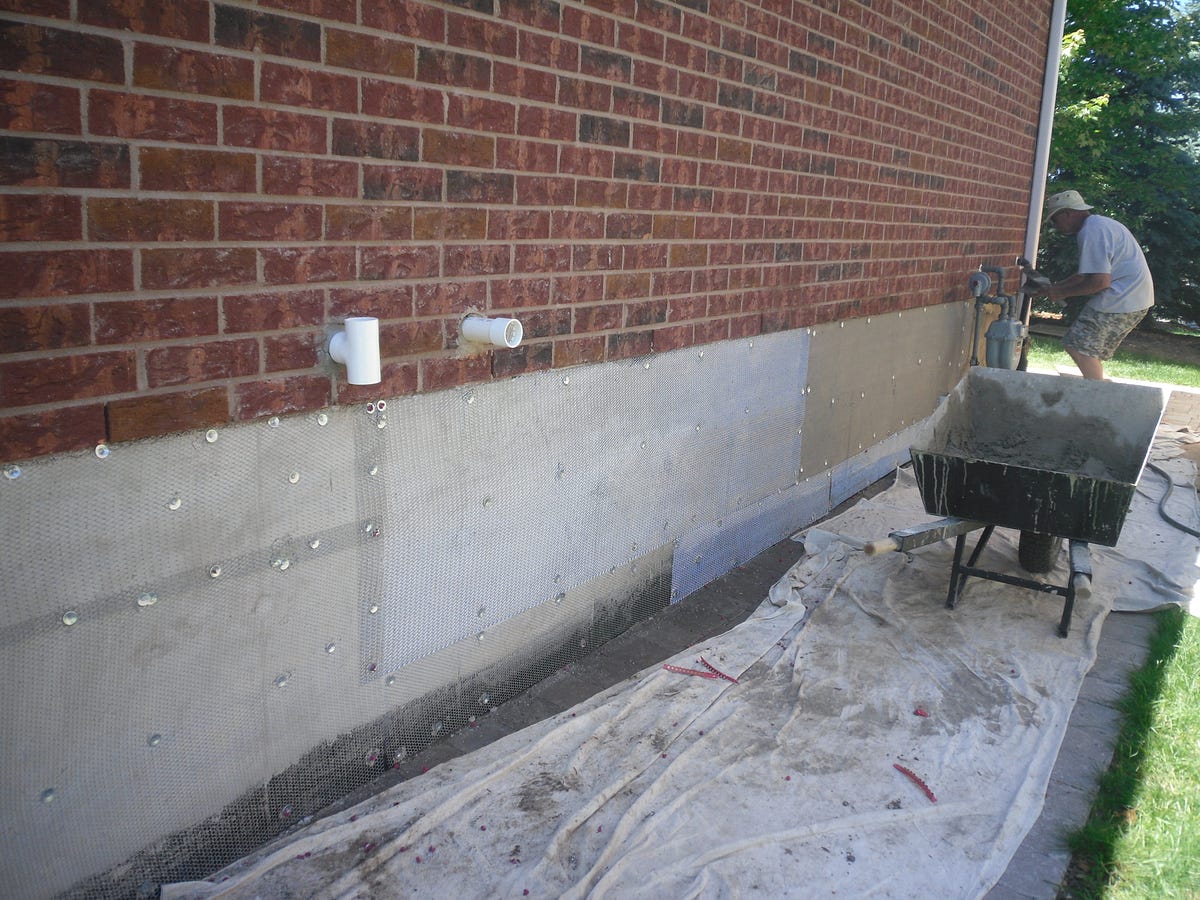
- Inspect and Perform Post-repair Maintenance: Once the patching compound has cured, inspect the repaired area for any imperfections or cracks. If necessary, apply a second layer of patching compound to ensure a seamless and durable repair. Additionally, consider applying a protective coating to enhance the longevity of the repair.
It’s important to note that the specific steps may vary depending on the type of crack and the products used for the repair. Always read and follow the manufacturer’s instructions for the patching compound and other materials you are using.
Remember, if you are unsure or the cracks are extensive or complex, it is recommended to consult with a professional contractor or foundation specialist. They have the expertise to assess the situation and provide the most appropriate repair solution for your specific needs.
With careful preparation and following each step of this guide, you can effectively repair your cracked foundation walls and restore the structural integrity of your building.
Post-Repair Care and Maintenance
After successfully repairing your cracked foundation walls, it is essential to implement proper post-repair care and maintenance to ensure the longevity and effectiveness of the repairs. Here are some important steps to follow:
- Allow Sufficient Drying Time: Depending on the type of patching compound used, it is crucial to allow sufficient drying and curing time before subjecting the repaired area to any stress or pressure. Follow the manufacturer’s instructions for the recommended drying time.
- Monitor for Water Leakage: Regularly inspect the repaired area for any signs of water leakage. After a rainfall or when watering the surrounding area, check for any moisture or dampness. If you notice water seepage, it may indicate a need for additional waterproofing measures.
- Address Any Cracks or Damage: Keep an eye on the repaired area and surrounding foundation walls for any new cracks or damage. If you notice any issues, address them promptly to prevent further deterioration and potential structural problems.
- Maintain Proper Drainage: Ensure that the grading around your building’s foundation is sloped away from the walls, directing water away from the foundation. This helps prevent excess water accumulation that can increase pressure on the walls and potentially cause future cracks.
- Manage Moisture Levels: Control the humidity levels within your building to prevent excessive moisture buildup. Use dehumidifiers in basements or crawl spaces and address any plumbing leaks promptly to avoid unnecessary stress on the foundation walls.
- Inspect Gutters and Downspouts: Regularly inspect and clean your gutters, ensuring they are free from debris and functioning properly. Additionally, ensure that downspouts properly divert water away from the foundation, preventing excess water from saturating the soil around the walls.
- Regularly Maintain Foundation Drainage System: If your property has a foundation drainage system, such as French drains or sump pumps, it is vital to maintain and regularly inspect these systems. Clear any clogs or obstructions and ensure they are functioning optimally to prevent water buildup near the foundation.
- Document and Schedule Periodic Inspections: Maintain a record of the repairs conducted on your foundation walls and periodically inspect the repaired areas. Regular inspections help identify any potential problems early on, allowing for timely repairs and preventing further damage.
By implementing these post-repair care and maintenance practices, you can protect your foundation walls and minimize the risk of future cracks or structural issues. Remember, regular maintenance and proactive measures are key to maintaining the stability and integrity of your building’s foundation.
In rare cases, despite your best efforts, foundation cracks may reappear or worsen over time. If you notice any significant changes or concerns, it is crucial to seek professional assistance to properly evaluate and address the situation.
With proper care and maintenance, the repairs to your cracked foundation walls can last for many years to come, providing a solid and stable foundation for your building.
Common Mistakes to Avoid
Repairing cracked foundation walls requires careful attention to detail and the use of proper techniques. To ensure the success and effectiveness of your repairs, it is essential to avoid common mistakes that can compromise the integrity of the repairs. Here are some mistakes to avoid:
- Ignoring the Root Cause: One of the biggest mistakes is solely focusing on patching the cracks without addressing the root cause. If the underlying issue, such as poor drainage or soil settlement, is not resolved, the cracks may reappear or worsen over time.
- Using Incorrect Materials: It is crucial to select the right materials for your specific situation. Using the wrong type of patching compound, sealant, or bonding agent may result in ineffective repairs and increased vulnerability to future cracks.
- Not Preparing the Crack Properly: Failing to properly prepare the crack by cleaning it thoroughly, widening it if necessary, and applying the appropriate bonding agent can compromise the bond between the patching material and the existing concrete, leading to weaker repairs.
- Applying Excessive Patching Compound: While it is important to fill the crack adequately, overfilling it can create stress points and may cause the patching compound to crack or fail. Follow the manufacturer’s instructions regarding the recommended thickness and application of the patching material.
- Skipping the Curing Time: Allowing sufficient drying and curing time for the patching compound is crucial for its long-term durability. Rushing the process and subjecting the repaired area to stress or pressure too soon can weaken the repairs.
- Not Conducting Regular Inspections: Neglecting regular inspections of the repaired area and the rest of the foundation can result in undetected issues. Periodic inspections can identify any new cracks, water leakage, or other problems early on, allowing for timely repairs and preventing further damage.
- Attempting Complex Repairs When Unsure: If you are uncertain about the severity of the cracks or lack the necessary expertise and tools, it is best to seek professional assistance. Attempting complex repairs without the proper knowledge can potentially worsen the situation and lead to costlier repairs in the long run.
By avoiding these common mistakes and taking a diligent and cautious approach, you can ensure the effectiveness and longevity of your foundation wall repairs. When in doubt, it is always advisable to consult with a professional contractor or foundation specialist who can provide guidance and expertise.
Remember, repairing foundation cracks requires a combination of proper materials, techniques, and addressing any underlying issues. By doing so, you can maintain a strong and stable foundation for your building and avoid future costly repairs.
When to Seek Professional Help
While many cracked foundation wall repairs can be successfully handled as DIY projects, there are certain situations where it is best to seek professional help. Recognizing when to involve a professional contractor or foundation specialist can save you time, effort, and potentially costly mistakes. Here are some scenarios in which professional assistance may be necessary:
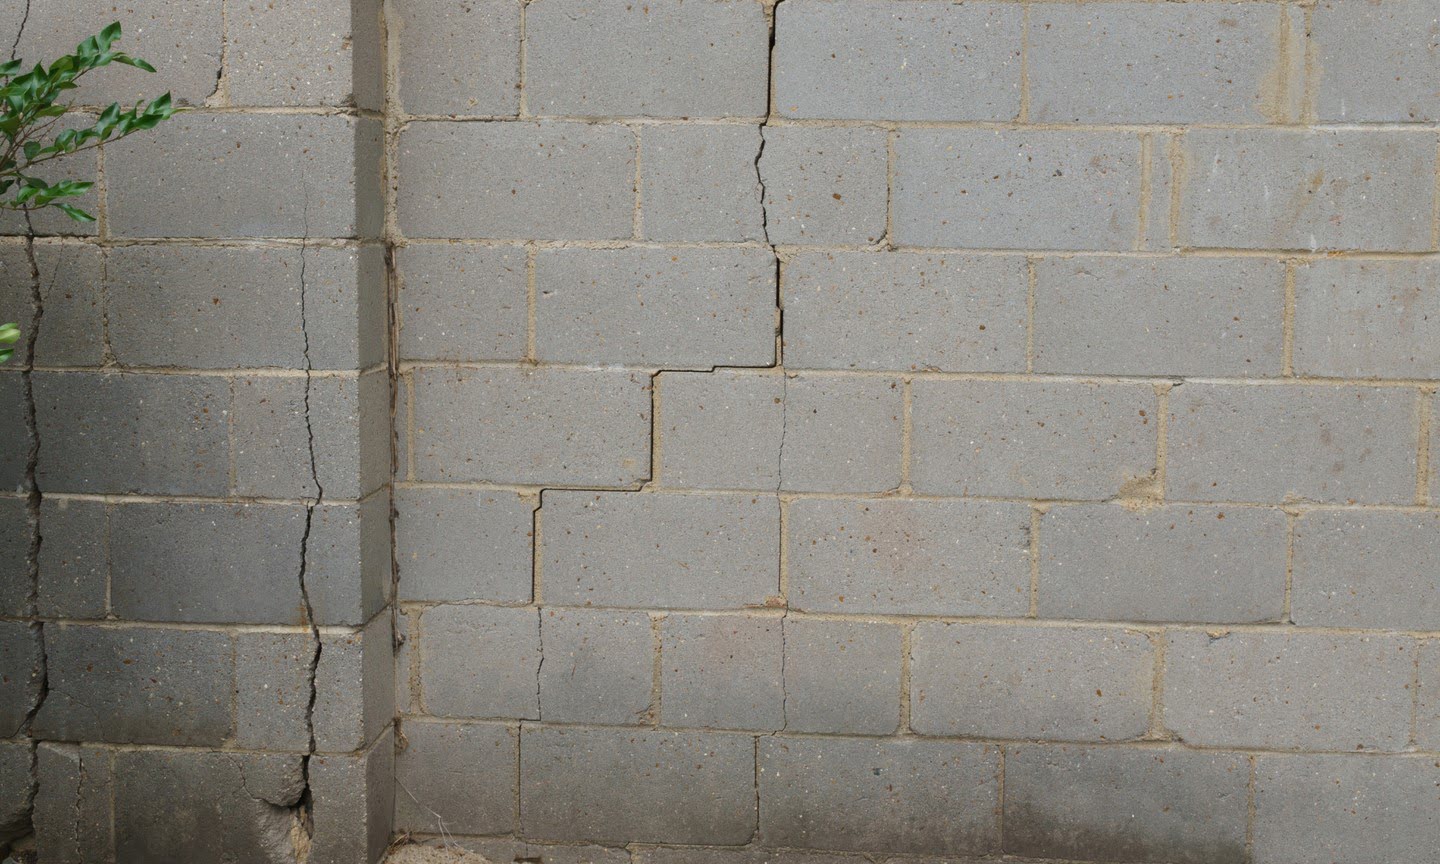
- Structural Damage: If you notice extensive, wide, or deep cracks in your foundation walls, or if you observe signs of significant structural damage such as bulging or shifting walls, it is crucial to involve a professional. These issues may indicate more severe problems that require expert evaluation and specialized repair techniques.
- Complex Repair Requirements: Certain types of cracks, such as horizontal cracks or cracks that extend through the entire thickness of the foundation walls, typically require more advanced repair methods. A professional contractor or foundation specialist will have the necessary expertise and equipment to address these complex repairs effectively.
- Recurring Cracks: If you have previously repaired foundation cracks that have reappeared or are worsening, it indicates an underlying issue that needs professional attention. They can assess the situation and determine the root cause of the recurring cracks to provide a long-lasting solution.
- Lack of Experience or Safety Concerns: If you are not confident in your ability to properly assess the severity of the cracks, perform the necessary repairs, or ensure safety during the process, it is best to leave it to the professionals. They have the knowledge, experience, and professional tools to handle these repairs safely and effectively.
- Time Constraints: If you have limited time to dedicate to the repair project or if you want the repairs to be completed quickly and efficiently, hiring a professional can save you time and ensure a timely completion of the repairs.
- Insurance and Legal Requirements: In some cases, insurance or legal regulations may require the involvement of a licensed professional for foundation repairs. Check with your insurance provider or local authorities to ensure compliance with any necessary regulations.
When in doubt, it is always better to err on the side of caution and consult with a professional. They can assess the situation, provide expert advice, and offer appropriate repair solutions tailored to your specific needs.
Remember, the stability and durability of your building’s foundation are of utmost importance. By seeking professional help when necessary, you can ensure that the repairs are conducted accurately and effectively, providing you with peace of mind and a solid foundation for your property.
Read more: How To Repair Slab Foundation Cracks
Conclusion
Repairing cracked foundation walls is a crucial task to maintain the stability, integrity, and longevity of your building. By understanding the causes and types of foundation wall cracks, assessing the severity of the cracks, and properly preparing for the repair process, you can effectively address this common construction issue.
Throughout this comprehensive guide, we have discussed the necessary materials, tools, and step-by-step instructions for repairing cracked foundation walls. We have also emphasized the importance of post-repair care and maintenance to ensure the long-term effectiveness of the repairs.
While DIY repairs are possible in many cases, it is important to recognize when professional assistance is needed. Structural damage, complex repairs, recurring cracks, lack of experience or safety concerns, time constraints, or insurance and legal requirements are all valid reasons to involve a professional contractor or foundation specialist.
By avoiding common mistakes, regularly inspecting, and addressing any issues in a timely manner, you can safeguard the structural integrity of your building’s foundation. Remember, maintaining a strong and stable foundation is not only essential for the safety of your property but also helps protect your investment in the long run.
Whether you choose to undertake the repairs yourself or decide to hire a professional, prioritize the prompt and effective repair of cracked foundation walls. Following the guidelines and best practices outlined in this guide will ensure that your building stands on a solid and stable foundation for years to come.
Get started today, and take the necessary steps to repair your cracked foundation walls and secure the structural integrity of your building!
Frequently Asked Questions about How To Repair Cracked Foundation Wall
Was this page helpful?
At Storables.com, we guarantee accurate and reliable information. Our content, validated by Expert Board Contributors, is crafted following stringent Editorial Policies. We're committed to providing you with well-researched, expert-backed insights for all your informational needs.

0 thoughts on “How To Repair Cracked Foundation Wall”