Articles
How To Repair A Cracked Floor Tile
Modified: August 26, 2024
Discover expert articles on how to repair a cracked floor tile. Learn step-by-step techniques and tips to fix your floor tiles easily and efficiently.
(Many of the links in this article redirect to a specific reviewed product. Your purchase of these products through affiliate links helps to generate commission for Storables.com, at no extra cost. Learn more)
Introduction
When it comes to the beauty and durability of a tiled floor, a cracked floor tile can be a real eyesore. Not only does it detract from the overall appearance of the room, but it can also pose a safety hazard. Over time, cracks in floor tiles can worsen, leading to water damage, mold growth, and even structural problems.
Fortunately, repairing a cracked floor tile is a task that can be accomplished by homeowners with a bit of patience and the right tools. In this article, we will guide you through the step-by-step process of repairing a cracked floor tile, ensuring a seamless and professional-looking result.
Before you begin, it’s important to mention that the techniques used in this article are applicable to ceramic or porcelain floor tiles. If you have natural stone or other types of tiles, it is recommended to consult with a professional to avoid damaging the tile or compromising its integrity during the repair process.
Now, let’s gather the necessary tools and materials to get started!
Key Takeaways:
- Repairing a cracked floor tile is achievable for homeowners with the right tools and materials. By following the step-by-step process outlined in the article, you can restore the beauty and functionality of your tiled floor with confidence.
- Proper maintenance, including regular cleaning and attention to spills, is essential for preserving the integrity of the tiles and grout. By following the final touches and maintenance tips, you can ensure the long-term beauty and durability of your newly repaired floor.
Tools and Materials Needed
Before you begin repairing a cracked floor tile, it’s important to gather the necessary tools and materials to ensure a smooth and efficient process. Here’s a list of the items you’ll need:
Tools:
- Safety goggles
- Gloves
- Chisel
- Hammer
- Drill with a carbide-tipped bit
- Tile spacer
- Grout float
- Sponge
- Tile adhesive spreader
- Grout brush
Materials:
- Replacement floor tile
- Tile adhesive
- Tile grout
- Grout sealer
- Caulk (color-matched to the tile)
It’s important to ensure you have all the necessary tools and materials before starting the repair process. This will save you time and ensure a smooth and hassle-free experience. Now that you have everything you need, let’s move on to the first step: assessing the damage.
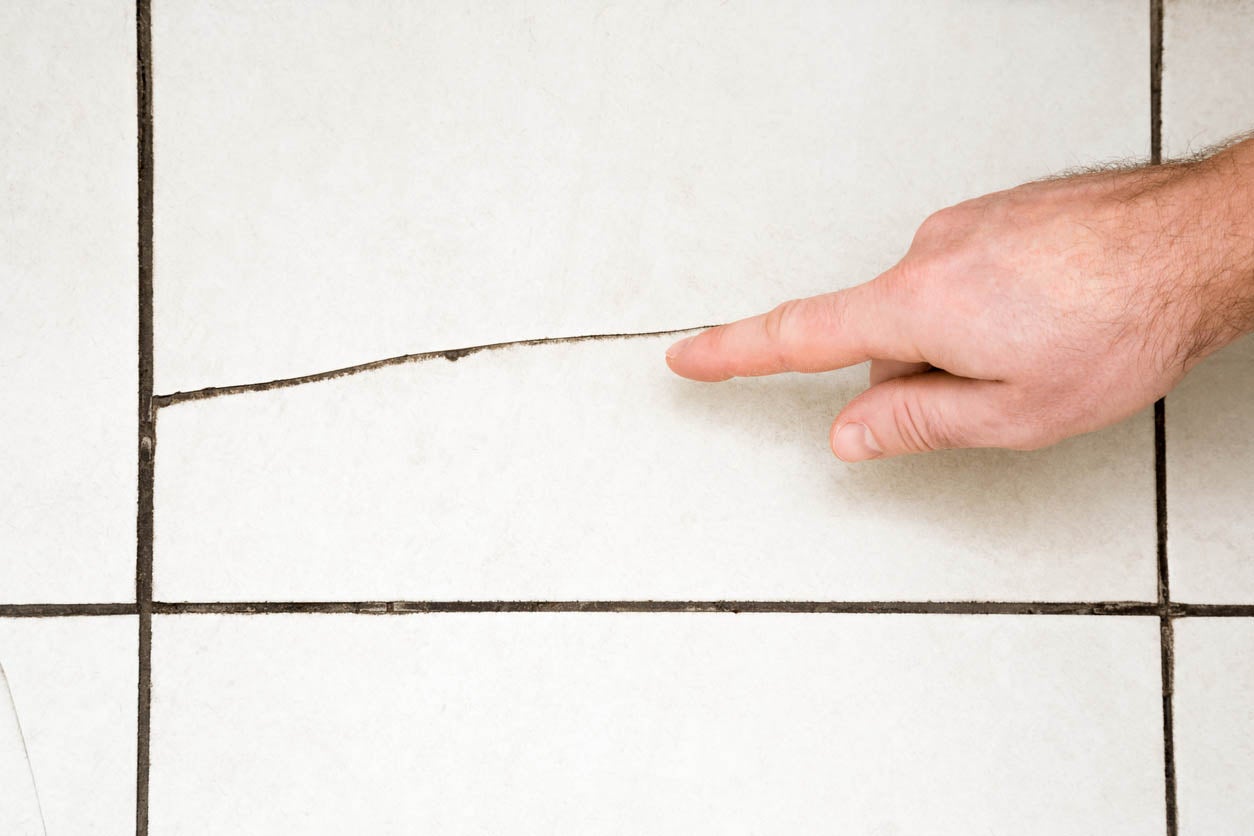
Step 1: Assess the Damage
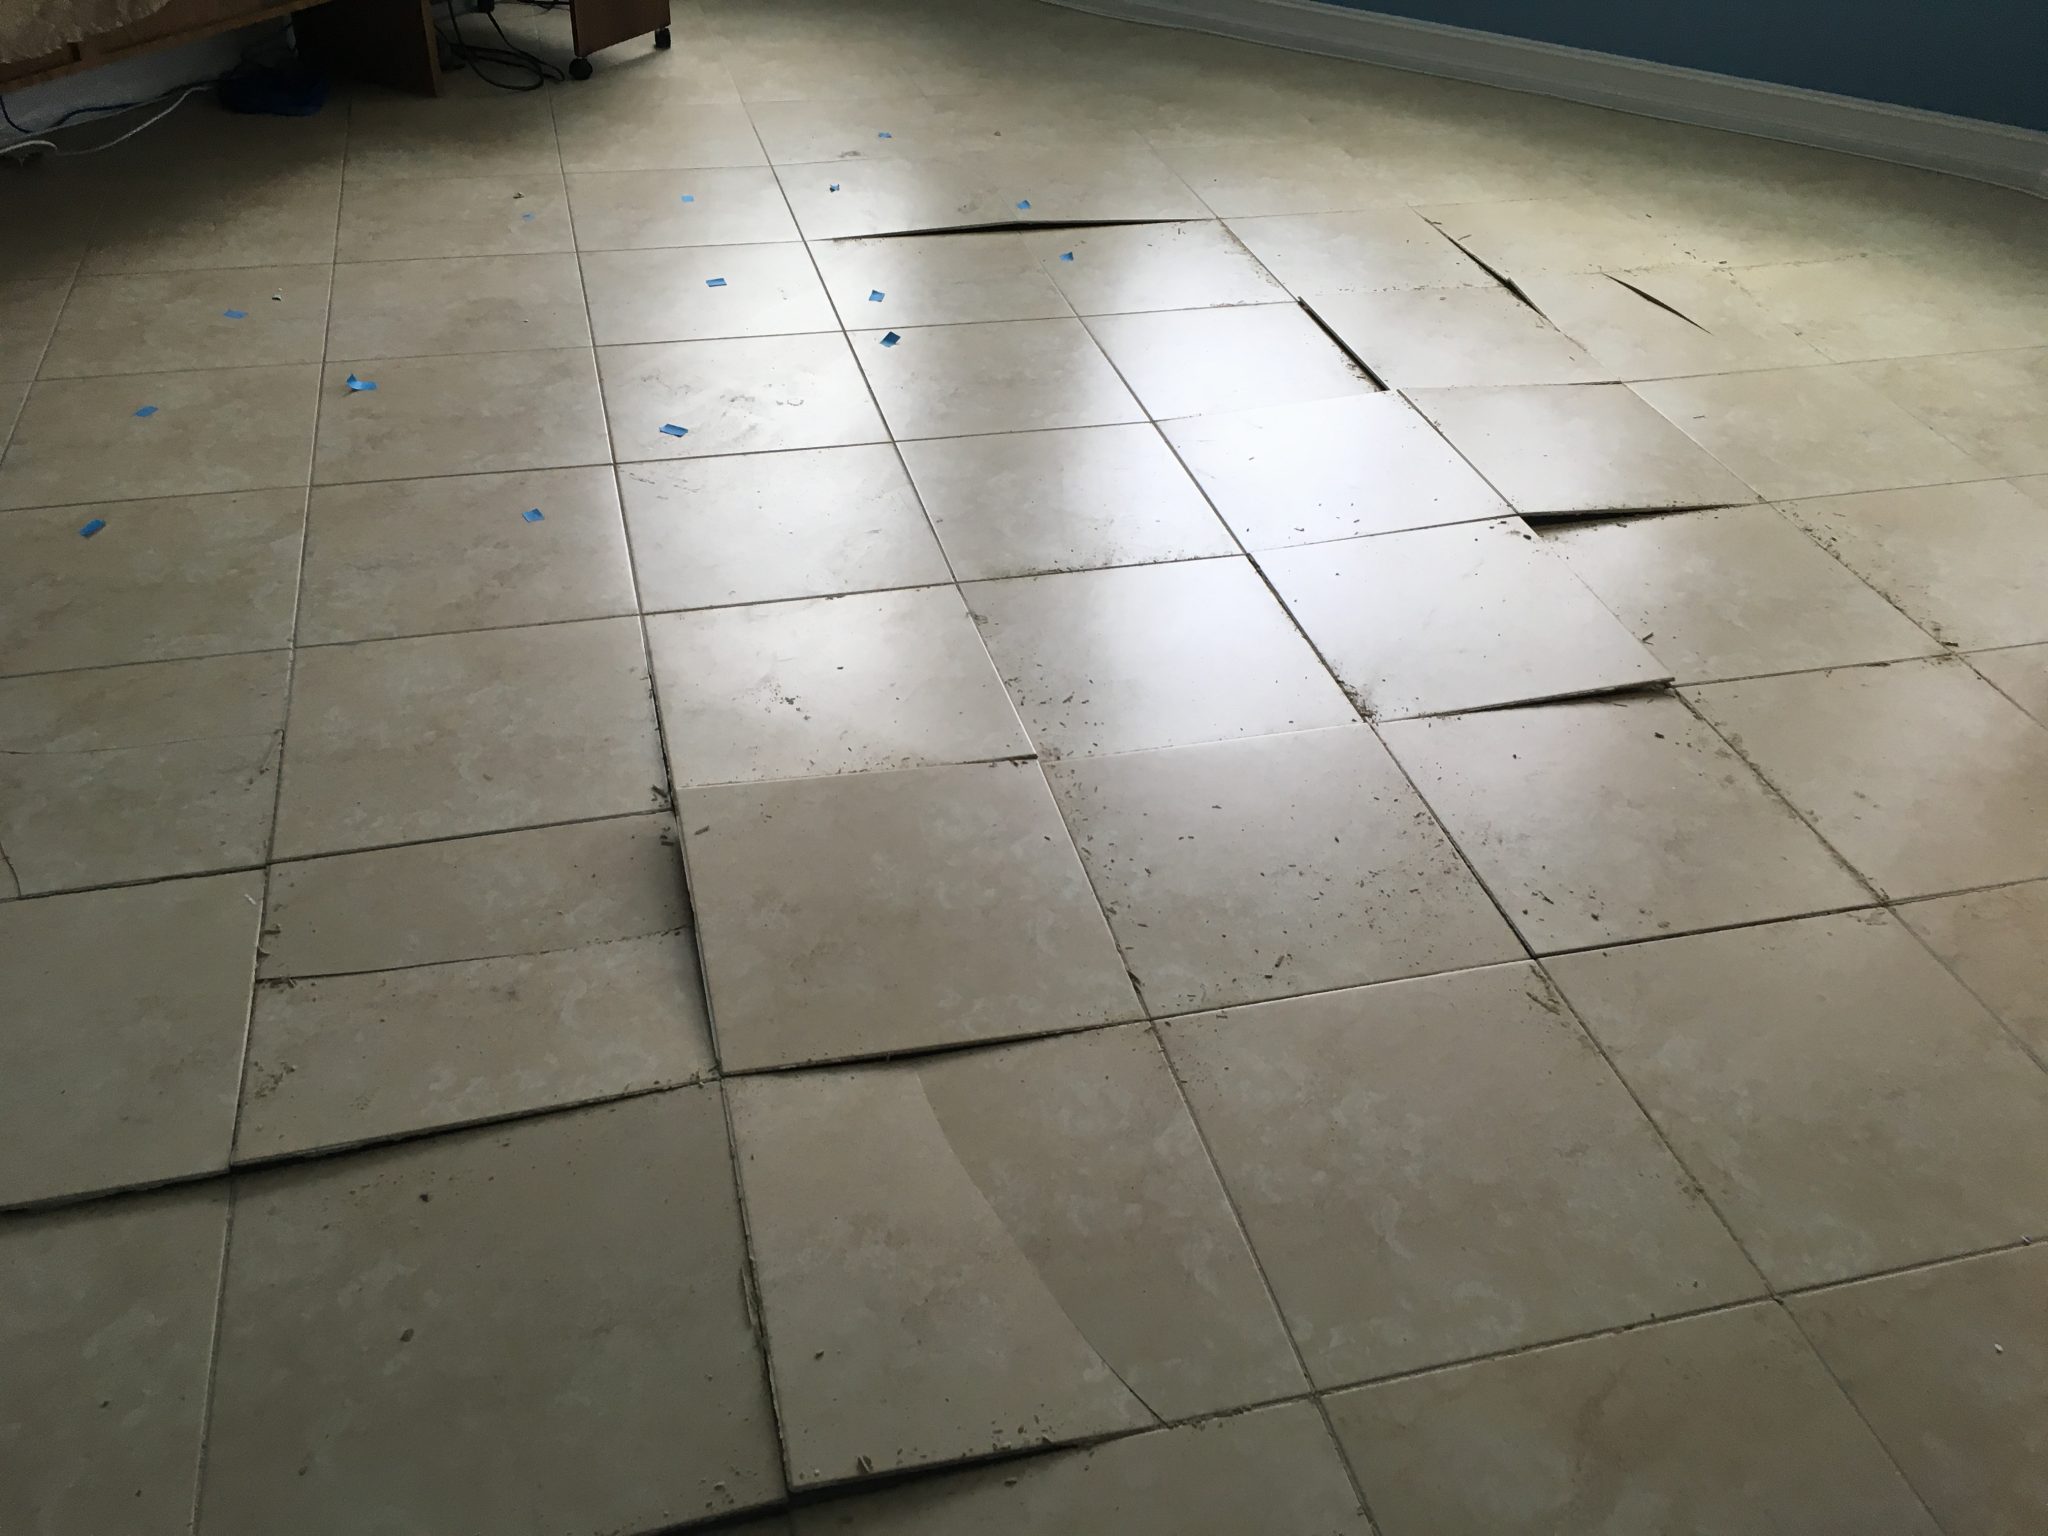
The first step in repairing a cracked floor tile is to assess the extent of the damage. Carefully inspect the cracked tile to determine if it’s a hairline crack or if it extends all the way through the tile. This will help you determine the best course of action.
If the crack is minor and doesn’t extend through the tile, you may be able to repair it without removing the tile completely. In this case, you can use a tile filler or epoxy specifically designed for filling cracks. However, if the crack is extensive or the tile is completely broken, it’s best to replace the tile altogether.
Additionally, pay attention to any surrounding tiles. If they are loose or show signs of damage, it may be necessary to address those as well. Take note of the type and color of the existing tile to ensure that you can find a suitable replacement.
Assessing the damage will give you a clear understanding of the scope of the repair and help you plan your next steps accordingly. Once you’ve assessed the damage, it’s time to gather the necessary tools and materials for the repair process.
Read more: How To Put Tile On Floor
Step 2: Gather Necessary Materials
After assessing the damage and determining the best course of action, it’s time to gather the necessary materials for repairing the cracked floor tile. By having all the materials on hand, you’ll be able to complete the repair process smoothly and efficiently.
Here’s a list of the materials you’ll need:
Replacement Tile:
Make sure to find a replacement tile that matches the size, color, and texture of the existing tiles. This will ensure a seamless and professional-looking repair. If possible, purchase an extra tile to keep as a spare in case you need it in the future.
Tile Adhesive:
Choose a high-quality tile adhesive that is suitable for the type of tile you’re working with. The adhesive should be specifically formulated for floor tiles and provide a strong bond. Read the manufacturer’s instructions for the adhesive to ensure proper application.
Tile Grout:
You’ll need tile grout to fill the gaps between the tiles after the replacement tile is installed. Select a grout color that matches the existing grout to maintain uniformity. Consider using an epoxy grout for added durability and resistance to stains and moisture.
Read more: How To Fix Cracks In Basement Floor
Grout Sealer:
A grout sealer is optional but highly recommended to protect the grout from stains and moisture. It creates a barrier that helps prolong the life of the grout and prevents discoloration over time.
Caulk (color-matched to the tile):
Caulk is used to seal the edges and corners of the tiled area, providing a finished look and preventing moisture from seeping into the subfloor. Choose a caulk color that matches the color of the tile to maintain a cohesive appearance.
By ensuring you have all the necessary materials, you’ll be well-prepared to proceed with the repair process. With the materials gathered, we’re ready to move on to the next step: removing the cracked tile.
Step 3: Remove the Cracked Tile
Now that you have assessed the damage and gathered the necessary materials, it’s time to remove the cracked tile from the floor. This step requires caution and precision to avoid damaging surrounding tiles or the subfloor beneath.
Follow these steps to safely remove the cracked tile:
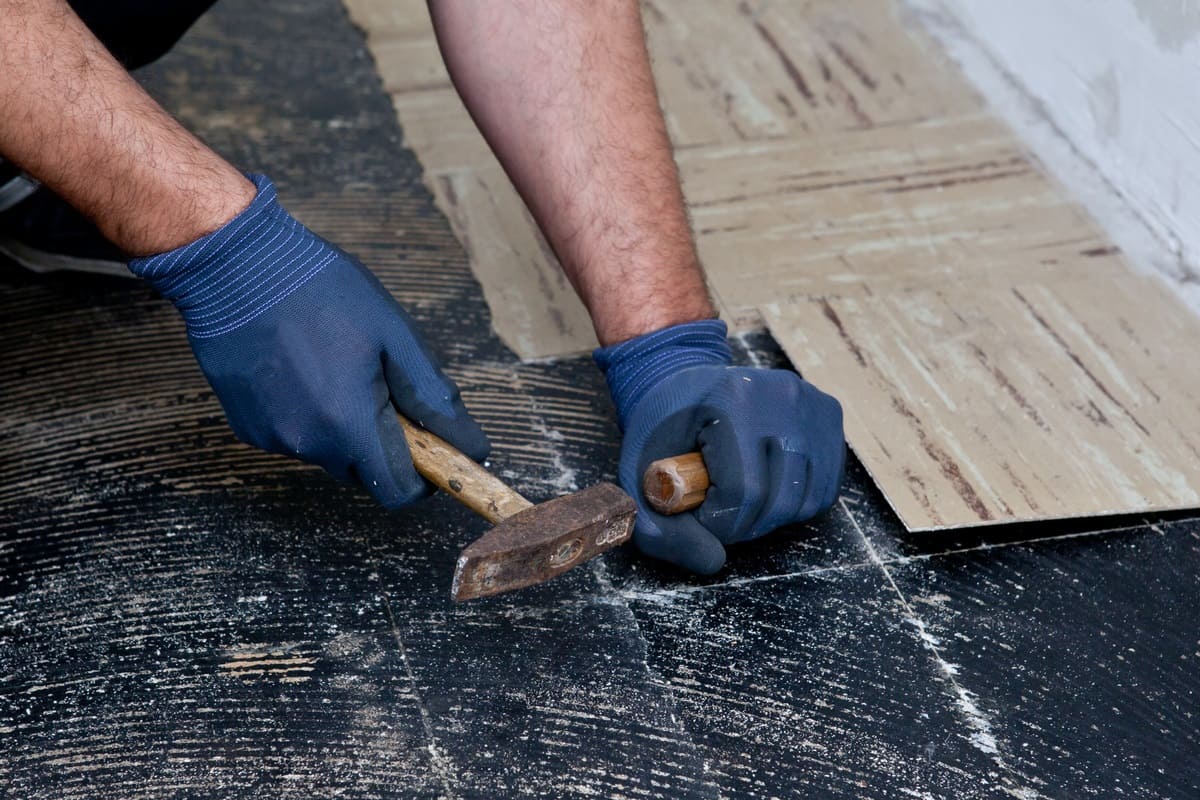
- Put on safety goggles and gloves to protect your eyes and hands from any flying debris.
- Take a chisel and position it at a slight angle against the cracked tile.
- Gently tap the chisel with a hammer to create a small crack in the tile.
- Continue tapping around the edges of the tile to loosen it from the adhesive beneath.
- Once the tile starts to come loose, carefully pry it up using the chisel and your hands.
- If the tile breaks into smaller pieces, remove them one by one until the entire tile is eliminated.
Be sure to remove any adhesive or mortar that may still be attached to the subfloor. Use a scraper or chisel to clear away any residue, ensuring a clean and smooth surface for the replacement tile.
Inspect the area to make sure there are no remaining fragments or debris before proceeding to the next step. Now that you have successfully removed the cracked tile, it’s time to prepare the subfloor for the replacement tile.
Step 4: Prepare the Subfloor
After removing the cracked tile, it’s crucial to prepare the subfloor to ensure a stable and secure foundation for the replacement tile. This step involves cleaning the subfloor and making any necessary repairs to ensure a smooth and level surface.
Follow these steps to prepare the subfloor:
- Thoroughly clean the subfloor using a broom or vacuum to remove any dust, dirt, or debris. Make sure the surface is free from any loose particles that could interfere with the tile adhesive.
- If there are any uneven areas or gaps on the subfloor, use a suitable leveling compound or mortar to fill them in. Smooth out the compound or mortar with a trowel, ensuring a level surface.
- Check the subfloor for stability. If you notice any loose or squeaky floorboards, secure them by driving screws through the subfloor and into the underlying joists.
- Inspect the subfloor for any signs of water or moisture damage. If you discover any issues, address them before proceeding with the tile installation. Allow the subfloor to completely dry before continuing.
By properly preparing the subfloor, you’ll ensure a solid foundation for the replacement tile and minimize the risk of future cracks or damage. Take the time to complete these steps diligently for a successful tile repair. With the subfloor prepared, we can now move on to the next step: applying the adhesive for the replacement tile.
Read more: How To Fix A Cracked Garage Floor
Step 5: Apply Adhesive
Now that the subfloor is prepared, it’s time to apply the tile adhesive to secure the replacement tile in place. The adhesive creates a strong bond between the tile and the subfloor, providing stability and preventing future cracks.
Follow these steps to apply the adhesive:
- Read the manufacturer’s instructions on the tile adhesive for specific mixing and application guidelines. Different adhesives may have varying instructions.
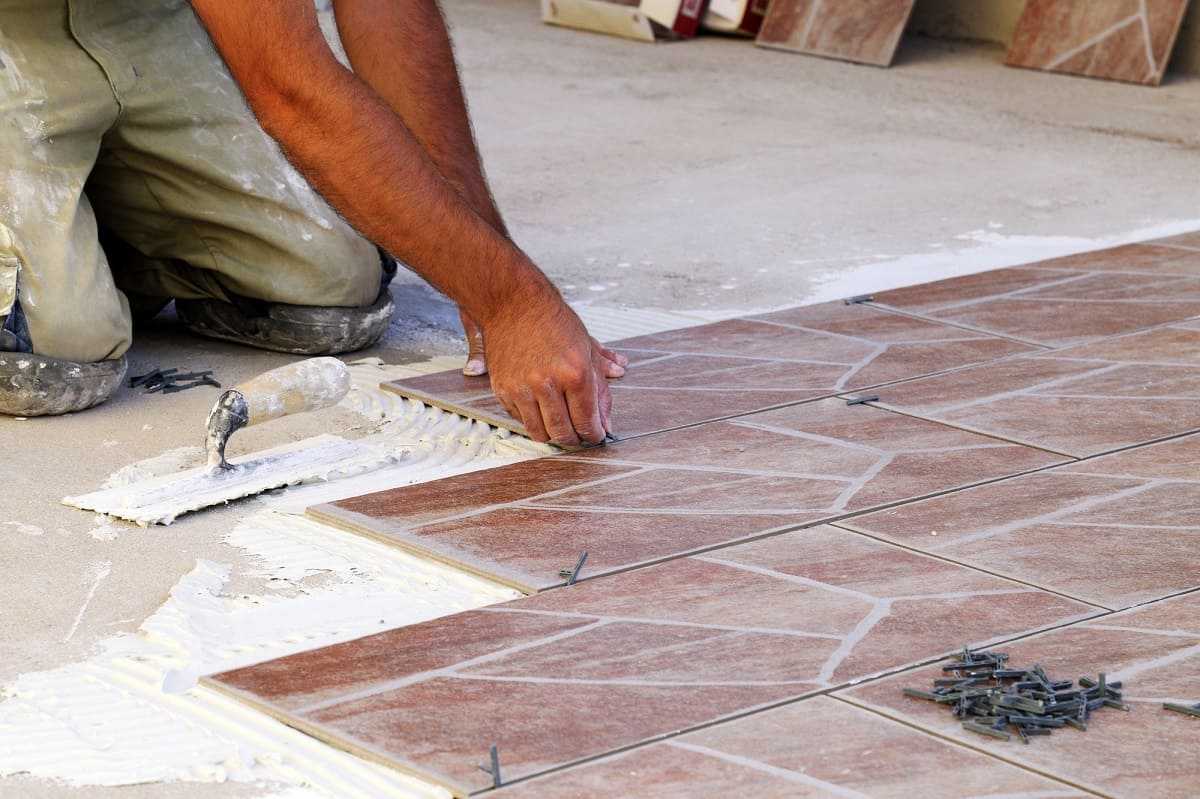
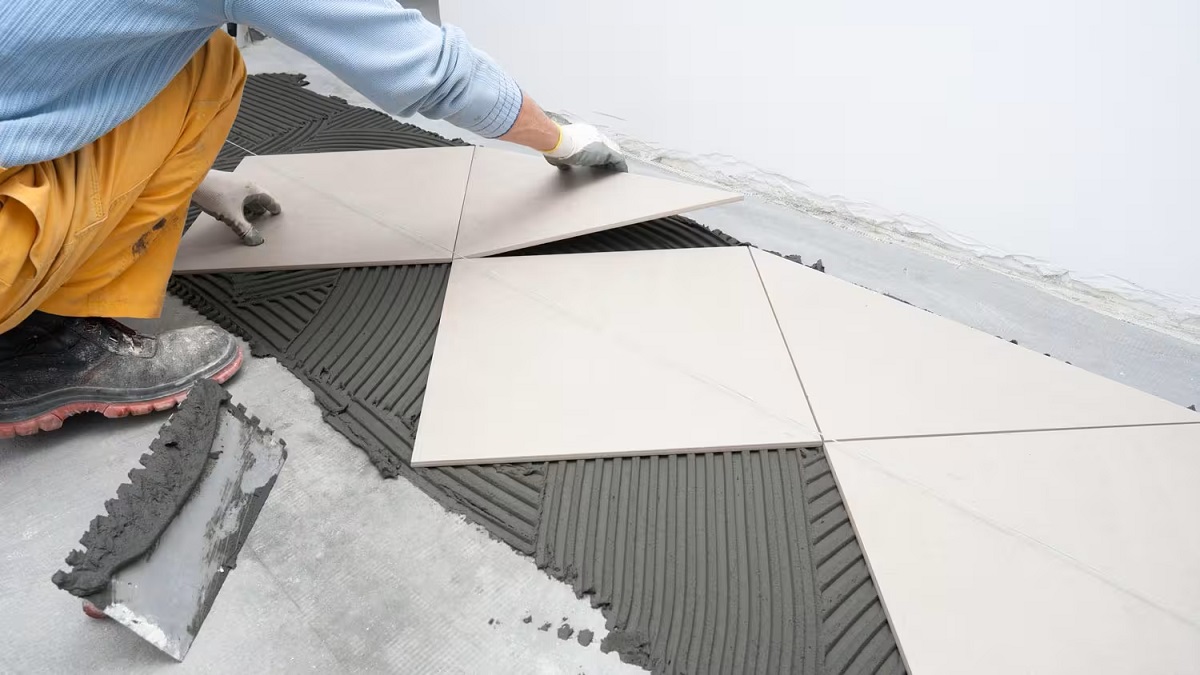
- Using a notched trowel or adhesive spreader, apply a thin, even layer of adhesive to the subfloor in the area where the replacement tile will be placed. Make sure to cover the entire area to ensure proper adhesion.
- Hold the trowel at a 45-degree angle and comb through the adhesive to create ridges. This helps to ensure a proper bond and allows for air to escape when setting the tile.
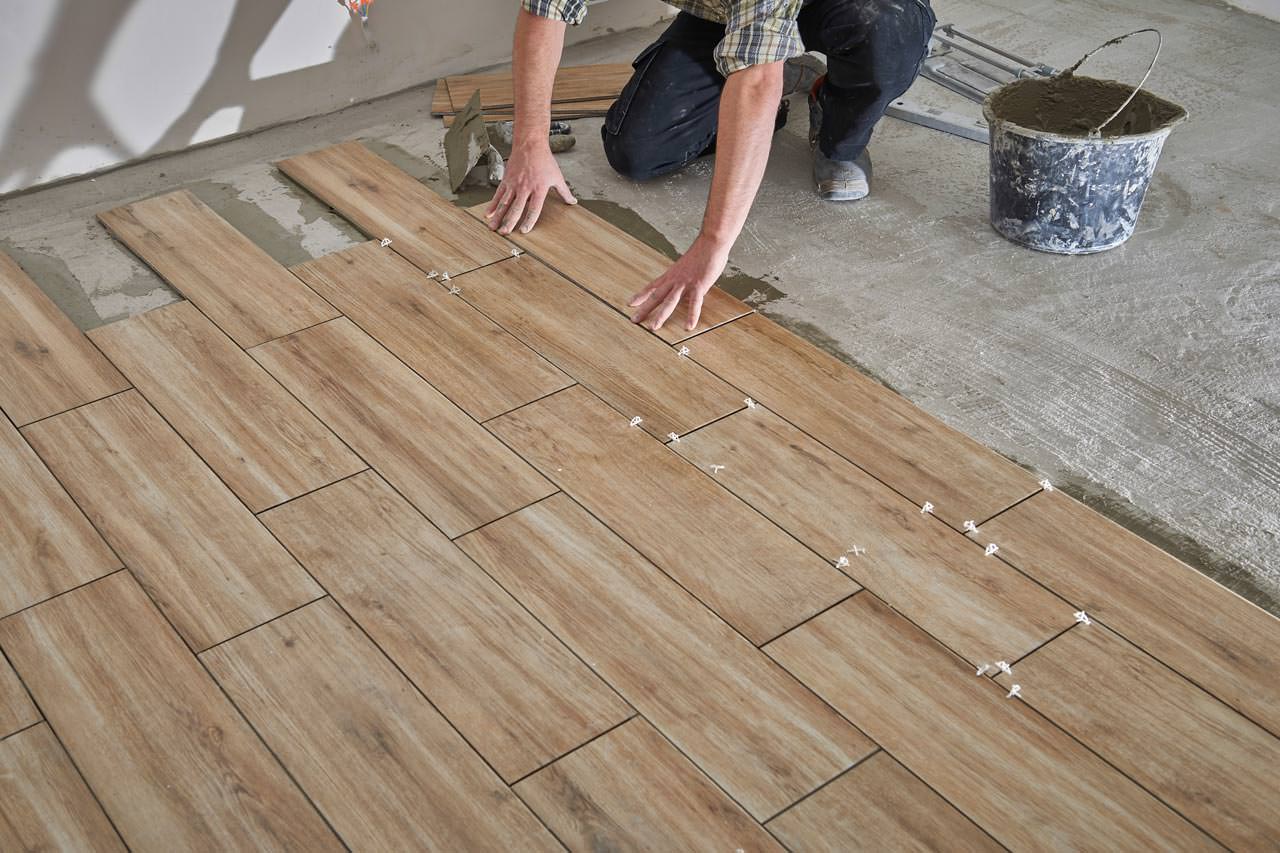
- Place the replacement tile onto the adhesive, pressing it firmly into place. Wiggle the tile slightly to ensure it is fully embedded in the adhesive and the ridges on the subfloor.
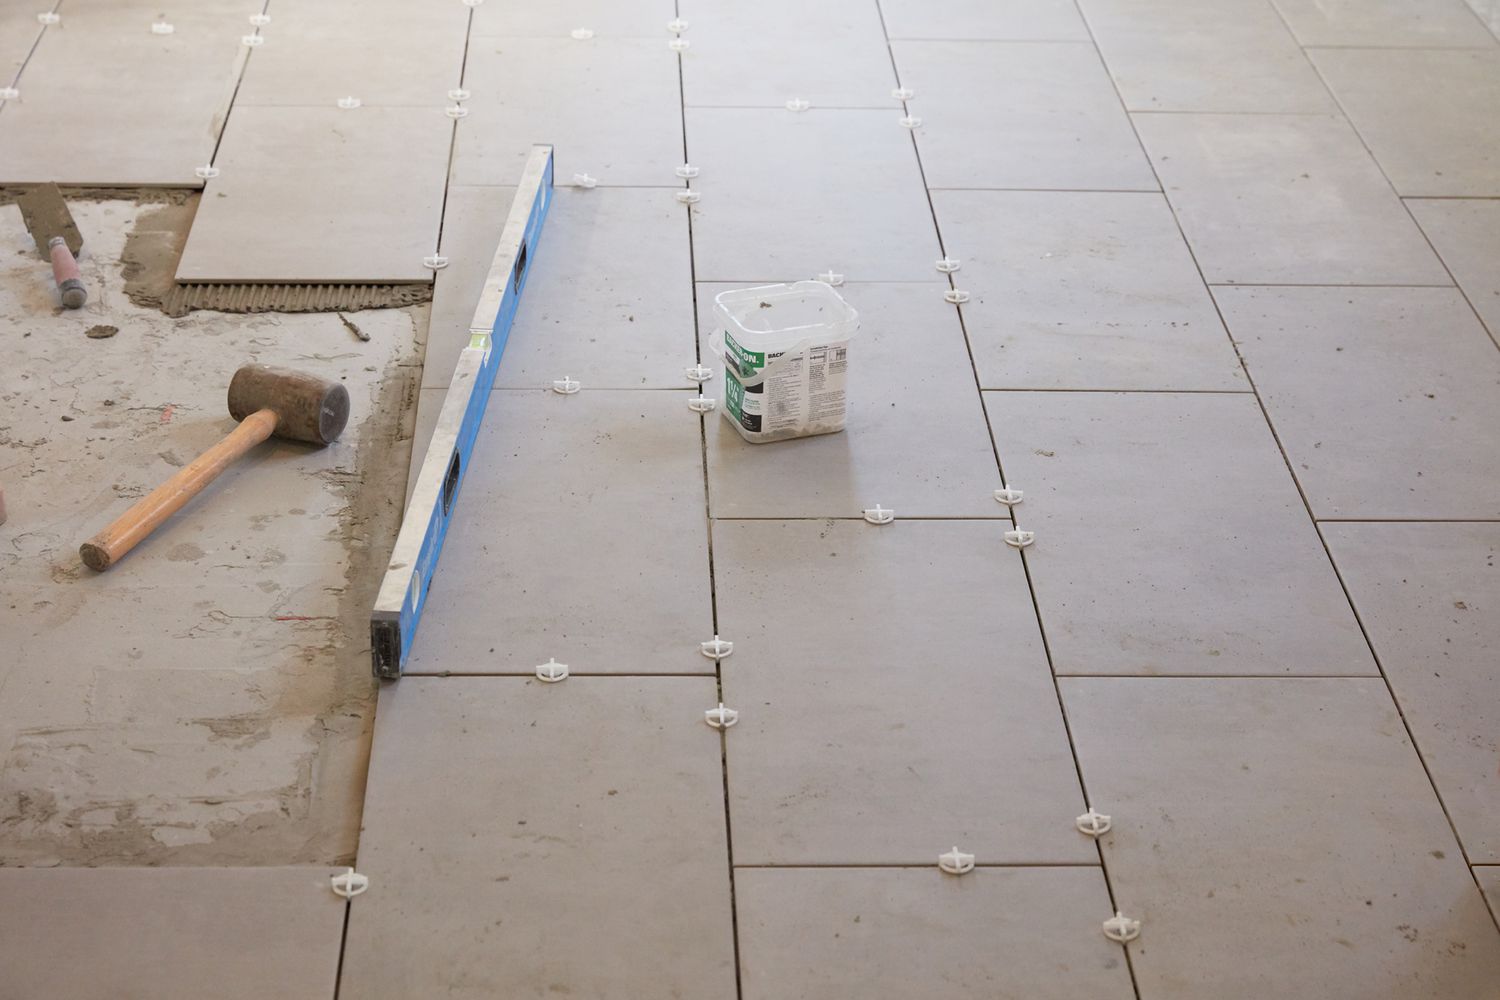
- Use tile spacers to maintain even spacing between the replacement tile and the surrounding tiles. This will provide uniform grout lines.
- Check the tile’s alignment and adjust as necessary. Ensure that it sits level with the surrounding tiles and there are no noticeable gaps or lippage.
Allow the adhesive to cure according to the manufacturer’s instructions before proceeding to the next step. This typically takes about 24 hours, but be sure to check the adhesive packaging for specific curing times.
With the replacement tile in place and the adhesive curing, we can now move on to the next step: grouting the tile.
Step 6: Set the Replacement Tile
With the adhesive cured, it’s time to set the replacement tile into its final position. This step involves removing the tile spacers, checking the alignment, and ensuring a secure fit with the surrounding tiles.
Follow these steps to set the replacement tile:
- Start by carefully removing the tile spacers that were used to maintain even spacing between the replacement tile and the surrounding tiles. Remove the spacers one by one, being cautious not to disturb the position of the tiles.
- Check the alignment of the replacement tile with the surrounding tiles. Make sure it is level and flush with the adjacent tiles.
- If the tile needs adjustment, gently lift it using a putty knife or similar tool and add or remove adhesive as needed to achieve the desired position.
- Once the replacement tile is properly aligned, press it firmly into place to ensure good contact with the adhesive and a uniform level with the surrounding tiles.
- Use a damp sponge or cloth to wipe away any excess adhesive that may have seeped out from the sides of the tile. Ensure the area is clean and free from any visible adhesive.
Take a moment to step back and visually inspect the replaced tile. Double-check the alignment and levelness to ensure a professional and seamless appearance. Allow the tile to fully set and bond with the adhesive before moving on to the next step.
After successfully setting the replacement tile, we can now proceed to the crucial step of grouting the tile to fill in the gaps and provide a finished look.
Step 7: Allow the Adhesive to Cure
After setting the replacement tile, it’s important to allow the adhesive to fully cure before proceeding with the grouting process. Curing time is essential for creating a strong bond between the tile and the subfloor, ensuring long-lasting durability.
Follow these guidelines to allow the adhesive to cure properly:
- Refer to the manufacturer’s instructions on the adhesive packaging for the recommended curing time. Different adhesives have varying curing durations, so it’s crucial to follow the specific guidelines provided.
- Avoid walking on the newly tiled area during the curing period. Excessive foot traffic can disrupt the adhesive bond and lead to uneven tile placement.
- Ensure proper ventilation in the room to aid in the curing process. This will help the adhesive dry adequately and strengthen the bond between the tile and the subfloor.
- Depending on the adhesive used, the curing process may take anywhere from 24 to 48 hours. Be patient and allow sufficient time for the adhesive to fully set.
It’s important to note that humidity and temperature can affect the curing time of the adhesive. Ideal conditions for curing include a temperature range of 70-90°F (21-32°C) and moderate humidity levels.
While waiting for the adhesive to cure, it’s a good idea to cover the newly tiled area with a protective sheet or tape off the surrounding tiles to prevent accidental damage or contamination.
Once the adhesive has completely cured, we can proceed to the next step: grouting the tile to fill in the gaps and provide a professional finish.
Step 8: Grout the Tile
Now that the adhesive has cured, it’s time to grout the tile to fill in the gaps and create a seamless, finished appearance. Grout not only enhances the aesthetic appeal of the tiled floor but also helps to protect the edges of the tiles and maintain their stability.
Follow these steps to grout the tile:
- Choose a grout color that matches the existing grout or complements the tile design. Ensure that the grout is suitable for floor tiles and follows the manufacturer’s instructions.
- Mix the grout according to the manufacturer’s instructions. Use a grout float or trowel to create a smooth and workable consistency.
- Apply the grout onto the tile surface by holding the grout float at a 45-degree angle. Force the grout into the gaps, working diagonally across the tiles to ensure full coverage.
- Use the grout float to remove excess grout from the tile surface. Hold the float at a steeper angle and sweep it across the tiles, applying light pressure to fill in the gaps and remove any excess grout.
- Allow the grout to set for a short period of time as specified by the manufacturer. This is typically around 10-15 minutes.
- Using a clean, damp sponge, lightly wipe the tile surface in circular motions to remove any grout haze or residue. Rinse the sponge frequently and change the water as needed.
- Repeat the wiping process several times until the tile surface is clean and the grout lines are smooth and evenly filled.
- Allow the grout to cure according to the manufacturer’s instructions, which usually takes around 24-48 hours.
During the grouting process, it’s important to work in small sections to prevent the grout from drying too quickly. Keep in mind that grout can be messy, so it’s always a good idea to protect the surrounding areas with tape or plastic sheeting to minimize cleanup.
Once the grout has fully cured, we can move on to the next step: cleaning the tile surface to reveal its true beauty.
Use a small amount of epoxy or tile adhesive to fill in the crack, then smooth it out with a putty knife. Once dry, use a matching grout to fill in any gaps and seal the tile.
Read more: How To Tile A Floor – In Easy Steps
Step 9: Clean the Tile Surface
After grouting the tile, it’s important to clean the tile surface to remove any grout residue and reveal the true beauty of your newly repaired floor. Cleaning the tile surface properly will ensure a polished and professional finish.
Follow these steps to clean the tile surface:
- Wait for the grout to cure fully as specified by the manufacturer. This is typically around 24-48 hours.
- Fill a bucket with clean water.
- Dampen a clean sponge or cloth in the water and wring out any excess water.
- Gently wipe the tile surface in circular motions, applying light pressure. This will help to remove any grout residue or haze on the tiles.
- Rinse the sponge or cloth frequently in the clean water to prevent spreading grout residue.
- Continue wiping the tile surface until it is clean and free from any grout residue.
- Allow the tile surface to air dry, or use a dry, clean cloth to blot away any remaining moisture.
- Inspect the tile surface for any remaining grout residue or haze. If necessary, repeat the cleaning process as needed to ensure a pristine finish.
It’s important to avoid using harsh chemicals or abrasive cleaners on the tile surface during the cleaning process. These can damage the tiles or remove the grout prematurely.
Now that the tile surface is clean and free from any grout residue, we can move on to the final step: adding the final touches and maintenance tips to keep your newly repaired floor in excellent condition.
Step 10: Final Touches and Maintenance Tips
After completing the repair process and cleaning the tile surface, it’s time to add the final touches and learn some essential maintenance tips to keep your newly repaired floor looking its best for years to come.
Follow these final touches and maintenance tips:
- Inspect the grout lines to ensure they are evenly filled and smooth. If necessary, touch up any areas where the grout may have settled or shrunk during the drying process.
- Apply a grout sealer to protect the grout from stains and moisture. Follow the manufacturer’s instructions for proper application and reapplication intervals.
- Check the caulk around the edges and corners of the tiled area. If it appears cracked or worn, remove the old caulk and apply a fresh bead of color-matched caulk to seal and protect those areas.
- Regularly clean the tile surface with a mild, non-abrasive cleaner to remove dirt and maintain its appearance. Avoid using harsh chemicals or scrub brushes that may damage the tiles or grout.
- Place area rugs or mats at entrances to minimize dirt and debris being tracked onto the tiled floor. This will help prevent scratches and wear on the tiles.
- Avoid dragging heavy furniture or objects across the tiled floor. Use furniture pads or sliders to protect the tiles from scratches and damage.
- Immediately wipe up any spills or stains on the tile surface to prevent them from penetrating the grout or tiles. Use a clean, damp cloth or sponge for prompt cleaning.
- Regularly inspect the tiled floor for any signs of cracks, loose tiles, or grout deterioration. Address any issues promptly to prevent further damage and costly repairs.
- Consider applying a protective sealant to the tiles to enhance their durability and resistance to stains and scratches. Consult with a professional or refer to the manufacturer’s recommendations.
By following these final touches and maintenance tips, you’ll be able to enjoy your newly repaired floor for years to come. Proper care and regular maintenance will preserve the beauty and longevity of your tiled floor.
Congratulations on successfully repairing your cracked floor tile and restoring the beauty of your floor! With the right tools, materials, and steps, you’ve achieved a professional-looking result that will enhance the overall appeal of your space.
Remember, if you encounter any challenges or feel uncertain about the repair process, it’s always advisable to seek assistance from a professional to avoid causing further damage to your flooring.
Enjoy your revitalized and stunning tiled floor!
Conclusion
Repairing a cracked floor tile may seem like a daunting task, but with the right knowledge and tools, it is achievable for homeowners. By following the step-by-step process outlined in this article, you can repair a cracked floor tile and restore the beauty and functionality of your tiled floor.
Throughout this journey, we’ve learned the importance of assessing the damage, gathering the necessary tools and materials, and taking the appropriate steps to remove the cracked tile and prepare the subfloor. We’ve also covered the crucial tasks of applying adhesive, setting the replacement tile, grouting the tile, and cleaning the tile surface.
Additionally, we’ve gained insight into the final touches and maintenance tips necessary to keep your newly repaired floor looking its best for the long term. Regular cleaning, prompt attention to spills and stains, and proper maintenance will help preserve the integrity of the tiles and grout, prolonging their lifespan and keeping the floor in excellent condition.
Remember, while this article provides a comprehensive guide, every repair project may have unique considerations based on the type of tile and extent of damage. If you feel unsure or encounter unexpected challenges during the process, it’s best to consult a professional to ensure the job is done properly.
With the knowledge and guidance provided here, you are equipped to take on the task of repairing a cracked floor tile confidently. Enjoy the satisfaction of a beautifully restored floor and the peace of mind knowing that you’ve successfully tackled this home improvement project.
Now, it’s time to put your newfound expertise into action and bring new life to your cracked floor tiles!
Frequently Asked Questions about How To Repair A Cracked Floor Tile
Was this page helpful?
At Storables.com, we guarantee accurate and reliable information. Our content, validated by Expert Board Contributors, is crafted following stringent Editorial Policies. We're committed to providing you with well-researched, expert-backed insights for all your informational needs.


0 thoughts on “How To Repair A Cracked Floor Tile”