
Articles
How To Fix A Crack In Concrete Floor
Modified: January 5, 2024
Learn how to fix a crack in your concrete floor with these helpful articles. Get step-by-step instructions and expert tips to restore your floor's integrity.
(Many of the links in this article redirect to a specific reviewed product. Your purchase of these products through affiliate links helps to generate commission for Storables.com, at no extra cost. Learn more)
Introduction
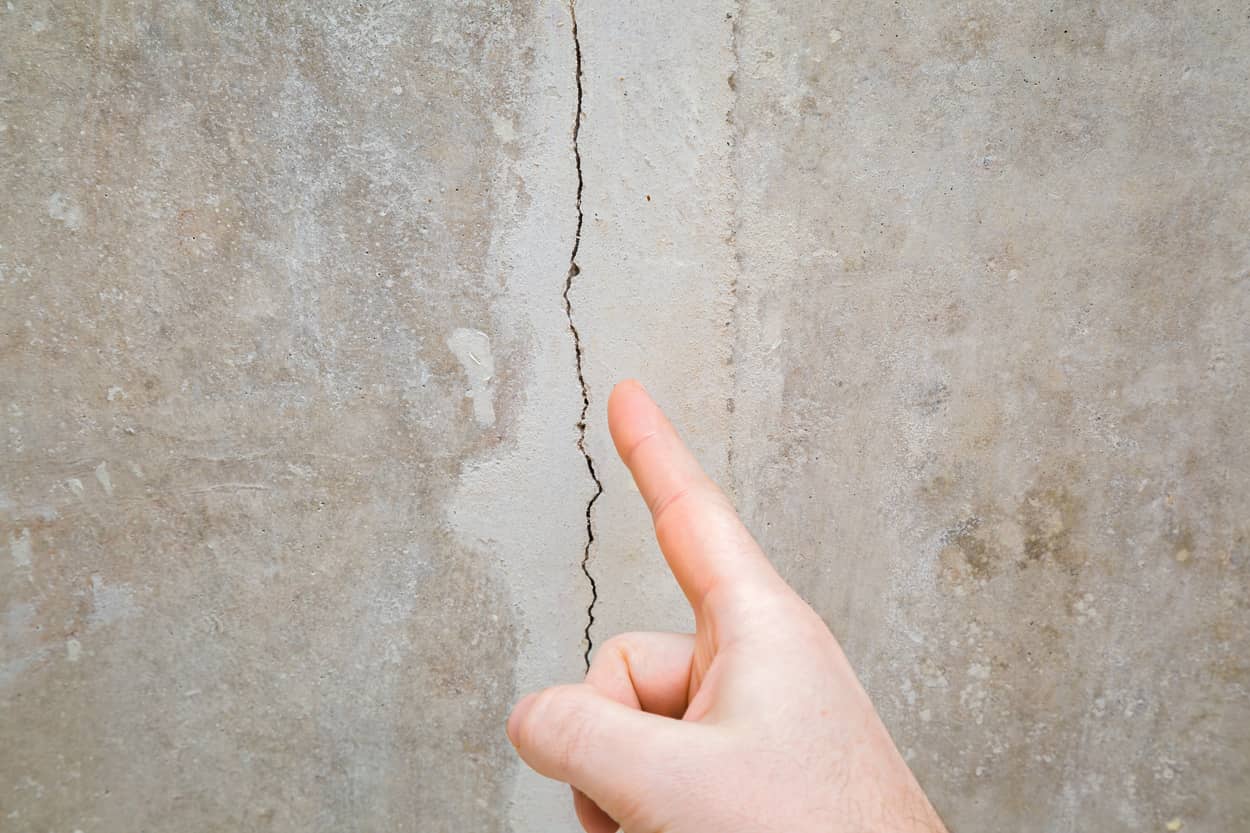
Cracks can be a common problem in concrete floors. Whether caused by settlement, shrinkage, or other factors, cracks can not only be unsightly but also pose potential hazards. Fortunately, fixing a crack in a concrete floor is a relatively straightforward process that can be done with the right materials and tools.
In this article, we will guide you through the step-by-step process of fixing a crack in a concrete floor, ensuring a durable and aesthetically pleasing result. We will cover everything from preparing the area to filling and smoothing the crack. So, roll up your sleeves and let’s get started!
Key Takeaways:
- Proper preparation is crucial for a successful concrete floor crack repair. Clear the area, clean the crack, and protect yourself with safety gear to ensure a durable and aesthetically pleasing result.
- Smoothing, leveling, and allowing the patching compound to cure are essential steps in achieving a seamless finish. Adding finishing touches like sanding and applying sealant enhances the longevity of the repair.
Read more: How To Fix A Cracked Concrete Patio
Materials and Tools Needed
Before you begin repairing the crack in your concrete floor, it’s essential to gather all the necessary materials and tools. Here’s a list of what you’ll need:
- Concrete patching compound
- Concrete bonding agent
- Caulking gun
- Trowel or putty knife
- Wire brush or scraper
- Vacuum cleaner or broom
- Protective gloves
- Safety goggles
- Dust mask
- Water
Make sure you have all these materials and tools on hand before you start the repair process. This will save you time and ensure that you can complete the job without any interruptions.
Step 1: Prepare the Area
Before you can begin fixing the crack in your concrete floor, it’s important to prepare the area properly. This involves a few simple steps:
- Clear the area: Start by removing any furniture, rugs, or debris from the area around the crack. This will ensure that you have plenty of space to work and prevent any obstacles from interfering with the repair process.
- Clean the crack: Use a wire brush or scraper to remove any loose debris, dirt, or old caulking from the crack. This will help create a clean and smooth surface for the patching compound to adhere to. Make sure to thoroughly clean the surrounding area as well.
- Remove dust and residue: Use a vacuum cleaner or broom to remove any remaining dust and residue from the crack and the surrounding area. This will further ensure that the patching compound can bond properly to the concrete surface.
- Protect yourself: It’s important to wear protective gloves, safety goggles, and a dust mask during the preparation process. This will protect you from any potential irritants or harmful particles that may be released.
By taking the time to properly prepare the area, you are setting the foundation for a successful crack repair. It ensures that the patching compound will adhere well to the concrete and provides a clean and safe environment for the repair process.
Step 2: Clean the Crack
After preparing the area, the next step is to clean the crack thoroughly. Cleaning the crack is essential to remove any dirt, debris, or contaminants that may hinder the bonding of the patching compound. Here’s how to clean the crack:
- Use a wire brush or scraper to remove any loose debris, dirt, or old caulking from the crack. Make sure to brush along the crack to dislodge any particles stuck within.
- If the crack is particularly dirty or has stubborn residue, you can use a mild detergent or concrete cleaner and a brush to scrub the crack. Rinse the crack with water afterwards to ensure all cleaning agents are removed.
- Allow the crack to dry completely before proceeding. This may take a few hours, depending on the humidity levels in your area.
- Inspect the crack to ensure that it is clean and free of any remaining debris or contaminants. It’s important to have a clean surface for the patching compound to adhere to.
By cleaning the crack thoroughly, you’re creating an optimal surface for the patching compound to bond with the concrete. This step removes any obstacles that could compromise the overall durability and effectiveness of the repair.
Step 3: Fill the Crack
Now that the crack is clean and dry, it’s time to fill it with a suitable patching compound. This will help restore the integrity of the concrete floor and prevent further damage. Here’s how to fill the crack:
- Apply a concrete bonding agent to the inside walls of the crack. This will help the patching compound adhere better to the concrete surface. Follow the instructions on the bonding agent product for the best application results.
- Using a caulking gun, carefully fill the crack with the concrete patching compound. Start from one end of the crack and work your way to the other, ensuring that the compound completely fills the crack and slightly overflows the surface. This will ensure a solid repair.
- Smooth the surface of the patching compound using a trowel or putty knife. Feather the edges of the compound to blend it with the surrounding concrete surface. This will create a seamless and aesthetically pleasing repair.
It’s important to note that different patching compounds may have specific instructions and cure times. Follow the manufacturer’s recommendations for the best results.
Once the crack is filled and smoothed, allow the patching compound to cure according to the manufacturer’s instructions. This typically takes a few hours to a few days, depending on the type of compound used and the environmental conditions.
By filling the crack with a quality patching compound, you’re effectively repairing the damage and preventing it from spreading. This step is crucial to ensure the long-term durability and functionality of your concrete floor.
Clean the crack with a wire brush, then fill it with a concrete patching compound. Smooth the surface with a trowel and allow it to dry completely before walking on it.
Read more: How To Fix Cracks In A Concrete Patio
Step 4: Smooth and Level the Surface
After filling the crack with the patching compound, it’s important to smooth and level the surface to ensure a seamless finish. This step will enhance the appearance of the repaired area and provide a safe and even surface. Here’s how to smooth and level the surface:
- Use a trowel or putty knife to smooth the surface of the patching compound. Move the trowel or putty knife in a sweeping motion to create an even surface.
- If necessary, add additional patching compound to any areas that are lower than the surrounding surface. Smooth it out with the trowel or putty knife to create a level finish.
- Once the surface is smoothed and leveled, use a sponge or damp cloth to gently wipe away any excess patching compound on the surrounding concrete. This will help blend the repair with the rest of the floor.
- Allow the repaired area to dry according to the manufacturer’s instructions. This may take several hours or even days, depending on the type of patching compound used and the environmental conditions.
By smoothing and leveling the surface, you’re ensuring a visually appealing finish and minimizing any tripping hazards. This step adds the final touch to your crack repair, leaving you with a revitalized concrete floor.
Step 5: Allow the Patch to Cure
After smoothing and leveling the surface, it’s crucial to allow the patching compound to fully cure. Curing is the process by which the compound hardens and reaches its maximum strength. Proper curing ensures the longevity and durability of the repair. Here’s how to allow the patch to cure:
- Read the manufacturer’s instructions on the patching compound’s packaging to determine the recommended curing time. Different compounds may have different curing times, so it’s important to follow the specific guidelines.
- During the curing process, it’s important to protect the repaired area from foot traffic, heavy objects, or excessive stress. Place caution tape or barriers around the area to prevent accidental damage.
- Avoid exposing the repaired area to excessive moisture during the curing process. This can adversely affect the curing time and overall strength of the patching compound.
- Typically, patching compounds take anywhere from a few hours to a few days to fully cure. Make sure to wait the recommended curing time before subjecting the area to regular use or heavy loads.
- While waiting for the patch to cure, periodically inspect the repaired area to ensure that it is maintaining its structural integrity and appearance.
By allowing the patching compound to cure properly, you’re ensuring that the repaired crack retains its strength and effectiveness. This step is crucial for the long-term durability of the repair and will help prevent future cracking or damage.
Step 6: Finishing Touches
Once the patching compound has fully cured, it’s time to add the finishing touches to complete the crack repair. These final steps will help blend the repaired area seamlessly with the rest of the concrete floor. Here’s what you need to do:
- Inspect the repaired area to ensure that it is smooth and level. Use a sandpaper or abrasive pad to gently sand any rough edges or imperfections.
- Clean the repaired area and the surrounding floor to remove any dust or debris that may have accumulated during the curing process.
- If desired, apply a concrete sealant or epoxy coating to the entire floor. This will provide an extra layer of protection, enhance the overall appearance, and help prevent future cracks or damage.
- Allow the sealer or epoxy coating to dry according to the manufacturer’s instructions before resuming regular use of the floor.
- Maintain the repaired area by regularly cleaning and inspecting for any signs of new cracks or damage. Promptly address any issues to prevent further deterioration.
By adding these finishing touches, you’re not only improving the appearance of the repaired area but also enhancing the overall longevity and performance of your concrete floor. These steps will help protect the repaired crack and minimize the risk of future damage.
Conclusion
Fixing a crack in a concrete floor is a task that can be accomplished with the right materials, tools, and techniques. By following the step-by-step process outlined in this article, you can successfully repair a crack in your concrete floor and restore its integrity.
From preparing the area and cleaning the crack to filling it with a quality patching compound and smoothing the surface, each step plays a vital role in ensuring a durable and aesthetically pleasing repair. Allowing the patch to cure properly and adding the finishing touches, such as sanding rough edges and applying sealant, will give your repaired crack a polished and seamless finish.
Remember to wear the appropriate protective gear throughout the process and carefully follow the manufacturer’s instructions for the patching compound and other materials used. Proper preparation and attention to detail are key to achieving a successful crack repair that lasts.
Maintaining your concrete floor and promptly addressing any new cracks or damage will help prevent future issues and prolong the lifespan of your floor. Regular cleaning and inspection will keep your floor in optimal condition and ensure its safety.
By dedicating the time and effort to fix a crack in your concrete floor, you’re not only restoring its appearance but also maintaining its functionality. A well-maintained concrete floor can withstand daily wear and tear, enhancing the overall value and usability of your space.
So, don’t let a crack linger on your concrete floor. Roll up your sleeves, gather the necessary materials and tools, and get ready to give your floor the repair it deserves.
Frequently Asked Questions about How To Fix A Crack In Concrete Floor
Was this page helpful?
At Storables.com, we guarantee accurate and reliable information. Our content, validated by Expert Board Contributors, is crafted following stringent Editorial Policies. We're committed to providing you with well-researched, expert-backed insights for all your informational needs.


0 thoughts on “How To Fix A Crack In Concrete Floor”