Home>diy>Building & Construction>How To Repair Brick Foundation
Building & Construction
How To Repair Brick Foundation
Modified: October 19, 2024
Learn the steps to repair your brick foundation with expert tips and techniques. Enhance the stability of your building construction with our comprehensive guide.
(Many of the links in this article redirect to a specific reviewed product. Your purchase of these products through affiliate links helps to generate commission for Storables.com, at no extra cost. Learn more)
Introduction
When it comes to building construction, the foundation is undoubtedly one of the most critical elements. It provides stability and support to the entire structure, ensuring its durability and safety. However, over time, factors such as settlement, moisture, and natural wear and tear can cause damage to the brick foundation.
Repairing a brick foundation is a complex task that requires careful assessment, planning, and execution. Although it may seem daunting, with the right knowledge and tools, you can successfully restore your brick foundation without the need for professional assistance. In this article, we will guide you through the step-by-step process of repairing a brick foundation, ensuring that your building stands on a sturdy and reliable base.

Before we delve into the repair process, it is essential to understand the importance of regular inspections and maintenance for your building’s foundation. Periodically examining your foundation can help detect early signs of damage, allowing you to address the issue before it worsens. Common signs of foundation damage include cracks in the walls, sloping floors, or doors and windows that no longer close properly.
In this comprehensive guide, we will cover each step involved in repairing a brick foundation, from assessing the damage to applying the finishing touches. By following these steps, you can restore the strength and stability of your building’s foundation, ensuring its longevity and safety for years to come.
Key Takeaways:
- Assessing the extent of damage, gathering the right tools and materials, and meticulously rebuilding the brick foundation are crucial steps in ensuring a successful repair process. Attention to detail and safety are paramount throughout the restoration journey.
- Properly preparing the mortar mix, applying it to the joints, and focusing on finishing touches and cleanup contribute to the stability and visual appeal of the repaired brick foundation. Regular inspections and maintenance are essential for long-term durability.
Read more: How To Parge A Brick Foundation Wall
Step 1: Assessing the Damage
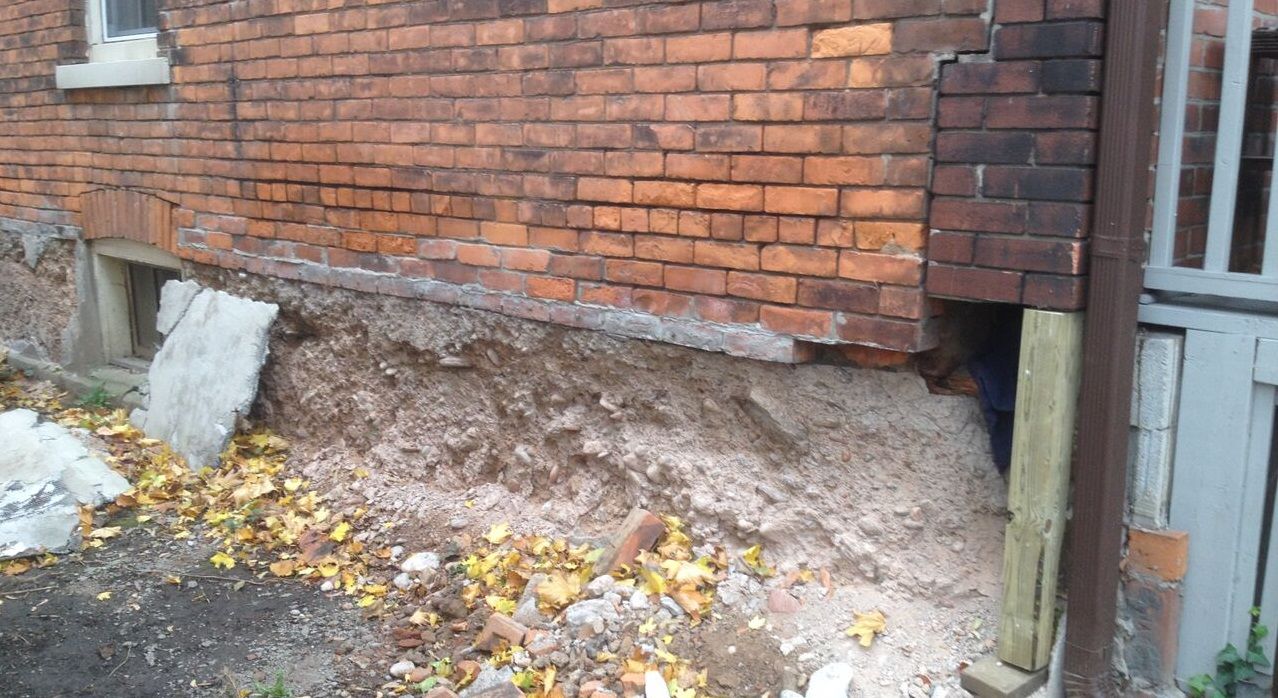
Before you begin repairing your brick foundation, it is crucial to thoroughly assess the extent of the damage. This assessment will help you determine the scope of the repair and the necessary materials and tools needed for the job. Here are the key factors to consider when assessing the damage:
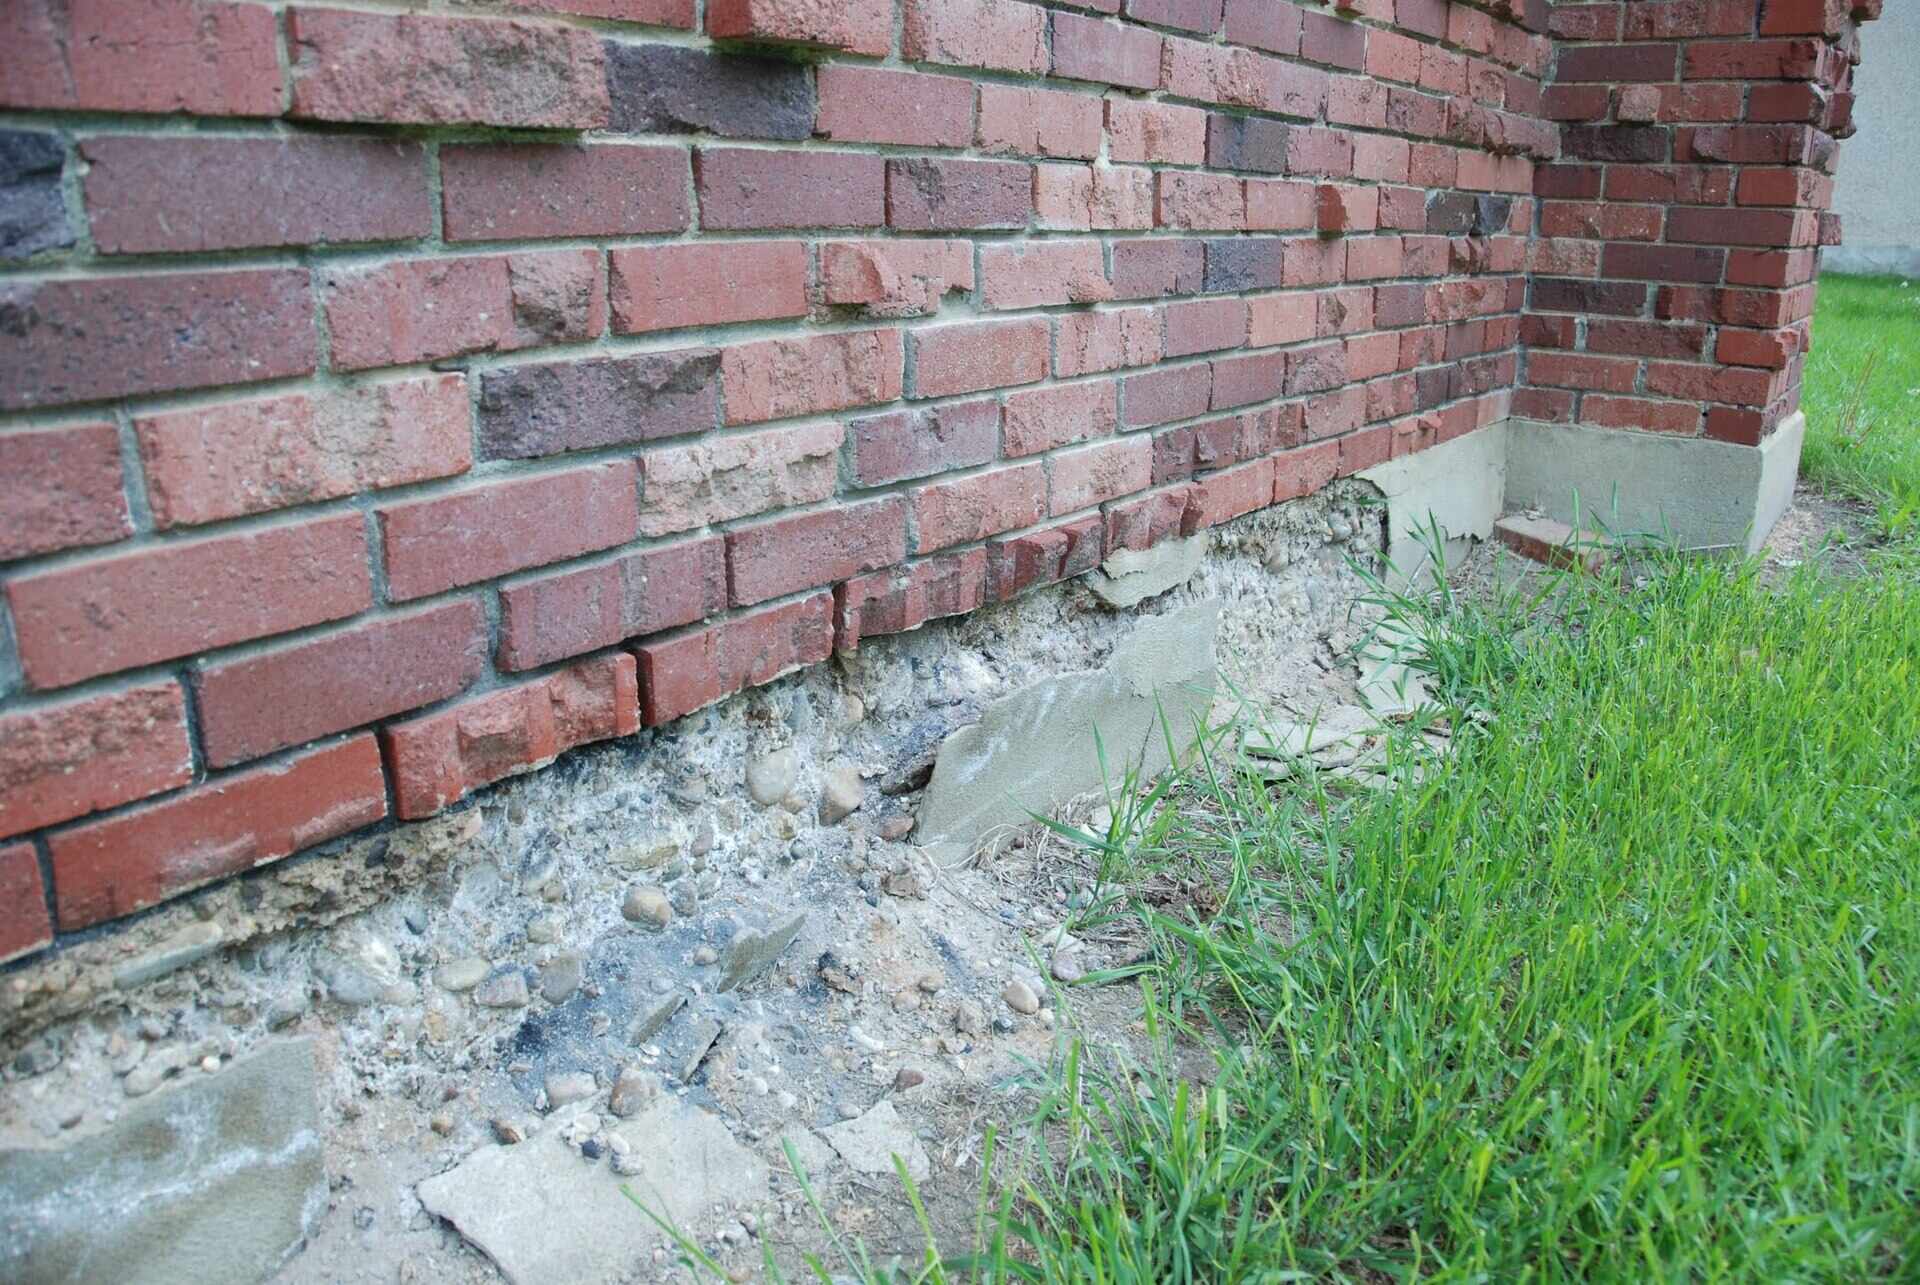
- Inspect for cracks and gaps: Carefully examine the foundation walls for any visible cracks or gaps. Note the size, location, and direction of the cracks. Small hairline cracks may not be a cause for immediate concern, but larger cracks or those that appear to be expanding should be addressed promptly.
- Check for leaning or bulging walls: In some cases, foundation damage may cause the walls to lean or bulge. Use a level to determine if the walls are vertically straight. If you notice any significant deviations, it may indicate structural issues that require attention.
- Look for signs of water damage: Water infiltration can significantly impact the stability of a brick foundation. Inspect the walls for signs of water stains, efflorescence (white powdery substance), or mold growth. These indicators suggest that water is seeping into the foundation, potentially causing further damage.
- Monitor foundation movement: Take note of any shifts or movements in the foundation. This can be indicated by uneven floors, doors or windows that no longer close properly, or cracks in the interior walls. Foundation movement may be caused by soil settling, hydrostatic pressure, or other external factors.
By carefully assessing the damage, you can determine the appropriate repair methods and materials needed for your brick foundation. It is important to remember that extensive or severe foundation damage may require professional assistance or additional structural evaluations. In such cases, consulting with a qualified engineer or contractor can provide valuable insights and guidance for the repair process.
Step 2: Gathering the Necessary Tools and Materials
Once you have assessed the damage to your brick foundation, it’s time to gather the necessary tools and materials for the repair process. Having the right equipment and supplies on hand will ensure a smooth and efficient repair job. Here are the essential tools and materials you’ll need:
- Masonry Hammer and Chisel: These tools are used to remove damaged or loose bricks from the foundation.
- Joint Raker: A joint raker is used to clean out old mortar from the joints between bricks.
- Trowel: A trowel is necessary for applying new mortar and manipulating it when rebuilding the foundation.
- Masonry Brush: This brush is used to clean the foundation surface before applying new mortar.
- Level: A level is essential for ensuring that the new bricks and mortar are aligned and properly installed.
- Mortar Mix: Choose an appropriate mortar mix depending on the condition of your foundation and the climate in your area. You can opt for pre-mixed mortar or mix it yourself using cement, sand, and any necessary additives.
- Brick and Mortar Sealer: This sealer is optional but can be used to enhance the durability and weather resistance of the repaired foundation.
- Safety Gear: Don’t forget to wear safety goggles, gloves, and a dust mask to protect yourself during the repair process.
Before you begin the repairs, ensure that you have all the necessary tools and materials readily available. This will save you time and prevent any interruptions during the repair process. It’s also a good idea to have a clean work area and organize your tools and materials for easy access.
By gathering the right tools and materials, you’ll be well-prepared to tackle the repair process and ensure a successful restoration of your brick foundation. Remember to always prioritize safety and follow proper procedures when using tools and handling mortar to minimize the risk of accidents.
Step 3: Removing Loose or Damaged Bricks
Now that you have assessed the damage and gathered the necessary tools and materials, it’s time to move on to the repair process itself. The first step in repairing a brick foundation is to remove any loose or damaged bricks. Follow these steps to safely and effectively remove the bricks:
- Prepare the work area: Clear away any debris or obstructions around the damaged bricks. This will provide you with a clean and accessible work area.
- Identify and mark the damaged bricks: Inspect the foundation walls and identify the bricks that are loose, cracked, or otherwise damaged. Use a marker or chalk to mark these bricks for removal.
- Protect surrounding bricks: Place a piece of plywood or a protective board against the adjacent bricks to prevent damage to undamaged bricks during the removal process.
- Break the mortar: Use a masonry hammer and chisel to carefully break the mortar joint surrounding the marked brick. Start by gently tapping the chisel to create a groove in the mortar, then gradually increase the force until the mortar breaks away from the brick.
- Remove the brick: Once the mortar is broken, use the chisel and hammer to carefully pry the damaged brick out of the foundation. Take your time to avoid damaging the surrounding bricks or the foundation itself.
- Clean the cavity: After removing the damaged brick, use a brush or a joint raker tool to clean out any remaining mortar from the cavity. This will ensure a clean and secure space for the new brick.
Repeat these steps for each loose or damaged brick in your foundation. It’s important to note that if you encounter structural issues or extensive damage during this process, it is recommended to consult with a professional who can assess and address the underlying problems.
By properly removing the loose or damaged bricks, you are preparing the foundation for the next steps in the repair process. Taking your time and being cautious during this step will help maintain the integrity of the structure and ensure a successful repair of your brick foundation.
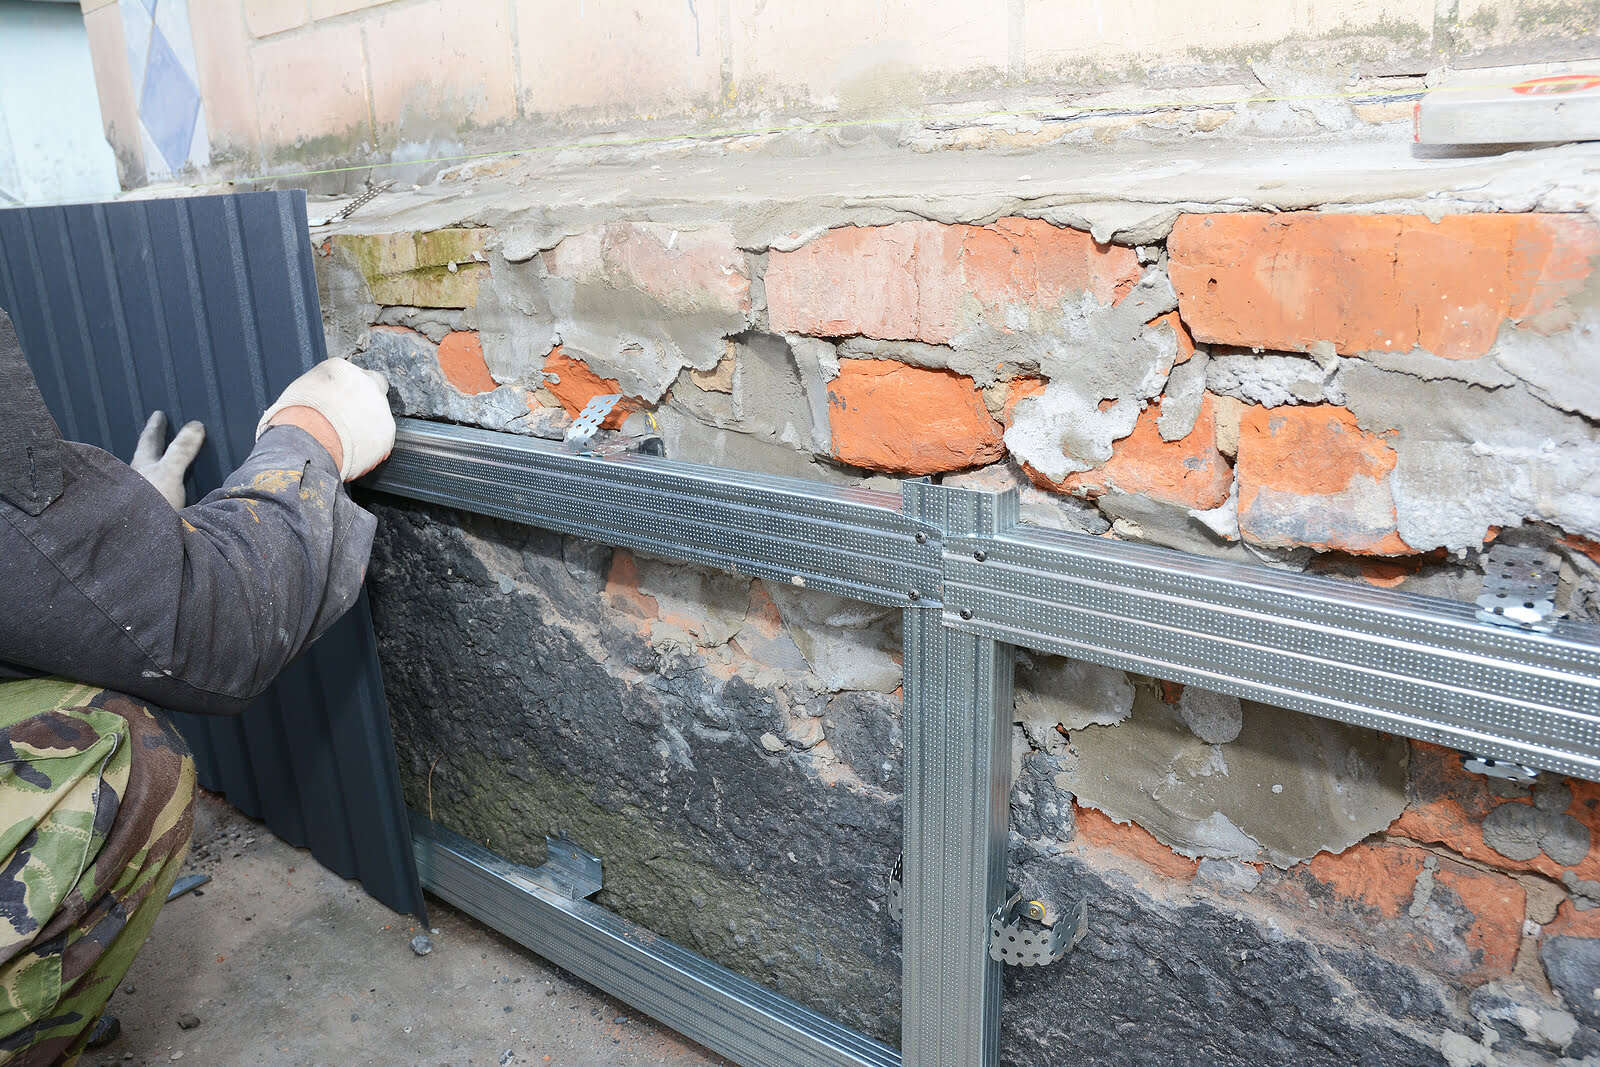
Step 4: Cleaning the Foundation Surface
Once you have removed the loose or damaged bricks from your foundation, it’s important to clean the foundation surface before proceeding with the repair. Cleaning the foundation surface will help ensure proper adhesion of new mortar and provide a clean and stable base for the rebuilt foundation. Here’s how to clean the foundation surface effectively:
- Remove debris: Use a broom or a brush to sweep away any loose dirt, dust, or debris from the foundation surface. This will ensure a clean and smooth surface for the repairs.
- Inspect for remaining mortar: Check the foundation surface and the mortar joints for any remaining old mortar. Use a joint raker or a wire brush to scrape away any remnants of old mortar. Make sure to remove all loose or deteriorated mortar that may hinder the strength and adherence of the new mortar.
- Clean with water: Wet the foundation surface with water using a hose or a spray bottle. This will help remove any remaining dust or dirt and prepare the surface for the application of new mortar.
- Scrub the surface: Use a masonry brush or a scrub brush to gently scrub the wet foundation surface. This will further remove any stubborn dirt or debris and ensure a clean and porous surface for the mortar.
- Allow the surface to dry: After cleaning, allow the foundation surface to air dry completely before proceeding to the next step. This will ensure that the new mortar adheres properly to the surface and prevents any moisture-related issues.
Keeping the foundation surface clean is essential for the long-term stability and durability of your repaired brick foundation. A clean surface promotes proper bonding of the new mortar and helps prevent any issues that may arise from residual contaminants or debris.
By following these steps to clean the foundation surface, you are setting the stage for a successful repair and ensuring that the new mortar will bond securely to the existing structure. Take your time and be thorough in cleaning the foundation surface before moving on to the next steps in the repair process.
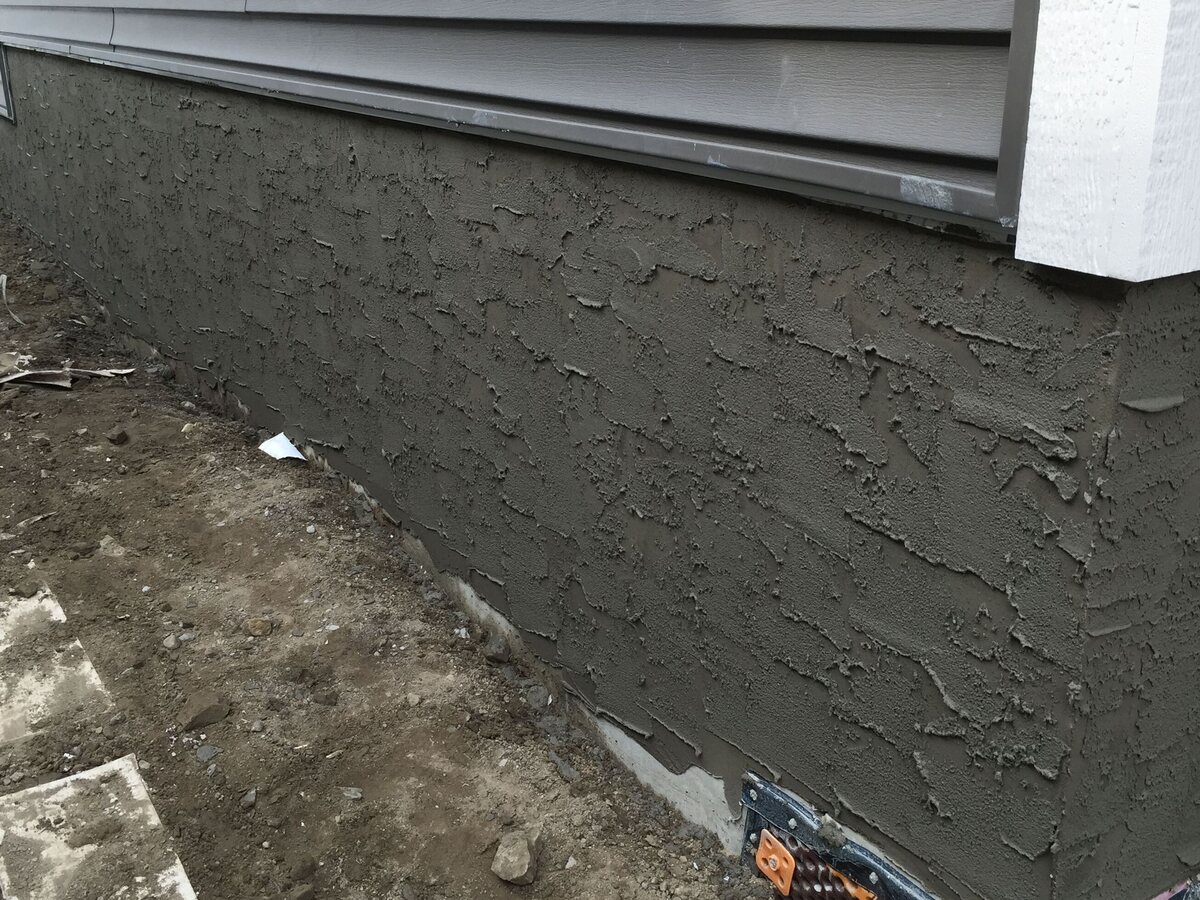
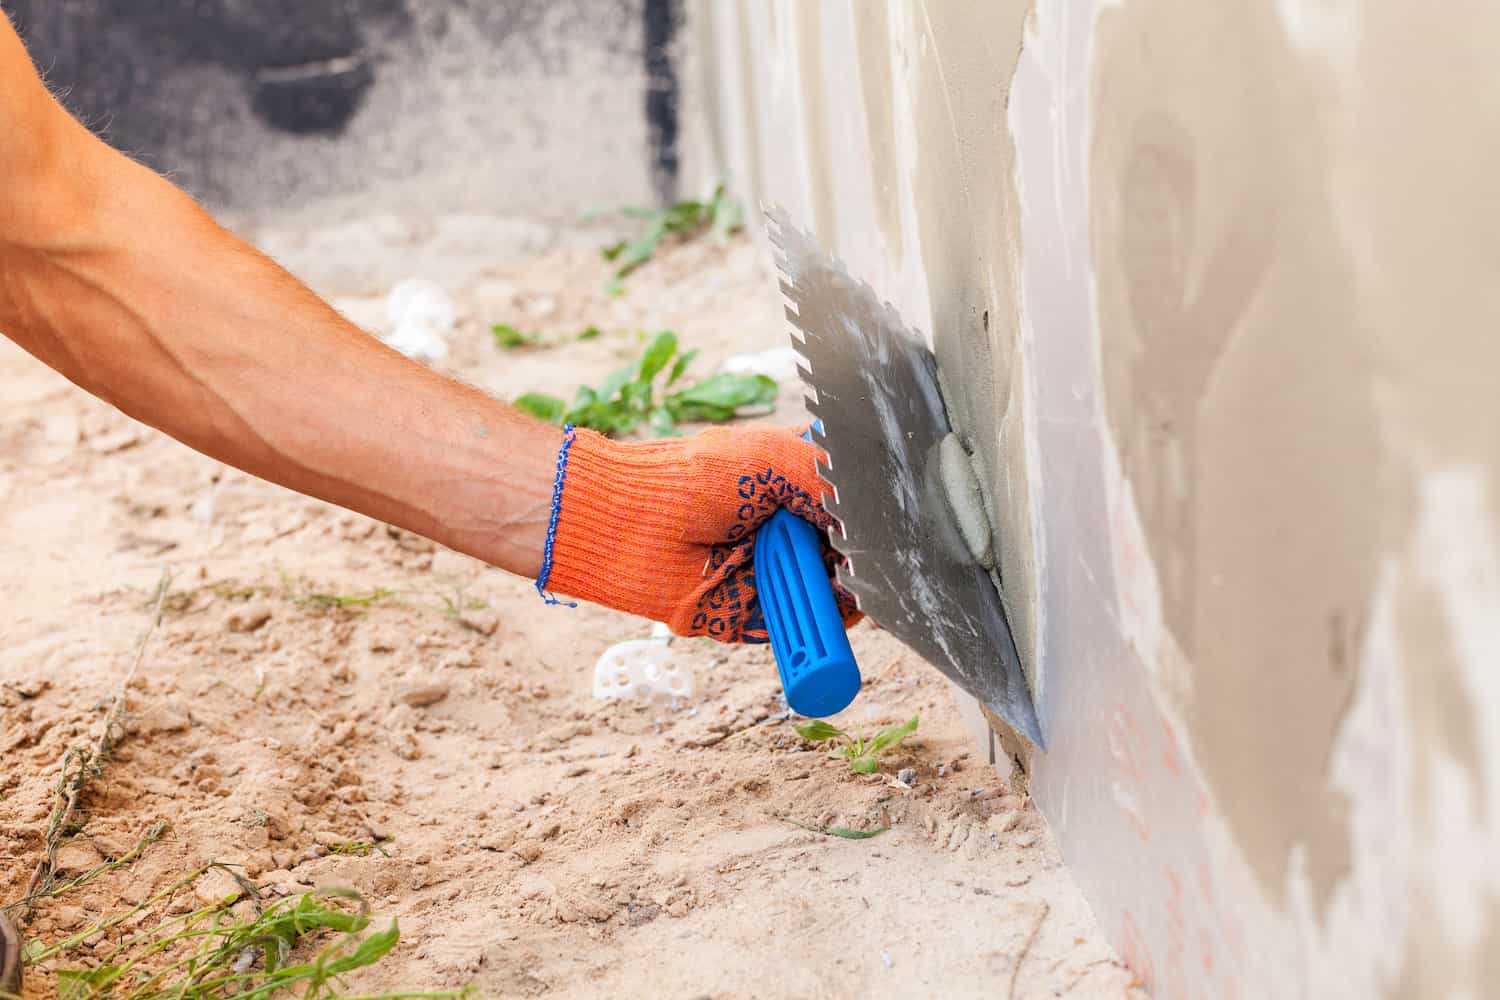
Inspect the foundation for cracks and damage. Use a wire brush to clean the area, then apply a layer of mortar to fill in the cracks. Finally, seal the repaired area with a waterproof sealant.
Read more: How To Build A Brick Chimney
Step 5: Preparing the Mortar Mix
With the foundation surface clean and ready, it’s time to prepare the mortar mix for rebuilding the brick foundation. Mortar is used to bond the bricks together and provide structural support. Here’s a guide on how to prepare the mortar mix:
- Choose the right mortar mix: Select a mortar mix that is suitable for your specific project. The type of mortar needed will depend on factors such as climate, the condition of the foundation, and the type of bricks being used. Consult with a local building supply store or refer to industry guidelines for guidance on the appropriate mortar mix.
- Measure the mortar components: Follow the manufacturer’s instructions to determine the correct ratio of mortar components. Generally, mortar consists of cement, sand, and water. Measure the ingredients carefully to achieve the desired consistency and strength of the mortar.
- Mix the mortar ingredients: In a large container or wheelbarrow, combine the measured amounts of cement and sand. Mix them together using a shovel or a mortar hoe until they are well blended.
- Add water gradually: Slowly add water to the mixture while continuously mixing. Mix until the mortar reaches a consistency similar to thick paste. Avoid adding too much water, as it can weaken the mortar’s integrity.
- Test the mortar consistency: Take a small amount of the mixed mortar and scoop it with a trowel. Turn the trowel upside down, and the mortar should not slide off easily. It should stick to the trowel but still be workable.
It’s crucial to follow the manufacturer’s instructions for the specific mortar mix you are using. Different mortar mixes may have varying ratios and requirements, so refer to the packaging or consult the manufacturer to ensure proper preparation.
By properly preparing the mortar mix, you will have a strong and cohesive material to rebuild the brick foundation. Take your time during this step to ensure that the mortar mix is of the correct consistency and properly mixed, as it will play a significant role in the structural integrity of your repaired foundation.
Step 6: Rebuilding the Foundation with New Bricks
With the mortar mix prepared, you are now ready to rebuild the brick foundation. This step involves laying new bricks in place of the removed or damaged ones. Follow these steps for a successful rebuilding process:
- Apply mortar to the foundation: Use a trowel to apply a layer of mortar to the foundation surface where the new brick will be placed. Ensure that the mortar layer is evenly spread and covers the area where the brick will sit.
- Position the new brick: Carefully place the new brick onto the mortar, pressing it firmly into place. Make sure the brick is aligned with the surrounding bricks and sits flush with the rest of the foundation.
- Check for level: Use a level to ensure that the new brick is horizontally and vertically level. Adjust as necessary by tapping gently with a rubber mallet or by adding or removing mortar.
- Continue laying bricks: Repeat the process of applying mortar, positioning the brick, and checking for level for each new brick. Keep a consistent mortar joint thickness between the bricks for a uniform appearance.
- Leave room for expansion: Leave a small gap, typically 1/4 inch, between bricks to allow for expansion and contraction due to temperature changes. This will help prevent future cracking or damage.
- Remove excess mortar: As you lay each brick, use a trowel to scrape away any excess mortar that squeezes out from the joints. This will ensure a clean and neat appearance.
- Allow the mortar to cure: Leave the newly laid bricks undisturbed for the recommended curing time specified by the manufacturer. This typically ranges from 24 to 48 hours, but refer to the product guidelines for precise instructions.
Take your time during the rebuilding process and make sure each brick is properly positioned and aligned. Remember to maintain a consistent mortar joint thickness and remove excess mortar to achieve a professional finish.
By carefully and meticulously rebuilding the foundation with new bricks, you are restoring the structural integrity of your brick foundation. This step requires attention to detail and precision to ensure a solid and stable foundation for your building.
Step 7: Applying Mortar to the Joints
Now that you have successfully laid the new bricks in place, it’s time to apply mortar to the joints between the bricks. This step is crucial for the stability and durability of your repaired foundation. Follow these steps to ensure proper mortar application:
- Prepare the mortar: Check the consistency of the mortar mix you prepared earlier. If it has started to dry out, mix it again to attain the desired workability.
- Load the mortar: Using a pointing trowel, load a small amount of mortar onto the edge of the trowel. This will make it easier to transfer the mortar to the joints.
- Apply the mortar: Starting from one end of the brick wall, use the point of the trowel to push the mortar into the joints. Fill the joint with mortar, ensuring it is completely filled from the bottom to the top.
- Tool the mortar: After applying the mortar, use a jointing tool or a striking iron to shape and finish the mortar joints. This helps compact the mortar and create a clean and smooth surface.
- Smooth the joints: With a slightly damp sponge or a brush, gently smooth the surface and remove any excess mortar. This will give a neat and uniform appearance to the joints.
- Continue the process: Move along the brick wall, applying mortar and tooling the joints systematically. Work in small sections at a time to ensure the mortar remains workable.
- Wipe away excess mortar: As you go, frequently clean off any excess mortar from the brick faces using a damp sponge or a trowel. This will prevent the mortar from drying and staining the bricks.
- Allow the mortar to cure: Let the mortar cure for the recommended time specified by the manufacturer. This can range from 24 to 48 hours, but refer to the product guidelines for accurate information.
Applying mortar to the joints is an essential step in the repair process as it provides strength and stability to the brick foundation. Taking your time to apply the mortar neatly and evenly ensures a secure bond between the bricks and creates a visually appealing finish.
By following these steps and exercising precision in applying mortar to the joints, you are completing a crucial element of the repair process. Properly filling and tooling the mortar joints will contribute to the overall strength and integrity of your brick foundation.
Step 8: Finishing Touches and Cleanup
As you near the completion of the brick foundation repair, it’s important to focus on the finishing touches and perform a thorough cleanup. This final step will help ensure a polished and professional outcome. Follow these steps for the finishing touches and cleanup process:
- Inspect the repaired area: Take a step back and carefully examine the repaired brick foundation. Check for any visible inconsistencies, excess mortar, or areas that require additional attention.
- Touch up mortar joints: If you notice any gaps or areas where the mortar is uneven, use a pointing trowel to carefully fill in these areas. This will improve the overall appearance and structural integrity of the foundation.
- Smooth the mortar joints: Using a jointing tool or a striking iron, go over the mortar joints once more to ensure they have a consistent and uniform appearance. This will create a professional finish.
- Clean off excess mortar: Before the mortar fully cures, gently scrape off any residual mortar on the brick faces using a trowel or a scraper. Be careful not to damage the fresh mortar joints or dislodge any bricks.
- Cleanup the work area: Remove any debris, tools, and equipment from the work area. Dispose of old bricks, loose mortar, and other waste materials in a proper and responsible manner.
- Final cleaning: Use a brush or a damp cloth to wipe down the repaired brick foundation. This will remove any dust or residue and give the repaired area a clean and presentable appearance.
- Allow for curing: Give the repaired brick foundation ample time to cure and fully set before subjecting it to any additional stress or loads. Consult the mortar manufacturer’s guidelines for the recommended curing time.
- Inspect the final result: Once the mortar has fully cured, take a final inspection of the repaired brick foundation. Ensure that the bricks are secure, the mortar joints are solid, and the overall appearance is satisfactory.
By paying attention to the finishing touches and performing a thorough cleanup, you are ensuring a professional and aesthetically pleasing repair of your brick foundation. Taking the time to address any imperfections and leaving the work area clean and tidy will contribute to the long-term durability and visual appeal of the repaired foundation.
Completing these final steps brings you to the end of the repair process, and you can now enjoy the confidence of a stable and restored brick foundation for your building.
Read more: How To Repair Brick Chimney
Conclusion
Repairing a brick foundation is a task that requires careful assessment, meticulous execution, and attention to detail. By following the step-by-step process outlined in this guide, you can successfully restore the stability and durability of your building’s foundation.
Throughout the process, it is important to assess the extent of the damage, gather the necessary tools and materials, and remove any loose or damaged bricks. Cleaning the foundation surface and preparing the mortar mix are crucial steps that set the stage for a successful repair.
Rebuilding the foundation with new bricks and applying mortar to the joints ensures a strong and secure structure. The finishing touches and cleanup process are the final steps that contribute to the overall appearance and quality of the repaired brick foundation.
Remember, safety is paramount throughout the repair process. Don’t hesitate to seek professional assistance or consult with an engineer if you encounter structural issues or extensive damage that requires further evaluation.
As you complete the repair, take pride in the knowledge that you have successfully restored and preserved the foundation of your building. A solid brick foundation provides the necessary stability to ensure the longevity and safety of the entire structure.
Regular inspections and maintenance of your foundation are crucial to prevent further damage. Pay attention to warning signs such as cracks, leaning walls, or water infiltration, and address any issues promptly.
By following the guidelines provided in this article, you can confidently tackle the repair of your brick foundation. Remember, patience, precision, and proper technique are key to achieve a successful outcome. With your repaired brick foundation, your building will have a solid and reliable base for years to come.
Frequently Asked Questions about How To Repair Brick Foundation
Was this page helpful?
At Storables.com, we guarantee accurate and reliable information. Our content, validated by Expert Board Contributors, is crafted following stringent Editorial Policies. We're committed to providing you with well-researched, expert-backed insights for all your informational needs.


0 thoughts on “How To Repair Brick Foundation”