Home>diy>Building & Construction>How To Repair Foundation Wall
Building & Construction
How To Repair Foundation Wall
Modified: January 3, 2024
Learn the best techniques for repairing foundation walls in building construction. Discover step-by-step instructions to fix cracks and prevent further damage.
(Many of the links in this article redirect to a specific reviewed product. Your purchase of these products through affiliate links helps to generate commission for Storables.com, at no extra cost. Learn more)
Introduction
Welcome to our comprehensive guide on how to repair a foundation wall. The foundation wall is an integral part of any building, providing essential support and stability. However, over time, these walls can develop cracks or other damage that compromises their structural integrity.
Repairing a foundation wall is not a task to be taken lightly. It requires careful assessment, proper tools, and materials, as well as a step-by-step approach. In this article, we will explore the signs of foundation wall damage, how to assess the severity of the damage, and provide a detailed guide on how to repair the wall.
If you notice any signs of foundation wall damage, such as cracks, bowing, or water infiltration, it is essential to address the issue promptly. Ignoring the problem can lead to more significant structural issues and costly repairs in the future. By following the steps outlined in this guide, you can restore the integrity of your foundation wall and ensure the long-term stability of your building.
Before we dive into the repair process, let’s explore some of the common signs that indicate foundation wall damage. Understanding these signs will help you identify any potential issues and take appropriate action.
Key Takeaways:
- Properly repairing a foundation wall involves thorough assessment, gathering of necessary tools and materials, and step-by-step repair processes, including epoxy or polyurethane injection, crack and hole repair, reinforcement, and waterproofing.
- Regular maintenance and inspections are crucial for ensuring the longevity and effectiveness of foundation wall repairs, as well as for detecting potential issues early on. Seeking professional expertise for extensive damage is highly recommended.
Read more: How To Parge A Brick Foundation Wall
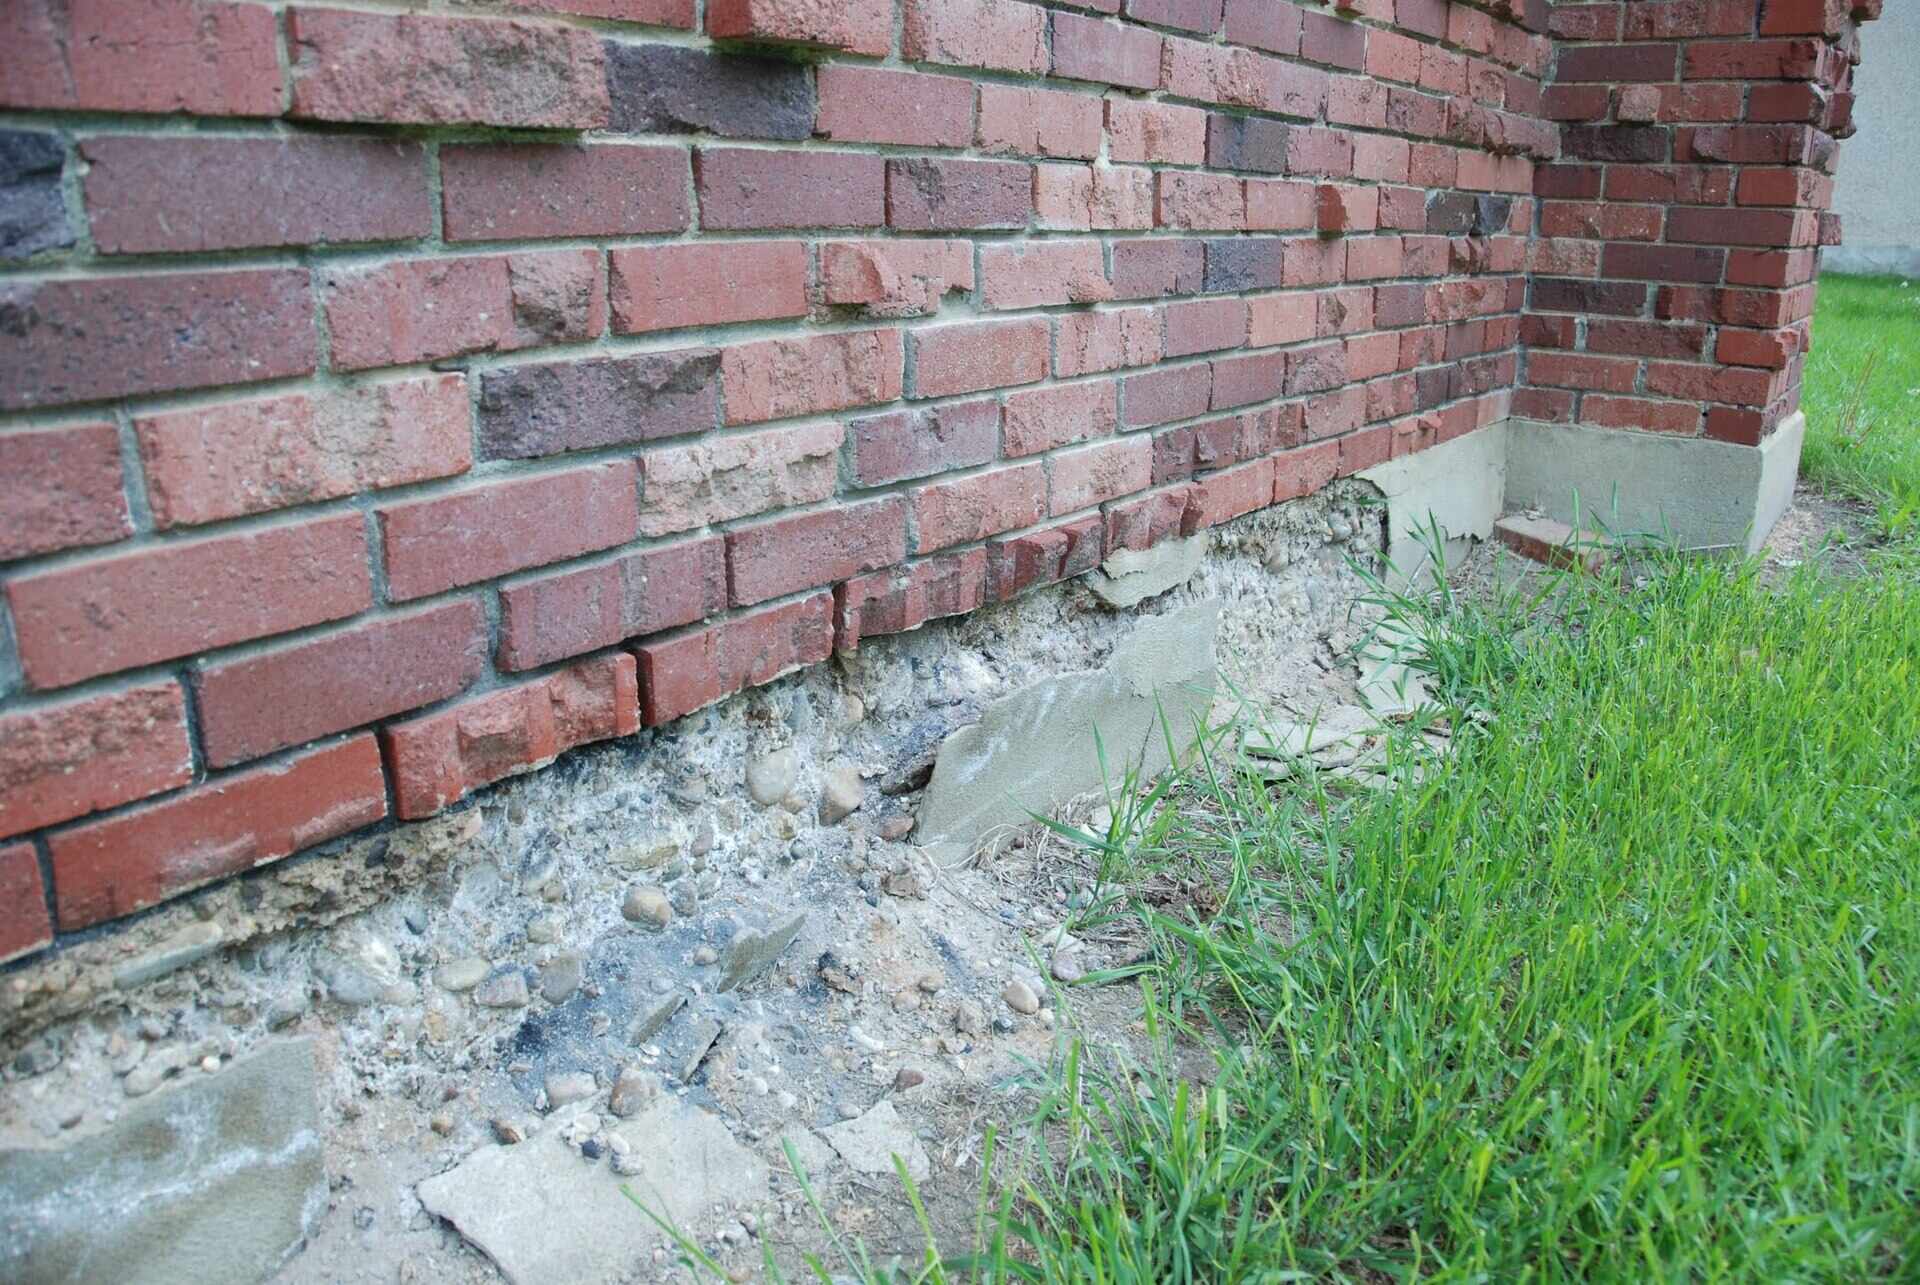
Signs of Foundation Wall Damage
Recognizing the signs of foundation wall damage is crucial in addressing the issue before it worsens. Here are some common signs that indicate potential problems with your foundation wall:
- Cracks: One of the most obvious signs of foundation wall damage is the presence of cracks. These cracks may be vertical, horizontal, or diagonal and can vary in size and severity. Pay close attention to any cracks that are wider than 1/8 inch or are accompanied by other signs of damage.
- Bowing or Bulging Walls: If you notice that your foundation wall is bowing or bulging outward, it indicates significant structural issues. This is typically caused by excessive pressure from the soil or water surrounding the foundation.
- Water Infiltration: Wet spots or water seepage in the basement can be a sign of foundation wall damage. This may occur due to cracks or gaps in the walls, allowing water to penetrate and cause further deterioration.
- Uneven or Sagging Floors: If the floors inside your building are uneven or appear to be sagging, it could be an indication of foundation issues. As the foundation wall settles or shifts, it can cause the floors to become unlevel.
- Sticking Doors and Windows: Difficulty in opening or closing doors and windows is a common sign of foundation wall damage. This occurs when the shifting or settling of the foundation causes misalignment, making it challenging to operate these fixtures smoothly.
It’s important to note that these signs may not always be immediately apparent. Regularly inspecting your foundation walls for any changes or new developments can help you catch potential issues early on.
If you notice any of these signs, it’s critical to assess the severity of the damage before attempting any repairs. The next section will guide you through the process of evaluating the extent of the foundation wall damage.
Assessing the Severity of the Damage
Before embarking on the repair process, it’s important to assess the severity of the damage to your foundation wall. This will help determine the appropriate repair methods and materials required. Here are some steps to follow when assessing the extent of the damage:
- Visual Inspection: Start by visually examining the foundation wall for any visible signs of damage, such as cracks, bulges, or water infiltration. Note the size, length, and location of the cracks to better understand the scope of the problem.
- Measuring Cracks: Use a measuring tape or ruler to measure the width and depth of the cracks. Pay attention to any cracks wider than 1/8 inch, as they may indicate more significant structural issues. Additionally, measure the length of the cracks to determine if they extend into other areas of the wall.
- Monitoring Crack Movement: If possible, monitor the cracks over a period of time to see if they are stable or if they continue to worsen. Document any changes in the size, length, or direction of the cracks. This information will be helpful when seeking professional assistance or deciding on appropriate repair methods.
- Checking for Structural Issues: Assess if there are any other visible structural problems, such as bowing or bulging walls, uneven floors, or misaligned doors and windows. These issues may indicate more extensive damage to the foundation wall that requires immediate attention.
- Consulting a Professional: If you are unsure about the severity of the damage or lack the expertise to assess it accurately, it is recommended to consult a professional foundation contractor or structural engineer. They can provide a more comprehensive evaluation and recommend the best course of action.
By thoroughly assessing the severity of the damage, you can make informed decisions regarding the repair process. Remember that some foundation wall repairs may require specialized expertise and professional assistance, especially for severe or structural issues. Now that you have assessed the damage, let’s move on to the next section, which covers the necessary tools and materials for the repair job.
Gathering the Necessary Tools and Materials
Before you begin repairing your foundation wall, it’s important to gather all the necessary tools and materials. Having everything prepared in advance will ensure a smoother and more efficient repair process. Here is a list of essential tools and materials you may need:
Tools:
- Protective Gear: Safety should be your top priority. Make sure to have safety goggles, gloves, and a dust mask to protect yourself during the repair process.
- Hammer and Chisel: These tools are used to remove loose debris from the cracks and create clean edges for better adhesion of repair materials.
- Wire Brush: A wire brush is useful for cleaning the surface of the foundation wall, removing loose particles, dirt, and debris.
- Power Drill and Bits: If you’re planning to use epoxy or polyurethane injection for crack repair, a power drill and suitable bits will be necessary to create injection ports.
- Trowel and Putty Knife: These tools are used for applying repair materials, smoothing surfaces, and creating a uniform finish.
- Level: A level will help you ensure that repaired areas are flat and aligned properly.
- Caulking Gun: If you’re using a caulk or sealant for crack repair, a caulking gun will be needed for precise application.
- Concrete Patching Compound: Depending on the extent of the damage, you may need a concrete patching compound to fill larger cracks or holes in the foundation wall.
- Epoxy or Polyurethane Injection Kit: These kits are used for injecting structural epoxy or polyurethane into cracks to reinforce and repair the foundation wall.
- Waterproofing Coating: To protect the repaired area and prevent future water infiltration, a waterproofing coating can be applied as a final step.
Materials:
- Cement: Depending on the repair method, you may need cement or mortar mix for patching cracks or holes in the foundation wall.
- Epoxy or Polyurethane Injection Material: These materials are used for structural crack repair and reinforcement.
- Caulk or Sealant: A high-quality caulk or sealant is required to seal smaller cracks and prevent water penetration.
- Waterproofing Coating: A waterproofing coating is necessary to protect the repaired area and ensure long-term durability.
Ensure that you have all the required tools and materials before starting the repair process. Running out of supplies mid-way can be inconvenient and delay the completion of the project. With everything prepared, you can proceed to the next section, which covers the preparation of the work area.
Preparing the Work Area
Properly preparing the work area is essential for a successful foundation wall repair. Taking the time to prepare the area will ensure that it is clean, safe, and ready for the repair process. Here are the steps to follow when preparing the work area:
- Clean and Clear the Area: Begin by removing any objects, furniture, or debris near the foundation wall. This will provide you with ample space to work and minimize the risk of damage or obstruction during the repair process.
- Protect Adjacent Surfaces: Cover any nearby surfaces, such as floors and adjacent walls, with plastic sheets or drop cloths. This will help protect them from dust, debris, and potential damage during the repair work.
- Safety Measures: Ensure that you have proper ventilation in the work area by opening windows or using fans. If you’re working in a confined space, consider using a dust extraction system or wearing a respirator mask to protect yourself from any harmful particles.
- Secure Access Points: Close and secure any doors, windows, or vents that lead to the work area. This will prevent dust or debris from spreading to other parts of the building and ensure a clean and controlled work environment.
- Provide Adequate Lighting: Make sure you have sufficient lighting in the work area to clearly see the damaged areas and perform the repairs effectively. If needed, use portable work lights or additional light sources to illuminate the space.
- Prepare Mixing Areas: If you’re using cement or mortar mix for patching, prepare a mixing area with a clean bucket or container. Follow the manufacturer’s instructions for mixing ratios and ensure you have the necessary tools, such as a trowel or mixing paddle, ready for use.
- Keep Safety Precautions in Mind: Always prioritize safety during the preparation and repair process. Wear appropriate protective gear, such as gloves, safety goggles, and a mask, to protect yourself from any potential hazards.
By thoroughly preparing the work area, you create a clean and safe environment for the foundation wall repair. This sets the stage for a more effective and efficient repair process. With the work area ready, you can now move on to cleaning and clearing the foundation wall before applying the necessary repairs.
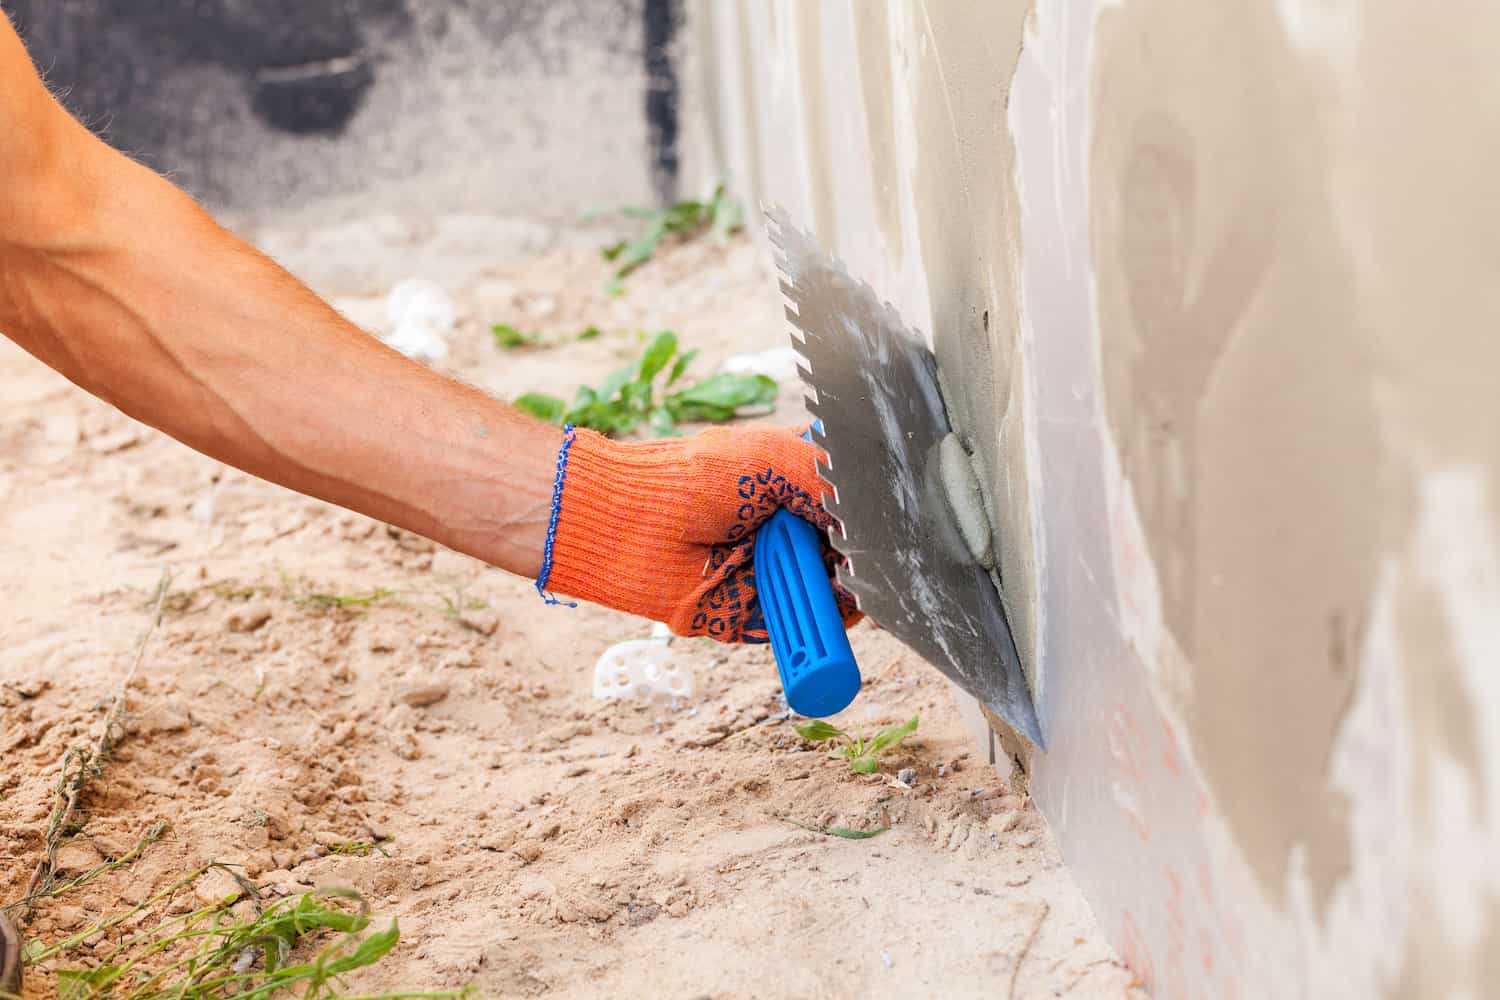
Cleaning and Clearing the Foundation Wall
Before you can start repairing your foundation wall, it is crucial to clean and clear the surface. This step ensures proper adhesion of repair materials and allows for a smooth and durable finish. Here is how you can clean and clear the foundation wall:
- Remove Loose Debris: Start by using a wire brush, broom, or vacuum cleaner to remove any loose debris, dirt, or dust from the surface of the foundation wall. Pay close attention to the cracks and damaged areas, ensuring they are free of any loose particles.
- Scrape off Old Sealants or Paint: If there are old sealants or paint on the foundation wall, use a scraper or a wire brush to remove them. It’s essential to have a clean and bare surface for the best adhesion of repair materials.
- Repair Small Cracks: Use a hammer and chisel to widen small cracks slightly. This will help create clean edges for better adhesion. Remove any loose fragments or debris from the cracks using a wire brush or a vacuum cleaner.
- Power Wash if Necessary: If the foundation wall is heavily soiled or stained, consider using a power washer to remove stubborn dirt and grime. Follow the manufacturer’s instructions for safe and proper use of the power washer.
- Dry the Surface: Allow the foundation wall to dry completely before proceeding with any repairs. This will ensure that the repair materials properly adhere to the surface and provide long-lasting results.
- Inspect for Mold or Mildew: While cleaning the foundation wall, keep an eye out for any signs of mold or mildew. If you come across any, it is crucial to address the issue before proceeding with the repairs. Consult with a professional if necessary for proper mold remediation.
By thoroughly cleaning and clearing the foundation wall, you create an optimal surface for the repair materials to adhere to. This step helps ensure a strong bond, preventing future damage and contributing to the long-term stability of the wall. Once the wall is clean and dry, you can proceed with the appropriate repair method, whether it’s using epoxy or polyurethane injection, patching cracks, or reinforcing the wall.
Applying Epoxy or Polyurethane Injection
When it comes to repairing foundation wall cracks, one effective method is to use epoxy or polyurethane injection. These materials help reinforce the structure and prevent further damage. Here’s a step-by-step guide on applying epoxy or polyurethane injection:
- Prepare the Crack: Clean the crack thoroughly using a wire brush or vacuum cleaner to remove any loose debris. Ensure the crack is dry before proceeding with the injection.
- Create Injection Ports: Using a power drill fitted with an appropriate bit, create small holes along the crack at regular intervals, typically 6 to 8 inches apart. These holes will act as injection ports for the epoxy or polyurethane.
- Insert the Injection Ports: Insert the injection ports into the holes, making sure they fit tightly and are flush with the surface of the wall. These ports will allow you to inject the epoxy or polyurethane into the crack.
- Mix the Epoxy or Polyurethane: Follow the manufacturer’s instructions to prepare the epoxy or polyurethane material. It’s important to mix it thoroughly and in the correct proportions to ensure proper curing and bonding.
- Start Injecting: Begin injecting the epoxy or polyurethane into the first injection port using a caulk gun or specialized injection tool. Slowly fill the crack from the bottom up, continuing with the other injection ports until the crack is fully filled.
- Monitor the Injection: Watch the crack closely as you inject the material to ensure it fills the entire crack and doesn’t leak from the sides. If necessary, apply additional material at the injection ports to ensure complete coverage.
- Allow Curing: Let the epoxy or polyurethane cure as per the manufacturer’s instructions. This process may take a few hours or longer, depending on the specific product and environmental conditions.
- Remove Injection Ports: Once the material has cured, carefully remove the injection ports from the wall using a hammer or chisel. Smooth the surface of the repaired area using a putty knife or trowel for a clean finish.
Epoxy injection is ideal for structural crack repairs, while polyurethane injection works best for sealing non-structural cracks and preventing water infiltration. The chosen material will depend on the type and severity of the crack. It’s important to follow the manufacturer’s instructions and consult with professionals if you’re unsure about the right approach.
Now that you’ve successfully injected the epoxy or polyurethane, you can move on to repairing any remaining cracks and holes in the foundation wall.
Inspect your foundation regularly for cracks, water damage, or bulging. Address any issues promptly to prevent further damage.
Read more: How To Stucco A Foundation
Repairing Cracks and Holes
After applying epoxy or polyurethane injection to address structural cracks, it’s important to repair any remaining cracks and holes in the foundation wall. This step will ensure a smooth and seamless finish. Here’s a step-by-step guide on repairing cracks and holes:
- Inspect and Prepare the Cracks and Holes: Assess the remaining cracks and holes to determine their size and depth. Use a hammer and chisel to widen and clean the cracks, and remove any loose debris or fragments.
- Mix the Repair Material: Follow the manufacturer’s instructions to prepare the appropriate repair material, whether it’s cement, mortar mix, or a specialized patching compound. Ensure a proper mixture for optimal adhesion and strength.
- Apply the Repair Material: Using a putty knife or trowel, apply the repair material into the cracks and holes, filling them completely. Smooth the surface and ensure it is level with the surrounding wall.
- Work in Small Sections: If you’re repairing larger cracks or holes, it’s advisable to work in small sections rather than trying to fill them all at once. This will allow for better control and ensure proper adhesion.
- Blend with the Surrounding Wall: As you apply the repair material, take care to blend it smoothly with the rest of the foundation wall. This will create a seamless transition and improve the overall appearance of the repaired area.
- Allow for Proper Curing: Give the repair material sufficient time to cure, following the manufacturer’s instructions. Avoid disturbing or applying pressure to the repaired areas until they are fully cured to ensure the best results.
- Inspect and Make Necessary Touch-Ups: Once the repaired areas have cured, inspect them for any imperfections or inconsistencies. If needed, apply additional layers of repair material and smooth the surface for a flawless finish.
- Consider Waterproofing: To further protect the repaired areas and prevent future damage, consider applying a waterproofing coating or sealant. This will help keep moisture out and maintain the integrity of the foundation wall.
Remember, the specific repair material and techniques may vary depending on the type and severity of the cracks or holes. Ensure that you follow the manufacturer’s instructions and consult professionals if you’re unsure about the best approach.
With the cracks and holes repaired, the foundation wall is now structurally sound. However, reinforcing the wall can provide additional strength and stability, especially in cases where the damage was extensive. Let’s explore how to reinforce the foundation wall in the next section.
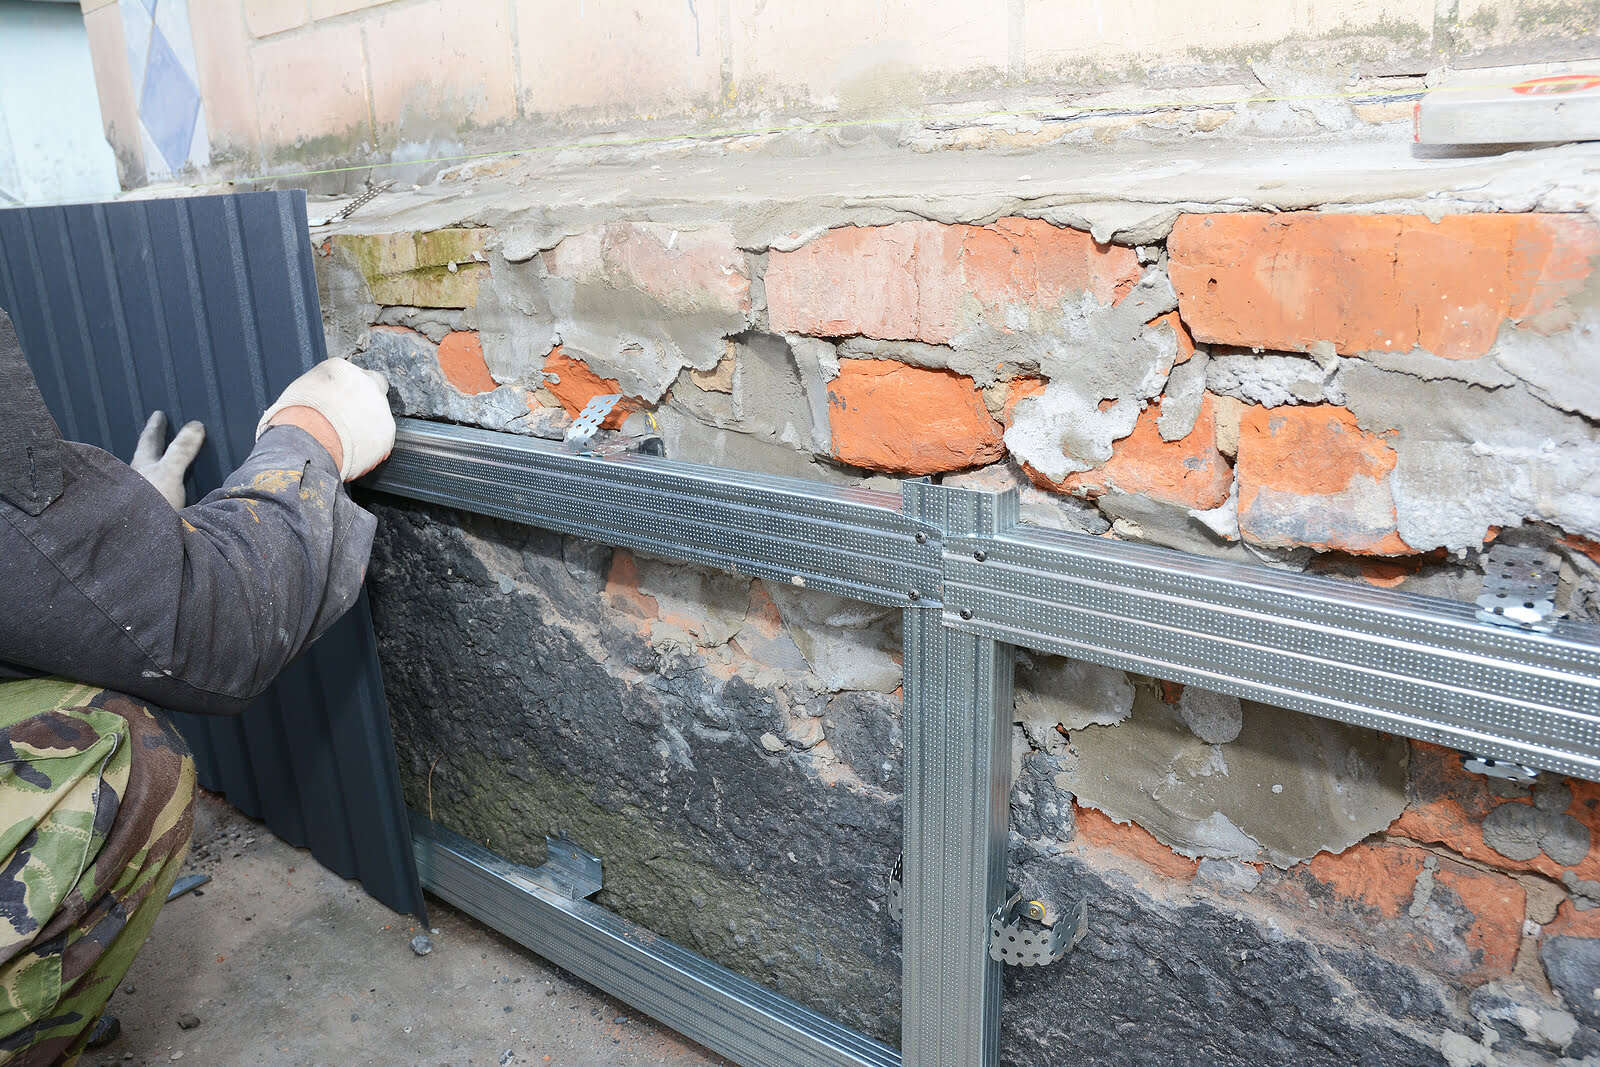
Reinforcing the Foundation Wall
Reinforcing the foundation wall is an important step in ensuring long-term stability and preventing future damage. This process helps distribute the load more evenly and strengthens the wall against external pressure. Here’s a step-by-step guide on reinforcing the foundation wall:
- Assess the Structural Needs: Before reinforcing the foundation wall, it’s crucial to evaluate its structural needs. This may involve consulting with a professional engineer or foundation specialist to determine the appropriate reinforcement method.
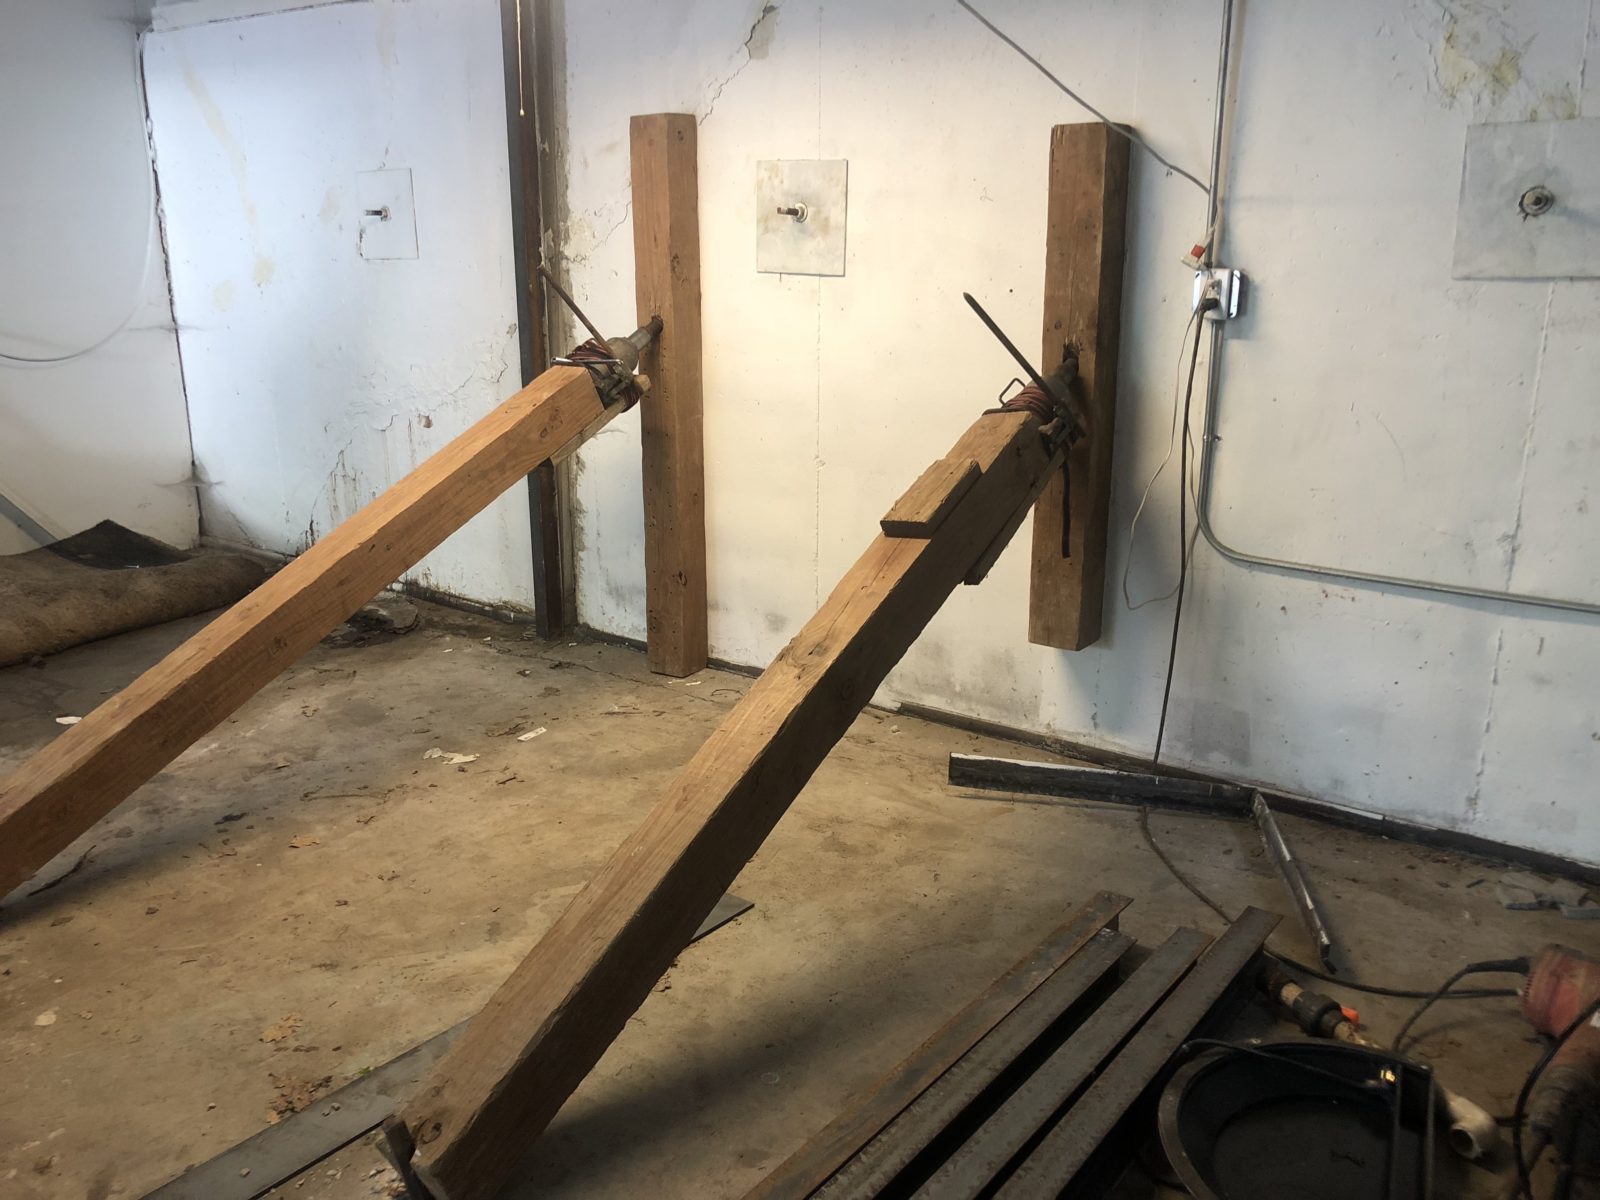
- Choose the Reinforcement Method: Depending on the specific requirements, there are various methods for reinforcing foundation walls, such as steel braces, carbon fiber straps, or helical piers. Select the method that best suits your building’s needs.
- Prepare the Surface: Clean and clear the surface of the foundation wall where the reinforcement will be installed. Remove any loose debris and ensure the wall is free from impurities that may hinder proper adhesion.
- Follow Installation Instructions: Depending on the chosen reinforcement method, carefully follow the manufacturer’s instructions for installation. This may involve drilling certain anchor points or adhering reinforcement materials to the wall surface.
- Secure Reinforcement Materials: Ensure that the reinforcement materials, such as steel braces or carbon fiber straps, are securely fastened and properly aligned with the foundation wall. This will provide the necessary support and stability.
- Check for Proper Alignment: Verify that the reinforcement materials are aligned correctly and in line with the structural needs of the foundation wall. Double-check measurements and alignment before finalizing the installation.
- Seal and Protect: Apply a sealant or protective coating over the reinforcement materials to prevent moisture penetration and enhance their durability. This will help prolong the effectiveness of the reinforcement and ensure long-term stability.
- Maintain Regular Inspections: After reinforcing the foundation wall, it’s important to conduct regular inspections to ensure the reinforcement is in good condition. Monitor for any signs of movement, cracks, or deterioration and address any issues promptly.
Remember, reinforcing the foundation wall is a complex task that may require professional expertise. If you’re unsure about the best approach or the structural needs of your building, consult with a qualified engineer or foundation specialist for guidance.
By reinforcing the foundation wall, you add an extra layer of support to your building’s structure and reduce the risk of future damage. With the reinforcement complete, the next step is to finish and waterproof the repaired areas for added protection.
Finishing and Waterproofing the Repaired Area
After repairing and reinforcing the foundation wall, it’s important to properly finish and waterproof the repaired areas. This final step ensures that the repaired sections blend seamlessly with the rest of the wall and provides long-lasting protection against water infiltration. Here’s a step-by-step guide on finishing and waterproofing the repaired area:
- Smooth the Surface: Use a putty knife or trowel to smooth out any rough edges or uneven surfaces in the repaired areas. This will create a uniform finish and enhance the appearance of the foundation wall.
- Fill in Any Imperfections: Inspect the repaired areas for any imperfections, such as small gaps or unevenness. Apply additional repair material as necessary, making sure to blend it seamlessly with the surrounding surface.
- Cure the Repaired Areas: Allow the repaired areas to cure fully according to the manufacturer’s instructions. This may take several days or longer, depending on the type of repair material used.
- Apply a Waterproof Coating: Once the repaired areas are fully cured, apply a waterproof coating to the entire foundation wall. This will protect the repaired sections from water infiltration and moisture damage.
- Follow Manufacturer’s Instructions: Read and follow the instructions provided with the waterproof coating product. Apply it using a brush or roller, ensuring complete coverage and adherence to the repaired areas.
- Consider Multiple Layers: Depending on the level of waterproofing required, it may be beneficial to apply multiple layers of the waterproof coating. Allow each layer to dry completely before applying the next.
- Seal Any Gaps or Joints: Inspect the areas where the foundation wall meets other structures, such as windows, doors, or utility penetrations. Apply a high-quality caulk or sealant to seal any gaps or joints, preventing water intrusion.
- Regular Maintenance: Maintain the waterproofing integrity of the repaired areas by conducting regular inspections. Look for any signs of deterioration or damage and address them promptly to ensure long-term protection.
Finishing and waterproofing the repaired areas is essential for the longevity and stability of the foundation wall. It provides an extra layer of protection against water damage, preventing future issues and preserving the integrity of the repairs.
With the finishing and waterproofing complete, you have successfully repaired and reinforced your foundation wall. By following these steps and taking the necessary precautions, you have restored the structural integrity of your building and ensured its long-term stability.
Remember, if you’re unsure about any aspect of the foundation wall repair process or if the damage is extensive, it’s always recommended to seek the assistance of professionals who have the expertise and experience in handling such repairs.
Conclusion
Repairing a foundation wall is a crucial step in maintaining the structural integrity and stability of a building. By addressing signs of damage, such as cracks, bowing walls, or water infiltration, you can prevent further deterioration and costly repairs in the future. Throughout this comprehensive guide, we have explored the signs of foundation wall damage, how to assess the severity of the damage, and the step-by-step process of repairing and reinforcing the wall.
Properly repairing a foundation wall requires careful assessment, the gathering of necessary tools and materials, and thorough preparation of the work area. From cleaning and clearing the foundation wall to applying epoxy or polyurethane injection, repairing cracks and holes, and reinforcing the wall, each step plays a crucial role in restoring the stability of the foundation.
Finishing and waterproofing the repaired areas is the final touch in the repair process, providing long-lasting protection against future water infiltration and enhancing the appearance of the foundation wall. Regular maintenance and inspections are essential to ensure the longevity and effectiveness of the repairs, as well as to detect any potential issues early on.
While this guide provides a comprehensive overview, it’s important to note that foundation wall repairs can be complex and may require the expertise of professionals. If you have any doubts or the damage is extensive, it’s recommended to consult with qualified engineers or foundation specialists who can provide precise assessments and guidance.
By following the steps outlined in this guide and taking appropriate measures, you can successfully repair and reinforce your foundation wall, ensuring the stability and longevity of your building for years to come.
Frequently Asked Questions about How To Repair Foundation Wall
Was this page helpful?
At Storables.com, we guarantee accurate and reliable information. Our content, validated by Expert Board Contributors, is crafted following stringent Editorial Policies. We're committed to providing you with well-researched, expert-backed insights for all your informational needs.


0 thoughts on “How To Repair Foundation Wall”