Home>Furniture & Design>Bathroom Accessories>How Long To Replace A Bathtub
Bathroom Accessories
How Long To Replace A Bathtub
Modified: October 20, 2024
Find out how long it takes to replace a bathtub and upgrade your bathroom accessories. Get expert tips and advice for a hassle-free renovation.
(Many of the links in this article redirect to a specific reviewed product. Your purchase of these products through affiliate links helps to generate commission for Storables.com, at no extra cost. Learn more)
Introduction
Replacing a bathtub is a significant home improvement project that can breathe new life into your bathroom. Whether you're upgrading to a luxurious spa-style tub or simply refreshing the space with a modern design, the process of replacing a bathtub involves several essential steps. From removing the old fixture to installing the new one and adding the finishing touches, each phase demands careful attention to detail and a methodical approach.
In this comprehensive guide, we will walk you through the process of replacing a bathtub, providing valuable insights and practical tips to help you navigate this undertaking with confidence. Whether you're a seasoned DIY enthusiast or a homeowner considering professional assistance, understanding the steps involved in replacing a bathtub is crucial for making informed decisions and ensuring a successful outcome.
By following the steps outlined in this guide, you'll gain a deeper understanding of the intricacies involved in bathtub replacement, empowering you to approach the project with clarity and purpose. From assessing the condition of your existing bathtub to selecting a suitable replacement and executing the installation, each phase presents unique challenges and opportunities. With the right knowledge and approach, you can transform your bathroom into a rejuvenating oasis that reflects your personal style and enhances the overall appeal of your home.
So, let's embark on this journey together, exploring the art of bathtub replacement and uncovering the secrets to achieving a seamless and satisfying transformation. Whether you're envisioning a sleek, contemporary bathtub or a timeless, classic design, the insights shared in this guide will serve as your trusted companion, guiding you through each step of the process with precision and expertise. Let's dive in and discover the transformative power of bathtub replacement!
Key Takeaways:
- Transform your bathroom with a new bathtub! From removing the old fixture to adding finishing touches, each step is crucial for a successful and satisfying upgrade.
- Careful planning and attention to detail are essential for a seamless bathtub replacement. Prepare the space, install the new fixture, and enjoy a rejuvenated bathroom oasis!
Read more: How To Replace Stopper In A Bathtub
Step 1: Removing the old bathtub
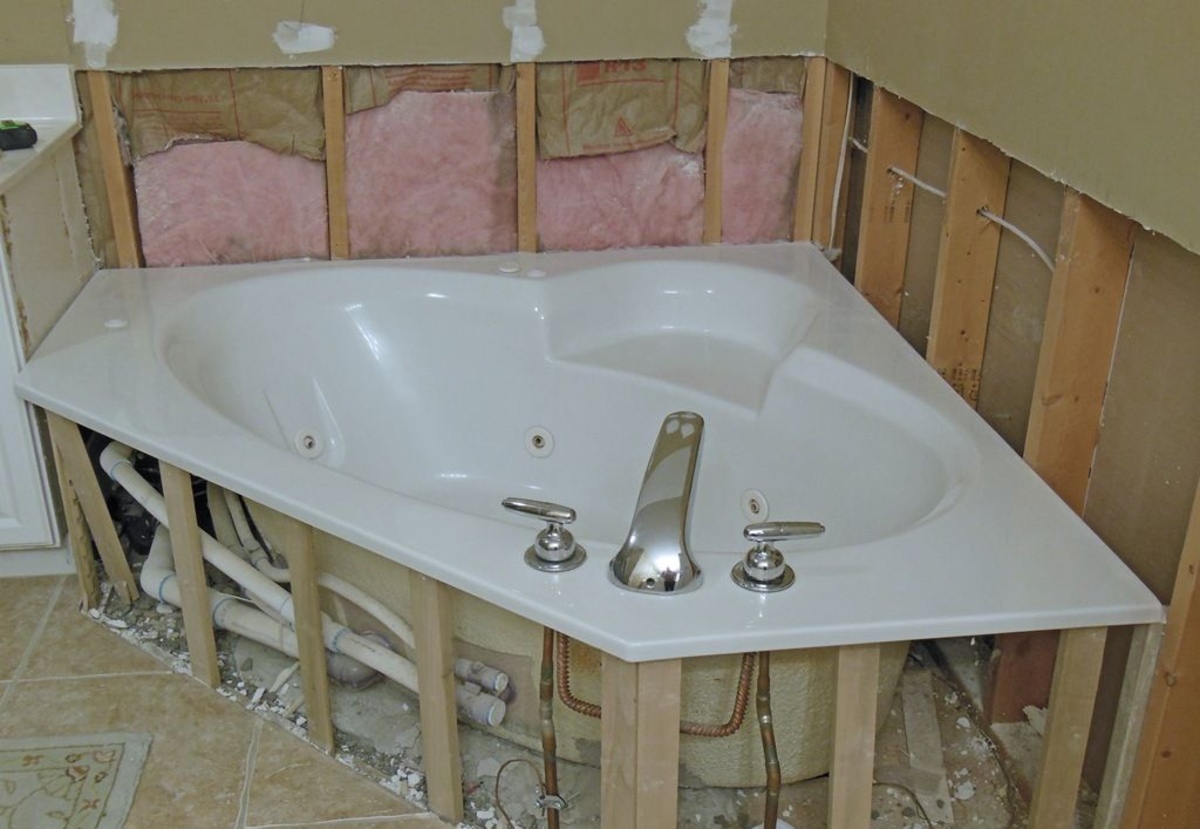
Removing the old bathtub is the crucial first step in the process of replacing a bathtub. This phase requires careful planning and meticulous execution to ensure a smooth transition from the old fixture to the new one. Whether you're embarking on a DIY bathtub replacement project or enlisting the expertise of professionals, understanding the intricacies of removing the old bathtub is essential for setting the stage for a successful installation.
Assessing the Existing Setup
Before diving into the removal process, it's important to assess the existing bathtub setup. This involves inspecting the surrounding walls, plumbing connections, and any fixtures or accessories attached to the bathtub. By taking stock of the current configuration, you can identify potential challenges and determine the best approach for removing the old bathtub without causing damage to the surrounding area.
Disconnecting Plumbing and Fixtures
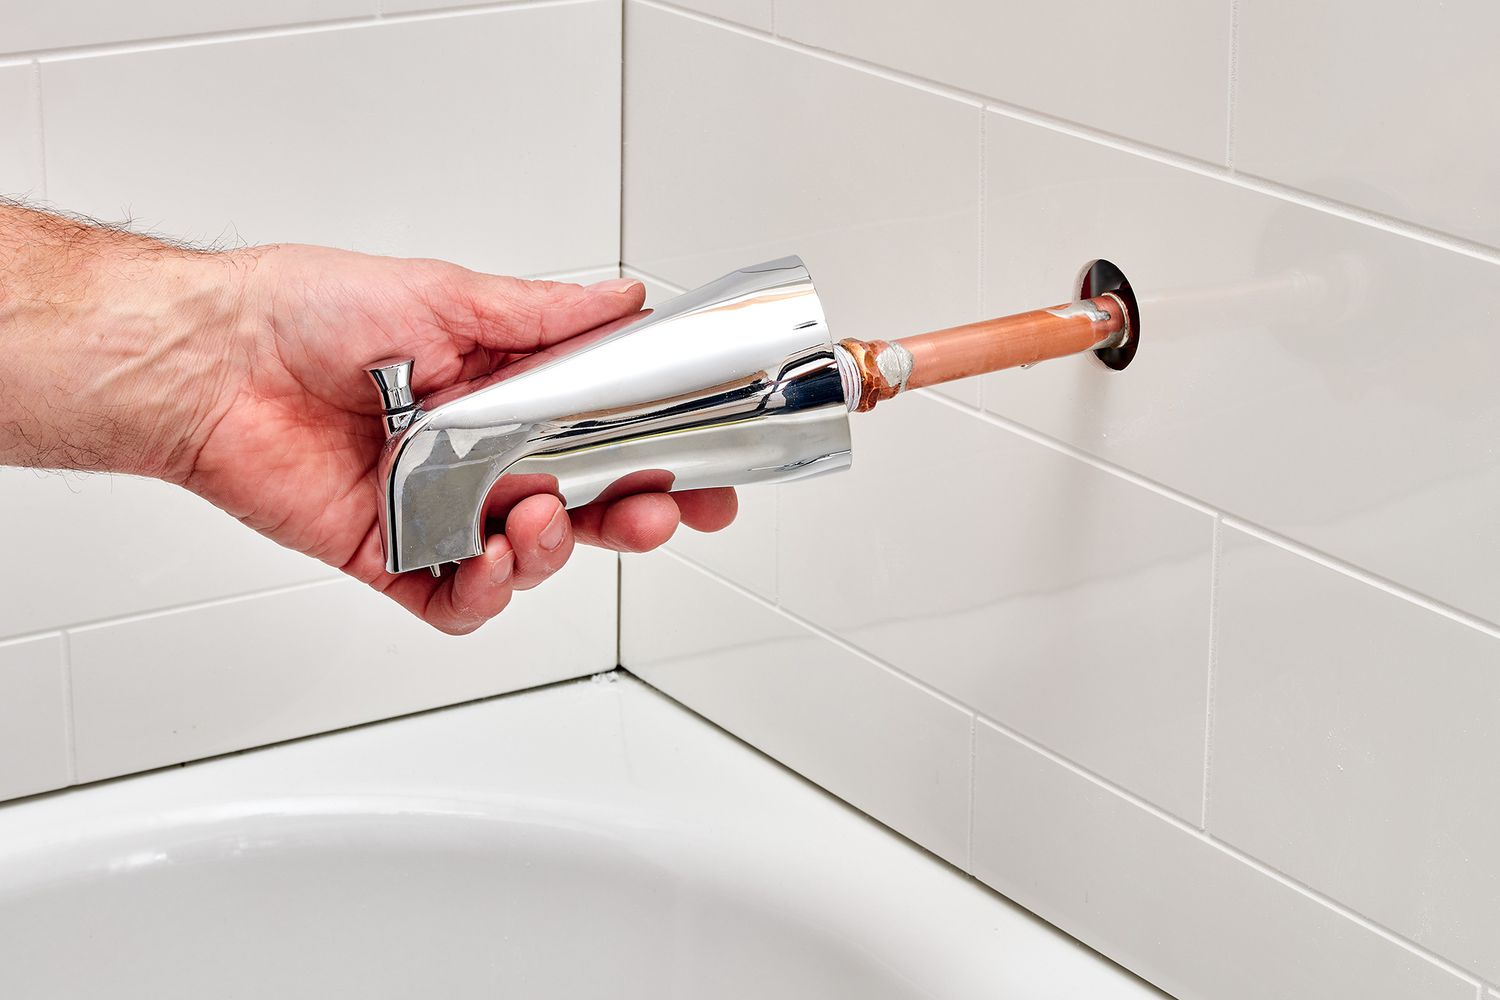
Once the assessment is complete, the next step involves disconnecting the plumbing and fixtures attached to the bathtub. This includes turning off the water supply, disconnecting the drain, and removing any faucets, showerheads, or other accessories. Careful attention should be paid to ensure that all connections are properly turned off and secured to prevent any water leakage or damage during the removal process.
Removing the Surrounding Materials
In many cases, bathtubs are installed with surrounding materials such as tiles, panels, or enclosures. These materials need to be carefully removed to access the bathtub and facilitate its extraction. Depending on the type of surrounding materials, this step may involve using specialized tools and techniques to dismantle the existing structure while minimizing disruption to the surrounding walls and flooring.
Read more: How To Replace A Bathtub Valve
Extracting the Bathtub
With the plumbing disconnected and surrounding materials removed, the old bathtub is ready to be extracted. This step requires caution and precision to avoid damaging the surrounding area and ensure the safe removal of the fixture. Depending on the bathtub's size and weight, this may involve enlisting the help of additional individuals to assist with lifting and maneuvering the bathtub out of its position.
Cleaning and Preparation
Once the old bathtub has been successfully removed, it's essential to clean the area and prepare it for the installation of the new fixture. This involves clearing any debris, inspecting the plumbing connections, and addressing any necessary repairs or adjustments to ensure that the space is primed for the next phase of the bathtub replacement process.
By meticulously following these steps, you can effectively remove the old bathtub and set the stage for the subsequent phases of the bathtub replacement project. With careful planning and attention to detail, this pivotal step lays the foundation for a successful and satisfying transformation of your bathroom space.
Step 2: Preparing the space for the new bathtub
Preparing the space for the new bathtub is a critical phase that sets the stage for a seamless and successful installation. This step involves meticulous planning and attention to detail to ensure that the space is primed to accommodate the new fixture with precision and stability. Whether you're replacing the bathtub with a similar model or opting for a completely different design, the preparation phase plays a pivotal role in laying the groundwork for a transformative upgrade to your bathroom.
Measuring and Assessing the Space
The first task in preparing the space for the new bathtub is to measure and assess the dimensions of the area. This involves carefully evaluating the available space to determine the compatibility of the new bathtub with the existing layout. By taking accurate measurements of the length, width, and depth of the installation area, you can ascertain the suitability of different bathtub models and identify any potential modifications or adjustments required to accommodate the new fixture.
Read more: How To Replace A Bathtub Shower
Addressing Plumbing and Drainage Considerations
Another crucial aspect of preparing the space for the new bathtub is addressing plumbing and drainage considerations. This involves ensuring that the existing plumbing connections align with the requirements of the new bathtub, including the placement of the drain and faucet fixtures. If any modifications or reconfigurations are necessary to accommodate the new bathtub's plumbing requirements, this is the opportune time to make the necessary adjustments to ensure a seamless and watertight installation.
Evaluating Flooring and Support Structures
The condition of the flooring and support structures beneath the bathtub installation area is also a key consideration during the preparation phase. It's essential to assess the integrity of the flooring to ensure that it can support the weight of the new bathtub and withstand the demands of regular use. Additionally, inspecting the support structures, such as the subfloor and floor joists, can reveal any signs of damage or deterioration that may need to be addressed before proceeding with the installation.
Making Necessary Adjustments
Based on the measurements, plumbing considerations, and structural assessments, making necessary adjustments to the installation area may be required. This can include modifying the plumbing connections, reinforcing the flooring or support structures, and addressing any spatial constraints that could impact the installation of the new bathtub. By proactively identifying and addressing these considerations, you can create a solid foundation for the successful integration of the new fixture into your bathroom space.
Clearing and Preparing the Surrounding Area
In addition to the specific preparations for the installation area, clearing and preparing the surrounding space is essential to facilitate a smooth and efficient installation process. This involves removing any debris, obstructions, or unnecessary fixtures from the vicinity of the installation area to provide ample space for maneuvering and positioning the new bathtub. By ensuring a clean and unobstructed environment, you can streamline the installation process and minimize potential complications during the transition to the new fixture.
By meticulously attending to these preparatory tasks, you can set the stage for a seamless and successful installation of the new bathtub. This phase not only ensures that the space is ready to accommodate the new fixture but also lays the groundwork for a durable and aesthetically pleasing integration that enhances the overall appeal and functionality of your bathroom. With careful planning and attention to detail, preparing the space for the new bathtub paves the way for a transformative upgrade that elevates your bathing experience and revitalizes your home environment.
Read more: How To Replace Overflow Drain On A Bathtub
Step 3: Installing the new bathtub
Installing the new bathtub marks a pivotal phase in the process of bathtub replacement, representing the culmination of meticulous planning and preparation. This step demands precision, attention to detail, and a methodical approach to ensure that the new fixture is seamlessly integrated into the bathroom space, delivering both functionality and aesthetic appeal. Whether you're embarking on a DIY installation or enlisting the expertise of professionals, understanding the intricacies of this phase is essential for achieving a successful and satisfying outcome.
Positioning the New Bathtub
The first task in installing the new bathtub involves positioning the fixture within the designated installation area. Careful consideration should be given to aligning the bathtub with the plumbing connections, ensuring that the drain and faucet fixtures are properly oriented to facilitate seamless integration. Depending on the design and dimensions of the new bathtub, this step may require the assistance of additional individuals to maneuver and position the fixture with precision.
Securing the Bathtub in Place
Once the bathtub is positioned correctly, the next crucial step is to secure it in place to ensure stability and structural integrity. This involves anchoring the bathtub to the floor or support structures using appropriate fasteners and securing mechanisms. Ensuring a secure and stable installation is essential for preventing shifting or movement of the bathtub during use, thereby enhancing safety and longevity.
Connecting Plumbing Fixtures
With the bathtub securely positioned, the plumbing fixtures, including the drain and faucets, are connected to the corresponding plumbing lines. Careful attention should be paid to ensure watertight connections, preventing any potential leaks or drainage issues. Proper alignment and sealing of the plumbing fixtures are essential for the efficient and reliable operation of the new bathtub.
Read more: How To Replace A Bathtub In A Mobile Home
Sealing and Finishing Touches
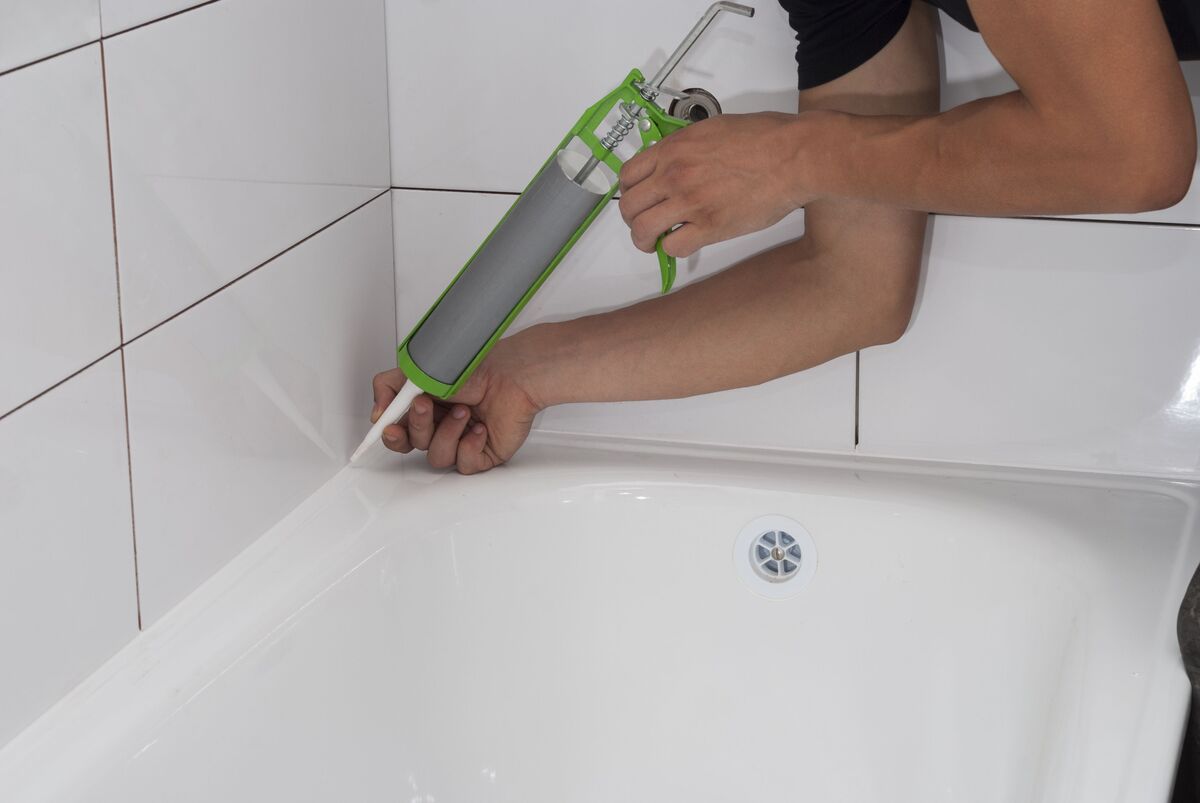
Once the plumbing fixtures are connected, the final step in installing the new bathtub involves sealing the surrounding areas to prevent water seepage and ensuring a clean, polished appearance. This may include applying waterproof sealant around the edges of the bathtub, securing any surrounding materials, and addressing any remaining gaps or openings to create a seamless and visually appealing integration. Additionally, any necessary finishing touches, such as installing trim or accessories, can be added to enhance the overall aesthetic and functionality of the new bathtub.
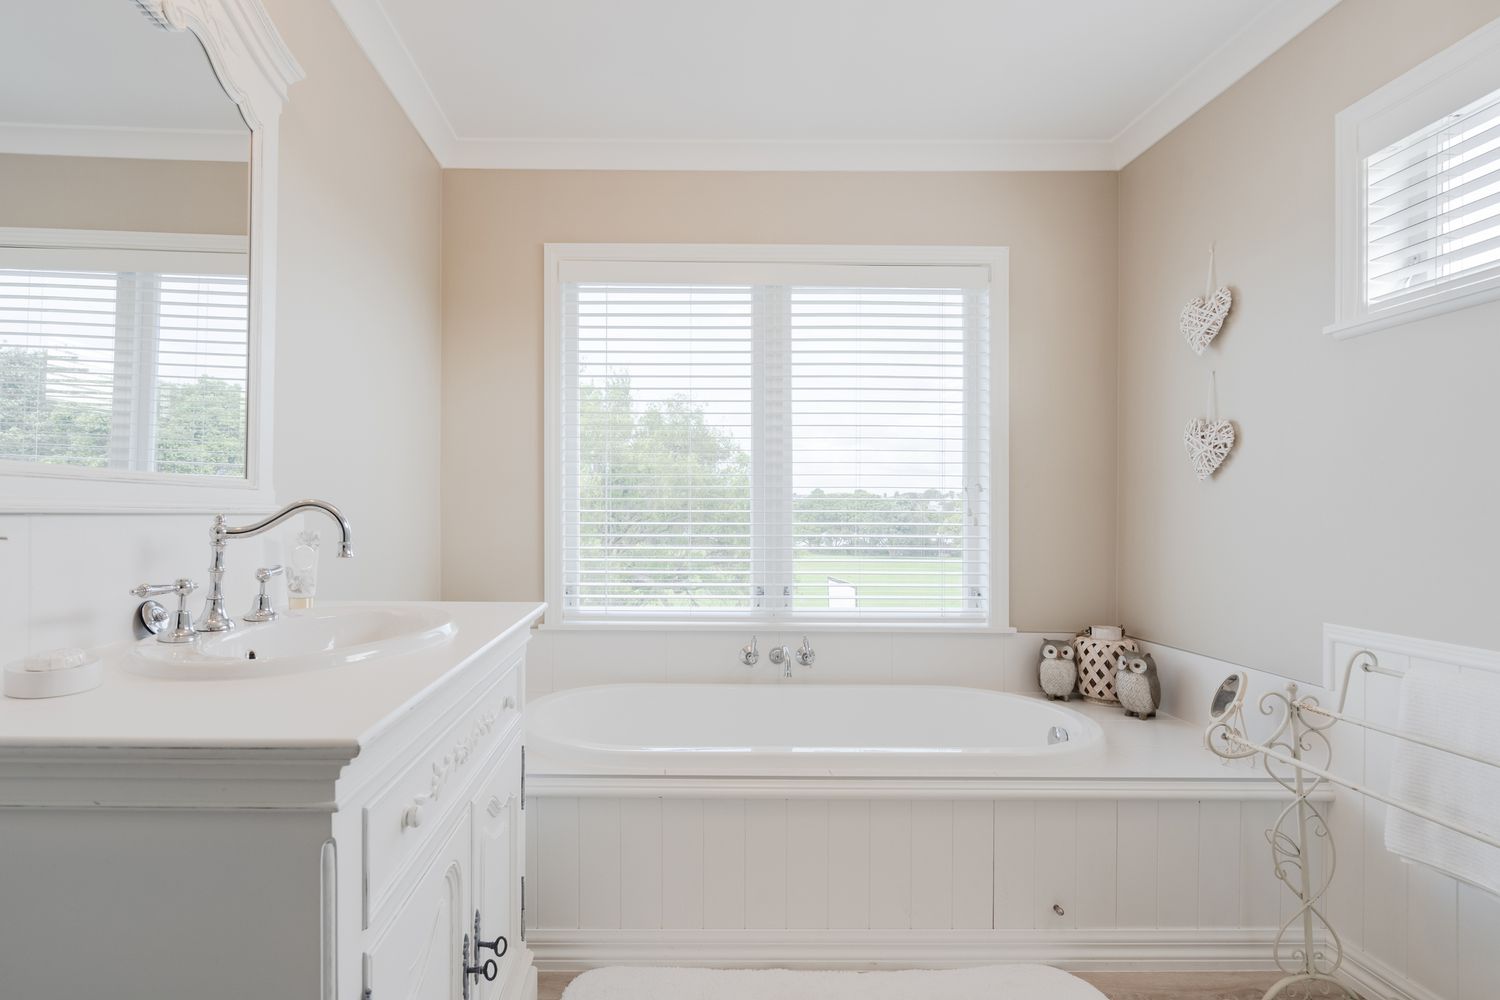
By meticulously following these steps, you can effectively install the new bathtub, bringing your vision of a rejuvenated bathroom space to life. Whether you're embracing a contemporary, freestanding bathtub or opting for a traditional, built-in design, the installation phase represents the culmination of your efforts, transforming your bathroom into a welcoming and luxurious retreat. With precision, care, and attention to detail, the installation of the new bathtub sets the stage for a revitalized bathing experience and a renewed sense of comfort and elegance in your home.
Step 4: Finishing touches and cleanup
The final phase of replacing a bathtub involves adding the finishing touches and conducting a thorough cleanup to ensure that the newly installed fixture shines with elegance and functionality. This step represents the culmination of the meticulous efforts invested in the bathtub replacement project, offering the opportunity to refine the aesthetics and functionality of the bathroom space while ensuring that every detail is attended to with precision and care.
Sealing and Trim Installation
One of the key aspects of the finishing touches involves sealing the edges and seams around the newly installed bathtub. This crucial step not only enhances the watertight integrity of the installation but also contributes to a polished and seamless appearance. Applying high-quality waterproof sealant to the joints and edges of the bathtub helps prevent water seepage and ensures long-term durability. Additionally, installing trim pieces, such as decorative molding or edging, can further enhance the visual appeal of the bathtub installation, creating a cohesive and refined look that complements the overall aesthetic of the bathroom.
Testing and Adjustments
After the installation of the new bathtub and the application of sealant and trim, it's essential to conduct thorough testing to ensure that the plumbing fixtures operate efficiently and that the bathtub functions as intended. This includes checking for any potential leaks, verifying the proper drainage of the bathtub, and testing the functionality of the faucets and other accessories. Any necessary adjustments or fine-tuning can be made at this stage to address any minor issues and ensure that the new bathtub delivers optimal performance and reliability.
Read more: How Long To Fill A Bathtub
Cleanup and Debris Removal
Once the finishing touches are in place and the functionality of the new bathtub has been verified, attention turns to the cleanup phase. This involves removing any debris, dust, or construction materials that may have accumulated during the installation process. Thoroughly cleaning the surrounding area, including the walls, flooring, and fixtures, helps create a pristine and inviting environment that showcases the newly installed bathtub in all its splendor. Additionally, ensuring that the plumbing connections and surrounding spaces are free from any residual materials or obstructions contributes to the overall safety and cleanliness of the bathroom.
Final Inspection and Enjoyment
With the finishing touches complete and the cleanup efforts finalized, a final inspection of the newly replaced bathtub and its surroundings can be conducted. This provides an opportunity to ensure that every aspect of the installation meets the desired standards of quality and aesthetics. Once the inspection is complete and the space is deemed ready for use, it's time to revel in the rejuvenated ambiance and enjoy the enhanced comfort and luxury that the new bathtub brings to the bathroom. Whether it's a relaxing soak or a refreshing shower, the newly replaced bathtub stands as a testament to the meticulous attention to detail and the transformative power of a well-executed home improvement project.
By meticulously attending to the finishing touches and conducting a thorough cleanup, the process of replacing a bathtub culminates in a stunning and functional upgrade to the bathroom space. From sealing the edges and testing the functionality to ensuring a pristine environment and relishing the newfound comfort, this phase encapsulates the essence of a successful bathtub replacement project, elevating the home environment and enriching the bathing experience with style and sophistication.
Conclusion
In conclusion, the process of replacing a bathtub encompasses a series of essential steps that demand careful planning, meticulous execution, and a keen eye for detail. From the initial phase of removing the old bathtub to the final touches and cleanup, each step plays a crucial role in transforming the bathroom space and elevating the overall comfort and aesthetic appeal of the home.
By embarking on this transformative journey, homeowners have the opportunity to breathe new life into their bathrooms, creating a rejuvenating oasis that reflects their personal style and enhances the functionality of the space. Whether it's the allure of a luxurious spa-style bathtub or the timeless elegance of a classic design, the art of bathtub replacement empowers individuals to reimagine their bathing experience and revitalize their home environment.
Throughout the process, careful attention to measurements, plumbing considerations, and structural assessments ensures that the space is primed to accommodate the new bathtub with precision and stability. The installation phase represents the culmination of meticulous planning and preparation, as the new fixture is seamlessly integrated into the bathroom space, delivering both functionality and aesthetic appeal.
As the finishing touches are added and the cleanup efforts are finalized, the newly replaced bathtub stands as a testament to the transformative power of a well-executed home improvement project. The culmination of these efforts results in a stunning and functional upgrade to the bathroom space, creating a pristine environment that showcases the newly installed bathtub in all its splendor.
Ultimately, the process of replacing a bathtub is not merely a home improvement project; it is a journey of transformation and rejuvenation. It is an opportunity to infuse the home environment with comfort, elegance, and a renewed sense of luxury. By embracing the art of bathtub replacement, homeowners can elevate their bathing experience, revitalize their living space, and revel in the satisfaction of a successful and rewarding endeavor.
Frequently Asked Questions about How Long To Replace A Bathtub
Was this page helpful?
At Storables.com, we guarantee accurate and reliable information. Our content, validated by Expert Board Contributors, is crafted following stringent Editorial Policies. We're committed to providing you with well-researched, expert-backed insights for all your informational needs.


0 thoughts on “How Long To Replace A Bathtub”