Home>Furniture & Design>Bathroom Accessories>How To Replace Your Bathtub
Bathroom Accessories
How To Replace Your Bathtub
Modified: March 2, 2024
Learn how to upgrade your bathroom with our step-by-step guide on replacing your bathtub and choosing the best bathroom accessories. Transform your space today!
(Many of the links in this article redirect to a specific reviewed product. Your purchase of these products through affiliate links helps to generate commission for Storables.com, at no extra cost. Learn more)
Introduction
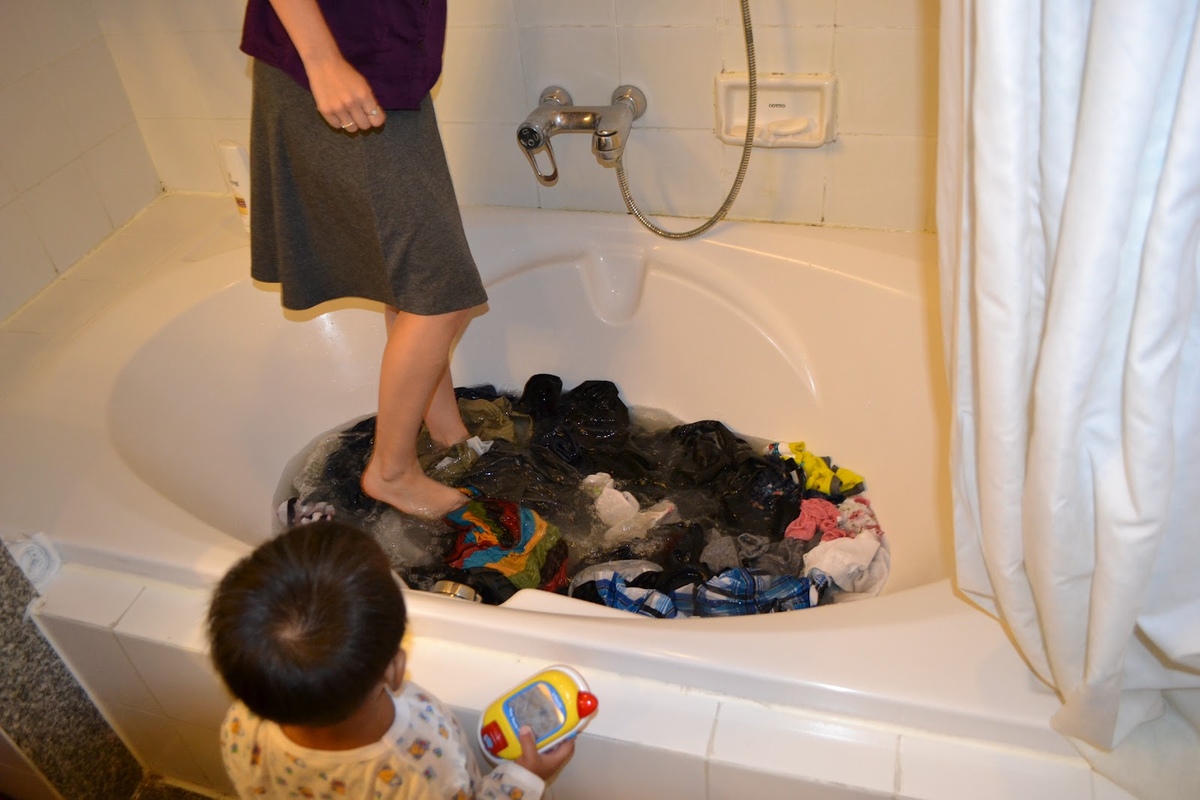
Replacing a bathtub can breathe new life into your bathroom, transforming it from a functional space to a luxurious retreat. Whether you're upgrading to a sleek, modern tub or simply refreshing the existing one, this project can revitalize the entire room. However, before diving into the process, it's essential to understand the steps involved in replacing a bathtub.
From gathering the necessary tools and materials to removing the old bathtub, preparing the area for the new installation, and finally sealing and finishing the project, each step requires careful consideration and attention to detail. By following a systematic approach, you can ensure a successful and satisfying outcome.
In this comprehensive guide, we'll walk you through the process of replacing your bathtub, providing valuable insights and practical tips to help you navigate each stage with confidence. Whether you're a seasoned DIY enthusiast or tackling this project for the first time, this guide will equip you with the knowledge and expertise needed to achieve a professional-quality result.
So, roll up your sleeves, gather your tools, and let's embark on this transformative journey to upgrade your bathroom with a brand-new bathtub. With the right guidance and a can-do attitude, you'll soon be enjoying the comfort and elegance of your newly installed bathtub. Let's get started!
Key Takeaways:
- Replacing a bathtub involves gathering tools, removing the old tub, preparing the area, installing the new tub, and sealing the edges. It’s a DIY project that can transform your bathroom into a luxurious retreat.
- The process requires attention to detail, structural integrity checks, and waterproofing measures. Once completed, you’ll enjoy a professionally installed bathtub, enhancing both the functionality and aesthetic appeal of your bathroom.
Read more: How To Replace The Bathtub Drain
Step 1: Gather the necessary tools and materials
Before embarking on the bathtub replacement project, it's crucial to gather all the essential tools and materials to ensure a smooth and efficient process. Having the right equipment at your disposal will not only streamline the installation but also minimize potential delays and frustrations. Here's a comprehensive list of the items you'll need:
Tools:
- Adjustable Wrench: This versatile tool will come in handy for various plumbing connections and fittings.
- Screwdriver Set: Ensure you have both flathead and Phillips head screwdrivers for different types of fasteners.
- Utility Knife: Useful for cutting and trimming materials such as caulk and sealing tape.
- Pry Bar: Ideal for removing old tiles, fixtures, and other components around the bathtub.
- Measuring Tape: Accurate measurements are crucial for ensuring a precise fit during installation.
- Level: To check and maintain the evenness and alignment of the new bathtub.
- Hacksaw: In case you need to modify or trim plumbing pipes to accommodate the new bathtub.
- Caulking Gun: Essential for applying sealant around the edges of the bathtub.
Materials:
- New Bathtub: Select a bathtub that fits the dimensions of your bathroom and aligns with your aesthetic preferences.
- Bathtub Surround or Tile: Depending on your design choice, you may opt for a surround or tile to complement the new bathtub.
- Plumbing Supplies: This includes PVC pipes, fittings, and connectors required for the water supply and drainage system.
- Shims: These are essential for leveling the bathtub and ensuring a stable, secure fit.
- Plumber's Putty or Caulk: To seal joints and connections, preventing water leakage and ensuring a watertight installation.
- Screws and Nails: Depending on the type of bathtub and surround, you'll need appropriate fasteners for secure attachment.
- Safety Equipment: Don't forget protective gear such as gloves and safety goggles to ensure a safe working environment.
By gathering these tools and materials in advance, you'll be well-prepared to tackle the subsequent steps of the bathtub replacement process. With everything at your fingertips, you can proceed with confidence, knowing that you have the necessary resources to complete the project efficiently and effectively.
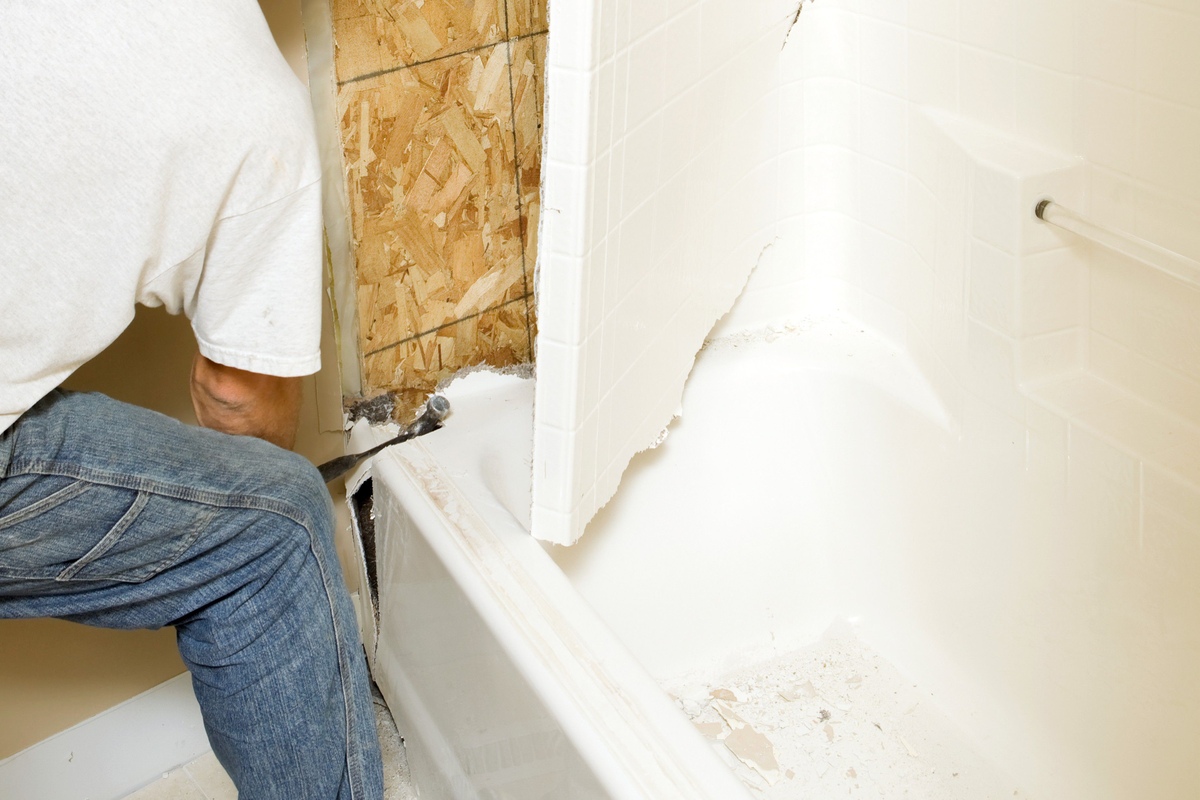
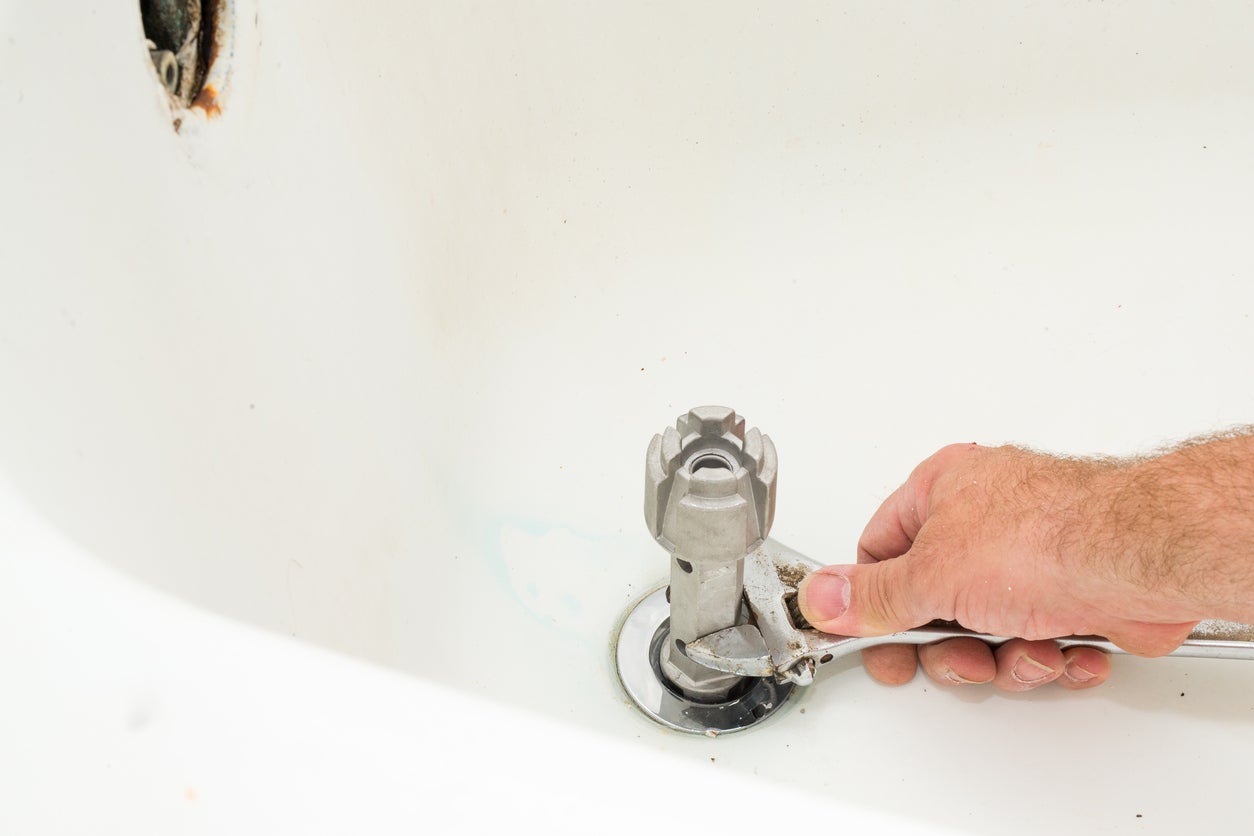
Step 2: Remove the old bathtub
Removing the old bathtub is a critical phase in the process of replacing a bathtub. It requires careful planning and execution to ensure a smooth transition to the new installation. Here's a detailed breakdown of the steps involved in removing the old bathtub:
-
Turn off the Water Supply: Begin by shutting off the water supply to the bathtub. Locate the shutoff valves for the hot and cold water lines and turn them clockwise to stop the flow of water. It's essential to verify that the water supply is completely turned off before proceeding.
-
Disconnect the Drain: Use a wrench to loosen and disconnect the drain pipe from the bathtub. This may involve removing the overflow cover and unscrewing the drain flange. Once disconnected, carefully remove the drain components and set them aside for disposal or future use.
-
Remove Surrounding Fixtures: If the bathtub is surrounded by tiles, panels, or other fixtures, carefully remove these to expose the edges of the bathtub. Use a utility knife or pry bar to detach any caulk or adhesive securing the fixtures to the walls.
-
Detach the Tub: With the surrounding fixtures removed, it's time to detach the bathtub from its position. Depending on the type of installation, this may involve unscrewing fasteners, cutting through caulk and adhesive, and carefully maneuvering the bathtub to release it from its placement.
-
Clear the Space: Once the old bathtub is removed, take the opportunity to clean and clear the space where the new bathtub will be installed. Remove any debris, old sealant, or remnants of the previous installation to ensure a clean and level surface for the new bathtub.
-
Dispose of the Old Bathtub: Properly dispose of the old bathtub and any associated materials in accordance with local regulations. Depending on the material of the old bathtub, you may need to arrange for its disposal through appropriate waste management channels.
By following these steps with precision and attention to detail, you can effectively remove the old bathtub, paving the way for the next phase of the installation process. With the old bathtub out of the way, you're now ready to prepare the area for the seamless installation of the new bathtub.
Read more: How To Replace Stopper In A Bathtub
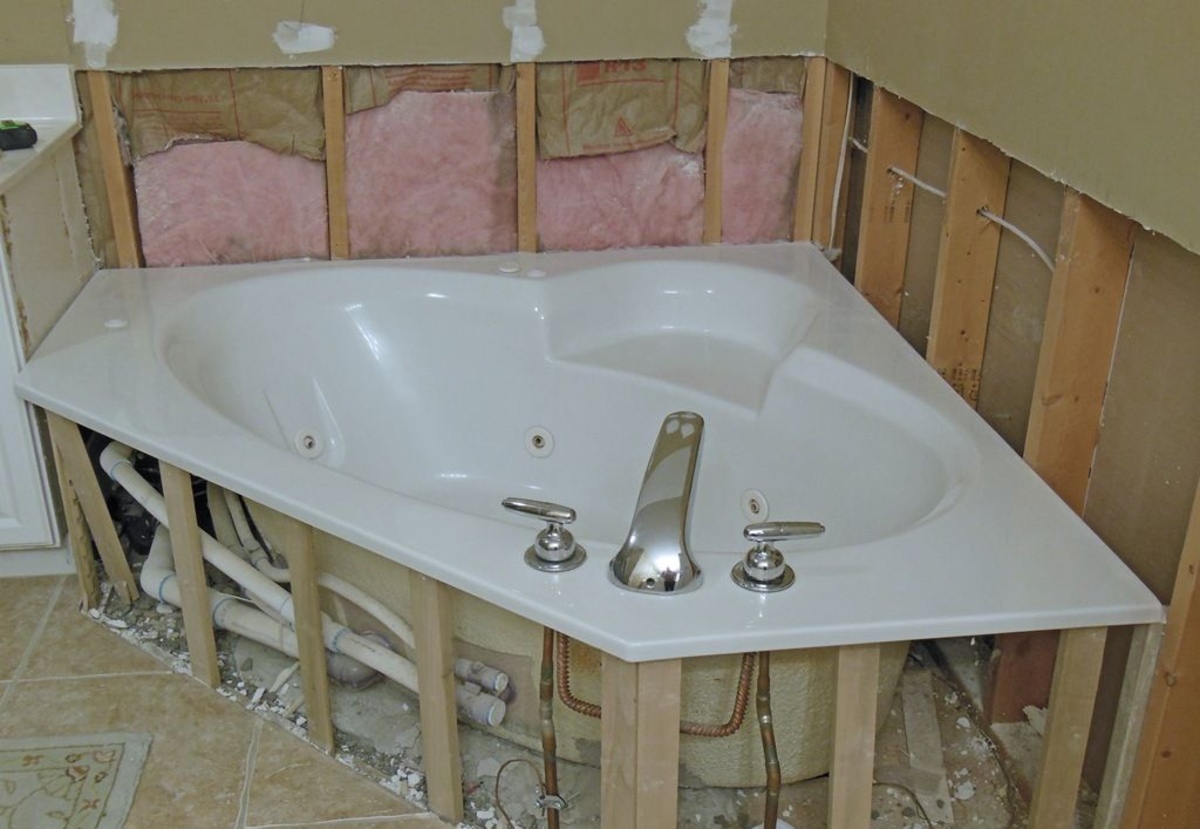
Step 3: Prepare the area for the new bathtub
With the old bathtub successfully removed, it's time to focus on preparing the area for the installation of the new bathtub. This crucial step sets the foundation for a seamless and secure fit, ensuring that the new bathtub integrates harmoniously into the bathroom space. Here's a comprehensive guide to preparing the area for the new bathtub:
Assess the Structural Integrity
Before proceeding with the installation, carefully inspect the structural integrity of the floor and surrounding walls. Ensure that the floor is level and capable of supporting the weight of the new bathtub. Address any issues related to uneven surfaces or structural weaknesses to create a stable foundation for the installation.
Check Plumbing Connections
Verify the condition of the existing plumbing connections, including the water supply lines and drainage system. Inspect for any signs of damage, corrosion, or leaks, and address any issues promptly. It's essential to ensure that the plumbing connections are in optimal condition to support the new bathtub without any risk of water damage or malfunction.
Install Support and Leveling Mechanisms
Depending on the type of bathtub and the specific installation requirements, consider installing support and leveling mechanisms to ensure a secure and stable fit. This may involve using shims to level the bathtub, reinforcing the floor beneath the tub, or adjusting the support framework to accommodate the new installation. Attention to these details is crucial for the long-term durability and functionality of the new bathtub.
Read more: When To Replace A Bathtub
Apply Waterproofing Measures
Prior to installing the new bathtub, apply waterproofing measures to protect the surrounding areas from potential water damage. This may involve applying a waterproof membrane or sealant to the walls and floor around the bathtub installation area. By implementing effective waterproofing measures, you can safeguard the structural integrity of the bathroom and prevent moisture-related issues in the future.
Plan for Accessibility and Safety
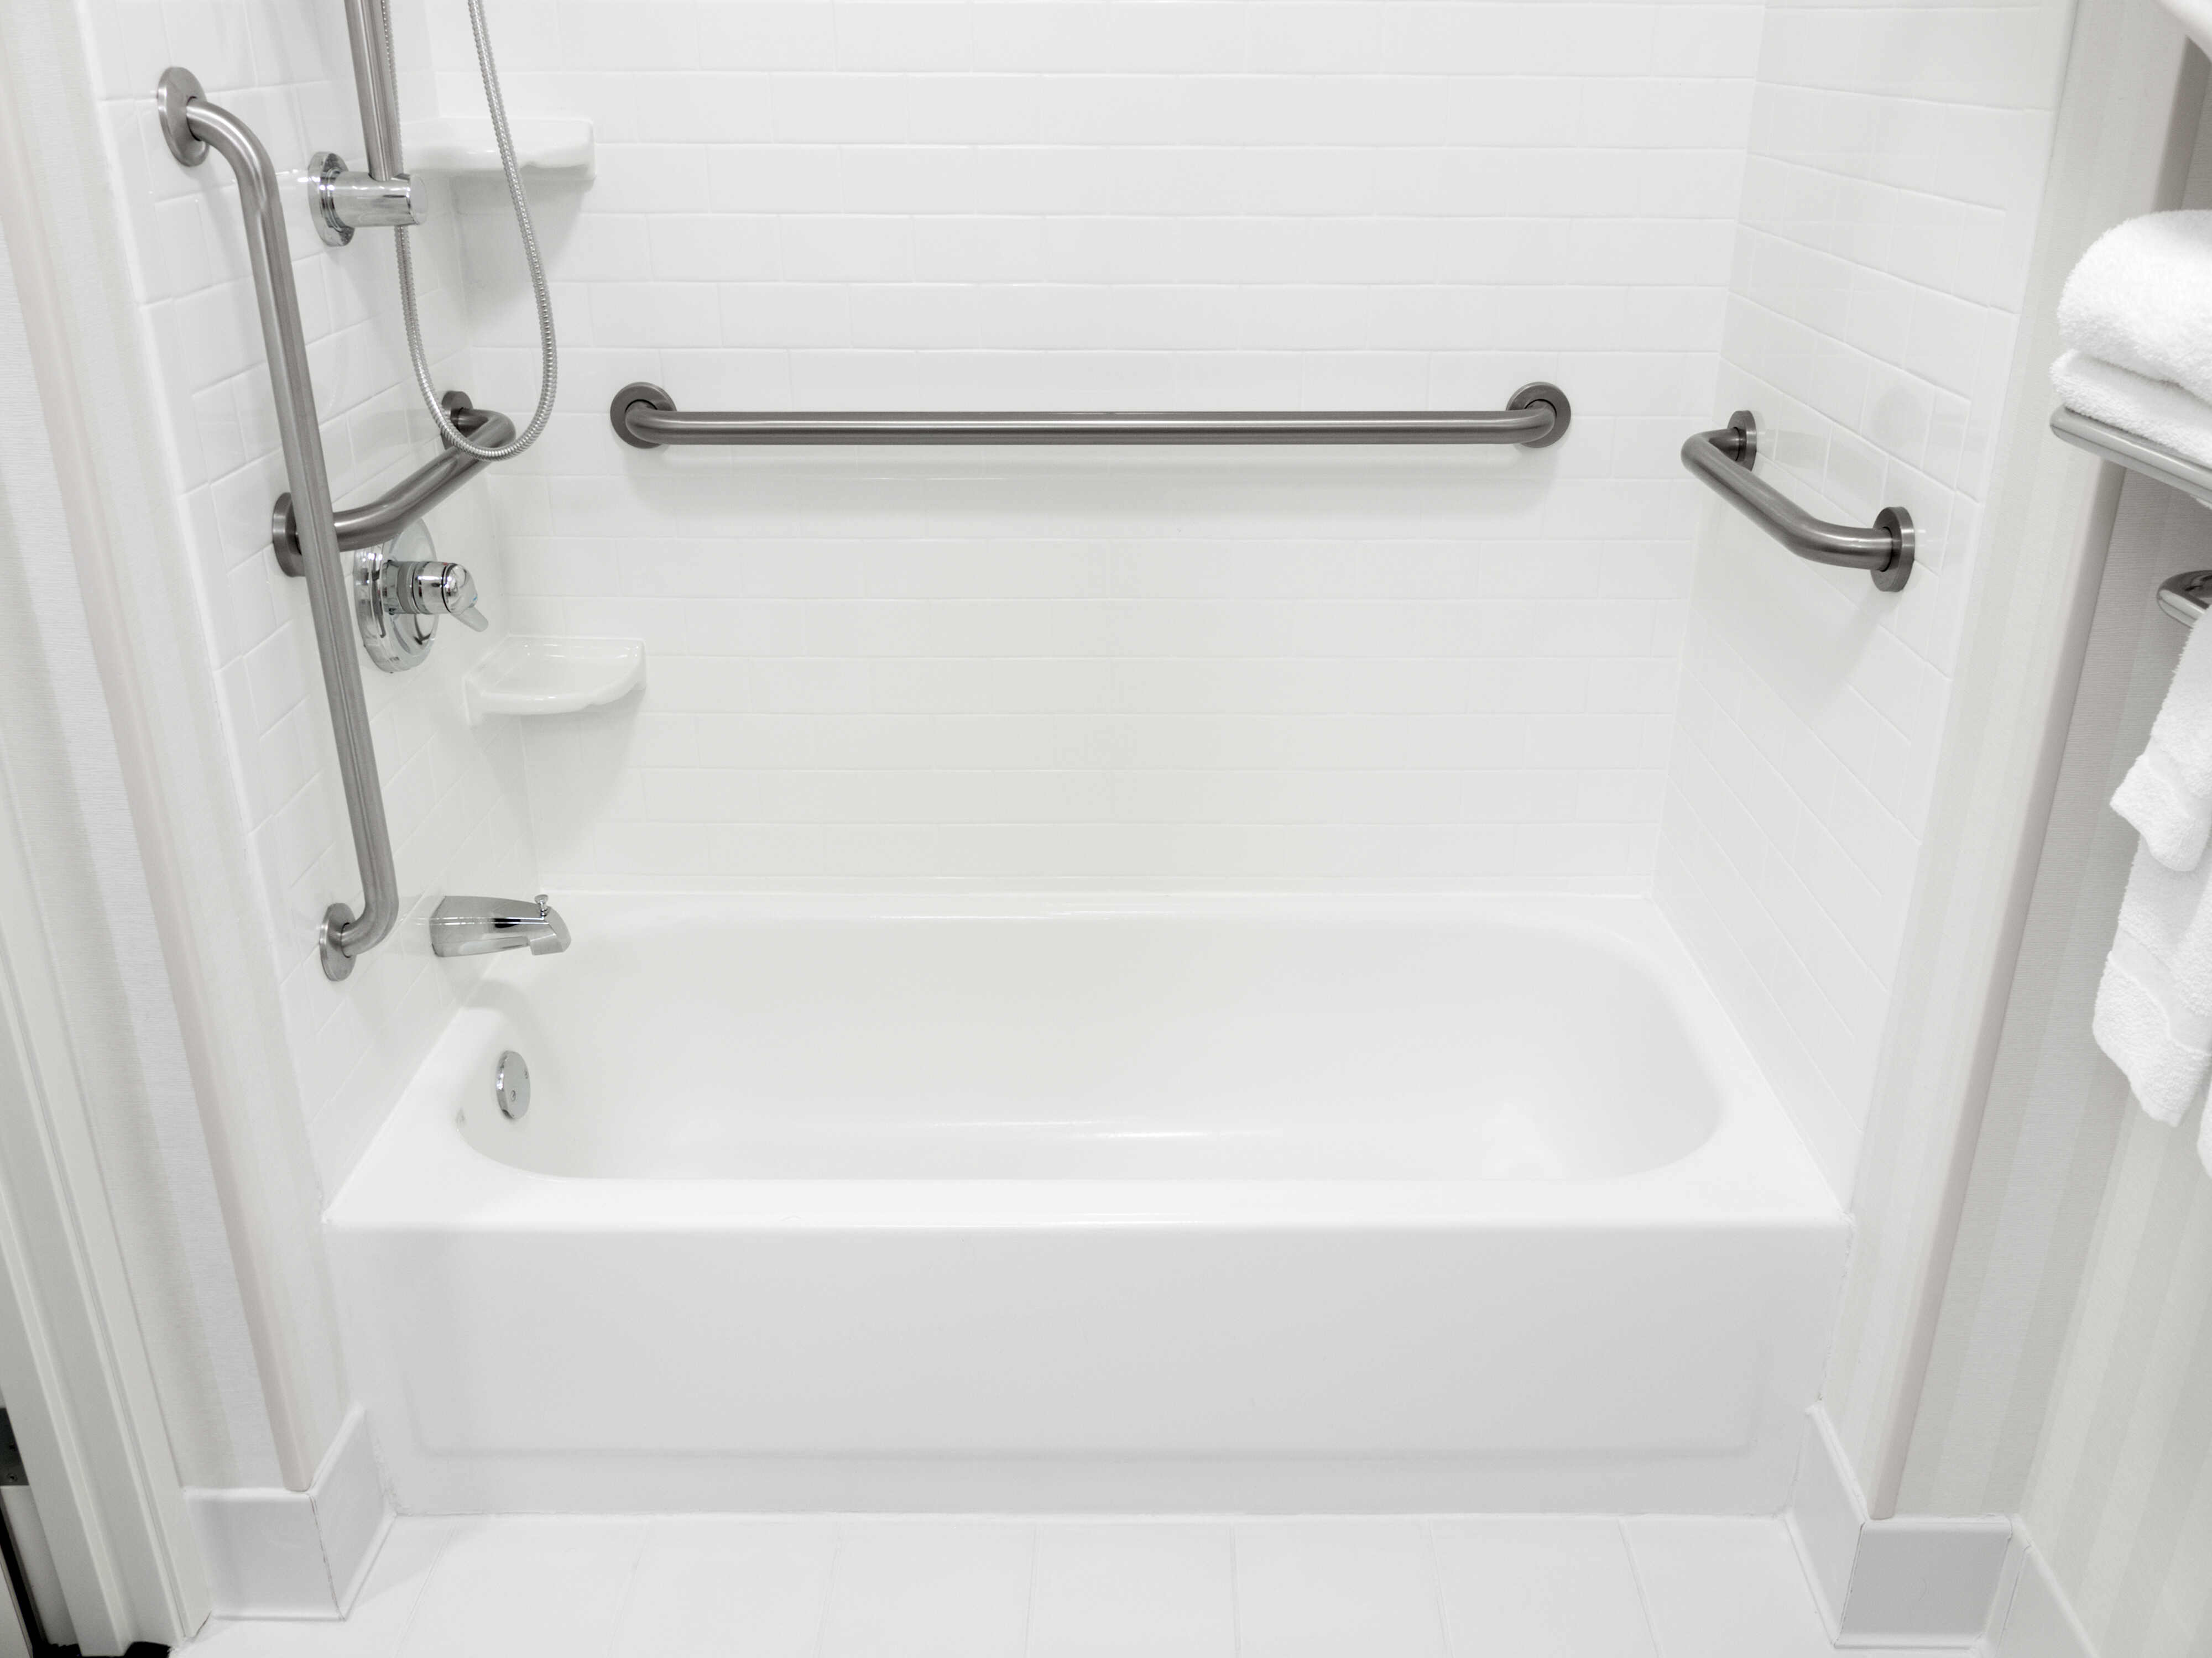
Consider accessibility and safety factors when preparing the area for the new bathtub. Ensure that the installation complies with relevant safety standards and provides ease of access for maintenance and potential future renovations. This may involve incorporating grab bars, non-slip flooring, and other safety features to enhance the functionality and safety of the bathtub area.
By meticulously preparing the area for the new bathtub, you can lay the groundwork for a successful and enduring installation. Attention to detail, structural integrity, and waterproofing measures will contribute to a seamless transition to the next phase of the bathtub replacement process. With the groundwork in place, you're now ready to proceed with the installation of the new bathtub, bringing you one step closer to revitalizing your bathroom space.
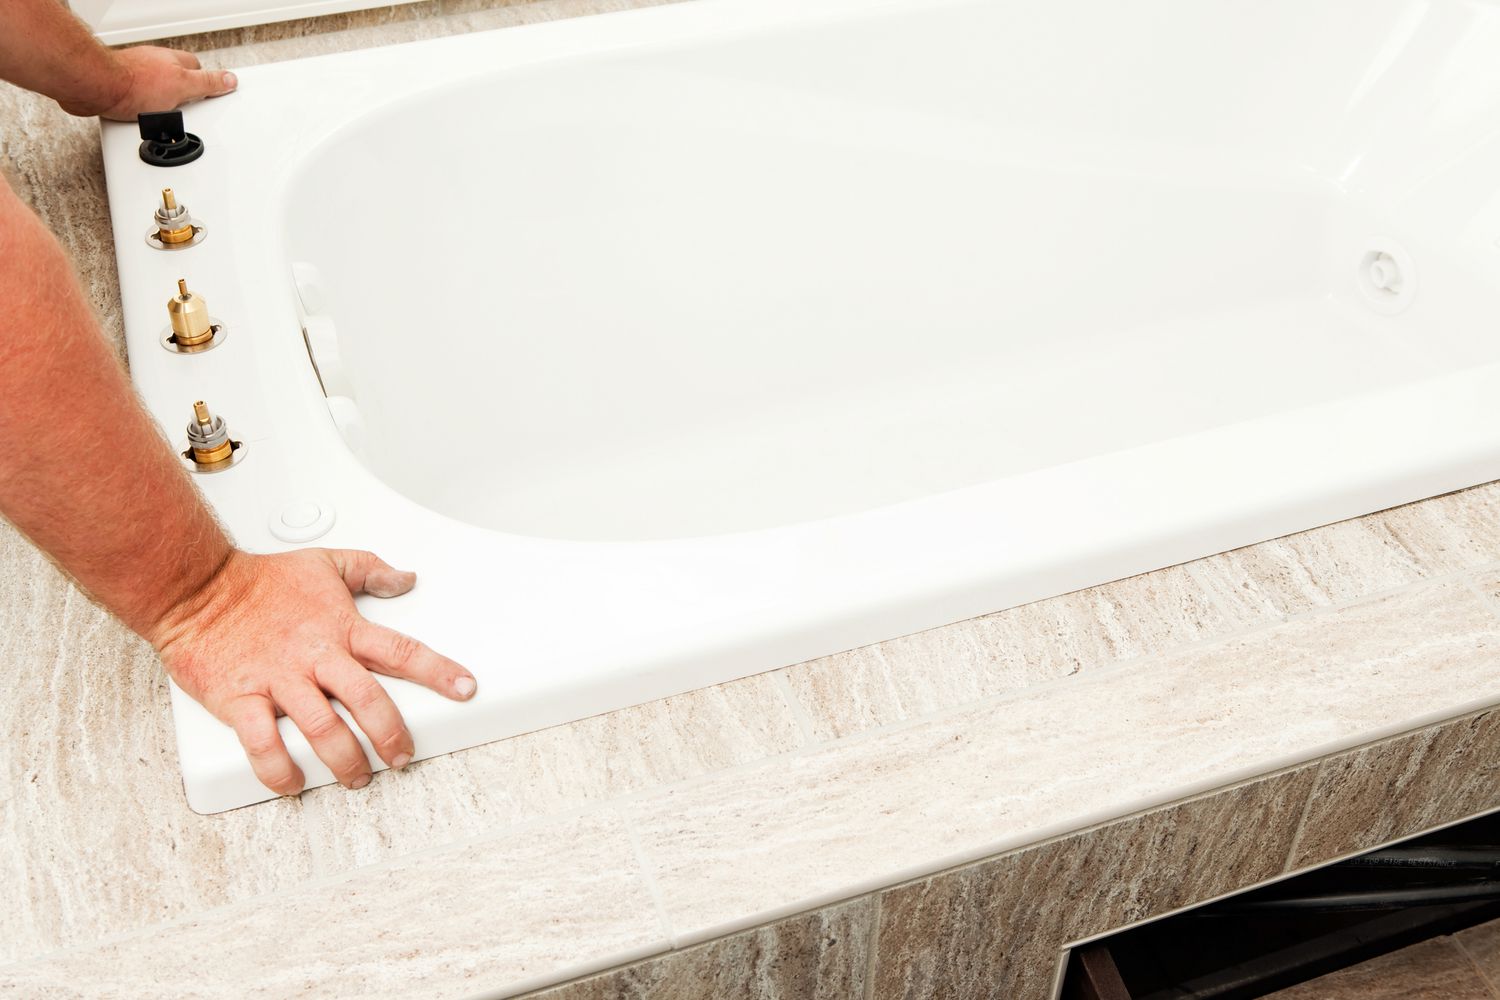
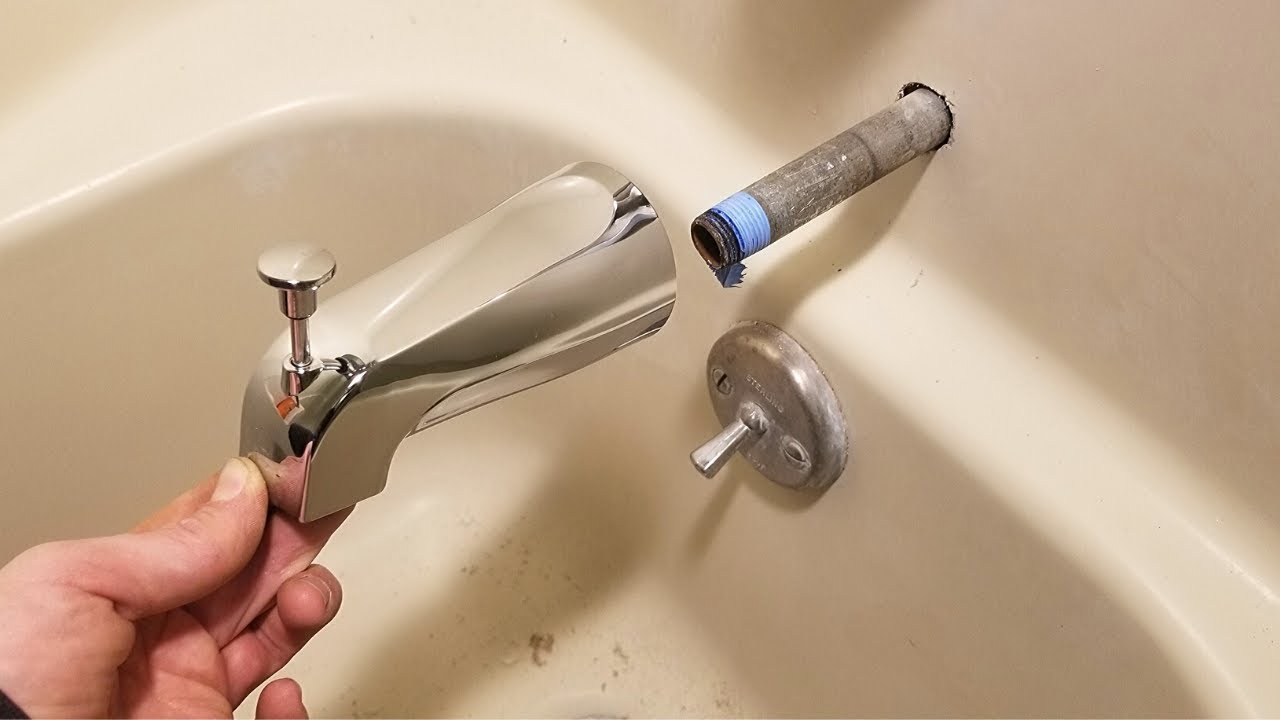
Step 4: Install the new bathtub
Installing the new bathtub marks a pivotal stage in the process of rejuvenating your bathroom space. This step demands precision, attention to detail, and a methodical approach to ensure a seamless and secure fit for the new fixture. Here's a comprehensive guide to navigating the installation of the new bathtub:
Positioning the Bathtub
Carefully maneuver the new bathtub into the designated installation area, ensuring that it aligns precisely with the plumbing connections and surrounding fixtures. Take accurate measurements to confirm that the bathtub is centered and positioned according to the intended layout. Use a level to verify that the bathtub is perfectly aligned and adjust its placement as needed to achieve optimal balance and stability.
Read more: How To Replace A Bathtub Valve
Securing the Bathtub
Once the bathtub is positioned correctly, proceed to secure it in place using the designated fasteners and support mechanisms. Depending on the installation requirements, this may involve anchoring the bathtub to the wall studs, floor joists, or support framework. Ensure that the bathtub is firmly anchored and level, minimizing any potential movement or instability.
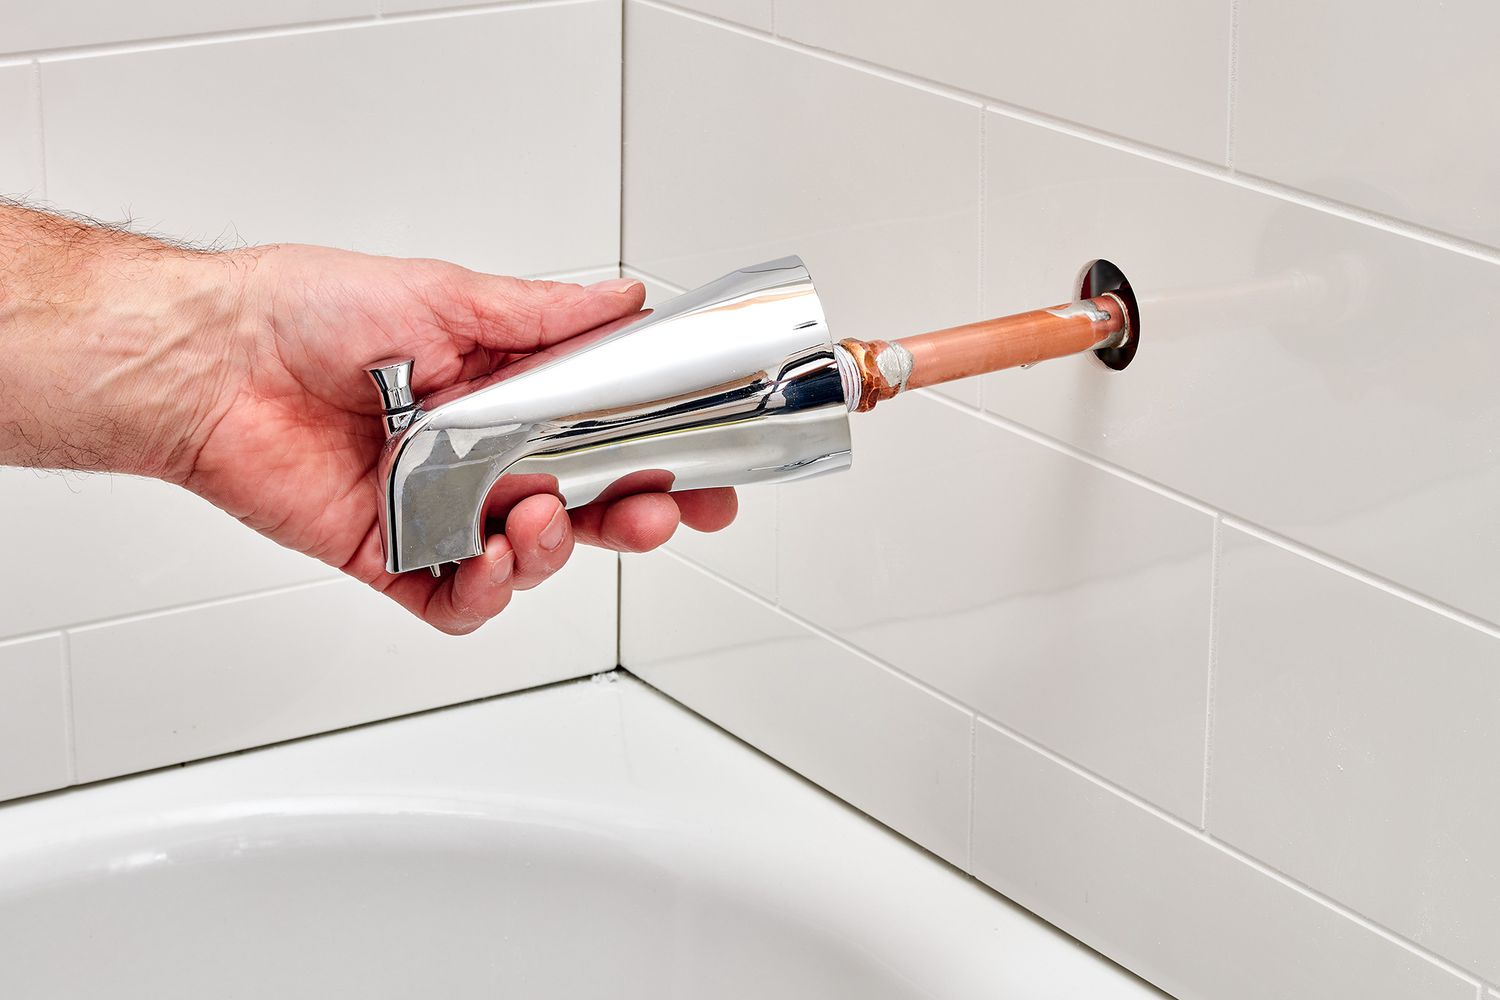
Connecting the Plumbing
Carefully connect the water supply lines and drainage system to the new bathtub, ensuring a watertight and secure fit. Use appropriate fittings and connectors to establish reliable connections, and verify that all plumbing components are aligned and free from leaks. Thoroughly test the water supply and drainage to confirm proper functionality and address any issues promptly.
Sealing and Finishing
Apply a generous bead of plumber's putty or silicone caulk around the edges of the bathtub to create a watertight seal. This crucial step prevents water seepage and ensures that the bathtub is effectively sealed against the surrounding surfaces. Smooth the sealant to achieve a clean and professional finish, paying particular attention to the corners and joints for optimal protection against water intrusion.
Final Adjustments
Conduct a final inspection of the installed bathtub, checking for any signs of misalignment, gaps, or imperfections. Make any necessary adjustments to ensure that the bathtub is securely in place and aesthetically pleasing. Double-check the levelness and stability of the bathtub, making minor tweaks as needed to achieve a flawless installation.
By meticulously following these steps, you can successfully install the new bathtub, bringing your bathroom transformation one step closer to completion. The careful positioning, secure anchoring, precise plumbing connections, and meticulous sealing will culminate in a professionally installed bathtub that enhances the functionality and aesthetic appeal of your bathroom. With the new bathtub in place, you're poised to enjoy the revitalized ambiance and comfort of your upgraded bathroom space.
Read more: How To Replace A Bathtub With A Shower?
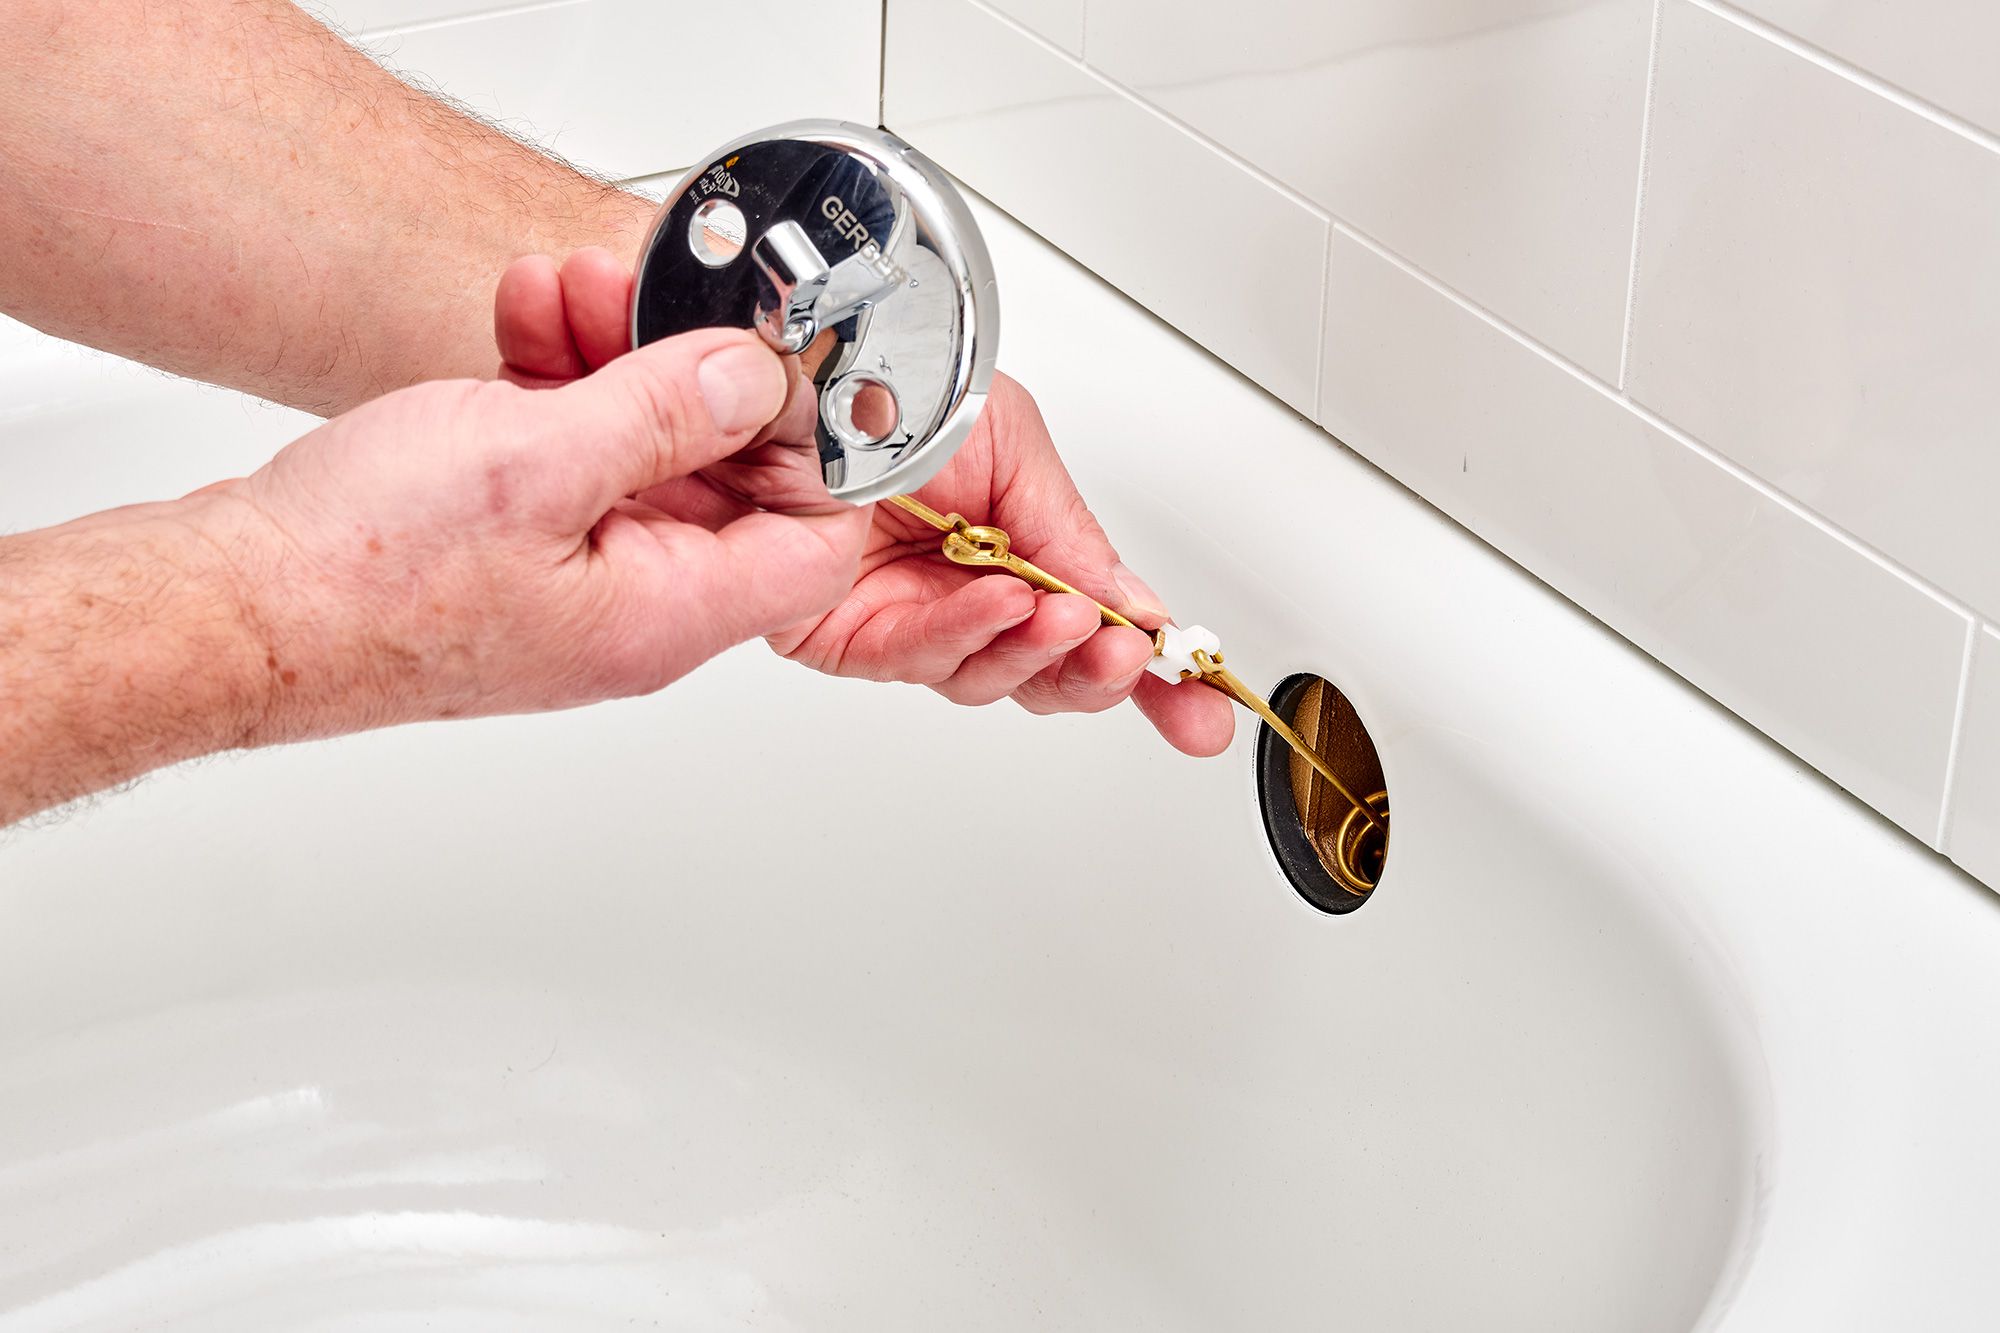
Step 5: Seal and finish the installation
With the new bathtub securely in place, the final step involves sealing and finishing the installation to ensure long-lasting durability and a polished aesthetic. This critical phase not only enhances the visual appeal of the bathtub but also plays a pivotal role in safeguarding the surrounding areas from water damage and moisture intrusion. Here's a detailed breakdown of the essential tasks involved in sealing and finishing the installation of the new bathtub:
Apply Sealant
Begin by applying a high-quality waterproof sealant around the perimeter of the bathtub. Utilize a plumber's putty or silicone caulk to create a watertight seal between the edges of the bathtub and the adjacent walls or surrounding fixtures. Pay meticulous attention to the corners and joints, ensuring that the sealant forms a seamless barrier against water seepage. The thorough application of sealant is crucial for preventing leaks and maintaining the structural integrity of the installation.
Smooth and Shape the Sealant
After applying the sealant, use a caulking tool or a damp cloth to smooth and shape the sealant bead. This process not only ensures a neat and professional finish but also eliminates any excess sealant that could detract from the overall appearance. By meticulously shaping the sealant, you can achieve a clean and uniform seal around the bathtub, enhancing both its visual appeal and protective functionality.
Inspect and Touch-Up
Conduct a comprehensive inspection of the sealed areas, checking for any gaps, inconsistencies, or imperfections in the sealant. Address any areas that require touch-up or additional sealing, ensuring that every seam and joint is effectively protected against water infiltration. Thorough attention to detail during the inspection and touch-up phase is essential for achieving a flawless and resilient seal that withstands the rigors of daily use.
Read more: How To Replace Bathtub Caulking
Clean and Polish
Once the sealant is in place and thoroughly inspected, take the opportunity to clean and polish the surfaces surrounding the bathtub. Remove any residual sealant, smudges, or marks, and wipe down the area to achieve a pristine finish. This final touch ensures that the newly installed bathtub presents a polished and inviting appearance, elevating the overall aesthetic of the bathroom space.
By meticulously executing these sealing and finishing tasks, you can elevate the installation of the new bathtub to a professional standard. The watertight seal and immaculate finish not only enhance the visual appeal of the bathtub but also contribute to the long-term durability and functionality of the installation. With the sealing and finishing phase complete, your bathroom transformation journey culminates in a beautifully installed bathtub that promises years of comfort and enjoyment.
Conclusion
Congratulations on successfully completing the transformative journey of replacing your bathtub! By following the systematic steps outlined in this comprehensive guide, you've not only revitalized your bathroom space but also acquired valuable insights and skills in the realm of home improvement. As you stand back and admire the newly installed bathtub, it's evident that your efforts have yielded a remarkable upgrade, infusing your bathroom with a fresh ambiance and enhanced functionality.
The process of replacing a bathtub is a testament to the rewarding nature of DIY projects, empowering you to take charge of your living space and tailor it to your preferences. From gathering the necessary tools and materials to meticulously removing the old bathtub, preparing the area for the new installation, and finally securing the new fixture in place, each step has contributed to the comprehensive rejuvenation of your bathroom.
As you reflect on this accomplishment, take pride in the attention to detail and precision that have shaped the successful outcome of this project. The careful positioning and secure anchoring of the new bathtub, coupled with the meticulous application of sealant and finishing touches, have culminated in a professional-quality installation that promises enduring durability and aesthetic appeal.
Beyond the tangible results, this endeavor has equipped you with valuable knowledge and hands-on experience, fostering a sense of confidence and capability in tackling future home improvement projects. The skills honed throughout this process, from plumbing connections to structural assessments and waterproofing measures, serve as a testament to your growing expertise in the realm of home maintenance and enhancement.
As you bask in the satisfaction of a job well done, remember that the journey doesn't end here. The revitalized bathroom space now stands as a canvas for further personalization and embellishment, inviting you to explore additional enhancements such as decorative accents, lighting upgrades, and functional accessories to complete the transformation.
In closing, the successful replacement of your bathtub stands as a testament to your dedication, resourcefulness, and commitment to elevating your living environment. As you continue to embark on future home improvement endeavors, may the knowledge and skills gained from this experience serve as a guiding light, empowering you to turn your vision for your living space into a tangible reality.
With the new bathtub as the centerpiece of your rejuvenated bathroom, you're poised to enjoy the comfort, elegance, and functionality of a space that reflects your unique style and aspirations. Embrace the sense of accomplishment and the endless possibilities that lie ahead as you embark on the next chapter of enhancing your living environment.
Frequently Asked Questions about How To Replace Your Bathtub
Was this page helpful?
At Storables.com, we guarantee accurate and reliable information. Our content, validated by Expert Board Contributors, is crafted following stringent Editorial Policies. We're committed to providing you with well-researched, expert-backed insights for all your informational needs.

0 thoughts on “How To Replace Your Bathtub”