Home>Furniture & Design>Bathroom Accessories>How To Replace Bathtub Water Diverter
Bathroom Accessories
How To Replace Bathtub Water Diverter
Modified: March 2, 2024
Learn how to replace a bathtub water diverter with our step-by-step guide. Find the best bathroom accessories and upgrade your space today!
(Many of the links in this article redirect to a specific reviewed product. Your purchase of these products through affiliate links helps to generate commission for Storables.com, at no extra cost. Learn more)
Introduction
Replacing a bathtub water diverter is a common maintenance task that can significantly improve your bathing experience. The water diverter is a crucial component of your bathtub, responsible for directing water flow between the faucet and the showerhead. Over time, wear and tear can cause the diverter to malfunction, leading to issues such as low water pressure or water leaking from the faucet while using the shower.
Fortunately, replacing a bathtub water diverter is a manageable DIY project that can save you time and money compared to hiring a professional plumber. By following a few simple steps and using the right tools and materials, you can restore your bathtub's functionality and enjoy a refreshing shower or a relaxing bath without any plumbing-related concerns.
In this comprehensive guide, we will walk you through the process of replacing a bathtub water diverter, providing detailed instructions and valuable tips to ensure a successful outcome. Whether you are a seasoned DIY enthusiast or a novice homeowner looking to tackle your first plumbing project, this guide will equip you with the knowledge and confidence to complete the task efficiently and effectively.
Before diving into the step-by-step process, it's essential to gather the necessary tools and materials to facilitate a smooth and organized workflow. By preparing in advance and understanding the importance of each item, you can minimize interruptions and complete the project with ease. With the right approach and a willingness to learn, you can elevate your home maintenance skills and take pride in resolving common plumbing issues on your own.
Now, let's embark on this rewarding journey of replacing your bathtub water diverter, taking proactive steps to enhance your bathroom's functionality and reclaim the joy of a rejuvenating bathing experience.
Key Takeaways:
- Replacing a bathtub water diverter is a manageable DIY project that can improve your bathing experience. With the right tools and materials, you can restore your bathtub’s functionality and enjoy a refreshing shower or a relaxing bath without any plumbing-related concerns.
- By diligently following safety protocols, inspecting plumbing connections, and testing the new diverter, you can enhance your practical skills and cultivate a sense of empowerment in managing household maintenance tasks. This DIY achievement fosters a deeper connection to your living space and a sense of accomplishment.
Step 1: Gather Necessary Tools and Materials
Before initiating the process of replacing a bathtub water diverter, it's crucial to gather the essential tools and materials to ensure a seamless and efficient workflow. By having everything at your disposal, you can minimize interruptions and complete the task with confidence and precision.
Tools:
- Adjustable Wrench: This versatile tool will be instrumental in loosening and tightening various plumbing connections, providing the necessary leverage to manipulate fittings with ease.
- Screwdriver Set: Ensure you have both flat-head and Phillips-head screwdrivers to accommodate different types of screws commonly found in plumbing fixtures.
- Pipe Wrench: A sturdy pipe wrench will enable you to grip and turn pipes and fittings securely, facilitating the disassembly and installation of the water diverter.
- Plumber's Tape: Also known as Teflon tape, this thin, white tape is used to seal pipe threads, preventing leaks and ensuring a secure connection between components.
- Plumbers Putty: This moldable sealant is ideal for creating watertight seals around the edges of plumbing fixtures, such as the new water diverter, enhancing its stability and preventing water seepage.
- Utility Knife: A sharp utility knife will come in handy for cutting and trimming materials such as plumber's tape and putty to the required size, ensuring a precise application.
Materials:
- New Bathtub Water Diverter: Ensure you have the correct replacement diverter that matches the specifications of your existing bathtub fixture, promoting compatibility and seamless integration.
- Replacement Washers and O-Rings: It's advisable to have a set of replacement washers and O-rings on hand to address any worn or damaged seals within the plumbing connections, preventing potential leaks.
- Clean Cloth or Rag: Having a clean cloth or rag nearby will allow you to wipe down surfaces and components, ensuring a tidy work environment and promoting efficient assembly.
- Bucket or Container: Keep a bucket or container available to catch any residual water that may drain from the plumbing system when disassembling the old water diverter, preventing unnecessary mess and water damage.
- Flashlight: A reliable flashlight will aid in illuminating dark or confined spaces within the bathtub fixture, enhancing visibility and facilitating precise maneuvering during the replacement process.
By assembling these tools and materials before commencing the project, you can approach the task with readiness and assurance, setting the stage for a successful and gratifying experience. With the necessary resources at your disposal, you are well-prepared to embark on the subsequent steps of replacing your bathtub water diverter, taking proactive strides toward enhancing your bathroom's functionality and your overall bathing satisfaction.
Step 2: Turn Off Water Supply
Before proceeding with any plumbing-related task, it is imperative to prioritize safety and prevent potential water damage by turning off the water supply to the bathtub. This crucial step mitigates the risk of accidental water discharge and allows you to work on the water diverter with confidence and peace of mind.
To begin, locate the main water shut-off valve for your bathtub. This valve is typically situated near the tub or within the vicinity of the bathroom, often concealed behind an access panel or within a dedicated utility area. Once you have identified the shut-off valve, proceed to turn it in a clockwise direction to stop the flow of water to the bathtub fixtures.
In some cases, older homes may have individual shut-off valves for the hot and cold water supply lines leading to the bathtub. If this applies to your plumbing configuration, ensure that both the hot and cold water valves are fully closed to completely isolate the water flow to the bathtub.
After successfully shutting off the water supply, it is advisable to test the faucets and showerhead to confirm that water flow has been effectively halted. This simple verification step provides assurance that the shut-off process was executed accurately, minimizing the risk of unexpected water discharge during the subsequent stages of the water diverter replacement.
By diligently adhering to the protocol of turning off the water supply, you demonstrate a proactive approach to safety and responsible home maintenance. This foundational step sets the stage for a controlled and secure working environment, allowing you to proceed with the upcoming tasks of removing the old water diverter and installing the new one without the concern of water-related complications.
With the water supply effectively turned off and the risk of water damage mitigated, you are now prepared to advance to the next phase of the bathtub water diverter replacement process, maintaining a steadfast focus on safety and precision throughout the entirety of the project.
Read more: What Is A Bathtub Diverter
Step 3: Remove the Old Water Diverter
With the water supply to the bathtub effectively turned off and safety measures in place, the next pivotal phase of replacing the bathtub water diverter involves the systematic removal of the old diverter. This process requires attentiveness and precision to disassemble the existing fixture without causing damage to surrounding components or creating unnecessary complications.
-
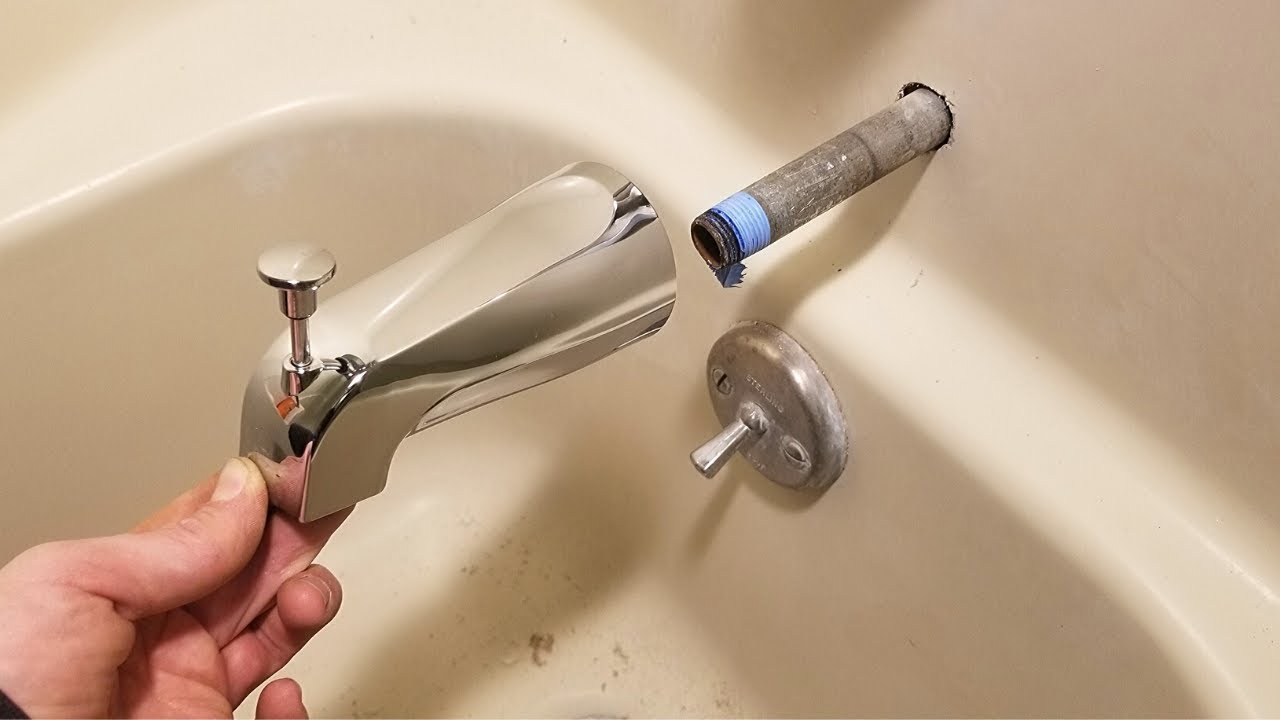
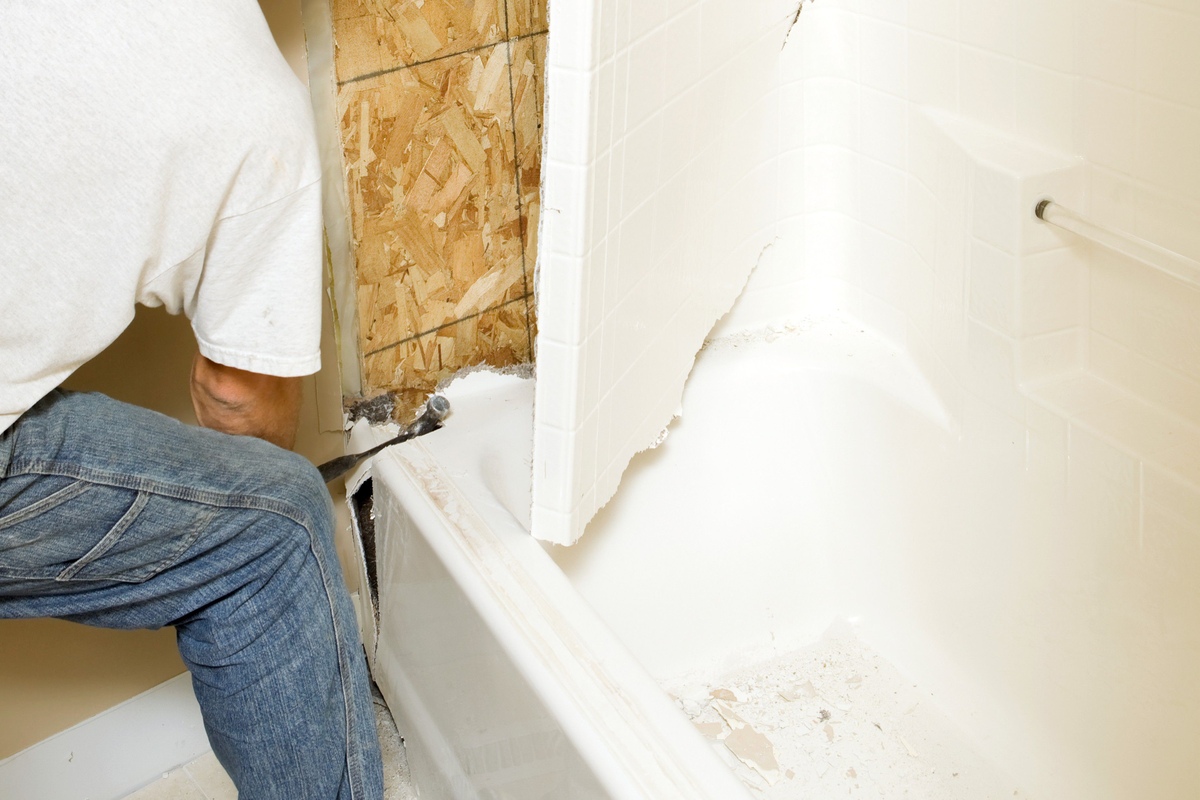
Access the Diverter: Depending on the specific design of your bathtub fixture, gaining access to the water diverter may involve removing a cover plate or panel. Utilize a screwdriver to carefully detach any screws securing the cover, allowing you to expose the internal plumbing components, including the water diverter.
-
Inspect and Clean: Before proceeding with the removal, take a moment to inspect the condition of the old water diverter and surrounding connections. Look for signs of corrosion, mineral buildup, or visible damage that may have contributed to the diverter's malfunction. Additionally, use a clean cloth or rag to wipe down the area, removing any accumulated grime or debris that could impede the disassembly process.
-
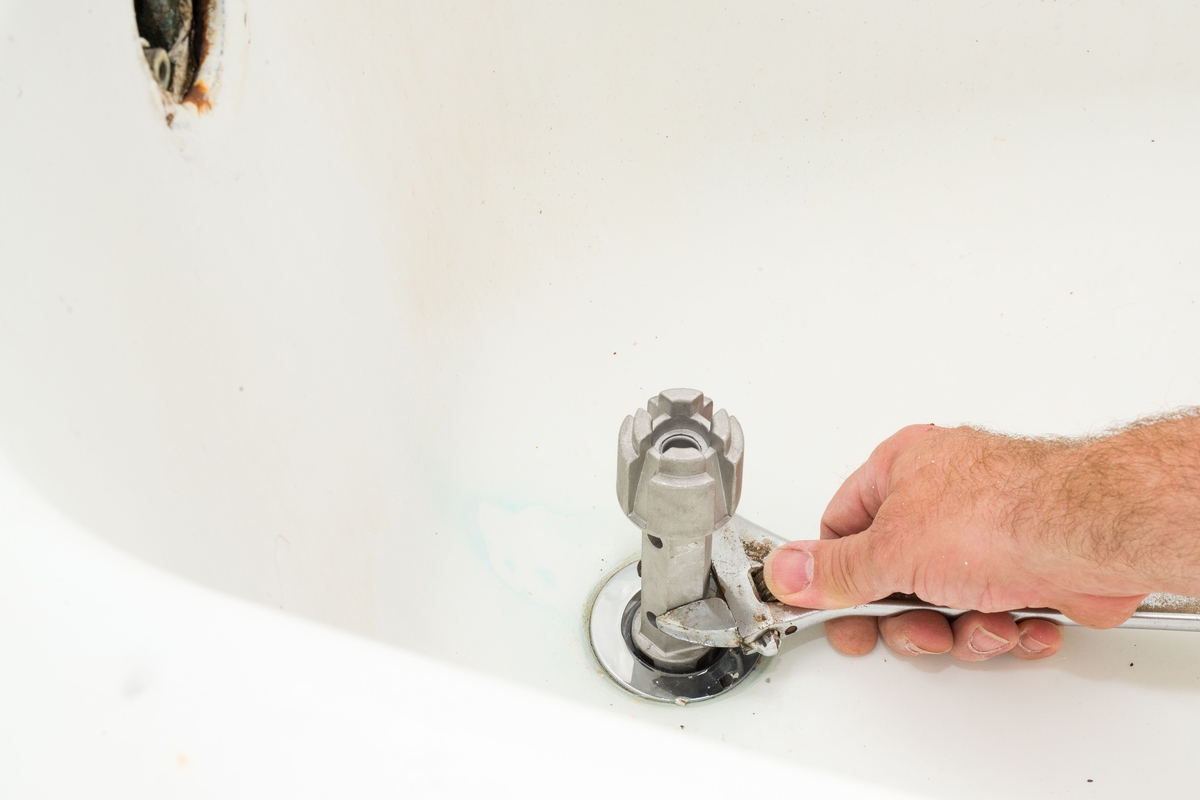
Loosen and Disconnect: Employ the appropriate tools, such as an adjustable wrench or pipe wrench, to loosen and disconnect the fittings and connections securing the old water diverter. Exercise caution and gradual force to avoid overtightening or damaging the plumbing components. If the diverter is threaded, consider using plumber's tape to protect the threads and facilitate smooth disengagement.
-
Capture Residual Water: As you detach the old water diverter, be prepared for residual water to drain from the plumbing connections. Position a bucket or container strategically to capture any runoff, preventing water from spilling onto the surrounding surfaces and ensuring a tidy work environment.
-
Evaluate Seals and Gaskets: Upon removing the old water diverter, inspect the accompanying seals, gaskets, and O-rings for signs of wear or deterioration. If these components appear compromised, it is advisable to replace them with new, compatible counterparts to maintain optimal sealing and prevent potential leaks in the reassembly phase.
-
Thorough Clean-Up: With the old water diverter successfully removed, take the opportunity to clean the exposed plumbing connections and surrounding areas. Use a mild cleaning solution and a clean cloth to eliminate any residual grime or mineral deposits, preparing the space for the seamless installation of the new water diverter.
By meticulously navigating through the process of removing the old water diverter, you demonstrate a methodical and detail-oriented approach to home maintenance, setting the stage for the subsequent installation of the new diverter. With the old fixture safely disassembled and the workspace meticulously prepared, you are now poised to transition to the pivotal phase of installing the new bathtub water diverter, advancing toward the culmination of this rewarding DIY endeavor.
Step 4: Install the New Water Diverter
With the old water diverter successfully removed and the workspace meticulously prepared, the installation of the new water diverter marks a pivotal phase in the bathtub maintenance process. This step requires precision, attention to detail, and a methodical approach to ensure the seamless integration of the new fixture into the existing plumbing configuration.
-
Prepare the New Diverter: Before proceeding with the installation, carefully inspect the new water diverter to verify its compatibility with the bathtub fixture. Ensure that all necessary seals, gaskets, and O-rings are in place and in optimal condition. If required, apply plumber's tape to the threaded connections of the new diverter to facilitate a secure and leak-free installation.
-
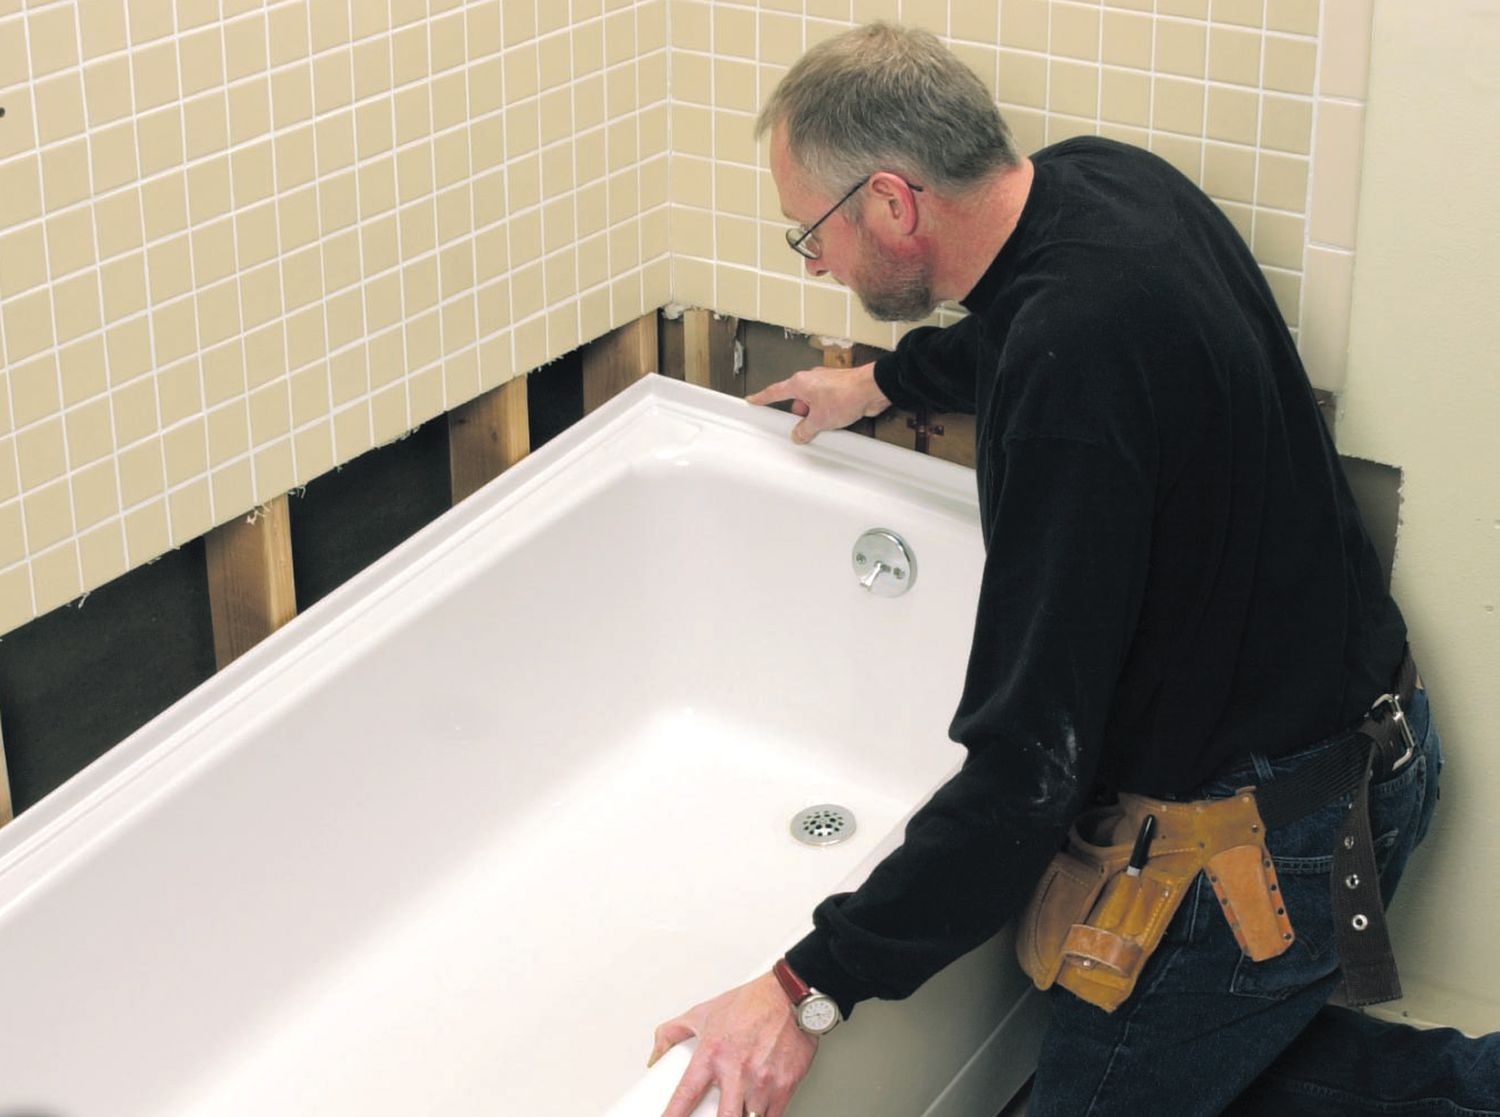
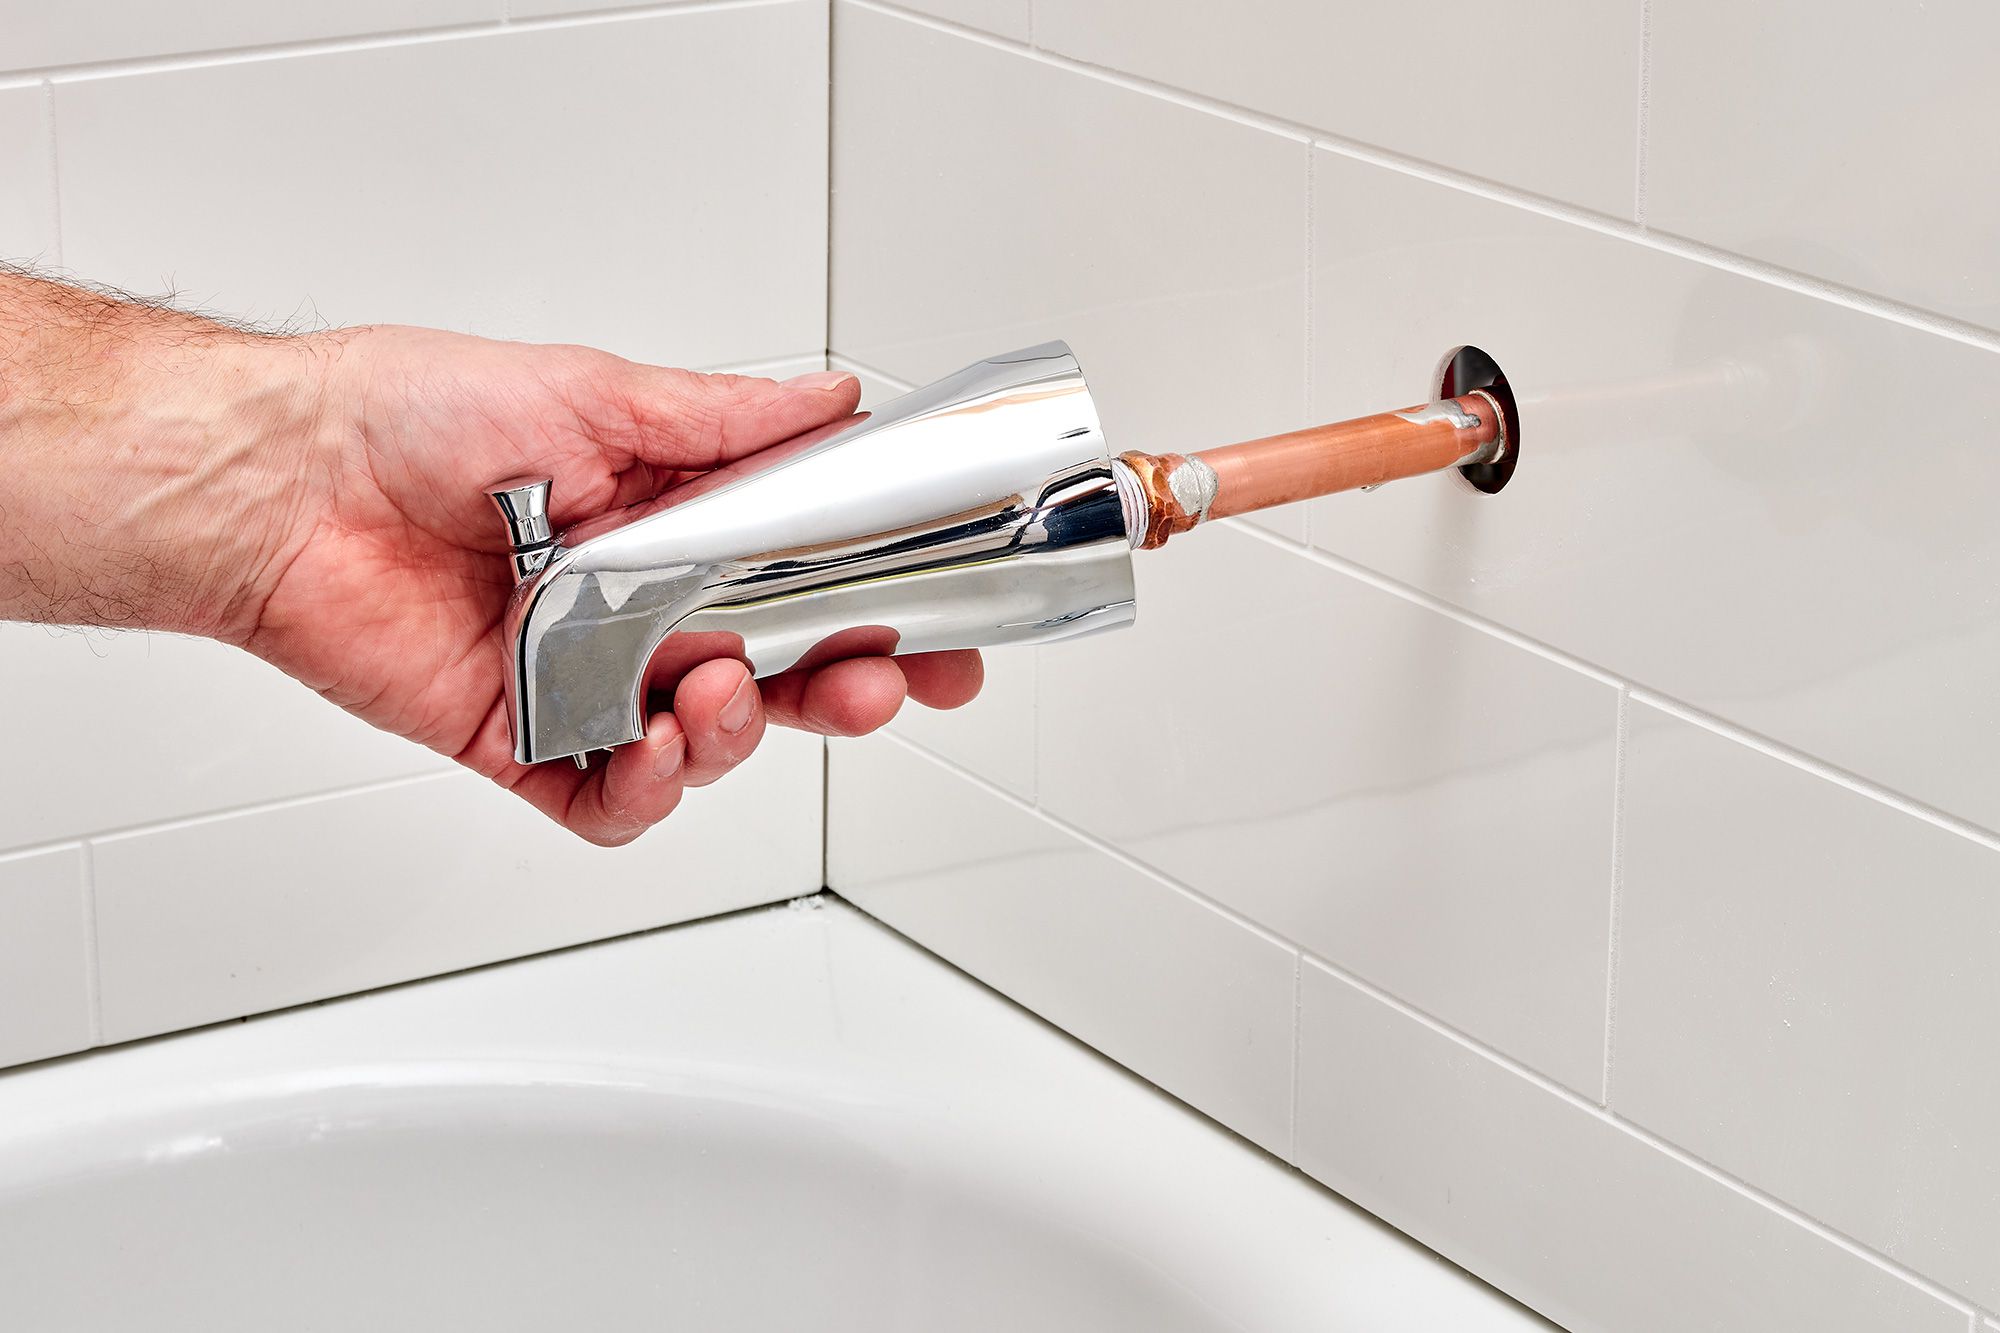
Position and Secure: Align the new water diverter with the designated opening in the bathtub fixture, taking care to position it correctly and orient it according to the manufacturer's specifications. Once properly aligned, use an adjustable wrench or suitable tool to secure the diverter in place, ensuring a snug fit without over-tightening that could potentially damage the fixture or compromise the seals.
-
Tighten Connections: With the new water diverter in position, proceed to tighten the connections and fittings, exercising caution to achieve the appropriate level of tightness without causing strain on the plumbing components. Verify that all threaded connections are adequately sealed with plumber's tape and that the diverter is firmly secured within the fixture.
-
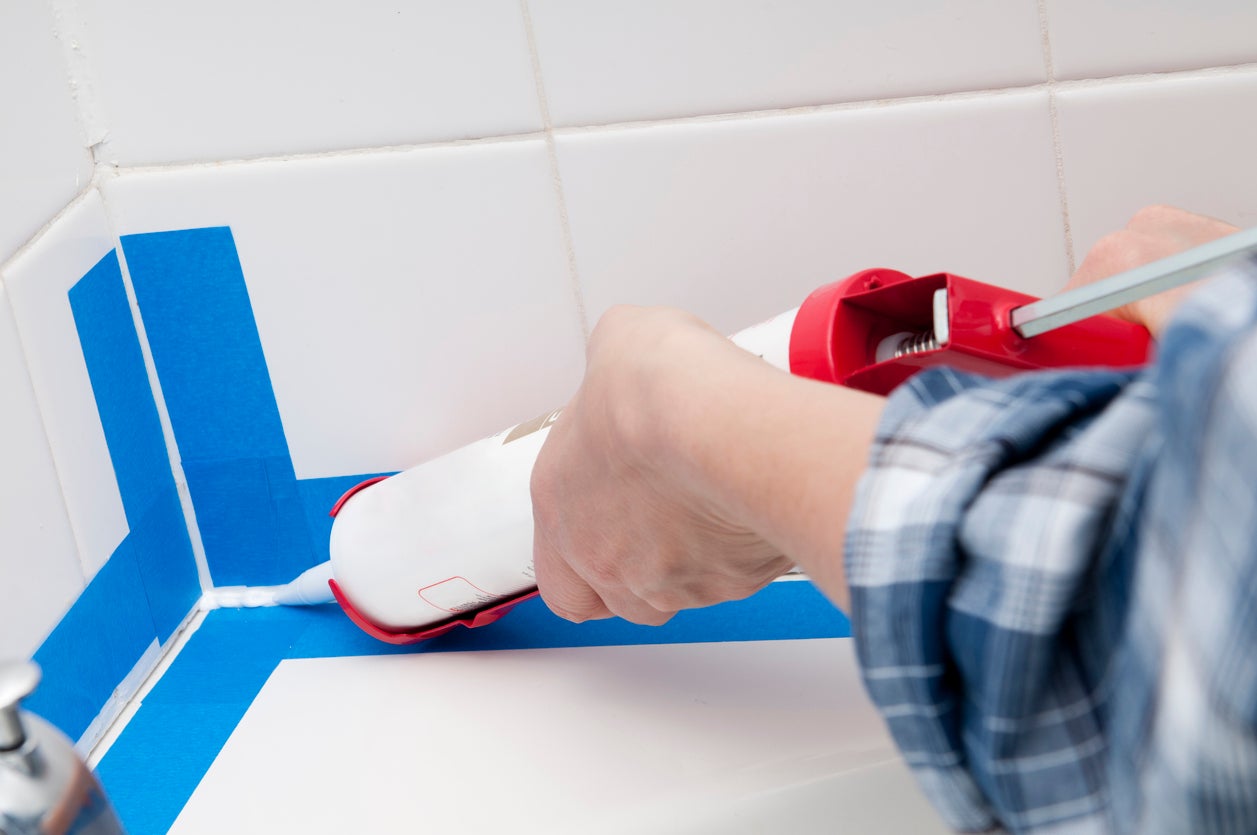
Apply Plumbers Putty: If the new water diverter features any exposed edges or gaps where water may seep through, consider applying a thin layer of plumber's putty to create a watertight seal. Mold the putty to conform to the contours of the diverter and the surrounding fixture, ensuring comprehensive protection against potential leaks.
-
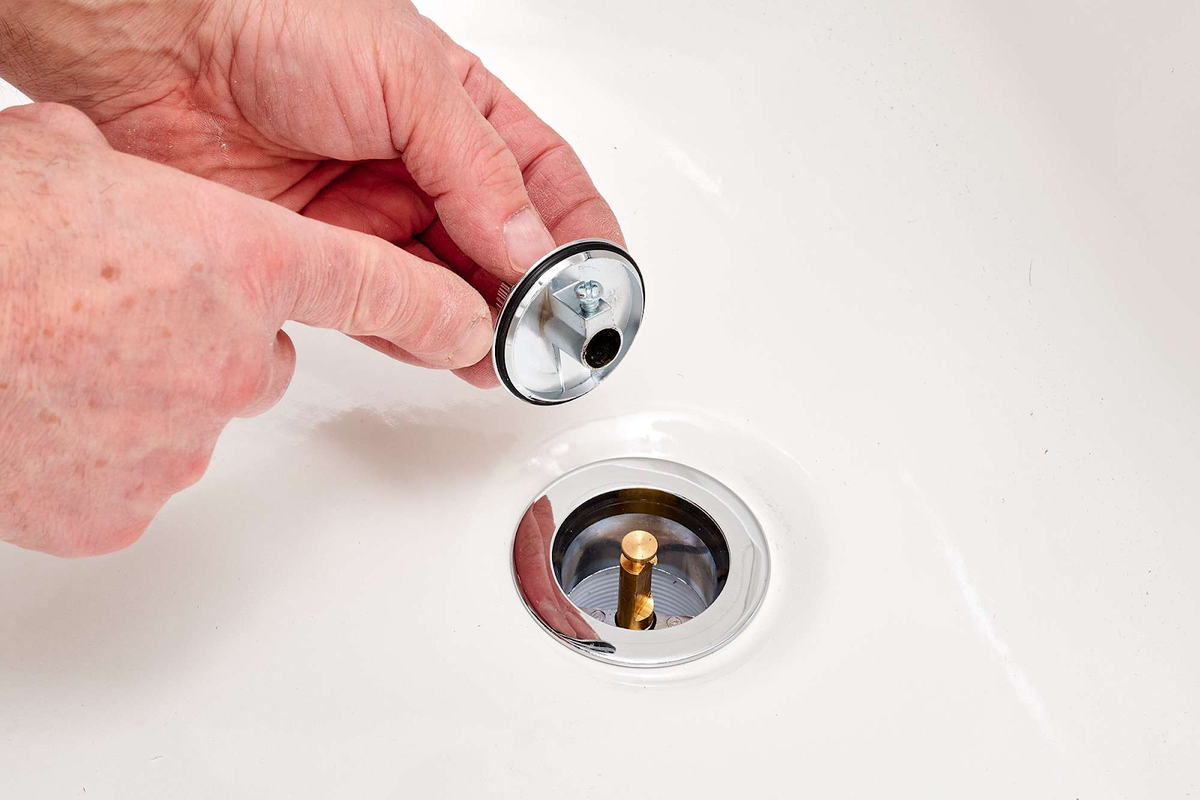
Test for Leaks: Once the new water diverter is securely installed, turn the water supply back on and carefully test the functionality of the diverter. Run both the faucet and the showerhead to assess the water flow and verify that there are no leaks or irregularities in the operation of the newly installed fixture.
-
Final Adjustments: If any adjustments or fine-tuning are necessary to optimize the performance of the new water diverter, address them promptly to achieve the desired water flow and functionality. Pay close attention to any signs of leakage or inconsistent water distribution, making necessary modifications to ensure a reliable and efficient operation.
By meticulously navigating through the process of installing the new water diverter, you demonstrate a methodical and detail-oriented approach to home maintenance, setting the stage for the successful restoration of your bathtub's functionality. With the new diverter seamlessly integrated and the plumbing connections meticulously secured, you are now prepared to advance to the final phase of testing the new water diverter, bringing this gratifying DIY endeavor to fruition.
When replacing a bathtub water diverter, make sure to turn off the water supply to the bathtub before starting. Use a screwdriver to remove the old diverter and replace it with a new one, making sure to secure it tightly. Test the new diverter to ensure it is working properly before turning the water supply back on.
Step 5: Test the New Water Diverter
With the new water diverter securely installed and the plumbing connections meticulously secured, the critical phase of testing the functionality of the replacement fixture becomes paramount. This pivotal step serves as the ultimate validation of the meticulous efforts invested in the bathtub water diverter replacement process, ensuring that the new fixture operates seamlessly and fulfills its intended purpose.
To commence the testing phase, turn on the water supply to the bathtub and carefully observe the behavior of the newly installed water diverter. Begin by activating the faucet and allowing water to flow through it, assessing the diversion of water to the showerhead when the diverter lever or knob is engaged. Pay close attention to the transition of water flow, ensuring that the diverter effectively redirects the water from the faucet to the showerhead without any signs of leakage or irregularities.
As the water flows through the showerhead, evaluate the water pressure and consistency to ascertain that the new water diverter facilitates a steady and reliable stream of water. Take note of any fluctuations in water pressure or unexpected drips from the faucet, which may indicate potential issues with the installation or the functionality of the diverter.
Subsequently, engage the diverter to redirect the water back to the faucet and observe the transition, verifying that the reversion process occurs smoothly and without any disruptions. Assess the faucet's water flow and check for any indications of leaks or abnormal water discharge, ensuring that the diverter effectively restores the water flow to the desired outlet.
To comprehensively validate the performance of the new water diverter, alternate between the faucet and the showerhead multiple times, meticulously monitoring the transition of water flow and scrutinizing the overall functionality of the diverter. This iterative testing approach allows for a thorough assessment of the diverter's reliability and responsiveness, providing confidence in its seamless operation.
In the event of any unexpected issues or irregularities during the testing phase, promptly address the concerns by revisiting the installation and verifying the integrity of the plumbing connections. If necessary, make adjustments to the diverter's positioning or the tightness of the fittings to rectify any observed deficiencies and optimize the fixture's performance.
By diligently conducting a comprehensive testing of the new water diverter, you affirm the successful completion of the replacement process and validate the functionality of the fixture. With the diverter demonstrating consistent and reliable operation, you can take pride in your adeptness at resolving plumbing challenges and restoring your bathtub's functionality, culminating in a gratifying and rewarding DIY achievement.
Conclusion
In conclusion, the process of replacing a bathtub water diverter encompasses a series of methodical steps and meticulous attention to detail, culminating in the restoration of optimal functionality to your bathing space. By embarking on this DIY endeavor, you have not only demonstrated a proactive approach to home maintenance but also acquired valuable insights into plumbing maintenance and repair.
Throughout the journey of replacing the water diverter, you have embraced the role of a capable and resourceful homeowner, equipped with the knowledge and skills to address common plumbing issues with confidence. From gathering the necessary tools and materials to meticulously testing the new diverter, each phase of the process has contributed to your growing expertise in home maintenance.
By adhering to safety protocols, such as turning off the water supply and diligently inspecting the plumbing connections, you have exemplified a commitment to responsible and secure work practices. Your attention to detail during the removal of the old diverter and the precise installation of the new fixture reflects a dedication to achieving optimal results and ensuring the long-term reliability of your bathtub's components.
As you navigated through the intricacies of the replacement process, you have not only enhanced your practical skills but also cultivated a sense of empowerment and self-sufficiency in managing household maintenance tasks. The successful completion of this project serves as a testament to your ability to tackle challenges and proactively maintain your living environment.
Moreover, the gratification derived from resolving a plumbing issue independently and witnessing the seamless operation of the new water diverter underscores the intrinsic value of DIY initiatives. Your commitment to enhancing your home's functionality and your bathing experience has resulted in a tangible and rewarding outcome, fostering a deeper connection to your living space and a sense of accomplishment.
As you reflect on the journey of replacing the bathtub water diverter, may this experience serve as a catalyst for future endeavors, inspiring you to embrace new opportunities for learning and growth within the realm of home maintenance. Whether it involves plumbing, electrical work, or general repairs, your demonstrated proficiency and determination position you as a capable steward of your home, ready to tackle challenges and elevate your living environment.
In essence, the successful replacement of the bathtub water diverter not only signifies a practical achievement but also symbolizes your unwavering commitment to nurturing a harmonious and functional home. With each project undertaken, you continue to enrich your skills, expand your knowledge, and fortify your bond with your living space, embodying the spirit of resourcefulness and resilience that defines a dedicated homeowner.
Frequently Asked Questions about How To Replace Bathtub Water Diverter
Was this page helpful?
At Storables.com, we guarantee accurate and reliable information. Our content, validated by Expert Board Contributors, is crafted following stringent Editorial Policies. We're committed to providing you with well-researched, expert-backed insights for all your informational needs.


0 thoughts on “How To Replace Bathtub Water Diverter”