Home>Furniture & Design>Bathroom Fixtures>How To Install A Moen Curved Tension Shower Rod
Bathroom Fixtures
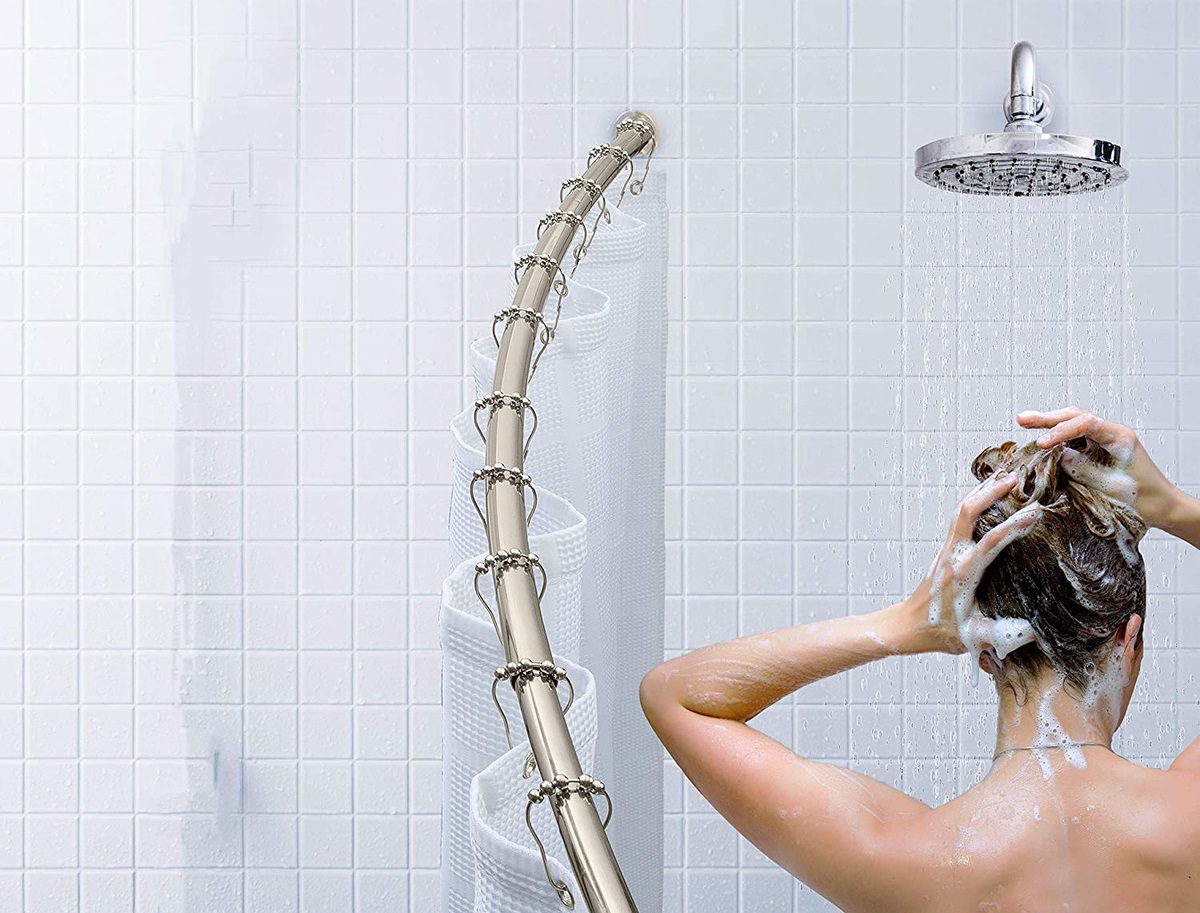
How To Install A Moen Curved Tension Shower Rod
Modified: February 18, 2024
Learn how to easily install a Moen curved tension shower rod to upgrade your bathroom fixtures. Follow our step-by-step guide for a quick and hassle-free installation.
(Many of the links in this article redirect to a specific reviewed product. Your purchase of these products through affiliate links helps to generate commission for Storables.com, at no extra cost. Learn more)
Introduction
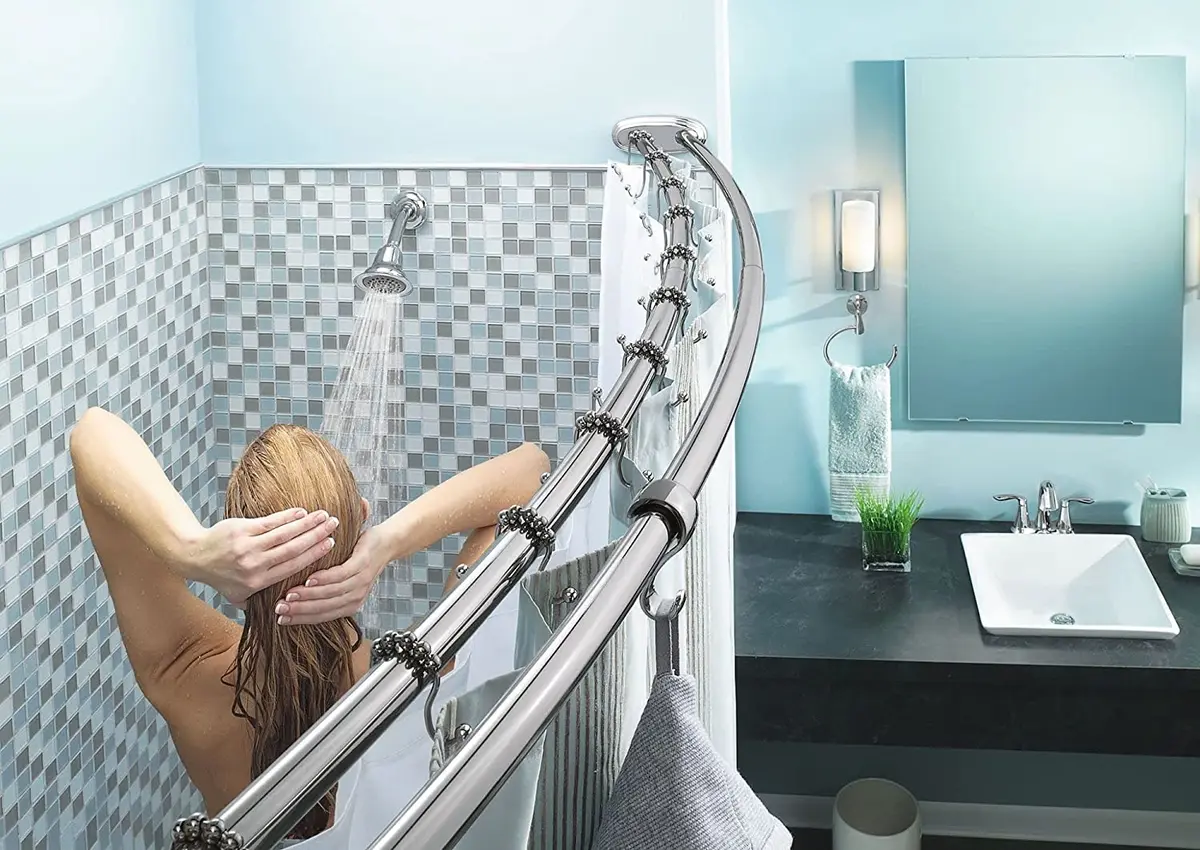
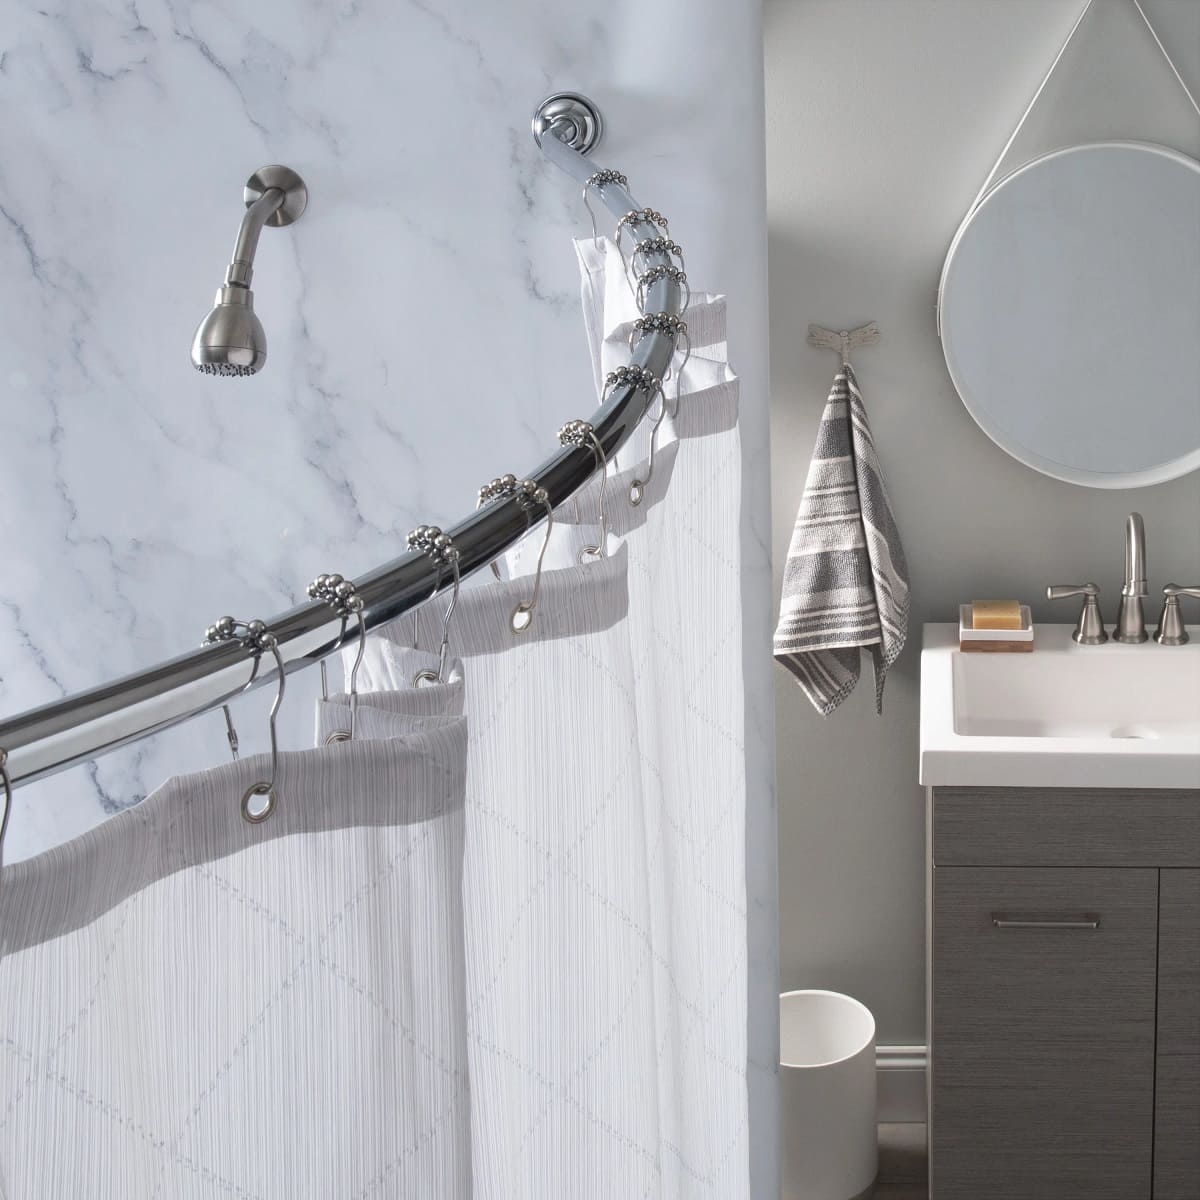
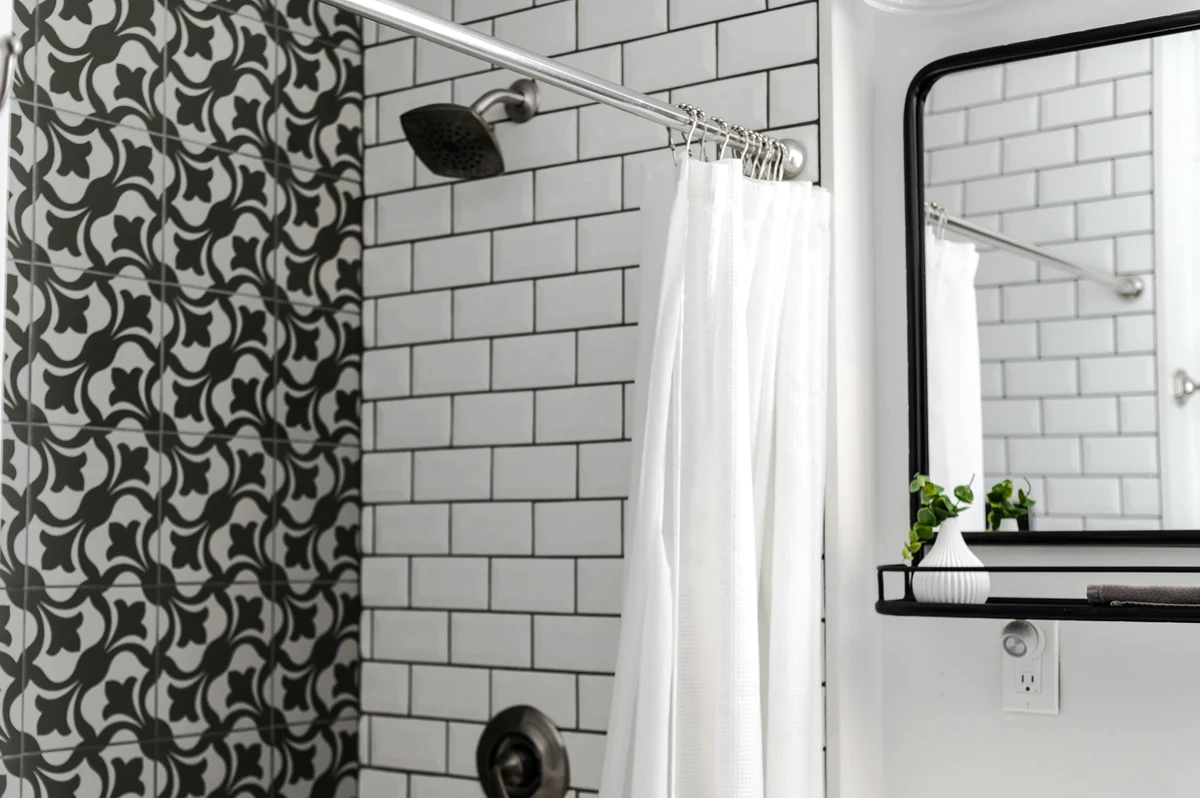
Installing a Moen curved tension shower rod can be a simple yet impactful way to upgrade your bathroom. This stylish and functional fixture not only adds a touch of elegance to your shower space but also provides additional room for a more comfortable shower experience. Whether you're looking to replace an old shower rod or enhance the aesthetics of your bathroom, this step-by-step guide will walk you through the process of installing a Moen curved tension shower rod with ease and confidence.
By following these instructions, you can transform your shower area into a more spacious and inviting environment, perfect for unwinding after a long day or starting your morning routine on a refreshing note. With the right tools and a clear understanding of the installation process, you can achieve a professional-looking result without the need for extensive remodeling or professional assistance.
Now, let's dive into the details of how to install a Moen curved tension shower rod, starting with gathering the necessary tools and materials.
Key Takeaways:
- Upgrade your bathroom with a Moen curved tension shower rod for a more spacious and elegant shower experience. Follow the simple installation steps to achieve a professional result without the need for extensive remodeling.
- Ensure a stable and reliable installation by measuring the space, adjusting the tension, and testing the stability of your Moen curved tension shower rod. Enjoy a luxurious showering experience with added space and visual appeal.
Read more: How To Install A Curved Tension Shower Rod
Step 1: Gather the necessary tools and materials
Before beginning the installation process, it's essential to gather all the required tools and materials to ensure a smooth and efficient setup. Here's a comprehensive list of what you'll need:
Tools:
- Measuring Tape: A reliable measuring tape will help you accurately determine the space for installing the curved tension shower rod.
- Pencil: Use a pencil to mark the precise spots for mounting the shower rod brackets.
- Level: A level will ensure that the shower rod is installed perfectly straight, enhancing both its appearance and functionality.
- Step Stool or Ladder: Depending on the height of your shower area, a step stool or ladder may be necessary to reach and install the shower rod securely.
- Screwdriver: Ensure you have the appropriate screwdriver, whether it's a flathead or Phillips head, based on the type of screws provided with the Moen curved tension shower rod.
Materials:
- Moen Curved Tension Shower Rod: The centerpiece of the installation, make sure you have the specific model of the Moen curved tension shower rod ready for installation.
- Mounting Hardware: This typically includes the necessary screws and mounting brackets for securing the shower rod in place.
- Dry Cloth: Keep a dry cloth handy to wipe down the installation area and ensure it's clean and free from any debris before mounting the shower rod.
By having all these tools and materials prepared and within reach, you'll streamline the installation process and minimize interruptions. With everything at your disposal, you can proceed to the next step with confidence, knowing that you're fully equipped to install the Moen curved tension shower rod efficiently and effectively.
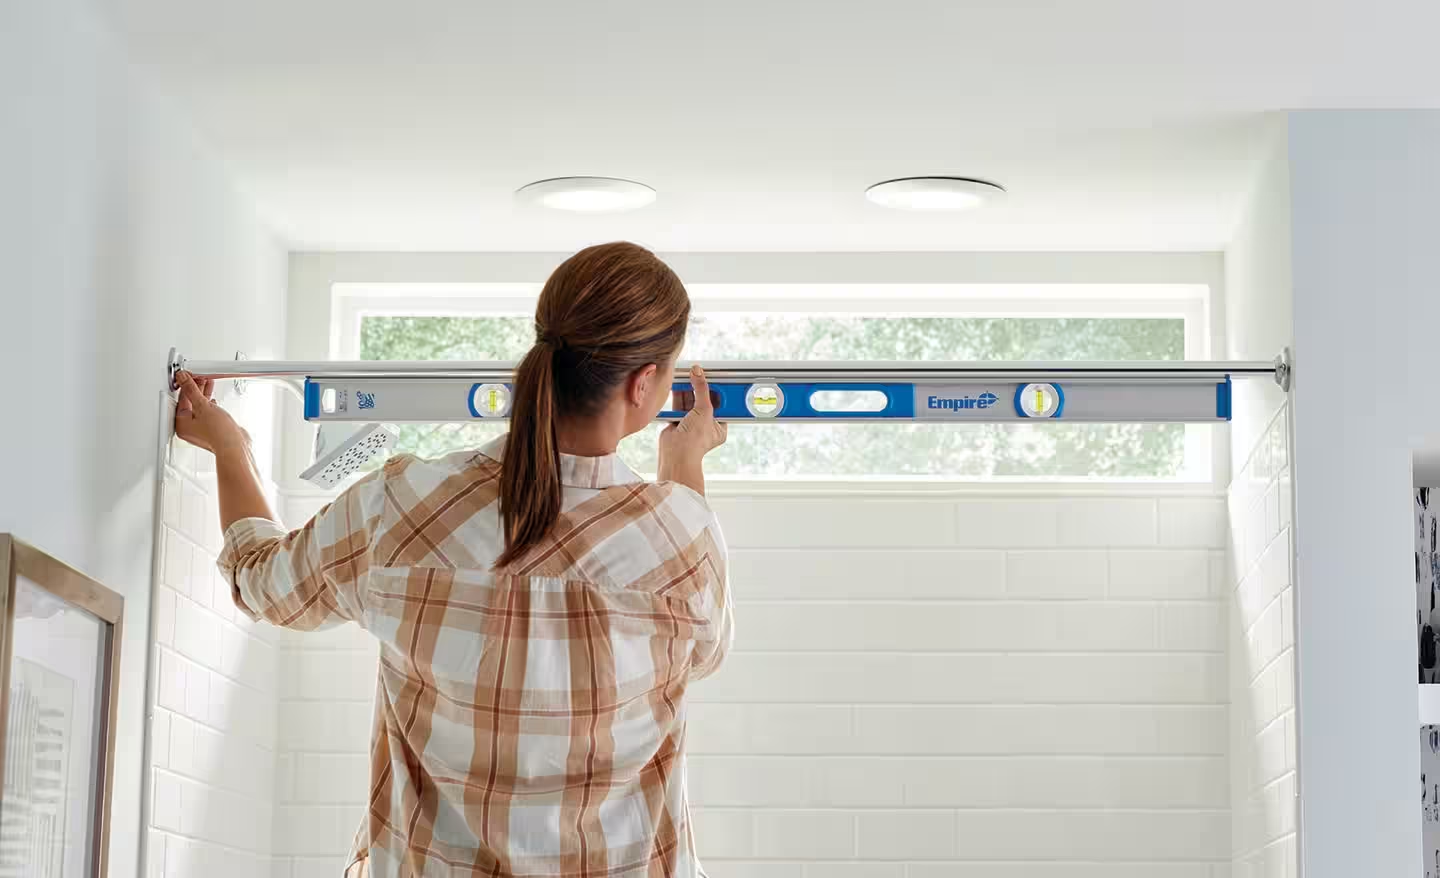
Step 2: Measure the space and adjust the shower rod
Before diving into the physical installation of the Moen curved tension shower rod, it's crucial to take precise measurements of the space where the rod will be placed. This step is essential for ensuring that the shower rod fits perfectly and functions as intended. Here's a detailed guide on how to measure the space and adjust the shower rod for a seamless installation process.
Read more: How To Install A Tension Shower Rod
Measure the Space:
-
Height and Width: Use a measuring tape to determine the height and width of the shower area where the curved tension rod will be installed. Measure from the top edge of the tub or the floor to the desired height for the shower rod. Additionally, measure the width of the space to ensure the shower rod will span the entire opening of the shower.
-
Marking the Placement: Once you have the measurements, use a pencil to mark the precise spots where the mounting brackets will be placed. Ensure that the markings are level and aligned to avoid any discrepancies during the installation process.
Adjust the Shower Rod:
-
Adjusting the Length: Most Moen curved tension shower rods are designed to be adjustable in length to accommodate various shower sizes. Follow the manufacturer's instructions to extend or retract the rod to match the width of your shower space accurately.
-
Testing the Fit: After adjusting the length, hold the shower rod against the marked spots to verify that it fits perfectly within the measured space. Make any necessary adjustments to the length of the rod to achieve a snug and secure fit.
-
Using a Level: Before proceeding to the installation, use a level to ensure that the shower rod is perfectly straight. This step is crucial for both the aesthetic appeal and the functionality of the shower rod, as a level installation prevents water from pooling on one side of the curtain.
By meticulously measuring the space and adjusting the shower rod to fit seamlessly, you set the stage for a successful installation process. Taking the time to ensure accurate measurements and a proper fit will ultimately contribute to the overall stability and visual appeal of the Moen curved tension shower rod once it's installed.
With the measurements confirmed and the shower rod adjusted to fit flawlessly, you're now ready to move on to the next step: installing the shower rod securely in place.
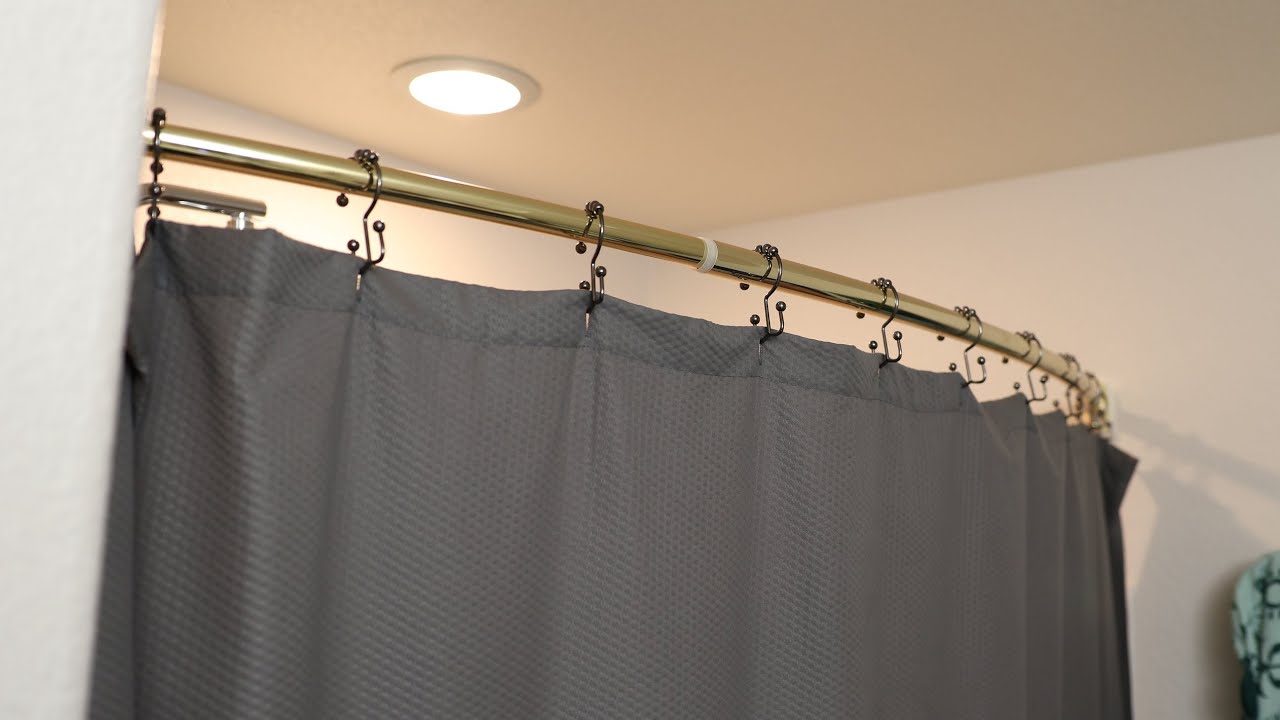
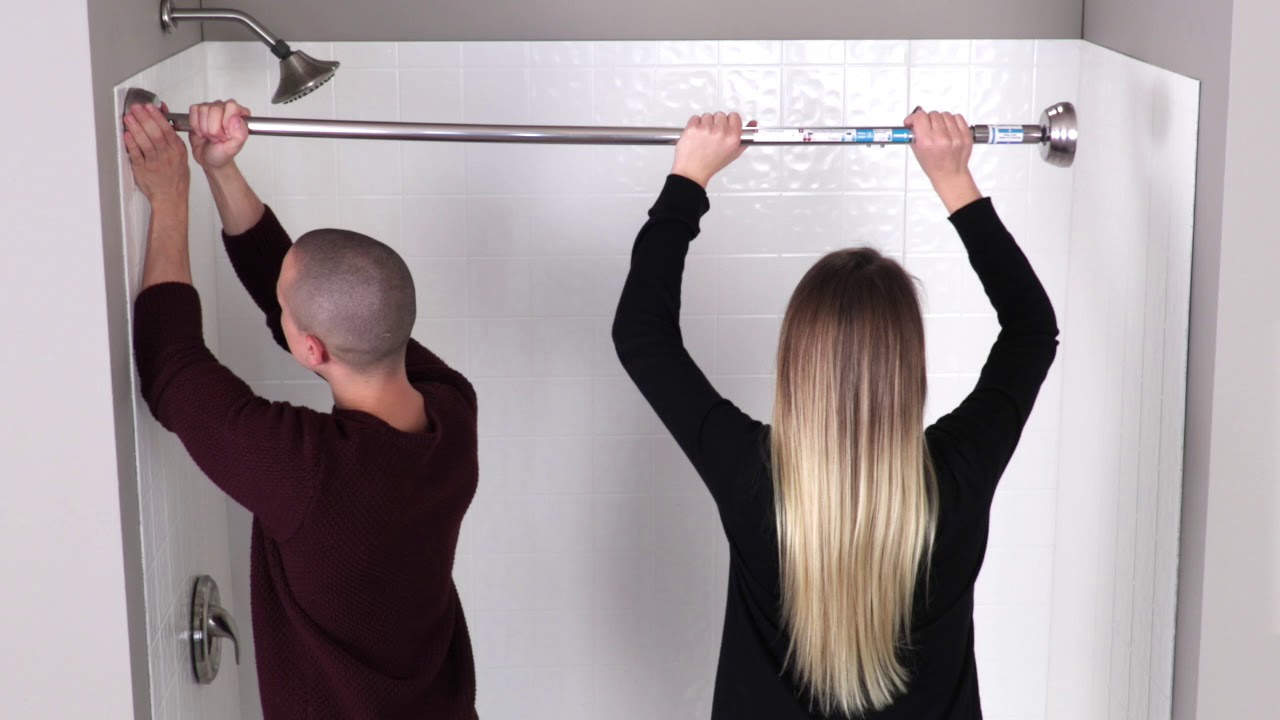
Step 3: Install the shower rod
With the measurements confirmed and the shower rod adjusted to fit flawlessly, you're now ready to install the Moen curved tension shower rod securely in place. Follow these detailed steps to ensure a smooth and effective installation process:
-
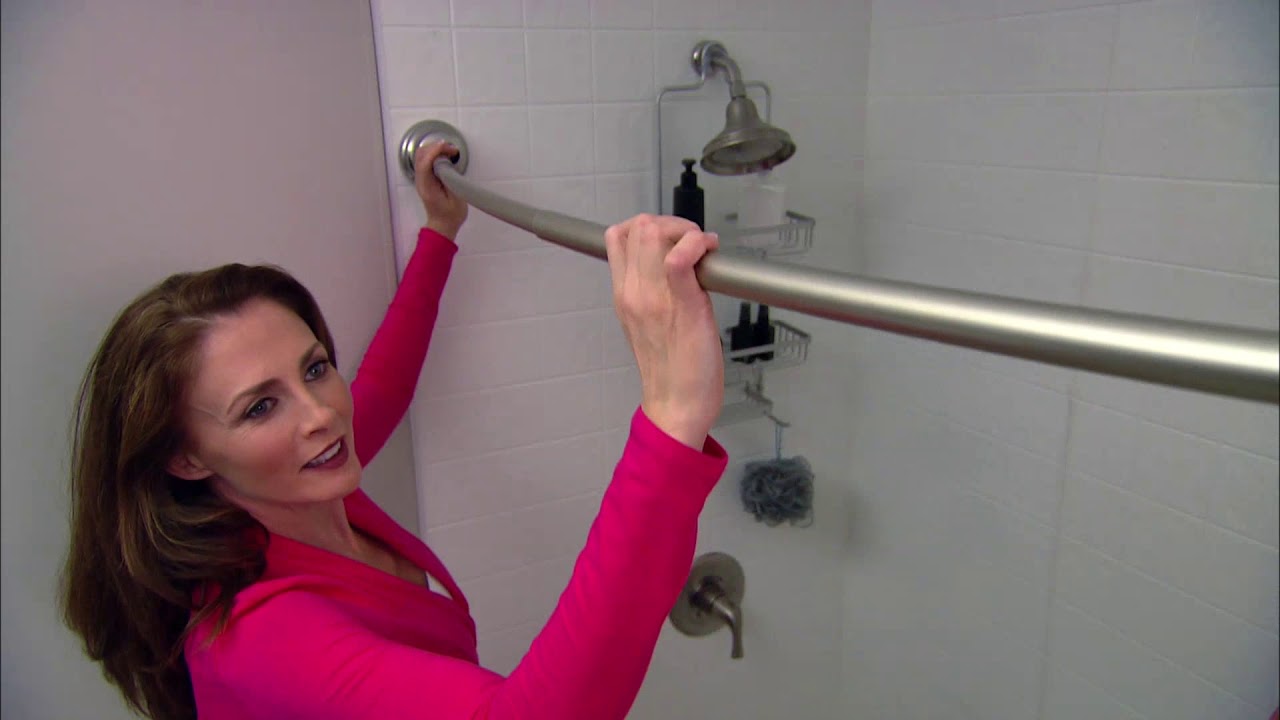
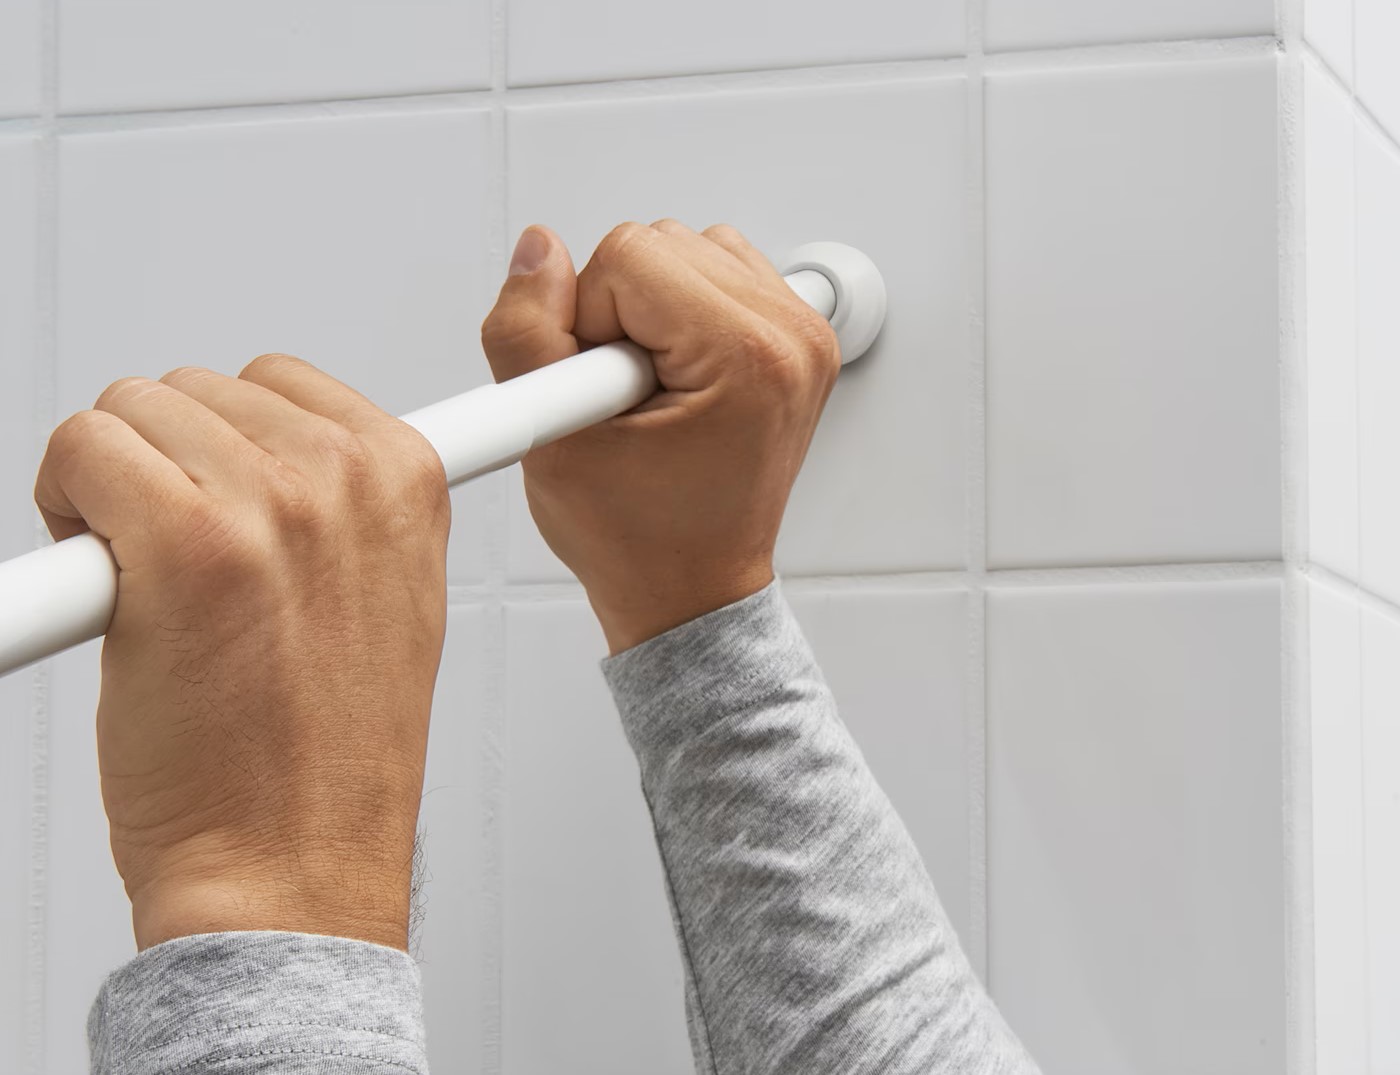
Prepare the Mounting Brackets: Start by positioning the mounting brackets at the marked spots on the wall. Ensure that the brackets are aligned with the markings and that they are level. Using a pencil, mark the locations for the screws through the bracket's screw holes.
-
Secure the Mounting Brackets: Using a suitable screwdriver, carefully secure the mounting brackets to the wall using the provided screws. Make sure the brackets are firmly attached and that they can support the weight of the shower rod.
-
Insert the Shower Rod: With the mounting brackets in place, insert the ends of the Moen curved tension shower rod into the brackets. Apply gentle pressure to fit the rod securely into the brackets. Ensure that the rod is evenly positioned within the brackets for a balanced and stable installation.
-
Adjust the Tension: If your Moen curved tension shower rod features an adjustable tension mechanism, follow the manufacturer's instructions to adjust the tension to your preference. This step is crucial for ensuring that the shower rod remains securely in place without slipping or sliding during use.
-
Double-Check the Alignment: Once the shower rod is in position, double-check that it is level and straight. Use a level to verify that the rod is not tilted or uneven, as this can affect the functionality and appearance of the installation.
-
Tighten Any Adjusting Screws: If your Moen curved tension shower rod includes adjusting screws or mechanisms for fine-tuning the fit, make any necessary adjustments and ensure that all components are securely tightened to prevent any movement or instability.
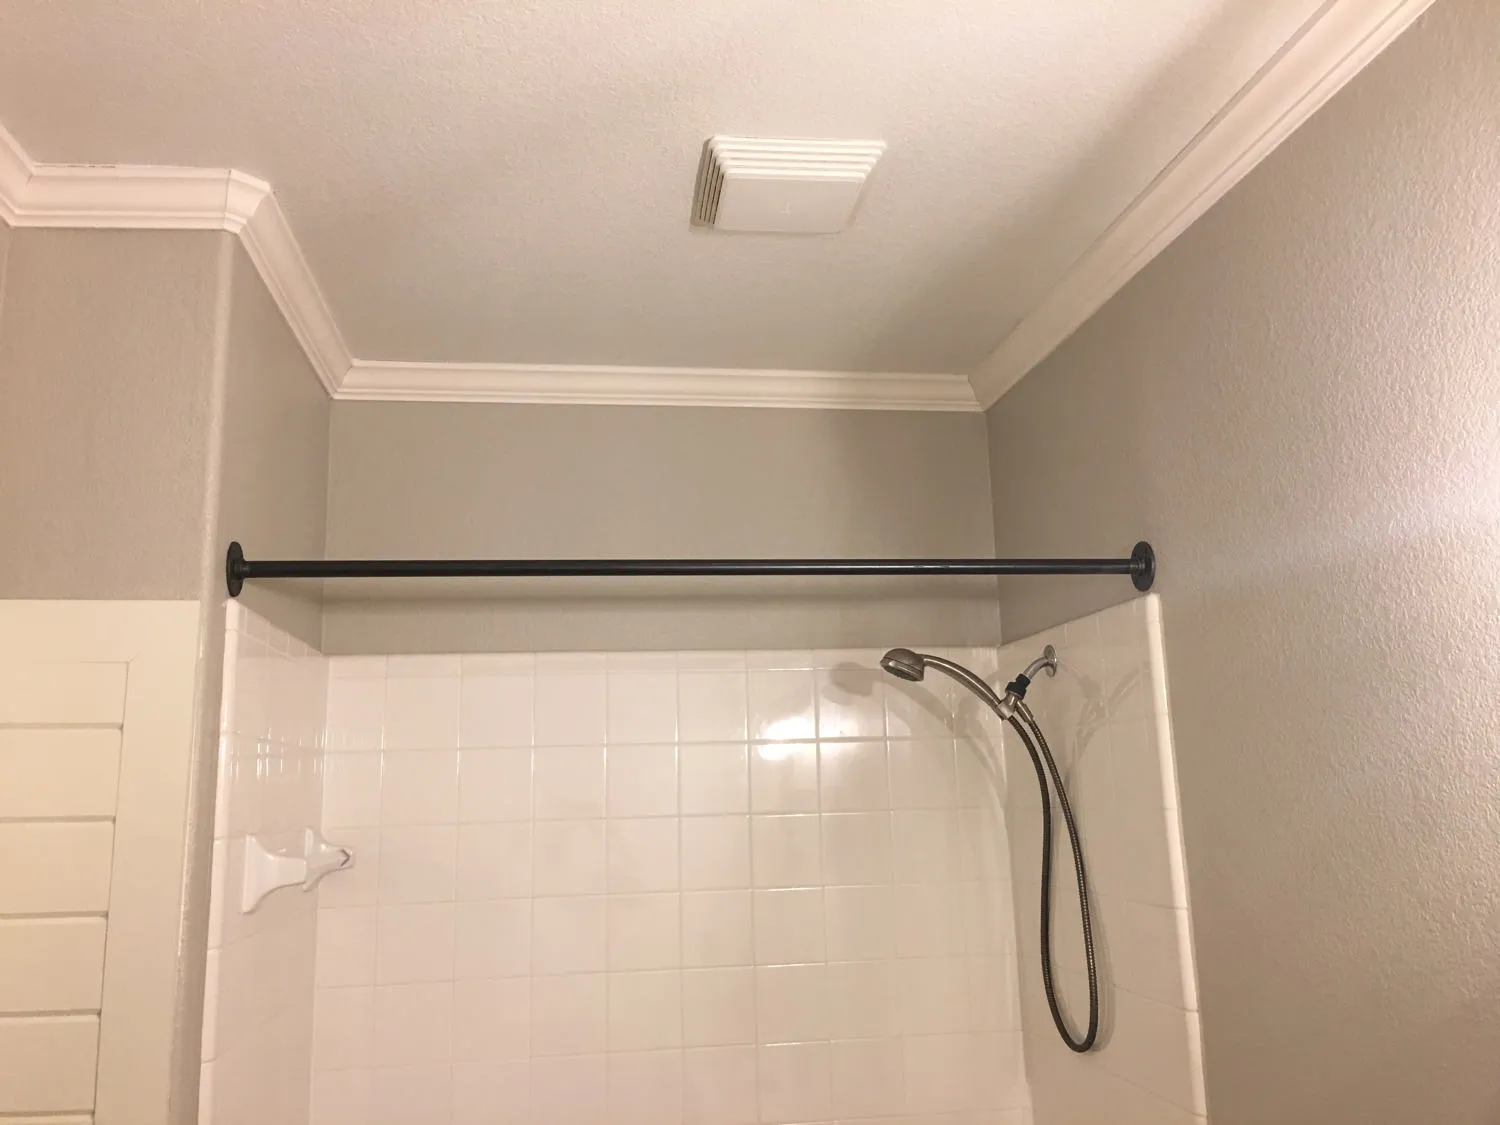
By following these steps meticulously, you can effectively install the Moen curved tension shower rod with confidence and precision. A securely installed shower rod not only enhances the visual appeal of your bathroom but also provides a stable and reliable support for your shower curtain, contributing to a more enjoyable and functional shower experience.
With the shower rod successfully installed, the final step involves testing its stability and ensuring that it meets your expectations in terms of both appearance and functionality.
Step 4: Adjust the tension and secure the rod in place
After successfully installing the Moen curved tension shower rod, the next crucial step is to adjust the tension and secure the rod in place to ensure its stability and functionality. This step is essential for preventing the rod from slipping or sliding during use, ultimately contributing to a secure and reliable showering experience. Here's a detailed guide on how to adjust the tension and secure the rod effectively:
-
Adjusting the Tension Mechanism: If your Moen curved tension shower rod features an adjustable tension mechanism, carefully follow the manufacturer's instructions to fine-tune the tension to your preference. Typically, this involves twisting or extending the rod to create the desired tension against the walls of the shower enclosure. By adjusting the tension, you can ensure that the rod remains firmly in place without the need for permanent fixtures or drilling.
-
Testing the Stability: Once the tension is adjusted, test the stability of the shower rod by gently pulling on the curtain or applying light pressure to the rod. The goal is to verify that the rod remains securely in place and does not shift or dislodge easily. A stable and well-secured shower rod is essential for supporting the weight of the shower curtain and maintaining a tidy and organized shower space.
-
Ensuring Even Distribution: Check that the tension is evenly distributed across the length of the shower rod. Uneven tension can lead to instability and may cause the rod to sag or become misaligned. By ensuring uniform tension, you can maintain a balanced and secure installation, enhancing both the appearance and functionality of the shower rod.
-
Securing the Rod Ends: If your Moen curved tension shower rod includes end caps or covers, make sure they are securely in place. These components not only provide a finished look to the installation but also help prevent the rod from slipping out of the mounting brackets. Confirm that the end caps are snugly fitted to the ends of the rod, adding an extra layer of security to the installation.
-
Final Adjustment Checks: Double-check the tension and overall stability of the shower rod, making any necessary adjustments to ensure a secure and reliable installation. Pay attention to any signs of movement or instability, and address them promptly to achieve a professional and long-lasting result.
By meticulously adjusting the tension and securing the Moen curved tension shower rod in place, you can enjoy the peace of mind that comes with a stable and reliable shower fixture. This step not only enhances the functionality of the shower rod but also contributes to the overall safety and comfort of your showering experience. With the tension adjusted and the rod securely in place, you're now ready to move on to the final step: testing the stability of the shower rod to ensure a successful installation.
Read more: How To Install A Curved Shower Curtain Rod
Step 5: Test the stability of the shower rod
After completing the installation and adjusting the tension of your Moen curved tension shower rod, it's crucial to thoroughly test its stability to ensure a secure and reliable setup. This step is essential for confirming that the shower rod can withstand the daily demands of supporting a shower curtain and providing a stable enclosure for your shower space. Here's a detailed guide on how to test the stability of the shower rod effectively:
-
Gentle Pressure Test: Begin by applying gentle pressure to the shower rod, mimicking the force that may be exerted when opening or closing the shower curtain. This test allows you to assess the initial stability of the rod and identify any immediate signs of movement or instability.
-
Pulling Test: Gently pull on the shower curtain to evaluate the rod's ability to withstand the weight and movement of the curtain. The goal is to ensure that the rod remains securely in place and does not shift or dislodge when subjected to the typical motions associated with using the shower.
-
Shaking Test: Lightly shake the shower rod from side to side to simulate the natural movements that may occur during showering. This test helps identify any potential weak points or areas of instability, allowing you to address them before regular use.
-
Visual Inspection: While testing the stability, visually inspect the mounting brackets, end caps, and the overall alignment of the shower rod. Look for any signs of stress, movement, or misalignment that may indicate the need for further adjustments or reinforcement.
-
Repeat Adjustments: If you notice any instability or movement during the testing phase, repeat the necessary adjustments to the tension and positioning of the shower rod. It's essential to address any issues promptly to ensure a secure and reliable installation.
-
Long-Term Stability: Consider leaving the shower rod in place for a few hours or overnight and retesting its stability. This extended assessment allows you to evaluate the long-term stability of the installation and make any final adjustments as needed.
By meticulously testing the stability of the Moen curved tension shower rod, you can confirm that it meets the highest standards of reliability and functionality. A stable and secure shower rod not only enhances the overall aesthetics of your bathroom but also provides a dependable support system for your shower curtain, contributing to a more enjoyable and stress-free showering experience.
With the stability of the shower rod successfully tested and confirmed, you can now revel in the satisfaction of a professionally installed and reliable Moen curved tension shower rod, ready to elevate your daily shower routine with its enhanced functionality and visual appeal.
When installing a Moen Curved Tension Shower Rod, make sure to measure the space accurately before purchasing. Follow the manufacturer’s instructions carefully and use a level to ensure the rod is installed straight.
Conclusion
In conclusion, the installation of a Moen curved tension shower rod is a rewarding endeavor that can significantly enhance the functionality and aesthetics of your bathroom space. By following the step-by-step guide outlined in this article, you can confidently embark on the process of installing this stylish and practical fixture, ultimately transforming your shower area into a more spacious, organized, and visually appealing environment.
Throughout the installation process, meticulous attention to detail is crucial, from gathering the necessary tools and materials to adjusting the tension and testing the stability of the shower rod. Each step contributes to the overall success of the installation, ensuring that the Moen curved tension shower rod not only looks impressive but also functions reliably, providing a secure enclosure for your shower space.
By carefully measuring the space, adjusting the shower rod to fit seamlessly, and securely installing it with the provided mounting brackets, you lay the foundation for a stable and professional-looking result. The subsequent steps of adjusting the tension and testing the stability further reinforce the integrity of the installation, guaranteeing that the shower rod can withstand the demands of daily use with ease.
Upon completing the installation and confirming the stability of the Moen curved tension shower rod, you can take pride in the enhanced comfort and visual appeal it brings to your bathroom. The additional space created by the curved design offers a more luxurious showering experience, while the secure installation ensures that your shower curtain remains in place, contributing to a tidier and more organized shower area.
Furthermore, the installation of a Moen curved tension shower rod represents a cost-effective and straightforward way to upgrade your bathroom without the need for extensive renovations. With the right tools, materials, and a clear understanding of the installation process, you can achieve professional-looking results that elevate the overall ambiance of your bathroom space.
In essence, the installation of a Moen curved tension shower rod is a testament to the transformative power of simple yet impactful bathroom fixtures. By following the detailed steps outlined in this guide, you can embark on this rewarding project with confidence, knowing that you're creating a more inviting and functional shower space that enhances your daily routine and adds a touch of elegance to your home.
Frequently Asked Questions about How To Install A Moen Curved Tension Shower Rod
Was this page helpful?
At Storables.com, we guarantee accurate and reliable information. Our content, validated by Expert Board Contributors, is crafted following stringent Editorial Policies. We're committed to providing you with well-researched, expert-backed insights for all your informational needs.

0 thoughts on “How To Install A Moen Curved Tension Shower Rod”