Home>Furniture & Design>Living Room Furniture>How To Repair A Lazy Boy Recliner
Living Room Furniture
How To Repair A Lazy Boy Recliner
Modified: April 22, 2024
Learn how to repair a Lazy Boy recliner and bring new life to your living room furniture. Get expert tips and advice on fixing your favorite piece of living room furniture and design.
(Many of the links in this article redirect to a specific reviewed product. Your purchase of these products through affiliate links helps to generate commission for Storables.com, at no extra cost. Learn more)
Introduction
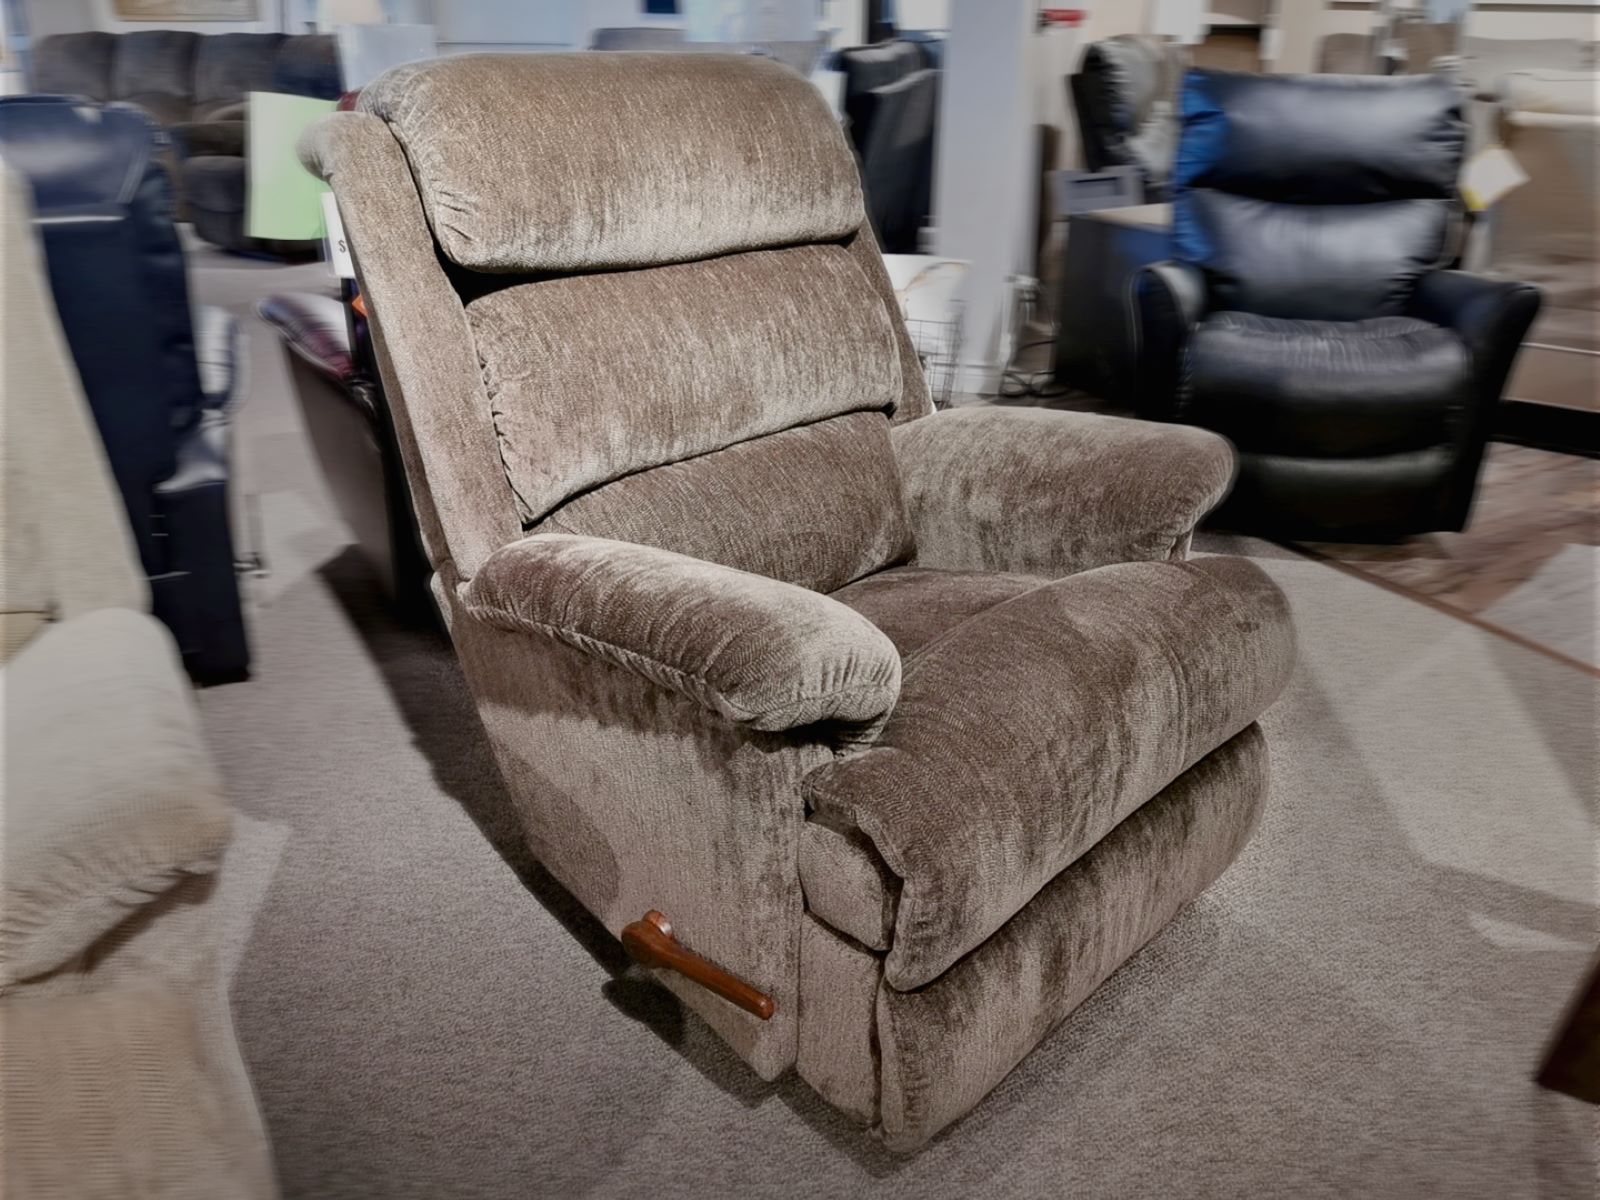
A Lazy Boy recliner is the epitome of comfort and relaxation, providing a cozy haven for unwinding after a long day. However, over time, these beloved pieces of furniture may encounter issues that compromise their functionality. Whether it's a stuck footrest, a malfunctioning backrest, or a squeaky mechanism, knowing how to repair a Lazy Boy recliner can save you from the inconvenience of a faulty favorite seat.
Understanding the inner workings of your recliner and having the right tools and knowledge to address common problems can extend the lifespan of your cherished furniture. By taking a hands-on approach to repair, you can restore your recliner to its former glory without the need for costly professional assistance.
In this comprehensive guide, we will walk you through the step-by-step process of repairing a Lazy Boy recliner, empowering you to tackle common issues with confidence. From identifying the problem to disassembling the recliner, inspecting and repairing the mechanism, and finally reassembling and testing the recliner, each stage of the repair process will be covered in detail.
By following the instructions provided in this guide, you can breathe new life into your recliner and reclaim the comfort and functionality it once provided. So, roll up your sleeves, gather your tools, and let's embark on a journey to revive your beloved Lazy Boy recliner.
Key Takeaways:
- Revive your favorite Lazy Boy recliner by following a step-by-step repair guide. Save on professional costs and enjoy the satisfaction of restoring comfort and functionality to your beloved furniture.
- Discover the joy of hands-on furniture repair as you breathe new life into your Lazy Boy recliner. Gain valuable DIY skills and a deeper connection with your cherished piece of furniture.
Read more: How To Adjust A Lazy Boy Recliner
Tools and Materials Needed
Before embarking on the repair journey, it's essential to gather the necessary tools and materials to ensure a smooth and efficient process. Here's a comprehensive list of items you'll need to have on hand:
Tools:
- Screwdriver Set: A set of screwdrivers with various head types, including flathead and Phillips, will be indispensable for disassembling and reassembling the recliner.
- Pliers: Both regular and needle-nose pliers will aid in gripping and manipulating small components during the repair process.
- Adjustable Wrench: This versatile tool will come in handy for tightening or loosening nuts and bolts.
- Hammer: A lightweight hammer can assist in gently tapping or adjusting certain components without causing damage.
- Flashlight: A flashlight will facilitate visibility when working in dimly lit areas within the recliner's frame.
- Allen Wrench Set: Many recliners utilize Allen screws, so having a set of Allen wrenches in various sizes is crucial for accessing and adjusting these fasteners.
- Scissors: A pair of scissors will be useful for cutting and trimming materials such as fabric or padding during the repair process.
Materials:
- Replacement Parts: Depending on the specific issue with your recliner, you may need to acquire replacement parts such as springs, cables, or levers. It's advisable to identify the exact components needed before commencing the repair.
- Lubricant: A high-quality lubricant, such as silicone-based spray or grease, will be essential for addressing squeaks and ensuring smooth operation of the recliner's moving parts.
- Clean Cloth: Keeping a clean cloth on hand will allow you to wipe down components and surfaces as you work, ensuring a tidy and organized repair process.
- Safety Gloves: It's important to prioritize safety, so a pair of durable gloves will protect your hands from sharp edges and potential pinching hazards while handling the recliner's internal mechanisms.
- Safety Glasses: When working with tools and disassembling the recliner, wearing safety glasses will safeguard your eyes from any debris or small components that may become dislodged during the repair.
- Marker or Labeling Tape: To keep track of components and their placement, having a marker or labeling tape will enable you to label and organize parts as you disassemble the recliner, ensuring a seamless reassembly process.
By ensuring that you have these tools and materials at your disposal, you'll be well-prepared to tackle the repair of your Lazy Boy recliner with confidence and efficiency.
Step 1: Identify the Problem
Before diving into the repair process, it's crucial to pinpoint the specific issue affecting your Lazy Boy recliner. Identifying the problem accurately will lay the foundation for an effective and targeted repair approach. Here are common problems that may arise:
Read more: How To Clean A Lazy Boy Recliner
Stuck Footrest or Reclining Mechanism
If your recliner's footrest refuses to extend or retract, or if the reclining mechanism fails to engage or disengage smoothly, the issue may stem from a variety of causes. These can include tangled or damaged cables, worn-out springs, or obstructions within the reclining mechanism.
Unresponsive Backrest
When the backrest of your recliner fails to adjust to different positions or becomes stuck in a particular angle, the problem may be attributed to faulty levers, broken locking mechanisms, or irregular tension in the reclining system.
Squeaking or Grinding Noises
The emergence of squeaking, creaking, or grinding noises when operating the recliner often indicates a need for lubrication or potential wear and tear within the internal components. Friction between metal parts, worn bearings, or dry pivot points can contribute to these auditory disturbances.
Uneven or Unstable Reclining
If your recliner tilts to one side, wobbles excessively, or exhibits uneven reclining behavior, the issue may be linked to imbalanced springs, loose fasteners, or misaligned components within the reclining mechanism.
Read more: What Is The Best Lazy Boy Recliner
Torn or Worn Upholstery
Visible signs of wear and tear on the upholstery, such as tears, fraying, or excessive sagging, can detract from the recliner's aesthetic appeal and comfort. Identifying these issues early on can prevent further damage and facilitate timely repairs.
By carefully assessing the symptoms and behavior of your recliner, you can narrow down the root cause of the problem and proceed with targeted repairs. Once the issue has been identified, you can proceed to the next step of disassembling the recliner to gain access to the internal components for inspection and repair.
Step 2: Disassemble the Recliner
Disassembling a Lazy Boy recliner is a critical step in the repair process, as it grants access to the internal components that require inspection and potential repair. Before initiating the disassembly, it's essential to ensure that the recliner is positioned on a stable surface, free of any obstacles that may impede the disassembly process. Additionally, having a clear workspace with ample room to maneuver around the recliner will facilitate a smooth disassembly process.
-
Remove the Backrest: Begin by locating the retaining brackets or screws that secure the backrest to the recliner's frame. Utilizing the appropriate screwdriver or wrench, carefully remove these fasteners to detach the backrest from the frame. It's advisable to have a second person assist in supporting the backrest during removal to prevent any accidental damage.
-
Detach the Seat Cushion: If the seat cushion is removable, lift it out of the recliner to expose the internal components. In some recliner models, the seat cushion may be secured with clips or hooks that require disengagement before removal. Carefully inspect the underside of the cushion for any securing mechanisms and release them as needed.
-
Access the Reclining Mechanism: With the backrest and seat cushion removed, the reclining mechanism and internal frame will be exposed. Depending on the recliner's design, there may be additional fabric or padding covering the internal frame. If present, carefully detach and set aside these materials to reveal the reclining mechanism and associated components.
-
Uncover the Fasteners and Components: As you gain access to the recliner's internal frame and mechanism, take note of the various fasteners, screws, and bolts that secure the components in place. Using the appropriate tools, systematically remove these fasteners, keeping them organized and labeled for ease of reassembly.
-
Separate the Reclining Mechanism: Once the fasteners are removed, the reclining mechanism can be separated from the frame, allowing for closer inspection and potential repairs. Exercise caution when handling the mechanism to avoid damage to delicate components or upholstery.
By methodically disassembling the recliner, you'll create a clear path for inspecting and addressing the underlying issues affecting its functionality. With the internal components exposed, you can proceed to the next step of inspecting and repairing the recliner's mechanism to restore its optimal performance and comfort.
Step 3: Inspect and Repair the Mechanism
With the recliner disassembled, it's time to closely examine the internal mechanism to identify any issues that may be impeding its functionality. Begin by inspecting the individual components, such as springs, cables, levers, and pivot points, for signs of wear, damage, or misalignment. Look for frayed cables, bent or broken springs, and loose or worn-out fasteners that may be contributing to the recliner's malfunction.
If the recliner's footrest or backrest is stuck, check for any obstructions within the mechanism that may be hindering smooth operation. Clear any debris or foreign objects that may have become lodged in the moving parts, impeding their functionality. Additionally, lubricate pivot points and moving components with a high-quality lubricant to ensure smooth and friction-free operation.
In the case of squeaking or grinding noises, focus on lubricating the pivot points, hinges, and moving parts to reduce friction and eliminate the source of the noise. Apply the lubricant generously, ensuring that it reaches all relevant areas within the mechanism. This step can significantly improve the recliner's overall operation and minimize disruptive noises.
For issues related to uneven or unstable reclining, carefully inspect the springs, levers, and fasteners to identify any imbalances or misalignments. Adjust or replace components as necessary to restore balance and stability to the recliner's reclining function. Tighten any loose fasteners and ensure that all components are securely in place to prevent wobbling or uneven movement.
If the upholstery is torn or worn, this is an opportune time to address any visible damage. Depending on the extent of the damage, consider repairing or replacing the affected upholstery to restore the recliner's aesthetic appeal and comfort.
Throughout the inspection process, take note of any components that require replacement or repair. If replacement parts are needed, ensure that they are compatible with your specific recliner model and mechanism. Once the necessary repairs and adjustments have been made, reassemble the recliner by following the reverse order of the disassembly process.
By meticulously inspecting and addressing the underlying issues within the recliner's mechanism, you can effectively restore its functionality and comfort. Taking a hands-on approach to repair not only prolongs the lifespan of your Lazy Boy recliner but also provides a sense of satisfaction in revitalizing a cherished piece of furniture.
Step 4: Reassemble the Recliner
Reassembling the recliner is a crucial phase that follows the inspection and repair of its internal mechanism. This step involves carefully putting the components back together in the reverse order of the disassembly process, ensuring that each part is securely fastened and aligned to restore the recliner to its fully functional state.
Begin by positioning the reclining mechanism back into the frame, aligning it with the corresponding attachment points. Take care to secure the mechanism using the labeled or organized fasteners that were removed during the disassembly. Utilize the appropriate tools to tighten the fasteners, ensuring that the mechanism is firmly and securely affixed to the frame.
Next, if any fabric or padding was removed to access the internal components, carefully reattach and secure these materials to the recliner's frame. Pay attention to any clips, hooks, or fasteners that may be integral to securing the fabric or padding in place, ensuring a snug and uniform fit.
Once the fabric and padding are in place, reposition the seat cushion within the recliner, ensuring that it sits securely and evenly. If the seat cushion features securing mechanisms, engage them to prevent any shifting or displacement during use.
With the seat cushion in position, proceed to reattach the backrest to the recliner's frame. Align the backrest with the retaining brackets or attachment points, then carefully secure it using the appropriate fasteners. If assistance is available, having a second person support the backrest during reattachment can help prevent any accidental damage or misalignment.
As each component is reassembled, take the time to inspect the recliner for any signs of misalignment or instability. Ensure that all fasteners are tightened securely and that the recliner's frame and components are aligned as intended. This meticulous approach will contribute to the recliner's overall stability and functionality once fully reassembled.
By methodically reassembling the recliner and paying attention to detail at each stage, you can ensure that the internal components are restored to their optimal configuration. This careful reassembly process sets the stage for the final step: testing the recliner to confirm that the repairs have successfully addressed the identified issues.
Read more: How To Lock A Lazy Boy Recliner
Step 5: Test the Recliner
With the recliner fully reassembled, the final step in the repair process involves testing its functionality to ensure that the identified issues have been effectively addressed. Testing the recliner allows you to validate the success of the repairs and verify that the mechanism operates smoothly, providing the comfort and functionality expected from a Lazy Boy recliner.
Begin by carefully engaging the reclining mechanism to test the extension and retraction of the footrest. Verify that the footrest moves seamlessly without any sticking or resistance, indicating that any previous issues with its functionality have been resolved. Pay attention to the smoothness of the movement and the absence of any unusual sounds, ensuring that the footrest operates as intended.
Next, test the backrest adjustment to confirm that it moves freely between different positions without any hindrances. Check for smooth transitions between reclining angles and ensure that the locking mechanisms, if applicable, securely hold the backrest in place without slippage or instability. This step validates the successful repair of any issues related to the backrest's responsiveness and adjustability.
As you test the recliner, listen for any lingering squeaks, creaks, or grinding noises that may have previously been present. Operate the recliner through its full range of motion, paying close attention to any auditory cues that could indicate unresolved friction or mechanical issues. The absence of disruptive noises confirms the effectiveness of lubrication and any necessary adjustments made during the repair process.
Additionally, evaluate the recliner for stability and balance during reclining. Ensure that it reclines evenly without tilting to one side or exhibiting wobbling behavior. This assessment verifies that any previous issues related to uneven or unstable reclining have been successfully rectified, restoring the recliner's stability and reliability.
Finally, take a moment to inspect the overall condition of the upholstery and ensure that any repairs or replacements have been seamlessly integrated. Verify that the upholstery appears uniform, free of tears or excessive wear, and that it contributes to the recliner's visual appeal and comfort.
By systematically testing the recliner's functionality and performance, you can confirm the success of the repair efforts and enjoy the satisfaction of revitalizing your beloved Lazy Boy recliner. With the reassurance of a fully functional and comfortable recliner, you can once again indulge in its luxurious comfort and relaxation, knowing that your hands-on repair endeavors have restored it to its optimal state.
Conclusion
In conclusion, the process of repairing a Lazy Boy recliner encompasses a journey of discovery, hands-on engagement, and the gratifying restoration of comfort and functionality. By following the step-by-step guide outlined in this comprehensive resource, you have gained the knowledge and confidence to address common issues that may affect your recliner, ultimately prolonging its lifespan and preserving its value as a cherished piece of furniture.
Throughout the repair process, you have delved into the inner workings of your recliner, identifying and addressing specific issues such as stuck footrests, unresponsive backrests, squeaking mechanisms, and uneven reclining behavior. By disassembling the recliner, inspecting and repairing its internal mechanism, and meticulously reassembling and testing its functionality, you have taken a proactive approach to revitalizing your recliner, breathing new life into its comforting embrace.
The hands-on nature of recliner repair not only fosters a deeper understanding of the furniture's construction and operation but also instills a sense of accomplishment and empowerment. As you navigated the intricacies of the recliner's mechanism, meticulously addressed underlying issues, and validated the success of your repairs through thorough testing, you have exemplified the rewarding nature of DIY furniture maintenance.
By embracing the repair process, you have not only saved on potential professional repair costs but have also fostered a deeper connection with your recliner, appreciating its craftsmanship and the comfort it provides. The journey from identifying the problem to executing targeted repairs has equipped you with valuable skills and insights that extend beyond furniture maintenance, empowering you to tackle future DIY projects with confidence and proficiency.
As you settle back into the welcoming embrace of your fully functional and revitalized Lazy Boy recliner, take pride in the effort and dedication invested in its repair. Your commitment to preserving the comfort and functionality of this beloved piece of furniture reflects a genuine appreciation for the role it plays in your daily relaxation and well-being.
With the knowledge and experience gained from this repair endeavor, you are well-prepared to address any future challenges that may arise, ensuring that your Lazy Boy recliner remains a steadfast source of comfort and relaxation for years to come.
Frequently Asked Questions about How To Repair A Lazy Boy Recliner
Was this page helpful?
At Storables.com, we guarantee accurate and reliable information. Our content, validated by Expert Board Contributors, is crafted following stringent Editorial Policies. We're committed to providing you with well-researched, expert-backed insights for all your informational needs.


0 thoughts on “How To Repair A Lazy Boy Recliner”