
Articles
How To Install Lazy Susan Cabinet
Modified: October 19, 2024
Looking to add pantry storage? Learn how to install a lazy susan cabinet for convenient access and efficient organization. Transform your kitchen today!
(Many of the links in this article redirect to a specific reviewed product. Your purchase of these products through affiliate links helps to generate commission for Storables.com, at no extra cost. Learn more)
Introduction
Welcome to our comprehensive guide on how to install a Lazy Susan cabinet. A Lazy Susan is a rotating shelf unit that maximizes storage space and makes accessing items easier in kitchen cabinets. Whether you’re looking to upgrade your existing cabinet or installing a new one, this step-by-step guide will walk you through the process, ensuring a successful installation.
Having a well-organized kitchen is essential for efficient meal prep and a stress-free cooking experience. With a Lazy Susan cabinet, you can say goodbye to rummaging through crowded shelves and make the most of every inch of storage space.
In this guide, we will cover everything you need to know to install a Lazy Susan cabinet, from gathering the necessary tools and materials to testing the rotation and securing the cabinet in place. Let’s dive in and get started!
If you already have a Lazy Susan cabinet but it needs some repairs or adjustments, feel free to skip to the relevant sections for the specific steps you need to take. Otherwise, let’s continue with the installation process to transform your kitchen storage!
Key Takeaways:
- Maximize kitchen storage and accessibility with a well-installed Lazy Susan cabinet. Follow our step-by-step guide for a smooth installation process and enjoy the convenience of organized, easy-to-access items.
- Prepare your cabinet, mark the center point, and secure the Lazy Susan for optimal functionality. Enjoy a stress-free cooking experience with maximized storage space in your kitchen.
Read more: How Big Is A Lazy Susan Cabinet
Step 1: Gather the necessary tools and materials
Before you begin the installation process, it’s important to gather all the necessary tools and materials. This will ensure a smooth and efficient installation. Here’s a list of what you’ll need:
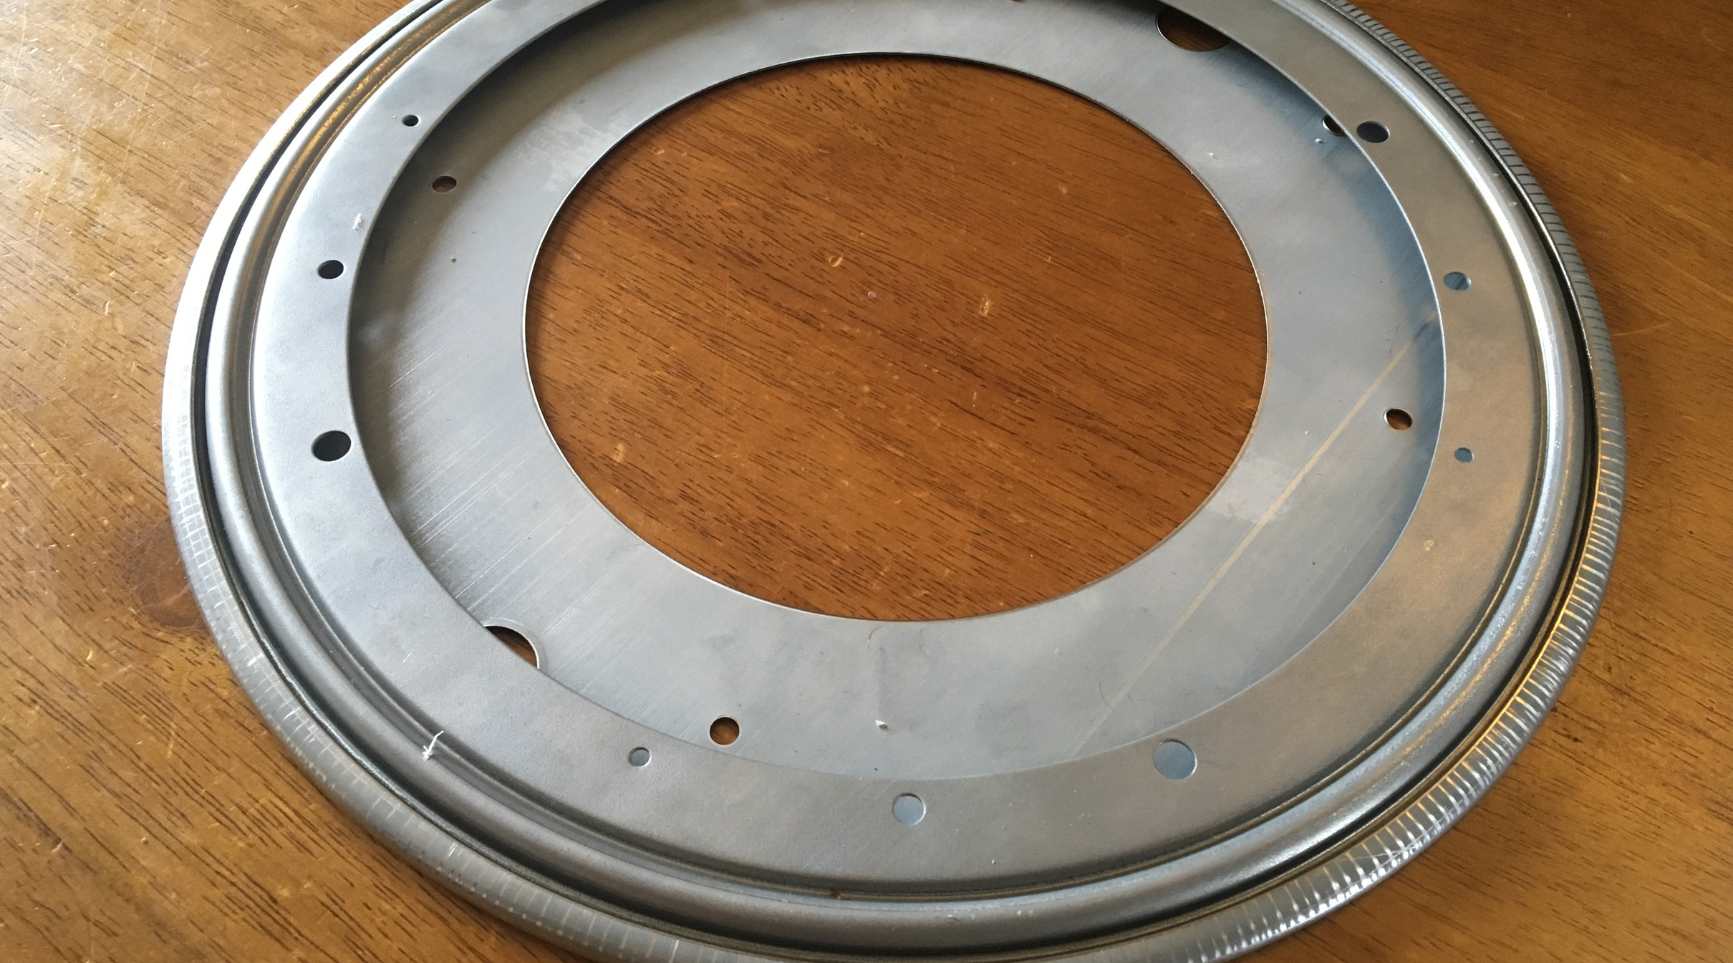
- A Lazy Susan cabinet kit: This typically includes the rotating base, upper and lower shelves, and necessary hardware.
- Measuring tape: To accurately measure the dimensions of the cabinet and mark the center point.
- Pencil: To mark the center point and other important measurements.
- Power drill: To drill holes for attaching the Lazy Susan hardware and securing the cabinet.
- Screwdriver: To tighten screws and bolts.
- Level: To ensure that the cabinet is installed straight and level.
- Stud finder: To locate the wall studs for securing the cabinet.
- Wood screws: For attaching the Lazy Susan hardware and securing the cabinet.
- Optional: Wood filler and sandpaper: If you need to fill any holes or smooth out surfaces before installation.
Make sure you have all these tools and materials ready before you begin the installation process. Having everything within reach will save you time and prevent unnecessary interruptions.
It’s also a good idea to read through the instructions provided with your Lazy Susan cabinet kit. Familiarize yourself with the components and any specific requirements or recommendations for installation.
Once you have gathered all the necessary tools and materials, you’re ready to move on to the next step: preparing the cabinet for installation.
Step 2: Prepare the cabinet for installation
Before installing the Lazy Susan cabinet, it’s important to prepare the existing cabinet or the space where you plan to install the new one. Follow these steps to ensure a proper foundation for your Lazy Susan:
- Clear out the cabinet: Start by removing all items from the cabinet to create a clear workspace. This will make it easier to work and prevent any items from getting damaged during the installation process.
- Measure the cabinet dimensions: Use a measuring tape to determine the height, width, and depth of the cabinet. These measurements will help you in selecting the appropriate size of the Lazy Susan cabinet kit.
- Clean the cabinet: Thoroughly clean the interior of the cabinet, removing any dirt, dust, or debris. A clean surface will ensure better adhesion and proper installation of the Lazy Susan.
- Check for any repairs: Inspect the cabinet for any repairs or adjustments that may be needed before installation. This includes fixing loose hinges, replacing damaged panels, or addressing any other issues that could affect the stability and performance of the Lazy Susan.
- Ensure a level surface: Use a level to check if the cabinet floor is level. If it’s not, you may need to make adjustments by adding shims or leveling the cabinet itself. A level surface is essential for the proper functioning of the Lazy Susan.
- Optional: Apply wood filler or sand surfaces (if necessary): If there are any existing holes, scratches, or uneven surfaces in the cabinet, you can use wood filler to fill them in. Sand any rough areas to create a smooth and even surface for the installation.
By properly preparing the cabinet, you create a solid and stable foundation for your Lazy Susan. This will ensure a smooth installation and optimal functionality of the rotating shelves.
Once you have completed these steps, you’re ready to move on to the next step: marking the center point.
Step 3: Mark the center point
The next step in installing a Lazy Susan cabinet is to mark the center point. This is crucial for proper alignment and rotation of the shelves. Follow these steps to accurately mark the center point:
- Measure the width of the cabinet: Use a measuring tape to determine the width of the cabinet. Divide this measurement in half to find the center point.
- Mark the center point: With a pencil, make a small, light mark at the center of the cabinet’s back wall. This will serve as a reference point for aligning the Lazy Susan base.
- Double-check the alignment: Use a level or measuring tape to ensure that the center point is aligned with the middle of the front opening of the cabinet. This will help ensure that the Lazy Susan rotates smoothly without any obstructions.
It’s important to take your time with this step and make sure the center point is accurately marked. A properly aligned center point is essential for the overall stability and functionality of the Lazy Susan cabinet.
Once you have marked the center point, you’re ready to move on to the next step: installing the Lazy Susan base.
Step 4: Install the Lazy Susan base
With the center point marked, it’s time to install the Lazy Susan base. This rotating component serves as the foundation for the upper and lower shelves. Follow these steps to properly install the base:
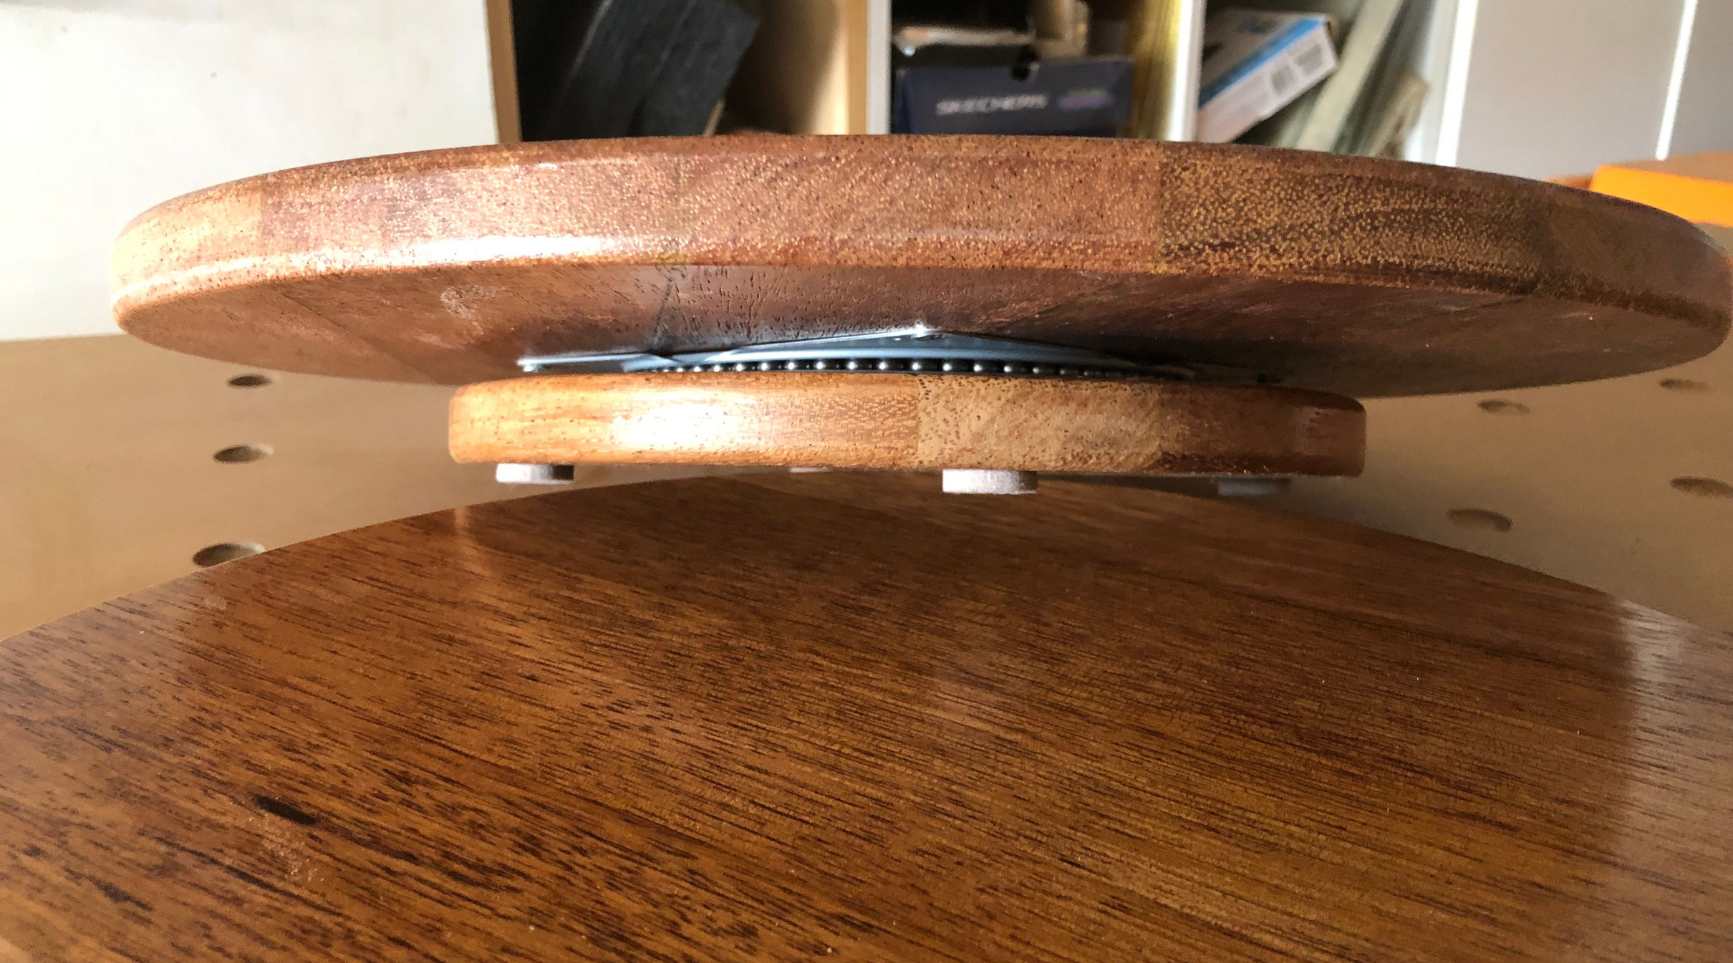
- Position the base: Place the Lazy Susan base inside the cabinet, aligning it with the center point you marked in the previous step. Make sure the base is centered and level.
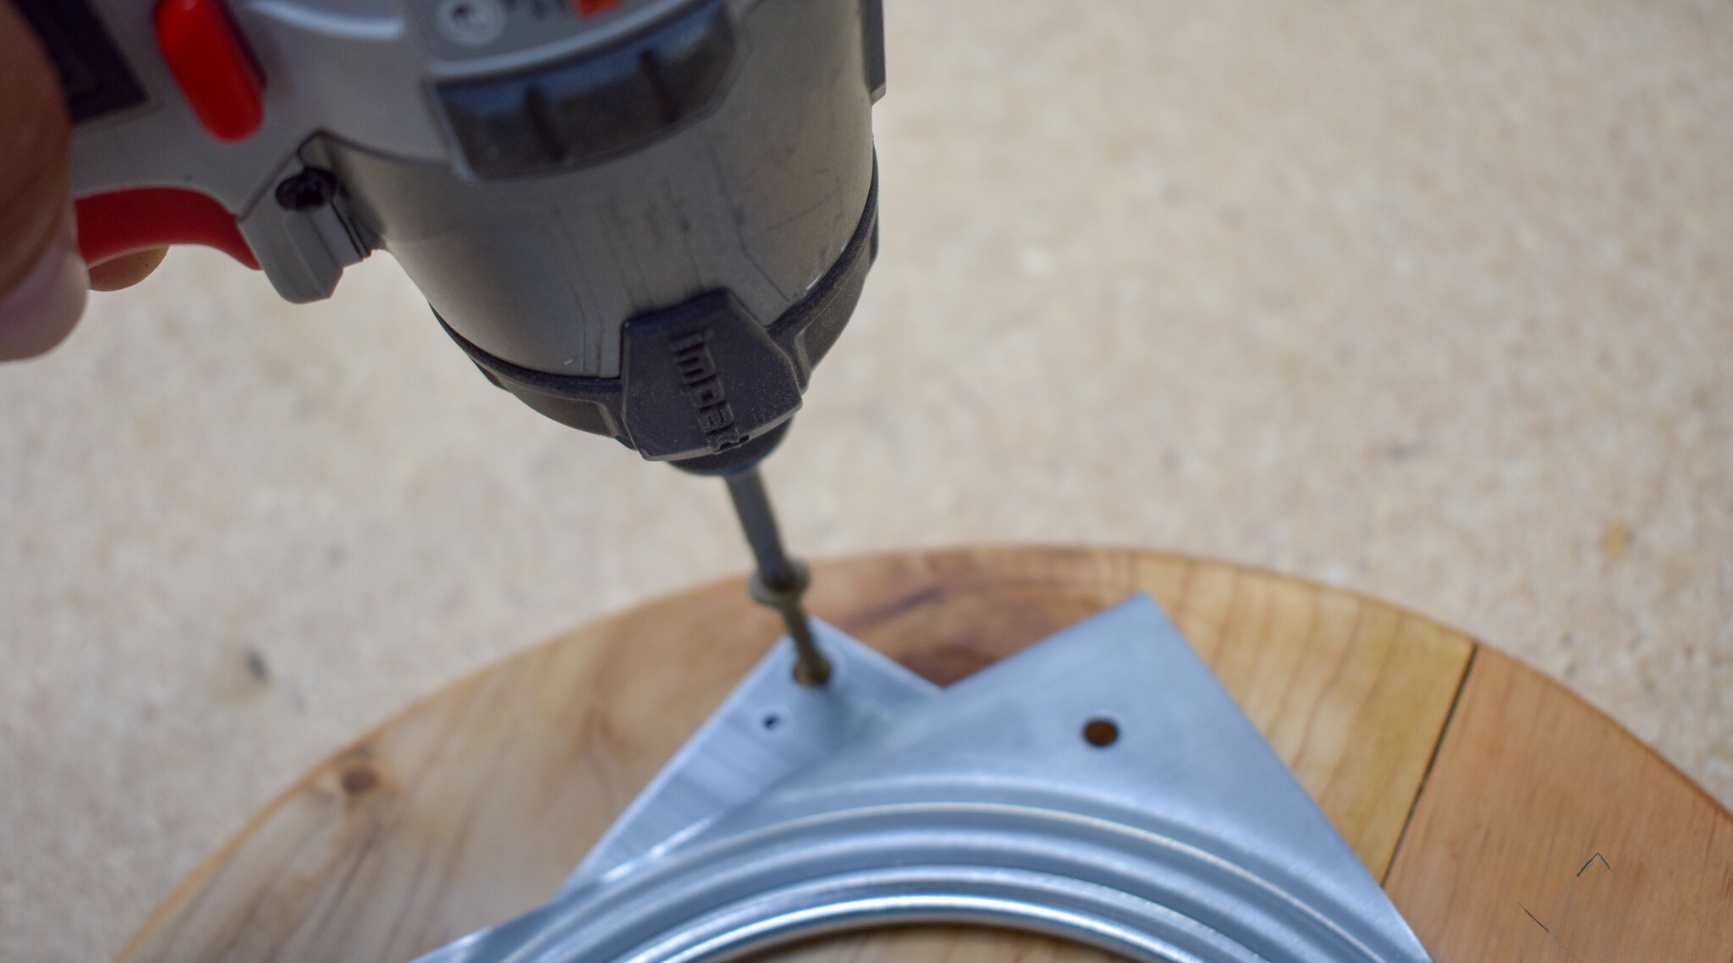
- Secure the base: Using a power drill and the provided screws, attach the Lazy Susan base to the cabinet’s back wall. Make sure to securely fasten the screws, but be cautious not to overtighten and damage the cabinet.
- Test the rotation: Give the base a gentle spin to test the rotation. It should rotate smoothly and without any obstructions. If you encounter any issues, double-check the alignment and ensure that the base is securely fastened.
Proper installation of the Lazy Susan base is crucial for the stability and functionality of the cabinet. Take your time to ensure that it is centered, level, and securely attached to the cabinet’s back wall.
Once the Lazy Susan base is installed, you can move on to the next step: attaching the upper and lower shelves.
When installing a lazy susan cabinet, make sure to measure the space accurately and ensure that the cabinet is level before securing it in place. Also, follow the manufacturer’s instructions carefully to ensure proper installation.
Read more: How To Fix A Lazy Susan Cabinet
Step 5: Attach the upper and lower shelves
Now that the Lazy Susan base is securely in place, it’s time to attach the upper and lower shelves. These shelves will provide storage space and rotate within the cabinet for easy access to your items. Follow these steps to complete this installation:
- Position the upper shelf: Place the upper shelf on top of the Lazy Susan base, ensuring it sits evenly and securely. Take note of any pre-drilled holes or markings on the shelf that indicate where it should align with the base.
- Attach the upper shelf: Using the provided hardware, typically screws or brackets, secure the upper shelf to the Lazy Susan base. Follow the instructions provided with your cabinet kit for the specific installation method.
- Repeat for the lower shelf: Place the lower shelf onto the Lazy Susan base, aligning it with any pre-drilled holes or markings. Secure the lower shelf to the base using the provided hardware.
- Test the rotation: Give the shelves a gentle spin to test the rotation. Ensure that they move freely and without any obstructions.
Take care when attaching the shelves to ensure they are properly aligned and securely attached to the Lazy Susan base. This will guarantee smooth and reliable rotation of the shelves.
Once the upper and lower shelves are attached, you’re ready to move on to the next step: testing the rotation of the Lazy Susan cabinet.
Step 6: Test the rotation
After attaching the upper and lower shelves, it’s important to test the rotation of the Lazy Susan cabinet. This step ensures that the shelves move smoothly and without any issues. Follow these steps to properly test the rotation:
- Gently spin the shelves: With your hands, give the shelves a gentle spin in both directions. They should rotate smoothly and effortlessly.
- Check for any obstructions: As the shelves rotate, inspect for any obstructions or areas where they may be catching or rubbing against the cabinet walls. Adjust the shelves if needed to ensure unobstructed rotation.
- Test weight distribution: Place some lightweight items on the shelves and spin them again. Check that the weight is distributed evenly and the rotation remains smooth. Adjust the positioning of items if necessary.
- Listen for any abnormalities: Pay attention to any unusual sounds or noises during the rotation. The shelves should operate quietly without any grinding or scraping sounds.
If you encounter any issues during the rotation test, such as sticking or uneven movement, double-check the alignment of the shelves and the base. It’s important to address any problems before proceeding to the final step.
By thoroughly testing the rotation of the Lazy Susan cabinet, you can ensure that it operates seamlessly and provides easy access to your stored items.
Once you’re satisfied with the rotation, it’s time to move on to the final step: securing the Lazy Susan cabinet.
Step 7: Secure the Lazy Susan cabinet
After successfully testing the rotation of the Lazy Susan cabinet, it’s important to secure it in place. This step ensures that the cabinet remains stable and prevents any movement or accidents. Follow these steps to securely fasten the cabinet:
- Locate wall studs: Use a stud finder to locate the wall studs where the cabinet will be mounted. This is important for providing strong support and stability.
- Mark mounting points: Once the studs are located, mark the mounting points on the cabinet’s back wall. Ensure that these points align with the center point and allow for proper attachment.
- Drill pilot holes: Using a power drill and an appropriate bit size, drill pilot holes at the marked mounting points. Make sure to drill into the studs for maximum stability.
- Attach the cabinet to the wall: With the help of a friend or family member, carefully lift the cabinet and align it with the pilot holes. Insert screws into the drilled holes and drive them into the studs using a power drill.
- Check for levelness: Use a level to ensure that the cabinet is straight and level on the wall. Adjust the positioning if necessary.
- Tighten screws: Once the cabinet is properly aligned and level, tighten the screws securely. Be careful not to overtighten and damage the cabinet or wall.
By securely fastening the Lazy Susan cabinet to the wall, you can ensure its stability and longevity. This step is crucial, especially if the cabinet will be holding heavier items or experiencing frequent use.
After securing the cabinet, give it a final test by gently rotating the shelves and ensuring that they continue to move smoothly and without any issues.
Congratulations! You have successfully installed a Lazy Susan cabinet. Enjoy the convenience and organization that it brings to your kitchen storage!
With the installation complete, you can now stand back and appreciate the transformation of your cabinet space. The Lazy Susan will provide easy access to your items and maximize the functionality of your kitchen storage.
Thank you for following this step-by-step guide. We hope it has been helpful and that you have a positive experience with your newly installed Lazy Susan cabinet!
Conclusion
Installing a Lazy Susan cabinet can greatly enhance the storage and accessibility of your kitchen. With its rotating shelves, you can make the most of every inch of space and easily access your items without the need to rummage through crowded cabinets. Followed diligently, this step-by-step guide has walked you through the installation process to ensure a successful outcome.
Starting with gathering the necessary tools and materials, you have acquired everything you need to complete the installation smoothly. Preparing the cabinet and marking the center point were crucial steps in creating a solid foundation for the Lazy Susan cabinet.
By installing the Lazy Susan base and attaching the upper and lower shelves, you have set up the functional core of the cabinet. Testing the rotation allowed you to ensure smooth movement and identify any adjustments required for optimal performance.
Finally, securing the Lazy Susan cabinet to the wall completes the installation process by providing stability and peace of mind. The cabinet is now ready to be filled with your kitchen essentials, offering convenience and organization in your daily cooking routine.
Remember, if you encounter any difficulties during the installation, always consult the instructions provided with your specific Lazy Susan cabinet kit. Additionally, seeking the assistance of a professional is never a bad idea if you feel unsure or overwhelmed.
We hope this guide has helped you successfully install your Lazy Susan cabinet. Enjoy the transformed storage space and experience the convenience it brings to your kitchen. Happy cooking!
Frequently Asked Questions about How To Install Lazy Susan Cabinet
Was this page helpful?
At Storables.com, we guarantee accurate and reliable information. Our content, validated by Expert Board Contributors, is crafted following stringent Editorial Policies. We're committed to providing you with well-researched, expert-backed insights for all your informational needs.


0 thoughts on “How To Install Lazy Susan Cabinet”