Home>Furniture & Design>Kitchen Furniture>How To Clean A Lazy Susan

Kitchen Furniture
How To Clean A Lazy Susan
Published: January 20, 2024
Learn how to effectively clean and maintain your kitchen lazy Susan to keep it looking pristine and functioning smoothly. Discover expert tips and tricks for preserving your kitchen furniture and design.
(Many of the links in this article redirect to a specific reviewed product. Your purchase of these products through affiliate links helps to generate commission for Storables.com, at no extra cost. Learn more)
Introduction
Welcome to the comprehensive guide on how to clean a Lazy Susan! A Lazy Susan is a fantastic addition to any kitchen, providing convenient access to a wide array of items without the need to reach into the depths of your cabinets. However, with frequent use, these rotating shelves can accumulate dust, spills, and grime, making regular cleaning essential to maintain a tidy and organized kitchen.
In this article, we will walk you through the step-by-step process of cleaning your Lazy Susan, ensuring that it remains a functional and visually appealing part of your kitchen. Whether you have a wooden, plastic, or metal Lazy Susan, the cleaning techniques and tips provided here will help you achieve a sparkling clean and well-organized storage solution.
So, roll up your sleeves and get ready to bring back the shine to your Lazy Susan. Let's dive into the cleaning process to ensure that your kitchen's rotating shelves remain a practical and attractive feature for years to come!
Key Takeaways:
- Keep your Lazy Susan clean and organized by removing items, wiping down shelves, cleaning hardware, and reorganizing contents. Regular maintenance ensures a tidy and efficient kitchen storage solution.
- Declutter, streamline, and optimize your Lazy Susan for easy access and balanced rotation. With a clean and organized Lazy Susan, enjoy a seamless and enjoyable cooking experience.
Read more: How To Measure A Lazy Susan
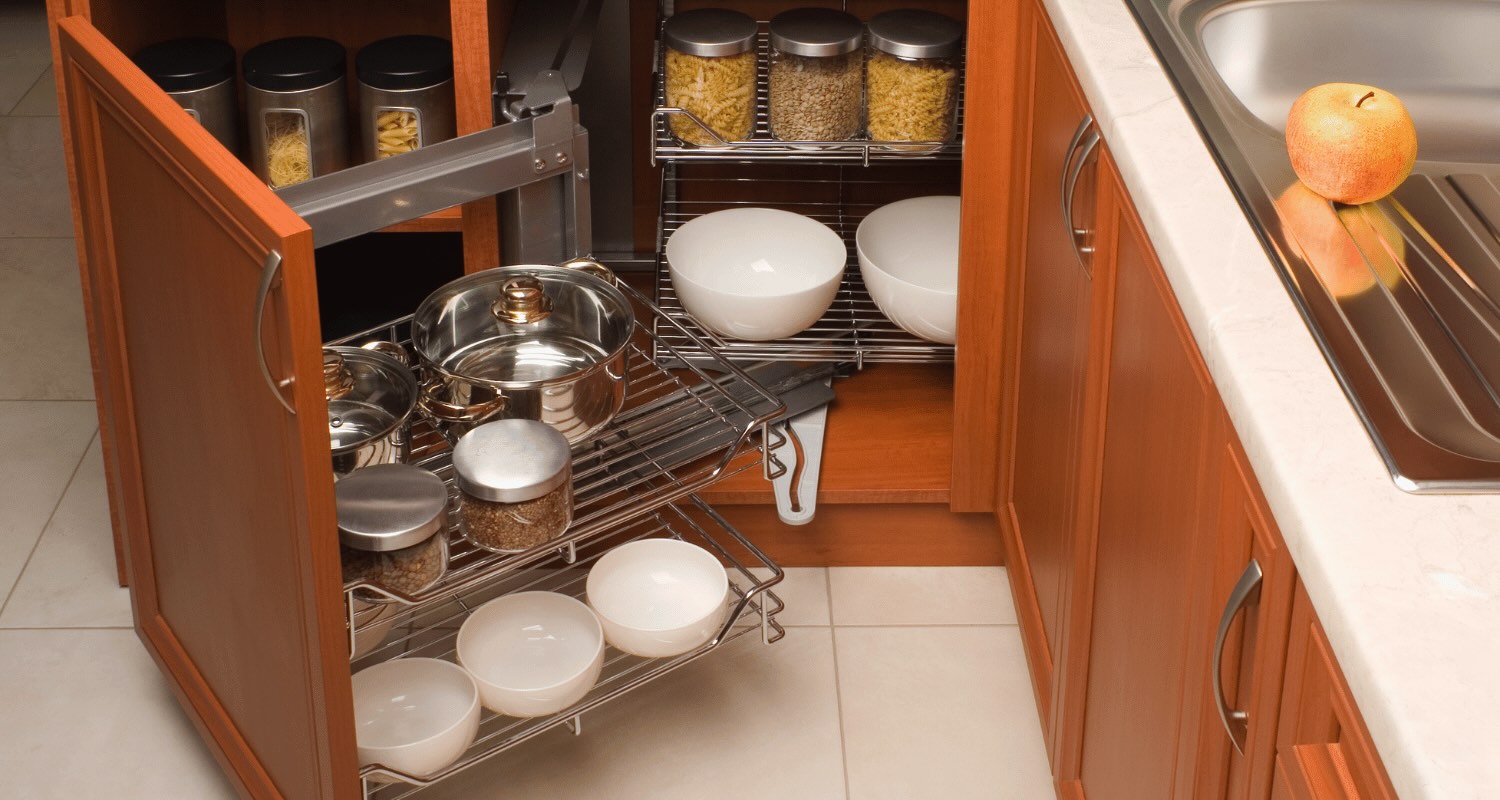
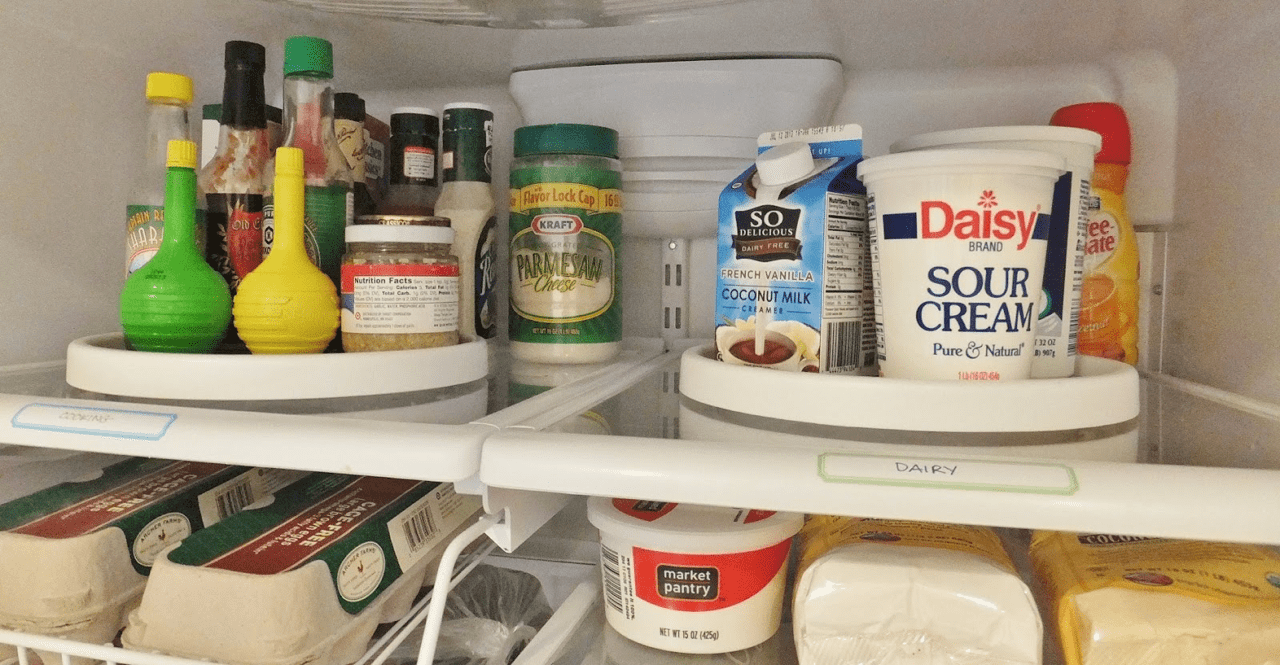
Step 1: Remove Items from the Lazy Susan
Before embarking on the cleaning process, it’s essential to start by clearing the Lazy Susan of all items stored on its shelves. Carefully remove any jars, bottles, spices, or other kitchen essentials to create a clear workspace for thorough cleaning. As you empty the Lazy Susan, take the opportunity to inspect each item, discarding any expired products and wiping down containers that may have accumulated spills or grime.
As you clear the shelves, consider organizing the items as you remove them, making it easier to restock the Lazy Susan once the cleaning process is complete. By decluttering and organizing the contents of your Lazy Susan, you can ensure a more efficient and visually appealing storage solution in your kitchen.
Remember to handle fragile or breakable items with care, and consider placing them in a safe location away from the cleaning area to prevent accidental damage. Once the shelves are clear and the items are safely stored, you’re ready to move on to the next step in the cleaning process!
Step 2: Wipe Down the Lazy Susan Shelves
With the shelves cleared of items, it’s time to focus on cleaning the surfaces of the Lazy Susan. Begin by using a microfiber cloth or a soft, lint-free cloth to wipe down the shelves, removing any loose debris, crumbs, or dust. For stubborn residue or spills, dampen the cloth with a gentle cleaning solution suitable for the material of your Lazy Susan.
If your Lazy Susan shelves are made of wood, consider using a mild wood cleaner or a solution of warm water and gentle dish soap to avoid damaging the finish. For plastic or metal shelves, a solution of warm water and mild detergent can effectively remove grime and spills without causing harm to the material.
When wiping down the shelves, pay special attention to the edges and corners where dirt and spills tend to accumulate. Thoroughly clean the entire surface of each shelf, ensuring that no residue or grime is left behind. This step not only contributes to a cleaner and more hygienic Lazy Susan but also helps maintain the condition of the shelves, prolonging their durability and visual appeal.
Once the shelves have been carefully wiped down and any spills or residue have been removed, take a moment to inspect the surfaces for any lingering stains or marks. If necessary, spot-treat stubborn stains with an appropriate cleaner, following the manufacturer’s recommendations for the specific material of your Lazy Susan.
By dedicating attention to cleaning the shelves, you’re one step closer to restoring your Lazy Susan to its pristine condition. With the surfaces thoroughly cleaned, it’s time to move on to the next phase of the cleaning process!
To clean a lazy susan, remove all items from the shelves and wipe them down with a damp cloth. Use a mild cleaner for tough spots, and dry thoroughly before replacing items.
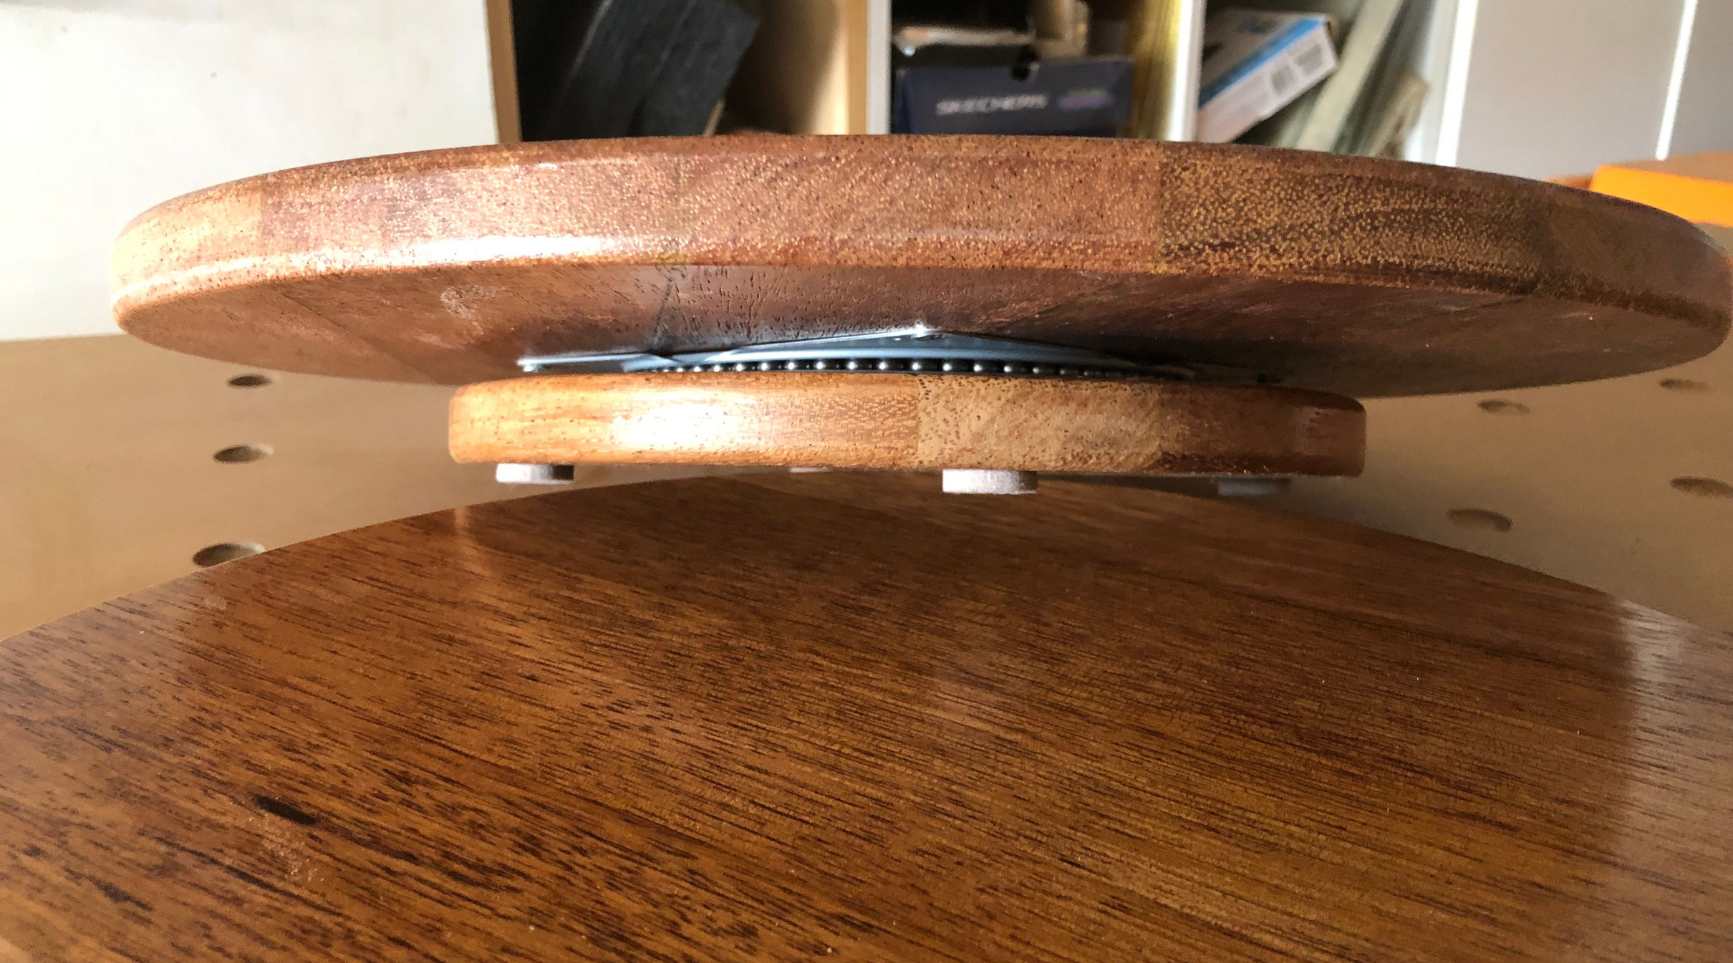
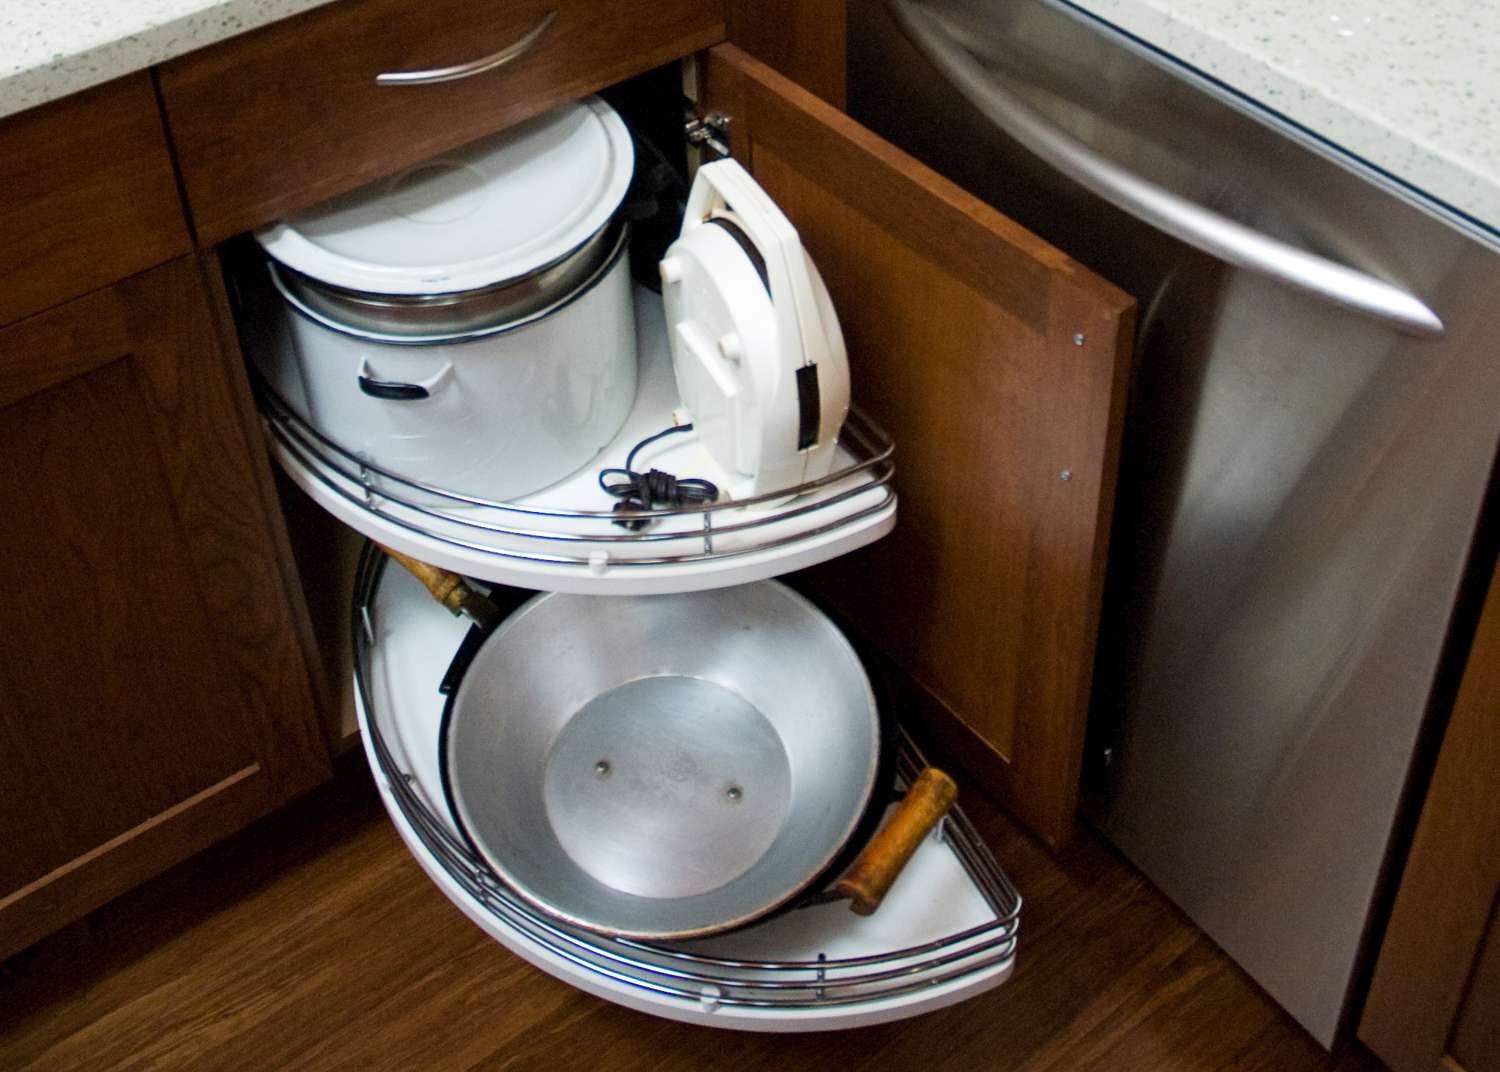
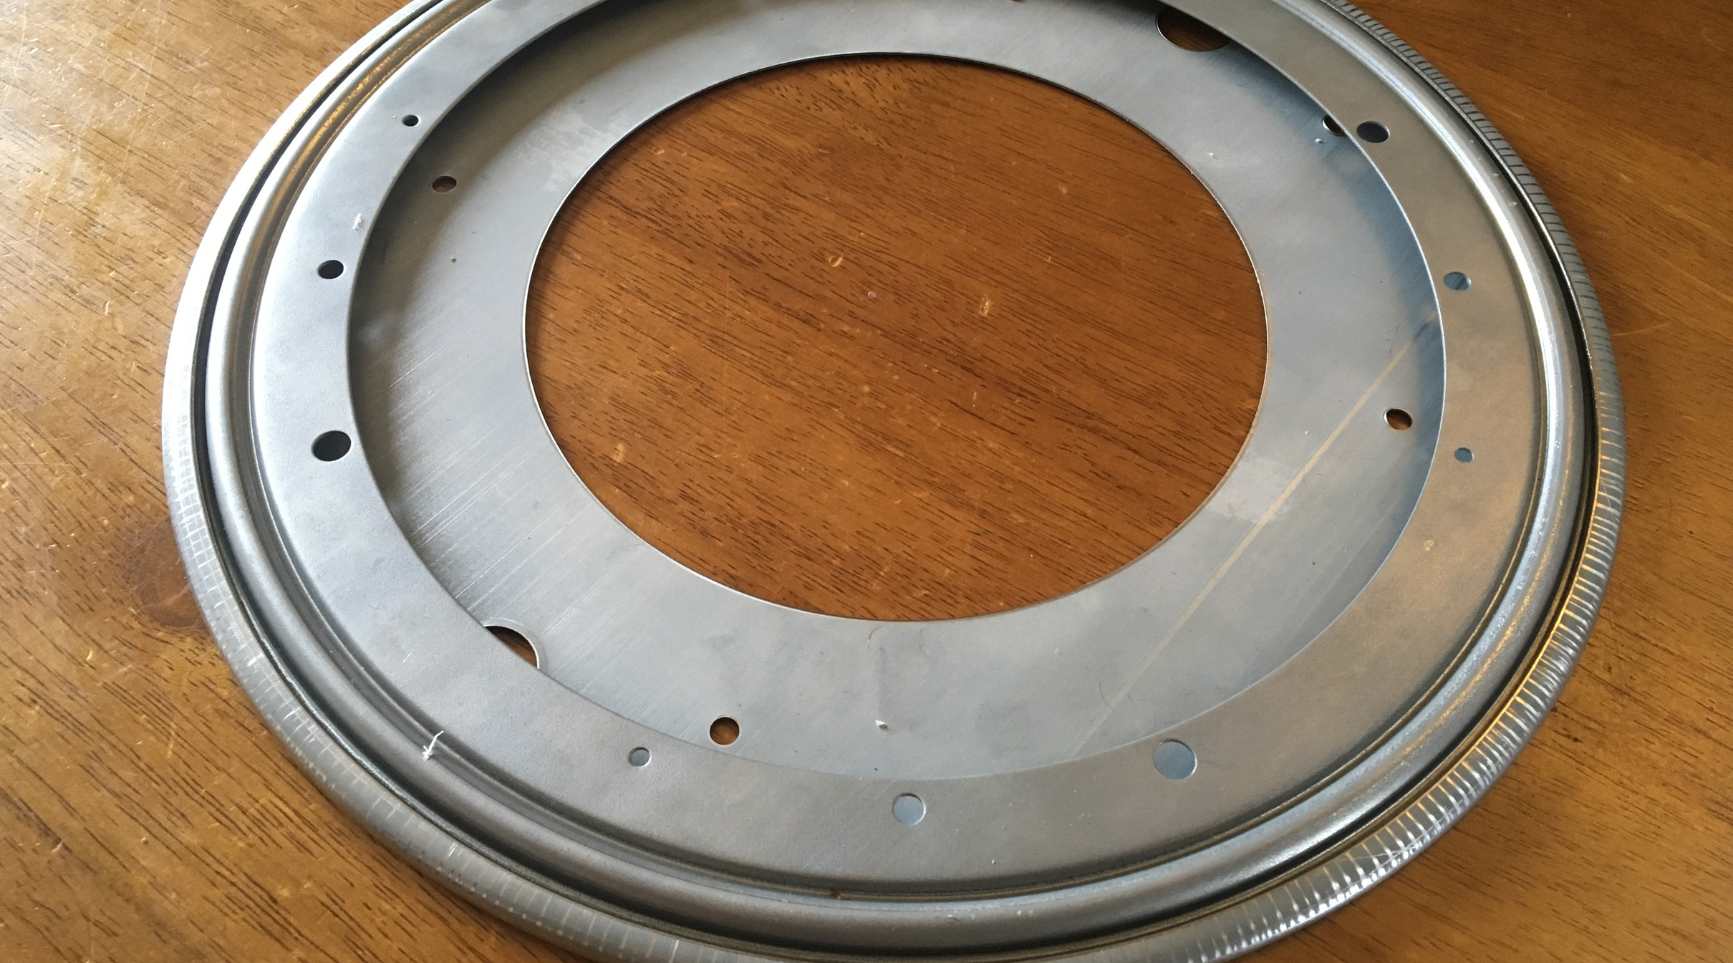
Step 3: Clean the Lazy Susan Hardware
As you continue the cleaning process, it’s important to pay attention to the hardware components of your Lazy Susan. Whether it’s the central pivot, bearings, or any other rotating mechanisms, keeping the hardware clean and well-maintained is crucial for ensuring smooth and effortless rotation of the shelves.
Begin by inspecting the hardware for any visible dust, dirt, or grime. Use a soft-bristled brush or a microfiber cloth to gently remove any accumulated debris from the pivot and bearings. Carefully rotate the Lazy Susan to access all hardware components, ensuring thorough cleaning of each part.
If the hardware components exhibit stubborn grime or residue, consider using a mild cleaning solution suitable for the specific material of the hardware. For metal components, a gentle metal cleaner can effectively remove tarnish and restore the shine. When cleaning plastic or composite hardware, opt for a solution of warm water and mild detergent to maintain the integrity of the material.
After cleaning the hardware, take a moment to inspect the components for any signs of wear, damage, or loose fittings. Tighten any loose screws or fasteners to ensure the stability and functionality of the Lazy Susan. Additionally, consider applying a small amount of lubricant to the pivot and bearings to facilitate smooth rotation and reduce friction.
By maintaining the hardware components of your Lazy Susan, you not only contribute to its cleanliness and functionality but also extend the lifespan of the rotating mechanism. With the hardware thoroughly cleaned and inspected, you’re ready to proceed to the final step of the cleaning process!
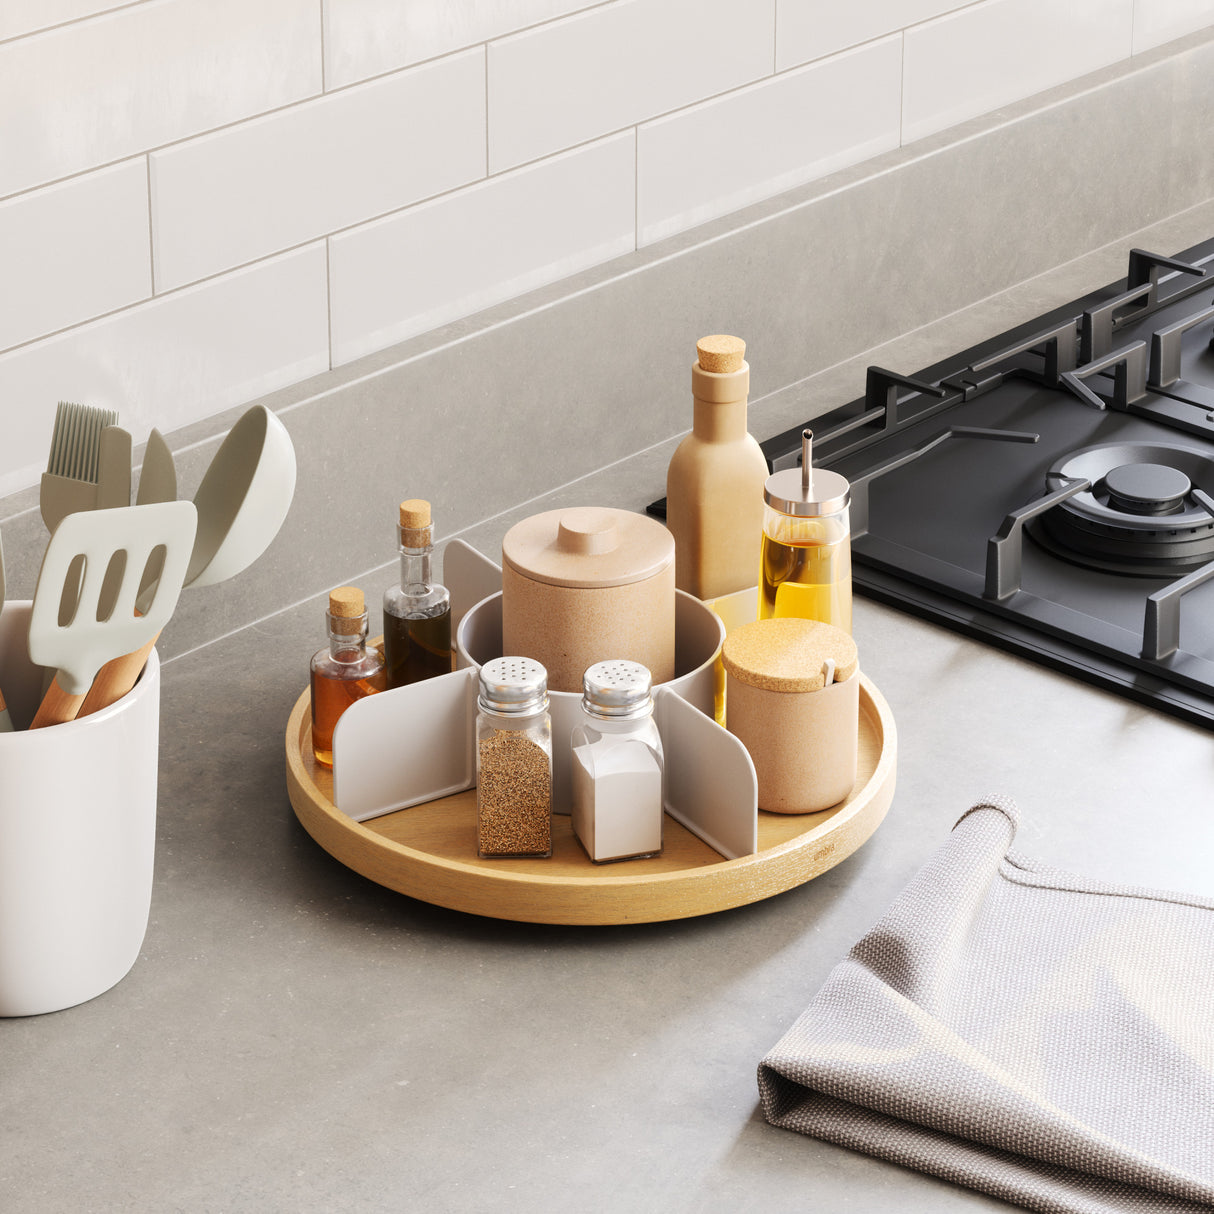
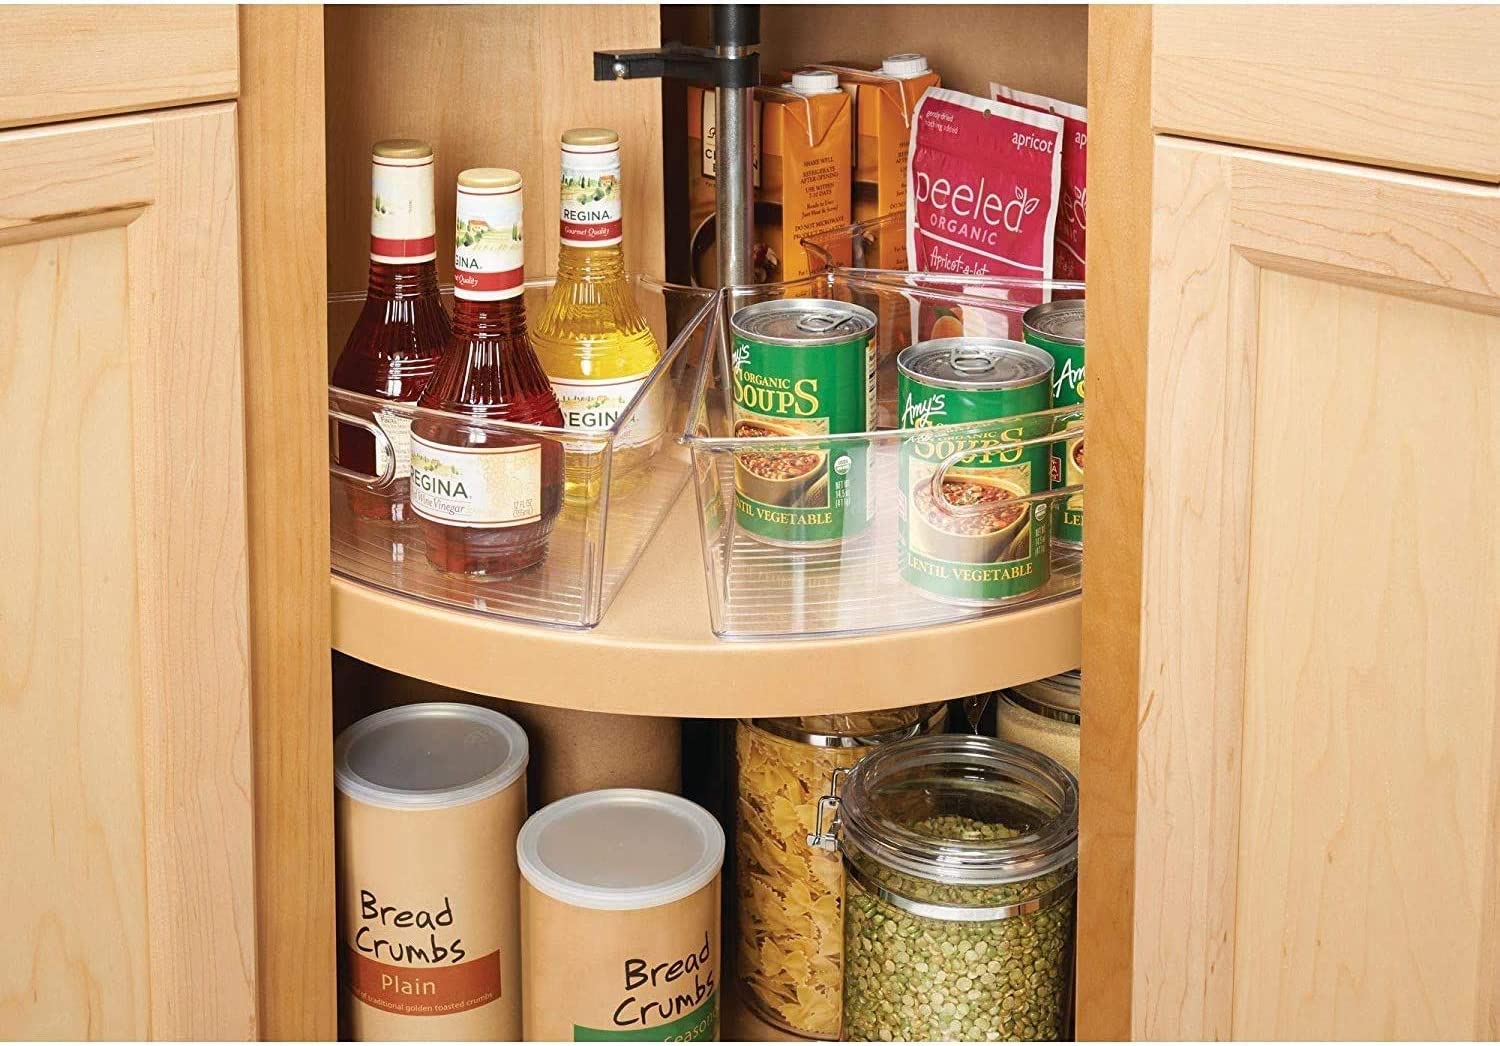
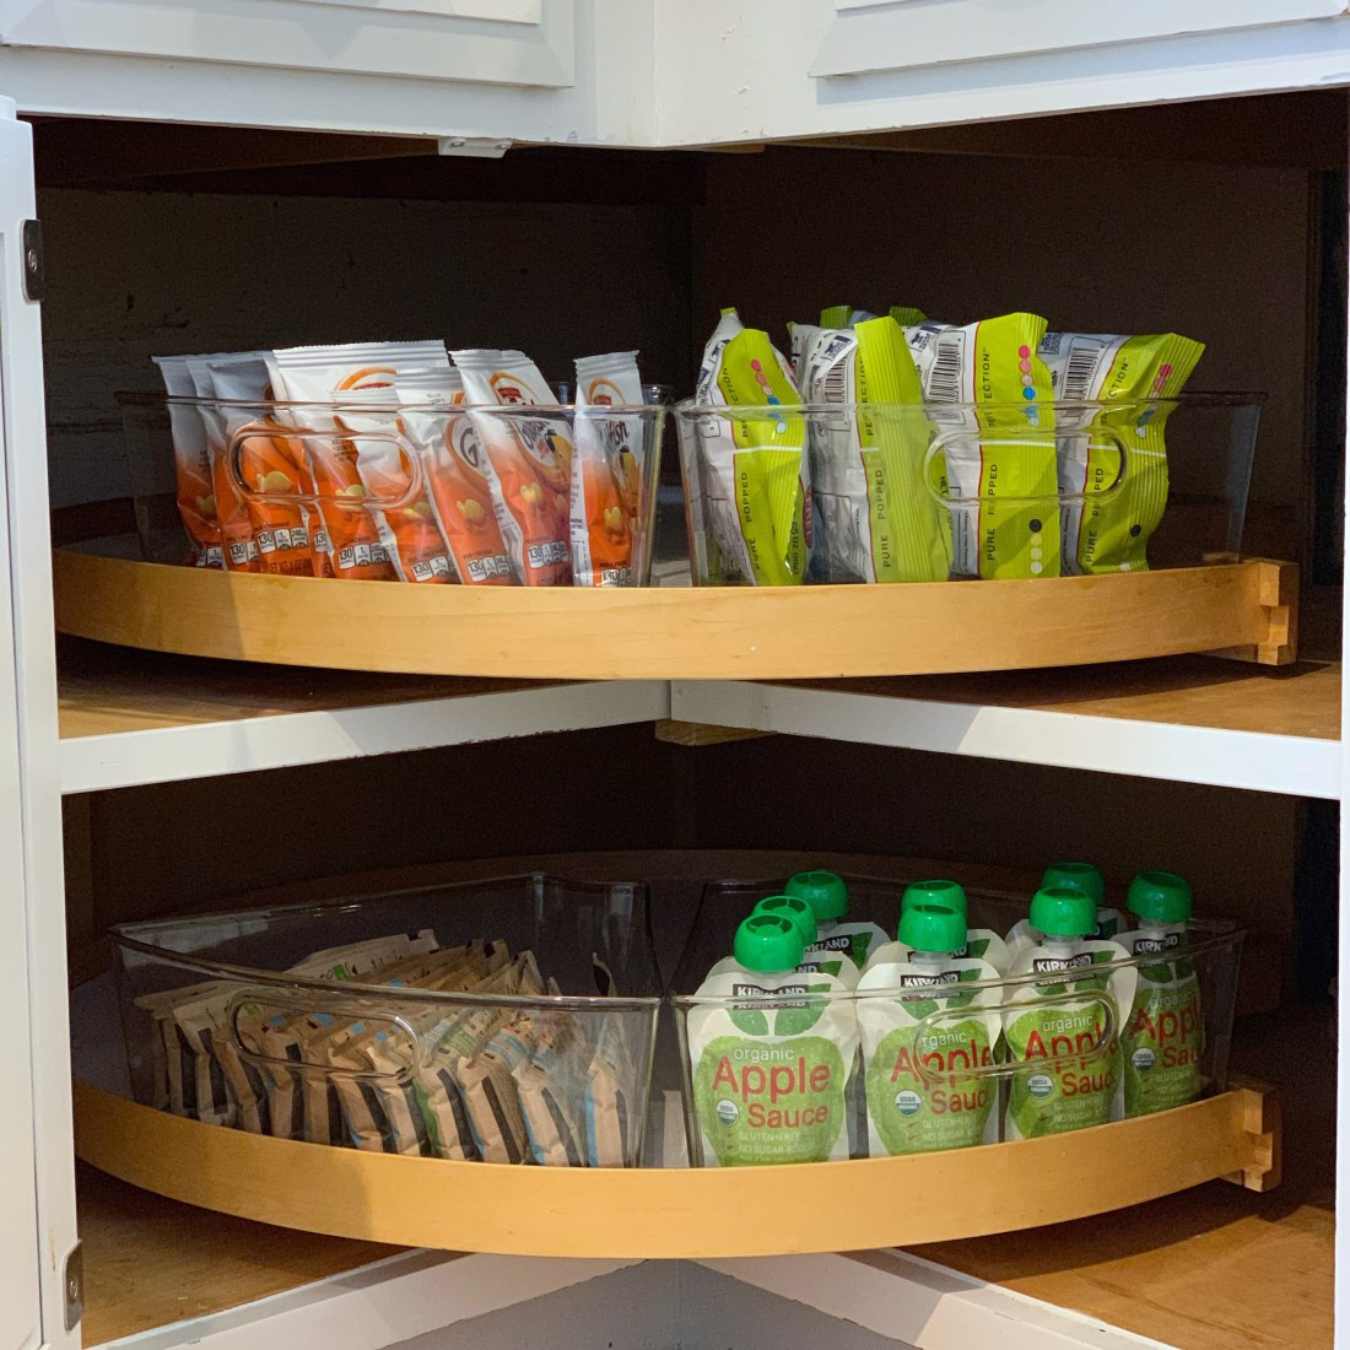
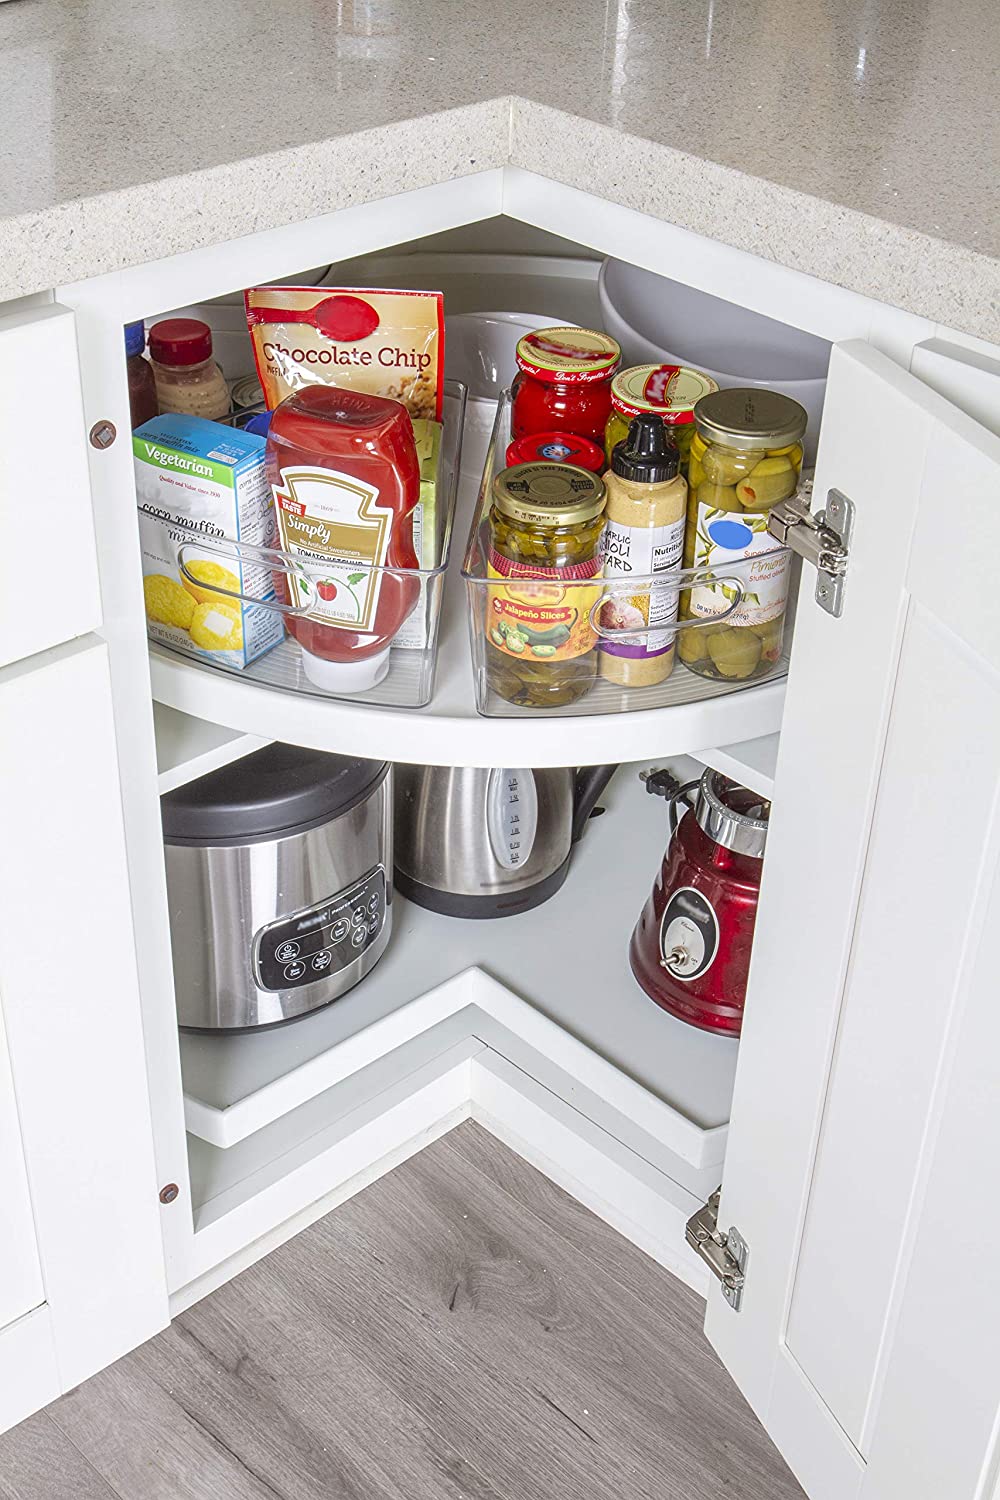
Step 4: Reorganize and Restock the Lazy Susan
With the cleaning process complete, it’s time to reorganize and restock your freshly cleaned Lazy Susan. Before returning items to the shelves, take a moment to assess the layout and organization of the contents. Consider grouping similar items together, arranging them in a manner that maximizes accessibility and convenience.
As you restock the Lazy Susan, take the opportunity to declutter and streamline its contents. Discard any expired or unused items, and consider transferring frequently used items to the front of the shelves for easy access. Utilize storage containers or bins to keep smaller items tidy and prevent them from rolling or shifting during rotation.
When arranging items on the shelves, be mindful of weight distribution to ensure balanced rotation and prevent strain on the Lazy Susan hardware. Place heavier items towards the center of the shelves and distribute lighter items towards the periphery, promoting smooth and effortless rotation without placing undue stress on the rotating mechanism.
Consider incorporating organizational tools such as tiered racks, dividers, or lazy Susan inserts to further optimize the storage space and keep items neatly arranged. These accessories can enhance the functionality of your Lazy Susan, making it easier to locate and retrieve items while maintaining a clutter-free and visually appealing storage solution.
Once you have reorganized and restocked the Lazy Susan, take a moment to appreciate the clean and organized appearance of your kitchen storage. The freshly cleaned shelves, coupled with thoughtfully arranged items, contribute to an efficient and visually pleasing kitchen space.
By reorganizing and restocking your Lazy Susan, you’ve not only completed the cleaning process but also optimized its functionality and visual appeal. With the shelves neatly arranged and items conveniently accessible, your kitchen’s Lazy Susan is ready to serve as a practical and efficient storage solution!
Read more: How To Attach A Lazy Susan
Conclusion
Congratulations on successfully completing the comprehensive cleaning process for your Lazy Susan! By following the step-by-step guide outlined in this article, you’ve revitalized your kitchen’s rotating shelves, ensuring a clean, organized, and efficient storage solution for your culinary essentials.
Regular maintenance and cleaning are essential for preserving the functionality and visual appeal of your Lazy Susan. By removing items, wiping down the shelves, cleaning the hardware, and reorganizing the contents, you’ve not only achieved a sparkling clean result but also optimized the usability of this convenient kitchen feature.
As you gaze upon your freshly cleaned and reorganized Lazy Susan, take pride in knowing that your kitchen storage is now a reflection of tidiness, efficiency, and practicality. The organized arrangement of items, coupled with the smooth rotation of the shelves, contributes to a seamless and enjoyable cooking experience.
Remember to incorporate regular cleaning and maintenance into your kitchen routine to preserve the cleanliness and functionality of your Lazy Susan. By doing so, you’ll continue to benefit from a well-organized and accessible storage solution that enhances the efficiency and visual appeal of your kitchen.
Thank you for joining us on this cleaning journey for your Lazy Susan. We hope this guide has empowered you to maintain a pristine and well-organized kitchen space, with your Lazy Susan serving as a shining example of efficiency and cleanliness in your culinary domain.
Here’s to a sparkling clean and effortlessly functional Lazy Susan, enriching your kitchen with its practicality and charm!
Frequently Asked Questions about How To Clean A Lazy Susan
Was this page helpful?
At Storables.com, we guarantee accurate and reliable information. Our content, validated by Expert Board Contributors, is crafted following stringent Editorial Policies. We're committed to providing you with well-researched, expert-backed insights for all your informational needs.


0 thoughts on “How To Clean A Lazy Susan”