Home>Furniture>Outdoor Furniture>How To Build A Stone Patio Grill

Outdoor Furniture
How To Build A Stone Patio Grill
Modified: May 6, 2024
Learn how to build a stunning stone patio grill for your outdoor space. Create the perfect spot to gather and enjoy meals with our step-by-step guide and expert tips.
(Many of the links in this article redirect to a specific reviewed product. Your purchase of these products through affiliate links helps to generate commission for Storables.com, at no extra cost. Learn more)
Introduction
Welcome to the world of outdoor cooking! If you love spending time in your backyard and enjoy hosting gatherings with your friends and family, then building a stone patio grill is the perfect project for you. A stone patio grill not only adds functionality to your outdoor space but also creates a visually appealing focal point that can elevate the overall aesthetic of your backyard.
Imagine the smell of sizzling steaks, the sound of laughter, and the warm glow of the fire as you gather around your custom-built grill. Whether you’re a seasoned grill master or someone who is just starting out, having a dedicated grill area can enhance your outdoor cooking experience and provide you with endless opportunities to experiment with flavors and techniques.
In this comprehensive guide, we will walk you through the step-by-step process of building a stone patio grill. From selecting the right location to adding finishing touches, we will cover all the essential aspects to ensure that you have a functional and visually appealing grill that will be the envy of your neighbors.
Before diving into the nitty-gritty details, it’s important to understand that building a stone patio grill requires careful planning and preparation. You will need to gather the necessary materials and tools, acquire some basic construction skills, and invest time and effort into the project. However, the end result will undoubtedly be worth it!
So, grab your hard hat (figuratively speaking), roll up your sleeves, and let’s get started on this exciting journey of building your very own stone patio grill.
Key Takeaways:
- Building a stone patio grill requires careful planning, precise construction, and attention to detail. From selecting the location to adding finishing touches, creating a custom grill can enhance outdoor cooking experiences.
- Constructing a stone patio grill involves steps such as preparing the foundation, building the base and walls, and creating the cooking surface. Adding final touches like countertops, storage, and seating completes the project.
Read more: How To Make A Stone Patio
Step 1: Selecting the Right Location
The first step in building a stone patio grill is selecting the right location in your backyard. Choosing the perfect spot will ensure that your grill is easily accessible, functional, and blends well with the overall design of your outdoor space.
Before you start digging or laying down any stones, take some time to evaluate your backyard. Consider factors such as the size and shape of your yard, proximity to your house, and any existing landscaping features. You should also think about the prevailing wind direction and the amount of shade or sunlight the area receives throughout the day.
Here are some essential points to keep in mind when selecting the location:
- Accessibility: Choose a location that is easily accessible from your kitchen or dining area. This will make it convenient for you to transport food, utensils, and other grilling essentials.
- Safety: Ensure that the location is safe and away from any flammable materials, structures, or overhanging trees. Maintain a safe distance from your house to prevent any fire hazards.
- Sun and Shade: Consider the amount of sunlight and shade the area receives. While a little shade can be beneficial, you don’t want your grill to be located in a spot where it’s constantly shaded, as it may affect the cooking experience.
- Wind Protection: Take note of the prevailing wind direction and choose a location that provides some natural protection. This will help maintain a consistent temperature within the grilling area and prevent excessive smoke and heat from blowing towards your seating area.
- Design and Aesthetics: Consider how the grill will fit into the overall design and flow of your backyard. Ensure that it complements any existing outdoor features and doesn’t obstruct any walkways or landscaping elements.
By carefully considering these factors, you can select the perfect location for your stone patio grill. Once you have chosen the spot, mark it out using stakes or spray paint to visualize the area and ensure that it meets your requirements.
With the location determined, you are now ready to move on to the next step: planning and designing the grill.
Step 2: Planning and Designing the Grill
Now that you have selected the location for your stone patio grill, it’s time to start planning and designing the grill itself. This step is crucial as it will determine the size, shape, and layout of your grill, ensuring it meets your cooking needs and fits seamlessly into your outdoor space.
Here are some key considerations for planning and designing your grill:
- Size: Determine the size of your grill based on the amount of cooking space you need and the number of people you usually cook for. Consider whether you want to incorporate additional features such as countertops, storage cabinets, or a built-in sink.
- Layout: Decide on the layout of your grill, considering elements such as the placement of the grill surface, preparation areas, and any additional features. Think about the flow of cooking, keeping in mind the accessibility of ingredients, utensils, and workspace.
- Materials: Choose the type of stones or bricks you will use for the construction of your grill. Consider factors such as durability, heat resistance, and aesthetics. Common options include natural stone, concrete blocks, or fire bricks.
- Style: Determine the style of your grill, taking into account your personal preferences and the overall design of your outdoor space. You can opt for a traditional and rustic look or a modern and sleek design.
- Additional Features: Decide if you want to incorporate any additional features into your grill, such as a rotisserie, smoker box, or side burners. These can enhance your grilling capabilities and add versatility to your cooking experience.
Once you have a clear vision of the size, layout, materials, style, and additional features of your grill, it’s a good idea to sketch out your design or create a detailed plan. This will serve as a roadmap throughout the construction process and help you stay organized.
If you’re unsure about the design or need some inspiration, you can explore various outdoor grill designs online or consult with a professional landscaper or designer. They can provide expert advice and guidance to help you create a grill that suits your specific needs and complements your outdoor space.
With a well-thought-out plan in hand, you’re now ready to move on to the next step: gathering the materials and tools required for the construction of your stone patio grill.
Step 3: Gathering Materials and Tools
Now that you have the design and plan for your stone patio grill, it’s time to gather all the necessary materials and tools needed for its construction. Having everything you need at hand will ensure a smooth and efficient building process.
Here is a list of the materials and tools you will typically need to build a stone patio grill:
Materials:
- Stone or bricks: Choose the type of stones or bricks that you decided on during the planning phase. Make sure to calculate the quantity needed based on the dimensions and layout of your grill.
- Mortar mix: Select a mortar mix that is suitable for outdoor applications and complements the type of stone or bricks you are using.
- Rebar or wire mesh: For additional strength and stability, you may need to reinforce the base of the grill with rebar or wire mesh.
- Grill grate: Depending on the style and size of your grill, choose a durable and heat-resistant grill grate that fits perfectly.
- Concrete mix: If you plan to add a concrete countertop or other structural elements, you will need concrete mix.
- Fire bricks (optional): Fire bricks are highly heat-resistant bricks that can be used to line the inside of the grill, providing additional insulation and durability.
Read more: How To Grout Patio Stones
Tools:
- Tape measure and level: These tools are essential for accurate measurements and ensuring level surfaces.
- Masonry tools: Including a trowel, masonry brush, jointer, and masonry saw or chisel.
- Safety equipment: Gloves, safety glasses, and a dust mask to protect yourself during the construction process.
- Concrete mixer (if needed): If you are using concrete mix for any part of your grill, a concrete mixer can make the mixing process easier and more efficient.
- Hammers and chisels: These tools are useful for shaping stones or bricks if needed.
- Grill assembly tools: Depending on the type of grill grate you have chosen, you may need specific tools for assembling it.
It’s important to ensure that you have all the necessary materials and tools before you start the construction process. This will save you time and prevent any delays or interruptions during the building process.
In addition to the materials and tools mentioned above, it’s a good idea to have a dedicated space or storage area for all your equipment. This will help keep your workspace organized and make it easier to access the tools when needed.
Now that you are fully equipped with the necessary materials and tools, you’re ready to move on to the next step: preparing the foundation for your stone patio grill.
Step 4: Preparing the Foundation
With all the materials and tools gathered, it’s time to prepare the foundation for your stone patio grill. The foundation is crucial as it provides stability and ensures that your grill is built on a solid base.
Here are the steps to follow when preparing the foundation:
- Clear the Area: Start by clearing the designated area of any debris, plants, or obstructions. Remove any grass or sod, and ensure that the ground is level.
- Excavation: Dig a trench for the foundation of your grill, ensuring that it is deep enough and follows the dimensions laid out in your plan. The depth will depend on the type of soil in your backyard, but typically it should be around 4-6 inches.
- Compact the Soil: Use a tamper or a hand compactor to compact the soil in the trench. This will provide a solid base for your grill and prevent any sinking or shifting in the future.
- Add a Layer of Gravel: Pour a layer of gravel into the trench, approximately 2-3 inches thick. This will improve drainage and provide additional stability for your grill.
- Level the Gravel: Use a tamper or a straight board to level the layer of gravel. Ensure that it is evenly distributed and compacted.
- Lay the Wire Mesh (optional): If you want to reinforce your foundation further, you can lay wire mesh on top of the gravel. This will provide added strength and prevent cracking.
Once you have completed these steps, your foundation is ready for the next phase of construction. It’s important to take your time during this stage to ensure that the foundation is solid and level. Any inconsistencies or errors at this stage can affect the overall stability and durability of your grill.
Before proceeding to the next steps, double-check your measurements and make any necessary adjustments to ensure that the foundation aligns with the design and dimensions of your grill. This will help you avoid any issues later on during the construction process.
With the foundation prepared, you’re one step closer to enjoying delicious meals from your very own stone patio grill. Next, we’ll move on to step 5, which involves building the base of your grill.
Step 5: Building the Grill Base
Having prepared the foundation, it’s now time to build the base of your stone patio grill. The base will provide support and structure for the rest of the grill and is an essential element in the construction process.
Follow these steps to build the base of your grill:
- Lay the First Layer of Stones: Start by applying a layer of mortar on top of the prepared foundation. This will act as the adhesive for the stones. Begin laying the stones or bricks, following the design and dimensions outlined in your plan. Use a level to ensure that the stones are even and properly aligned.
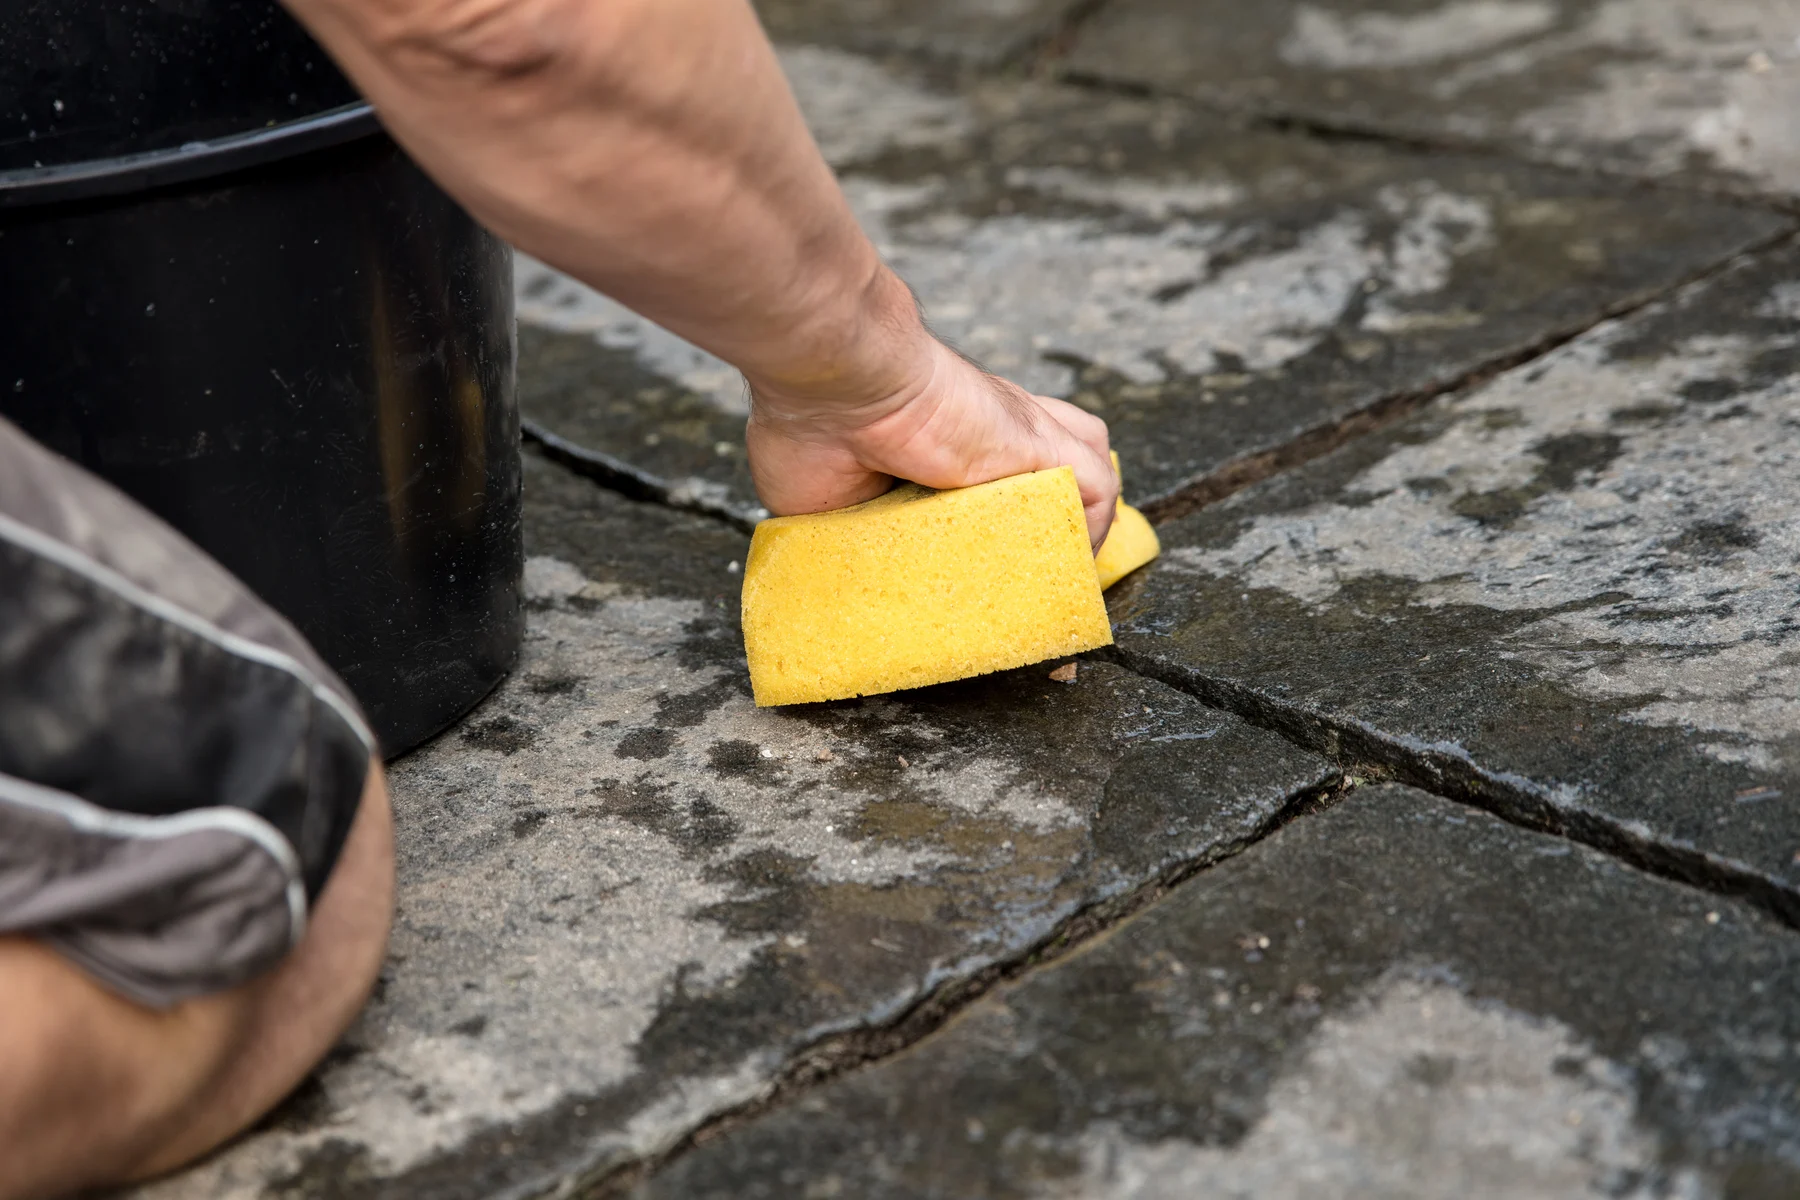
- Add Mortar and Build Up: Apply mortar on top of the first layer of stones and add more stones, gradually building up the base. Use a trowel to spread the mortar evenly and a jointer to create a smooth finish on the joints between the stones.
- Check for Levelness: As you build up the base, periodically check for levelness both horizontally and vertically. Adjust the stones as needed to ensure a level and stable foundation.
- Continue Layering: Repeat the process of adding mortar and placing stones until you reach the desired height for your base. Make sure to alternate the placement of the stones to provide stability and strength.
- Allow for Curing: Once the base is completed, allow the mortar to cure as per the manufacturer’s instructions. This may take a couple of days, so be patient and refrain from placing any weight on the base during this time.
Building the base of the grill requires precision and attention to detail. Take your time to ensure that each stone is properly positioned and that the base is level and stable. This will provide a solid foundation for the rest of your grill.
During the process, adjust the design and layout if necessary. Sometimes, slight tweaks may be required to accommodate any unforeseen challenges or to ensure the overall stability and aesthetics of the grill.
With the base constructed and the mortar cured, you can now move on to the exciting part of building the grill walls. This is where you will see your stone patio grill take shape, becoming a prominent feature in your outdoor cooking area.
When building a stone patio grill, make sure to use a sturdy and level foundation to support the weight of the grill. This will ensure stability and prevent any potential accidents.
Step 6: Constructing the Grill Walls
Now that the base of your stone patio grill is complete, it’s time to move on to constructing the walls. The walls will enclose the cooking area and provide a sturdy structure for your grill.
Follow these steps to construct the walls of your grill:
- Lay the First Layer of Stones: Apply a layer of mortar on top of the base, just like you did when building the base. Begin laying the stones or bricks, making sure to follow the design and dimensions of your plan. Check for levelness and adjust as necessary.
- Add Mortar and Continue Building: Apply mortar on top of the first layer of stones and continue to build up the walls. As you go, use a trowel to spread mortar evenly and ensure strong adhesion between the stones. Remember to alternate the placement of the stones for stability.
- Leave Openings for Air Vents: Depending on your grill design, you may need to leave openings for air vents to regulate heat and airflow. These can be small gaps or dedicated vent holes, depending on your preferences and the style of your grill.
- Check for Plumbness and Levelness: Periodically check that the walls are plumb (vertical) and level (horizontal). Use a level and adjust the stones as needed to maintain a consistent and balanced structure.
- Continue Building Layers: Repeat the process of applying mortar, placing stones, and checking for plumbness and levelness until you reach the desired height for your grill walls.
- Allow for Curing: Once the walls are completed, allow the mortar to cure according to the manufacturer’s instructions. This typically takes a few days, so refrain from placing any weight on the walls during this time.
Constructing the walls of your stone patio grill requires patience and attention to detail. Take the time to ensure that each stone is properly positioned, and that the walls are level and sturdy. This will result in a durable and visually appealing grill structure.
Be mindful of any openings or spaces needed for accessories, such as a chimney or a space for a grill lid. Incorporating these elements into your grill design will enhance its functionality and convenience.
With the walls constructed and the mortar cured, you are getting closer to enjoying the fruits of your labor. The next step will guide you through creating the cooking surface for your stone patio grill.
Read more: How Much Is A Stone Patio
Step 7: Creating the Grill Cooking Surface
With the walls of your stone patio grill in place, it’s time to focus on creating the cooking surface. This is the area where you will place your grill grate and prepare delicious meals for your family and friends.
Follow these steps to create the grill cooking surface:
- Prepare the Base: If you haven’t done so already, make sure the top layer of your grill walls is level and smooth. This will provide a sturdy and even base for the cooking surface.
- Add a Layer of Fire Bricks (Optional): For enhanced heat retention and durability, consider adding a layer of fire bricks on top of the base. These bricks are highly heat-resistant and will provide a solid foundation for your grill grate.
- Place the Grill Grate: Carefully position the grill grate on top of the fire bricks or directly on the smooth top layer of your grill walls. Ensure that the grate is level and centered, allowing for even cooking.
- Adjustable Grate Height (Optional): Depending on your cooking preferences, you may consider incorporating an adjustable grate height feature. This will allow you to raise or lower the grill grate to control the distance between the heat source and the food.
- Ensure Proper Ventilation: Make sure there is adequate ventilation beneath the grill cooking surface. This will allow air to flow and ensure proper combustion for efficient grilling.
- Test for Stability: Give the cooking surface a gentle shake and ensure that it is stable and secure. Make any necessary adjustments or additions to enhance stability and safety.
Creating the grill cooking surface is an important step in the construction process. It’s essential to ensure that the surface is level, stable, and properly ventilated to promote even cooking and efficient grilling.
Remember to take measurements and consider the dimensions of your grill grate when building the base and adding the fire bricks. This will ensure that your cooking surface fits perfectly and provides optimal heat distribution.
With the grill cooking surface ready, you’re almost done with constructing your stone patio grill. The next and final step will add those finishing touches that will make your grill truly unique and inviting.
Step 8: Adding Finishing Touches
Congratulations! You’re in the final phase of building your stone patio grill. Step 8 is all about adding those finishing touches that will elevate the aesthetics and functionality of your grill.
Here are some finishing touches you can consider adding to your stone patio grill:
- Countertops: Install countertops or workspace surfaces adjacent to your grill. This will provide a convenient area for food preparation, seasoning, and plating.
- Storage: Incorporate storage options such as cabinets or shelves for utensils, grilling accessories, and charcoal or propane tanks. This will keep everything organized and within reach.
- Chimney: If your grill design incorporates a chimney, make sure it is properly installed to vent smoke out from the cooking area. This will improve air circulation and enhance the grilling experience.
- Lights: Install outdoor lighting fixtures near your grill to ensure visibility during nighttime grilling sessions. This will make your grill area safe and functional, even after sunset.
- Seating: Create a comfortable seating area around your stone patio grill, allowing friends and family to gather and enjoy the delicious meals you’ll be preparing. Consider adding outdoor furniture, such as chairs, benches, or even a dining table.
- Decoration: Enhance the visual appeal of your grill area with decorative elements such as plants, artwork, or outdoor decor items. This will add personality and charm to your outdoor cooking space.
Adding these finishing touches will not only make your stone patio grill more functional but also create a welcoming and inviting atmosphere. Take the time to consider your personal preferences and the overall style of your outdoor space when selecting these elements.
Remember to follow any safety guidelines when installing electrical fixtures and ensure that all elements are weatherproof and suitable for outdoor use. Taking proper care during the final stage of construction will ensure the longevity and enjoyment of your stone patio grill.
With the finishing touches in place, step back and admire the beautiful and functional addition you have created in your backyard. Get ready to impress your guests and enjoy memorable moments around your custom-built stone patio grill.
Congratulations once again on completing this project! We hope your stone patio grill brings you many years of joy and delicious grilling experiences.
Conclusion
Building a stone patio grill is a rewarding and satisfying project that allows you to create a functional and visually stunning outdoor cooking space. Throughout this comprehensive guide, we have walked you through the step-by-step process of building your own stone patio grill, from selecting the right location to adding the finishing touches.
By carefully planning and designing your grill, gathering the necessary materials and tools, and following the construction steps, you have created a custom-made grill that suits your cooking needs and complements your outdoor space.
Remember, the key to a successful stone patio grill project is attention to detail, precision, and patience during each stage of the construction process. Take the time to ensure that your foundation is solid, the walls are level, and the cooking surface is properly positioned.
With your stone patio grill complete, you now have an outdoor cooking area that will be the envy of your neighbors. Whether you’re grilling steaks, smoking ribs, or baking pizzas, your custom-built grill will serve as the centerpiece for memorable gatherings and delicious meals.
Don’t forget to consider the finishing touches that will make your grill uniquely yours. Install countertops, storage options, and seating, and add decorative elements to create a welcoming and functional outdoor space. And of course, always prioritize safety when operating your grill and follow proper grilling techniques.
We hope this guide has inspired and empowered you to embark on your stone patio grill project. Enjoy the process, savor the flavors, and create lasting memories around your new outdoor cooking haven.
Happy grilling!
Ready to take on more DIY projects? Building a stone patio grill is just the start. There's a whole world of self-made satisfaction waiting for you. DIY projects offer not only a chance to save money but also a way to personalize your space. Whether you're crafting something small or tackling a larger project, each step you take builds skills and confidence. Curious about the perks of rolling up your sleeves and getting hands-on at home? Dive into our other article on why DIY projects are such a rewarding endeavor.
Frequently Asked Questions about How To Build A Stone Patio Grill
Was this page helpful?
At Storables.com, we guarantee accurate and reliable information. Our content, validated by Expert Board Contributors, is crafted following stringent Editorial Policies. We're committed to providing you with well-researched, expert-backed insights for all your informational needs.


0 thoughts on “How To Build A Stone Patio Grill”