Home>Furniture & Design>Outdoor Furniture>How To Build An Outdoor Step
Outdoor Furniture
How To Build An Outdoor Step
Modified: August 27, 2024
Learn how to build an outdoor step with our expert tips and design ideas for outdoor furniture. Create a stylish and functional addition to your outdoor space.
(Many of the links in this article redirect to a specific reviewed product. Your purchase of these products through affiliate links helps to generate commission for Storables.com, at no extra cost. Learn more)
Introduction
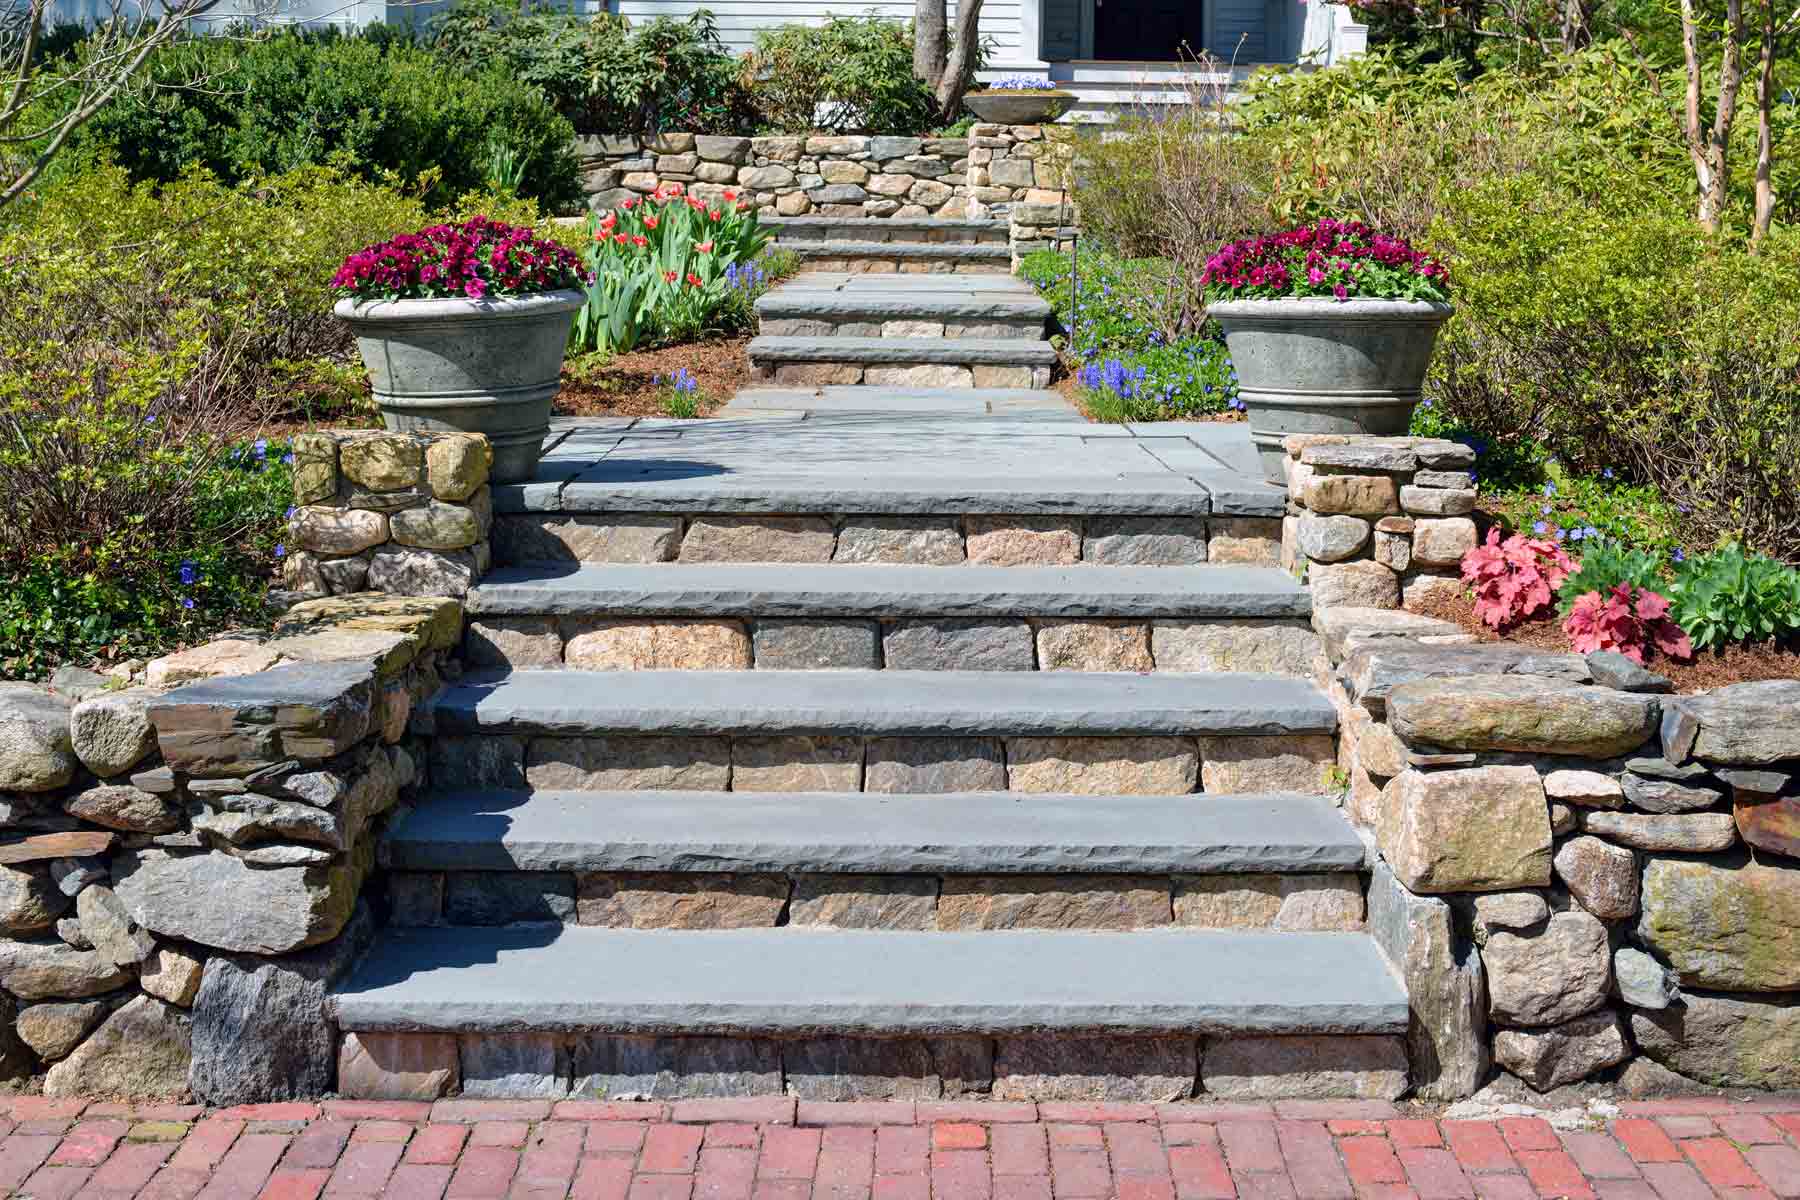
Welcome to the world of outdoor home improvement! Building an outdoor step can be a rewarding and practical project that enhances both the functionality and aesthetics of your outdoor space. Whether you're aiming to create a welcoming entryway to your home, a convenient step for your deck, or a charming addition to your garden, this DIY endeavor offers a fantastic opportunity to showcase your creativity and craftsmanship.
In this comprehensive guide, we will walk through the step-by-step process of constructing a sturdy and visually appealing outdoor step. From gathering the necessary materials and tools to adding the finishing touches, you'll gain valuable insights and practical tips to help you successfully complete this project. By the end of this journey, you'll have the confidence and know-how to build a beautiful and functional outdoor step that perfectly complements your outdoor living space.
So, roll up your sleeves, gather your tools, and let's embark on this exciting venture together. Whether you're an experienced DIY enthusiast or a newcomer to the world of outdoor projects, this guide is designed to equip you with the knowledge and inspiration to create a stunning outdoor step that will be admired for years to come. Let's get started!
Key Takeaways:
- Building an outdoor step is a fun and rewarding DIY project that enhances your outdoor space. From gathering materials to adding finishing touches, it’s a creative journey that adds beauty and functionality to your home.
- By carefully measuring, planning, and constructing, you can create a safe and visually appealing outdoor step. It’s not just a structure, but a gateway to new experiences and enjoyment in your outdoor sanctuary.
Read more: How To Build Handrails For Outdoor Steps
Step 1: Gather Materials and Tools
Before diving into the construction process, it’s essential to gather all the necessary materials and tools to ensure a smooth and efficient building experience. Here’s a comprehensive list of what you’ll need:
Materials:
- Pressure-treated lumber or cedar: These are excellent choices for outdoor steps due to their durability and resistance to rot and decay.
- Gravel or crushed stone: Essential for creating a stable base and promoting proper drainage.
- Landscape fabric: Helps prevent weed growth and maintains the integrity of the base.
- Concrete mix: Used for securing the base and providing stability.
- Galvanized or stainless steel screws: Ideal for outdoor projects as they are resistant to rust and corrosion.
- Outdoor wood sealer or stain: Protects the wood from the elements and enhances its appearance.
Tools:
- Tape measure: Essential for accurately measuring the dimensions of the step and planning the layout.
- Level: Ensures that the step is even and well-balanced.
- Shovel: For excavating and leveling the ground where the step will be installed.
- Circular saw: Used for cutting the lumber to the desired dimensions.
- Drill/driver: Necessary for securing the components together with screws.
- Trowel: For spreading and smoothing the concrete mix.
- Paintbrush or roller: Used for applying the wood sealer or stain.
By ensuring that you have all the required materials and tools on hand, you’ll be well-prepared to commence the construction process with confidence and efficiency. With everything in place, you’re ready to move on to the next step: measuring and planning the layout of your outdoor step.
Step 2: Measure and Plan
Accurate measurements and thoughtful planning are crucial for the successful construction of an outdoor step. Before picking up your tools, take the time to meticulously measure the intended area and create a detailed plan for the step’s layout. Here’s how to proceed:
Read more: How To Build Outdoor Steps On A Slope
Measurements:
Begin by measuring the height and depth of the area where the step will be installed. Take into account the desired rise (height) of each step and the tread (depth) to ensure comfortable and safe navigation. Additionally, measure the overall width of the step to determine the number of treads needed for adequate coverage.
Layout Planning:
With the measurements in hand, sketch out a layout plan for the step, considering the number of treads required to reach the desired height. Visualize the placement of the step in relation to the existing pathway, deck, or entryway to ensure a seamless and functional transition.
During the planning phase, it’s also essential to consider the aesthetic aspects of the step. Explore design options such as rounded or beveled edges for the treads, and consider how the step will harmonize with the surrounding landscape and architectural elements.
Moreover, if your outdoor space experiences heavy rainfall or snow, incorporating a slight slope in the design can facilitate proper water drainage, preventing accumulation and potential slipping hazards.
By meticulously measuring the area and thoughtfully planning the layout, you’ll lay a solid foundation for the construction process, ensuring that the outdoor step aligns with your vision and serves its practical purpose effectively. With the measurements and plan in place, you’re ready to move on to the next step: preparing the area for construction.
Step 3: Prepare the Area
Before commencing the construction of the outdoor step, it’s crucial to prepare the designated area to ensure a stable and durable foundation. The following steps will guide you through the essential preparations:
Clear the Space:
Begin by clearing the area where the step will be installed. Remove any debris, rocks, or vegetation, and ensure that the ground is level and free from obstructions. This initial step sets the stage for creating a solid base for the outdoor step.
Excavation and Leveling:
Using a shovel, excavate the area to the required depth, allowing ample space for the base materials and the step’s structure. Ensure that the ground is leveled and compacted to provide a stable foundation for the step. If necessary, add or remove soil to achieve the desired level and slope for proper water drainage.
Install the Base Materials:
Once the area is excavated and leveled, it’s time to introduce the base materials. Begin by spreading a layer of gravel or crushed stone to establish a stable and well-draining base. Compact the base material with a tamper to ensure firmness and stability.
Utilize Landscape Fabric:
To prevent weed growth and maintain the integrity of the base, lay down a layer of landscape fabric over the gravel or crushed stone. This will help to preserve the base materials and minimize maintenance efforts in the long run.
Secure the Base:
Finally, ensure that the base materials are firmly in place and well-compacted. This will provide a solid and reliable foundation for the subsequent construction steps, ensuring the longevity and stability of the outdoor step.
By diligently preparing the area for the construction of the outdoor step, you’ll establish a strong and durable foundation, setting the stage for the next phase of the project: building the base of the step.
Read more: How To Build Brick Steps
Step 4: Build the Base
With the area prepared, it’s time to construct the base of the outdoor step. This foundational element provides stability and support for the entire structure. Follow these steps to build a sturdy and reliable base:
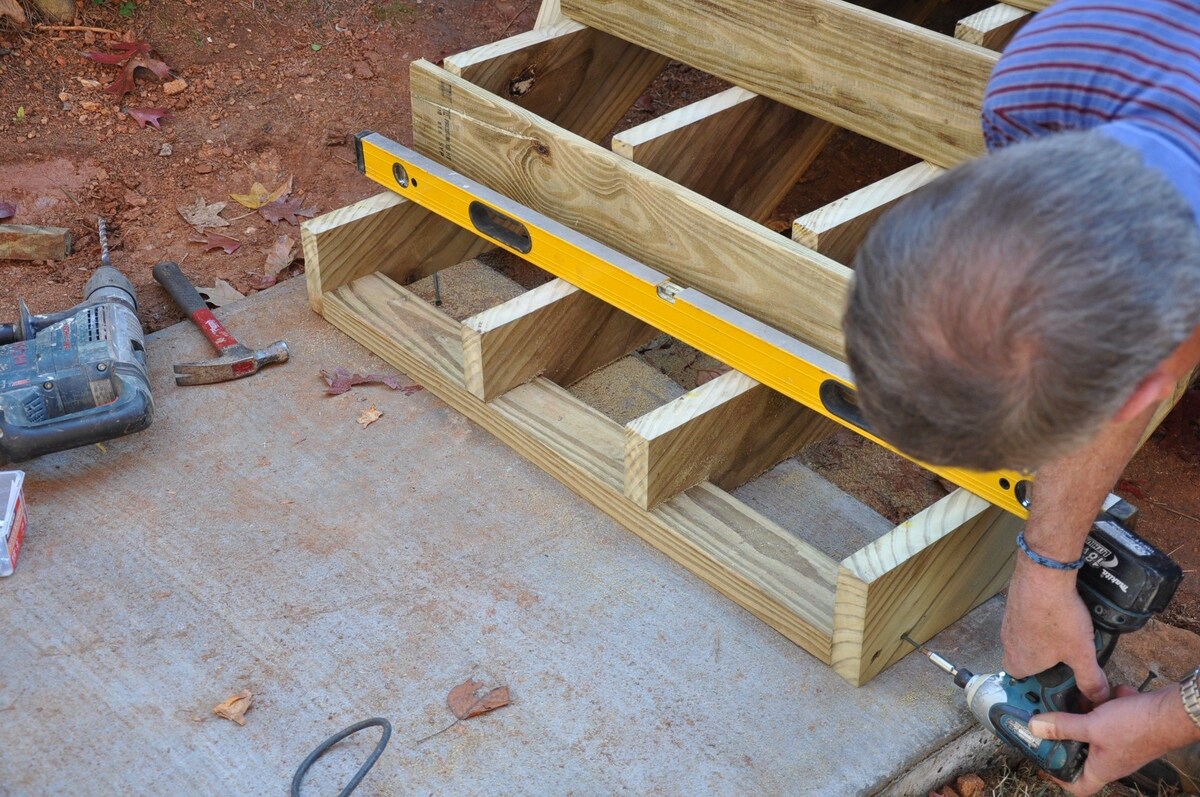
Frame Construction:
Begin by constructing a frame for the base using pressure-treated lumber or cedar. Measure and cut the lumber to the required dimensions, ensuring that the frame fits snugly within the excavated area. Use a level to confirm that the frame is even and well-aligned.
Pour and Level Concrete:
Once the frame is in place, pour concrete into the frame to create a solid base for the step. Use a trowel to spread and level the concrete, ensuring that it fills the frame evenly and reaches the desired thickness. The concrete base provides stability and durability, anchoring the step securely to the ground.
Allow for Proper Curing:
After pouring the concrete, allow sufficient time for it to cure and harden. Follow the manufacturer’s recommendations for curing time, ensuring that the concrete base achieves its full strength and resilience before proceeding to the next phase of construction.
By meticulously building a robust base for the outdoor step, you’ll establish a secure and long-lasting foundation for the structure. With the base in place, you’re ready to advance to the next step of the construction process: adding the treads to complete the step’s functional and aesthetic aspects.
Read more: How To Build An Angled Deck Step-by-Step
Step 5: Add the Treads
Adding the treads to the constructed base is a pivotal step in completing the outdoor step. The treads not only contribute to the step’s functionality by providing a secure surface for walking but also play a significant role in its visual appeal. Follow these essential steps to seamlessly integrate the treads into the structure:
Cut and Prepare the Treads:
Using pressure-treated lumber or cedar, measure and cut the treads to the desired dimensions. Ensure that the treads are consistent in size and align with the width of the step. If preferred, consider incorporating design elements such as rounded or beveled edges to enhance the aesthetic appeal of the treads.
Secure the Treads:
Position the cut treads onto the cured concrete base, ensuring that they are evenly spaced and aligned. Secure the treads to the base using galvanized or stainless steel screws, driving them through the treads and into the concrete base for a firm and stable attachment. Confirm that each tread is securely fastened, providing a safe and reliable surface for stepping.
Apply a Protective Finish:
Once the treads are securely in place, consider applying an outdoor wood sealer or stain to protect the lumber from the elements. This protective finish not only enhances the natural beauty of the wood but also shields it from moisture, UV rays, and general wear, extending its longevity and maintaining its visual appeal over time.
By adding the treads to the base of the outdoor step, you’ll complete the functional and aesthetic aspects of the structure, creating a safe and visually appealing transition within your outdoor space. With the treads securely installed and finished, you’re ready to move on to the final step: adding the finishing touches to perfect the outdoor step.
Read more: How To Build Landscaping Steps
Step 6: Finishing Touches
As you near the completion of the outdoor step construction, it’s time to add the finishing touches that will elevate its visual appeal and ensure its long-term durability. These final steps will add polish and finesse to the project, leaving you with a stunning and functional addition to your outdoor space.
Trim and Edging:
Consider adding trim or edging to the sides of the step to provide a clean and finished look. This detail not only enhances the aesthetic appeal of the step but also offers a subtle touch of elegance, creating a seamless integration with the surrounding landscape or architecture.
Non-Slip Surface:
If the outdoor step is frequently exposed to moisture or inclement weather, consider incorporating a non-slip surface treatment to the treads. This can be achieved through the application of non-slip strips or a specialized coating, providing enhanced traction and safety, especially during wet conditions.
Maintenance and Care:
Ensure that you are equipped with the knowledge and tools to maintain the outdoor step effectively. Regularly inspect the step for signs of wear, and perform any necessary maintenance, such as reapplying wood sealer or addressing any loose fasteners. By staying proactive in the care of your outdoor step, you’ll prolong its lifespan and preserve its visual appeal.
Read more: How To Build A Step On A Patio
Enhance with Greenery:
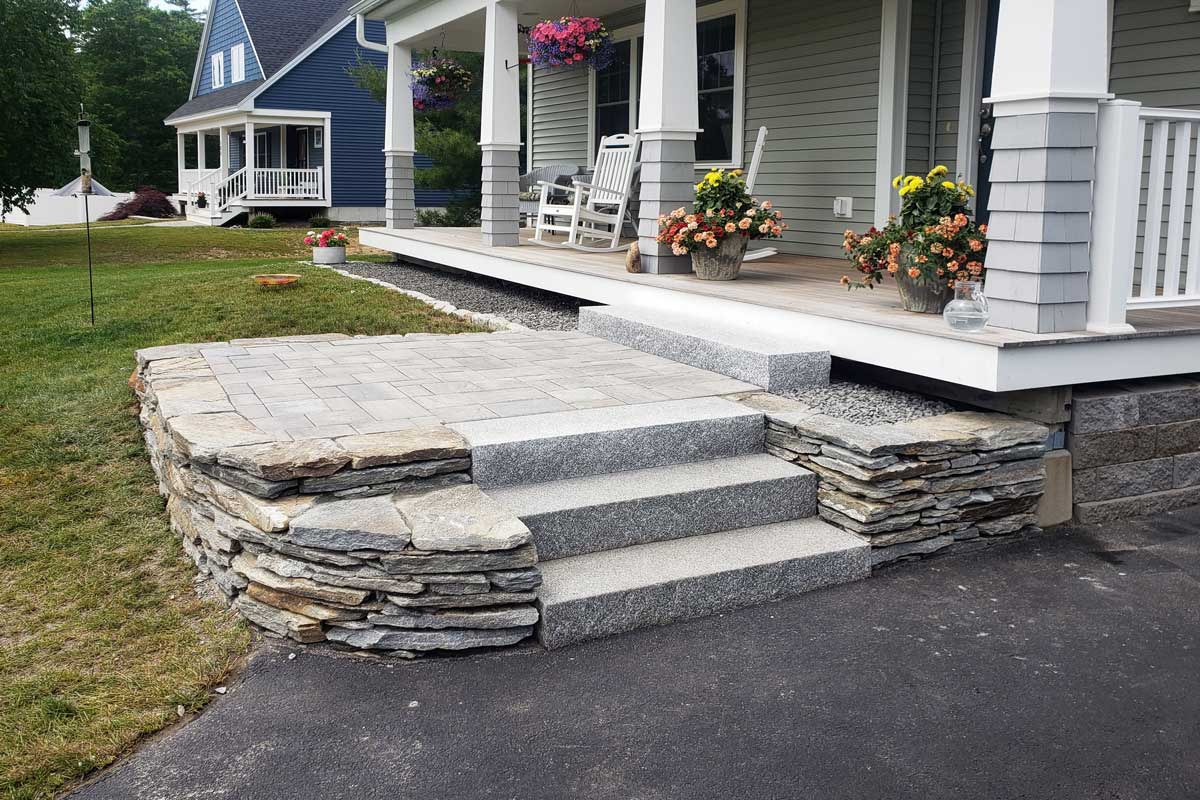
Consider enhancing the area surrounding the outdoor step with potted plants, flowers, or other greenery. This simple addition can infuse charm and character into the space, creating a welcoming and inviting ambiance around the newly constructed step.
By attending to these finishing touches, you’ll bring the outdoor step project to its completion, ensuring that it not only serves its practical purpose but also enhances the overall aesthetics of your outdoor environment. With the finishing touches in place, take a moment to admire your craftsmanship and revel in the satisfaction of a job well done.
Conclusion
Congratulations on successfully completing the construction of your outdoor step! Through careful planning, meticulous execution, and attention to detail, you’ve transformed a simple project into a beautiful and functional addition to your outdoor space. As you reflect on the journey from gathering materials to adding the finishing touches, you’ve not only enhanced the accessibility of your outdoor area but also created a focal point that harmonizes with the natural surroundings.
Building an outdoor step is not just about creating a physical structure; it’s about crafting a seamless transition that invites individuals to explore and enjoy the outdoor environment. Whether it’s a welcoming entryway to your home, a convenient access point to your deck, or a charming feature in your garden, the outdoor step you’ve constructed serves as a testament to your creativity and dedication to enhancing your living space.
As you admire the finished product, take pride in the craftsmanship and attention to detail that have gone into every aspect of the construction. From the sturdy base to the carefully secured treads and the thoughtful finishing touches, your outdoor step stands as a testament to your commitment to quality and excellence.
Furthermore, the skills and knowledge you’ve gained from this project extend beyond the completion of the step itself. You’ve honed your abilities in measurement, construction, and design, equipping yourself with valuable expertise that can be applied to future outdoor projects and endeavors.
Finally, as you revel in the satisfaction of a job well done, take a moment to envision the countless memories and moments that will unfold around this newly constructed outdoor step. Whether it’s a place for quiet reflection, a gathering spot for friends and family, or simply a picturesque addition to your outdoor landscape, your outdoor step is poised to become an integral part of your outdoor lifestyle.
With the completion of this project, you’ve not only built an outdoor step—you’ve crafted a gateway to new experiences and lasting enjoyment in your outdoor sanctuary. Embrace the pride of accomplishment, and may your outdoor step serve as a symbol of the creativity and dedication that enrich your living space.
Frequently Asked Questions about How To Build An Outdoor Step
Was this page helpful?
At Storables.com, we guarantee accurate and reliable information. Our content, validated by Expert Board Contributors, is crafted following stringent Editorial Policies. We're committed to providing you with well-researched, expert-backed insights for all your informational needs.


0 thoughts on “How To Build An Outdoor Step”