Home>Furniture & Design>Outdoor Furniture>How To Build An Outdoor Pull-Up Bar
Outdoor Furniture
How To Build An Outdoor Pull-Up Bar
Published: January 15, 2024
Learn how to build your own outdoor pull-up bar with our easy step-by-step guide. Create a functional and stylish addition to your outdoor furniture and design.
(Many of the links in this article redirect to a specific reviewed product. Your purchase of these products through affiliate links helps to generate commission for Storables.com, at no extra cost. Learn more)
Introduction
Welcome to the world of outdoor fitness! Building an outdoor pull-up bar is an excellent way to elevate your workout routine and enjoy the fresh air simultaneously. Whether you're a fitness enthusiast, a DIY aficionado, or someone looking to enhance their outdoor space, creating a sturdy and functional pull-up bar can be a rewarding project. Not only does it provide a dedicated spot for challenging upper body exercises, but it also adds a unique and practical element to your outdoor environment.
In this comprehensive guide, we'll walk you through the step-by-step process of building an outdoor pull-up bar. From selecting the ideal location to assembling the necessary materials and tools, each stage of the construction will be explained in detail. Additionally, we'll explore optional add-ons to customize your pull-up bar, ensuring that it caters to your specific fitness goals and preferences.
Whether you're aiming to boost your strength, increase your overall fitness level, or simply enjoy the convenience of having a workout station in your backyard, constructing an outdoor pull-up bar is a fulfilling endeavor. So, roll up your sleeves, gather your tools, and let's embark on this exciting journey of creating a durable and versatile outdoor fitness fixture!
Key Takeaways:
- Building an outdoor pull-up bar is a fun and rewarding project that adds a unique fitness element to your outdoor space. It requires careful planning, sturdy materials, and testing for stability to ensure a safe and enjoyable workout experience.
- Customizing your pull-up bar with optional add-ons, such as suspension trainers and gymnastics rings, can expand your exercise options and create a personalized fitness hub. Embrace the creativity and versatility of your outdoor workout environment!
Read more: How To Build An Outdoor Patio Bar
Step 1: Gather Materials and Tools
Before diving into the construction process, it’s crucial to gather all the necessary materials and tools. Here’s a comprehensive list to ensure you’re well-prepared for the project:
Materials:
- Two sturdy wooden posts or metal poles (typically 8-10 feet in length)
- Concrete mix or post-setting concrete
- Metal crossbar or wooden dowel (sized according to your preference)
- Galvanized steel brackets or pipe straps
- Wood screws or bolts
- Level
- Measuring tape
- Marker or chalk
- Gravel (for drainage, if using concrete)
- Optional: Paint or sealant for weatherproofing
Tools:
- Shovel or post-hole digger
- Wheelbarrow or mixing tub for concrete
- Adjustable wrench or socket set
- Power drill with appropriate bits
- Saw (if cutting the crossbar to a custom length)
- Protective eyewear and gloves
Once you’ve acquired all the materials and tools, you’ll be well-equipped to proceed with the subsequent steps of building your outdoor pull-up bar. Additionally, ensure that the materials are of high quality and suitable for outdoor use, as they will be exposed to various weather conditions.
Step 2: Choose a Location
When selecting the ideal location for your outdoor pull-up bar, several factors should be taken into consideration to ensure both safety and convenience. Here are some essential points to ponder while determining the placement:
Space and Clearance: Identify an area in your outdoor space that offers sufficient clearance for performing pull-ups and other related exercises without any obstructions. The space should also allow for free movement around the pull-up bar to ensure a comfortable workout experience.
Ground Stability: It’s crucial to choose a spot with stable ground, especially if you’re opting for a freestanding pull-up bar. Avoid areas with soft or uneven ground that may compromise the stability of the support posts.
Accessibility: Consider the accessibility of the location, ensuring that it’s easily reachable from your home or any other frequented area of your property. Convenience plays a significant role in maintaining consistency with your fitness routine.
Weather Exposure: Evaluate the exposure of the chosen location to different weather conditions. While some outdoor pull-up bars are designed to withstand various elements, it’s advisable to select a spot that minimizes prolonged exposure to harsh weather, if possible.
Privacy and Aesthetics: If privacy is a concern, choose a location that offers a degree of seclusion. Additionally, consider how the pull-up bar will complement the overall aesthetics of your outdoor space, ensuring that it harmonizes with the existing landscape or design elements.
Once you’ve carefully assessed these factors, mark the chosen location using a marker or chalk. This will serve as a guide when proceeding with the subsequent steps of the construction process. With the location determined, you’re now ready to move on to the next phase of building your outdoor pull-up bar.
Read more: How To Build Outdoor Bar Ideas
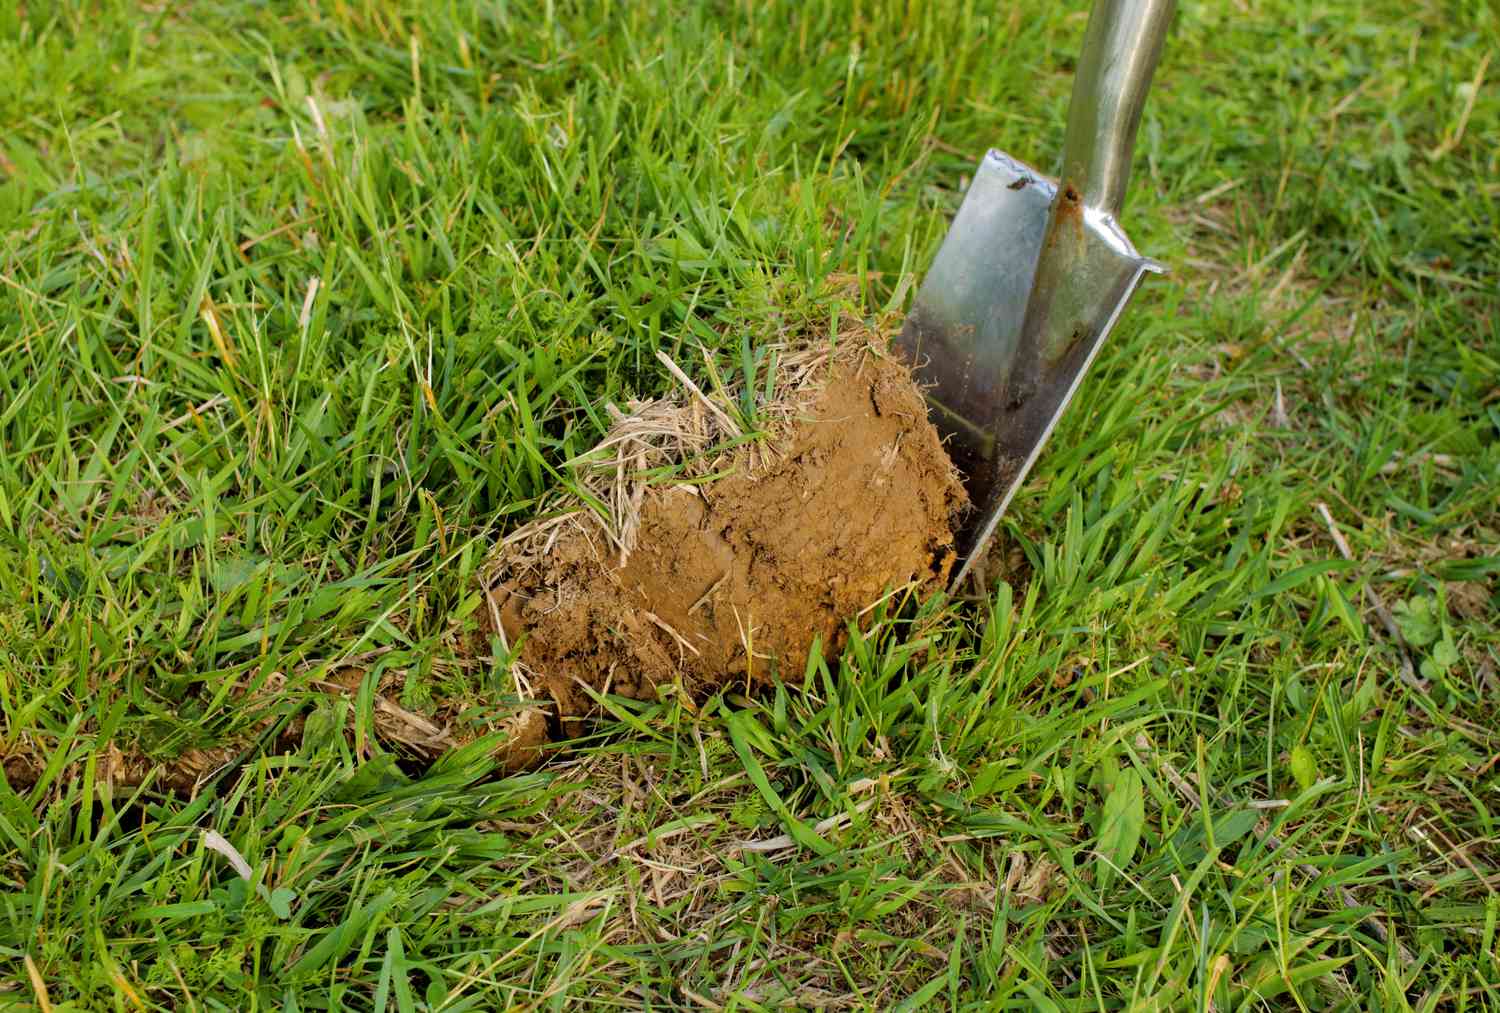
Step 3: Dig Holes for the Support Posts
With the location selected, it’s time to prepare the foundation for the support posts of your outdoor pull-up bar. Follow these steps to ensure the proper installation of the support structure:
Marking the Hole Locations: Using the measurements and layout plan, mark the spots where the support posts will be installed. Use a measuring tape and a marker to indicate the precise locations for digging the holes.
Choosing the Right Tools: Depending on the type of ground and the depth required, select an appropriate tool for digging the holes. A post-hole digger is ideal for softer ground, while a sturdy shovel may be sufficient for compact or rocky soil.
Digging the Holes: Begin digging the holes at the marked locations, ensuring that the depth and diameter of each hole align with the specifications outlined in your construction plan. The depth should accommodate the length of the support posts and allow for proper stabilization.
Clearing the Holes: Remove any debris or loose soil from the holes, ensuring that the base is level and stable. This will provide a solid foundation for securing the support posts and maintaining the overall stability of the pull-up bar.
Optional: Adding Gravel for Drainage: If you’re using concrete to secure the support posts, consider adding a layer of gravel at the base of each hole. This facilitates drainage and helps prevent water accumulation, which can compromise the integrity of the support structure over time.
By meticulously preparing the holes for the support posts, you’re laying the groundwork for a durable and reliable outdoor pull-up bar. The stability and alignment of the support posts are essential for the structural integrity of the entire assembly. With the holes dug and prepared, you’re now ready to move on to the next phase of the construction process.
Step 4: Set the Support Posts
Setting the support posts is a pivotal stage in the construction of your outdoor pull-up bar. This step involves securing the posts in the prepared holes and ensuring their stability. Follow these guidelines to effectively set the support posts:
Aligning the Posts: Carefully place the support posts in the designated holes, ensuring that they are positioned vertically and align with the predetermined layout. Use a level to confirm that the posts are perfectly upright and adjust their positioning if necessary.
Securing the Posts: If you’re using concrete to secure the support posts, prepare the concrete mix according to the manufacturer’s instructions. Fill the holes with the concrete, ensuring that it completely surrounds the base of each support post. Tamp the concrete to eliminate air pockets and promote a firm bond between the posts and the ground.
Adjusting for Stability: While the concrete is still pliable, recheck the alignment and stability of the support posts. Make any necessary adjustments to ensure that they are firmly rooted in place and maintain a consistent vertical orientation. This step is crucial for the long-term durability of the pull-up bar.
Allowing for Setting Time: After setting the support posts and confirming their alignment, allow an adequate amount of time for the concrete to cure and set. Follow the recommended setting time provided by the concrete manufacturer to ensure that the support posts are firmly anchored in place.
By effectively setting the support posts, you’re establishing a solid foundation for the outdoor pull-up bar, ensuring its stability and structural integrity. The meticulous execution of this step is essential for creating a safe and reliable fitness fixture that will withstand the rigors of outdoor use. With the support posts securely in place, you’re now prepared to proceed with the subsequent stages of assembling your outdoor pull-up bar.
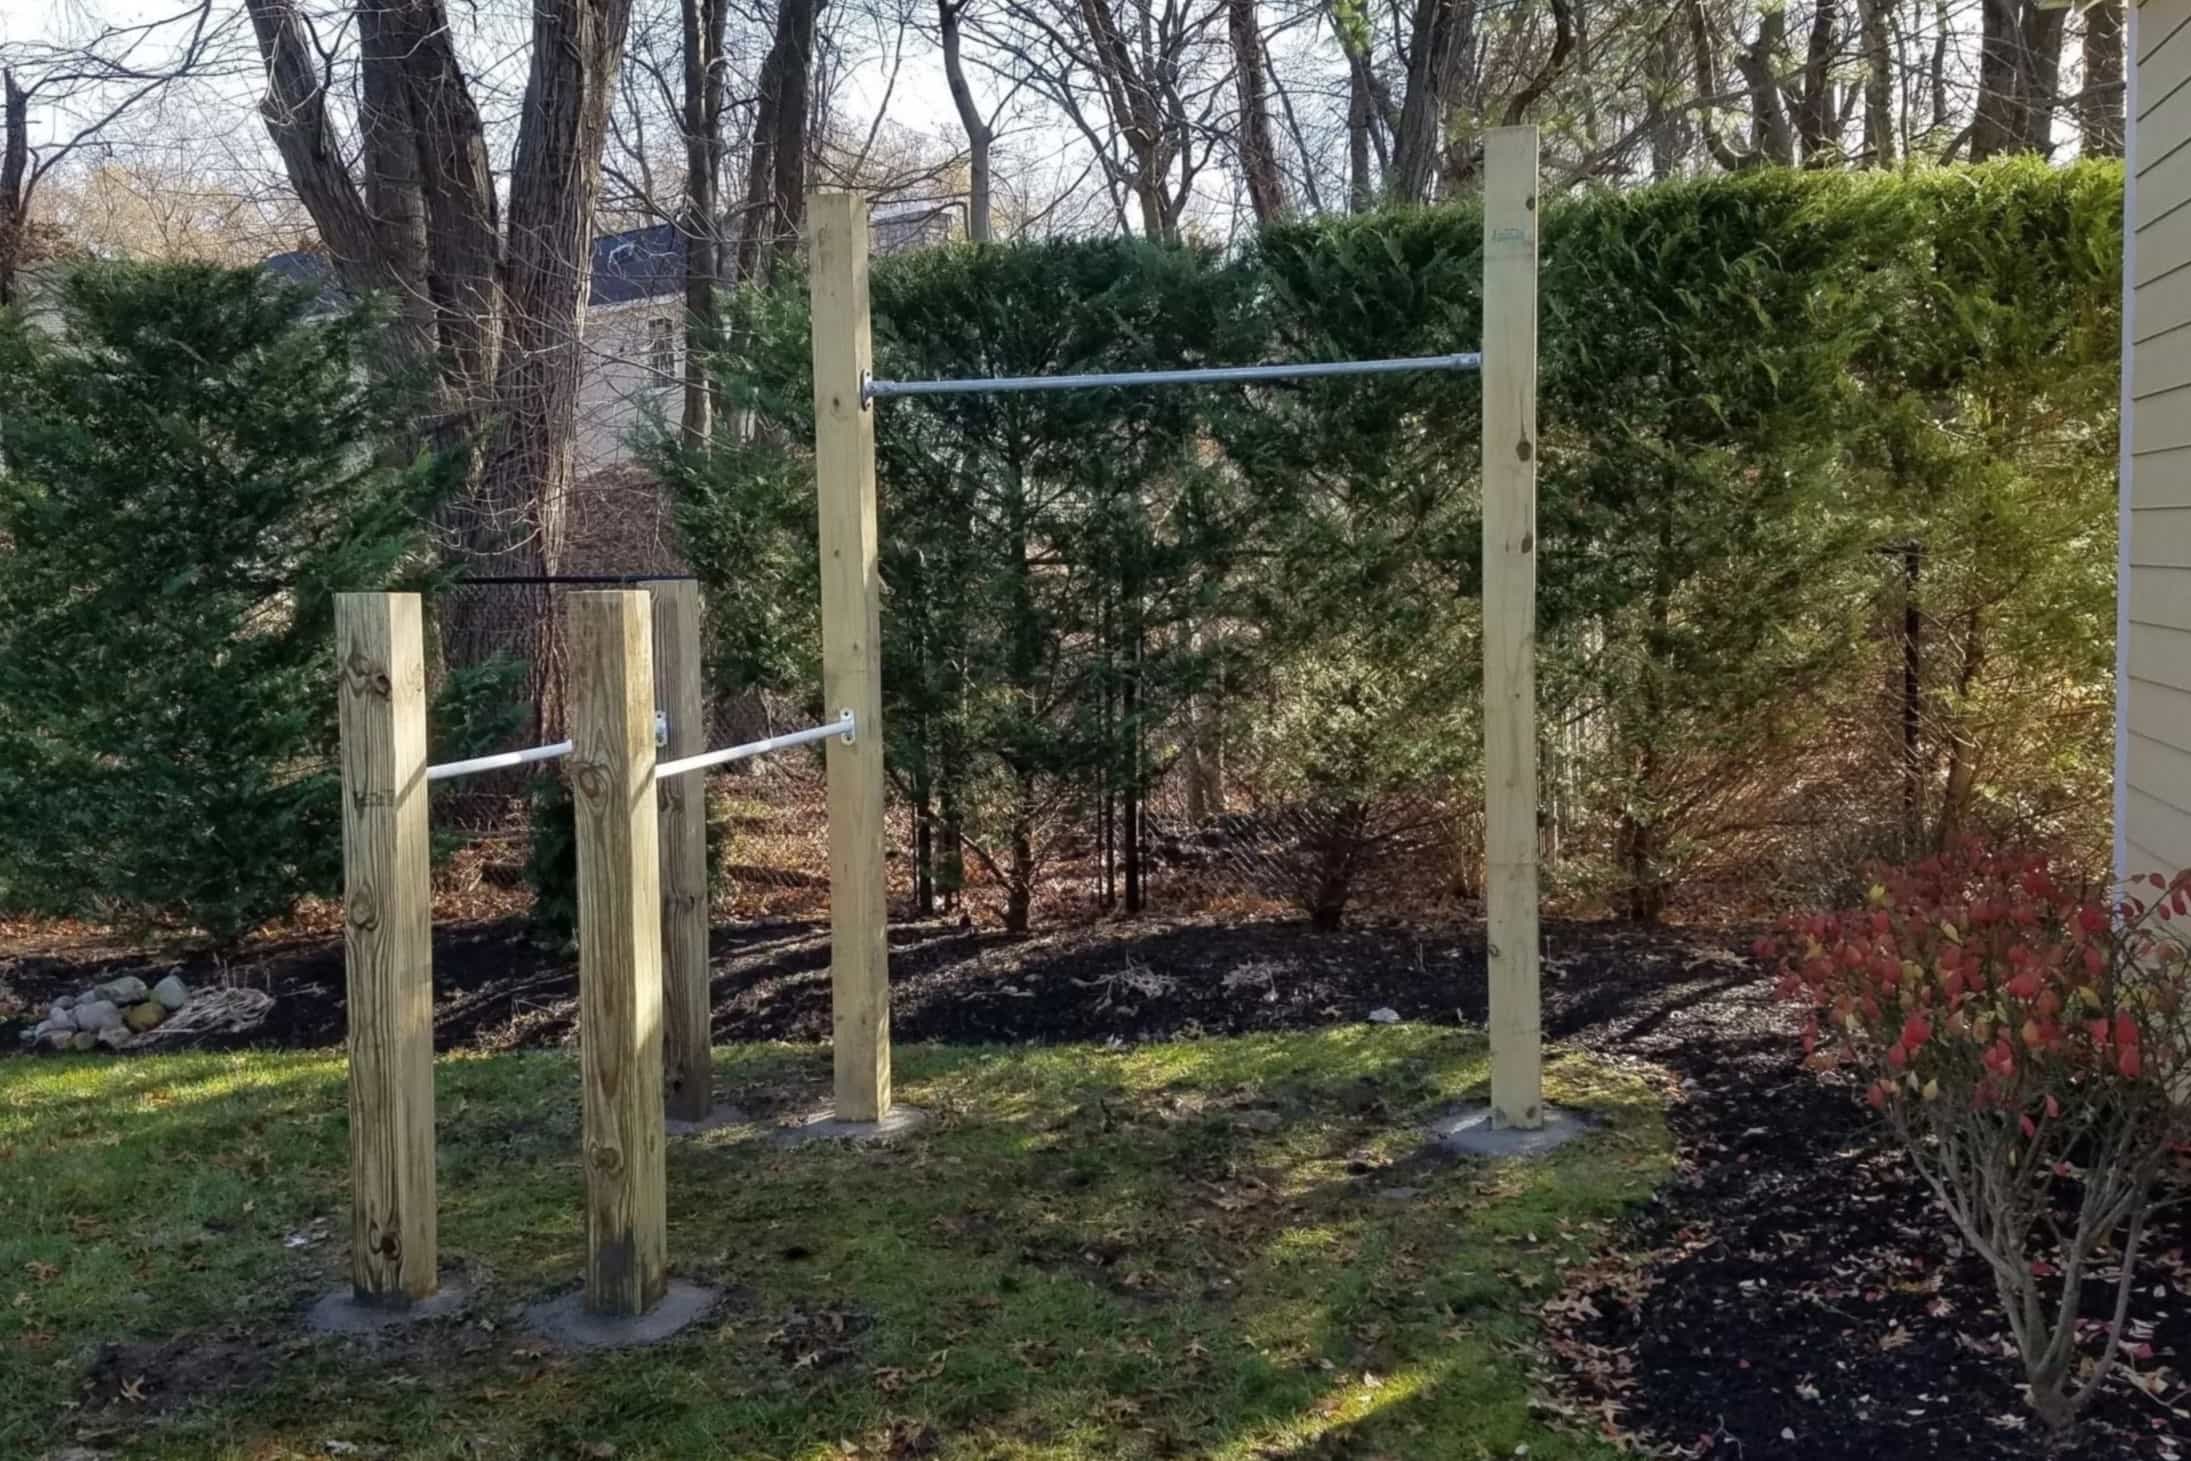
Step 5: Attach the Crossbar
Attaching the crossbar is a crucial step in completing the construction of your outdoor pull-up bar. The crossbar serves as the primary gripping and hanging point for various exercises, and its secure attachment is essential for the overall functionality of the fitness fixture. Follow these steps to effectively attach the crossbar:
Selecting the Crossbar: Choose a sturdy metal crossbar or a durable wooden dowel that is appropriate for your intended usage and fits the dimensions of your pull-up bar. Ensure that the crossbar is smooth and free from any sharp edges or splinters that may compromise user comfort and safety.
Positioning the Crossbar: Determine the desired height at which the crossbar will be attached, considering factors such as the user’s height and the intended exercises. Mark the spots on the support posts where the crossbar will be mounted, ensuring that they are level and equidistant from the ground.
Securing the Crossbar: Utilize galvanized steel brackets or pipe straps to securely attach the crossbar to the support posts. Position the brackets at the marked spots on each support post and fasten them using appropriate wood screws or bolts. Ensure that the crossbar is level and firmly affixed to the support structure.
Optional: Customizing the Crossbar: If necessary, trim the crossbar to a custom length using a saw, ensuring that it fits the available space and accommodates your preferred grip width. Sand the edges to achieve a smooth finish and eliminate any rough surfaces that may cause discomfort during use.
Testing the Stability: After attaching the crossbar, apply gentle pressure to ensure its stability and resistance to movement. The crossbar should remain firmly in place and exhibit no signs of wobbling or shifting. This step is crucial for verifying the secure attachment of the crossbar.
By effectively attaching the crossbar, you’re completing the structural assembly of your outdoor pull-up bar, bringing it one step closer to full functionality. The secure and level attachment of the crossbar is essential for ensuring a safe and reliable workout experience. With the crossbar firmly in place, you’re now ready to proceed with testing the stability of your newly constructed outdoor fitness fixture.
When building an outdoor pull-up bar, make sure to use sturdy materials like galvanized steel pipes or pressure-treated wood to ensure it can support your weight and withstand outdoor elements.
Step 6: Test the Stability
Testing the stability of your newly constructed outdoor pull-up bar is a critical phase in the construction process. Ensuring that the entire assembly is secure and capable of withstanding the intended usage is paramount for the safety and functionality of the fitness fixture. Follow these steps to methodically test the stability of your outdoor pull-up bar:
Performing a Visual Inspection: Carefully examine the entire structure, including the support posts, crossbar, and attachment points. Look for any signs of misalignment, loose fasteners, or structural irregularities that may compromise the stability of the pull-up bar.
Applying Pressure: Gradually apply pressure to the crossbar and the support posts, simulating the force exerted during pull-up exercises. Pay close attention to any movement or flexing of the structure, as well as any unusual sounds that may indicate instability.
Testing Weight Capacity: If feasible and safe to do so, test the weight capacity of the pull-up bar by applying gradual pressure to the crossbar. This step is particularly important if you anticipate heavy usage or plan to incorporate additional accessories, such as suspension trainers or gymnastics rings, into your workouts.
Observing for Movement: Observe the entire structure for any signs of movement, shifting, or instability as pressure is applied. Verify that the support posts remain firmly anchored in the ground and that the attachment points of the crossbar exhibit no signs of weakness or detachment.
Reinforcing as Needed: If any instability or weakness is detected during the testing phase, take the necessary measures to reinforce the affected areas. This may involve tightening fasteners, adjusting the support post alignment, or implementing additional bracing to enhance the overall stability of the pull-up bar.
By meticulously testing the stability of your outdoor pull-up bar, you’re ensuring that it meets the necessary safety standards and performance requirements. A stable and reliable fitness fixture not only enhances the workout experience but also minimizes the risk of accidents or structural failures. With the stability of the pull-up bar confirmed, you’re now prepared to explore optional add-ons to further customize and optimize your outdoor fitness setup.
Read more: How To Build An Outdoor Bar Table
Step 7: Optional Add-Ons
Customizing your outdoor pull-up bar with optional add-ons can elevate its functionality and versatility, allowing you to expand your workout options and tailor the fitness fixture to your specific preferences. Consider the following optional add-ons to enhance your outdoor fitness setup:
Suspension Trainers: Incorporating suspension trainers, such as TRX or similar systems, can diversify your workout routine by enabling a wide range of bodyweight exercises, including rows, chest presses, and core strengthening movements. Mounting anchor points for suspension trainers on or near the pull-up bar expands the variety of exercises you can perform.
Gymnastics Rings: Installing gymnastics rings on the crossbar provides an excellent platform for advanced upper body and core exercises. Rings offer instability, requiring greater stabilization and engaging a broader range of muscles during movements such as dips, muscle-ups, and ring rows.
Pull-Up Bar Accessories: Explore accessories designed to complement the pull-up bar, such as dip bars, leg raise attachments, or detachable handles with varied grip options. These accessories can enhance the versatility of the pull-up bar, enabling a wider array of exercises to target different muscle groups.
Weatherproofing and Aesthetics: Consider applying a weatherproof sealant or coating to the wooden components of the pull-up bar to protect them from the elements and prolong their lifespan. Additionally, incorporating decorative elements or landscaping around the pull-up bar can enhance its visual appeal and seamlessly integrate it into your outdoor space.
Personalized Signage or Motivational Quotes: Adding personalized signage or motivational quotes near the pull-up bar can infuse positivity and inspiration into your outdoor workout area. Encouraging messages or fitness-related quotes can create a motivating atmosphere and contribute to a more enjoyable fitness experience.
By exploring these optional add-ons, you can tailor your outdoor pull-up bar to align with your fitness goals, preferences, and the overall ambiance of your outdoor space. The incorporation of additional features and accessories can transform your pull-up bar into a multifunctional fitness hub, offering a diverse range of exercise options and enhancing the overall appeal of your outdoor workout environment.
Conclusion
Congratulations on completing the construction of your outdoor pull-up bar! By embarking on this rewarding project, you’ve not only created a dedicated space for challenging upper body workouts but also added a unique and practical element to your outdoor environment. The journey of building an outdoor pull-up bar has provided an opportunity to blend fitness, craftsmanship, and creativity, resulting in a valuable addition to your home’s outdoor space.
Throughout the construction process, you’ve meticulously gathered materials, selected an ideal location, and methodically set the support posts and attached the crossbar. By testing the stability of the pull-up bar and exploring optional add-ons, you’ve ensured that your fitness fixture is safe, reliable, and tailored to your specific fitness preferences. Whether you’re aiming to boost your strength, increase your overall fitness level, or simply enjoy the convenience of having a workout station in your backyard, your outdoor pull-up bar is now ready to accommodate your fitness endeavors.
As you begin to incorporate the pull-up bar into your fitness routine, remember to prioritize safety, proper form, and gradual progression in your workouts. The pull-up bar offers a versatile platform for a wide range of exercises, from traditional pull-ups and chin-ups to advanced variations and accessory-assisted movements. Embrace the opportunity to challenge yourself, set new fitness goals, and enjoy the benefits of outdoor exercise in the comfort of your own home.
Additionally, consider sharing your outdoor pull-up bar with family and friends, fostering a supportive and active community within your home environment. Encourage others to join you in outdoor workouts, share fitness tips, and celebrate achievements together. Your outdoor pull-up bar has the potential to inspire and motivate those around you to prioritize health and wellness, creating a positive ripple effect within your social circle.
Lastly, take pride in the craftsmanship and dedication that went into building your outdoor pull-up bar. Your creation stands as a testament to your commitment to fitness, creativity, and the pursuit of a balanced and active lifestyle. Whether you’re embarking on solo workouts, hosting outdoor fitness gatherings, or simply enjoying moments of solitude in your outdoor space, your pull-up bar is poised to enrich your life in numerous ways.
With your outdoor pull-up bar now ready for action, it’s time to embrace the countless opportunities for strength-building, personal growth, and enjoyment that await you. Here’s to many fulfilling and invigorating workouts in the open air, courtesy of your newly constructed outdoor pull-up bar!
Frequently Asked Questions about How To Build An Outdoor Pull-Up Bar
Was this page helpful?
At Storables.com, we guarantee accurate and reliable information. Our content, validated by Expert Board Contributors, is crafted following stringent Editorial Policies. We're committed to providing you with well-researched, expert-backed insights for all your informational needs.


0 thoughts on “How To Build An Outdoor Pull-Up Bar”