Home>Furniture>Outdoor Furniture>How To Build An Outdoor Patio Bar
Outdoor Furniture
How To Build An Outdoor Patio Bar
Modified: August 20, 2024
Learn how to build an outdoor patio bar with our step-by-step guide. Create a stylish and functional space with the right outdoor furniture and accessories.
(Many of the links in this article redirect to a specific reviewed product. Your purchase of these products through affiliate links helps to generate commission for Storables.com, at no extra cost. Learn more)
Introduction
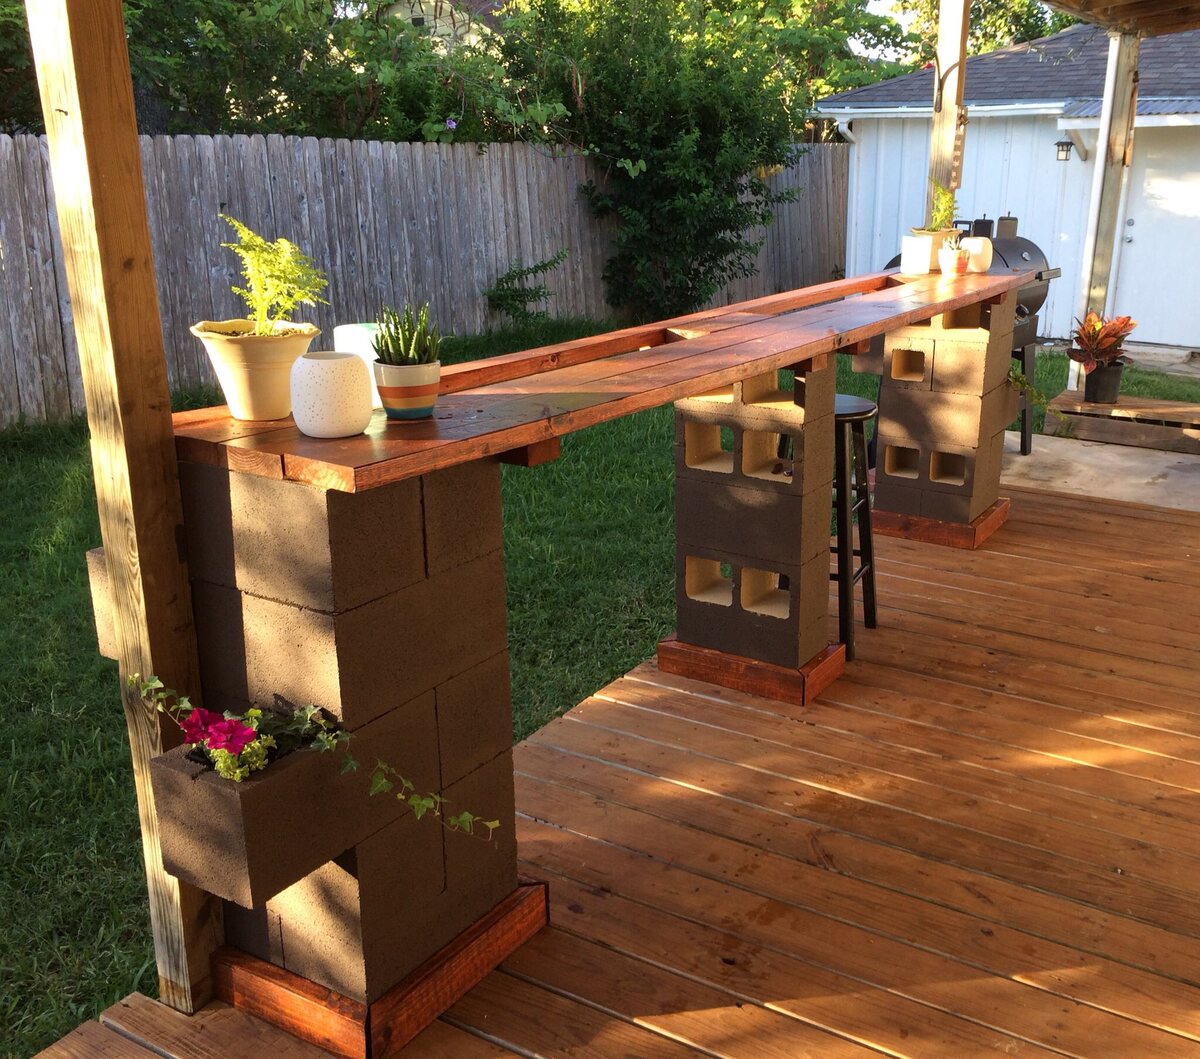
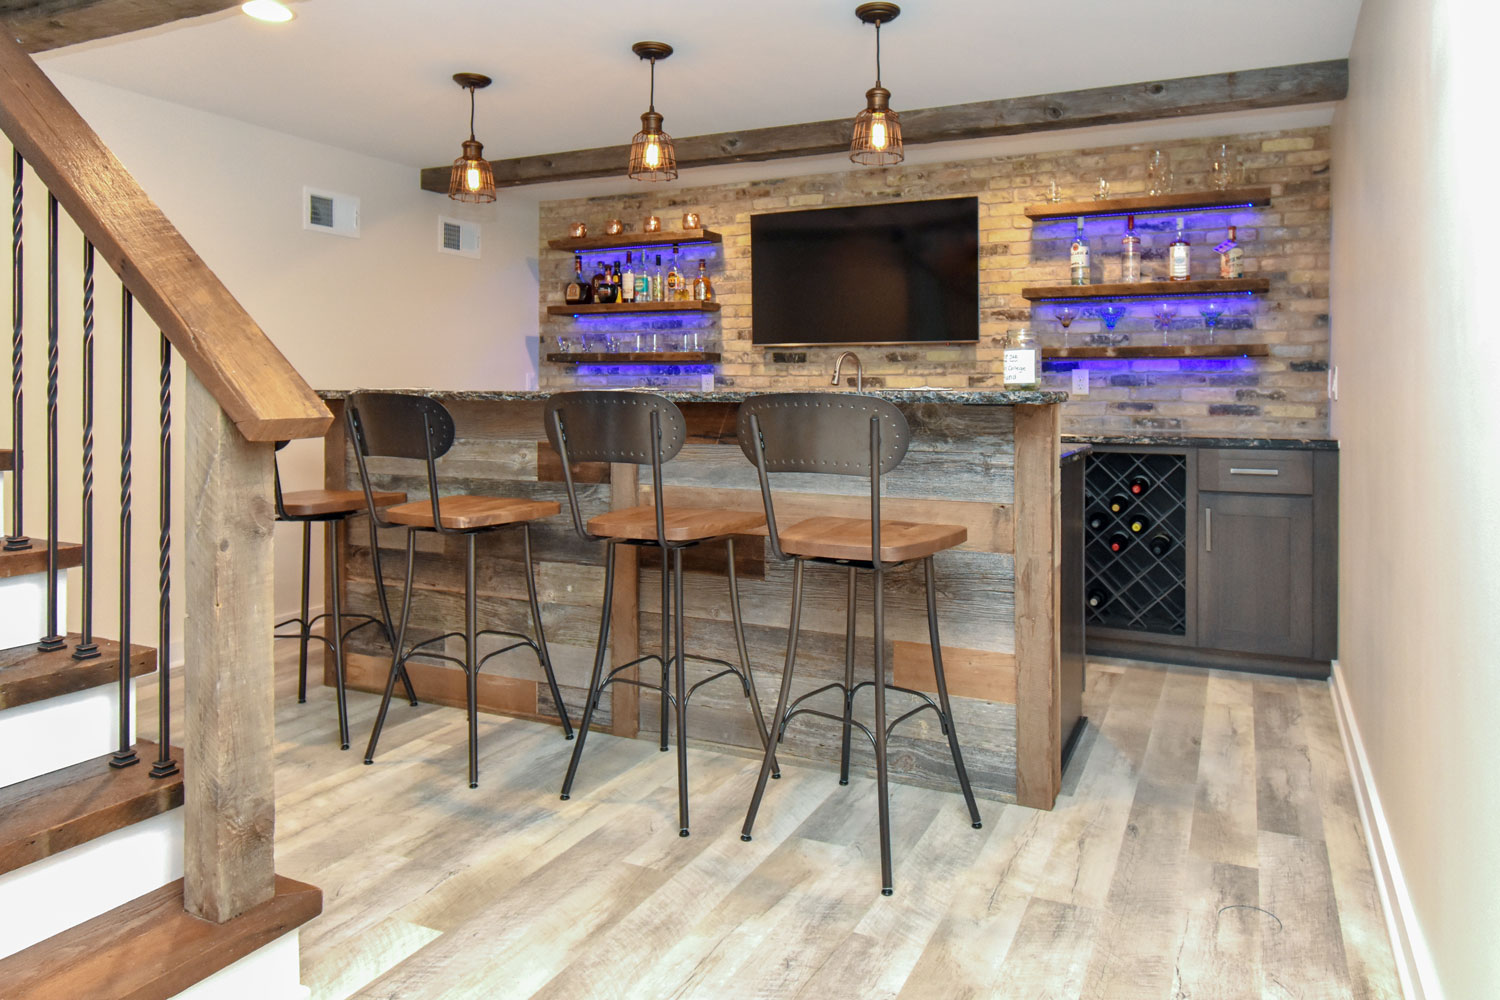
Welcome to the world of outdoor entertaining! Picture yourself enjoying a warm summer evening, surrounded by friends and family, sipping your favorite beverages at your very own outdoor patio bar. Having a patio bar not only adds a touch of elegance and functionality to your outdoor space, but it also provides a perfect gathering spot for socializing and relaxing.
In this article, we will guide you through the step-by-step process of building your own outdoor patio bar. From planning and designing to adding the finishing touches, we will cover all the necessary aspects to help you create a beautiful and functional space.
Whether you’re a seasoned DIY enthusiast or just starting out with woodworking projects, building an outdoor patio bar can be a rewarding experience. It allows you to unleash your creativity and customize the bar to suit your personal style and needs.
Before we dive into the construction process, let’s take a moment to discuss some important factors to consider when planning your outdoor patio bar. These considerations will ensure that your bar not only meets your aesthetic preferences but also functions well in your space.
Key Takeaways:
- Building an outdoor patio bar is a fun and rewarding DIY project that allows you to create a stylish and functional space for entertaining and relaxing in your outdoor area.
- From planning and designing to adding the finishing touches, careful consideration of space, materials, and design will help you create a personalized patio bar that enhances your outdoor living experience.
Read more: How To Build An Outdoor Patio
Factors to Consider
- Space: Measure the available area where you plan to build your patio bar. Consider the dimensions and shape of the space to determine the appropriate size and layout of your bar.
- Functionality: Think about how you intend to use your patio bar. Will it be solely for serving drinks, or do you also want to incorporate a small sink or storage space for utensils and supplies?
- Materials: Choose materials that are suitable for outdoor use and can withstand various weather conditions. Options such as cedar or teak wood, stainless steel, or durable polywood are great choices for outdoor furniture.
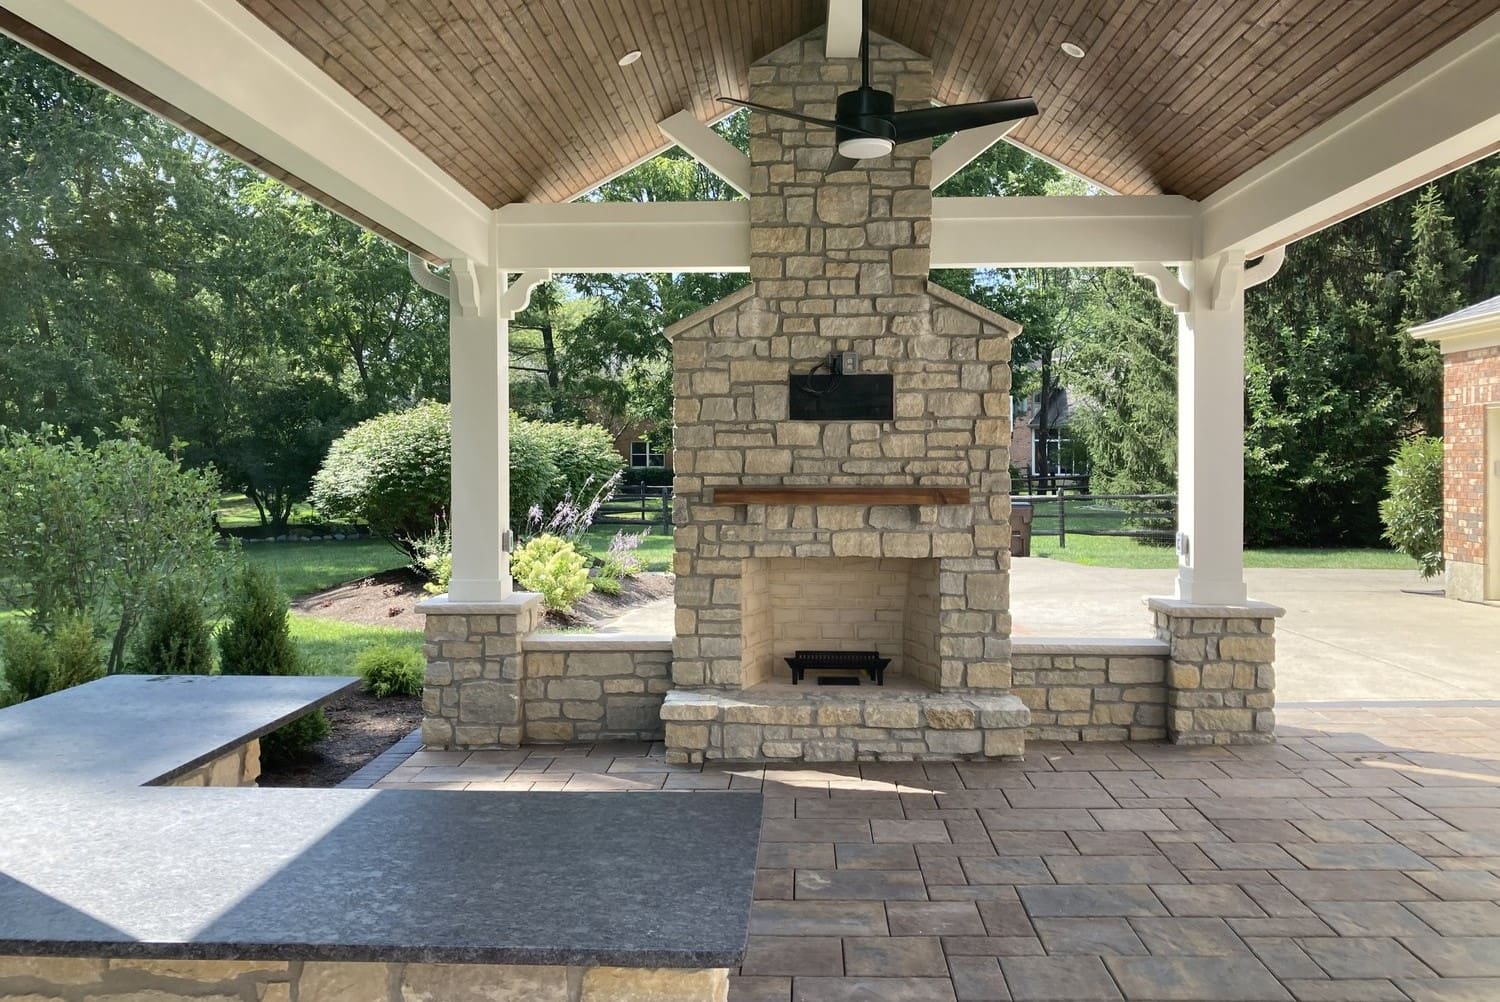
- Style: Consider the overall design aesthetic of your outdoor space and choose a patio bar design that complements it. Whether you prefer a rustic, modern, or tropical vibe, there are countless design options to choose from.
- Budget: Determine your budget for the project. This will help you make decisions regarding materials, size, and additional features.
Once you have considered these factors and have a clear vision in mind, you’re ready to start the exciting process of building your outdoor patio bar. So let’s roll up our sleeves and get started!
Step 1: Planning and Designing Your Patio Bar
The first step in building your outdoor patio bar is careful planning and designing. This is where you get to unleash your creativity and envision the perfect bar for your space. Here are some important things to consider during this phase:
- Measurements: Begin by measuring the area where you plan to build your patio bar. Take precise measurements of the length, width, and height to ensure that your bar fits perfectly in the space.
- Layout and Design: Consider the layout and design of your patio bar. Determine the shape, whether it’s a straight bar, L-shape, or U-shape, based on the available space and your desired functionality.
- Storage Space: Decide if you want to incorporate any storage space in your bar design. This can include shelves, cabinets, or drawers to hold your barware, glasses, and other entertainmnet essentials.
- Bar Top Material: Select the material for your bar top based on your style preferences and durability. Options include granite, concrete, wood, or tile. Consider the maintenance requirements and weather resistance of each material.
- Seating: Determine if you want to include seating at your patio bar. This could be in the form of bar stools or built-in seating along the sides. Take into account the number of people you expect to entertain to ensure you have enough seating space.
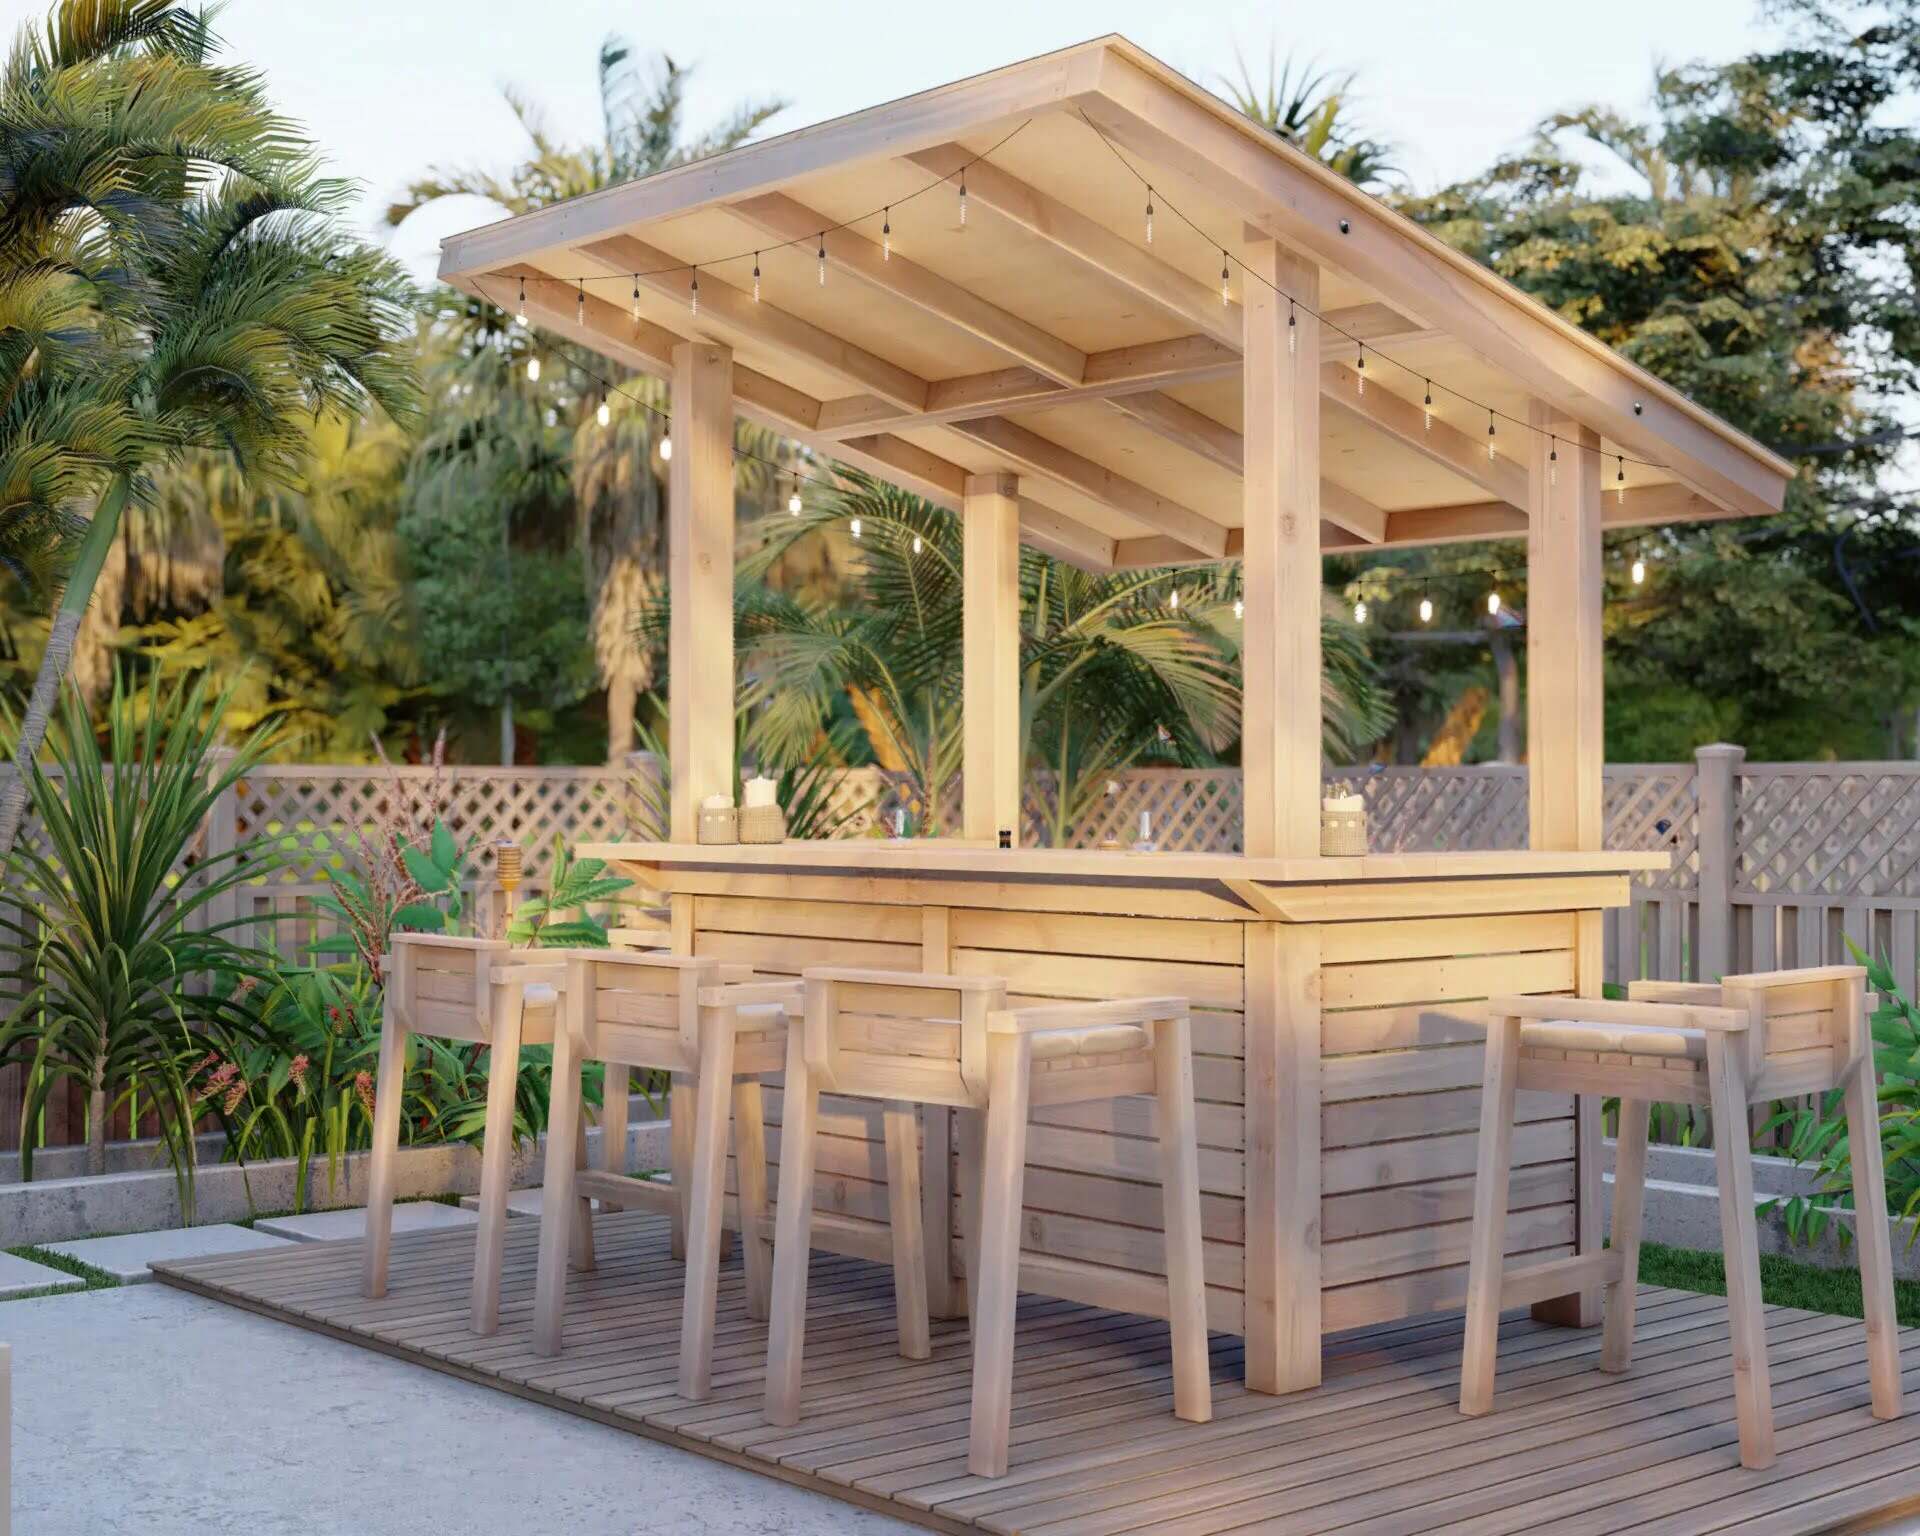
- Lighting: Think about the lighting for your patio bar. Outdoor string lights, LED strips, or built-in lighting can create a cozy and inviting atmosphere for nighttime gatherings.
When planning and designing your patio bar, it’s essential to keep in mind your personal style and preferences. Consider the overall aesthetic of your outdoor space and ensure that your patio bar complements it. Whether you prefer a rustic, modern, or tropical vibe, choose materials, colors, and patterns that align with your desired look.
Furthermore, take time to research different designs, browse through outdoor furniture stores, and even consult with professionals if needed. Look for inspiration in magazines, websites, or social media platforms dedicated to outdoor design. These sources can provide you with a wealth of ideas and help you narrow down your options.
Once you have finalized your patio bar design, it’s a good idea to create a detailed plan or sketch. This will serve as a blueprint throughout the construction process and help keep you organized.
By dedicating time to planning and designing your patio bar, you set the foundation for a successful and enjoyable project. So grab a pen and paper, unleash your creativity, and let your patio bar dreams come to life!
Step 2: Gathering Materials and Tools
Now that you have a well-thought-out plan for your patio bar, it’s time to gather the materials and tools you’ll need to bring your vision to life. Here is a list of commonly used materials and tools for building an outdoor patio bar:
Materials:
- Wood boards or composite decking for the bar frame and countertop
- Screws, nails, and wood glue for securing the pieces together
- Bar top material such as granite, concrete, wood, or tile
- Outdoor-grade sealant or primer to protect the bar from the elements
- Plumbing supplies if you plan to include a sink
- Backsplash tiles or materials for added aesthetics and functionality
- Paint or stain for finishing touches
- Bar stools or seating of your choice
- Lighting fixtures and wiring if desired
Tools:
- Measuring tape and level for accurate measurements
- Saw for cutting the wood boards to size
- Drill with various drill bits for creating holes and securing the pieces
- Screwdriver for driving screws and tightening bolts
- Sander or sandpaper for smoothing rough edges
- Paintbrushes or rollers for applying paint or stain
- Trowel for applying sealant or primer
- Tile cutter and adhesive if using backsplash tiles
- Plumbing tools for sink installation if applicable
- Safety equipment such as gloves, goggles, and a dust mask
It’s important to choose materials that are specifically designed for outdoor use and can withstand the elements. For the bar frame, opt for weather-resistant wood, such as cedar or teak, or consider using durable composite decking. When selecting the bar top material, keep in mind its durability, ease of maintenance, and resistance to stains and water damage.
Make a list of all the materials and tools you need and double-check it before making any purchases. This will ensure that you have everything you need to complete the project without any unnecessary trips to the hardware store.
Additionally, don’t forget to consider safety while gathering materials and tools. Wear proper protective gear, such as gloves, goggles, and a dust mask, when working with power tools and chemicals. Take caution to prevent any accidents or injuries during the construction process.
By making sure you have all the necessary materials and tools, you’ll be well-prepared to build your outdoor patio bar efficiently and effectively. So gather everything you need, set up your workspace, and get ready to embark on an exciting construction journey!
Step 3: Preparing the Area for Construction
Before you start building your outdoor patio bar, it’s important to properly prepare the area where it will be constructed. This step helps create a solid foundation and ensures a smooth construction process. Here are the key steps to prepare the area for your patio bar:
- Clean the space: Clear the area of any debris, plants, or other obstacles that may be in the way. This will provide a clean and clutter-free space for construction.
- Level the ground: Use a shovel and a level to even out the ground where the bar will be placed. This is crucial for proper stability and balance of the patio bar.
- Consider a base: If you plan to have a raised bar off the ground, you may need to build a base using concrete blocks or pavers. Ensure that the base is level and secure to prevent any shifting or movement in the future.
- Check for drainage: Assess the drainage of the area to avoid any water pooling or damage to your patio bar. If necessary, consider adding a drainage system or sloping the ground away from the bar structure.
- Install a weed barrier: To prevent weed growth and maintain the cleanliness of your patio bar area, consider laying a weed barrier fabric on the ground before building the bar. This will help keep your bar area well-maintained with minimal effort.
- Mark the boundaries: Use marking paint or stakes and string to outline the dimensions of your patio bar. This will serve as a visual guide during the construction process.
Preparation is key to ensure a solid and durable outdoor patio bar. Taking the time to clean, level, and properly prepare the area will contribute to the overall stability and longevity of your bar structure.
It’s also important to consider any local building codes or regulations that may apply to your area. Check with your local municipality for any permits or guidelines that need to be followed when constructing outdoor structures.
Lastly, don’t forget to stay safe during the preparation stage. Wear appropriate protective gear, such as gloves and sturdy footwear, and use caution when working with tools or lifting heavy materials.
Once you have completed these steps and have a clean and prepared area, you’re ready to move on to the exciting next phase: building the frame and base of your outdoor patio bar!
Read more: How To Build Outdoor Bar Ideas
Step 4: Building the Frame and Base of the Bar
With the area prepared, it’s time to start constructing the frame and base of your outdoor patio bar. This step forms the foundation of your bar structure and provides stability and support. Follow these steps to build the frame and base:
- Measure and cut the wood: Using your measurements from the planning phase, cut the wood boards to the appropriate lengths. Use a saw to achieve clean and precise cuts.
- Assemble the frame: Begin by creating the base of the bar. Attach the boards together using screws, making sure they are aligned and level. Use a level to ensure accuracy.
- Add support beams: Install support beams inside the frame to add stability and prevent sagging. Secure them with screws or nails, ensuring they are evenly spaced throughout the length of the bar.
- Secure the frame to the base: Attach the frame to the base using screws or brackets. This will secure the frame and ensure it is firmly attached, ready for the next steps.
- Reinforce corners: To strengthen the corners of the bar, add corner braces or brackets. These will provide extra support and stability to the structure.
- Create the bar front: Attach vertical boards to the front of the bar frame, creating the face of the bar. Use screws or nails to secure the boards, ensuring they are aligned and level.
- Build the base: If you are working with a raised bar, use additional wood or composite decking boards to create the base. This will provide support for the bar top and create a finished look.
During the construction process, it’s important to continuously check for accuracy and levelness. Use a level and measuring tape to ensure that each component is aligned and properly positioned.
When assembling the frame and base, consider using waterproof glue or additional reinforcement if you anticipate heavy usage or exposure to the elements. This will help increase the durability and longevity of your patio bar.
Remember to take necessary safety precautions, such as wearing protective gear and using caution when working with tools and machinery. Additionally, it may be helpful to have an extra set of hands when assembling the frame, as some components can be heavy and require assistance.
Once you have completed this step, you will have a sturdy and stable frame and base for your outdoor patio bar. Next up, we will move on to adding the bar top and countertop, bringing your bar to life!
When building an outdoor patio bar, make sure to use weather-resistant materials like cedar or teak to withstand outdoor elements and prolong the lifespan of your bar.
Step 5: Adding the Bar Top and Countertop
With the frame and base of your patio bar in place, it’s time to move on to the exciting step of adding the bar top and countertop. This is where your design choices and creativity will truly shine. Follow these steps to add the finishing touch to your outdoor patio bar:
- Measure and cut the bar top: Measure the dimensions of your bar frame and determine the size of the bar top. Cut the chosen material, whether it’s wood, granite, concrete, or tile, to fit the dimensions of the frame accurately.
- Place the bar top: Carefully place the bar top on the frame, ensuring it is centered and aligned. Use screws or strong adhesive to attach it securely to the frame.
- Smooth and sand the edges: Use sandpaper or a sander to smooth out any rough edges or imperfections on the bar top. Pay attention to the corners and edges to create a polished and finished look.
- Seal the bar top: If you are working with a porous material, such as wood or concrete, it is important to seal the surface to protect it from moisture and stains. Apply a waterproof sealant or primer according to the manufacturer’s instructions.
- Add a countertop: If you plan to have a countertop space for preparing and serving drinks, measure and cut the chosen material to fit the designated area. Attach it securely to the bar top using adhesive or screws.
- Ensure levelness: Use a level to double-check that the bar top and countertop are perfectly level. Make any necessary adjustments to ensure a smooth and even surface.
During this step, take your time to carefully position and secure the bar top and countertop. This will ensure a professional and polished appearance for your patio bar.
If you choose to use wood for the bar top and countertop, consider staining or painting it to suit your desired style. Apply multiple coats of stain or paint, allowing each coat to dry completely before applying the next. This will provide protection and enhance the aesthetic appeal of the wood.
Once the bar top and countertop are in place, step back and admire your progress. The addition of these elements will transform your patio bar into a functional and inviting space for entertaining and enjoying outdoor living.
Next, we will move on to the installation of the bar sink and plumbing, if you choose to include these features in your patio bar. So let’s continue building and customizing your outdoor oasis!
Step 6: Installing the Bar Sink and Plumbing
If you’re looking to add additional functionality to your outdoor patio bar, installing a bar sink can be a great option. Having a sink allows you to conveniently wash glasses, prepare drinks, and clean up without having to go back and forth to your indoor kitchen. Follow these steps to install the bar sink and plumbing:
- Choose the right sink: Select a bar sink that fits well within the dimensions of your bar and complements your design aesthetic. Consider the material, size, and style that best suits your needs and preferences.
- Identify the location: Determine where you want to install the sink within your patio bar. Consider factors such as accessibility, plumbing connections, and the overall layout of your bar.
- Create an opening: Using a jigsaw or appropriate tools, cut a hole in the bar countertop to fit the dimensions of the sink. Take precise measurements to ensure a snug fit.
- Install the sink: Follow the manufacturer’s instructions to install the sink into the prepared opening. Use sealing caulk or adhesive to secure it in place.
- Plan the plumbing layout: Determine how you want the plumbing to be routed, taking into account the proximity to a water source and drainage system. Ensure that the plumbing layout complies with local building codes.
- Connect the plumbing: Depending on your plumbing setup, you may need to connect water supply lines, drain pipes, and a P-trap for proper drainage. If you’re unsure about the process, it’s best to consult a professional plumber to ensure proper installation.
- Test for leaks: Once the plumbing connections are made, test for leaks by turning on the water supply and checking for any drips or water accumulation. Make any necessary adjustments or repairs to ensure a watertight installation.
When installing the bar sink and plumbing, it’s important to consider the functionality and practicality of your setup. Ensure that the sink is easily accessible and that the plumbing connections are properly secured and well-hidden for a clean and professional appearance.
Additionally, you may want to install a faucet that complements the style of your bar and sink. Select a durable and weather-resistant faucet that can withstand outdoor conditions.
Remember to consult local building codes and regulations to ensure compliance with any plumbing requirements. If you’re unsure about any aspect of the installation process, it’s always a good idea to seek guidance from a professional plumber.
With the bar sink and plumbing installed, you’ve added a valuable and convenient feature to your outdoor patio bar. Now it’s time to move on to building the backsplash and storage space, giving your bar both functionality and style!
Step 7: Building the Backsplash and Storage Space
Now that you’ve installed the bar sink and plumbing, it’s time to focus on building the backsplash and storage space for your outdoor patio bar. The backsplash adds a decorative element while also protecting the wall behind the bar from splashes and spills. Here’s how you can build the backsplash and incorporate storage space:
- Measure and cut the backsplash material: Determine the height and width of the area where you want to install the backsplash. Measure and cut the chosen material, such as tile, stone, or wood, to fit the dimensions.
- Prepare the wall: Ensure that the wall is clean and free from any dust or debris. If necessary, use a level and a pencil to mark a level line where the bottom of the backsplash will be placed.
- Install the backsplash: Apply adhesive or mortar to the back of the backsplash material and press it firmly onto the prepared wall. Use a level to ensure it is straight and aligned with the marked line. Allow the adhesive or mortar to dry according to the manufacturer’s instructions.
- Add grout or caulk: If you’re working with tile or stone backsplash, fill in the gaps between the tiles or stones with grout. Wipe away any excess grout and allow it to dry. If you’re using wood for the backsplash, fill any seams or gaps with caulk to create a seamless appearance.
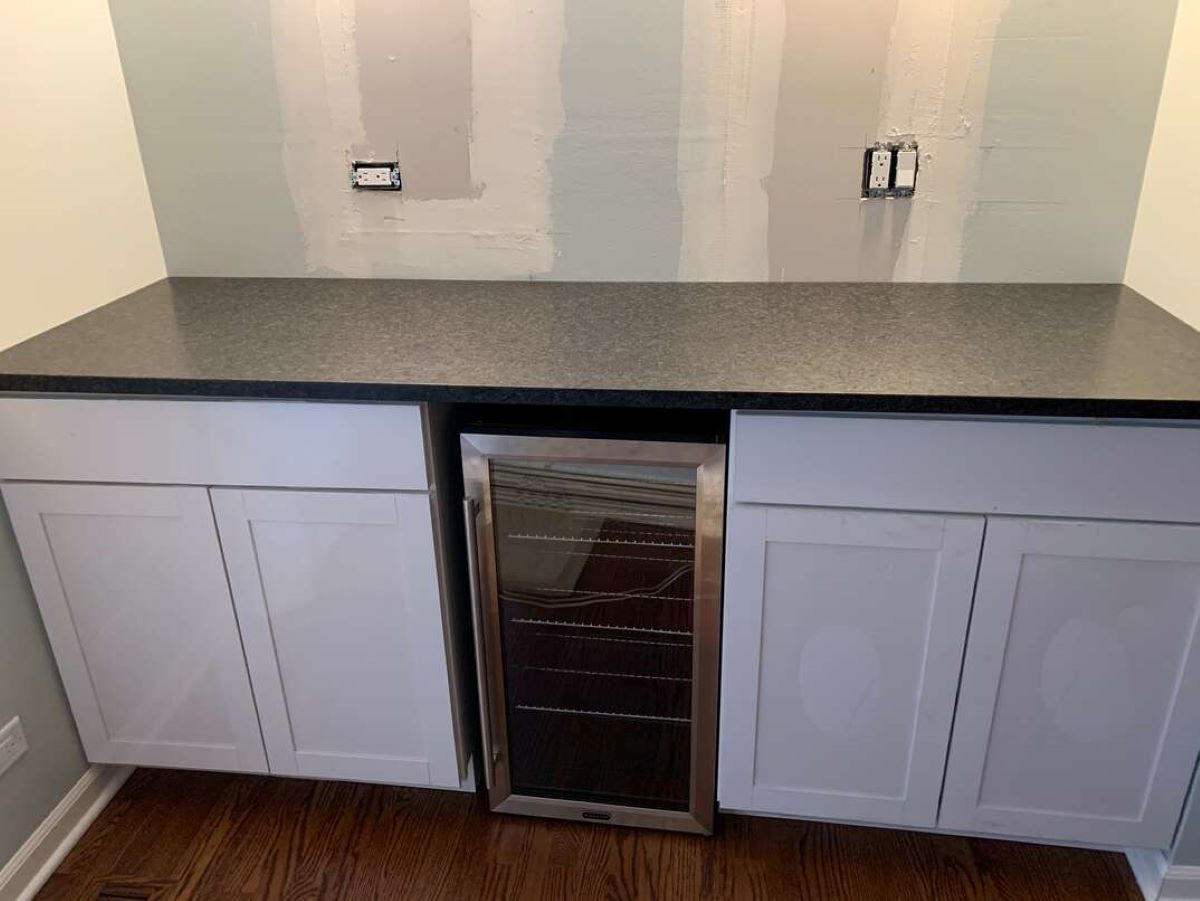
- Create storage space: Depending on your design preferences, you can incorporate storage space into your patio bar. This can be in the form of shelves, drawers, or cabinets. Use measurements to determine the size and location of the storage compartments.
- Build the storage compartments: Cut the wood boards to the appropriate sizes for the storage compartments. Assemble the components using screws or nails, ensuring that they are securely attached to the bar frame.
- Finish the storage space: Sand any rough edges and apply a waterproof sealant or paint to protect the wood. Install shelves, drawers, or cabinet doors, depending on your chosen storage design.
When building the backsplash and storage space, it’s important to consider both functionality and aesthetics. Choose materials and designs that complement the overall style of your patio bar while providing practical storage solutions.
Take your time to ensure that the backsplash is properly installed and aligned. Use a level to double-check that it is straight and even. If you’re working with tile or stone, seal the grout lines to prevent water penetration and make it easier to clean.
When building the storage compartments, consider your specific needs. If you plan to store dry items, such as glasses or bar accessories, open shelves may be sufficient. For items needing protection from the elements, drawers or cabinets with doors may be necessary.
Once you have completed this step, you will have a functional and visually appealing backsplash along with ample storage space for your outdoor patio bar. Now it’s time to add the finishing touches and decorations!
Read more: How To Build An Outdoor Bar Table
Step 8: Adding Finishing Touches and Decorations
Congratulations! You’re almost done with building your outdoor patio bar. Now it’s time to add those final touches and decorations that will make your bar truly unique and reflect your personal style. Here’s how you can add the finishing touches:
- Paint or stain: If you haven’t already done so, consider painting or staining your patio bar to enhance its appearance and protect it from the elements. Choose a color or finish that complements your outdoor space and matches your desired aesthetic.
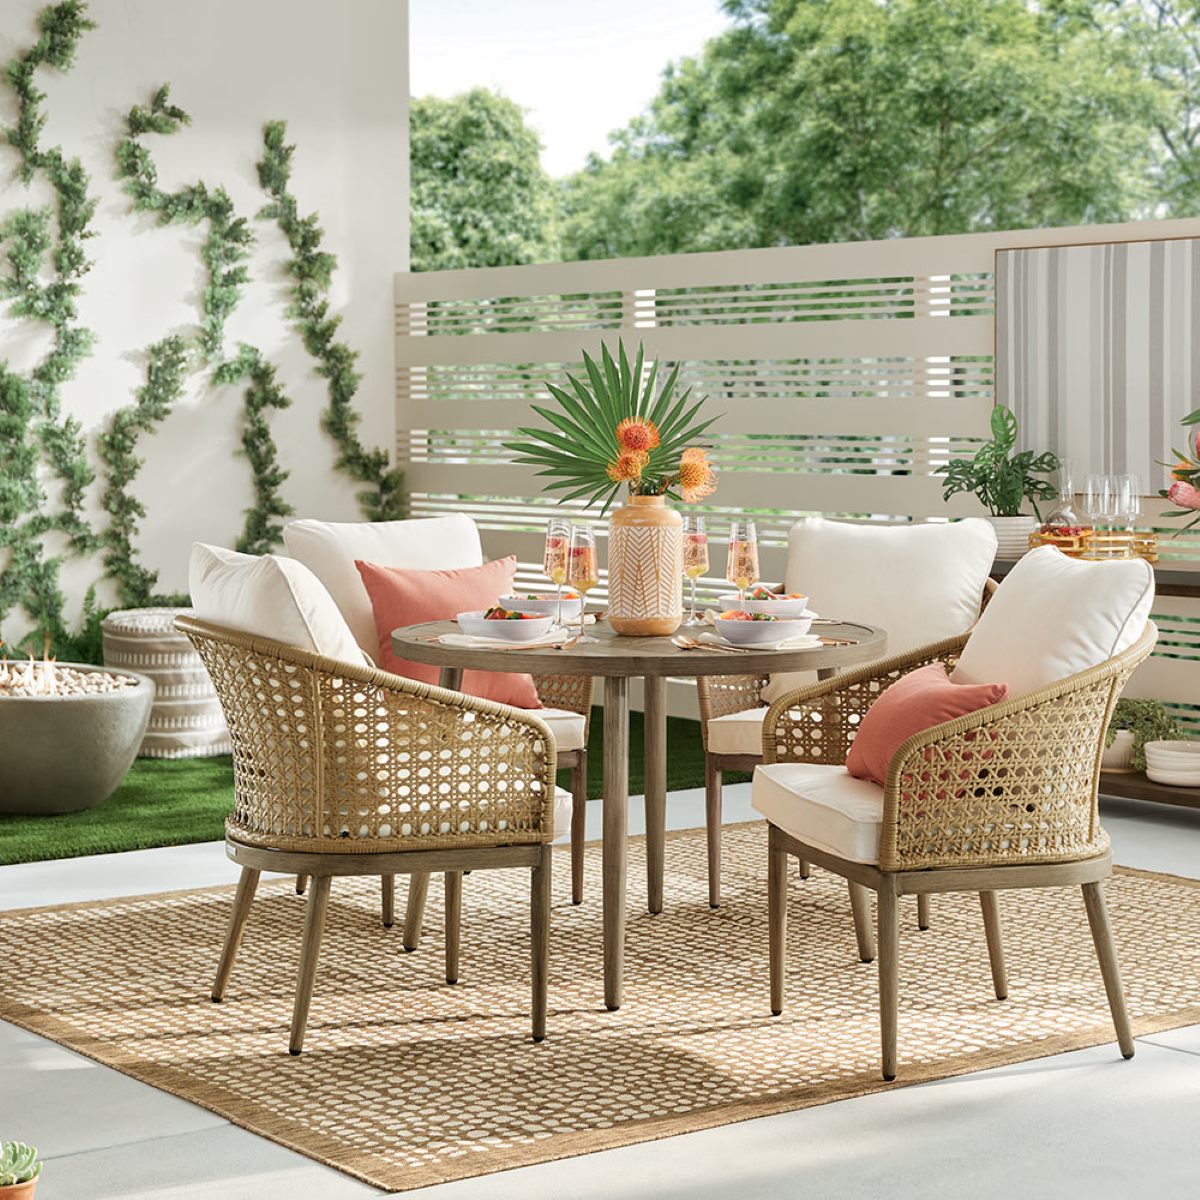
- Decorative accents: Add decorative accents such as potted plants, wall art, or string lights to create a cozy and inviting atmosphere. Incorporate elements that align with your personal style, whether it’s rustic, tropical, or modern.
- Accessorize the bar top: Add some flair to the bar top by placing decorative items such as a cocktail shaker, a bowl of limes or lemons, or a small vase of flowers. These small touches can make a big difference in the overall presentation.
- Install lighting: Consider installing outdoor lights above or around your patio bar to create ambiance and improve visibility during evening gatherings. Choose lighting fixtures that are suitable for outdoor use and complement the overall design of your space.
- Add comfortable seating: Complete your outdoor patio bar by adding comfortable seating options such as bar stools or outdoor lounge chairs. Choose seating that is weather-resistant and fits well with the style of your bar.
- Accessorize the storage space: If you have installed storage compartments, organize them and add storage solutions such as baskets or trays. This will help keep your barware and supplies tidy and easily accessible.
- Personalize the space: Consider adding personalized elements such as signs, monograms, or customized coasters to make your patio bar truly your own. These small details add a personal touch and make your bar feel special.
Remember, the goal is to create an outdoor patio bar that reflects your personality and enhances your outdoor living space. Play around with different styles and decorations until you achieve the desired atmosphere.
When adding finishing touches, consider the practicality of the items you choose. Opt for weather-resistant and durable materials that can withstand outdoor conditions. Regularly assess and maintain your decorations to ensure they remain in good condition over time.
Lastly, take a moment to step back and admire your hard work. Your outdoor patio bar is now complete, ready to be enjoyed by family and friends. Cheers to your successful project!
By following these steps, you’ve created a beautiful and functional outdoor patio bar. Whether you’re hosting a backyard barbecue, enjoying a relaxing evening with a book, or gathering with loved ones for a celebration, your patio bar is sure to become a popular spot in your outdoor living area.
Conclusion
Building your own outdoor patio bar is a rewarding and fulfilling project that allows you to create a functional and stylish space for entertaining and relaxation. Throughout the process, from planning and designing to adding the finishing touches, you’ve put your creativity and skills to work.
By carefully considering the space, functionality, materials, and design, you’ve created a patio bar that aligns with your personal style and meets your entertainment needs. The measured steps of planning, gathering materials, preparing the area, building the frame and base, adding the bar top and countertop, installing the bar sink and plumbing, building the backsplash and storage space, and adding the finishing touches have all come together to bring your outdoor patio bar to life.
With your new patio bar, you have the perfect setting for enjoying quality time with friends and family. Whether it’s serving up drinks, hosting outdoor gatherings, or simply taking a moment of relaxation in your outdoor oasis, your patio bar will undoubtedly become a cherished feature of your outdoor living space.
Remember to maintain and care for your patio bar to keep it looking its best. Regularly clean and protect the materials, assess for any repairs or maintenance needs, and refresh the decor as desired. By doing so, you’ll ensure that your patio bar remains a beautiful and inviting space for years to come.
We hope this guide has been helpful in guiding you through the process of building your outdoor patio bar. Enjoy the fruits of your labor, and cheers to many wonderful memories created in your outdoor haven.
Now that you've tackled building your own outdoor patio bar, why not step up your game with more creative setups? Discover various outdoor bar ideas that can transform any evening into a chill night out. Whether you're looking to impress guests or create a cozy spot for personal relaxation, these ideas will inspire you to enhance your outdoor space further. Don't miss out on these exciting designs!
Frequently Asked Questions about How To Build An Outdoor Patio Bar
Was this page helpful?
At Storables.com, we guarantee accurate and reliable information. Our content, validated by Expert Board Contributors, is crafted following stringent Editorial Policies. We're committed to providing you with well-researched, expert-backed insights for all your informational needs.


0 thoughts on “How To Build An Outdoor Patio Bar”