Home>Furniture & Design>Outdoor Furniture>How To Paint Outdoor Wood Railings
Outdoor Furniture
How To Paint Outdoor Wood Railings
Published: January 13, 2024
Learn how to paint outdoor wood railings to give your outdoor furniture a fresh new look. Follow our expert tips for outdoor furniture painting and design.
(Many of the links in this article redirect to a specific reviewed product. Your purchase of these products through affiliate links helps to generate commission for Storables.com, at no extra cost. Learn more)
Introduction
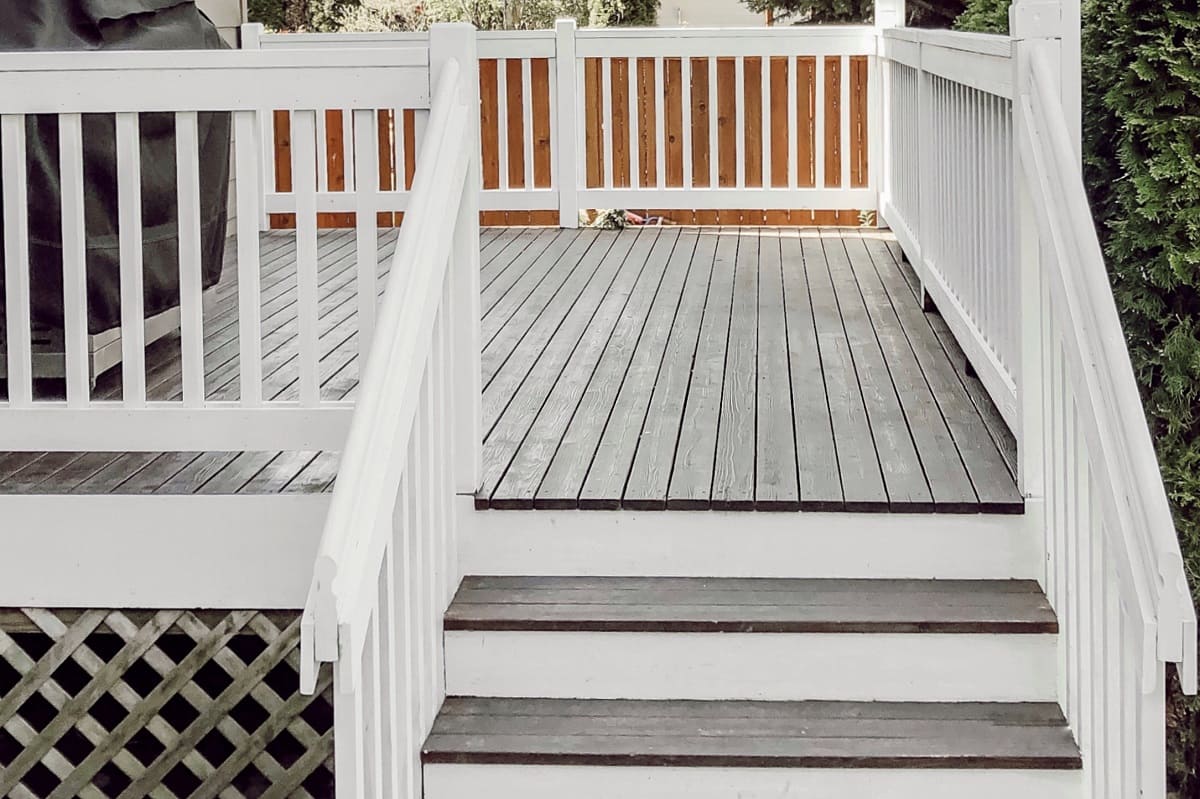
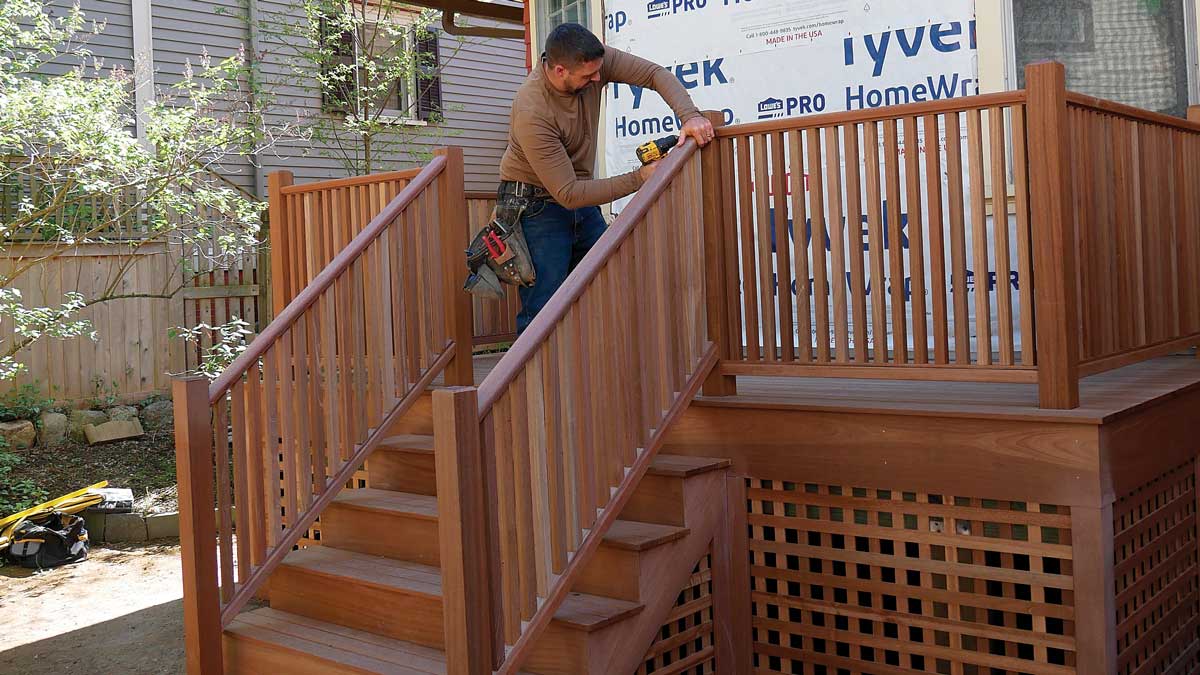
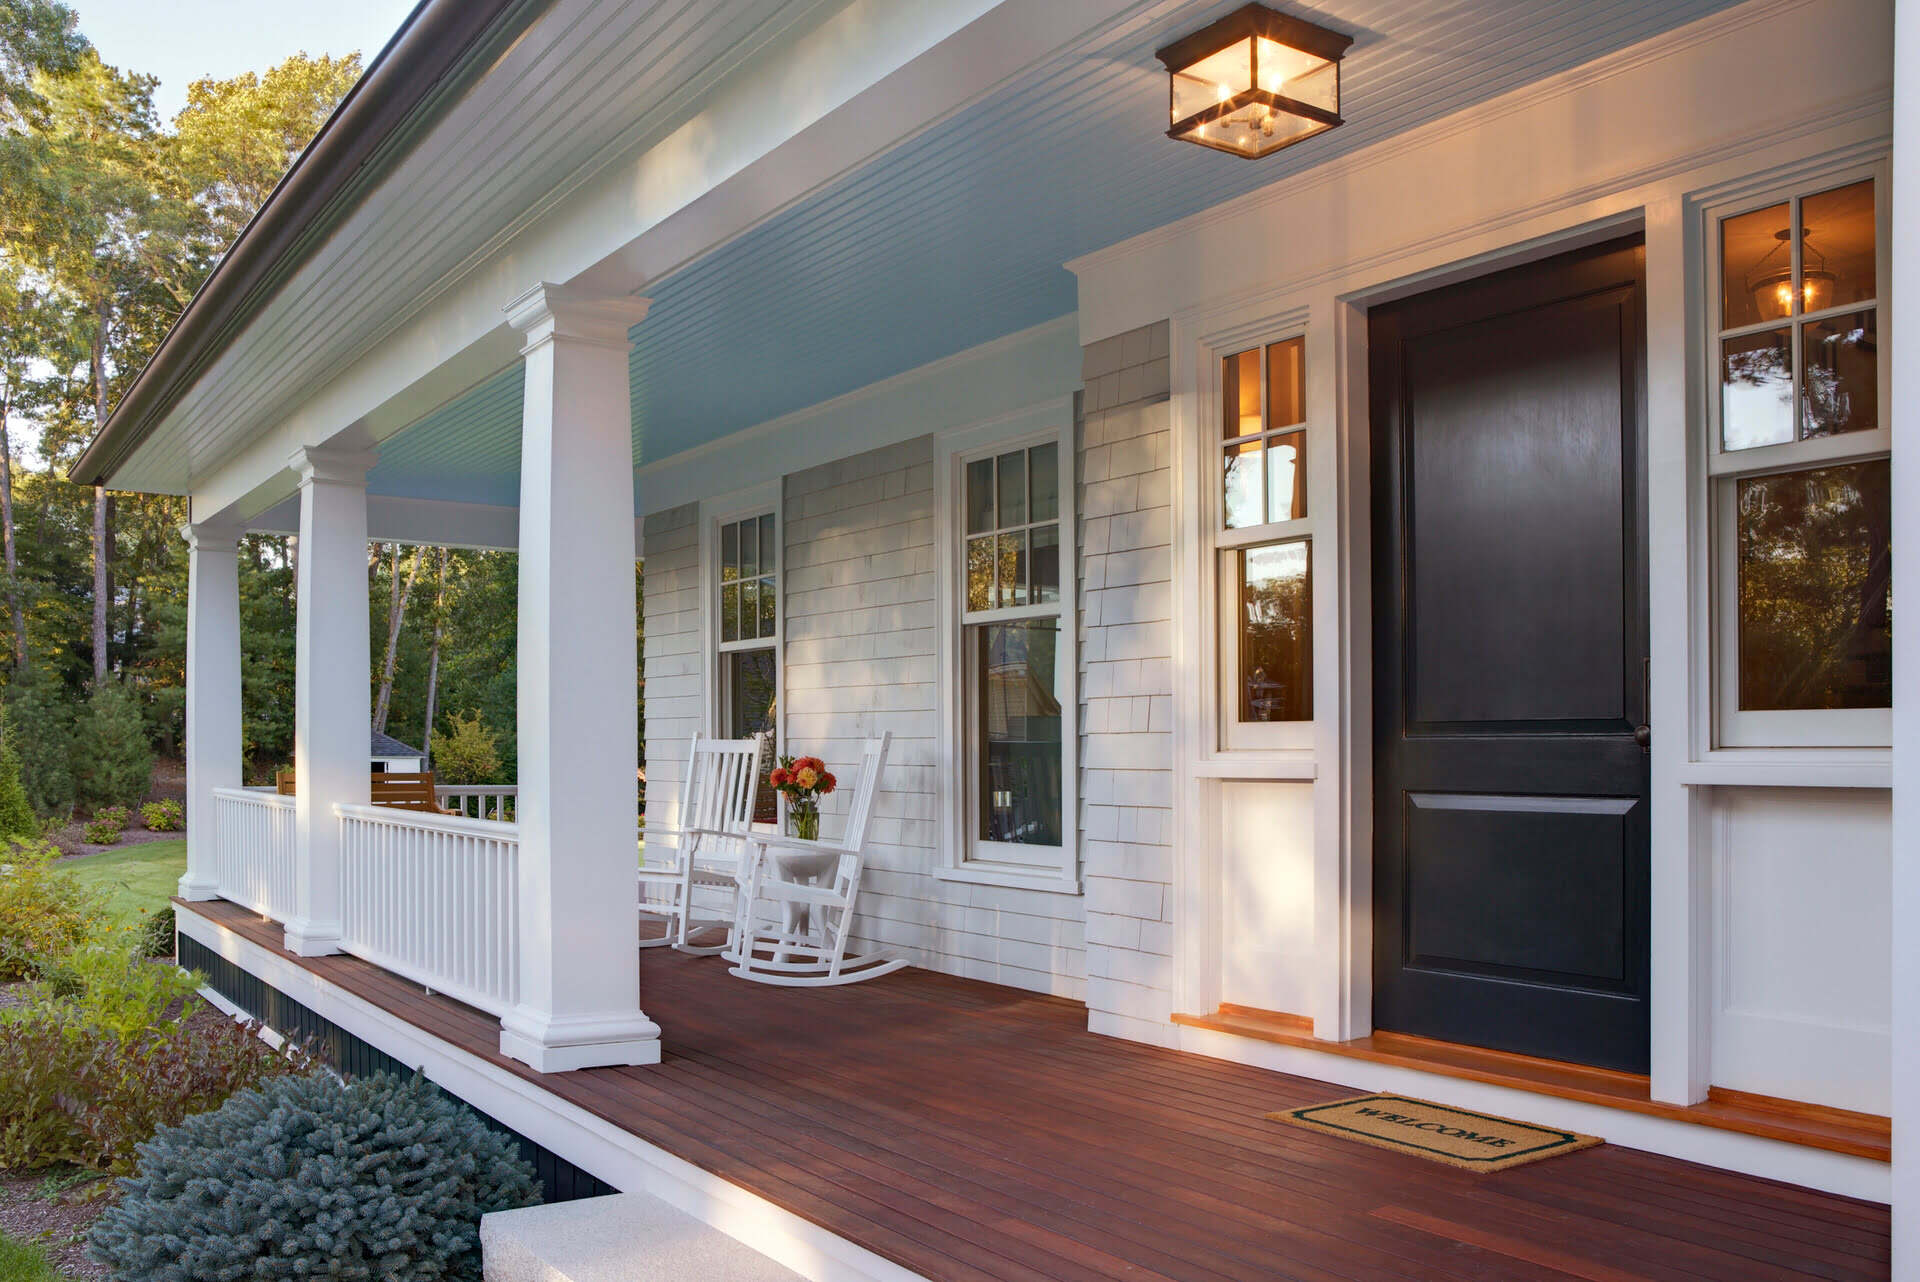
When it comes to enhancing the visual appeal of your outdoor space, few things make as significant an impact as freshly painted wood railings. Whether you're updating the look of your deck, porch, or patio, a fresh coat of paint can breathe new life into weathered, worn-out railings. Not only does it revitalize the aesthetic appeal of your outdoor area, but it also provides essential protection against the elements, extending the lifespan of your wood railings.
In this comprehensive guide, we'll walk you through the step-by-step process of painting outdoor wood railings, from choosing the right paint to maintaining the finish for long-lasting beauty. By the end of this journey, you'll be equipped with the knowledge and confidence to transform your outdoor space into a welcoming oasis that reflects your unique style and personality.
So, roll up your sleeves and get ready to unleash your creativity. It's time to embark on a transformative journey that will breathe new life into your outdoor living space!
Key Takeaways:
- Transform your outdoor space with a fresh coat of paint on wood railings. Choose high-quality, UV-resistant paint and maintain the finish for long-lasting beauty and protection against the elements.
- Prepare the wood surface thoroughly before painting. Use primer for adhesion and protection, and maintain the paint finish with regular cleaning and touch-ups for extended durability and visual appeal.
Read more: How To Paint Metal Railings Outdoors
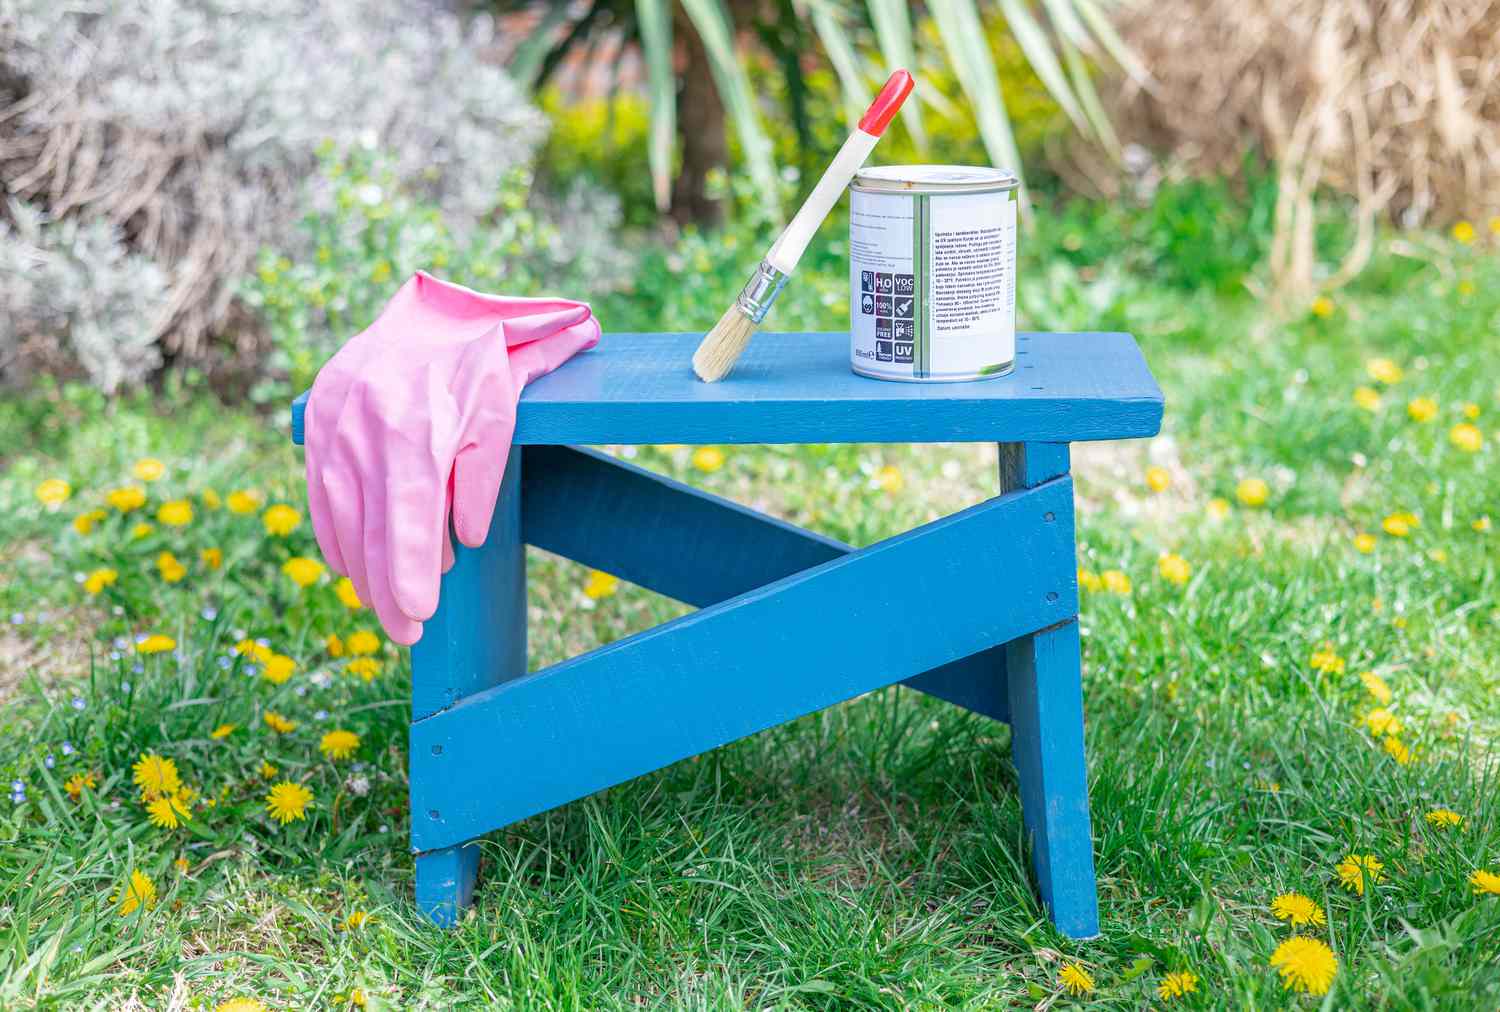
Choosing the Right Paint
Before diving into the painting process, it’s crucial to select the right type of paint for your outdoor wood railings. The ideal paint will not only complement the aesthetic of your outdoor space but also provide durability and protection against the elements.
1. Exterior Paint: Look for high-quality exterior paint specifically formulated for outdoor use. This type of paint is designed to withstand UV exposure, moisture, and temperature fluctuations, ensuring long-lasting color and protection.
2. Acrylic Latex Paint: Opt for acrylic latex paint, which offers excellent adhesion, flexibility, and resistance to cracking and peeling. Additionally, it’s easy to clean up with soap and water, making the painting process more convenient.
3. Semi-Gloss or Gloss Finish: Consider choosing a semi-gloss or gloss finish for your wood railings. These finishes not only provide a visually appealing sheen but also offer enhanced protection against moisture and are easier to clean compared to flat or satin finishes.
4. Color Selection: When selecting a color, take into account the overall aesthetic of your outdoor space. Whether you prefer a classic, neutral tone or a vibrant pop of color, choose a shade that complements your home’s exterior and landscaping while reflecting your personal style.
5. UV Protection: Some paints come with built-in UV protection, which can help prevent color fading and maintain the vibrancy of the paint over time. This feature is particularly important for outdoor applications exposed to direct sunlight.
By carefully considering these factors and choosing a high-quality paint designed for outdoor wood surfaces, you’ll set the stage for a successful and long-lasting paint finish that enhances both the beauty and durability of your wood railings.
Preparing the Wood Surface
Proper preparation of the wood surface is a critical step that sets the foundation for a flawless and enduring paint finish. Before diving into the painting process, it’s essential to ensure that the wood railings are clean, smooth, and free from any imperfections that could compromise the final result.
1. Cleaning: Begin by thoroughly cleaning the wood railings to remove dirt, grime, and any existing coatings. Use a gentle detergent or a specialized wood cleaner along with a scrub brush to effectively remove surface contaminants. Rinse the railings with water and allow them to dry completely before proceeding.
2. Sanding: Once the railings are dry, inspect the surface for any rough spots, splinters, or old paint that may be peeling or flaking. Use a medium-grit sandpaper to sand the wood, smoothing out any imperfections and creating a uniform surface for the new paint to adhere to. Pay close attention to corners, edges, and intricate details to ensure thorough preparation.
3. Repairing Imperfections: If you encounter any cracks, holes, or damaged areas, take the time to repair them before proceeding with the painting process. Fill any gaps or imperfections with a high-quality wood filler, following the manufacturer’s instructions. Once the filler has dried, sand the repaired areas to blend them seamlessly with the surrounding wood.
4. Removing Dust: After sanding, use a clean, damp cloth to wipe away any dust or debris from the surface of the railings. Ensuring a clean, dust-free surface is essential for achieving a smooth and professional-looking paint finish.
5. Protecting Surrounding Areas: If you’re painting near other surfaces or landscaping, take precautions to protect them from paint splatter. Use painter’s tape and drop cloths to shield adjacent areas, minimizing the risk of accidental paint transfer.
By meticulously preparing the wood surface, you’ll create an optimal canvas for the paint, promoting strong adhesion and a flawless, long-lasting finish. This attention to detail during the preparation phase will pay dividends in the final result, ensuring a stunning transformation of your outdoor wood railings.
Before painting outdoor wood railings, make sure to clean and sand the surface to remove any dirt or old paint. Use a high-quality outdoor paint and apply it in thin, even coats to ensure a smooth and durable finish.
Applying Primer
Priming the wood railings is a crucial step that enhances adhesion, promotes uniform coverage, and provides an additional layer of protection for the wood. A high-quality primer creates a stable foundation for the topcoat, ensuring that the paint adheres effectively and delivers long-lasting results.
1. Choosing the Right Primer: Select a primer specifically formulated for exterior wood surfaces. Look for a product that offers excellent adhesion, seals the wood, and provides a mildew-resistant coating to protect against moisture and fungal growth.
2. Primer Application: Use a high-quality synthetic bristle brush or a paint sprayer to apply the primer to the wood railings. Begin with the top and work your way down, ensuring thorough coverage of all surfaces, including the undersides and any intricate details. Take care to apply the primer evenly, avoiding drips or excess buildup.
3. Drying Time: Allow the primer to dry completely according to the manufacturer’s instructions. Depending on the product and environmental conditions, this may take several hours. Ensure that the railings are fully dry before proceeding to the next stage of the painting process.
4. Sanding Between Coats: For optimal results, lightly sand the primed surface with fine-grit sandpaper once it has dried. This step helps smooth out any imperfections and provides a key for the topcoat to adhere to, ensuring a professional and durable finish.
5. Primer Benefits: The application of primer offers numerous benefits, including enhanced adhesion, improved durability, and the ability to block wood tannins and stains from bleeding through the paint. Additionally, using a primer tailored for outdoor wood surfaces provides essential protection against the elements, contributing to the longevity of the paint finish.
By diligently applying a high-quality primer to the wood railings, you’ll establish a solid foundation for the topcoat, setting the stage for a professional-quality finish that withstands the rigors of outdoor exposure and elevates the visual appeal of your outdoor space.
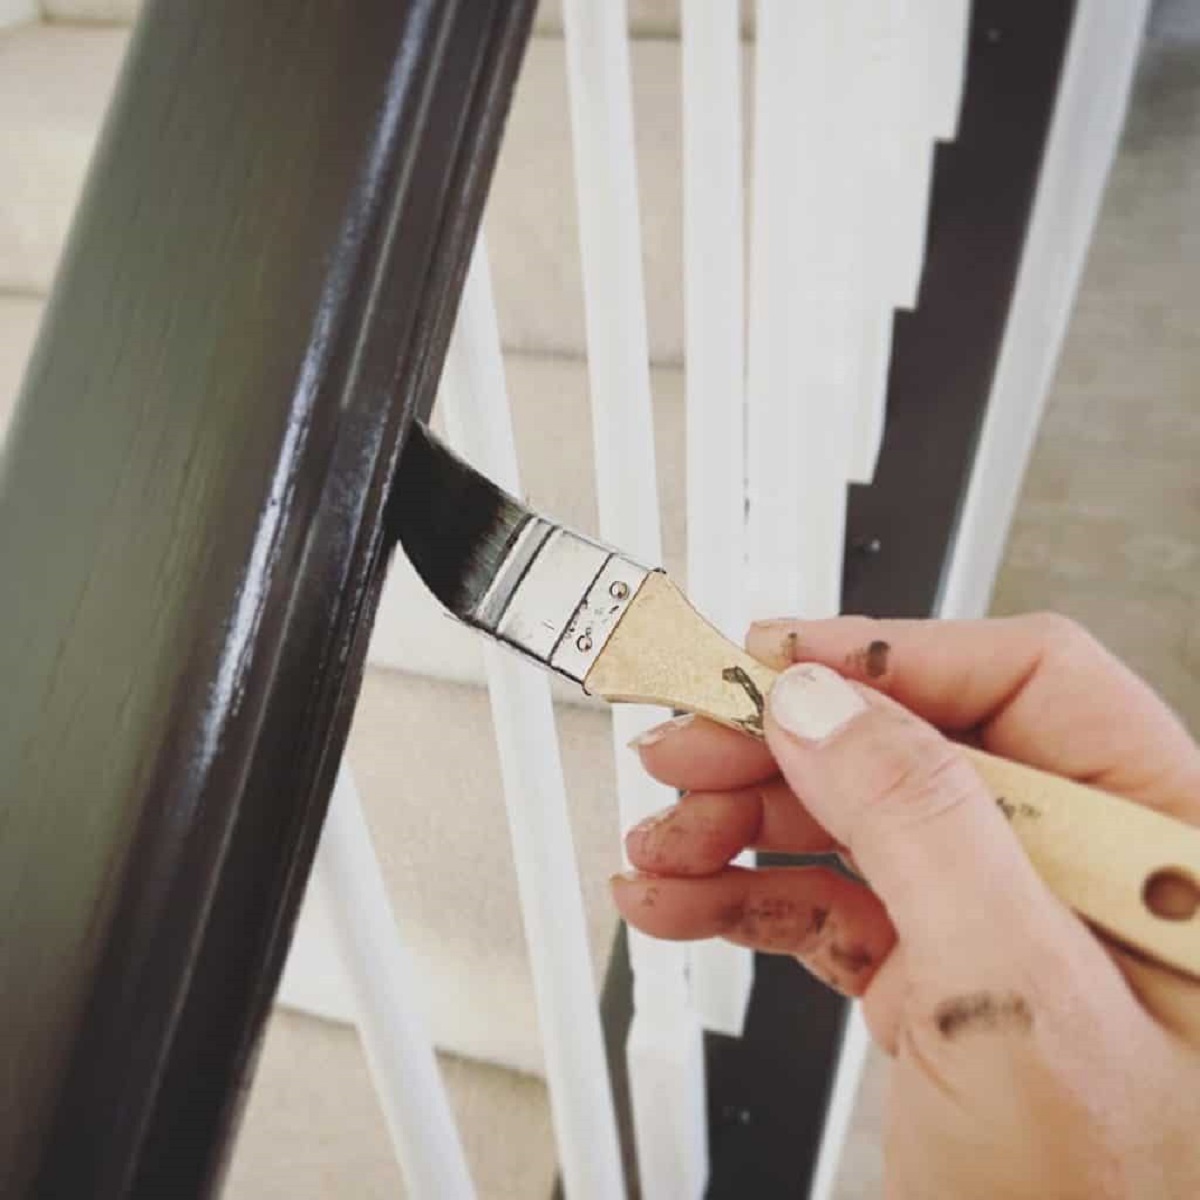
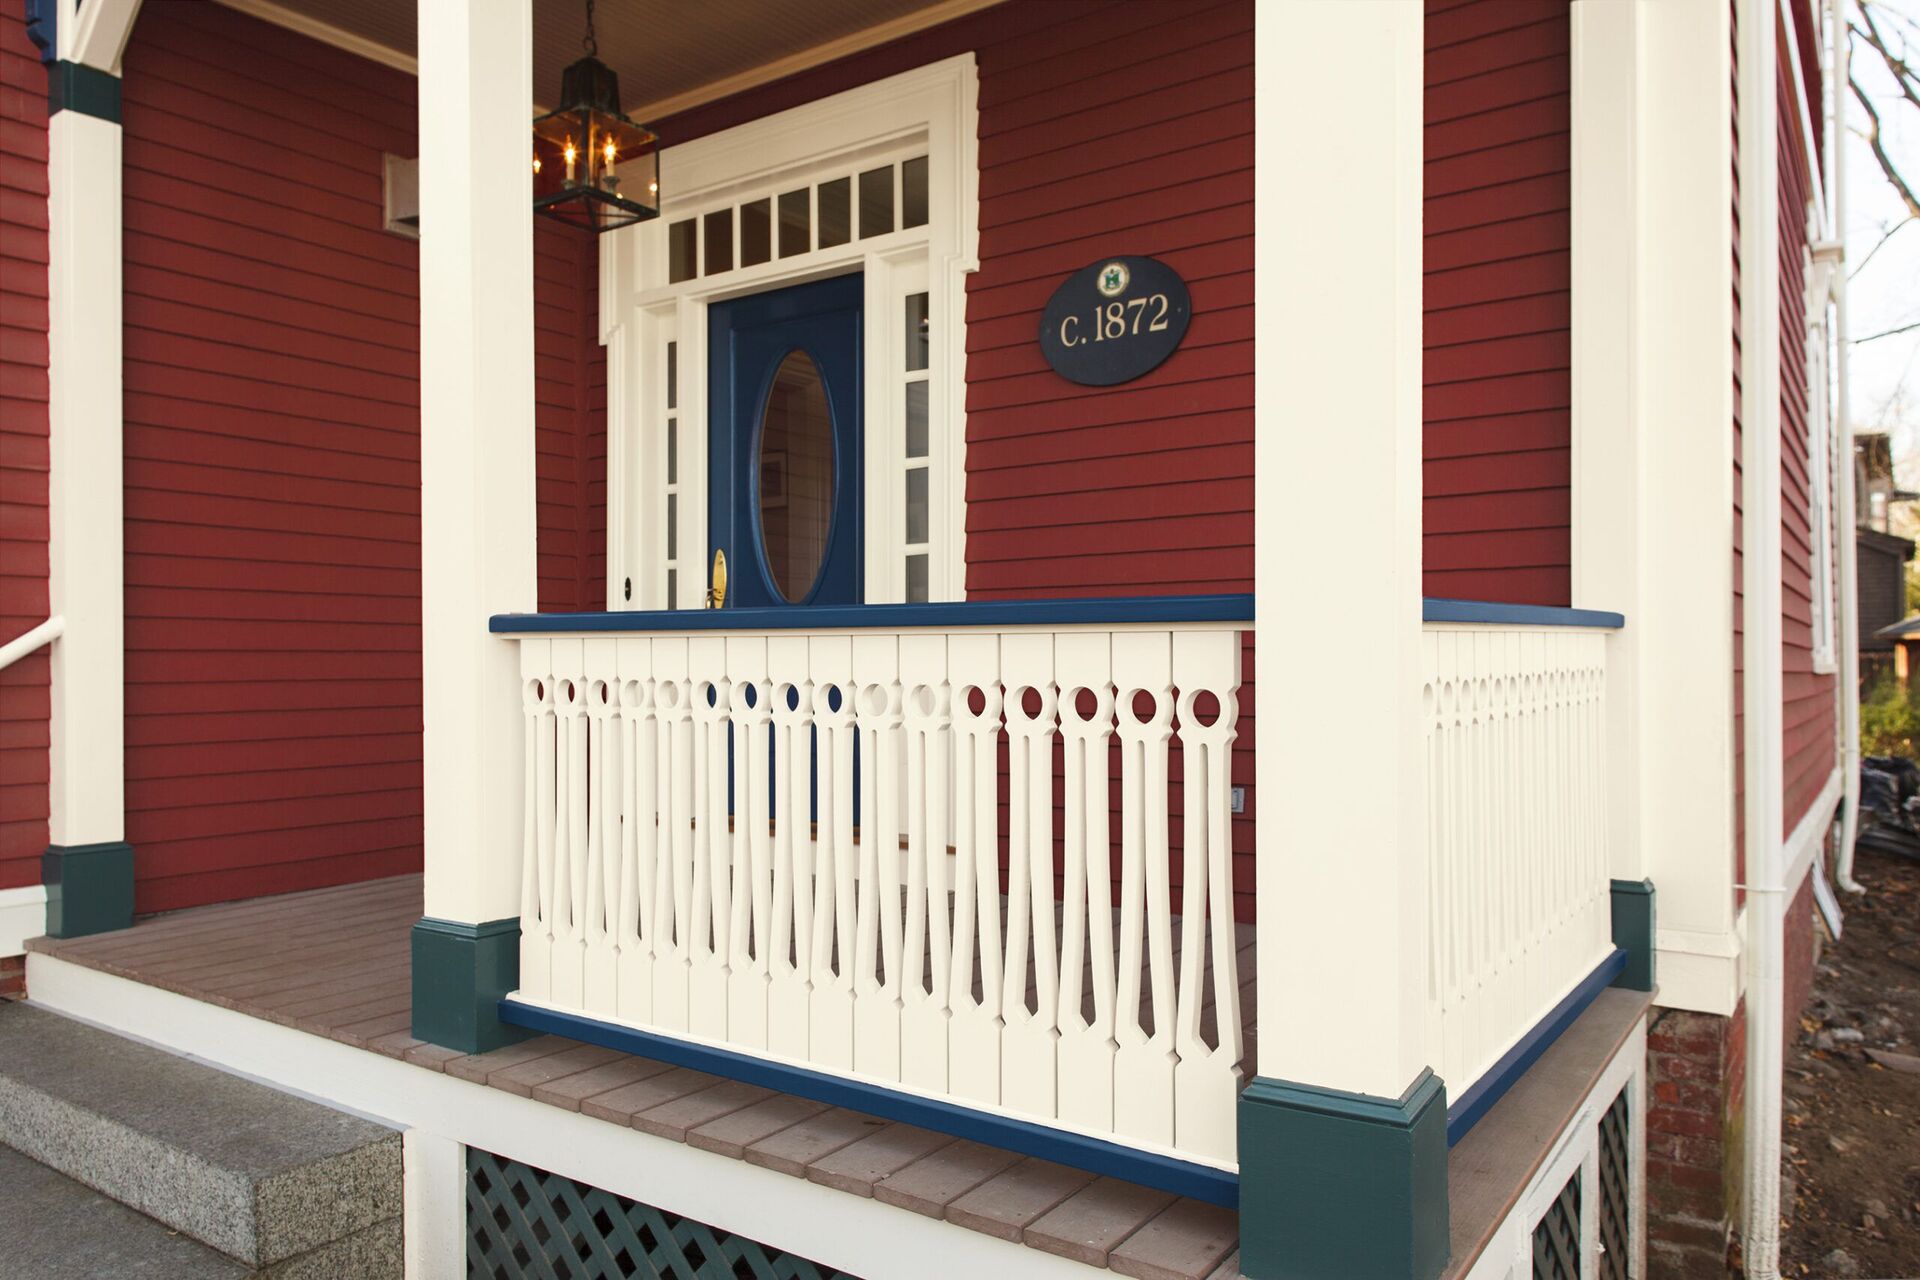
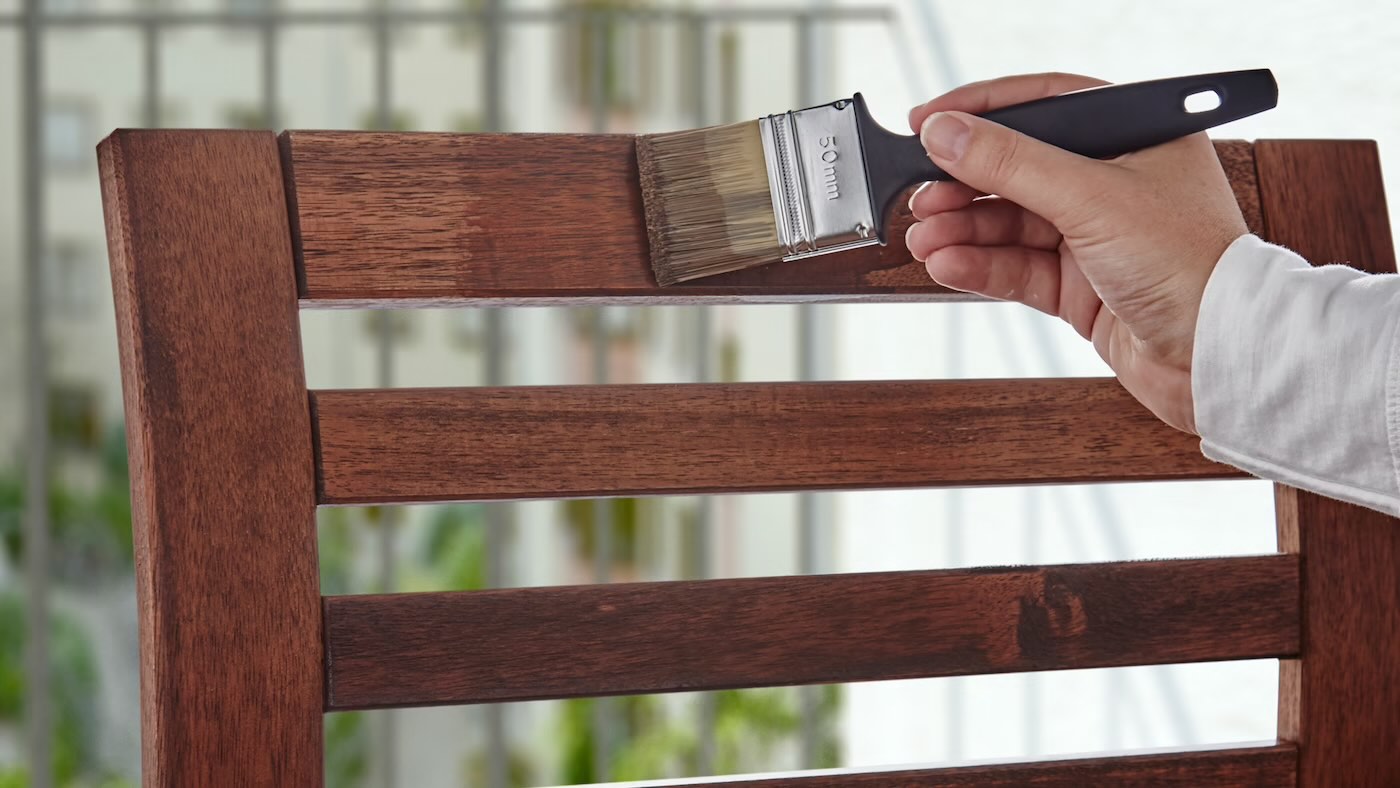
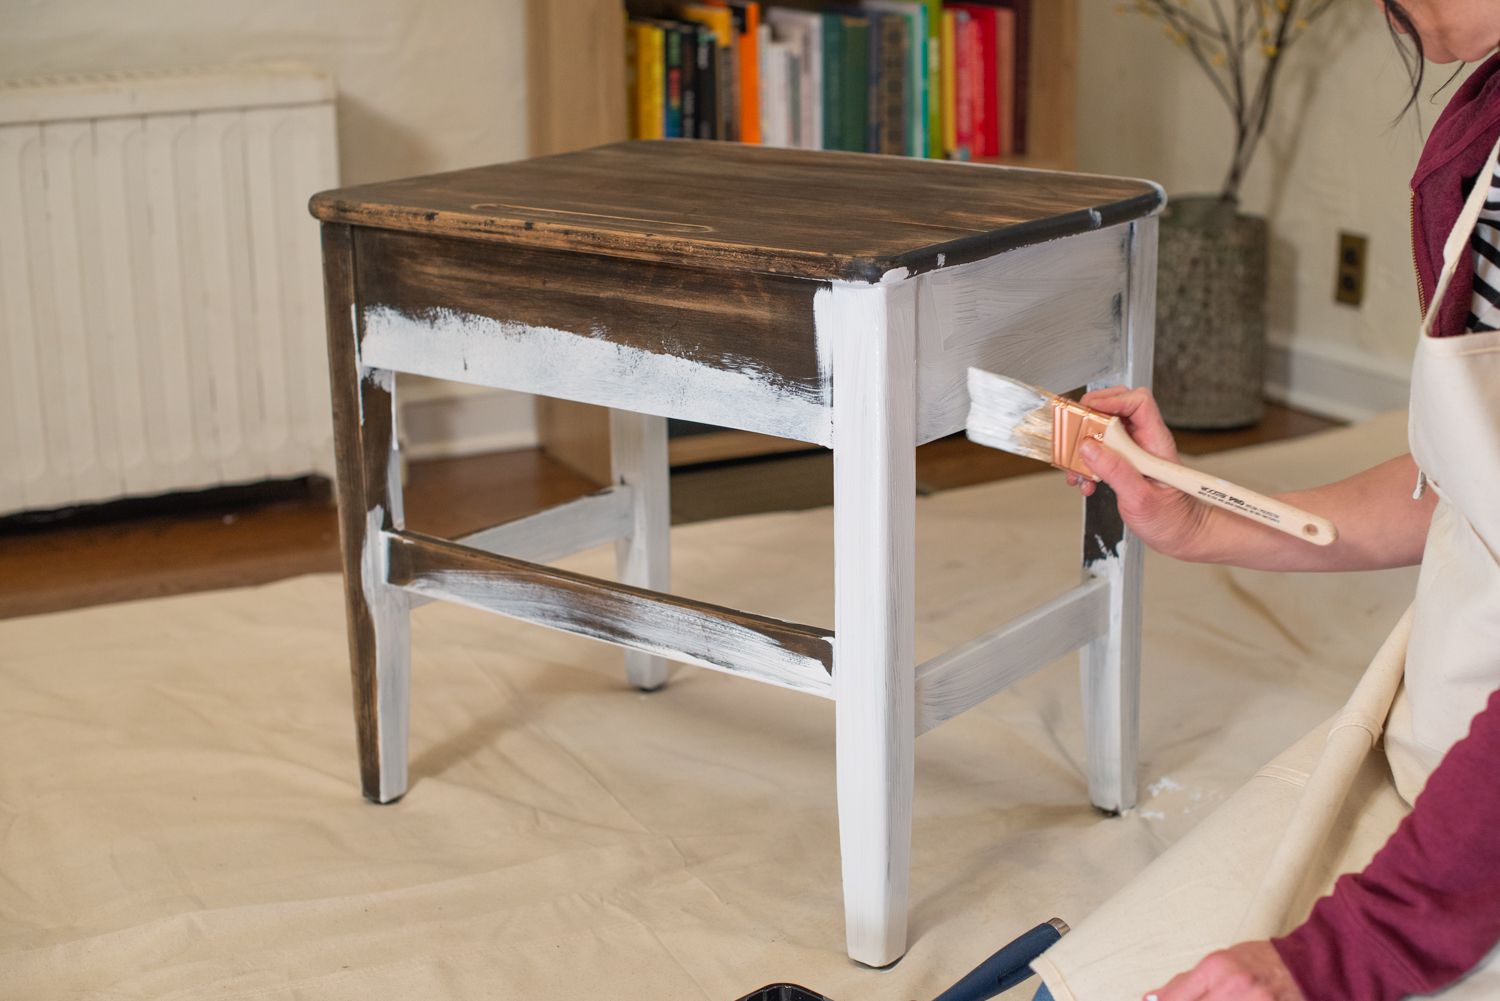
Painting the Railings
With the surface prepared and the primer applied, it’s time to embark on the transformative process of painting the wood railings. This stage allows you to infuse your outdoor space with a burst of color and personality while providing essential protection to the wood against the elements.
1. Stirring the Paint: Before painting, thoroughly stir the paint to ensure an even consistency and proper dispersion of pigments. This step is crucial for achieving uniform color and coverage throughout the railings.
2. Paint Application: Using a high-quality paintbrush or a paint sprayer, apply the paint to the wood railings in smooth, even strokes. Begin at one end and work your way methodically to the other, ensuring complete coverage of all surfaces, including corners, edges, and intricate details. Take care to maintain a wet edge to prevent lap marks and ensure a seamless finish.
3. Multiple Coats: Depending on the type of paint and desired coverage, multiple coats may be necessary to achieve the desired color depth and durability. Allow each coat to dry completely before applying the next, and follow the manufacturer’s recommendations for recoat times.
4. Even Coverage: Pay close attention to achieve even coverage and address any drips or runs promptly. Smooth out any excess paint to prevent uneven buildup and ensure a professional, polished appearance.
5. Drying Time: Allow the paint to dry thoroughly between coats and before exposing the railings to heavy use or inclement weather. Adequate drying time is essential for the paint to cure and develop its full protective and aesthetic properties.
6. Final Inspections: Once the final coat has been applied and has dried, inspect the railings carefully for any missed spots or imperfections. Touch up any areas as needed to ensure a flawless, uniform finish that enhances the beauty of your outdoor space.
By approaching the painting process with care and precision, you’ll achieve a stunning transformation of your wood railings, infusing your outdoor space with renewed vitality and charm. The freshly painted railings will not only elevate the aesthetic appeal of your home but also provide essential protection, ensuring lasting beauty for years to come.
Read more: How To Prep Outdoor Wood For Painting
Maintaining the Paint Finish
After investing time and effort into painting your outdoor wood railings, it’s essential to implement a maintenance routine to preserve the beauty and integrity of the paint finish. By incorporating simple upkeep practices, you can extend the lifespan of the paint and ensure that your railings continue to enhance the visual appeal of your outdoor space for years to come.
1. Regular Cleaning: Establish a regular cleaning schedule to remove dirt, dust, and debris that can accumulate on the railings. Use a mild detergent and water to gently wash the painted surfaces, followed by a thorough rinse with clean water. This simple practice helps prevent the buildup of grime and maintains the vibrancy of the paint.
2. Inspection and Touch-Ups: Periodically inspect the paint finish for signs of wear, chipping, or damage. Address any areas of concern promptly by performing touch-up painting to prevent the deterioration of the finish and protect the underlying wood from exposure to the elements.
3. Protective Coatings: Consider applying a clear protective topcoat over the painted railings to provide an additional layer of defense against UV rays, moisture, and general wear and tear. This extra measure can help prolong the life of the paint and safeguard the wood from environmental stressors.
4. Addressing Damage: In the event of significant damage, such as deep scratches or extensive peeling, take the time to repair and repaint the affected areas as soon as possible. Prompt action can prevent further deterioration and maintain the overall integrity of the paint finish.
5. Seasonal Maintenance: Adjust your maintenance efforts according to seasonal changes and weather patterns. For example, inspect the railings after harsh weather conditions, such as heavy rain or snow, and address any issues promptly to prevent damage from escalating.
6. Professional Refinishing: If the paint finish shows signs of significant wear over time, consider enlisting the expertise of professional refinishing services. Professional refinishing can breathe new life into the railings, addressing wear and tear while ensuring a high-quality, long-lasting finish.
By implementing a consistent maintenance regimen, you can safeguard the beauty and durability of the paint finish on your outdoor wood railings, preserving the visual allure of your outdoor space and maximizing the longevity of your investment. With proper care and attention, your freshly painted railings will continue to be a source of pride and enjoyment for years to come.
Frequently Asked Questions about How To Paint Outdoor Wood Railings
Was this page helpful?
At Storables.com, we guarantee accurate and reliable information. Our content, validated by Expert Board Contributors, is crafted following stringent Editorial Policies. We're committed to providing you with well-researched, expert-backed insights for all your informational needs.


0 thoughts on “How To Paint Outdoor Wood Railings”