Home>Furniture>Living Room Furniture>How To Paint A Wood Coffee Table
Living Room Furniture
How To Paint A Wood Coffee Table
Modified: March 16, 2024
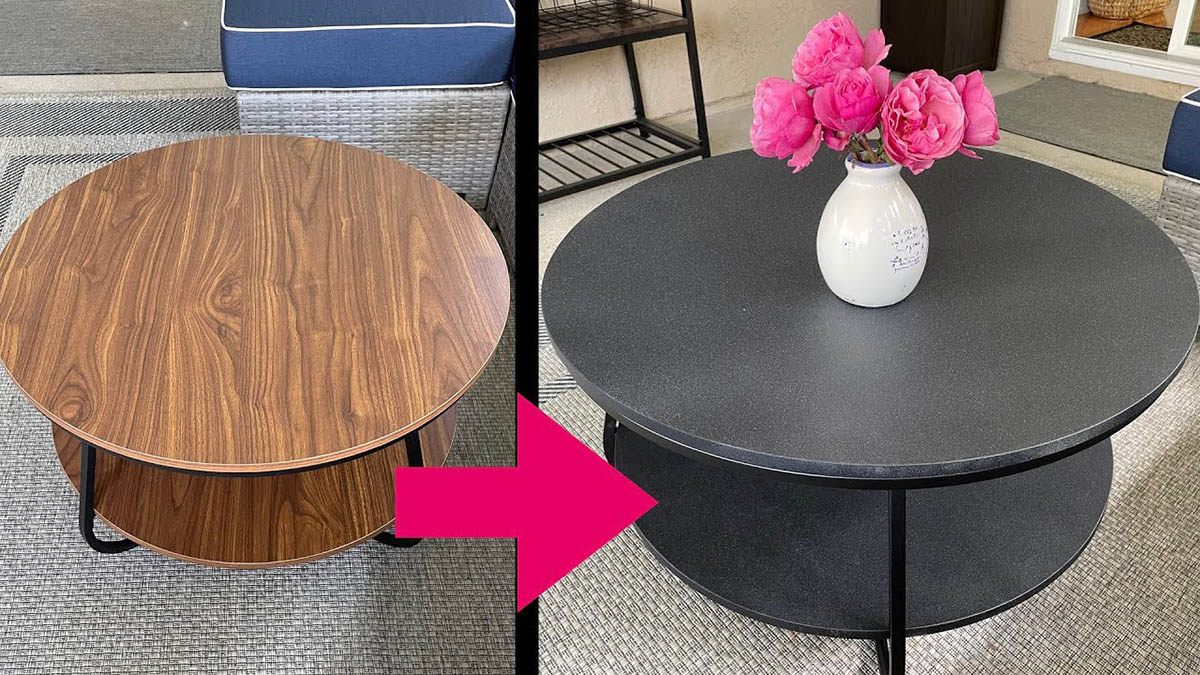
Learn how to paint a wood coffee table in this step-by-step guide. Transform your living room furniture with our easy-to-follow instructions.
(Many of the links in this article redirect to a specific reviewed product. Your purchase of these products through affiliate links helps to generate commission for Storables.com, at no extra cost. Learn more)
Introduction
Welcome to the world of DIY furniture makeovers! If you have an old, worn-out wood coffee table that is in desperate need of a facelift, then you’ve come to the right place. Painting a wood coffee table is a great way to breathe new life into an outdated piece of furniture and create a stunning focal point for your living room.
Not only is painting a wood coffee table a cost-effective alternative to buying a new one, but it also allows you the creative freedom to customize the piece to match your style and aesthetic preferences. Whether you want to go for a sleek and modern look or a rustic and distressed finish, the possibilities are endless.
In this step-by-step guide, we will walk you through the process of painting a wood coffee table, from gathering the necessary supplies to applying the final coat of paint. By following these instructions, you’ll be able to transform your tired coffee table into a stylish centerpiece that will surely impress your guests. So, roll up your sleeves, put on your painter’s hat, and let’s get started!
Key Takeaways:
- Transform your old wood coffee table into a stylish centerpiece by following these step-by-step painting instructions. Enjoy the DIY process and add your personal touch to your living space!
- Gather supplies, prep the surface, apply primer, choose the right paint, and seal for a professional-looking finish. Enjoy the process and admire your DIY masterpiece in your living room!
Read more: How To Paint A Coffee Table With Chalk Paint
Step 1: Gathering Supplies
Before diving into the painting process, it’s important to gather all the necessary supplies. Here’s a list of items you’ll need:
- Wood coffee table – the one you want to paint
- Duct tape or painter’s tape
- Sandpaper – medium-grit (120-150) and fine-grit (220-240)
- Clean, lint-free cloths
- Primer – specific to wood surfaces
- Paint – choose a high-quality latex or oil-based paint in your desired color
- Paintbrushes – consider a synthetic bristle brush for water-based paint and a natural bristle brush for oil-based paint
- Paint tray or bucket
- Drop cloth or newspapers to protect your workspace
- Optional: Sanding block or electric sander for larger surfaces
- Optional: Tack cloth for removing any residual dust
Make sure to select high-quality materials to ensure a smooth and long-lasting finish. It’s also a good idea to wear old clothes or an apron to protect your attire from paint splatters.
Once you have collected all the supplies, find a well-ventilated area to work in. If you will be painting indoors, open windows or use fans to increase airflow.
With all your supplies at the ready, you’re now prepared to move on to the next step: Preparing the Coffee Table for Painting.
Step 2: Preparing the Coffee Table for Painting
Preparing the coffee table before painting is crucial for achieving a professional-looking finish. This step involves cleaning the surface, removing any existing paint or varnish, and ensuring a smooth and even base for the new paint. Follow these steps to properly prepare your coffee table:
- Clean the surface: Use a mild detergent and warm water to clean the entire surface of the coffee table. Remove any dirt, dust, or grime, and make sure to dry it thoroughly with a clean cloth.
- Tape off any areas: If your coffee table has hardware or areas you don’t want to paint, use duct tape or painter’s tape to carefully cover those areas.
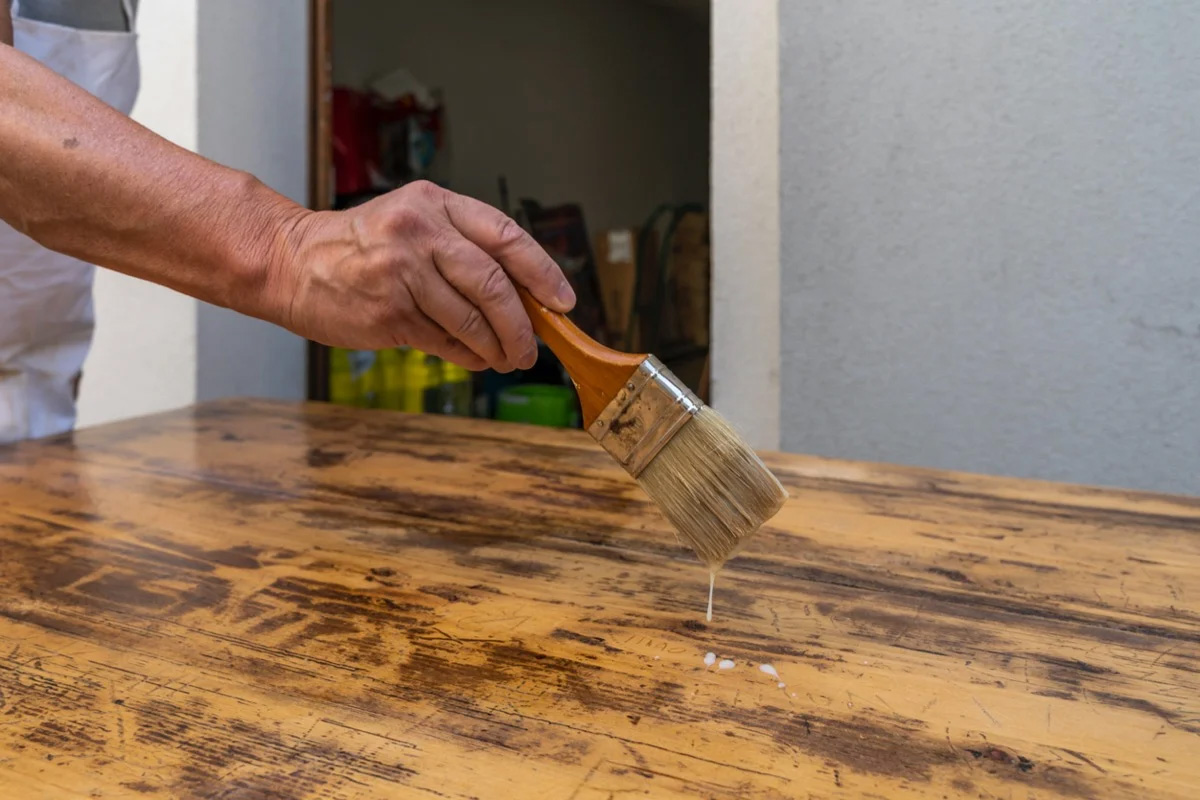
- Remove existing paint or varnish: If your coffee table has old paint or varnish that needs to be removed, you have a couple of options. You can use paint stripper or sandpaper. Follow the manufacturer’s instructions if using a paint stripper, or if using sandpaper, start with a medium-grit to remove the majority of the old finish, and then switch to a fine-grit sandpaper to smooth out the surface.
- Wipe down the surface: After removing old paint or varnish, use a clean, damp cloth to wipe down the entire surface of the coffee table to remove any residue or dust.
By following these preparatory steps, you ensure that the paint adheres properly and lasts longer on the surface of your coffee table. Once you have prepped the coffee table, you are ready to move on to the next step: Sanding the Coffee Table.
Step 3: Sanding the Coffee Table
Sanding the coffee table is a crucial step in the painting process. It helps create a smooth surface, removes any imperfections, and promotes better paint adhesion. Follow these steps to sand your coffee table effectively:
- Choose the right sandpaper: Start with medium-grit sandpaper (around 120 to 150 grit) to remove any roughness or imperfections on the surface. If your coffee table has stubborn paint patches or deep scratches, you may need to start with a coarser grit. Once the surface is smooth, switch to a finer-grit sandpaper (around 220 to 240 grit) for a final sanding to achieve a polished finish.
- Sand in the direction of the grain: Always sand with the grain of the wood, not against it. This will prevent any visible scratches or marks on the surface.
- Apply even pressure: Use a sanding block or your hand to apply even pressure across the surface of the coffee table. This ensures that you remove any uneven areas and create a consistent texture.
- Be mindful of delicate areas: If your coffee table has intricate details or decorative elements, use a finer-grit sandpaper or sanding sponge to avoid damaging those delicate areas.
- Clean the surface: After sanding, use a clean cloth or tack cloth to remove any residual dust or debris from the surface. This will create a clean base for the primer and paint.
Remember to take breaks while sanding to give your hand and arm muscles some rest. It’s also a good idea to wear a dust mask to protect yourself from inhaling any wood dust particles.
Once you have completed the sanding process, you’re ready to move on to the next step: Applying Primer.
Step 4: Applying Primer
Applying primer is a crucial step to ensure a smooth and long-lasting paint finish on your coffee table. Primer helps to seal the wood, hide any imperfections, and allow the paint to adhere better. Follow these steps to apply primer to your coffee table:
- Choose the right primer: Select a primer specifically designed for wood surfaces. Water-based primers are ideal for most wood projects, as they dry quickly and have less odor. However, if your coffee table will be exposed to high moisture or heavy use, an oil-based primer may provide more durability.
- Prepare the primer: Follow the manufacturer’s instructions to properly mix or shake the primer before use. This ensures that the primer’s consistency is even and ready for application.
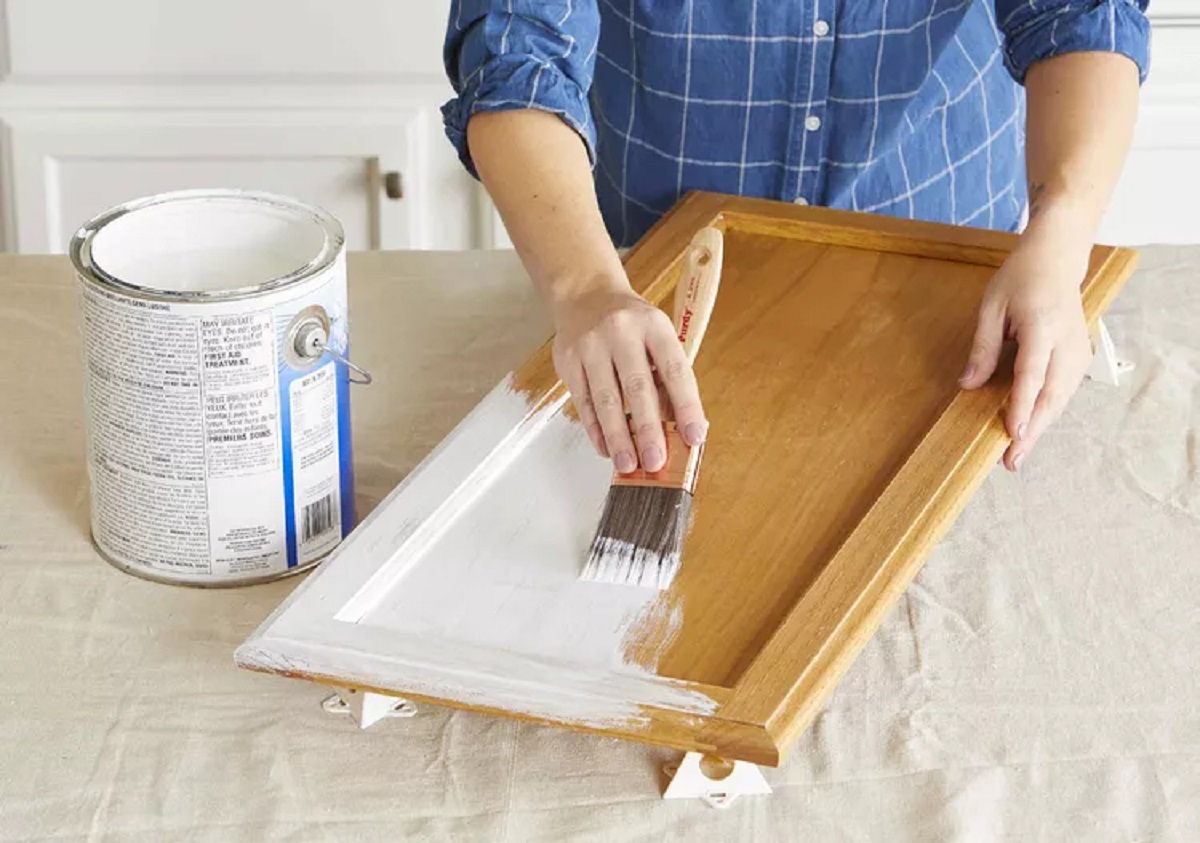
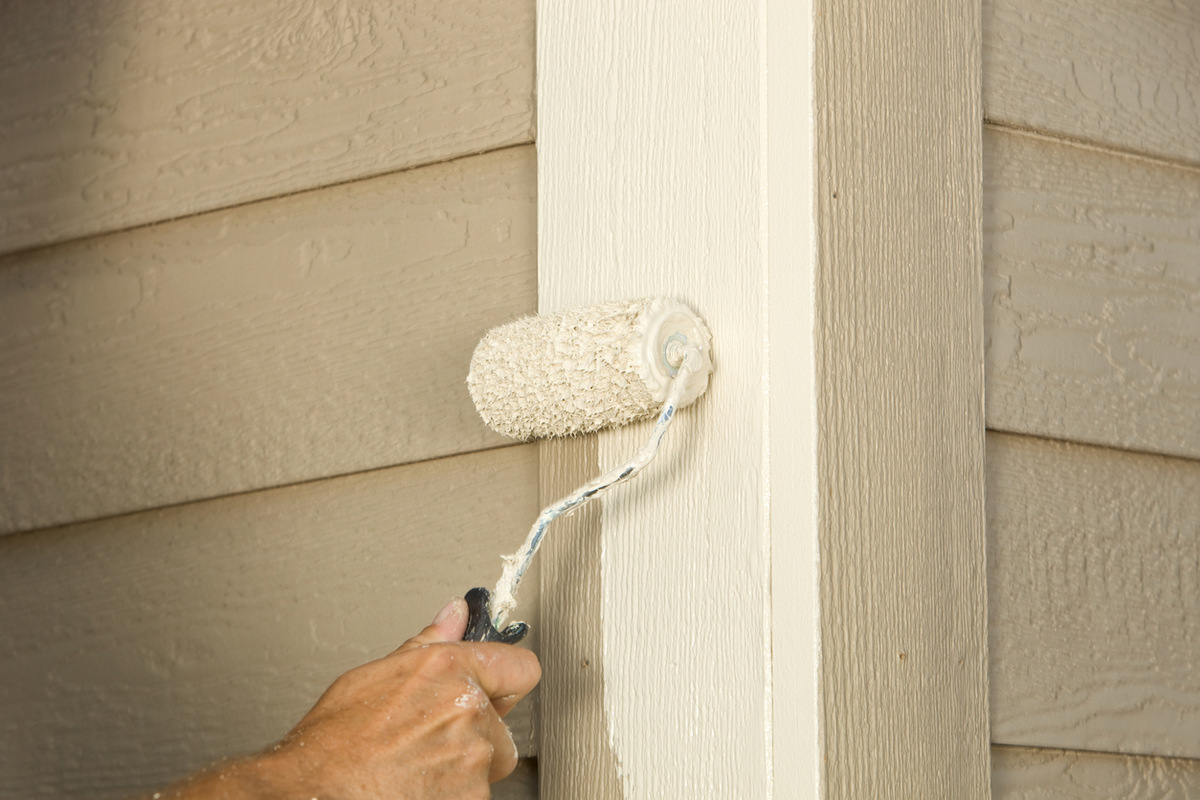
- Apply the primer: Use a brush or a roller to apply an even coat of primer to the entire surface of the coffee table. Work in small sections, starting from one end and moving towards the other. Make sure to apply the primer in the direction of the wood grain for a smoother finish. Take care to avoid excessive brush strokes or roller marks.
- Allow the primer to dry: Follow the recommended drying time specified by the primer manufacturer. It’s essential to allow the primer to fully dry before moving on to the next step. This may take anywhere from a few hours to overnight.
- Sand the primed surface (optional): If you notice any rough areas or imperfections on the primed surface, lightly sand it with a fine-grit sandpaper. This step will further smooth out the surface and create an even base for the paint.
- Clean the surface: After sanding, use a clean, lint-free cloth or tack cloth to remove any dust or debris from the surface. This will ensure that the paint adheres properly.
Priming your coffee table provides a solid foundation for the paint and helps achieve a professional-looking finish. Once the primer is dry and the surface is clean, you’re ready to move on to the next step: Choosing the Right Paint.
Read more: How To Paint A Coffee Table Black
Step 5: Choosing the Right Paint
Choosing the right paint for your coffee table is essential to achieve the desired look and durability. Different paint types offer unique finishes and levels of resilience. Consider the following factors when selecting the paint:
- Paint Type: Latex or oil-based paints are commonly used for wood furniture. Latex paints are water-based, quick-drying, and emit less odor. They are great for indoor use and are available in a wide variety of colors. Oil-based paints are known for their durability and are suitable for high-traffic areas.
- Finish: Decide on the desired finish for your coffee table. Glossy finishes provide a shiny, reflective surface, while satin finishes offer a subtle sheen. Matte or flat finishes have no shine and create a smooth, velvety appearance.
- Color: Choose a color that complements your room’s decor and personal style. Consider the existing color scheme and the ambiance you want to create. Sample paint swatches or gather inspiration from design magazines and websites to help you make a decision.
- Quality: Opt for high-quality paint brands that offer good coverage and durability. This ensures that your newly painted coffee table will withstand everyday use and maintain its color and finish for an extended period.
When purchasing your paint, consult with a store professional who can guide you through the available options and recommend the best products for your specific project.
Once you have chosen the right paint, you’re ready to move on to the exciting step of applying the first coat of paint to your coffee table.
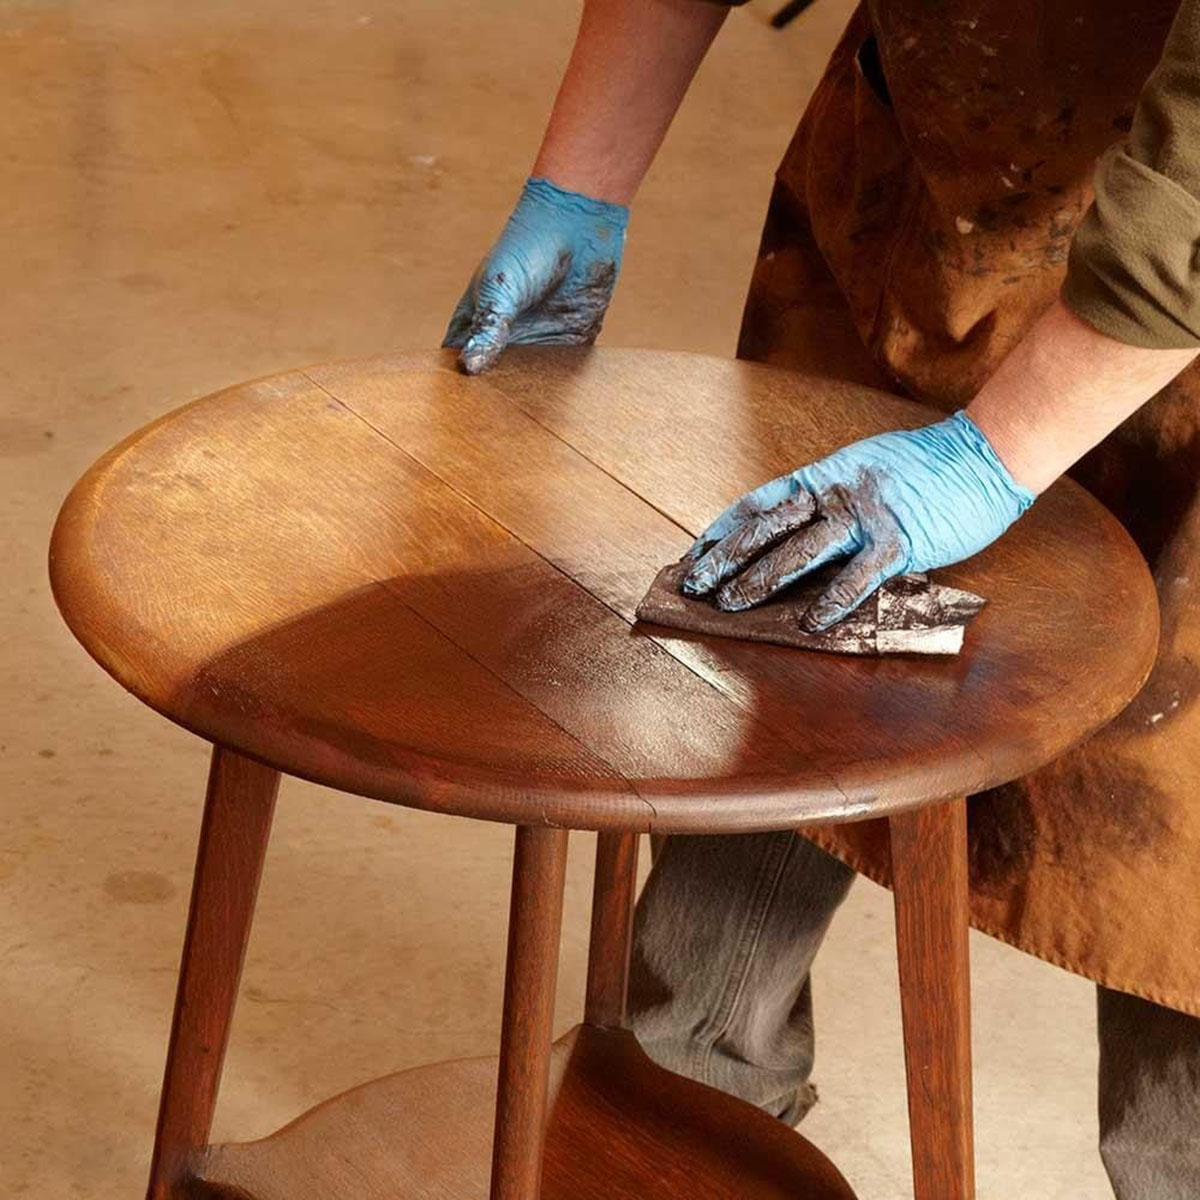
Before painting a wood coffee table, make sure to sand the surface to remove any existing finish and create a smooth base for the new paint. This will help the paint adhere better and result in a more professional-looking finish.
Step 6: Applying the First Coat of Paint
Now comes the fun part – applying the first coat of paint to your coffee table. Follow these steps to ensure a smooth and even application:
- Stir the paint: Use a stir stick to blend the paint thoroughly. This ensures that the color pigments are evenly distributed.
- Pour the paint: Pour a small amount of paint into a paint tray or bucket. This makes it easier to dip your brush into the paint and prevents paint waste.
- Start from the edges: Begin painting the coffee table’s edges and any intricate areas, such as decorative carvings or moldings. Use a smaller brush for precise application.
- Paint the tabletop: With a larger brush, start painting the tabletop. Work in small sections, moving in the direction of the wood grain. Apply the paint evenly, using smooth and overlapping brush strokes.
- Watch for drips or pooling: Keep an eye out for any drips or excessive pooling of paint. If you notice any, use your brush to smooth them out or remove the excess paint.
- Allow the first coat to dry: Let the first coat of paint dry according to the paint manufacturer’s instructions. This typically takes a few hours. Make sure the surface is completely dry before proceeding to the next step.
The first coat of paint creates the foundation for your coffee table’s new look. It’s normal for some imperfections to be visible at this stage, but don’t worry – subsequent coats will help achieve a smoother and more consistent finish.
While waiting for the first coat to dry, clean your paintbrushes and prepare for the next step – allowing the first coat to dry.
Step 7: Allowing the First Coat to Dry
After applying the first coat of paint to your coffee table, it’s important to allow it to dry completely before moving on to the next steps. Proper drying time ensures a smooth and durable finish. Here’s what you need to know:
- Read the paint can instructions: Different paints have varying drying times, so refer to the manufacturer’s instructions for the recommended drying time. In general, latex-based paints typically dry within a few hours, while oil-based paints may take longer, usually overnight.
- Provide adequate ventilation: Good airflow helps the paint dry faster. If possible, open windows or use fans to increase ventilation in the room. However, avoid placing the coffee table in direct sunlight, as it can cause the paint to dry unevenly or fade.
- Avoid touching the surface: It’s crucial to refrain from touching or moving the coffee table while the first coat of paint is drying. Even the slightest touch can leave marks or smudges on the surface.
- Check for tackiness: To determine if the paint has dried completely, gently touch a small, inconspicuous area of the coffee table’s painted surface. If it feels dry and no paint comes off, it’s ready for the next step. However, if it feels tacky or paint comes off on your finger, allow more drying time before proceeding.
Patience is key during this step. Rushing the drying process can result in an uneven finish or cause the paint to peel or smudge. While waiting for the first coat to dry, clean your brushes and prepare for applying the second coat of paint.
Step 8: Applying the Second Coat of Paint
Now that the first coat of paint has dried, it’s time to apply the second coat. This step will help achieve a more vibrant and uniform finish on your coffee table. Follow these steps for a successful application of the second coat:
- Stir the paint: Just like the first coat, give the paint a good stir to ensure consistency and an even color.
- Start from the edges: Begin by painting the edges and any intricate areas with a smaller brush, ensuring that every detail is covered.
- Paint the tabletop: Using a larger brush, apply the paint to the tabletop in smooth, even strokes. Work in small sections, always following the direction of the wood grain.
- Consistent coverage: Pay attention to achieving consistent coverage across the entire surface. Make sure no areas are left thin or streaky. If necessary, go back and touch up any spots that may have been missed.
- Smooth out any imperfections: Keep an eye out for drips, bubbles, or brush marks. If you notice any, use your brush to smooth them out immediately.
- Allow the second coat to dry: Let the second coat dry completely, following the manufacturer’s instructions for drying time. The drying time may be similar to the first coat, but it’s important to refer to the specific paint used.
The second coat of paint will provide a more vibrant and professional-looking finish to your coffee table. The additional layer helps to achieve better coverage and durability. Take care to allow the paint to dry fully before moving on to the next step.
While waiting for the second coat to dry, clean your brushes and prepare for the final steps of sealing and protecting the paint.
Read more: How To Make A Wood Pallet Coffee Table
Step 9: Allowing the Second Coat to Dry
Once you have applied the second coat of paint to your coffee table, it’s crucial to allow it to dry completely. Proper drying ensures that the paint cures and hardens, resulting in a durable and beautiful finish. Here are some important points to consider during this step:
- Refer to the paint can instructions: Different paint types and brands have varying drying times, so it’s important to follow the manufacturer’s instructions for the recommended drying time. Typically, latex-based paints can take a few hours to dry, while oil-based paints may require overnight drying.
- Provide adequate ventilation: Maintain good airflow in the room to expedite the drying process. Open windows or use fans to increase air circulation. However, avoid direct exposure to sunlight as it can cause the paint to dry unevenly or fade.
- Minimize contact: During the drying process, avoid touching or moving the coffee table. Even minor contact can leave marks or smudges on the surface.
- Check for tackiness: To determine if the second coat has dried completely, gently touch a small, inconspicuous area of the painted surface. If it feels dry and no paint transfers, it’s likely ready for the next steps. However, if it feels tacky or paint comes off on your finger, allow more drying time before proceeding.
Remember to exercise patience during this step to ensure a flawless and long-lasting finish. While waiting for the second coat to dry, clean your brushes and prepare for the final steps of sealing and protecting the paint.
Step 10: Finishing Touches – Sealing and Protecting the Paint
Once the second coat of paint has dried completely, it’s time to add the finishing touches to your beautifully painted coffee table. Sealing and protecting the paint not only enhances its longevity but also ensures that your coffee table withstands daily wear and tear. Follow these steps to seal and protect the paint on your coffee table:
- Choose a protective finish: Select a clear topcoat or sealer that is compatible with the type of paint you used. Water-based polyurethane is a popular choice for wood furniture, offering durability and resistance to stains and scratches. Polyacrylic and lacquer are also suitable options depending on your preferences and needs.
- Read the instructions: Carefully read the instructions on the protective finish product to ensure proper application. Follow any specific recommendations on drying times and application techniques.
- Prepare your workspace: Place your coffee table on a protected surface, such as a drop cloth or newspapers, to avoid any accidental spills or drips on your floors or furniture.
- Apply the protective finish: Use a brush or a foam applicator to apply an even coat of the protective finish to the entire surface of the coffee table. Work in the same direction as the wood grain for a smooth application. Avoid applying too much sealer or creating drips.
- Allow the sealer to dry: Follow the recommended drying time specified by the product manufacturer. Typically, it will take a few hours for the sealer to dry, but this may vary depending on the specific product.
- Lightly sand (optional): If desired, you can lightly sand the dried sealer with fine-grit sandpaper to achieve an extra-smooth finish. Ensure that you clean the surface thoroughly afterward to remove any dust particles.
- Apply additional coats (optional): Depending on the level of protection you desire, you can repeat the process of applying the protective finish for an additional coat or as recommended by the manufacturer.
Once the protective finish is dry and cured, your coffee table will be ready to use and enjoy. The sealing and protecting step ensures that your painted surface stays vibrant and well-preserved, even with regular use.
Congratulations! You have successfully painted and protected your wood coffee table, transforming it into a stunning centerpiece for your living room. Sit back, relax, and admire your DIY masterpiece!
Conclusion
Congratulations on completing the journey of transforming your old and worn-out wood coffee table into a beautiful and stylish centerpiece for your living room! By following the step-by-step guide outlined in this article, you have learned how to paint a wood coffee table with precision and achieve a professional-looking finish.
Gathering the necessary supplies, preparing the coffee table surface, sanding it properly, applying primer, choosing the right paint, and layering multiple coats have all contributed to the creation of a stunning new piece of furniture. Sealing and protecting the paint with a protective finish adds durability, ensuring that your coffee table maintains its beauty and withstands everyday use.
Remember, throughout this process, attention to detail and patience are key. Proper cleaning, sanding, and drying times ensure a smooth canvas for the paint to adhere to. Choosing high-quality materials and paint, as well as working in a well-ventilated area, ensure a long-lasting and visually appealing result.
So, now that you have successfully painted and protected your coffee table, it’s time to style it with your favorite decor pieces, such as a vase of fresh flowers, decorative books, or a tray of candles. Let your newly rejuvenated coffee table take center stage and become a focal point in your living room.
Don’t forget to sit back, relax, and enjoy the fruits of your labor. Not only have you given a new lease of life to an old piece of furniture, but you have also added your personal touch to your living space.
Thank you for joining us on this DIY furniture makeover journey. We hope this guide has empowered you to unleash your creativity and transform more pieces of furniture in the future.
Happy crafting and may your painted coffee table bring joy and style to your living room for years to come!
Frequently Asked Questions about How To Paint A Wood Coffee Table
Was this page helpful?
At Storables.com, we guarantee accurate and reliable information. Our content, validated by Expert Board Contributors, is crafted following stringent Editorial Policies. We're committed to providing you with well-researched, expert-backed insights for all your informational needs.


0 thoughts on “How To Paint A Wood Coffee Table”