Articles
How To Paint Wood Furniture White
Modified: November 1, 2024
Learn how to transform your wood furniture into a stunning white masterpiece with our step-by-step guide. Perfect for creating a fresh and modern look in any space.
(Many of the links in this article redirect to a specific reviewed product. Your purchase of these products through affiliate links helps to generate commission for Storables.com, at no extra cost. Learn more)
Introduction
When it comes to interior design, few things can transform the look and feel of a space like furniture. And if you’re looking to give your wooden furniture a fresh new look, painting it white can be a fantastic option. Not only does it bring a sense of brightness and lightness to a room, but it also gives a timeless and versatile appeal. Whether you have an old piece of furniture that needs a makeover or you simply want to incorporate the popular white furniture trend into your home, painting wood furniture white can be a simple and cost-effective way to achieve your desired look.
While painting wood furniture white may seem like a straightforward task, there are essential steps you need to follow to ensure a successful outcome. In this article, we will guide you through the entire process, from choosing the right materials to adding the finishing touches.
By the end of this article, you’ll have the knowledge and confidence to take on any wood furniture painting project and achieve a beautiful white finish that will revitalize your space.
Key Takeaways:
- Transform your space by painting wood furniture white. Follow the steps for proper preparation, choosing the right paint, and adding protective finishes to achieve a professional and long-lasting result.
- Enjoy the satisfaction of rejuvenating your space with freshly painted wood furniture. Take your time, be patient, and embrace your creativity to create a beautiful and personalized piece that adds elegance to your home.
Read more: How To White Wash Wood Furniture
Materials Needed
Before you begin, gather all the necessary materials for the project. Having everything prepared in advance will make the painting process smoother and more efficient. Here are the essential materials you’ll need:
- Wood furniture: Choose the piece you want to paint white. It could be anything from a table, chair, dresser, or even a bookshelf. Ensure that the piece is in good condition and free from major damages.
- Sandpaper: Get different grits of sandpaper, such as coarse, medium, and fine. The specific grits will depend on the condition of your furniture and the level of smoothness you desire.
- Tack cloth: Use a tack cloth to remove dust and debris from the furniture surface after sanding. It helps create a clean and smooth surface for painting.
- Primer: Invest in a good-quality primer that is specifically formulated for wood surfaces. The primer will provide a smooth base, enhance the adhesion of the paint, and prevent stains or bleed-through.
- White paint: Choose a high-quality paint suitable for furniture, preferably with a satin or semi-gloss finish. Look for a white shade that complements your interior style and desired aesthetic.
- Paintbrushes: Have a selection of paintbrushes of different sizes and shapes. A flat brush is ideal for large surfaces, while a smaller, angled brush is useful for detailed areas and edges.
- Painter’s tape: Use painter’s tape to protect any areas you don’t want to paint, such as hardware, glass, or decorative accents.
- Drop cloths or newspapers: Cover the surrounding area with drop cloths or old newspapers to protect it from paint splatters.
- Paint tray or container: Pour the paint into a paint tray or container for easy access and application.
- Protective finish: Consider applying a protective finish, such as polyurethane or varnish, to protect the painted surface from scratches and wear over time.
- Clean cloth and water: Keep a clean cloth and water nearby to wipe away any spills or mistakes during the painting process.
- Respirator mask and gloves: Protect yourself by wearing a respirator mask and gloves to avoid inhaling paint fumes and to keep your hands clean.
Gather these materials before you begin, and you’ll be well-prepared to paint your wood furniture white and achieve a stunning transformation.
Preparing the Furniture
Before you start painting your wood furniture white, it’s crucial to properly prepare the piece. By taking the time to clean and sand the surface, you’ll ensure better paint adhesion and a smoother, more professional-looking finish. Here’s what you need to do:
- Clear the workspace: Begin by clearing a well-ventilated area to work on your furniture. It’s best to choose a space that is free from dust, debris, and excessive moisture.
- Remove any hardware or accessories: If your furniture has any hardware, such as knobs, hinges, or pulls, remove them using a screwdriver. This will help you achieve a cleaner and more even paint job.
- Clean the surface: Use a clean cloth and warm soapy water to clean the surface of the furniture. Remove any dust, grease, or dirt that may have accumulated over time. Wipe it down thoroughly and allow it to dry completely before moving on to the next step.
- Make any necessary repairs: Inspect the furniture for any visible damages or imperfections. If there are any scratches, dents, or holes, use wood filler to repair them. Follow the instructions on the wood filler packaging and allow it to dry completely before proceeding.
- Smooth the surface: Once the wood filler is dry, use sandpaper to smooth out the repaired areas as well as any rough or uneven spots on the furniture. Start with a coarse-grit sandpaper and gradually move to finer grits for a more polished finish. Sand in the direction of the wood grain to avoid creating visible scratches.
- Wipe away dust: After sanding, use a tack cloth to remove any dust or debris from the surface. Make sure the furniture is completely clean before moving on to the next step.
Properly preparing your wood furniture sets the foundation for a successful painting project. By following these steps, you’ll create a clean and smooth surface that allows the paint to adhere better and ensures a professional-looking finish.
Sanding the Surface
Once you have prepared the furniture by cleaning it and making any necessary repairs, the next step in painting wood furniture white is to sand the surface. Sanding is crucial as it helps create a smooth and even canvas for the paint to adhere to. Here’s how to sand the surface effectively:
- Start with coarse-grit sandpaper: Begin by using coarse-grit sandpaper, such as 80 or 100 grit, to remove the top layer of the existing finish or paint. Sand in the direction of the wood grain, applying gentle pressure. This rougher grit will help eliminate any roughness, imperfections, or glossiness on the surface.
- Transition to medium-grit sandpaper: After using the coarse-grit sandpaper, switch to medium-grit sandpaper, such as 120 or 150 grit. This will further refine the surface and smoothen out any remaining imperfections left by the coarse grit. Continue sanding in the direction of the wood grain until you achieve a consistently smooth surface.
- Finish with fine-grit sandpaper: To achieve a pristine finish, finish off by sanding the surface with fine-grit sandpaper, such as 220 grit. This final sanding step will remove any fine scratches or blemishes left by the previous grits and create a velvety-smooth surface.
- Don’t forget the edges and corners: While sanding, pay attention to the edges and corners of the furniture. Use sandpaper or sanding blocks to reach these areas and ensure they are as smooth as the rest of the surface. A small sanding sponge can also be helpful for getting into tight spaces.
- Remove sanding residue: After sanding, use a clean cloth or tack cloth to remove any sanding residue from the surface. This step is essential to create a clean surface for paint application.
Sanding the surface of your wood furniture is a crucial step in achieving a professional-looking and long-lasting white paint finish. It helps not only in smoothing out imperfections but also in promoting better paint adhesion. Take your time and ensure that the entire surface is properly sanded before moving on to the next step.
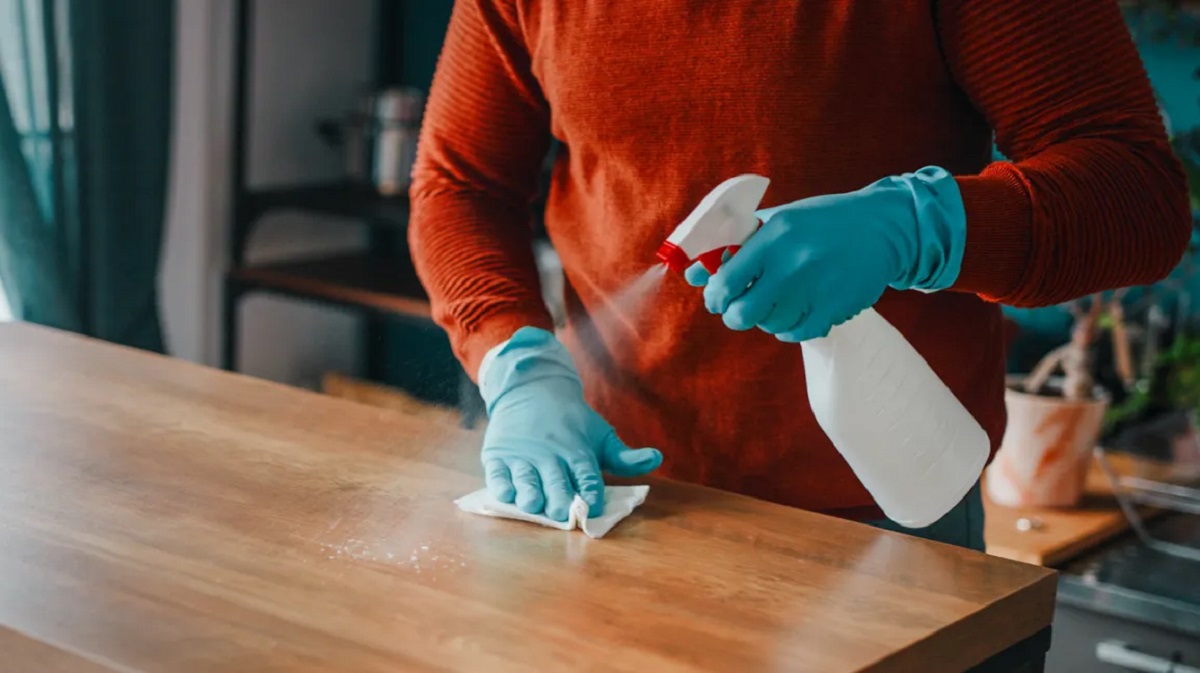
Cleaning the Furniture
After sanding the surface of the furniture, it’s important to thoroughly clean it before proceeding with the painting process. Cleaning the furniture removes any remaining dust, debris, or sanding residue, ensuring a clean surface for the paint to adhere to. Follow these steps to effectively clean your furniture:
- Use a clean cloth and warm soapy water: Prepare a mixture of warm water and mild dish soap. Dip a clean cloth into the soapy water and wring out any excess liquid. Gently wipe down the surface of the furniture, ensuring you cover all areas. Pay extra attention to any crevices, corners, or decorative details.
- Remove tough stains or grime: For stubborn stains or grime that doesn’t come off with soapy water, you may need to use a stronger cleaner. Take caution and make sure to use a cleaner that is safe for your furniture’s material. Follow the instructions on the cleaner and use a soft cloth or sponge to clean the affected areas.
- Rinse with clean water: Once you have cleaned the furniture, rinse off any soapy residue by wiping it down with a cloth dampened in clean water. This step is crucial to prevent any soap residue from interfering with the paint adhesion.
- Dry the furniture: After rinsing, use a clean cloth to dry the furniture thoroughly. Make sure there is no remaining moisture on the surface before proceeding with the next steps of the painting process.
Cleaning the furniture is an essential step to ensure a successful paint application. By removing dust, debris, and any contaminants, you create a clean surface that allows the paint to adhere properly and produce a smooth and professional finish. Take your time during this step to ensure the furniture is clean and dry before moving on to the next stage of the painting process.
Read more: How To Paint Outdoor Wood Furniture
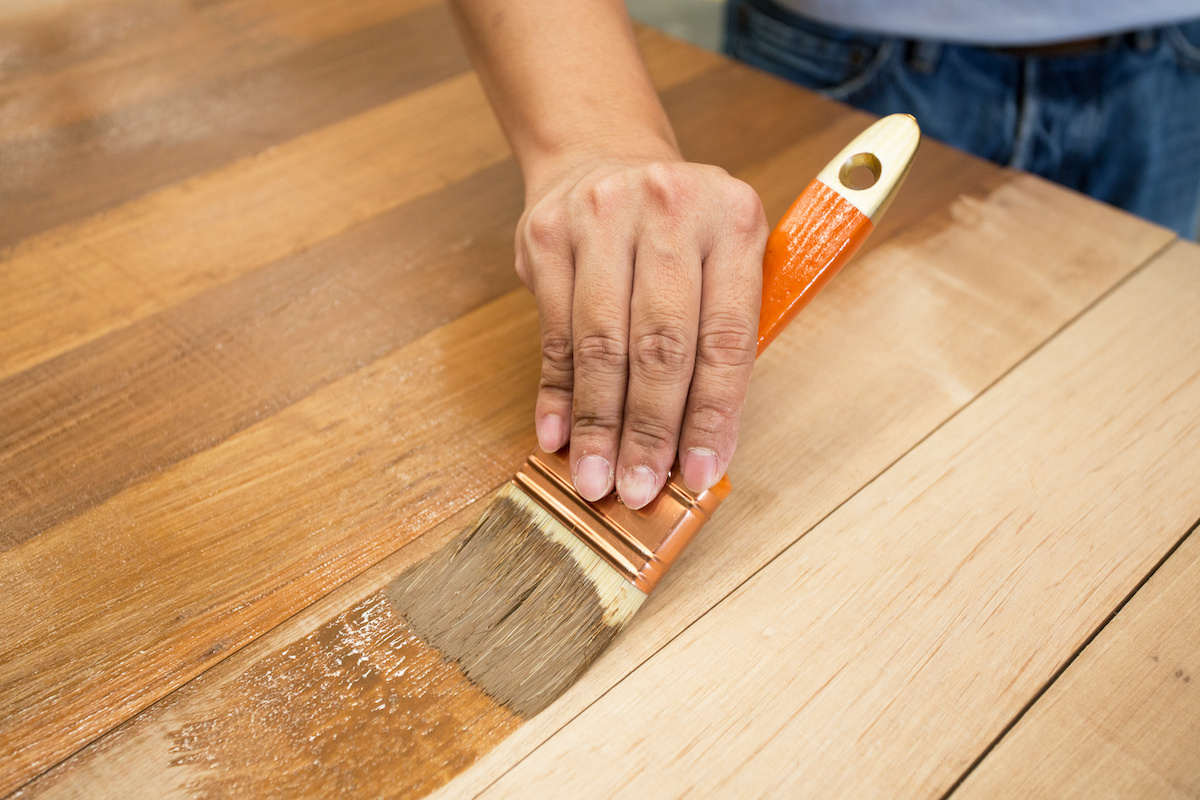
Applying Primer
Once the furniture is clean and dry, the next step in painting wood furniture white is to apply a primer. Primer serves as a base coat that helps the paint adhere better, improves the durability of the finish, and prevents any stains or discoloration from bleeding through the paint. Follow these steps to apply primer to your furniture:
- Choose the right primer: Select a primer specifically formulated for wood surfaces. Look for a primer that is compatible with the type of paint you’ll be using and is suitable for furniture applications.
- Prepare the primer: If the primer requires stirring or shaking, follow the manufacturer’s instructions to ensure it is well-mixed and ready for use.
- Protect surrounding areas: Use painter’s tape to mask off any areas you don’t want to prime, such as glass, hardware, or decorative accents. This will help you achieve clean and defined edges.
- Apply the primer: Pour a small amount of primer into a paint tray or container. Dip a brush into the primer and tap off any excess. Start by applying the primer to the larger surface areas of the furniture using long, even strokes in the direction of the wood grain. Work your way around the furniture, ensuring even coverage. For detailed or hard-to-reach areas, use a smaller brush or a foam brush for better precision.
- Smooth out brush strokes: After applying the primer, use a dry brush or foam brush to lightly smooth out any visible brush strokes. This will help create a more uniform and professional-looking finish.
- Allow the primer to dry: Follow the manufacturer’s instructions for the recommended drying time of the primer. Depending on the type of primer used, it may take anywhere from a few hours to overnight. Ensure that the primer is completely dry before moving on to the next step.
- Lightly sand the primer: Once the primer is dry, use fine-grit sandpaper, such as 220 grit, to lightly sand the surface. This step helps create a smoother surface for the paint and ensures better adhesion.
- Remove sanding residue: Use a clean cloth or tack cloth to remove any sanding residue from the surface. Make sure the furniture is clean and free from any debris before proceeding to the next stage of the painting process.
Applying a primer is a crucial step in achieving a professional and long-lasting paint finish on your wood furniture. It provides a smooth and even base for the paint and enhances its adhesion properties. Take your time during this step to ensure proper coverage and drying of the primer before proceeding to the next steps of the painting process.
Choosing the Right White Paint
When it comes to painting wood furniture white, choosing the right shade of white paint is essential. The right white can transform your furniture and create the desired aesthetic for your space. Here are some factors to consider when selecting the perfect white paint:
Undertones:
White paint can have different undertones, such as warm (yellow or beige), cool (blue or gray), or neutral. Consider the overall color scheme of your room and the existing furniture to determine whether you want a white with warm or cool undertones. Neutral whites can be versatile and pair well with various design styles.
Finish:
White paint comes in different finishes, such as matte, satin, or semi-gloss. Matte finishes have a flat, non-reflective look, while satin and semi-gloss finishes offer a slight sheen. Consider the level of durability and maintenance required for your furniture when choosing the finish. Keep in mind that higher sheen finishes may show imperfections more prominently.
Read more: How To Spray Paint Wood Furniture
Sampling:
It’s always a good idea to test paint samples on a small, inconspicuous area of the furniture or on a spare piece of wood. Viewing the color in the actual light and surroundings of your space will give you a better understanding of how it will look once applied to the entire furniture piece.
Quality:
Invest in a high-quality paint suitable for furniture refinishing. Higher-quality paints often provide better coverage, durability, and a smoother finish. Look for specialty furniture paints or paints designed for trim or cabinets, as they have a tougher formula that can withstand daily use.
Application:
Consider the method of application when choosing your paint. Brushes are great for smaller or detailed areas, while a foam roller can provide a smooth finish on larger surfaces. Some paints are formulated for brush application, while others may work better with a roller or sprayer.
Considerations:
Lastly, it’s crucial to consider your personal preferences and the overall style you want to achieve. Whether you prefer a bright, crisp white or a softer, off-white shade, choose a color that aligns with your vision for the piece and the space it will be placed in.
By considering these factors and taking the time to choose the right white paint, you can ensure that your furniture transformation is a success. Experiment with different shades and finishes to find the perfect white that will enhance the beauty of your wood furniture and complement your existing décor.
Read more: How To Remove Paint On Wood Furniture
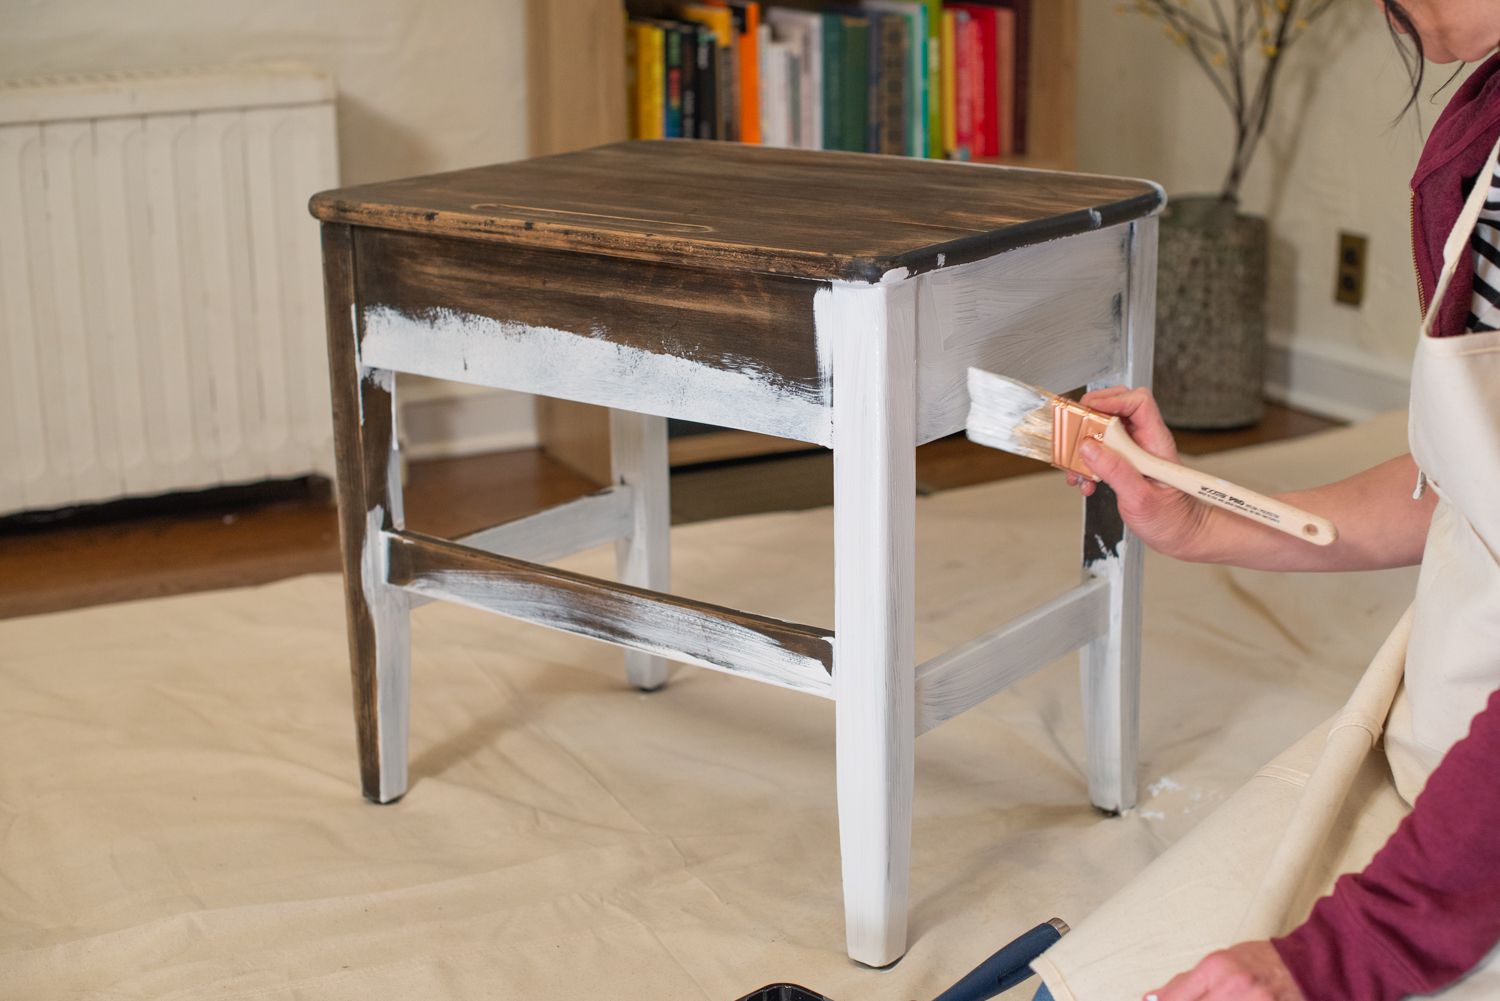
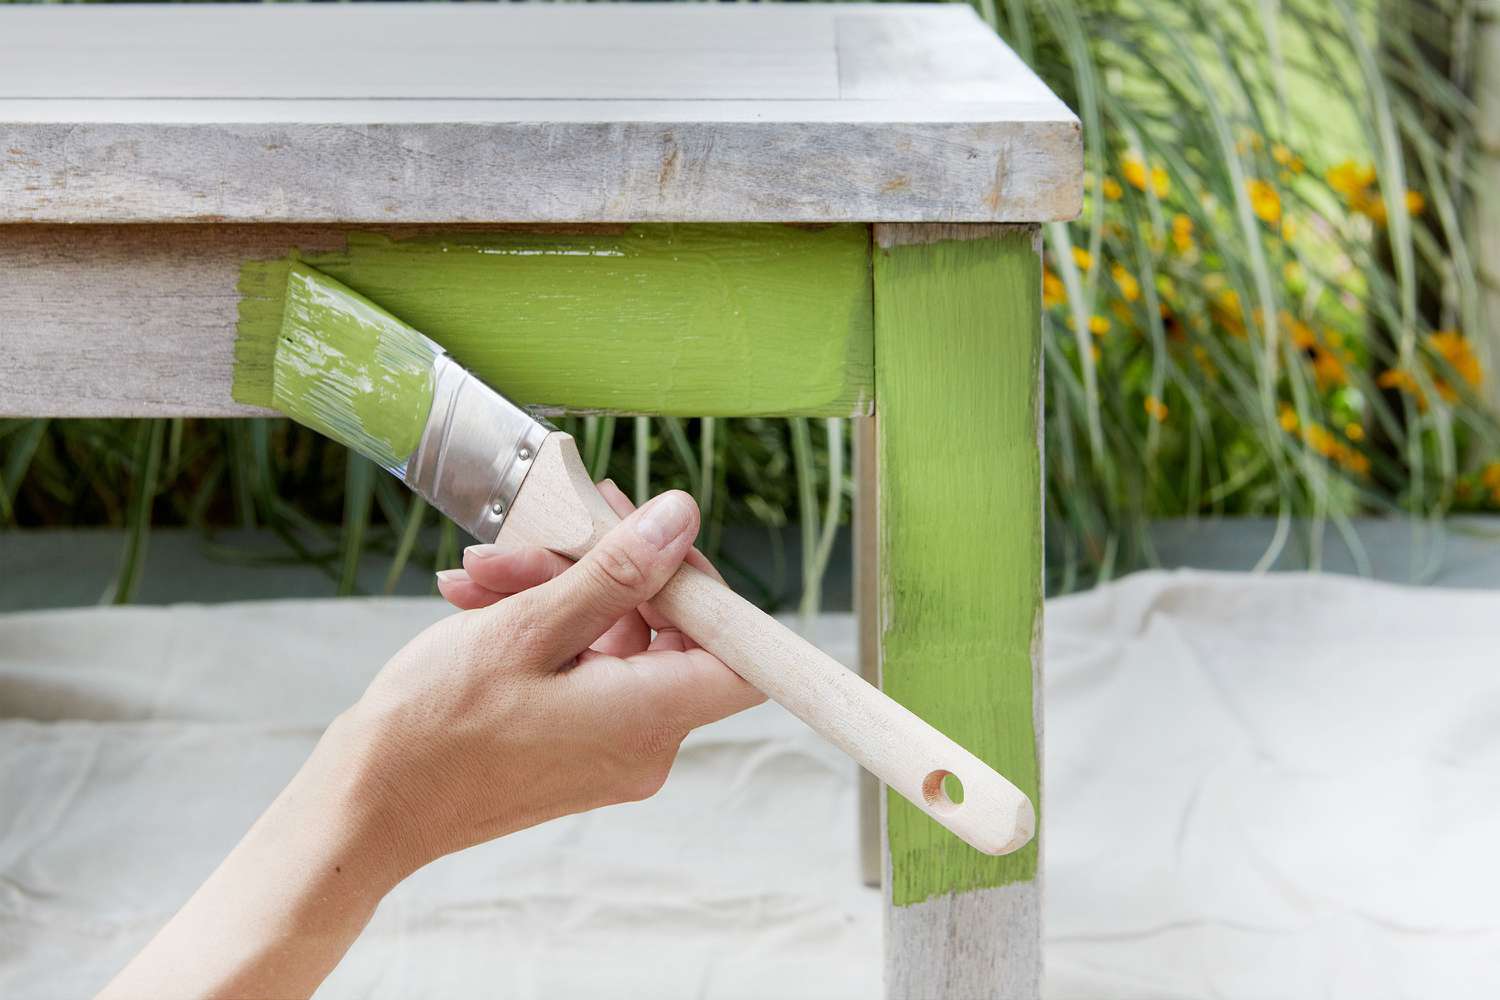
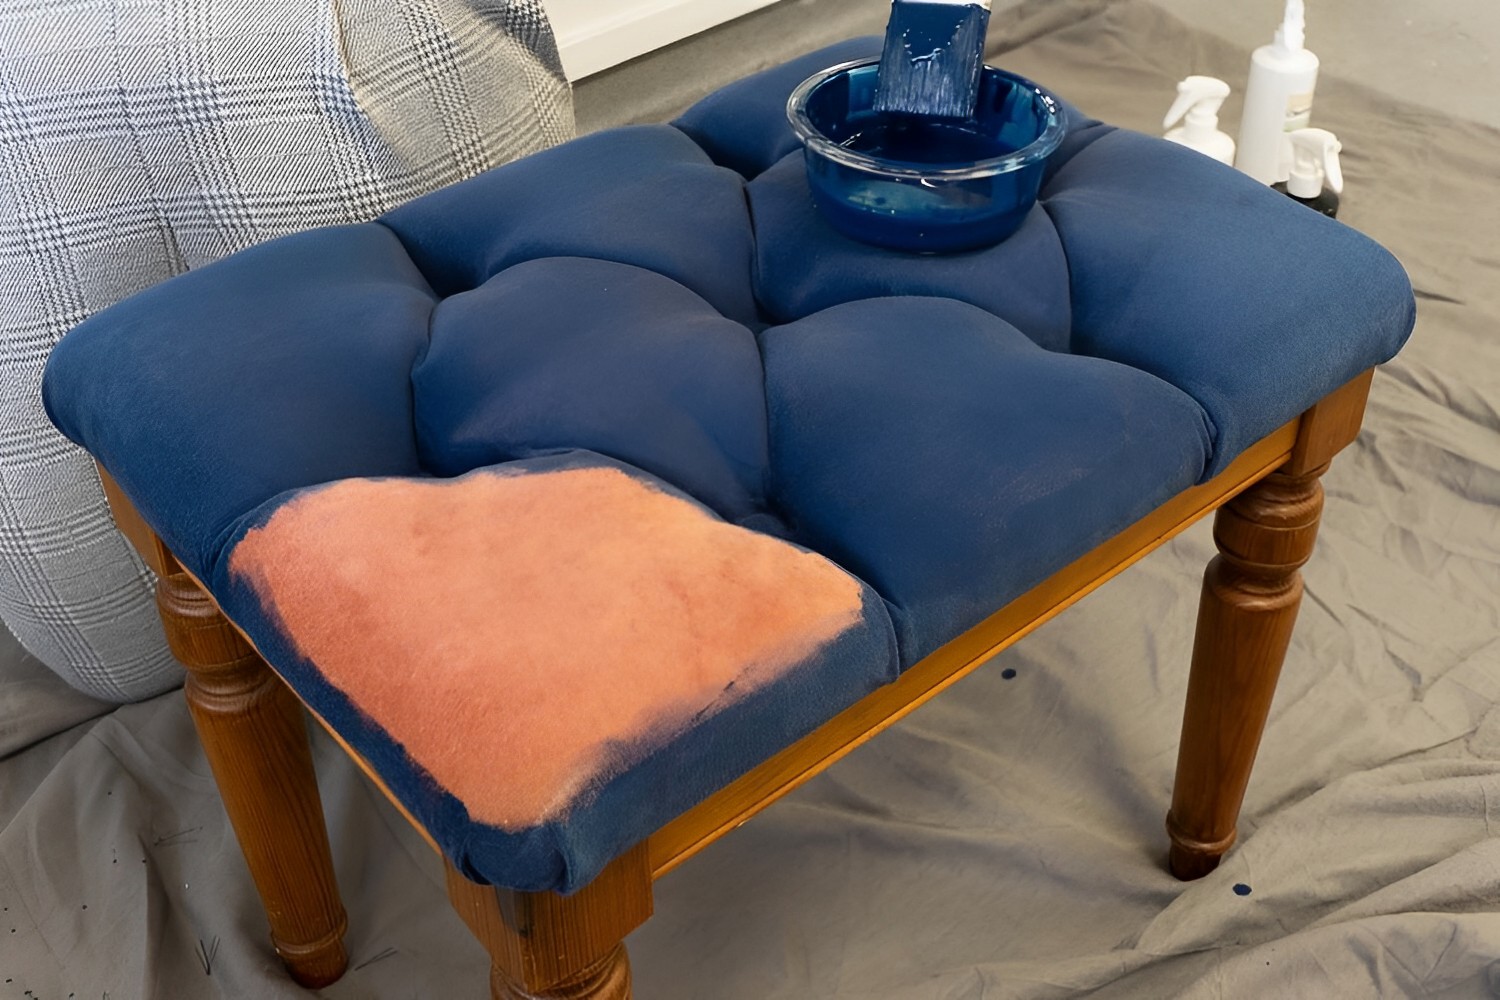
Applying the First Coat
Now that you have prepared the furniture, applied primer, and chosen the perfect white paint, it’s time to start painting. Applying the first coat of paint is an exciting step that brings your vision to life. Follow these steps to ensure a smooth and even application:
- Prepare the paint: Stir the paint thoroughly to ensure an even consistency. If the paint is too thick, add a small amount of water or paint thinner, following the manufacturer’s instructions. Avoid adding too much, as it can affect the paint’s coverage and durability.
- Protect surrounding areas: Use painter’s tape to mask off any areas that you don’t want to paint, such as glass, hardware, or decorative accents. This will help you achieve clean and defined edges.
- Begin painting: Start with a small brush or a brush suitable for the size of the furniture and the details of the piece. Dip the brush into the paint, tapping off any excess on the side of the paint container or tray.
- Apply the paint: Start painting from the top of the furniture, working your way down. Use long, smooth strokes in the direction of the wood grain, applying an even coat of paint. Avoid excessive brushing or going over the same area repeatedly, as it can create visible brush marks or uneven coverage.
- Cover all surfaces: Ensure that you cover all surfaces of the furniture, including edges, corners, and crevices. Take your time to achieve even coverage and a consistent color throughout.
- Watch for drips or pooling: Keep an eye out for any drips or pooling of paint and smooth them out with the brush. This will help prevent uneven drying and eliminate any unsightly marks.
- Allow the first coat to dry: Follow the drying time recommended by the paint manufacturer. It’s crucial to allow the first coat to dry completely before applying additional coats. This will help prevent smudging or lifting of the paint.
Applying the first coat of paint sets the foundation for the transformation of your wood furniture. Take your time and ensure even coverage, paying attention to details and hard-to-reach areas. Allow the first coat to dry completely, and once dry, assess the overall coverage and determine if another coat is needed. With each coat, the white color will become more vibrant and the furniture will start to take on the desired look you envisioned.
Sanding Between Coats
Once the first coat of paint has dried, it’s time to take an important step in achieving a professional finish: sanding between coats. Sanding between coats helps to smooth out any imperfections, such as brush marks or uneven surfaces, and promotes better adhesion for subsequent coats. Follow these steps to sand between coats effectively:
- Inspect the painted surface: Before sanding, carefully examine the painted surface for any flaws or rough areas. Keep an eye out for brush strokes, drips, or dust particles that may have settled on the surface during the drying process.
- Choose the right sandpaper: Select a fine-grit sandpaper, such as 220 or 320 grit, for sanding between coats. The fine grit will help gently smooth the surface without removing too much paint.
- Sand lightly: Using light pressure, sand the entire painted surface in the direction of the wood grain. Focus on the areas that may have imperfections or roughness. The goal is to create a smooth and even surface for the next coat of paint.
- Remove sanding residue: After sanding, use a clean cloth or tack cloth to remove any sanding residue from the surface. This step ensures that the furniture is clean and ready for the next coat of paint.
- Dust off the surface: To further eliminate any lingering dust or particles, use a soft brush or a lint-free cloth to gently dust off the surface. This step helps create a clean canvas for the next coat of paint.
Sanding between coats is a crucial step in achieving a flawless and professional-looking finish on your painted wood furniture. It helps to smooth out imperfections and create a seamless result. Take your time during this step and ensure that the surface is clean and free from any dust or debris before proceeding with the next coat of paint.
Applying the Final Coat
After sanding between coats and ensuring a smooth and clean surface, it’s time to apply the final coat of paint to your wood furniture. The final coat will bring your furniture to its desired white finish and provide a protective layer. Here’s how to apply the final coat:
- Prepare the paint: Stir the paint thoroughly to ensure an even consistency. If necessary, add a small amount of water or paint thinner following the manufacturer’s instructions. Avoid adding too much, as it can affect the paint’s coverage and durability.
- Protect surrounding areas: Use painter’s tape to mask off any areas such as glass, hardware, or decorative accents that you don’t want to paint. This will help you achieve clean and defined edges.
- Begin painting: Start painting from the top of the furniture, working your way down. Use long, smooth strokes in the direction of the wood grain, applying an even coat of paint. Take care to cover all surfaces, edges, corners, and crevices.
- Apply a smooth and even finish: Pay attention to brush strokes or drips and smooth them out as you go. Work systematically to ensure consistent coverage and minimize visible brush marks. Avoid applying too much pressure or overworking the paint, which can lead to an uneven finish.
- Allow the final coat to dry: Follow the drying time recommended by the paint manufacturer for the final coat. It’s crucial to allow the paint to dry completely before moving or using the furniture. This will help prevent any smudges or damage to the finish.
Applying the final coat of paint is a satisfying step as you see your wood furniture transform with a fresh and pristine white finish. Take your time, ensure even coverage, and pay attention to details. It’s important to allow the final coat to dry completely before considering any additional steps.
Once the paint has dried, step back and admire the new and refreshed look of your wood furniture. The final coat not only provides a beautiful white finish but also adds protection and durability to the painted surface. By following these steps, you can achieve a professional and long-lasting result that enhances the aesthetic of your space.
Adding a Protective Finish
After applying the final coat of paint to your wood furniture, you may want to consider adding a protective finish to further enhance its durability and longevity. A protective finish creates a barrier that shields the painted surface from everyday wear and tear, making it easier to clean and maintain. Here are a few options for adding a protective finish to your freshly painted furniture:
Read more: How To Paint Wood Furniture: An Expert Guide
Polyurethane:
Polyurethane is a popular choice for protecting painted furniture. It is available in different finishes, such as matte, satin, or gloss. It forms a clear and durable coating that guards against scratches, stains, and water damage. Apply polyurethane using a brush or foam applicator, following the manufacturer’s instructions for drying times and number of coats required.
Clear Protective Wax:
Another option is to use a clear protective wax. Wax adds a subtle sheen to the painted surface and provides a protective layer. Apply a thin layer of wax using a clean cloth, working it into the paint in a circular motion. Allow the wax to dry for the recommended time, and then buff the surface gently to achieve a smooth and lustrous finish.
Varnish:
If you prefer a more traditional finish, you can opt for varnish. Varnish creates a hard and durable surface coating that safeguards the paint and adds a glossy sheen. Apply varnish using a brush or foam applicator, following the manufacturer’s instructions for drying times and application techniques.
Water-Based Polyacrylic:
For a non-yellowing and low-odor option, you can choose a water-based polyacrylic sealer. It provides similar protection as polyurethane but dries clear and doesn’t yellow over time. Apply the sealer using a brush, foam applicator, or sprayer, ensuring even coverage and following the manufacturer’s instructions for drying times and number of coats required.
Before applying any protective finish, ensure that the final coat of paint is thoroughly dry. Additionally, follow the manufacturer’s instructions for the specific product you choose, as drying times and application techniques may vary. Adding a protective finish will not only safeguard your painted furniture but also add a touch of polish and professional quality to the overall appearance.
Remember to allow the protective finish to dry and cure completely before using or placing objects on the furniture. This will allow the finish to achieve its maximum hardness and provide the best possible protection for your painted wood furniture.
Read more: How To Paint Wood Furniture Without Sanding
Letting the Paint Cure
After completing the painting process and applying any necessary protective finishes, it’s crucial to allow the paint to cure properly. Curing is the process of drying and hardening the paint, ensuring that it reaches its maximum durability and longevity. Here’s what you need to know about letting the paint cure:
Follow the manufacturer’s instructions:
Every paint product has different curing times, which can vary based on factors such as temperature, humidity, and the type of paint used. It’s essential to read and follow the manufacturer’s instructions regarding the recommended curing time for the specific paint you used.
Initial drying vs. full cure:
While the paint may feel dry to the touch after a few hours, it doesn’t mean it’s fully cured. Initial drying refers to the time it takes for the paint to feel dry, but it may still be soft and susceptible to damage. Full cure, on the other hand, is the complete hardening and drying of the paint film, which may take several days or weeks.
Avoid heavy use or contact:
During the curing process, it’s important to avoid any heavy use or contact with the painted surface. This can help prevent any dents, scratches, or marks that may occur if the paint hasn’t fully hardened. Be mindful of placing objects, sitting, or handling the furniture with care during this time.
Provide proper ventilation:
Adequate ventilation is crucial for the paint to cure properly. Open windows or use fans to ensure good airflow in the room. This will help speed up the drying process and prevent any moisture from being trapped, which can hinder the curing process.
Be patient:
Patience is key when it comes to letting the paint cure. While it may be tempting to use or move the furniture sooner, it’s important to wait until the recommended curing time has passed. Rushing the process may result in a less durable finish and potentially compromise the hard work you put into painting the furniture.
By allowing the paint to cure completely, you will ensure a strong and durable finish that can withstand everyday use and cleaning. It’s worth the wait to achieve the best possible results and enjoy your painted wood furniture for years to come.
Reassembling the Furniture
After the paint has fully cured and you’re satisfied with the finish, it’s time to reassemble your furniture. Reassembling involves putting back any hardware, accessories, and components that were removed before painting. Follow these steps to safely and correctly reassemble your painted wood furniture:
- Organize the hardware: Gather all the screws, knobs, hinges, or any other hardware that was removed and set them aside in a safe place. It’s a good practice to keep them organized and labeled to avoid confusion during the reassembly process.
- Inspect the painted surface: Before reassembling, take a moment to closely inspect the painted surface. Check for any imperfections, touch-ups, or areas that may need additional attention. If needed, make any necessary touch-ups using the same paint you used for the furniture.
- Start with the main components: Begin by reattaching the main components of the furniture, such as table legs, chair backs, or dresser drawers. Refer to any instructions or reference photos you have for guidance on proper placement and alignment.
- Attach hardware: Once the main components are in place, proceed to attach the hardware. Use the screws or fittings to secure knobs, hinges, pulls, or any other accessories that were removed during the painting process. Ensure that they are tight but not overly tightened to avoid damaging the painted surface.
- Check for stability and functionality: After reassembling the furniture, check for stability and functionality. Test the drawers, doors, or any movable parts to make sure they operate smoothly. If anything feels loose or requires adjustment, make the necessary modifications before using the furniture.
- Clean and polish: Once the furniture is fully reassembled, give it a final cleaning and polish. Use a soft cloth or furniture cleaner to remove any dust or smudges that may have accumulated during the painting and reassembly process. This will help restore the shine and ensure that your freshly painted furniture looks its best.
Reassembling your painted wood furniture is the final step in the process of revitalizing and transforming your piece. Take your time during this step to ensure proper alignment and secure attachment of all components. Once the furniture is reassembled and polished, it’s ready to be placed back in its intended location and enjoyed in your home.
Congratulations on successfully completing the painting and reassembly of your wood furniture. By following these steps, you have created a beautiful and personalized piece that adds a fresh new look to your space. Enjoy your newly painted furniture for many years to come!
Conclusion
Painting wood furniture white is a rewarding project that can completely transform the look and feel of your space. By following the steps outlined in this guide, you can achieve a professional and long-lasting finish that enhances the beauty of your furniture. From preparing the furniture and sanding the surface to applying primer, choosing the right white paint, and adding protective finishes, each step plays a crucial role in the overall success of your project.
Throughout the process, it’s important to take your time, pay attention to detail, and be patient. Proper preparation, including cleaning and sanding, ensures better paint adhesion and a smoother surface. Applying primer creates a solid base for the paint and helps prevent any stains or bleed-through. Choosing the right shade of white paint and applying it in even coats bring your vision to life and give your furniture a fresh and updated look. Adding a protective finish provides durability and enhances the longevity of the painted surface.
Remember to allow the paint to cure fully before using or placing objects on the furniture. Proper curing ensures a durable and hardwearing finish that will stand the test of time. Finally, reassembling the furniture with care and attention to detail completes the process, allowing you to enjoy your newly painted masterpiece.
By incorporating your creativity, knowledge of furniture, and attention to detail, you can transform your wooden furniture into a beautiful and personalized piece that adds a touch of elegance to your home. So, grab your painting supplies and begin your furniture painting journey. Have fun, embrace your creativity, and enjoy the satisfaction of rejuvenating your space with freshly painted wood furniture!
Frequently Asked Questions about How To Paint Wood Furniture White
Was this page helpful?
At Storables.com, we guarantee accurate and reliable information. Our content, validated by Expert Board Contributors, is crafted following stringent Editorial Policies. We're committed to providing you with well-researched, expert-backed insights for all your informational needs.
0 thoughts on “How To Paint Wood Furniture White”