Home>Furniture>Bedroom Furniture>How To Make A Floor Bed Frame

Bedroom Furniture
How To Make A Floor Bed Frame
Modified: January 6, 2024
Learn how to make a stylish and functional floor bed frame for your bedroom with our step-by-step guide. Create a cozy and modern look with this DIY bedroom furniture project.
(Many of the links in this article redirect to a specific reviewed product. Your purchase of these products through affiliate links helps to generate commission for Storables.com, at no extra cost. Learn more)
Introduction
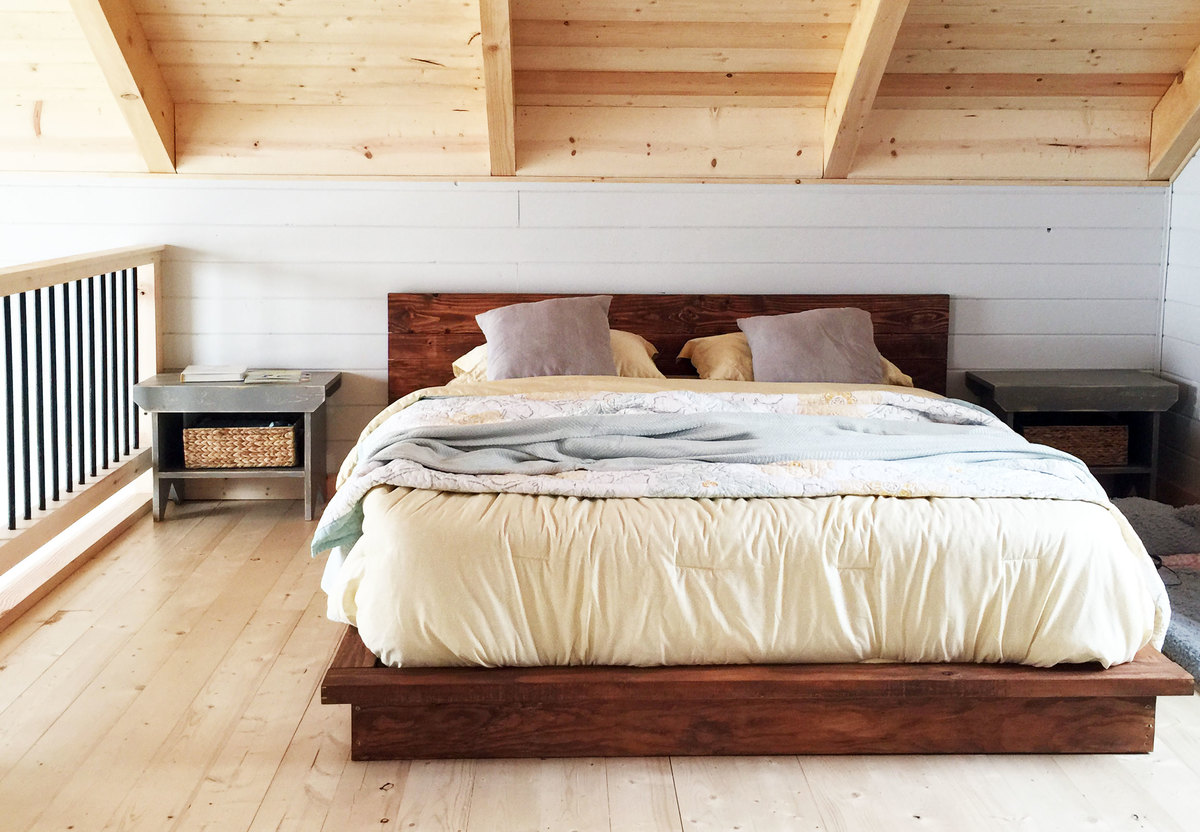
Welcome to our comprehensive guide on how to make a floor bed frame. If you’re looking for a low-profile and minimalist bed setup, a floor bed frame can be a great option. Not only does it provide a unique and modern aesthetic to any bedroom, but it also offers various benefits such as increased space, easy accessibility, and improved airflow for a comfortable sleep.
In this article, we will walk you through the step-by-step process of making your own floor bed frame. Whether you’re a DIY enthusiast or just looking to add a personal touch to your bedroom, this guide will give you all the information you need to create a functional and stylish floor bed frame.
Before we dive into the construction process, let’s talk about the materials you’ll need.
Key Takeaways:
- Create a stylish and space-saving floor bed frame with easy-to-follow steps and minimal materials, adding a modern touch to your bedroom while promoting a minimalist aesthetic and comfortable sleep experience.
- Enjoy the satisfaction of DIY-ing a personalized and functional floor bed frame, providing increased space, easy accessibility, and improved airflow for a refreshing and stylish sleeping space.
Read more: What Makes A Good Bed Frame
Materials Needed
Before you get started, gather the following materials:
- 2×4 lumber (quantity will depend on the size of your bed)
- Saw
- Sandpaper or a sander
- Drill
- Screws
- Measuring tape
- Paint or stain (optional)
- Slats or plywood (to support the mattress)
- Mattress
Make sure you have all of these materials on hand before starting the construction process. Now that you’re ready, let’s move on to the first step.
Step 1: Measure and Cut the Wood
The first step in making a floor bed frame is to measure and cut the wood for the frame. Start by determining the desired dimensions of your bed frame. This will depend on the size of your mattress and the space available in your bedroom.
Using a measuring tape, measure and mark the length and width of the bed frame on the 2×4 lumber. Make sure to add a few extra inches to account for the width of the mattress and any desired overhang. Once the measurements are marked, use a saw to carefully cut the lumber according to the marks.
Remember to wear protective eyewear and follow proper safety precautions when using the saw. Take your time to ensure accurate cuts and smooth edges.
Once all the pieces are cut, double-check their dimensions to ensure they match the desired size of the bed frame. Now that you have the individual components ready, it’s time to move on to the next step.
Step 2: Sand the Wood
After cutting the wood for your floor bed frame, the next step is to sand the surfaces for a smooth and polished finish. Sanding not only helps remove any rough edges or splinters but also creates a surface that is more comfortable to touch.
Start by using sandpaper or a sander to gently sand the cut edges and surfaces of the wood. Begin with a coarse-grit sandpaper to remove any imperfections and then gradually move to a finer-grit sandpaper for a smoother finish.
Take care to sand in the direction of the wood grain to avoid creating scratches or marks. Use light pressure and keep the sander or sandpaper moving in even strokes across the wood. Remember to wear a dust mask to protect yourself from inhaling any wood particles.
Continue sanding until all the surfaces feel smooth to the touch. Once you’re satisfied with the result, use a damp cloth or tack cloth to remove any dust or debris from the wood.
Sanding the wood not only improves the aesthetic appeal of your floor bed frame but also prepares the surface for painting or staining, if you choose to do so. With the wood now smooth and ready, let’s move on to the next step.
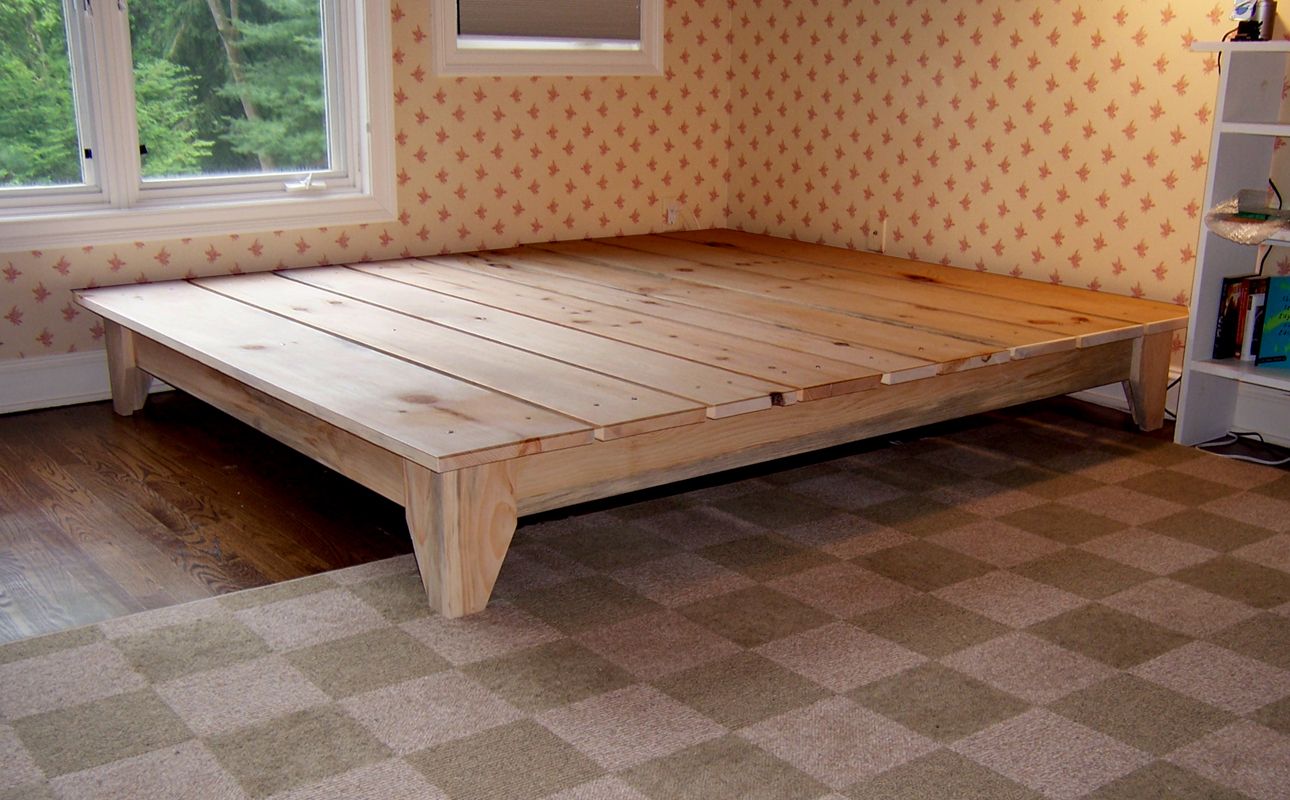
Step 3: Assemble the Frame
Now that you have your cut and sanded wood pieces, it’s time to assemble the frame of your floor bed. This step brings all the components together, forming the structure that will support your mattress.
Start by laying out the side rails (the longer pieces) parallel to each other on the floor. Place the shorter end pieces perpendicular to the side rails, creating a rectangular shape. Make sure the corners are square and align the edges properly.
Next, use a drill to make pilot holes where the pieces intersect. This will prevent the wood from splitting when you attach the screws. Once the pilot holes are drilled, attach the pieces together using screws. Make sure to countersink the screws so that they sit flush with the wood surface.
Continue this process for all four corners of the frame, ensuring the pieces are securely fastened. Once the frame is fully assembled, check its stability and make any necessary adjustments to ensure all joints are tight and secure.
By now, you should have a sturdy frame that is beginning to resemble a bed. In the next step, we’ll move on to adding legs to your floor bed frame to elevate it off the ground.
When making a floor bed frame, make sure to measure the mattress carefully to ensure a snug fit. Use sturdy materials like solid wood or metal for durability and support.
Read more: How To Make A Montessori Floor Bed
Step 4: Attach Legs to the Frame
To elevate your floor bed frame and create a more stable and balanced structure, it’s time to attach legs to the frame. The number of legs you’ll need will depend on the size of your bed and personal preference.
Start by measuring the desired height for your bed. Typically, floor bed frames have shorter legs to maintain the low-profile look. Once you have the measurements, cut the 2×4 lumber to the desired leg length.
Next, position the legs at each corner of the frame and mark the screw placement. It is recommended to attach the legs from the inside of the frame for a cleaner look.
Use a drill and screws to securely attach the legs to the frame. Make sure the legs are level and correctly aligned with the corners of the frame. Test the stability of the bed by gently rocking it from different sides to ensure that the legs are firmly attached.
Once the legs are securely fastened, give the frame a gentle shake to check for any wobbling or instability. If you notice any issues, adjust the legs or tighten the screws as needed.
Now that your floor bed frame has a solid foundation with attached legs, it’s time to move on to the next step: painting or staining the frame, if desired.
Step 5: Paint or Stain the Frame (Optional)
At this stage, you have the option to add a personal touch to your floor bed frame by painting or staining it. This step is entirely optional, but it can enhance the overall aesthetic appeal of the bed and complement your bedroom decor.
If you choose to paint the frame, start by applying a primer to ensure better adherence of the paint and to provide a smooth surface. Once the primer is dry, apply your chosen paint color evenly across the entire frame using a brush or roller. Consider using multiple coats for a more vibrant and professional-looking finish. Let each coat dry before applying the next one.
If you prefer a natural wood look, staining is a great option. First, ensure the surface is clean and free from dust or debris. Apply the wood stain using a brush or a clean cloth, following the manufacturer’s instructions. Wipe off any excess stain with a cloth and let it dry. If you prefer a darker shade, you can apply multiple coats of stain, allowing sufficient drying time in between.
Remember to work in a well-ventilated area and protect the surrounding surfaces from any potential paint or stain drips. Once the paint or stain is completely dry, you can proceed to the next step and install the slats on your frame.
Step 6: Install Slats
The next step in creating your floor bed frame is to install the slats. Slats provide support for your mattress and ensure a comfortable sleeping surface. The number and spacing of the slats will depend on the size of your bed and the recommended guidelines for mattress support.
Start by measuring the distance between the side rails of your bed frame. This will determine the length of the slats you need to cut. Use the appropriate tools to cut the slats from plywood or choose pre-cut slats that are readily available at home improvement stores.
Once you have the slats ready, place them evenly across the frame, parallel to the side rails. The spacing between the slats should be close enough to provide adequate support for the mattress, but not too close that it restricts air circulation. Aim for a spacing of around 2-3 inches between each slat.
Secure the slats to the side rails using screws or nails, ensuring they are firmly attached and won’t move or shift when the mattress is placed on top. Check the stability of each slat and make any necessary adjustments.
With the slats properly installed, your floor bed frame is almost complete. The final step is to place the mattress on the frame and make any necessary adjustments to ensure it fits securely and evenly.
Step 7: Place Mattress on the Frame
Congratulations! You’ve reached the final step in creating your floor bed frame. Now, it’s time to place the mattress on the frame and enjoy your newly constructed bed.
Start by carefully lifting your mattress and positioning it on top of the slats. Ensure that the mattress is centered and evenly distributed on the frame. Take a moment to adjust the position if needed, ensuring that there is an even overhang on all sides.
Gently press down on the mattress to check for any areas that may feel uneven or unsupported. If you notice any sagging or discomfort, you may need to add additional slats or adjust the existing ones to provide better support. Remember, the goal is to create a stable and comfortable sleeping surface.
Once the mattress is in place and feels secure, take a moment to step back and admire your handiwork. You’ve successfully created a stylish and functional floor bed frame that adds a unique touch to your bedroom.
Now, you can dress up your bed with your favorite bedding and pillows to create a cozy and inviting sleeping space. Enjoy the low-profile and minimalist design that a floor bed frame brings, as well as the benefits of increased space and easy accessibility.
Remember to periodically check the stability and condition of your floor bed frame, making any necessary repairs or adjustments as needed. With proper care, your floor bed frame will provide many nights of comfortable and restful sleep.
Thank you for following our comprehensive guide on how to make a floor bed frame. We hope you found this article helpful and inspiring. Sweet dreams!
Read more: How To Make A Bench Out Of A Bed Frame
Conclusion
Creating your own floor bed frame is not only a rewarding DIY project but also a practical and stylish addition to your bedroom. By following the steps outlined in this guide, you now have the knowledge and skills to construct a low-profile and minimalist bed platform that adds a touch of modernity to your space.
The materials needed are easily accessible, and the steps are straightforward to follow. Whether you choose to paint or stain the frame or keep it in its natural wood finish, the final result will be a personalized and functional piece of furniture.
A floor bed frame offers various benefits, including increased space and easy accessibility. It also provides excellent airflow for a comfortable and refreshing sleep experience. Furthermore, a floor bed frame promotes a minimalist aesthetic that can elevate the overall design of your bedroom.
Remember to take safety precautions throughout the construction process, such as wearing protective gear and working in a well-ventilated area. Take your time and ensure that each step is completed accurately for a sturdy and stable bed frame.
Once your floor bed frame is complete and the mattress is in place, you can enjoy the unique sleeping experience it provides. Whether you’re looking to create a cozy reading nook, accommodate guests, or simply embrace the minimalist lifestyle, a floor bed frame is a versatile and stylish choice.
We hope this guide has been informative and inspiring, helping you embark on your floor bed frame journey. Sweet dreams and happy DIY-ing!
Frequently Asked Questions about How To Make A Floor Bed Frame
Was this page helpful?
At Storables.com, we guarantee accurate and reliable information. Our content, validated by Expert Board Contributors, is crafted following stringent Editorial Policies. We're committed to providing you with well-researched, expert-backed insights for all your informational needs.


0 thoughts on “How To Make A Floor Bed Frame”