Furniture
How To Clean High Ceiling Chandelier
Modified: February 24, 2024
Learn how to efficiently clean your high ceiling chandelier with our expert tips and methods. Trust our furniture cleaning techniques to bring back its shine and beauty.
(Many of the links in this article redirect to a specific reviewed product. Your purchase of these products through affiliate links helps to generate commission for Storables.com, at no extra cost. Learn more)
Introduction
Having a high ceiling chandelier adds a touch of elegance and sophistication to any space. However, cleaning such a fixture can be a daunting task. With its intricate design and hard-to-reach areas, it’s important to understand the proper techniques and precautions to take when cleaning a high ceiling chandelier.
In this article, we will guide you through the step-by-step process of cleaning a high ceiling chandelier. We will provide you with a list of necessary supplies, safety precautions to take, and detailed instructions to ensure a thorough and effective cleaning.
Before we dive into the cleaning process, it’s important to note that if you don’t feel comfortable or confident in cleaning a high ceiling chandelier yourself, it’s always best to hire a professional. They have the experience and equipment to safely and efficiently clean your chandelier.
However, if you are up for the challenge and want to save some money, let’s get started!
Key Takeaways:
- Prioritize safety by turning off power, using a sturdy ladder, and wearing protective gear. Prepare the area, dust, clean, and reassemble the chandelier with patience and attention to detail for a sparkling and safe result.
- Regularly maintain and care for your chandelier by dusting, replacing bulbs, and following manufacturer’s guidelines. Consider professional maintenance for thorough cleaning and enjoy the elegance it brings to your space.
Read more: How To Clean Chandeliers On High Ceiling
Safety Precautions
Before you begin cleaning your high ceiling chandelier, it’s crucial to prioritize safety. Here are some important safety precautions to keep in mind:
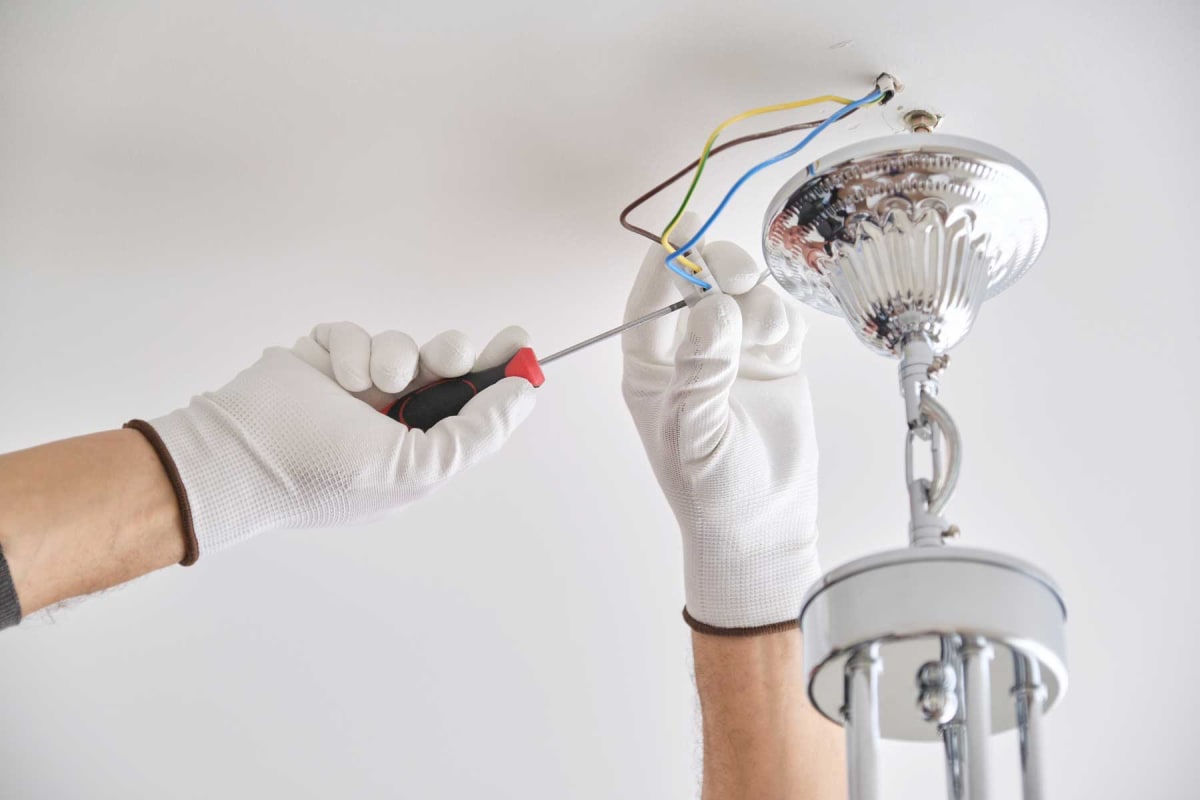
- Turn off the Power: The first and most important step is to turn off the power to the chandelier. This will ensure that you don’t accidentally get electrocuted while cleaning.
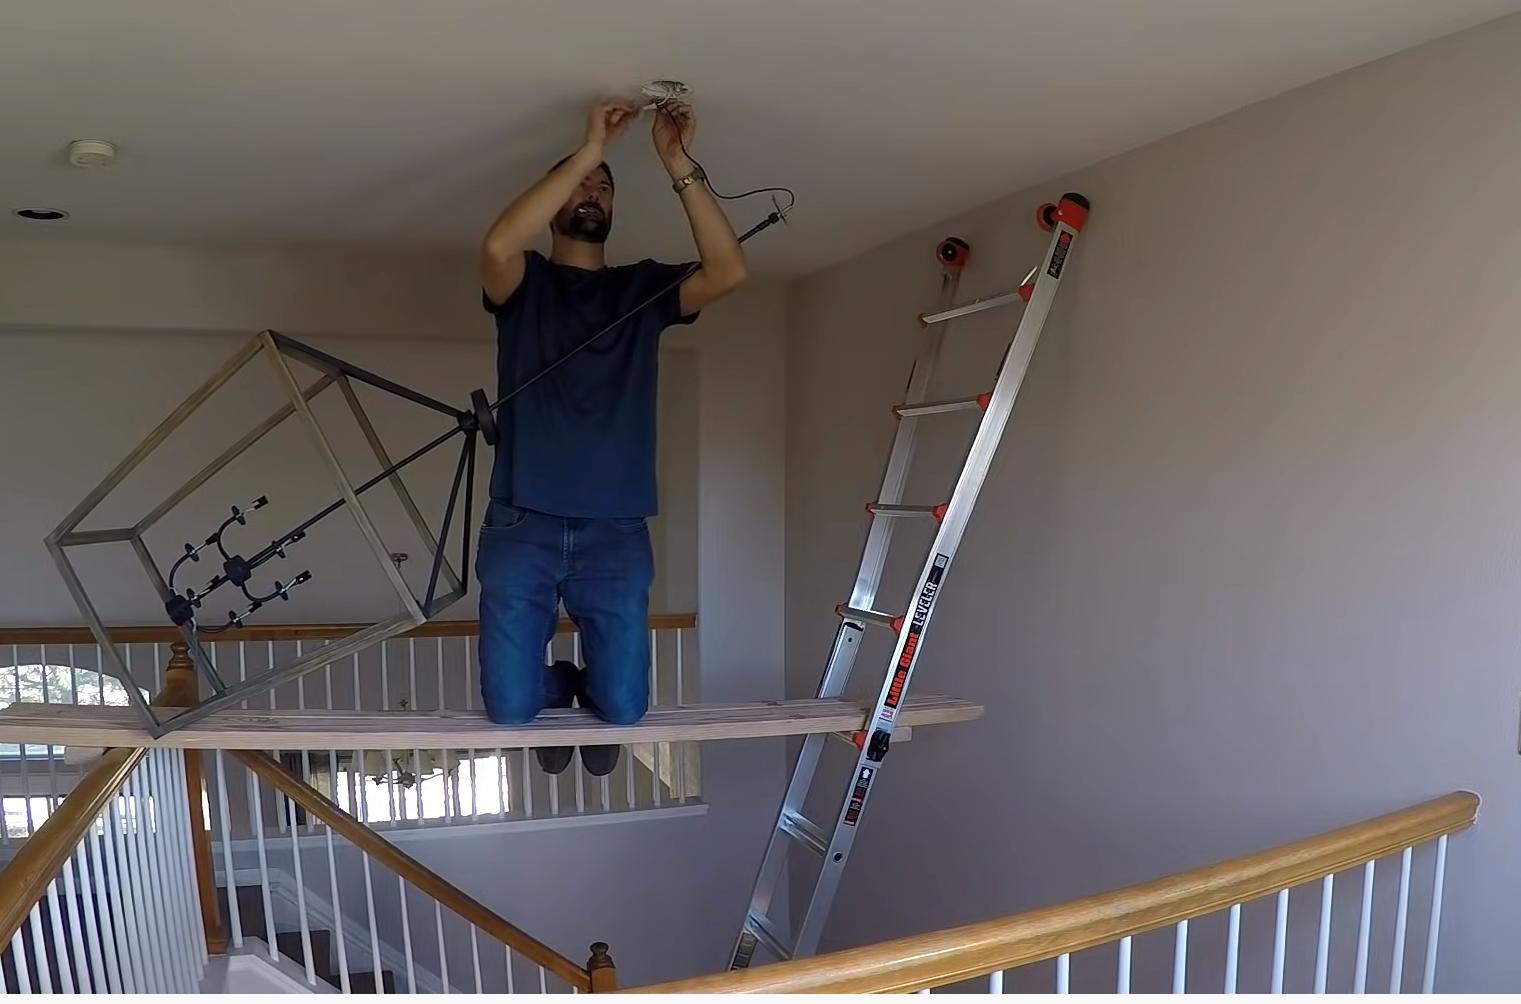
- Use a Sturdy Ladder: To reach the chandelier, you’ll need a sturdy ladder. Make sure the ladder is in good condition and placed on a level and stable surface. Have someone spot you while you climb the ladder for added safety.
- Protect Yourself: Wear protective gear such as safety glasses and gloves to prevent any injury from falling debris or cleaning solutions. Additionally, tie back loose hair and remove any jewelry that could get caught or damaged during the cleaning process.
- Secure the Area: Clear the surrounding area of any furniture, rugs, or other items that could cause a tripping hazard. Ensure that there are no obstacles that could impede your movement or potentially get damaged during the cleaning process.
- Turn off Nearby Fans: If you have any ceiling fans in the vicinity of the chandelier, make sure to turn them off. This will prevent the blades from spinning and causing accidents while you’re cleaning.
- Use Ladder Safety Measures: When climbing the ladder, maintain three points of contact at all times. This means having two feet and one hand, or two hands and one foot, on the ladder at all times. Avoid overreaching, as it will compromise your balance and stability.
- Follow Manufacturer’s Instructions: If your chandelier came with specific cleaning instructions from the manufacturer, be sure to follow them. Each chandelier may have unique requirements and guidelines for cleaning, so it’s important to adhere to them for safety and maintenance purposes.
By following these safety precautions, you can ensure a safe and secure environment while cleaning your high ceiling chandelier. As always, use your best judgment and prioritize your safety above all else.
Gathering the Necessary Supplies
Before you start cleaning your high ceiling chandelier, it’s essential to gather all the necessary supplies. Having everything on hand will make the cleaning process much more efficient and ensure that you have everything you need. Here are the supplies you’ll need:
- Step ladder or extension ladder: Depending on the height of your ceiling and the chandelier, you’ll need either a step ladder or an extension ladder. Make sure it’s sturdy and tall enough to reach the chandelier comfortably.
- Cleaning solution: Choose a mild, non-abrasive cleaning solution specifically designed for chandeliers. Avoid using harsh chemicals or abrasive cleaners, as they can damage the delicate finish of the fixture.
- Microfiber cloth or duster: Use a soft microfiber cloth or a duster with an extendable handle to remove dust and debris from the chandelier. This will help avoid scratching the surface or damaging any delicate parts.
- Bucket or basin: Fill a bucket or basin with warm water and a small amount of the cleaning solution. This will be used to dampen your cloth or duster for cleaning.
- Gloves: To protect your hands from any chemicals or sharp edges, wear a pair of gloves during the cleaning process.
- Optional: Disposable plastic drop cloth or tarp: If you want to protect the surrounding area from any dripping or falling debris, consider laying down a plastic drop cloth or tarp on the floor directly beneath the chandelier.
- Optional: Chandelier cleaning spray: Some manufacturers offer specialized chandelier cleaning sprays that are specifically formulated to dissolve dirt and grime. If available, consider using this product to enhance the cleaning process.
By having these supplies ready, you can streamline the cleaning process and ensure a thorough and effective job. Take a moment to gather all the items and double-check that you have everything before moving on to the next step.
Preparing the Area
Before you start cleaning your high ceiling chandelier, it’s important to prepare the area to ensure a smooth and hassle-free cleaning process. Taking the time to prepare the area will help protect your furniture, floors, and surrounding space from any potential damage. Follow these steps to prepare the area:
- Remove or cover furniture: If there is any furniture or valuable items directly beneath the chandelier, consider removing them from the area temporarily. This will prevent them from getting accidentally bumped or damaged during the cleaning process. If removing the furniture is not possible, cover it with a plastic drop cloth or tarp to protect it from any falling debris or cleaning solution.
- Turn off nearby lights: If there are any lights or lamps that are close to or in the same circuit as the chandelier, turn them off. This will prevent them from accidentally turning on while you are cleaning the chandelier, ensuring your safety.
- Secure the power switch: Use tape or a removable adhesive to secure the chandelier’s power switch in the “off” position. This will prevent anyone from accidentally turning on the chandelier while you are cleaning it. Alternatively, you can turn off the circuit breaker that controls the chandelier to ensure it won’t be powered on during the cleaning process.
- Protect the floor: Lay down a plastic drop cloth or tarp on the floor beneath the chandelier. This will catch any dripping cleaning solution or falling debris, preventing it from damaging your floor or carpet. Secure the edges of the drop cloth or tarp with tape or heavy objects to keep it in place.
- Ensure proper lighting: Before you start cleaning, make sure the room is well-lit. Natural daylight or additional lighting sources will help you see the chandelier more clearly and ensure that you don’t miss any spots while cleaning.
By taking these preparatory steps, you will create a safe and protected environment for cleaning your high ceiling chandelier. Taking the time to prepare the area will make the cleaning process easier and more efficient, allowing you to achieve the best results without any unnecessary accidents or damage. Now that the area is ready, it’s time to move on to the next step: dusting the chandelier.
Dusting the Chandelier
The first step in cleaning your high ceiling chandelier is to remove dust and debris from the fixture. Dusting not only enhances the appearance of the chandelier but also prepares it for the deeper cleaning that follows. Here’s how you can effectively dust your chandelier:
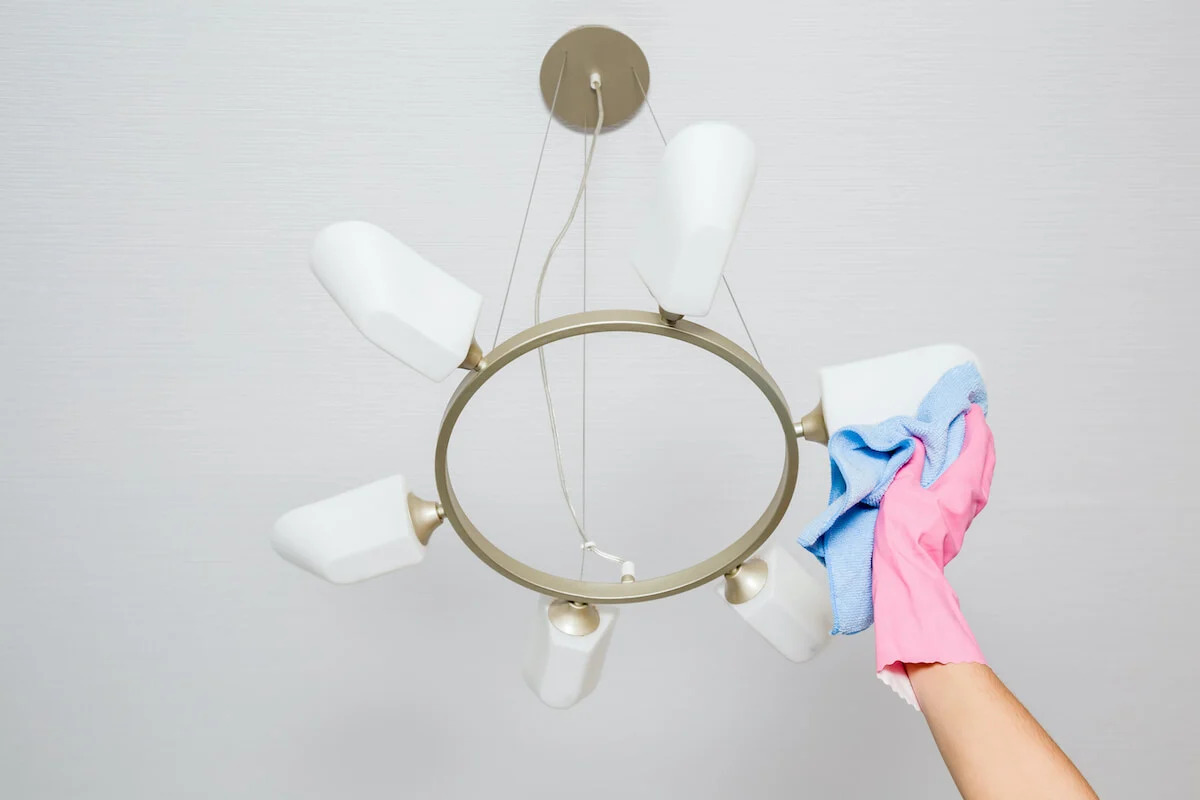
- Put on gloves: Before you begin, put on a pair of gloves to protect your hands from any sharp edges of the chandelier.
- Start from the top: Begin dusting the chandelier from the top and work your way down. This will prevent any dust or debris from falling onto previously cleaned areas.
- Use a microfiber cloth or duster: Gently wipe each part of the chandelier with a clean, dry microfiber cloth or duster. If your chandelier has intricate details, use a duster with a soft bristle brush attachment to reach those hard-to-access areas.
- Move in a circular motion: When wiping the chandelier, use a gentle circular motion to effectively remove dust. Avoid applying excessive pressure or rubbing too vigorously, as this can damage the delicate parts of the fixture.
- Pay attention to crystals or glass elements: If your chandelier has crystals or glass elements, be extra careful when dusting them. Use a soft, damp cloth to gently wipe the surfaces and restore their sparkle. Avoid using harsh cleaning solutions on these delicate elements.
- Be thorough: Take your time and ensure that you dust all visible surfaces of the chandelier, including the arms, decorative elements, and bulbs. Pay attention to any detailing or crevices, as these areas tend to accumulate more dust.
- Check for stubborn dirt: If you notice any stubborn dirt or grime that is not easily removed with dry dusting, mark those areas and move on to the next step. We will address them in the following section on cleaning the chandelier.
Dusting your high ceiling chandelier regularly can help maintain its overall cleanliness and shine. By removing dust and debris, you prepare the chandelier for a deeper clean and prevent any accumulation that could dull its appearance. Once you have thoroughly dusted the chandelier, it’s time to move on to the next step: cleaning the chandelier.
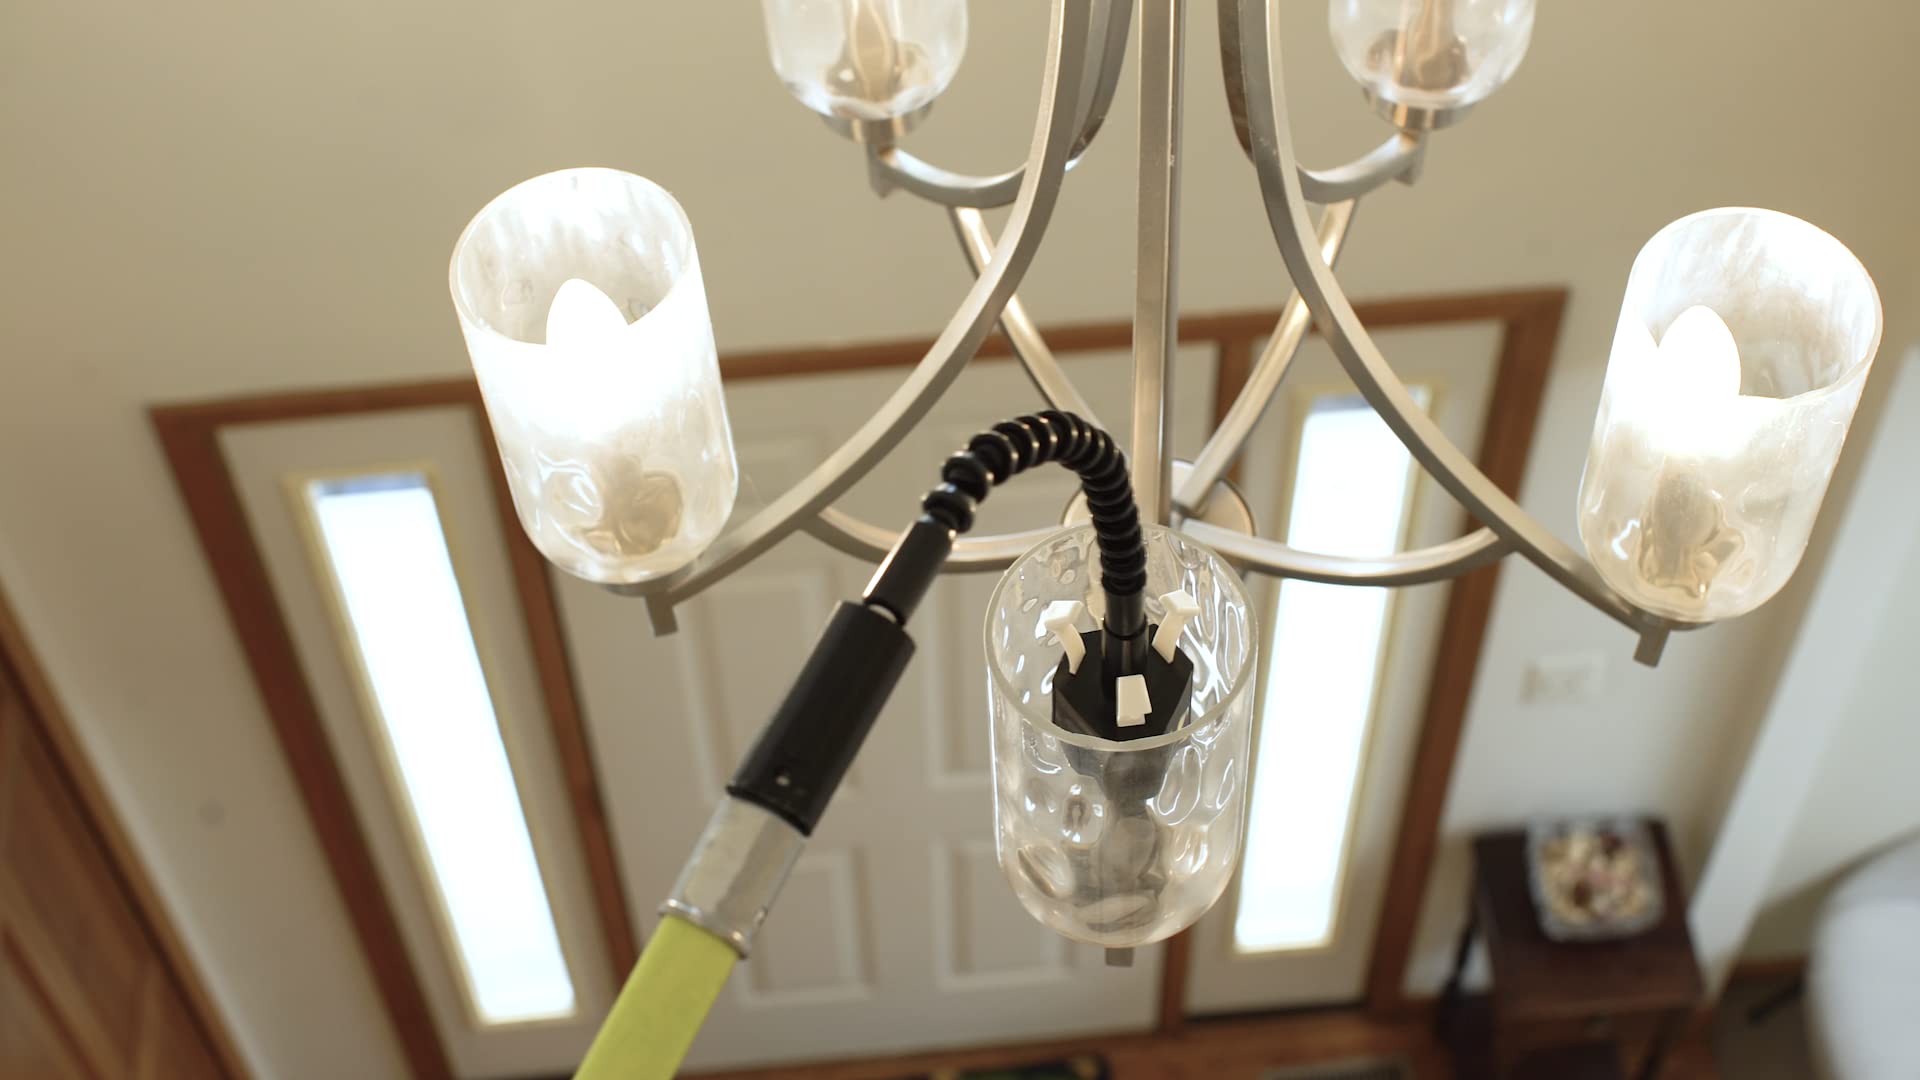
Use a telescoping duster or a microfiber cloth attached to an extendable pole to gently clean the chandelier. Avoid using harsh chemicals or abrasive materials that could damage the delicate surface.
Cleaning the Chandelier
Now that you have dusted your high ceiling chandelier, it’s time to move on to the next step: cleaning the chandelier. Cleaning will help remove any dirt, grime, or stuck-on residue that couldn’t be eliminated through dusting alone. Follow these steps to ensure a thorough and effective cleaning:
- Mix the cleaning solution: In a bucket or basin, mix warm water with a small amount of the chandelier cleaning solution. Follow the manufacturer’s instructions regarding the appropriate dilution ratio.
- Moisten the cloth or duster: Dip a clean microfiber cloth or duster into the cleaning solution. Wring out any excess liquid to avoid dripping and damaging the chandelier.
- Clean the chandelier: Starting from the top, gently wipe each surface and component of the chandelier with the damp cloth or duster. Move in a circular motion to ensure thorough cleaning. Pay attention to areas with stubborn dirt or grime and apply a little extra pressure if needed.
- Rinse the cloth or duster: As the cleaning solution accumulates dirt, rinse the cloth or duster in clean water and wring out any excess liquid. This will prevent transferring dirt back onto the chandelier and ensure the effectiveness of the cleaning process.
- Continue cleaning: Repeat the process of dampening the cloth or duster, cleaning the chandelier section by section, and rinsing the cloth as necessary. Take your time and be thorough to ensure all surfaces are properly cleaned.
- Dry the chandelier: After cleaning, allow the chandelier to air dry completely. Avoid using a hairdryer or any other heat source to expedite the drying process, as this can cause damage to the delicate components.
- Inspect for any remaining dirt: Once the chandelier is dry, inspect it carefully for any remaining spots of dirt, grime, or streaks. If needed, repeat the cleaning process on those specific areas until the chandelier is spotless and gleaming.
By following these steps, you can effectively clean your high ceiling chandelier and restore its beauty. Remember to work systematically, start from the top, and be patient during the cleaning process. Once you are satisfied with the cleanliness of the chandelier, you can proceed to the next step: removing and cleaning individual parts (if applicable).
Removing and Cleaning Individual Parts (if applicable)
Some high ceiling chandeliers have removable parts, such as crystals, glass elements, or decorative pieces, that require an additional level of cleaning. If your chandelier has these removable parts, follow these steps to safely remove and clean them:
- Refer to the manufacturer’s instructions: Before removing any parts, consult the manufacturer’s instructions or documentation that came with the chandelier. They may provide specific guidance on how to handle and clean individual components.
- Take photographs or make notes: Before you start removing any parts, take photographs or make notes of the original placement and arrangement. This will help you later when it’s time to reassemble the chandelier.
- Carefully remove each part: Gently detach the individual parts from the chandelier, taking care not to force or break them. Place each part in a designated container or tray to keep them organized and prevent any damage.
- Prepare a cleaning solution: Mix a mild cleaning solution in a separate container. Use warm water and a gentle cleaning agent recommended for the specific material of the removed parts, such as glass cleaner for glass elements or a delicate jewelry cleaner for crystals.
- Clean each part individually: Dip a soft cloth or brush into the cleaning solution and gently clean each removed part. Be cautious with delicate elements, applying only light pressure and avoiding abrasive materials that could scratch or damage the surface.
- Rinse and dry the parts: After cleaning, rinse each part thoroughly with clean water to remove any residue from the cleaning solution. Ensure all cleaning agents are completely removed. Then, dry the parts using a soft, lint-free cloth or allow them to air dry before reattaching them to the chandelier.
- Inspect and polish: Once the parts are dry, carefully inspect them for any remaining dirt or smudges. If needed, repeat the cleaning process. Finally, use a clean, dry cloth to gently polish each part to restore their shine.
With the individual parts thoroughly cleaned and dried, you can now move on to the next step: reassembling the chandelier (if applicable).
Reassembling the Chandelier (if applicable)
If you have removed individual parts from your high ceiling chandelier for cleaning, it’s now time to reassemble the fixture. Properly reassembling the chandelier ensures that all components are securely in place and restores its original aesthetic appeal. Follow these steps to smoothly reassemble your chandelier:
- Refer to your photographs or notes: Take out the photographs or notes you made earlier that show the original placement and arrangement of the chandelier parts. Use these references as a guide during the reassembly process.
- Start with the main body: Begin by reattaching the main body or structure of the chandelier. Make sure it is firmly connected and properly aligned according to the manufacturer’s instructions.
- Reattach crystals or glass elements: If your chandelier has crystals or glass elements, carefully reattach them one by one. Use any hooks, clips, or connectors provided to secure them in place. Double-check that each crystal or glass piece is properly aligned and hanging at the desired length.
- Reinstall decorative pieces: If your chandelier has any decorative pieces, such as ornamental accents or pendants, attach them according to your reference. Ensure they are evenly distributed and balanced throughout the chandelier for a visually appealing result.
- Tighten screws and connectors: As you reassemble the chandelier, make sure to tighten any screws or connectors that hold the parts together. Use a screwdriver or appropriate tool, taking care not to overtighten or damage the components.
- Test for stability: Once the chandelier is fully reassembled, gently shake it or give it a light tap to test its stability. Ensure that all parts are securely in place and that there are no loose connections or wobbling.
By following these steps and referring back to your documentation, you can effectively reassemble your high ceiling chandelier. Take your time and be patient during this process to ensure everything is properly aligned and secured. Once the chandelier is safely reassembled, it’s time to move on to the final touches and care.
Final Touches and Care
After cleaning and reassembling your high ceiling chandelier, there are a few final touches and ongoing care practices you can implement to maintain its beauty and functionality. Follow these steps to complete the cleaning process and ensure the longevity of your chandelier:
- Double-check for any remaining dirt: Take a moment to carefully inspect the entire chandelier for any remaining dirt, smudges, or streaks. If you notice any, use a clean, damp cloth to gently remove them.
- Polish the chandelier: Use a soft, dry cloth to give the chandelier a final polish. This will remove any fingerprints or smudges and restore its shine. Be gentle and avoid pressing too hard, especially on delicate parts.
- Replace any burnt-out bulbs: Check each bulb in the chandelier and replace any that have burnt out. Use the appropriate wattage and type of bulb recommended by the manufacturer. Remember to turn off the power before replacing the bulbs.
- Regularly dust and maintain the chandelier: Dust your high ceiling chandelier regularly to keep it looking its best. Use a microfiber cloth or duster to gently remove dust and debris from the surfaces. Additionally, consider implementing a routine maintenance schedule for a thorough cleaning every few months or as needed.
- Adhere to manufacturer’s guidelines: Pay attention to any specific care instructions or recommendations provided by the manufacturer. Follow these guidelines to ensure proper maintenance and to avoid compromising the chandelier’s warranty.
- Consider professional maintenance: While regular cleaning can be done by yourself, it may be a good idea to have your high ceiling chandelier professionally serviced and inspected periodically. Professionals have specialized tools and expertise to conduct a thorough cleaning and identify any issues that may require attention.
- Enjoy your sparkling chandelier: With your high ceiling chandelier clean, reassembled, and properly cared for, take a step back and admire the transformed space. Enjoy the beautiful illumination and ambiance it brings to your room.
By following these final touches and ongoing care practices, you can maintain the beauty and functionality of your high ceiling chandelier for years to come. Regular cleaning and maintenance will ensure that it continues to shine brightly and add a touch of elegance to your space.
+
Read more: How To Change A High Ceiling Chandelier
Conclusion
Cleaning a high ceiling chandelier may seem like a challenging task, but with the right techniques and precautions, it can be a manageable and rewarding process. By following the steps outlined in this article, you can safely and effectively clean your chandelier, restoring its beauty and ensuring its longevity.
Remember to prioritize safety by turning off the power, using a sturdy ladder, and wearing protective gear. Gathering the necessary supplies and preparing the area will make the cleaning process more efficient and protect the surrounding space from any potential damage.
Start by dusting the chandelier to remove surface debris, and then proceed with a gentle cleaning using a proper cleaning solution and soft cloth or duster. If applicable, remove and clean individual parts with care, making note of their original placement for reassembly.
Reassembling the chandelier requires patience and attention to detail, ensuring all components are securely attached and balanced. Finally, add the finishing touches by double-checking for any remaining dirt, polishing the chandelier, and implementing ongoing care practices such as regular dusting and bulb replacement.
By implementing these steps and following the manufacturer’s guidelines, you can maintain the beauty and functionality of your high ceiling chandelier for years to come. Whether it’s in a grand foyer, a formal dining room, or any other space, your sparkling chandelier will continue to enhance the ambiance and elegance of your home.
Remember, if you ever feel unsure or uncomfortable about cleaning your high ceiling chandelier yourself, it’s always best to consult a professional. They possess the experience, knowledge, and proper equipment to handle the task safely and efficiently.
So go ahead and embrace the challenge of cleaning your high ceiling chandelier, with the knowledge that the effort will result in a dazzling and radiant centerpiece that brings joy and beauty to your home.
Frequently Asked Questions about How To Clean High Ceiling Chandelier
Was this page helpful?
At Storables.com, we guarantee accurate and reliable information. Our content, validated by Expert Board Contributors, is crafted following stringent Editorial Policies. We're committed to providing you with well-researched, expert-backed insights for all your informational needs.


0 thoughts on “How To Clean High Ceiling Chandelier”