Articles
How To Change Light Bulb On High Ceiling
Modified: December 7, 2023
Looking for articles on how to change a light bulb on a high ceiling? Find step-by-step guides and tips for safely reaching and replacing light bulbs in high ceilings.
(Many of the links in this article redirect to a specific reviewed product. Your purchase of these products through affiliate links helps to generate commission for Storables.com, at no extra cost. Learn more)
Introduction
Changing a light bulb on a high ceiling can be a daunting task, especially if you don’t have the right tools or know the proper techniques. However, with some preparation and careful steps, you can safely and easily change a light bulb even in those hard-to-reach places. In this article, we will guide you through the process of changing a light bulb on a high ceiling, ensuring that you stay safe and get the job done efficiently.
Before you start, it’s important to note that working with electrical fixtures can be dangerous. If you’re not comfortable or confident in your abilities, it’s always best to hire a professional electrician to perform the task. Safety should always be your top priority.
That being said, if you’re up for the challenge, let’s dive into the steps and precautions you need to take to change a light bulb on a high ceiling.
Key Takeaways:
- Safety should always be the top priority when changing a light bulb on a high ceiling. Assess the height, gather necessary equipment, and follow safety precautions to ensure a safe and efficient process.
- Selecting the right light bulb is crucial for achieving the desired brightness, energy efficiency, and compatibility with the fixture. Consider wattage, bulb type, light output, and energy efficiency rating for an informed decision.
Read more: How To Change A High Ceiling Light Bulb
Safety Precautions
Before attempting to change a light bulb on a high ceiling, it’s crucial to take the necessary safety precautions. Here are some guidelines to follow:
- Ensure the power is turned off: Before starting any work on electrical fixtures, always switch off the power from the circuit breaker. This will prevent any potential accidents or electric shocks.
- Use a stable and secure ladder: Make sure you have a sturdy ladder that is tall enough to reach the light fixture. Ensure that the ladder is in good condition and on a stable surface. Consider using a ladder stabilizer to provide extra support and prevent wobbling.
- Wear appropriate safety gear: Protect yourself by wearing safety goggles to shield your eyes from debris that may fall during the process. Additionally, wear non-slip shoes to maintain a firm grip on the ladder and prevent any accidents.
- Have a spotter or assistant: When working on a high ceiling, it’s helpful to have someone assist you by holding the ladder steady or passing tools and equipment. This will enhance safety and make the task more manageable.
- Avoid overreaching: It’s crucial to maintain your balance and avoid overreaching while on the ladder. Overextending yourself can lead to loss of stability and potentially cause a fall or injury. Always position yourself securely on the ladder and move it as needed to access different areas.
- Inspect the fixture and surrounding area: Before starting the task, conduct a thorough inspection of the light fixture and its surroundings. Look for any signs of damage, loose connections, or potential hazards. If you notice anything unsafe, contact a professional electrician to address the issue.
By following these safety precautions, you can minimize the risks associated with changing a light bulb on a high ceiling. Remember, if you’re not comfortable or confident in your abilities, it’s best to seek professional help to ensure your safety.
Tools and Equipment Needed
Before you begin changing a light bulb on a high ceiling, make sure you have the necessary tools and equipment readily available. Here are some items you may need:
- Ladder: An extension ladder or a step ladder tall enough to reach the height of the ceiling.
- Ladder stabilizer: If possible, use a ladder stabilizer to provide extra stability and prevent the ladder from damaging the walls or ceiling.
- Safety goggles: Protect your eyes from debris or dust that may fall during the process.
- Gloves: Wear gloves to protect your hands and give you a better grip while handling the light bulb and fixtures.
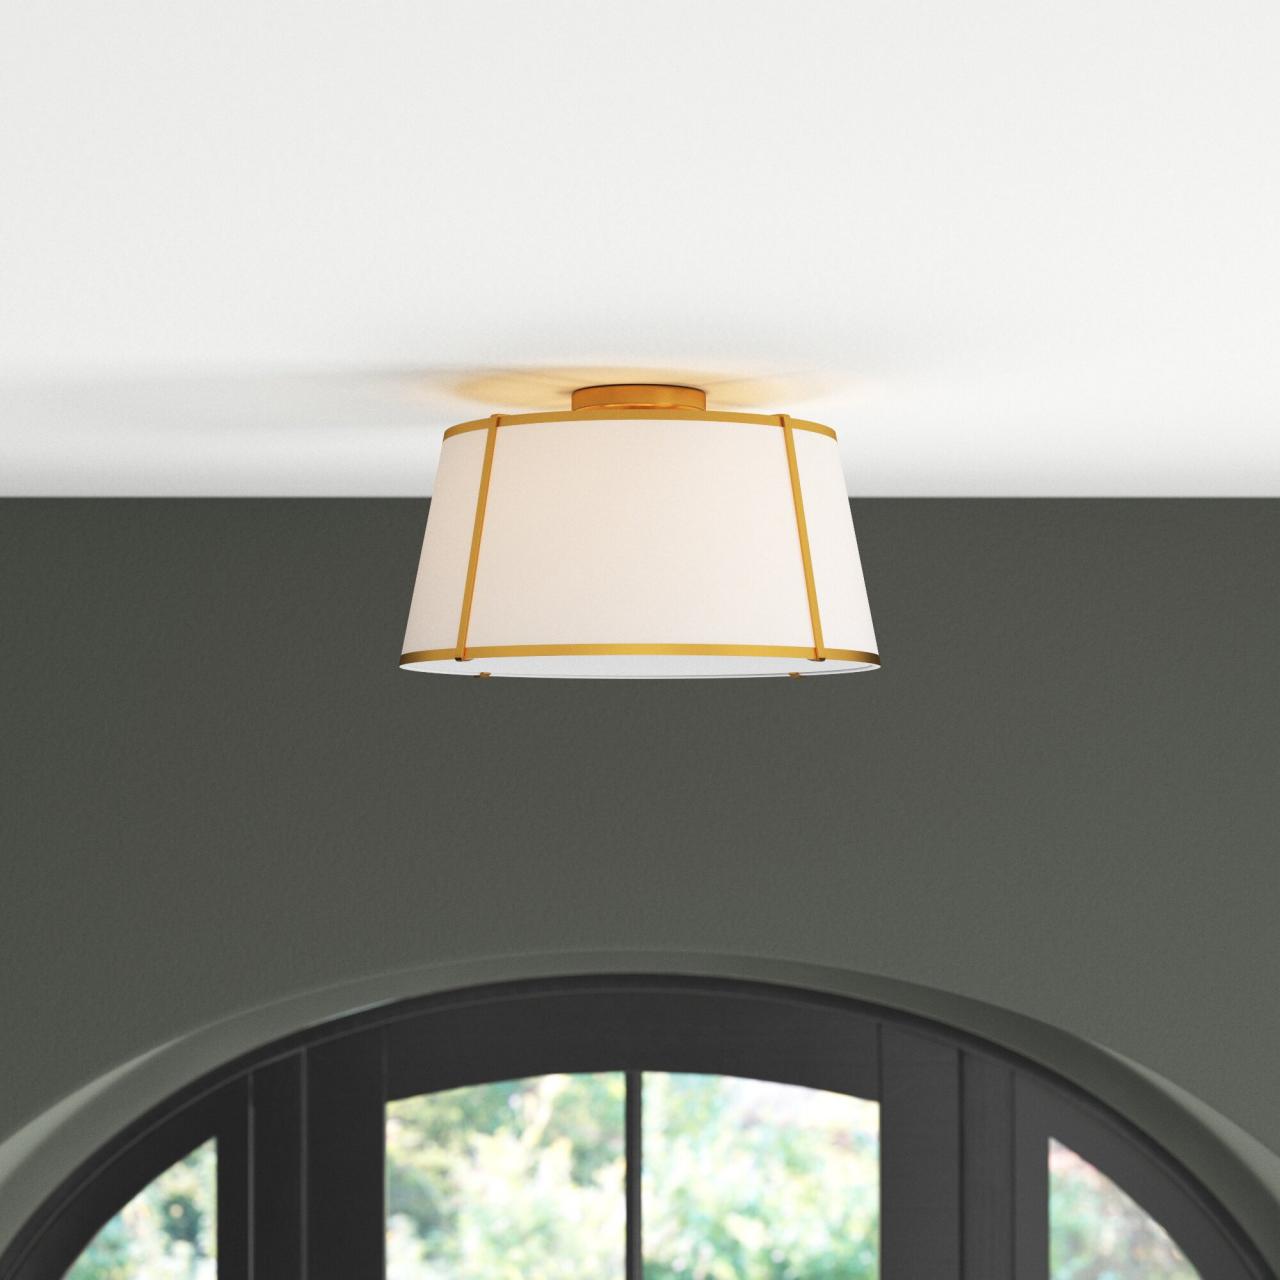
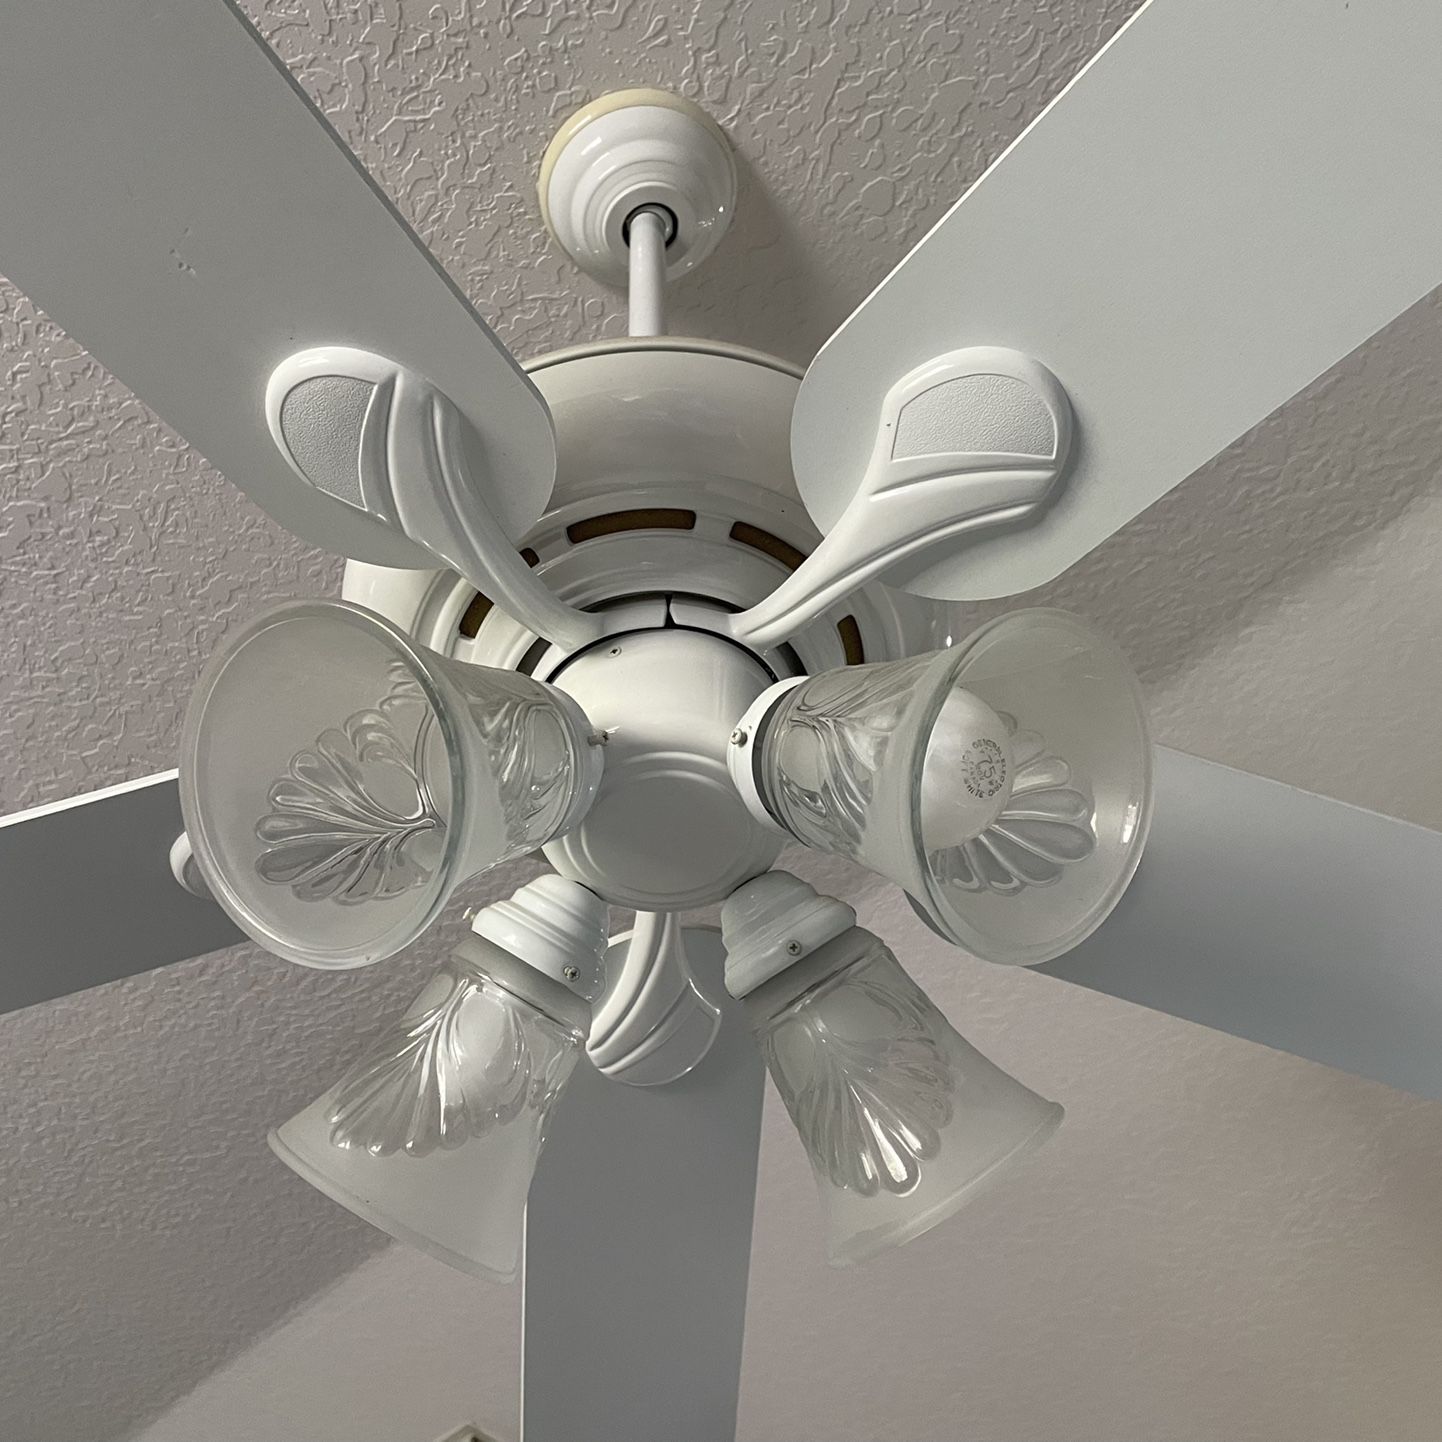
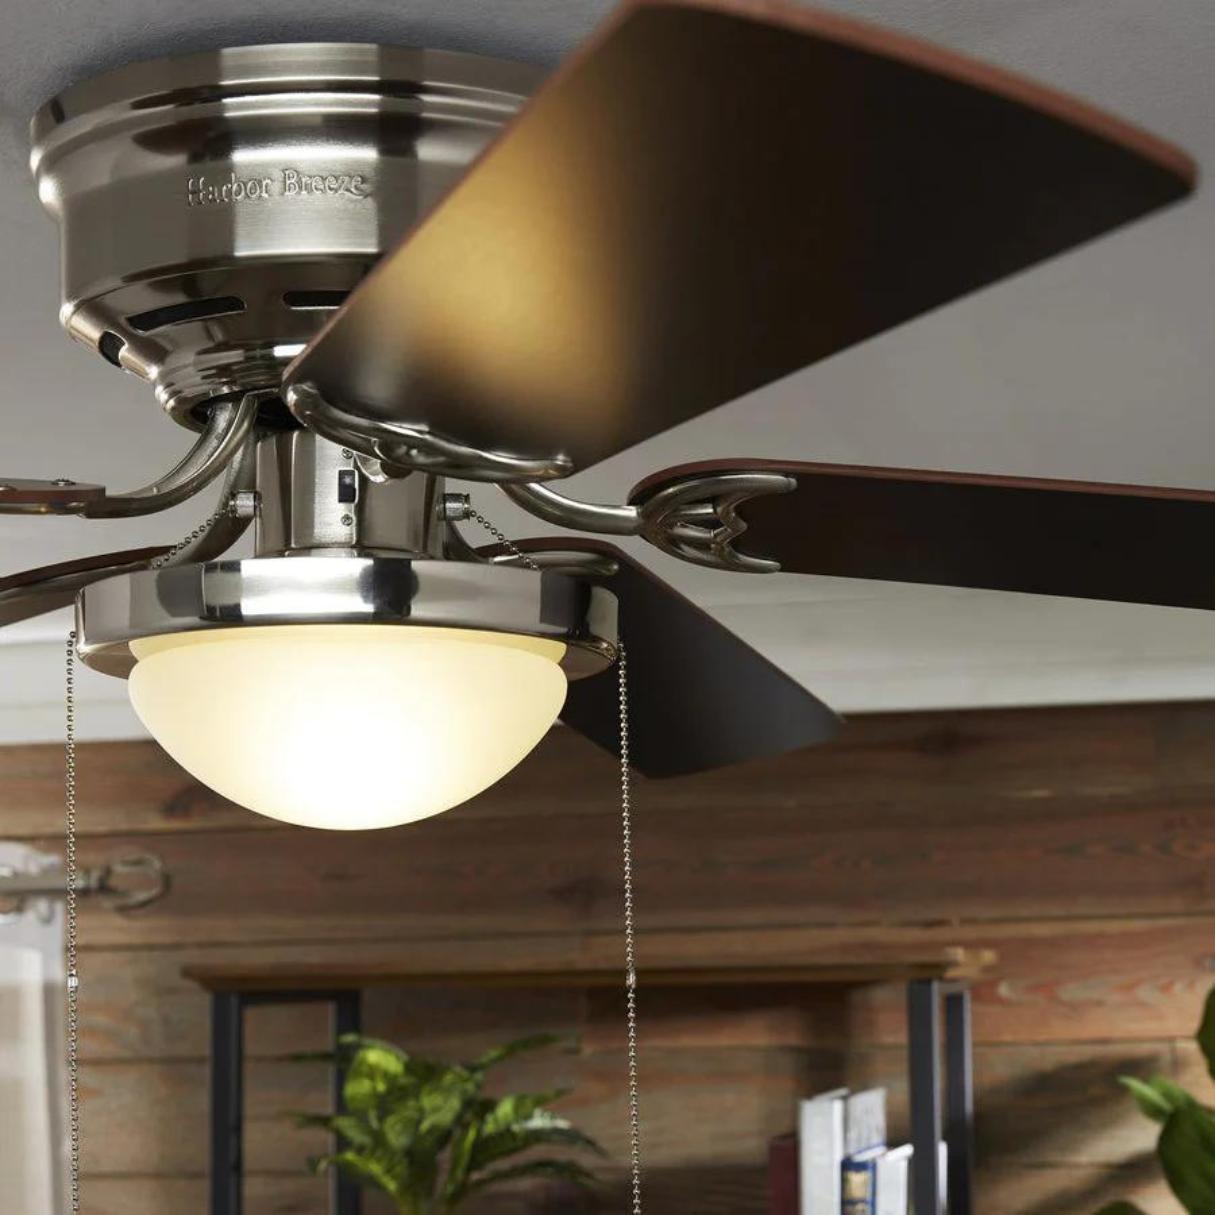
- Light bulb: Make sure you have a replacement light bulb that is compatible with the fixture and meets the necessary wattage and type (incandescent, LED, fluorescent, etc.).
- Screwdriver or pliers: Depending on the type of fixture, you may need a screwdriver or pliers to remove any screws or fastenings.
- Drop cloth or tarp: Place a drop cloth or tarp on the ground below the area you’ll be working to catch any debris or protect the floor or furniture from damage.
- Flashlight: In case you need additional lighting to see more clearly during the process.
- Cleaning supplies: Have a dusting cloth or cleaner on hand to clean the fixture or surrounding area before and after the bulb replacement.
Make sure to gather all the necessary tools and equipment before starting the task. Having everything prepared beforehand will save you time and make the process more efficient.
Step 1: Assess the Height and Type of Ceiling
Before attempting to change a light bulb on a high ceiling, you need to assess the height and type of ceiling you will be working with. This will help you determine the appropriate tools and techniques to use. Here’s how to assess the height and type of ceiling:
- Measure the height: Use a measuring tape to determine the height of the ceiling. This will help you determine the correct size ladder you’ll need to safely reach the light fixture.
- Determine the type of ceiling: Identify whether the ceiling is flat or sloped. Flat ceilings are typically easier to work with as they provide a more stable surface. Sloped ceilings may require additional precautions to ensure stability while working.
- Check for obstructions: Look for any obstacles or obstructions that may impede your access to the light fixture. This could include furniture, decorations, or other fixtures. Clear the area around the light fixture to ensure a safe working environment.
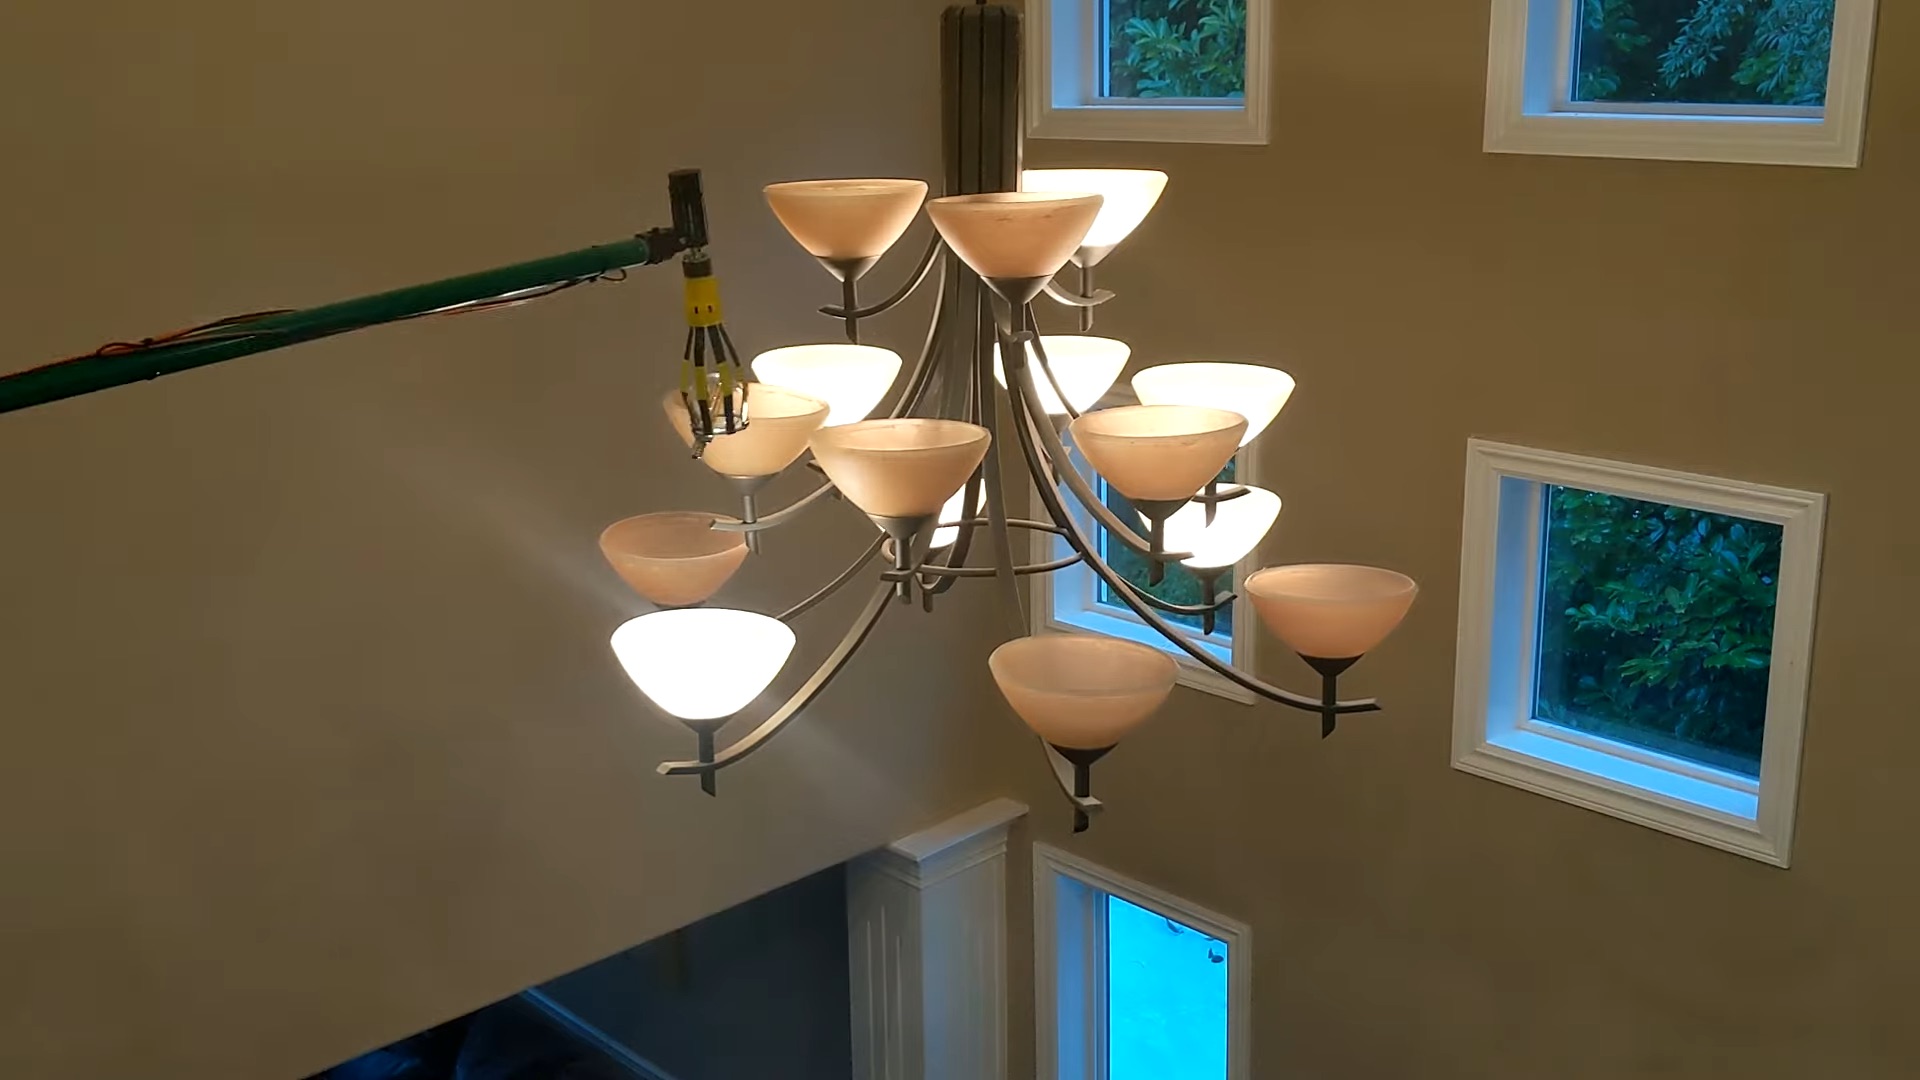
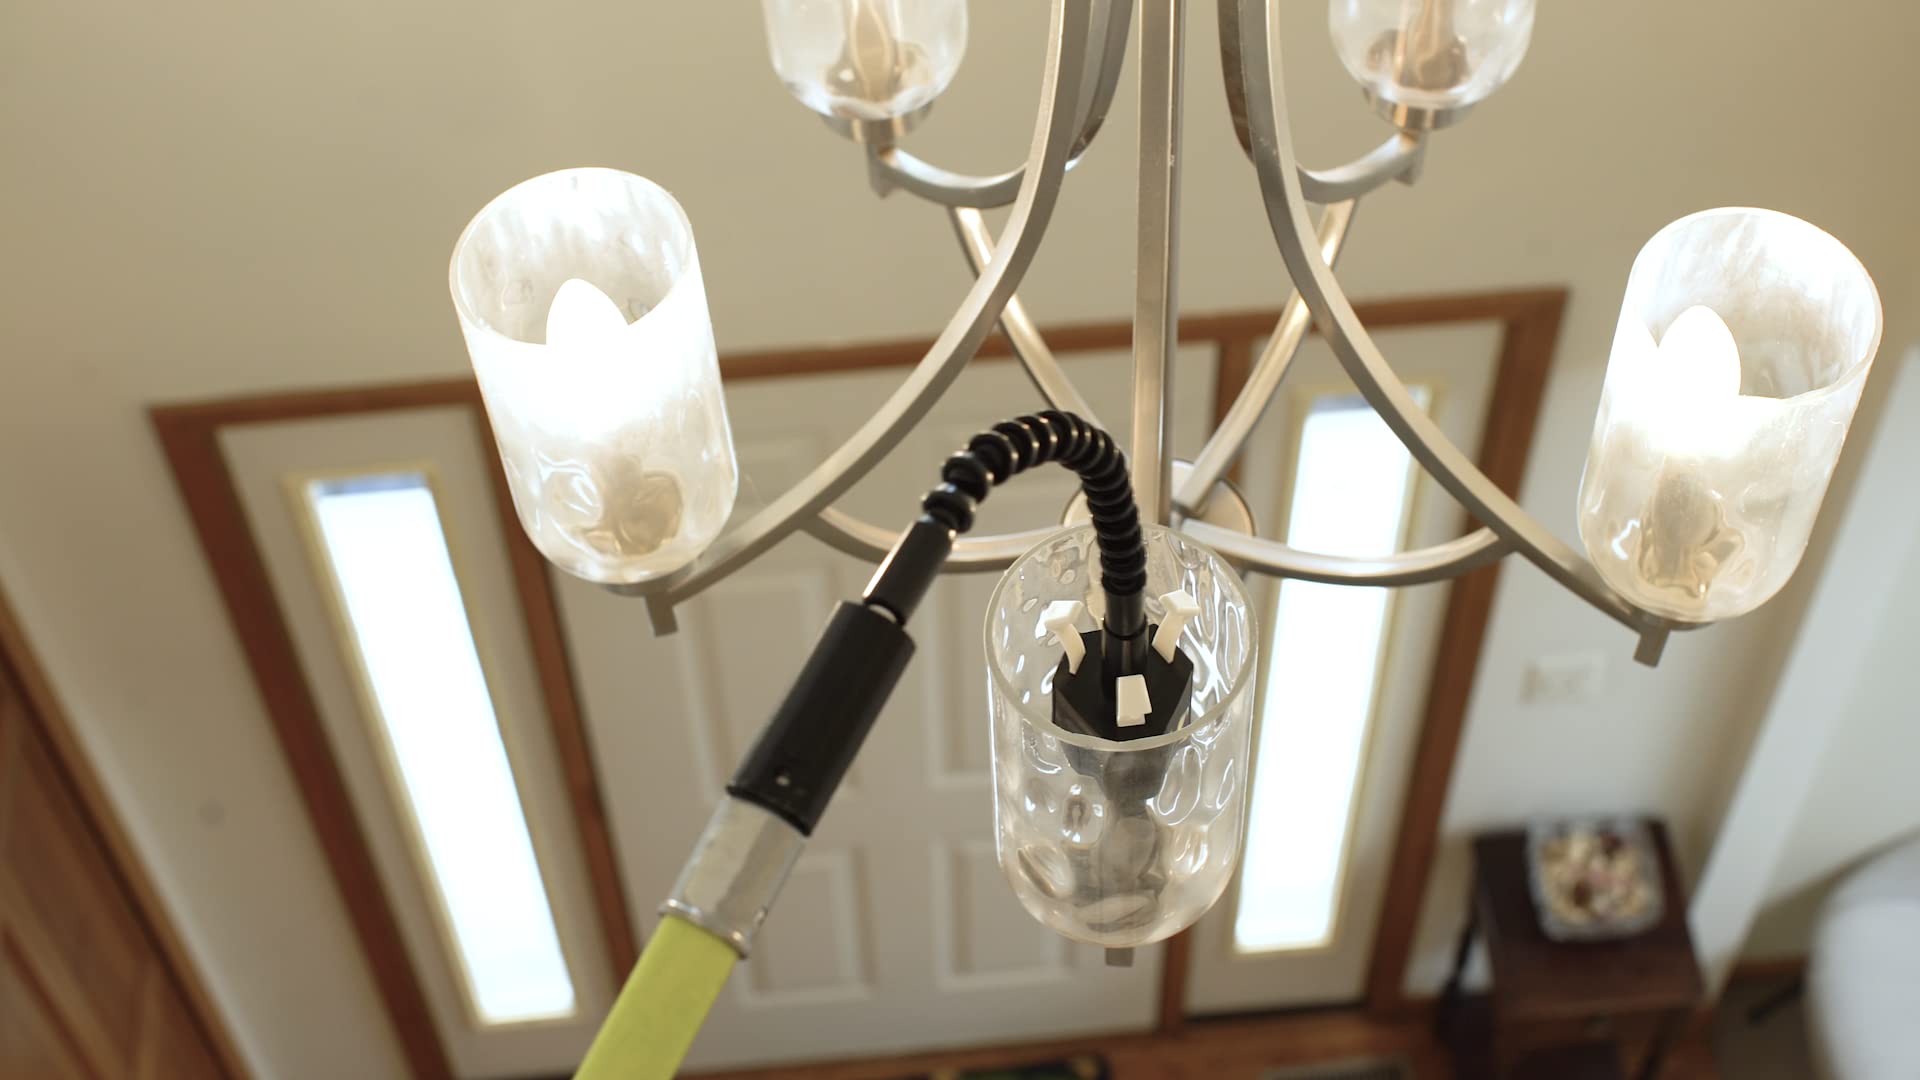
- Consider using a telescoping pole: Depending on the height of the ceiling, you may be able to use a telescoping pole with a bulb-changing attachment. This tool allows you to reach the bulb without the need for a ladder. However, keep in mind that this method may not be suitable for all types of fixtures or ceilings.
- Assess the maintenance history: If the light bulb has not been changed in a while, it’s important to consider the potential difficulty in removing the old bulb. Old bulbs may become stuck or difficult to remove due to heat or other factors. Be prepared to use additional tools or techniques if necessary.
By carefully assessing the height and type of ceiling, you can plan accordingly and ensure that you have the right tools and techniques to safely change the light bulb. Understanding the specifics of the ceiling will help you approach the task with confidence and efficiency.
Step 2: Select the Right Light Bulb
Choosing the appropriate light bulb is essential for a successful and efficient replacement. Here’s how to select the right light bulb:
- Check the fixture requirements: Examine the light fixture to determine the type and wattage of the bulb it requires. This information is usually indicated on the fixture itself or in the user manual. Make sure to use a bulb that is compatible with the fixture’s requirements to ensure proper functionality and safety.
- Consider the bulb type: Decide on the type of bulb you want to use based on factors such as energy efficiency, brightness, and color temperature. LED bulbs are popular for their longevity and energy-saving capabilities, while incandescent bulbs offer a warm and traditional glow. Also, consider specialized bulbs, such as those compatible with dimming systems or smart home technology.
- Select the appropriate wattage: Ensure that the new bulb has the correct wattage for the fixture. Using a bulb with an incorrect wattage can cause issues such as overheating or premature failure. Refer to the fixture’s specifications to determine the appropriate wattage range.
- Consider the light output: Determine the desired brightness level for the particular area. Light bulb packaging typically includes information about the bulb’s lumen output. Higher lumens indicate greater brightness. Consider the purpose of the lighting and the ambiance you want to create in the space.
- Check for energy efficiency: Opting for energy-efficient bulbs is not only environmentally friendly but can also save you money on your energy bills. Look for bulbs that are ENERGY STAR certified or have a high energy efficiency rating.
It’s important to note that different fixtures and settings may require specific bulbs, such as specialty bulbs for recessed lighting or track lighting. Always consult the manufacturer’s recommendations or seek advice from a lighting professional if you’re unsure about the best bulb for your specific needs.
By selecting the right light bulb, you can ensure optimal performance, energy efficiency, and the desired lighting effect in your space. Take the time to consider the various factors involved in choosing the right light bulb before proceeding to the next step.
Read more: How To Change Bulb In A High Ceiling
Step 3: Gather Necessary Equipment
Before you start changing the light bulb, it’s essential to gather all the necessary equipment. Having everything prepared beforehand will help streamline the process and prevent any unnecessary trips back and forth. Here’s a list of the equipment you’ll need:
- Ladder: Select a ladder that is tall enough to reach the light fixture comfortably and safely. The height of the ceiling will determine the appropriate ladder size. Ensure that the ladder is in good condition and provides a stable footing.
- Tools: Depending on the type of fixture, you may need specific tools to remove the old bulb or access the light fixture. Common tools include a screwdriver or pliers. Check the fixture’s specifications and gather the required tools accordingly.
- New bulb: It’s crucial to have a new bulb ready to replace the old one. Make sure you have the correct type and wattage, as specified by the fixture’s requirements. Double-check that the package contains an unbroken bulb before proceeding.
- Gloves: Wear gloves to protect your hands while handling the bulb and any sharp or hot surfaces. This will prevent accidents and ensure your safety throughout the process.
- Safety goggles: It’s always wise to wear safety goggles when working with electrical fixtures. Protect your eyes from any debris or dust that could fall during the process.
- Flashlight: A flashlight will come in handy, especially if the area you’re working in lacks sufficient lighting. It will help you see the bulb and fixture clearly and ensure accurate installation.
- Dust cloth or cleaning supplies: Keep a dust cloth or cleaning supplies nearby to wipe off any dust or debris that may accumulate during the bulb replacement process.
- Drop cloth or tarp: To protect the floor or furniture from any falling debris, place a drop cloth or tarp beneath the area you’ll be working in.
Make sure to gather all the necessary equipment before proceeding to the next steps. Having everything readily available will save you time and make the bulb replacement process more efficient.
Step 4: Use a Stable and Secure Ladder
Using a stable and secure ladder is crucial for your safety while changing a light bulb on a high ceiling. Follow these steps to ensure a stable ladder setup:
- Select the right ladder: Choose a ladder that is tall enough to reach the height of the ceiling comfortably. It’s important to have a ladder that allows you to work without overreaching or standing on the top rungs, which can be dangerous. Consider using an extension ladder or a step ladder with adjustable height.
- Inspect the ladder: Before using the ladder, thoroughly inspect it for any damage or defects. Check for loose screws, bent rungs, or wobbly parts. If you notice any issues, refrain from using the ladder and either repair it or replace it.
- Position the ladder correctly: Place the ladder on a level surface, ensuring that all four legs are firmly planted and have good traction. Avoid using a ladder on uneven or slippery surfaces, as it can compromise stability. If necessary, use a ladder stabilizer to provide additional support and prevent the ladder from damaging the walls or ceiling.
- Secure the ladder: Once the ladder is in the desired position, secure it to prevent any accidental movement or tipping. This can be done by engaging the ladder’s locking mechanisms, tying it against a secure anchor point, or having someone hold it steady while you work.
- Maintain three-point contact: While ascending or descending the ladder, always maintain three-point contact. This means having two feet and one hand, or two hands and one foot, in contact with the ladder at all times. Avoid leaning or reaching too far to either side, as this can cause loss of balance and potential accidents.
- Avoid overreaching: To ensure stability while on the ladder, avoid overreaching. Keep your body centered and within the sides of the ladder. If you need to access a different area, reposition the ladder instead of leaning towards it.
- Follow weight capacity guidelines: Ladders have weight capacity limits. Make sure to check the manufacturer’s instructions to ensure that you, along with any tools or equipment you’re carrying, are within the weight limit. Exceeding the weight capacity can compromise the ladder’s stability.
- Have a spotter or assistant: Whenever possible, have someone assist you by holding the ladder steady or passing tools and equipment. A spotter can provide an extra measure of safety and support while you work on the high ceiling.
By using a stable and secure ladder, you can minimize the risk of falls and accidents while changing a light bulb on a high ceiling. Remember to always prioritize your safety and take necessary precautions before ascending the ladder.
Use a sturdy ladder tall enough to reach the ceiling. Turn off the power to the light fixture. Carefully remove the old bulb and replace it with a new one. If necessary, use a bulb changer tool for extra reach.
Step 5: Turn Off the Power
Prior to changing a light bulb on a high ceiling, it’s crucial to turn off the power to the fixture. This step ensures your safety and prevents any electrical accidents. Follow these guidelines to turn off the power:
- Locate the circuit breaker: Identify the circuit breaker that controls the power supply to the specific light fixture you’ll be working on. The circuit breaker panel is typically located in a utility room, basement, or garage.
- Switch off the correct breaker: In the circuit breaker panel, locate the breaker that corresponds to the light fixture. It should be labeled accordingly, but if not, you may need to test each breaker to determine the correct one. Ensure that you have the correct breaker by flicking it off and verifying that the light turns off.
- Test the power: As an additional safety measure, use a non-contact voltage tester to confirm that there is no electrical current running to the fixture. Hold the tester near the light switch or the wires leading to the fixture. The tester will indicate if there is an active electrical current present – if it does, you should investigate further and potentially contact an electrician.
- Leave a note or warning: Once you have turned off the power to the fixture, consider leaving a note or warning near the light switch or breaker panel. This will serve as a reminder to anyone in the household or workplace not to turn on the power while you’re working on the fixture.
Double-checking that the power is turned off is essential for your safety when working with electrical fixtures. It helps prevent electric shocks and ensures a safe environment to change the light bulb on the high ceiling.
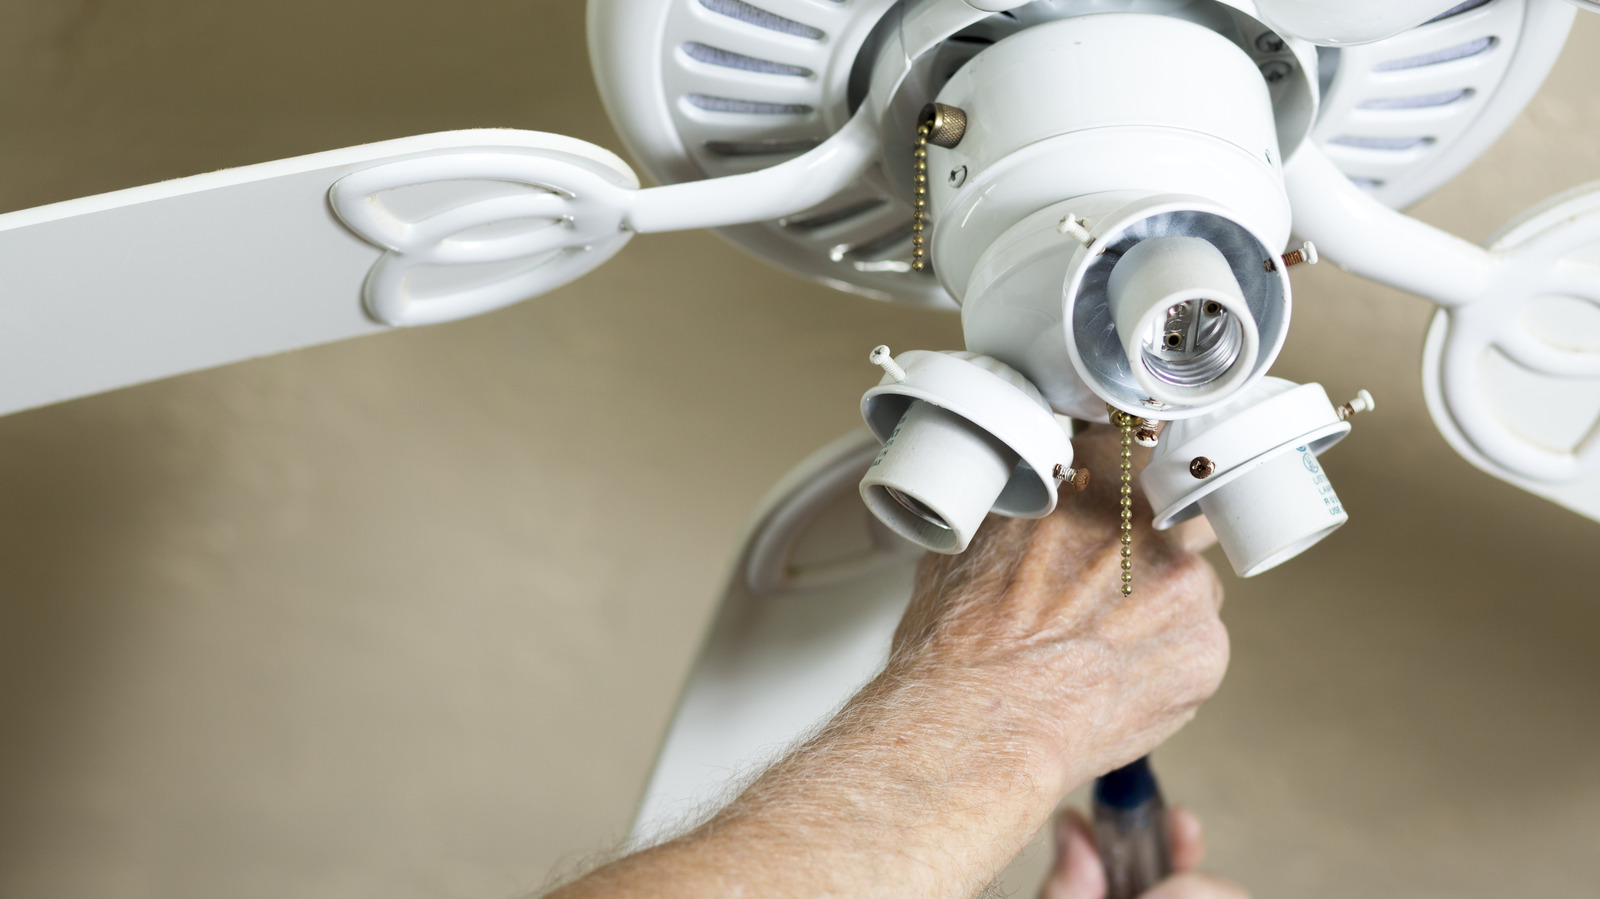
Step 6: Remove the Old Bulb
Now that you’ve taken the necessary safety precautions and turned off the power, it’s time to remove the old bulb. Follow these steps to safely remove the old bulb from the fixture:
- Allow the bulb to cool: If the light fixture was recently switched off, give the bulb some time to cool down before attempting to remove it. This will prevent burns or other injuries from coming into contact with a hot bulb.
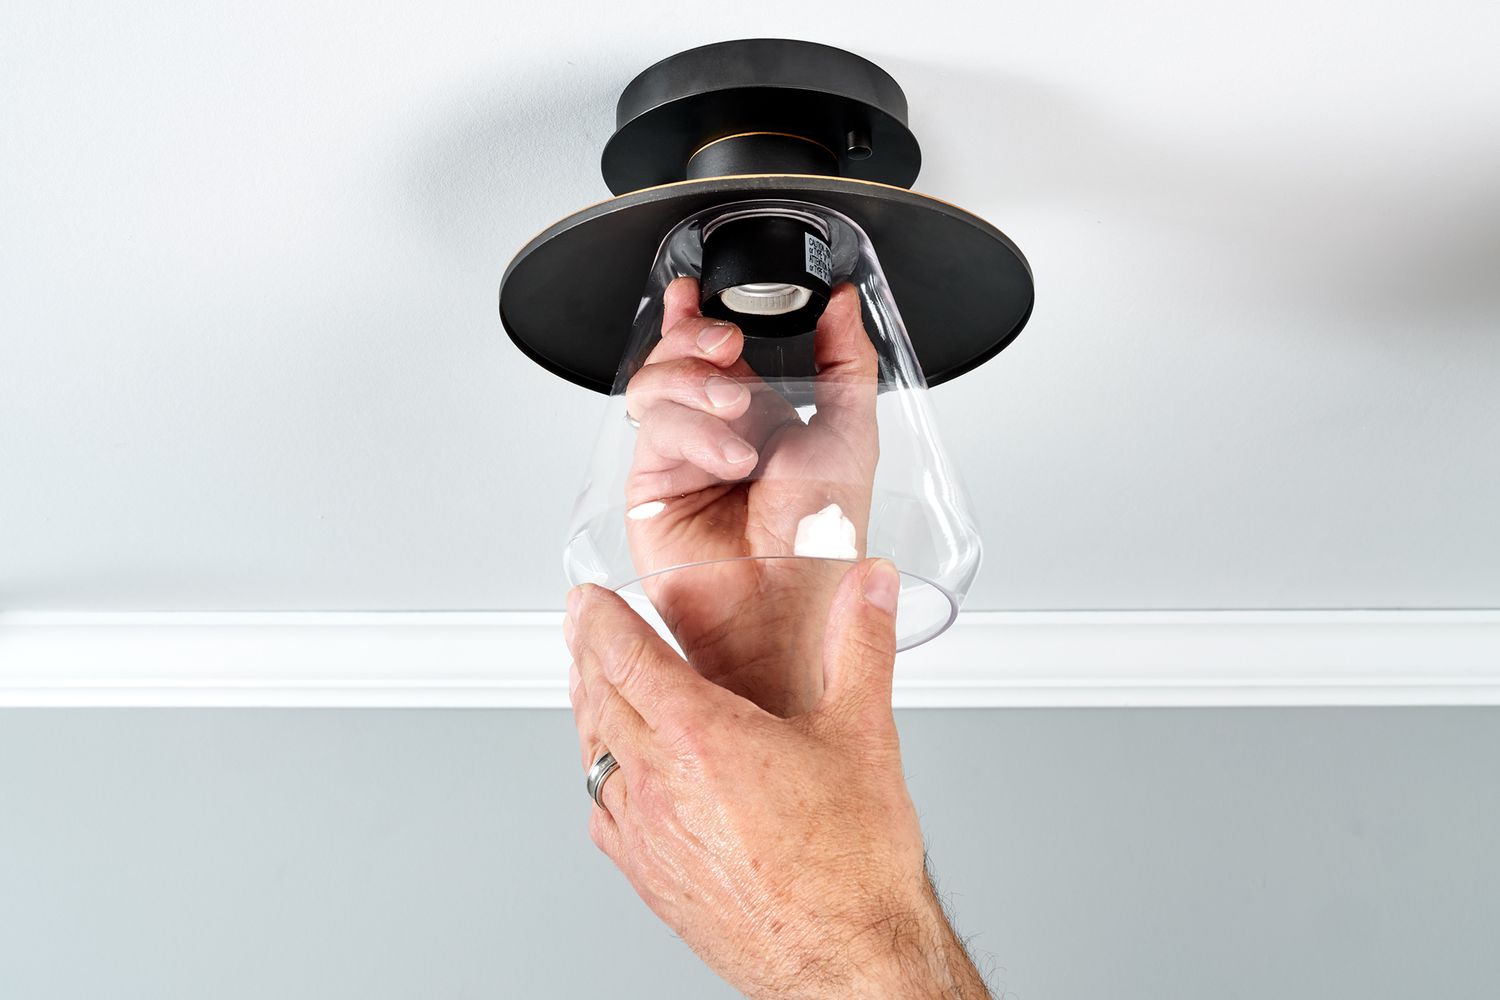
- Locate the bulb housing: Identify the area or cover that encloses the bulb. This can vary depending on the type of fixture, but it’s typically a glass or plastic covering.
- Remove the bulb housing: Carefully unscrew or unclip the bulb housing from the fixture. Take note of any screws or fasteners that may need to be loosened or removed. Place the housing aside in a safe location.
- Remove the old bulb: Once the housing is removed, you can access the old bulb. Gently twist the bulb counterclockwise to unscrew it from the socket. Be cautious not to apply excessive force or squeeze the bulb too tightly, as it can break or shatter.
- Dispose of the old bulb: Properly dispose of the old bulb, taking care not to touch the broken glass if it has shattered. Follow local regulations for the disposal of light bulbs, as some may require special recycling, especially for compact fluorescent bulbs or other environmentally sensitive bulbs.
- Clean the fixture: Use a soft cloth or dusting brush to clean the area around the socket and inside the fixture. Remove any dust or debris that may have accumulated over time. This will ensure good contact with the new bulb and improve the overall appearance of the fixture.
When removing the old bulb, take caution not to put excessive pressure on it or twist it too forcefully. This will help prevent any accidents or damage to the fixture. Dispose of the old bulb properly and keep the area clean for a smooth transition to the new bulb.
Read more: How To Change Light Bulb In The Ceiling
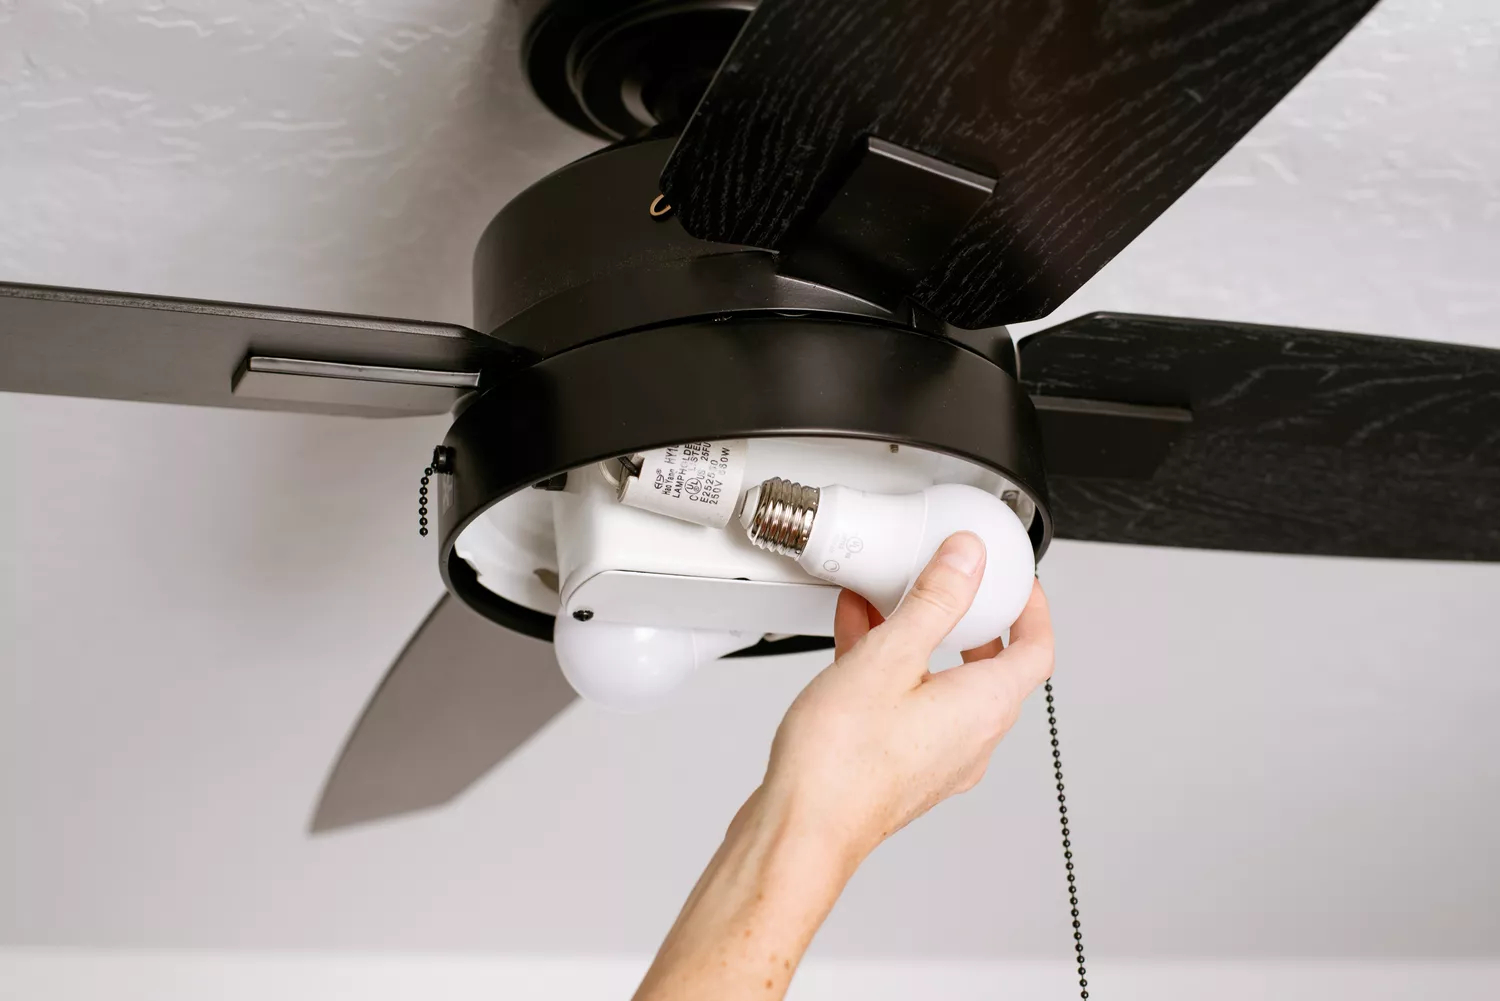
Step 7: Insert the New Bulb
With the old bulb safely removed, it’s time to insert the new bulb into the fixture. Follow these steps to properly install the new bulb:
- Select the correct bulb: Ensure that you have the correct type and wattage of the new bulb that matches the requirements of the fixture. Check the packaging or bulb markings to confirm this information.
- Handle the new bulb carefully: Avoid touching the glass part of the new bulb with your bare hands, as the natural oils from your skin can cause the bulb to heat unevenly and reduce its lifespan. If you accidentally touch the bulb, clean it gently with a lint-free cloth.
- Align the bulb with the socket: Hold the new bulb near the socket and align the base with the socket opening. Make sure the bulb is straightened and properly oriented for insertion.
- Insert the bulb into the socket: Gently push the bulb into the socket while applying a slight twisting motion clockwise. Be careful not to force the bulb or overtighten it, as this can cause damage.
- Secure the bulb in place: Depending on the fixture, you may need to tighten any screws or clips to secure the bulb in the socket. Make sure the bulb is firmly in place but avoid excessive pressure that could lead to breakage.
- Test the bulb: After installing the new bulb, turn the power back on at the circuit breaker. Flip the light switch to test if the bulb is functioning correctly. Verify that the new bulb illuminates properly without any flickering or issues.
- Make necessary adjustments: If the bulb does not light up or there are any issues, turn off the power again, double-check the bulb’s compatibility, and ensure it is fully inserted into the socket. If the problem persists, you may need to consult a professional electrician for further assistance.
By following these steps, you can safely and effectively install the new bulb into the fixture. Take care when handling the bulb and ensure it is properly aligned and securely inserted into the socket.
Step 8: Test the New Bulb
After successfully installing the new bulb, it’s important to test it to ensure proper functionality and illumination. Follow these steps to test the new bulb:
- Turn on the power: Ensure that the power is turned on at the circuit breaker to supply electricity to the light fixture.
- Flip the light switch: Locate the light switch that controls the specific fixture you’ve just replaced the bulb in. Flip the switch to the “on” position and observe the new bulb.
- Check for illumination: Observe the new bulb to verify that it illuminates correctly. Look for a steady and even glow without any flickering. If the bulb does not light up, double-check the connection and make sure it is securely inserted into the socket.
- Adjust brightness if necessary: If the new bulb appears too bright or too dim, check if it is dimmable or consider using a bulb with a different lumen output. Use a light dimmer, if applicable, to adjust the brightness to your desired level.
- Test the switch functionality: While the new bulb is illuminated, toggle the light switch on and off to ensure that the fixture responds as expected. Verify that the bulb turns on and off accordingly.
- Make necessary adjustments: If the new bulb does not light up or there are any issues, turn off the power at the circuit breaker, check the bulb’s compatibility and connection, and ensure that it is properly installed. If the problem persists, seek professional help or consult an electrician.
Testing the new bulb ensures that it works properly and meets your lighting needs. Performing this step gives you peace of mind and allows you to make any necessary adjustments before completing the bulb replacement process.
Step 9: Clean Up and Store Equipment
Once you have successfully tested the new bulb and ensured that it is functioning correctly, it’s time to clean up and store the equipment used during the process. Follow these steps to complete the light bulb replacement task:
- Turn off the power: Before proceeding with the cleanup, turn off the power at the circuit breaker to avoid any electrical hazards.
- Cool down the bulb: If the new bulb was recently lit, allow it to cool down before handling it or attempting to clean the surrounding area.
- Clean the fixture: Use a soft cloth or dusting brush to wipe down the fixture, removing any dust or debris that may have accumulated during the bulb replacement process. Pay attention to any intricate or hard-to-reach areas, ensuring a clean and fresh appearance.
- Dispose of packaging: Properly dispose of any packaging, such as the box or plastic wrap that the new bulb came in. Follow local recycling guidelines to ensure environmentally friendly disposal.
- Store equipment: Safely store the equipment used during the bulb replacement process. Coil up cords or cables, and store tools and equipment in a designated place for future use.
- Clean up the work area: Remove the drop cloth or tarp used to protect the floor or furniture. Dispose of any debris that may have fallen during the process and ensure the work area is tidy and free from hazards.
- Turn on the power: Once the cleanup is complete and all equipment is stored away, you can turn on the power at the circuit breaker to restore electricity to the light fixture.
- Enjoy the newly lit space: With the new bulb in place and the area cleaned up, take a moment to appreciate the properly lit space. Enjoy the improved lighting and the ambiance it provides.
By following these steps to clean up and store the equipment, you conclude the light bulb replacement task on a high ceiling. You leave behind a clean and safe environment while enjoying the benefits of a well-lit space.
Conclusion
Changing a light bulb on a high ceiling may seem like a challenging task, but with the right tools, knowledge, and precautions, it can be done safely and efficiently. By following the steps outlined in this article, you can successfully replace a light bulb without compromising your safety or the integrity of the fixture and surrounding area.
Remember, safety should always be your top priority. Before starting the process, take the time to assess the height and type of ceiling, gather the necessary equipment, and implement safety precautions. This includes turning off the power, using a stable ladder, and wearing appropriate safety gear.
Selecting the right light bulb is crucial for achieving the desired brightness, energy efficiency, and compatibility with the fixture. Take into consideration the wattage, bulb type, light output, and energy efficiency rating to make an informed decision.
Once you’ve gathered the necessary tools and equipment, carefully remove the old bulb, insert the new bulb, and test it to ensure proper functionality. Clean up the work area and store the equipment properly for future use.
By following these steps, you can confidently change a light bulb on a high ceiling, illuminating your space with ease. However, if you ever feel unsure or uncomfortable with the task, it’s always best to seek the assistance of a professional electrician.
With a new bulb in place, your high ceiling will once again provide the illumination needed to create a warm and inviting atmosphere. Enjoy the benefits of a well-lit space and take pride in your ability to tackle this household maintenance task.
Frequently Asked Questions about How To Change Light Bulb On High Ceiling
Was this page helpful?
At Storables.com, we guarantee accurate and reliable information. Our content, validated by Expert Board Contributors, is crafted following stringent Editorial Policies. We're committed to providing you with well-researched, expert-backed insights for all your informational needs.


0 thoughts on “How To Change Light Bulb On High Ceiling”