Furniture
How To Change Bulbs In A High Chandelier
Modified: October 18, 2024
Learn how to change bulbs in a high chandelier easily and safely. Get expert tips on furniture maintenance and lighting fixtures.
(Many of the links in this article redirect to a specific reviewed product. Your purchase of these products through affiliate links helps to generate commission for Storables.com, at no extra cost. Learn more)
Introduction
Welcome to our guide on how to change bulbs in a high chandelier. Chandeliers are beautiful lighting fixtures that can add a touch of elegance and sophistication to any space. However, when it comes time to replace the bulbs in a high chandelier, the task can seem daunting.
Whether you are a DIY enthusiast or a homeowner looking to save money on maintenance costs, learning how to change bulbs in a high chandelier can be a valuable skill. In this article, we will provide you with step-by-step instructions on how to safely and effectively change the bulbs in your chandelier, even if it is located in a hard-to-reach spot.
Before we dive into the details, it is important to note that safety should be your top priority when working with any electrical component. If you are uncomfortable or unsure about completing this task yourself, it is always best to hire a professional electrician to ensure the job is done correctly.
Now, let’s get started with the first step: safety precautions.
Key Takeaways:
- Safety is paramount when changing bulbs in a high chandelier. Always turn off the power, wear protective gear, and secure the area to minimize the risk of accidents and ensure a smooth process.
- Proper preparation and attention to detail are key when changing bulbs in a high chandelier. Gather necessary tools, determine bulb type, and carefully follow each step to ensure a successful and safe process.
Read more: How To Change A High Ceiling Chandelier
Safety Precautions
Before you begin changing bulbs in a high chandelier, it is crucial to follow these safety precautions to protect yourself and prevent any accidents:
- Turn off the Power: Before starting any electrical work, turn off the power to the chandelier at the circuit breaker. This will ensure that there is no electricity flowing to the fixture, reducing the risk of electric shocks.
- Wear Protective Gear: It is important to protect your eyes and hands while working on the chandelier. Wear safety goggles to shield your eyes from any debris that may fall during the bulb replacement process. Additionally, consider wearing gloves to avoid any injuries while handling the bulbs.
- Secure the Area: Clear the area around the chandelier to create a safe and clutter-free workspace. Remove any furniture or objects that may obstruct your access to the chandelier, and ensure that the ladder or scaffolding you will be using is stable and properly positioned.
- Use a Helper: If possible, it is always wise to have someone assist you during the bulb replacement process. They can stabilize the ladder or scaffolding, pass you the necessary tools, or provide extra support while you are working at heights.
- Check Bulb Compatibility: Before purchasing replacement bulbs, make sure to check the maximum wattage and bulb type recommended by the chandelier manufacturer. Using bulbs that exceed the recommended wattage can cause overheating and pose a fire hazard.
By taking these safety precautions seriously, you can minimize the risk of accidents and ensure a smooth and worry-free process when changing bulbs in a high chandelier.
Gathering the Necessary Tools
Before you begin the process of changing bulbs in a high chandelier, it is important to gather all the necessary tools. Having these tools on hand will make the task easier and more efficient. Here are the tools you will need:
- Ladder or Scaffolding: Depending on the height of your chandelier, you will need a sturdy ladder or scaffolding to safely reach it. Make sure the ladder or scaffolding is in good condition and that you position it on a stable surface.
- Bulbs: Purchase the appropriate replacement bulbs for your chandelier. Ensure they are the correct size and wattage as recommended by the manufacturer. It is advisable to have a few extra bulbs on hand in case any of them burn out in the future.
- Gloves: Wearing gloves will protect your hands from cuts or burns while handling the bulbs. Choose gloves that allow for dexterity and ensure a secure grip.
- Safety Goggles: Safety goggles are essential to protect your eyes from any debris that may fall during the bulb replacement process. Ensure that they fit securely and provide full coverage.
- Soft Cloth: A soft cloth or microfiber cloth will come in handy for cleaning the chandelier and removing any dirt or dust that may have accumulated.
- Screwdriver or Wrench: Depending on the type of screws or nuts holding the chandelier’s cover or shade in place, you may need a screwdriver or wrench to remove it before accessing the bulbs.
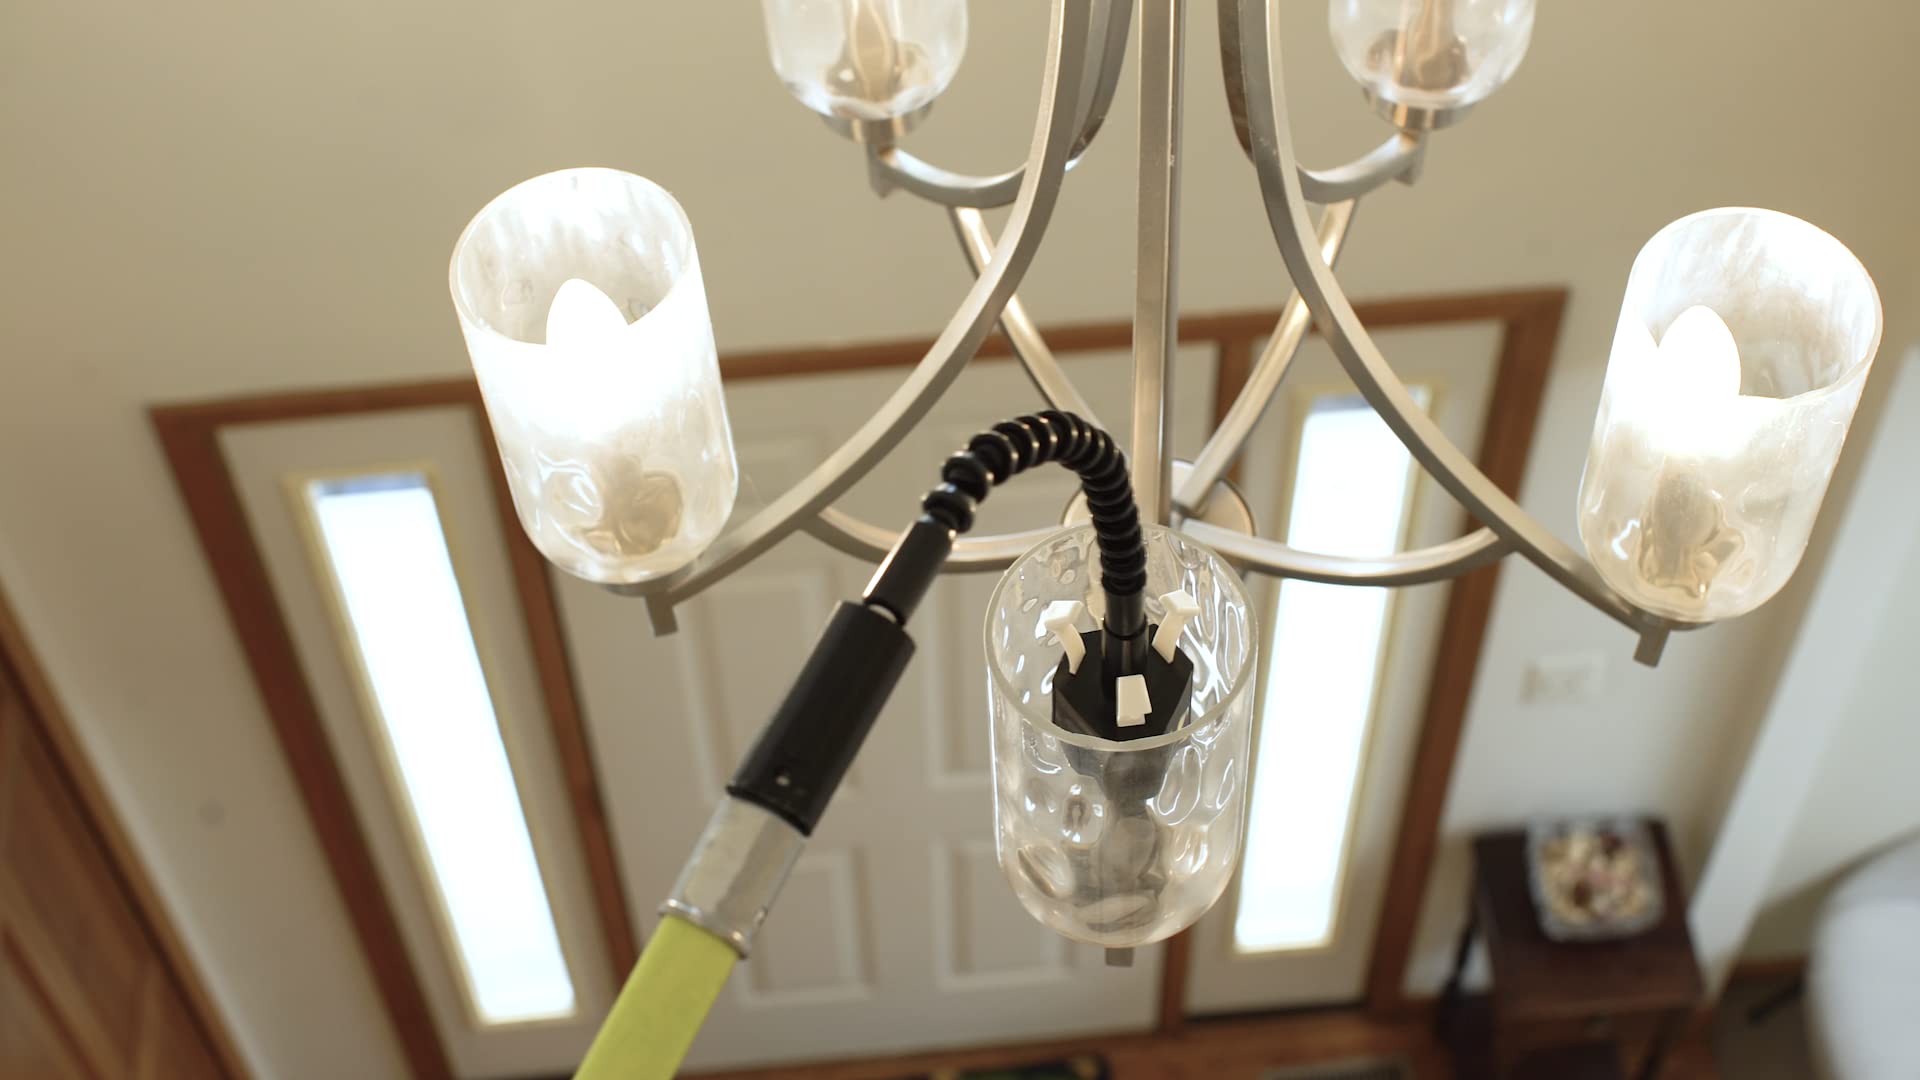
- Step Stool or Reach Tool: If you are unable to reach the bulbs even with a ladder or scaffolding, consider using a step stool or a reach tool with an extension arm to help you access the chandelier safely.
- Electrical Tape: Electrical tape can be useful for securing any loose wires or connections once you have replaced the bulbs.
By gathering these necessary tools before you start, you will be well-prepared to change the bulbs in your high chandelier efficiently and without any unnecessary delays.
Turning off the Power
Before you begin any work on the chandelier, it is essential to turn off the power to ensure your safety. Here are the steps to follow:
- Locate the Circuit Breaker: Find the circuit breaker that controls the electricity supply to the chandelier. It is usually located in the electrical panel of your home.
- Identify the Correct Circuit: Look for the circuit breaker labeled specifically for the chandelier or the area where it is located. If there is no specific label, you may need to switch off the power to the entire room or floor to be safe.
- Switch off the Circuit Breaker: Flip the switch or toggle to the “Off” position for the appropriate circuit. This will cut off the electrical supply to the chandelier.
- Verify Power Cutoff: To double-check that the power is turned off, try turning on the chandelier’s light switch. If the bulbs do not illuminate, you can be confident that the power has been successfully shut off.
It is crucial to follow these steps to prevent any electrical accidents while working on the chandelier. Taking the time to ensure the power is off will provide you with a safe working environment.
Once you have confirmed that the power is off, you can proceed with the next step: determining the type of bulbs used in your chandelier.
Determining the Type of Bulbs
Before you can replace the bulbs in your high chandelier, it is important to determine the type of bulbs that are currently installed. This will ensure that you purchase the correct replacements. Here are the steps to follow:
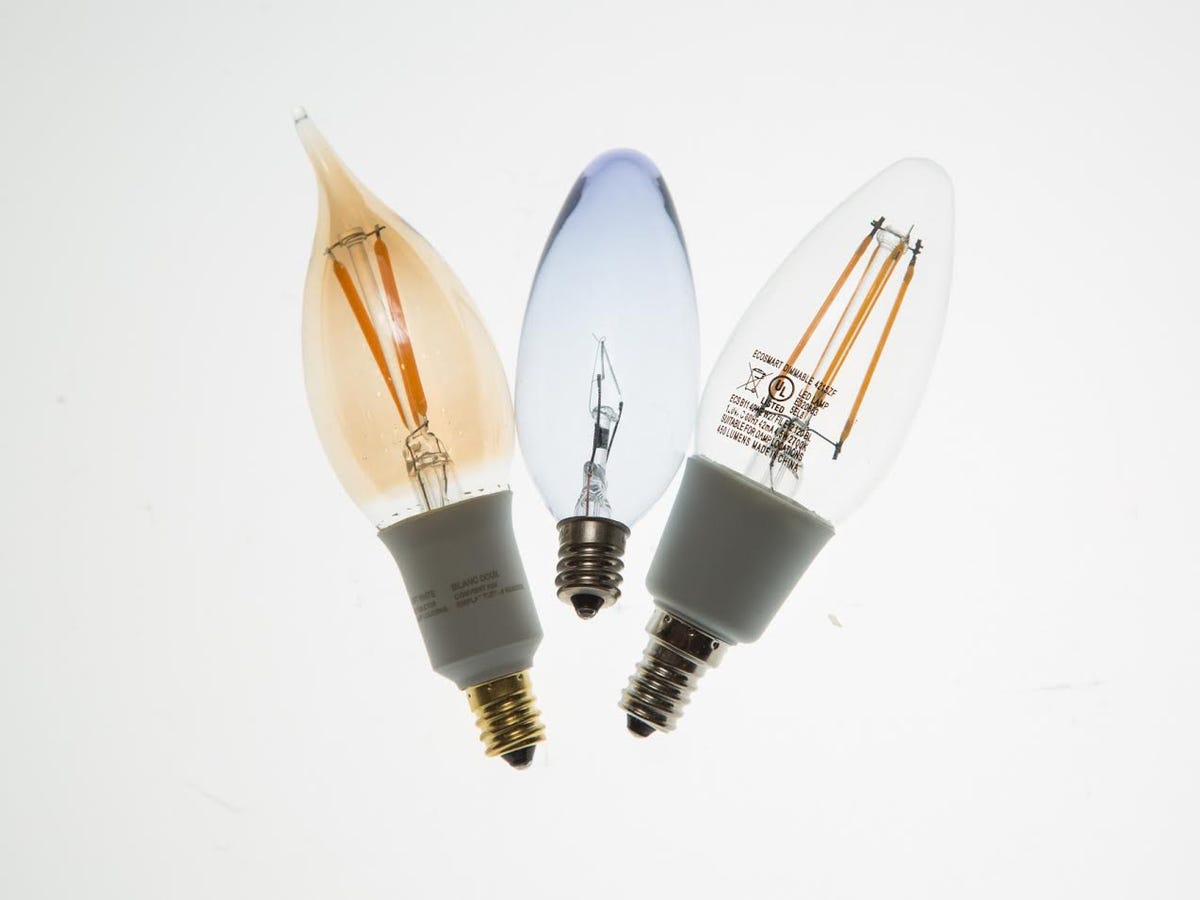
- Inspect the Existing Bulbs: Take a close look at the bulbs that are currently in your chandelier. Note the shape, size, and base type of the bulbs. Common bulb shapes include A19, B10, and G16.5, while base types may be candelabra (E12) or medium (E26).
- Check the Wattage: Look for the wattage rating on the existing bulbs. It is essential to replace them with bulbs that have a wattage within the manufacturer’s recommended range. Using bulbs with a higher wattage can lead to overheating and potential damage to the chandelier.
- Take Pictures or Notes: If you are unsure about the bulb type or have difficulty finding replacements, consider taking pictures or making detailed notes to assist you when shopping for new bulbs.
- Consult the Chandelier Manual: If you have the manual or documentation that came with your chandelier, refer to it for information about the specific bulb requirements. The manual may provide details on bulb types, wattage limits, and other important specifications.
- Seek Professional Advice: If you are still unsure about the correct bulb type to use, consider reaching out to a lighting specialist or the manufacturer of the chandelier for guidance. They can provide expert guidance and ensure that you find the correct replacement bulbs.
By accurately determining the type of bulbs needed for your high chandelier, you can ensure a seamless replacement process and avoid any potential compatibility issues that may arise.
Once you have identified the bulb requirements, you can move on to preparing a sturdy ladder or scaffolding for the bulb replacement process.
Read more: How To Change Bulb In A High Ceiling
Preparing a Sturdy Ladder or Scaffolding
When it comes to changing bulbs in a high chandelier, having a sturdy ladder or scaffolding is crucial to ensure your safety and provide stable support while working at heights. Here is how you can prepare them:
- Select the Right Ladder or Scaffolding: Choose a ladder or scaffolding that is appropriate for the height of your chandelier. Make sure it is in good condition and can support your weight.
- Set Up the Ladder or Scaffolding: Position the ladder or scaffolding directly below the chandelier, ensuring that it is stable on a level surface. If using a ladder, make sure the ladder is extended fully and locked securely in place.
- Secure the Ladder or Scaffolding: If possible, have someone hold the base of the ladder or scaffold while you climb up to ensure additional stability. Use leg levelers or non-slip pads to further secure the ladder or scaffolding on the floor.
- Consider Using Safety Equipment: If you are working on a particularly high chandelier or feel uncomfortable with heights, consider using safety equipment such as a harness or safety belt. This will provide an extra layer of protection in case of accidental slips or falls.
- Keep a Clear Path: Ensure that there are no obstacles or tripping hazards around the base of the ladder or scaffolding. Remove any furniture or objects that may obstruct your movement, allowing you to navigate the area safely.
- Minimize Movement on the Ladder or Scaffolding: Once you have positioned yourself on the ladder or scaffolding, try to minimize excessive movement to maintain balance and stability. Avoid leaning too far or reaching beyond your comfortable range.
By carefully preparing a sturdy ladder or scaffolding, you can ensure a safe and secure platform from which to change the bulbs in your high chandelier. Taking the time to set up properly will significantly reduce the risk of accidents and allow you to work confidently.
With the ladder or scaffolding ready, you can now proceed to the next step: removing the chandelier’s cover or shade.
Removing the Chandelier’s Cover or Shade
Before you can access the bulbs in your high chandelier, you will need to remove the chandelier’s cover or shade. Here is a step-by-step guide on how to do it:
- Turn off the Power: As a safety precaution, ensure that the power to the chandelier is turned off at the circuit breaker.
- Locate the Fasteners: Examine the chandelier’s cover or shade to identify the fasteners that are securing it in place. These can include screws, nuts, or clips.
- Prepare your Tools: Depending on the type of fasteners, you may need a screwdriver or wrench to remove them. Have the necessary tools on hand before proceeding.
- Remove the Fasteners: Carefully unscrew or loosen the fasteners holding the chandelier’s cover or shade. Make sure to keep track of any small parts or screws so that they can be easily reassembled later.
- Gently Lower the Cover or Shade: Once the fasteners are removed, carefully lower the chandelier’s cover or shade. Be cautious of any delicate or fragile elements that may be attached.
- Set Aside the Cover or Shade: Place the chandelier’s cover or shade in a safe location where it won’t get damaged or obstruct your workspace.
With the chandelier’s cover or shade successfully removed, you can now access the bulbs and proceed to the next step: removing the old bulbs.
Note: If you are unsure about any aspect of removing the chandelier’s cover or shade, consult the manufacturer’s manual or consider seeking guidance from a professional electrician to ensure that you handle the process correctly.
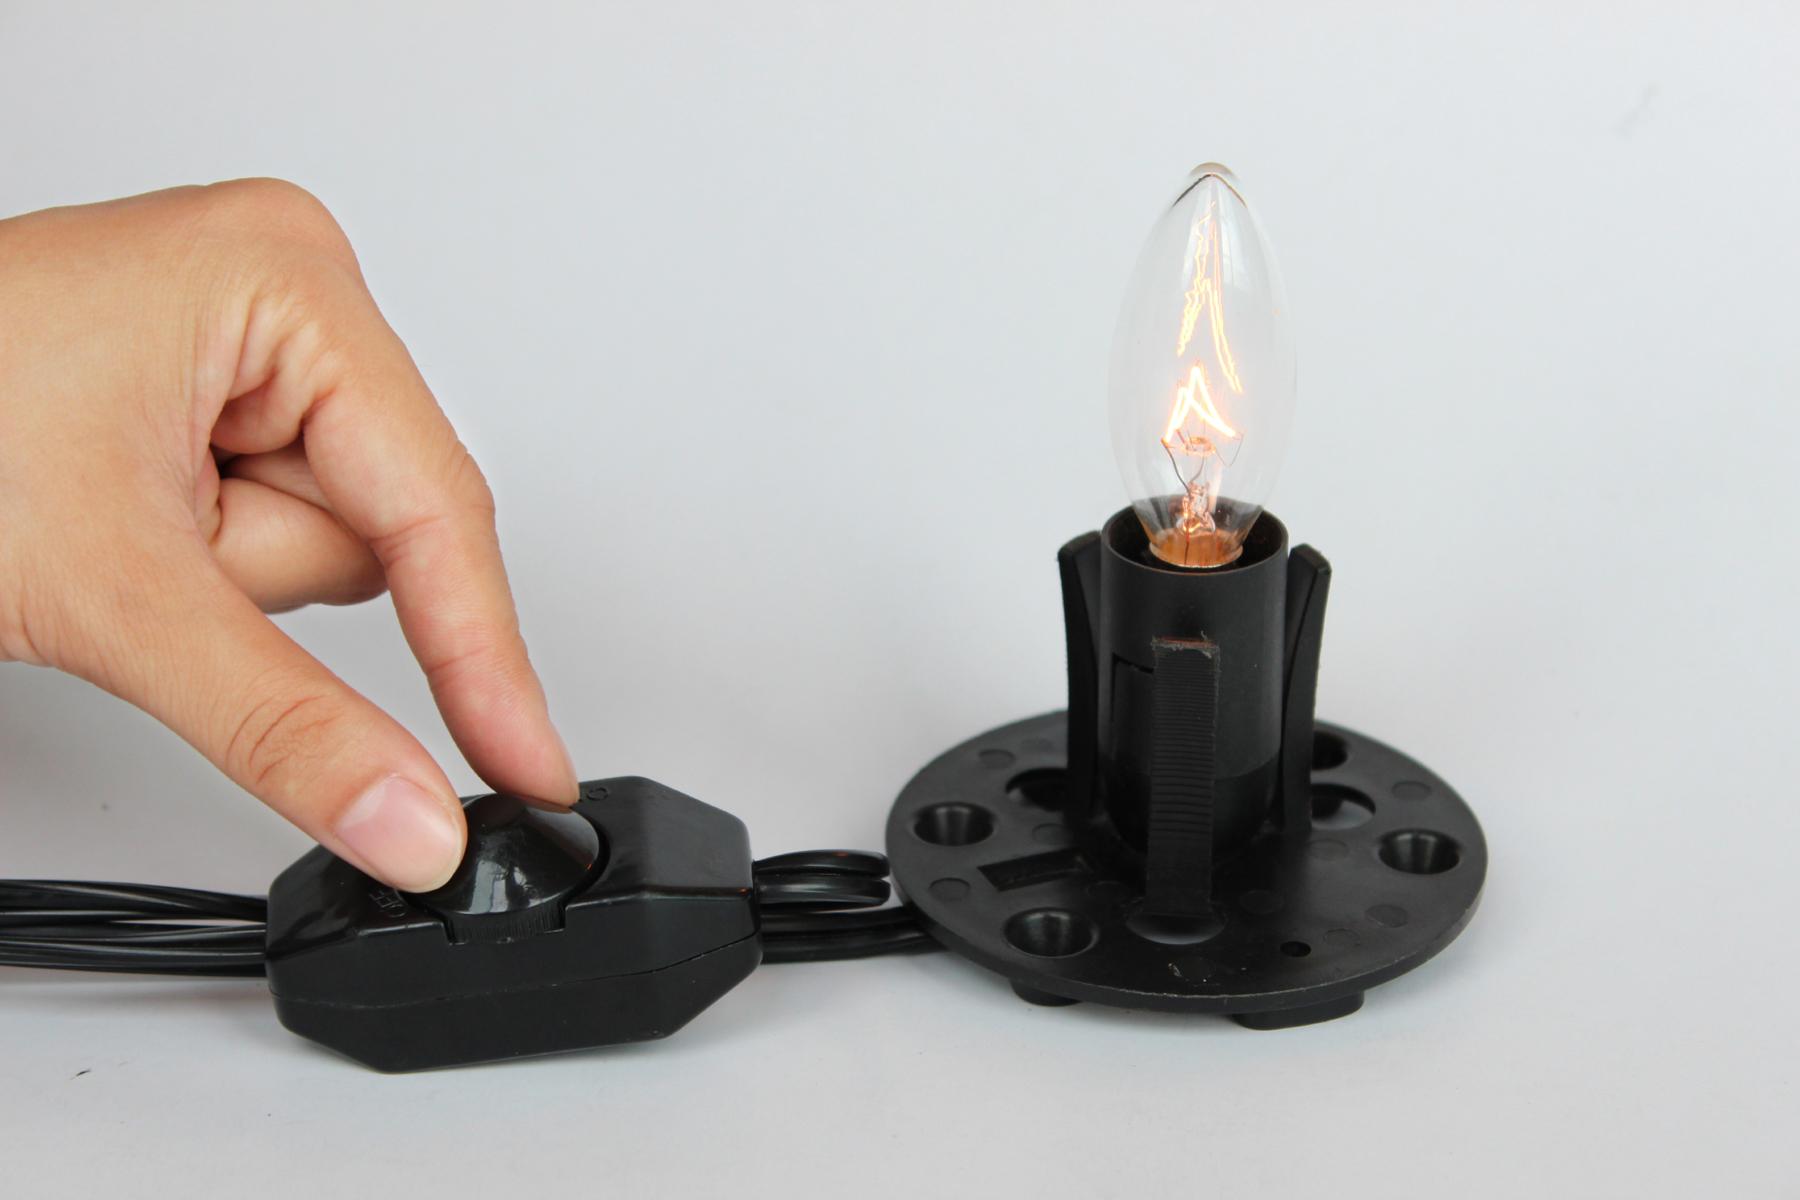
Use a sturdy ladder and have someone spot you. Turn off the power to the chandelier. Carefully remove the old bulbs and replace with new ones, being cautious not to overtighten.
Removing the Old Bulbs
Now that you have successfully removed the chandelier’s cover or shade, it’s time to proceed with removing the old bulbs. Follow these steps to safely and effectively remove the old bulbs from your high chandelier:
- Inspect the Bulbs: Before removing any bulbs, visually inspect them for any visible damage or signs of discoloration. Ensure that the power is still turned off and the bulbs have had sufficient time to cool down.
- Use Protective Gear: Put on a pair of gloves to protect your hands from any potential cuts or burns while handling the bulbs.
- Gently Twist or Unscrew: Depending on the type of bulb and socket, twist or unscrew the old bulbs counterclockwise to remove them from the chandelier. Be cautious not to apply excessive force to avoid damaging the socket or bulb.
- Set Aside the Old Bulbs: Place the removed bulbs in a safe container or wrap them in a cloth to prevent breakage. Properly dispose of the old bulbs according to local regulations regarding the recycling or disposal of light bulbs.
- Clean the Socket: Take a moment to inspect the socket for any debris or residue. Use a soft cloth or brush to clean the socket and ensure a clean contact point for the new bulbs.
Make sure to handle the old bulbs with care, as they can be fragile and easily break. It is always a good idea to have a few replacements bulbs on hand to immediately replace any bulbs that might be burned out or damaged.
With the old bulbs removed and the sockets cleaned, you are now ready to move on to the next step: cleaning the chandelier itself.
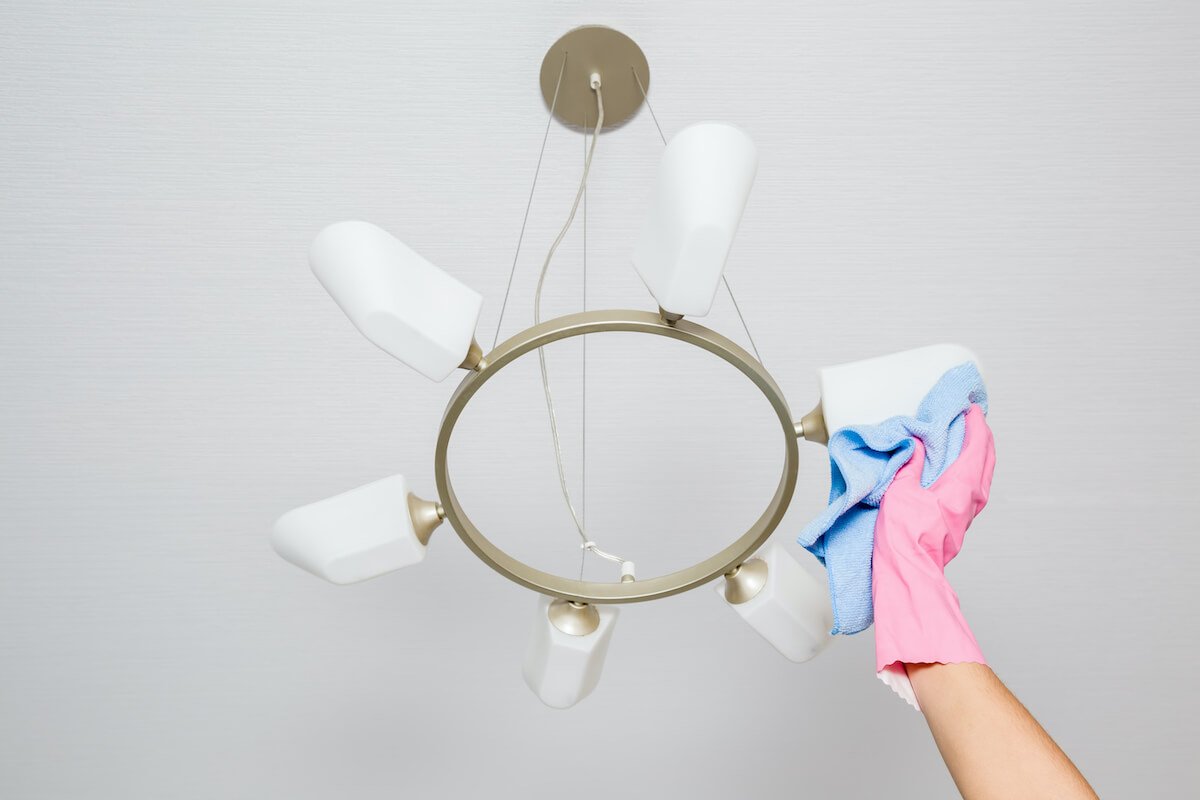
Cleaning the Chandelier
Now that you have removed the old bulbs from your high chandelier, it’s a good time to take the opportunity to clean the fixture and restore its sparkle. Follow these steps to clean your chandelier safely and effectively:
- Prepare the Cleaning Solution: In a bucket or a spray bottle, mix a solution of mild dish soap or chandelier cleaner with warm water. Follow the instructions provided on the cleaner’s packaging for the appropriate dilution ratio.
- Turn off the Power: As a safety precaution, ensure that the power to the chandelier is turned off at the circuit breaker. This will prevent any accidental electrical contact while cleaning.
- Cover Nearby Surfaces: Use plastic sheets or drop cloths to cover furniture or surrounding areas to protect them from any drips or splashes from the cleaning solution.
- Apply the Cleaning Solution: Dip a soft cloth or sponge into the cleaning solution and gently wipe down all accessible parts of the chandelier, including the arms, metal frame, and any decorative elements. Take care not to apply excessive pressure or tug on any delicate parts.
- Reach Difficult Areas: For hard-to-reach areas, use an extendable duster or a soft-bristle brush to gently remove dust and dirt. Be cautious not to damage any fragile parts or crystals.
- Dry and Polish: Once you have thoroughly cleaned the chandelier, use a clean, dry cloth to gently dry and polish the metal surfaces. This will remove any remaining moisture and restore the shine.
- Inspect for Damaged Parts: While cleaning, take the opportunity to inspect the chandelier for any damaged or missing parts, such as crystals or decorative elements. If necessary, make a note of any replacements or repairs that may be required.
Regular cleaning and maintenance of your chandelier will not only keep it looking beautiful but also prolong its lifespan. However, if you are unsure about any aspect of cleaning your chandelier or if it requires more extensive cleaning or repairs, it is advisable to seek the assistance of a professional chandelier cleaner or electrician.
With your chandelier now clean and sparkling, it’s time to move on to the next step: installing the new bulbs.
Installing the New Bulbs
With your chandelier clean and ready, it’s time to install the new bulbs. Follow these steps to properly install the new bulbs in your high chandelier:
- Refer to the Bulb Packaging: Review the instructions on the packaging of the new bulbs for any specific guidelines or warnings.
- Turn off the Power: As a safety precaution, ensure that the power to the chandelier is turned off at the circuit breaker.
- Take the New Bulbs: Carefully unwrap the new bulbs from their packaging, being mindful not to touch the glass with bare hands. Skin oils can reduce the lifespan of the bulb.
- Align the Bulbs: Align the new bulbs with the sockets, ensuring that they fit properly and are straight. Make sure not to insert the bulbs at an angle, as this can damage the socket.
- Insert the Bulbs: Gently push the new bulbs into the sockets and twist them clockwise until they are securely in place. Be careful not to overtighten, as this can cause damage to the bulb or socket.
- Test the Bulbs: Once all the new bulbs are installed, turn on the power at the circuit breaker and test the bulbs to ensure they illuminate properly. If any bulbs do not turn on, check the connections and make sure they are securely inserted.
It is important to use caution when handling and installing the new bulbs to prevent any breakage or damage. If you experience any difficulty or resistance while inserting the bulbs, double-check their compatibility with the chandelier and consult the manufacturer’s guidelines.
Congratulations! You have successfully installed the new bulbs in your high chandelier. The next step is to reattach the chandelier’s cover or shade.
Reattaching the Chandelier’s Cover or Shade
With the new bulbs securely in place, it’s time to reattach the chandelier’s cover or shade to complete the bulb replacement process. Follow these steps to reattach the chandelier’s cover or shade:
- Ensure the Power is Turned Off: Before proceeding, double-check that the power to the chandelier is turned off at the circuit breaker. This is crucial for your safety during the reattachment process.
- Align the Cover or Shade: Hold the chandelier’s cover or shade up to the chandelier, ensuring that it is aligned properly and fits securely.
- Secure the Fasteners: Using the appropriate tools (screwdriver, wrench, or clips), reattach the fasteners that hold the chandelier’s cover or shade in place. Tighten them gently but firmly, ensuring that the cover or shade is securely fastened.
- Double-Check the Stability: Give the chandelier’s cover or shade a gentle shake or tap to ensure that it is stable and properly secured. If there are any signs of looseness or instability, recheck the fasteners to ensure they are tightened adequately.
It is essential to be cautious and patient when reattaching the chandelier’s cover or shade. Take your time to ensure a proper fit and secure fastening to prevent any issues or potential hazards.
Now that the chandelier’s cover or shade is reattached, you are ready for the final step: turning the power back on and testing the new bulbs.
Turning the Power Back On
With the bulb replacement process complete and the chandelier’s cover or shade securely reattached, it’s time to turn the power back on. Follow these steps to safely restore power to your high chandelier:
- Ensure Everything is in Place: Double-check that all parts of the chandelier are properly installed and secured, including the bulbs, cover or shade, and fasteners.
- Clean up the Work Area: Remove any plastic sheets or drop cloths that were used to protect nearby surfaces during the cleaning and installation process.
- Turn on the Circuit Breaker: Locate the circuit breaker that controls the power to the chandelier and flip the switch or toggle to the “On” position. This will restore electricity to the fixture.
- Observe the Chandelier: Once the power is restored, observe the chandelier to ensure that all bulbs are illuminating properly. Take note of any flickering lights or bulbs that do not turn on, as these may be indicators of a loose connection or faulty bulb.
- Test the Light Switch: If there is a light switch specifically dedicated to the chandelier, test it to ensure that it controls the illumination. If the chandelier is controlled by a dimmer switch, ensure that the dimming function is working correctly.
- Make Adjustments if Necessary: If you notice any issues with the bulbs or the chandelier’s functionality, turn off the power again and check for loose connections or improperly installed bulbs. Make the necessary adjustments to ensure proper functionality.
By following these steps, you can safely and confidently restore power to your high chandelier and enjoy the beautiful illumination it provides.
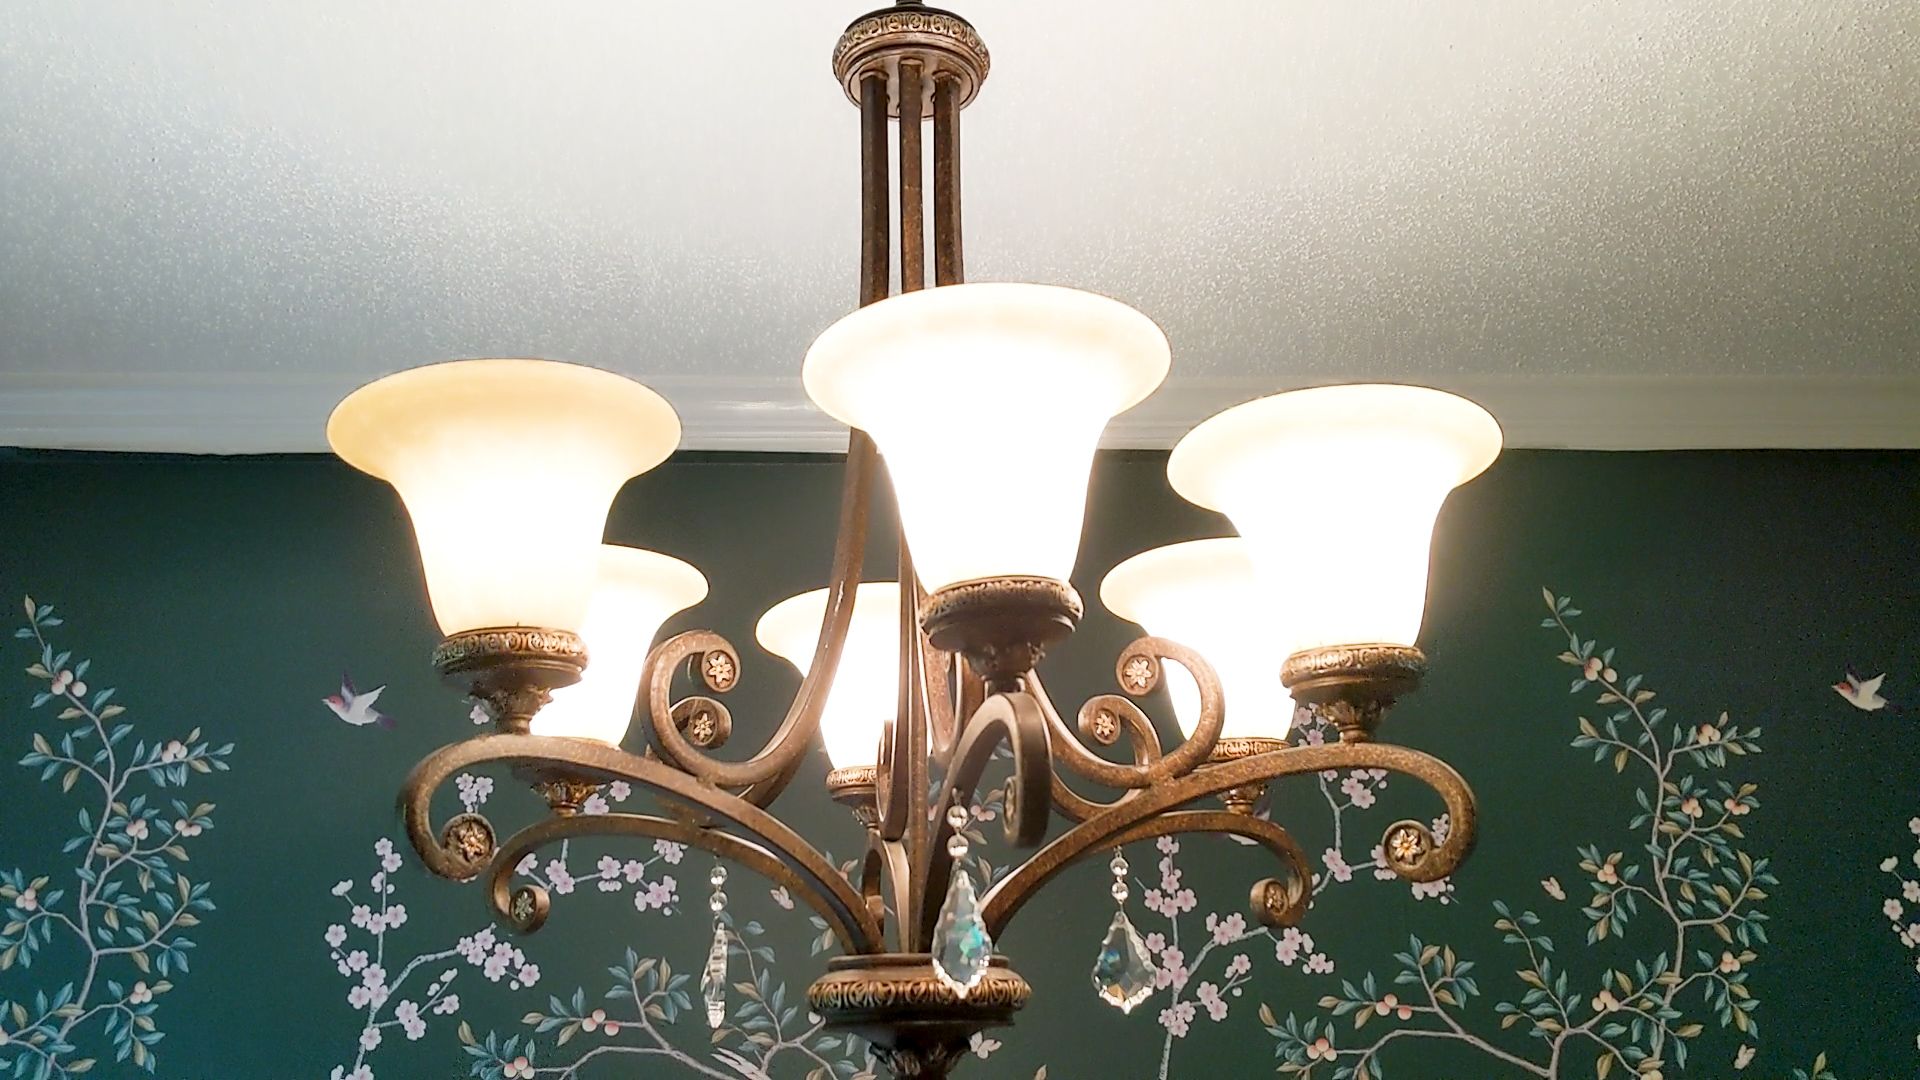
Congratulations! You have successfully completed the process of changing bulbs in a high chandelier. Your chandelier is now clean, adorned with new bulbs, and ready to bring light and elegance to your space.
Remember to periodically check and replace any burned out bulbs to maintain the chandelier’s optimal lighting. Regularly cleaning the chandelier will also help to preserve its beauty and ensure its longevity.
Testing the New Bulbs
With the power restored and the new bulbs installed, it’s important to test the bulbs to ensure they are functioning properly. Follow these steps to test the new bulbs in your high chandelier:
- Turn on the Chandelier: Use the light switch or dimmer switch to turn on the chandelier. Ensure that the power to the fixture is fully restored.
- Observe the Illumination: Carefully examine each bulb to ensure that they are all illuminated. Take note of any bulbs that may be dimmer than others or bulbs that do not light up at all.
- Check for Flickering: Watch the bulbs closely to see if any of them are flickering or experiencing intermittent lighting. Flickering bulbs may indicate a loose connection or a compatibility issue.
- Confirm Proper Brightness: Compare the brightness of the new bulbs to the previous bulbs. They should provide a consistent and appropriate level of illumination for your space.
- Test Dimming Function (If Applicable): If your chandelier is controlled by a dimmer switch, test the dimming function to ensure that the bulbs respond accordingly and adjust the brightness smoothly.
- Address any Issues: If you notice any issues with the bulbs, such as flickering or inadequate illumination, turn off the power and inspect the connections. Ensure that the bulbs are securely inserted and contacts are clean.
- Replace Faulty Bulbs: If any bulbs are not functioning correctly, switch off the power and replace them with new bulbs of the correct wattage and type.
Testing the new bulbs is an essential step to ensure that your high chandelier is providing the desired lighting effect. It allows you to identify and address any issues promptly, ensuring a well-lit and beautiful space.
By following these steps and performing regular checks on the bulbs, you can maintain the optimal functionality and appearance of your high chandelier for years to come.
Frequently Asked Questions about How To Change Bulbs In A High Chandelier
Was this page helpful?
At Storables.com, we guarantee accurate and reliable information. Our content, validated by Expert Board Contributors, is crafted following stringent Editorial Policies. We're committed to providing you with well-researched, expert-backed insights for all your informational needs.


0 thoughts on “How To Change Bulbs In A High Chandelier”