
Furniture
How To Change A High Ceiling Chandelier
Modified: October 20, 2024
Learn how to easily change a high ceiling chandelier with our step-by-step guide. Transform your space with this furniture upgrade today!
(Many of the links in this article redirect to a specific reviewed product. Your purchase of these products through affiliate links helps to generate commission for Storables.com, at no extra cost. Learn more)
Introduction
Changing a high ceiling chandelier can be a daunting task that seems like it requires professional assistance. However, with the right tools, materials, and a step-by-step guide, you can easily tackle this project on your own. Not only will you save money on hiring a professional, but you will also have the satisfaction of completing a home improvement project yourself.
Before embarking on this endeavor, it’s important to assess the installation area and determine the type of chandelier that will suit your space. You’ll also need to gather the necessary tools and materials to ensure a smooth installation process. Safety should be a top priority, so remember to turn off the power before starting any electrical work.
In this guide, we will walk you through each step of the process, from removing the old chandelier to wiring and installing the new one. By following these instructions carefully, you can have your high ceiling chandelier replaced in no time.
So let’s get started on this exciting DIY project and transform your space with a stunning new chandelier!
Key Takeaways:
- Transform your space with a stunning new chandelier by assessing the installation area, gathering necessary tools, and following step-by-step instructions for a successful DIY project.
- Prioritize safety and follow manufacturer’s instructions to securely install and test your new chandelier, adding beauty and illumination to your home with confidence.
Assessing the Installation Area
Before you begin changing a high ceiling chandelier, it’s crucial to assess the installation area to ensure that the new chandelier will fit properly and complement the space. Here are a few key factors to consider:
- Ceiling Height: Measure the height of your ceiling to determine the appropriate size of the chandelier. It’s essential to choose a chandelier that is proportionate to the room size and ceiling height. A chandelier that is too small will get lost in a large space, while one that is too large may overpower the room.
- Weight Bearing Capacity: Check the weight-bearing capacity of your ceiling to ensure it can support the new chandelier. High ceilings often have a structurally reinforced area where a chandelier can be safely mounted. Consult a professional if you are unsure about the weight-bearing capacity or if additional reinforcement is needed.
- Style and Design: Consider the overall style and design of the room when selecting a new chandelier. Choose a chandelier that complements the existing décor and enhances the aesthetics of the space. Whether you prefer a modern, traditional, or eclectic style, there are numerous chandelier options available to suit your taste.
- Lighting Needs: Determine the lighting needs of the room. Chandeliers come in various designs, including those with multiple bulbs for bright illumination or adjustable dimming options for creating ambient lighting. Consider whether you need a chandelier primarily for decorative purposes or if it serves as the main source of light in the room.
- Electrical Wiring: Assess the location of the electrical wiring and ensure that it aligns with the desired placement of the new chandelier. If necessary, hire an electrician to make any adjustments or install additional wiring for the new chandelier.
By carefully assessing the installation area, you can choose a chandelier that fits perfectly and enhances the overall ambiance of the room. Once you have considered these factors, you can move on to gathering the necessary tools and materials for the installation process.
Gathering Necessary Tools and Materials
Before you can begin changing a high ceiling chandelier, it’s crucial to gather all the necessary tools and materials. Having everything prepared beforehand will ensure a smooth and efficient installation process. Here are the essential tools and materials you’ll need:
- Ladder or Scaffolding: Since you’ll be working on a high ceiling, a sturdy ladder or scaffolding is essential for gaining access to the chandelier and safely reaching the installation area.
- Adjustable Wrench: You’ll need an adjustable wrench to loosen and tighten nuts and bolts during the removal and installation of the chandelier.
- Wire Strippers: Wire strippers are necessary for removing the insulation from the electrical wires before connecting them to the new chandelier.
- Wire Connectors: Wire connectors, also known as wire nuts, are used to securely join electrical wires together. Make sure to choose connectors that are appropriate for the wire size and ensure a secure connection.
- Electrical Tape: Electrical tape is used to wrap around the connected wires to provide insulation and protect against electrical shocks.
- Circuit Tester: A circuit tester is used to verify that the power is off before you start working on the chandelier. This is crucial for your safety.
- Chandelier Mounting Bracket: If your new chandelier requires a different mounting bracket than the previous one, make sure to have the appropriate mounting bracket ready for installation.
- Chandelier: Of course, you’ll need the new chandelier itself. Ensure that it’s the right size, style, and design for the installation area, as assessed in the previous step.
- Screws and Anchors: Depending on the mounting surface, you may need screws and anchors to secure the mounting bracket to the ceiling.
- Light Bulbs: Check the specifications provided with the chandelier to determine the type and quantity of light bulbs required. Purchase the appropriate bulbs beforehand.
By gathering these essential tools and materials, you’ll be well-prepared to tackle the installation process without any interruptions. It’s always a good idea to double-check your tools and ensure that you have everything you need before starting the project.
Now that you have all the necessary tools and materials ready, it’s time to turn off the power before proceeding with the removal of the old chandelier.
Turning off the Power
Safety should always be a top priority when working with electrical components. Before you start removing the old chandelier, it’s crucial to turn off the power to avoid any potential electrical hazards. Here’s how you can safely turn off the power:
- Locate the Electrical Panel: Identify the location of your electrical panel in your home. It is usually found in the basement, utility room, or garage. In some cases, it may be located outside the house.
- Open the Electrical Panel: Remove the panel cover by using a screwdriver or following any specific instructions provided by the manufacturer.
- Locate the Chandelier Circuit Breaker: Inside the electrical panel, locate the circuit breaker that corresponds to the chandelier. Circuit breakers are labeled to identify each circuit in your home. Look for a label indicating the chandelier or refer to the circuit diagram if available.
- Switch Off the Circuit Breaker: Once you have identified the chandelier circuit breaker, switch it to the “Off” position. This will cut off the power supply to the chandelier and ensure a safe working environment.
- Test the Chandelier: To double-check that the power is off, attempt to turn on the chandelier using the light switch or pulling the chain. If the chandelier remains off, it is a clear indication that the power has been successfully turned off.
- Secure the Electrical Panel: After verifying that the power is off, securely replace the panel cover and fasten it using the appropriate screws.
It’s important to note that turning off the main circuit breaker in your electrical panel will shut off power to the entire house. If you’re not comfortable doing this or if you’re unsure which circuit breaker controls the chandelier, it’s advisable to consult a licensed electrician for assistance.
Now that you have successfully turned off the power, you can proceed to the next step, which involves removing the old chandelier.
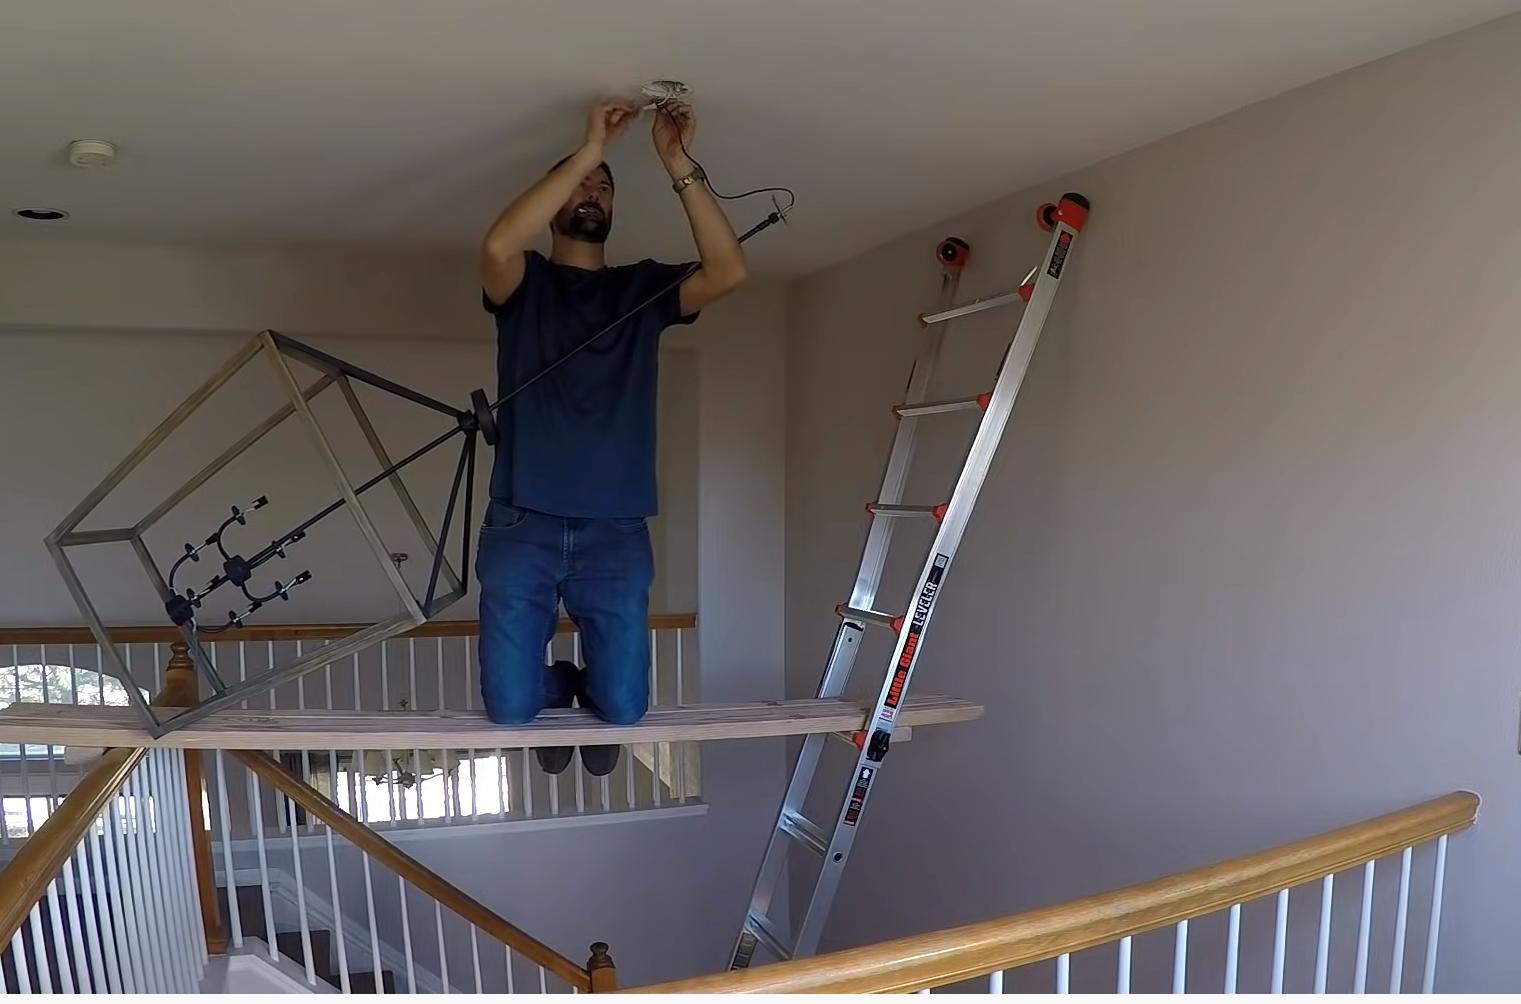
Removing the Old Chandelier
Now that the power is turned off, you can safely begin removing the old chandelier. Follow these steps to complete this process:
- Clear the Area: Clear the space around the chandelier and remove any furniture or objects that might obstruct your work.
- Inspect the Existing Wiring: Carefully inspect the existing wiring to ensure there are no signs of damage or fraying. If you notice any issues, it’s advisable to hire a licensed electrician to address them before proceeding.
- Disconnect the Chandelier: Locate the junction box where the chandelier is connected to the electrical wiring. Most chandeliers have a decorative canopy that covers the junction box. Gently unscrew and remove the canopy to access the electrical connections.
- Disconnect the Wiring: Using your adjustable wrench, carefully disconnect the wiring connections. Typically, the chandelier will have black and white wires connected to the corresponding wires in the junction box. Some chandeliers may also have a ground wire that needs to be disconnected.
- Support the Chandelier: Since you’re working with a high ceiling, it’s important to have someone assist you in safely supporting the weight of the chandelier while you disconnect the wiring and remove any mounting hardware.
- Remove the Mounting Hardware: Once the chandelier is disconnected, remove the mounting hardware that secures it to the ceiling. This may involve removing screws or nuts that hold the chandelier in place.
- Lower the Chandelier: Carefully lower the chandelier from the ceiling, ensuring that it is safely supported throughout the process. Take caution not to damage any surrounding objects or surfaces during this step.
- Inspect the Mounting Surface: After removing the chandelier, inspect the mounting surface for any damage or issues. Address any necessary repairs or modifications before proceeding with the installation of the new chandelier.
By following these steps, you can successfully remove the old chandelier and prepare for the installation of the new one. Always exercise caution when working with electrical components and ensure that the chandelier is properly supported throughout the removal process.
With the old chandelier out of the way, you can now move on to the next step, which involves disconnecting the wiring to prepare for the installation of the new chandelier.
Read more: How To Change Bulbs In A High Chandelier
Disconnecting the Wiring
Now that the old chandelier has been removed, it’s time to disconnect the wiring. Follow these steps to safely disconnect the wiring and prepare for the installation of the new chandelier:
- Inspect the Wiring: Before proceeding, carefully inspect the wiring in the ceiling junction box. Look for any signs of damage or wear, such as frayed wires or exposed insulation. If you notice any issues, it’s essential to address them before proceeding with the installation.
- Prepare the New Chandelier: Set up the new chandelier in a safe and accessible location. Refer to the manufacturer’s instructions to familiarize yourself with the wiring requirements and any specific guidelines for connecting the chandelier.
- Turn Off the Power: Double-check that the power to the chandelier is still turned off by testing the light switch or pulling the chain. This step is essential for your safety during the wiring process.
- Exposed Wires: Depending on the wiring configuration, you may need to expose the wires in the ceiling junction box. This can typically be done by removing wire nuts or connectors that cover the individual wires.
- Matching Wires: Match the corresponding wires from the new chandelier to the existing wires in the ceiling junction box. Typically, black wires are connected to black wires, white wires to white wires, and any ground wires are connected together.
- Wire Connectors: Using wire connectors, securely join the matching wires. Twist the exposed wire ends together and then screw on the wire connector until it is tight and secure. Ensure that all connections are properly insulated and protected.
- Ground Wire: If your chandelier has a ground wire, connect it to the grounding wire in the ceiling junction box. This wire is typically green or bare copper. Consult the manufacturer’s instructions for specific grounding requirements.
- Test the Connections: Once the wiring is connected, gently tug on each wire to ensure that the connections are secure. Check for any loose or unstable connections and correct them if necessary.
During the wiring process, it’s essential to follow all safety precautions, such as using wire connectors, properly insulating the connections with electrical tape, and ensuring that the chandelier is properly supported. If you’re unsure about any aspect of the wiring, consult a licensed electrician for assistance.
With the wiring successfully disconnected and the new chandelier prepared, you’re now ready to proceed with the installation by attaching the mounting bracket.
Preparing the New Chandelier
With the old chandelier removed and the wiring disconnected, it’s time to prepare the new chandelier for installation. Follow these steps to ensure that your new chandelier is ready to be mounted:
- Unpack the Chandelier: Carefully unpack the new chandelier and remove any packaging materials. Lay out all the components and verify that all the necessary parts are present.
- Read the Instructions: Take the time to carefully read the manufacturer’s instructions provided with the chandelier. Familiarize yourself with any specific wiring instructions, assembly requirements, or safety precautions.
- Assemble the Chandelier: If your chandelier requires assembly, follow the provided instructions to put it together. This may involve attaching arms, crystals, or shades as per the design of the chandelier.
- Inspect the Chandelier: Thoroughly inspect the chandelier for any defects or damage. Check for any loose or broken parts, frayed wires, or missing components. If you notice any issues, contact the manufacturer for guidance on how to proceed.
- Prepare the Mounting Bracket: If your new chandelier requires a different mounting bracket than the previous one, ensure that the new bracket is compatible and, if needed, attach it securely to the chandelier following the manufacturer’s instructions.
- Check the Weight: Confirm that the new chandelier is within the weight-bearing capacity of your ceiling. Refer to the specifications provided by the manufacturer and ensure that your ceiling can safely support the weight of the chandelier.
- Inspect the Wiring: Examine the chandelier’s wiring, ensuring that it is in good condition and free from any defects. Look for any loose connections or damaged wires. If any issues are detected, consult a licensed electrician for assistance.
- Prepare Light Bulbs: Depending on the type and style of chandelier, you may need to install light bulbs before mounting it to the ceiling. Refer to the manufacturer’s instructions for the appropriate type and wattage of bulbs to use. If included, attach any decorative bulbs or shades to the chandelier.
By carefully preparing the new chandelier, you can ensure a smooth installation process and avoid any setbacks or issues. Take the time to read the instructions, inspect the chandelier for defects, and assemble it correctly. With the new chandelier ready, it’s time to move on to the next step: attaching the mounting bracket.
When changing a high ceiling chandelier, use a sturdy ladder and have someone assist you. Turn off the power, remove the old fixture, and carefully install the new one, following the manufacturer’s instructions.
Attaching the Mounting Bracket
Now that the new chandelier is prepared, the next step in the installation process is attaching the mounting bracket. The mounting bracket provides a secure and stable base for hanging the chandelier from the ceiling. Follow these steps to securely attach the mounting bracket:
- Gather the Bracket and Hardware: Locate the mounting bracket included with your new chandelier. Ensure that you have all the necessary hardware, such as screws or bolts, that are required for attaching the bracket.
- Position the Bracket: Hold the mounting bracket up to the ceiling in the desired location. Make sure that it is aligned with the electrical junction box and that any wiring or cables are easily accessible through the openings in the bracket.
- Mark the Screw Holes: Use a pencil or marker to mark the positions of the screw holes on the ceiling. These markings will serve as a guide when drilling or inserting screws into the ceiling.
- Drill Pilot Holes: If necessary, drill pilot holes into the marked positions on the ceiling. The size of the pilot holes will depend on the type of hardware included with the chandelier. Use a drill bit that matches the size of the screws or anchors to be used.
- Secure the Bracket: Place the mounting bracket over the pilot holes and insert the screws or bolts through the bracket and into the ceiling. Use a screwdriver or wrench to tighten them securely. Ensure that the bracket is firmly attached to the ceiling and can support the weight of the chandelier.
- Check Levelness: Use a level to verify that the mounting bracket is level. Adjust the bracket if necessary to ensure that the chandelier will hang straight.
- Attach Ground Wire: If your chandelier has a ground wire, securely attach it to the grounding screw in the mounting bracket or follow the manufacturer’s instructions for proper grounding.
- Double-Check Secureness: Once the mounting bracket is attached, give it a gentle tug to ensure that it is firmly secured to the ceiling. This will help prevent any accidents or instability when hanging the chandelier.
By following these steps, you can confidently attach the mounting bracket and create a sturdy foundation for hanging your new chandelier. Take your time to ensure that the bracket is securely attached and properly aligned. With the mounting bracket in place, you’re now ready to proceed to the next step: wiring the new chandelier.
Wiring the New Chandelier
With the mounting bracket securely attached, it’s time to wire the new chandelier. Proper wiring is crucial to ensure that the chandelier functions safely and effectively. Follow these steps to wire your new chandelier:
- Gather the Wiring: Locate the chandelier’s wiring and ensure that it is in good condition, free from any damage or defects.
- Strip the Wires: Using wire strippers, carefully remove about half an inch of insulation from the end of each wire, exposing the copper conductor.
- Identify the Wires: Typically, chandeliers have black (hot), white (neutral), and sometimes green or bare copper (ground) wires. Refer to the manufacturer’s instructions to identify the specific color coding for your chandelier’s wires.
- Match the Wires: Match the corresponding wires from the chandelier to the wires in the electrical junction box. Connect the black wire from the chandelier to the black (hot) wire in the junction box, the white wire to the white (neutral) wire, and the green or bare copper wire to the grounding wire.
- Secure the Connections: Twist the matching wires together firmly, ensuring a tight connection. Then, cover each connection with a wire nut and twist it clockwise until secure. This will insulate the connections and prevent any exposed wires.
- Wrap with Electrical Tape: After securing the connections with wire nuts, wrap each connection with electrical tape. This provides an extra layer of insulation and helps to keep the wires in place.
- Tuck the Wires: Carefully tuck the connected and insulated wires into the electrical junction box. Ensure that they are neatly arranged and not pinched or strained.
- Reinstall the Canopy: If your chandelier has a decorative canopy that covers the electrical junction box, carefully reinstall it. Follow the manufacturer’s instructions to securely fasten the canopy in place.
- Inspect the Connections: Once the wiring is complete, double-check all the connections to ensure they are secure and insulated. Gently tug on each wire to ensure there are no loose connections.
Always adhere to local electrical codes and regulations when wiring your chandelier. If you are unsure about any aspect of the wiring process or feel uncomfortable working with electrical components, it’s best to seek assistance from a licensed electrician.
With the chandelier successfully wired, you’re one step closer to completing the installation. Next, we’ll discuss how to securely attach the chandelier to the ceiling and ensure its stability.
Read more: How To Clean Chandeliers On High Ceiling
Securing the Chandelier to the Ceiling
Now that the wiring is complete, it’s time to securely attach the chandelier to the ceiling. Properly securing the chandelier is essential for its stability and safety. Follow these steps to ensure a secure installation:
- Position the Chandelier: Carefully lift the chandelier and position it over the mounting bracket. Make sure the mounting bracket aligns with the keyholes or screws on the chandelier’s canopy or base.
- Insert the Screws: Insert the screws through the keyholes or mounting holes on the chandelier and into the corresponding openings on the mounting bracket. Tighten the screws using a screwdriver or the provided wrench, but be cautious not to overtighten and damage the chandelier or the bracket.
- Ensure Stability: Gently shake the chandelier to check for any wobbling or instability. If you notice any movement, loosen the screws slightly and adjust the chandelier until it hangs evenly and securely. Then, tighten the screws again.
- Attach Additional Support: For heavier or larger chandeliers, additional support may be required. Consult the manufacturer’s instructions to determine if any additional support brackets or chains are necessary. Securely attach them according to the provided guidelines.
- Check Clearances: Ensure that the chandelier has adequate clearance from the ceiling and surrounding objects. Make any necessary adjustments to ensure proper spacing and avoid any potential hazards.
- Tidy up the Wiring: Neatly arrange and tuck any excess wiring from the chandelier into the ceiling junction box. Use wire clips or ties to keep the wires organized and prevent them from hanging loose.
- Verify Stability: Once everything is in place, gently shake or jiggle the chandelier again to verify its stability. This final check will ensure that the chandelier is securely attached to the ceiling and will remain in place.
When securing the chandelier, it’s important to follow the manufacturer’s instructions and recommendations for your specific model. If you have any concerns about the stability or installation process, it’s advisable to consult a professional electrician or follow up with the chandelier manufacturer for guidance.
With the chandelier securely attached to the ceiling, you’re almost done! The next step involves installing light bulbs, adjusting the height, and finalizing the installation.
Installing Light Bulbs and Adjusting Height
Now that the chandelier is securely attached to the ceiling, it’s time to install the light bulbs and adjust the height. Follow these steps to complete this final stage of the installation:
- Refer to the Instructions: Consult the manufacturer’s instructions for your specific chandelier model to determine the type and maximum wattage of light bulbs recommended.
- Prepare the Light Bulbs: Remove any protective covers or packaging from the light bulbs. Ensure that your hands are clean and dry to prevent any damage to the bulbs.
- Insert the Light Bulbs: Carefully insert the light bulbs into the appropriate sockets on the chandelier. Gently twist them clockwise until they are securely in place. Avoid overtightening, as it can damage the bulb or the socket.
- Turn on the Power: Double-check that the power to the chandelier is still turned off before proceeding. Once confirmed, restore power to the chandelier by switching on the circuit breaker.
- Adjust the Height: If your chandelier allows for height adjustment, carefully adjust the length of the suspension chain or rods according to your desired height. Follow the manufacturer’s instructions for adjusting the height and ensure that it is done safely and securely.
- Level the Chandelier: Use a level to ensure that the chandelier is hanging straight and level. Make any necessary adjustments to the height or positioning to ensure a balanced and aesthetically pleasing appearance.
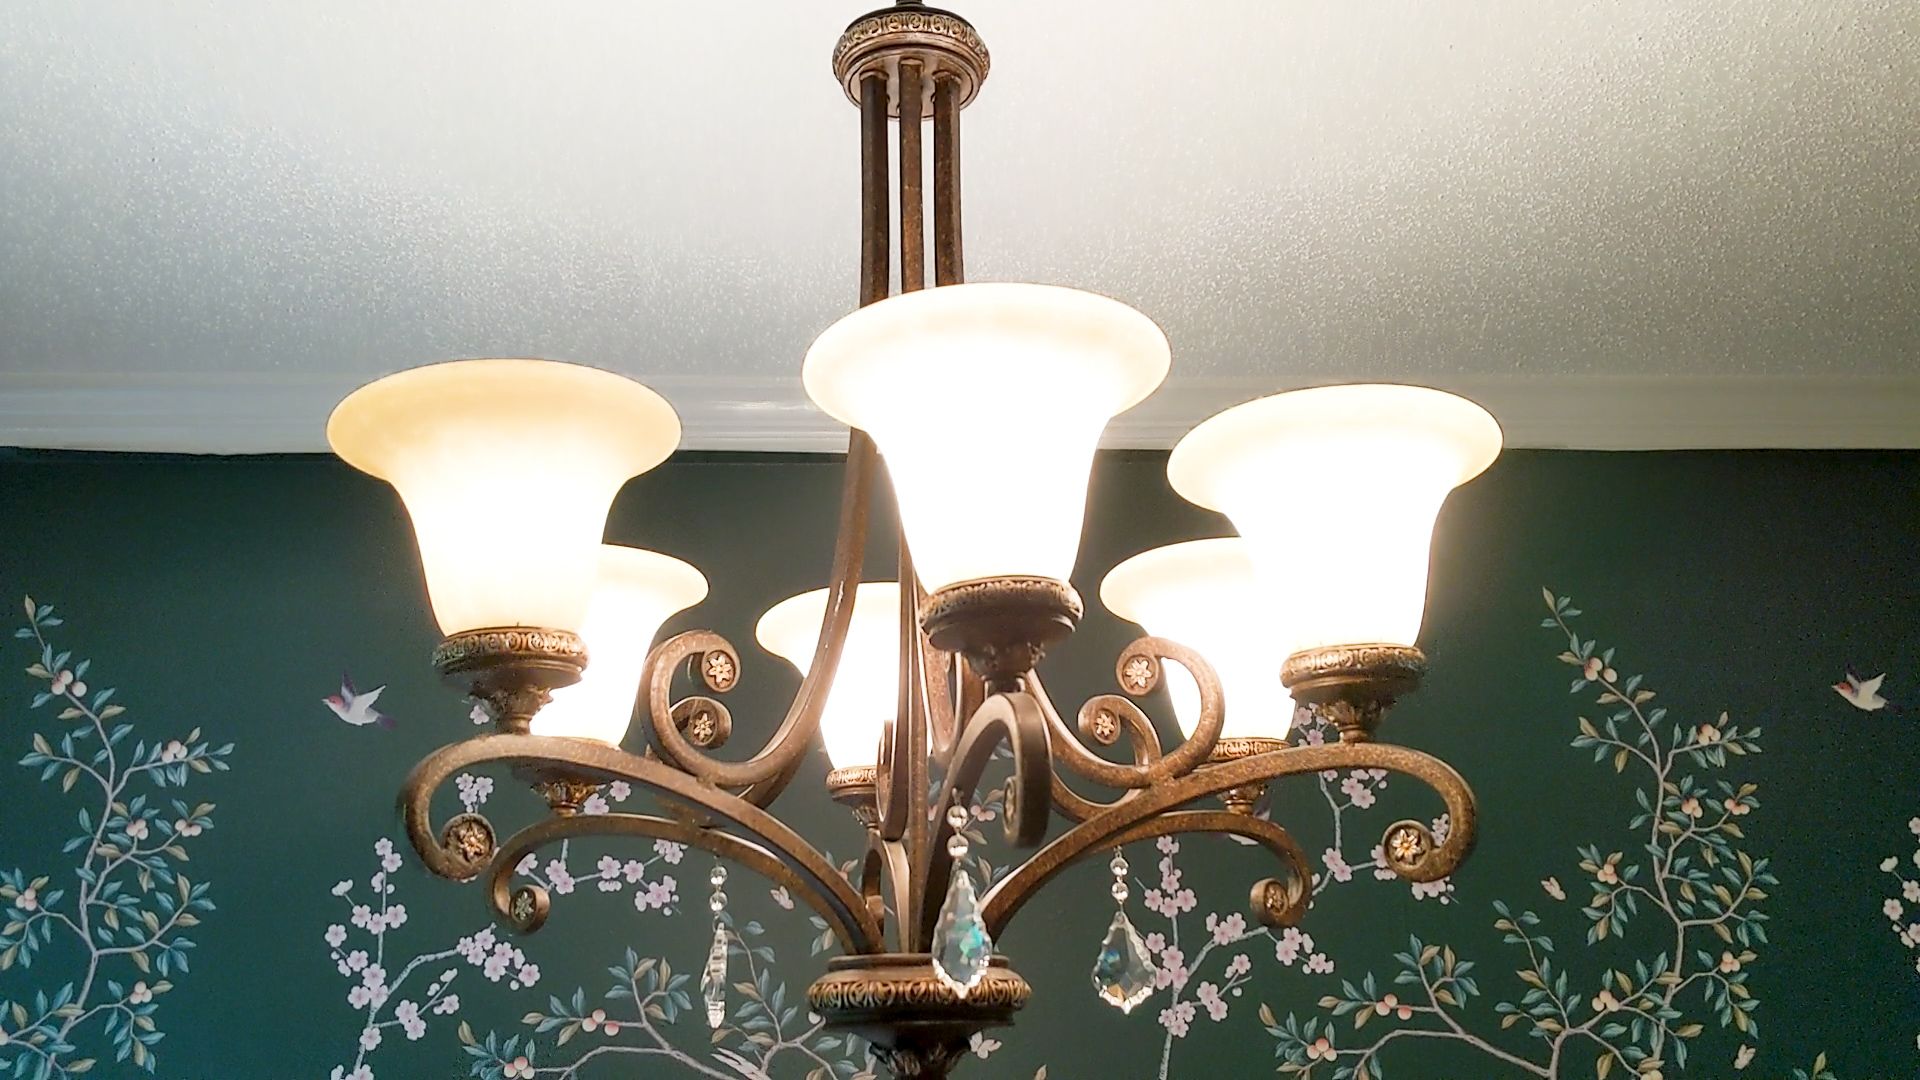
- Test the Light Bulbs: With the power restored, turn on the chandelier and check that all the light bulbs are working properly. Replace any defective bulbs as needed.
- Final Check: Give the chandelier a final shake or gentle push to ensure that it is stable and properly secured. Inspect the connections, light bulbs, and overall appearance to ensure everything is in order.
By following these steps, you can complete the installation of your chandelier. Always refer to the manufacturer’s instructions provided with your chandelier for specific guidelines and recommendations.
With the light bulbs installed and the height adjusted, your newly installed chandelier will illuminate your space and add a touch of elegance. Before concluding, it’s important to perform one final test to ensure that everything is functioning correctly.
Restoring Power and Testing the Chandelier
Now that the installation is complete, it’s time to restore power to the chandelier and conduct a final test to ensure that everything is working properly. Follow these steps to safely restore power and test your newly installed chandelier:
- Double-Check: Before proceeding, make sure that all the connections are secure, the light bulbs are properly installed, and the chandelier is hanging securely.
- Turn On the Power: Locate the circuit breaker that controls the power to the chandelier. Flip the switch to the “On” position to restore power to the chandelier.
- Test the Chandelier: Turn on the light switch or pull the chain to illuminate the chandelier. Observe the light bulbs to ensure they light up properly without flickering or any other issues.
- Check for any Issues: Pay close attention to any signs of instability, flickering lights, or unusual sounds coming from the chandelier. If you notice any problems, immediately turn off the power and investigate the cause before continuing.
- Inspect the Wiring: Perform a visual inspection of the wiring connections to ensure that they remain secure and are not experiencing any loose or exposed wires.
- Adjust the Lighting: If your chandelier has adjustable settings for brightness or dimming, experiment with different lighting levels to find the desired ambiance for your space.
By following these steps, you can confidently restore power to the chandelier and test its functionality. Always remember to prioritize safety throughout the process and consult a licensed electrician if you encounter any issues or concerns.
With power restored and the chandelier successfully tested, you have completed the installation process. Your new chandelier is ready to add beauty and illumination to your space. Enjoy the enhanced aesthetic and ambiance that it brings to your home!
If you have any further questions or need assistance, do not hesitate to consult a professional or refer to the manufacturer’s instructions for specific guidance related to your chandelier.
Conclusion
Congratulations! You have successfully changed a high ceiling chandelier on your own. By following the step-by-step guide and using the right tools and techniques, you have transformed your space and added a stunning focal point to your room.
Throughout the process, you assessed the installation area, gathered necessary tools and materials, turned off the power, removed the old chandelier, disconnected the wiring, prepared the new chandelier, attached the mounting bracket, wired the chandelier, secured it to the ceiling, installed light bulbs, adjusted the height, restored power, and tested the chandelier. Each step was carefully executed, ensuring your safety and achieving a beautiful result.
Remember, safety should always be your top priority when working with electrical components, and it is essential to turn off the power before starting any electrical work. If you ever feel unsure or uncomfortable during the installation process, it is wise to consult a licensed electrician for assistance.
Now, enjoy the beauty and illumination that your new chandelier brings to your space. Step back and marvel at how it enhances the overall ambience and transforms the room. The right chandelier can completely elevate the look and feel of any space, making it more elegant, stylish, and inviting.
If you ever decide to change your chandelier in the future or take on other DIY projects, feel free to refer back to this guide as a helpful reference. With the skills and knowledge you have gained, you are well-prepared to tackle future home improvement endeavors.
Thank you for choosing to change your high ceiling chandelier on your own. Embrace the sense of accomplishment that comes with a successful DIY project, and enjoy the beautiful new focal point in your space!
Frequently Asked Questions about How To Change A High Ceiling Chandelier
Was this page helpful?
At Storables.com, we guarantee accurate and reliable information. Our content, validated by Expert Board Contributors, is crafted following stringent Editorial Policies. We're committed to providing you with well-researched, expert-backed insights for all your informational needs.


0 thoughts on “How To Change A High Ceiling Chandelier”