Furniture
How To Hang A Swag Lamp
Modified: September 2, 2024
Learn how to effortlessly hang a swag lamp and add a touch of elegance to your furniture. Step-by-step guide with helpful tips and tricks.
(Many of the links in this article redirect to a specific reviewed product. Your purchase of these products through affiliate links helps to generate commission for Storables.com, at no extra cost. Learn more)
Introduction
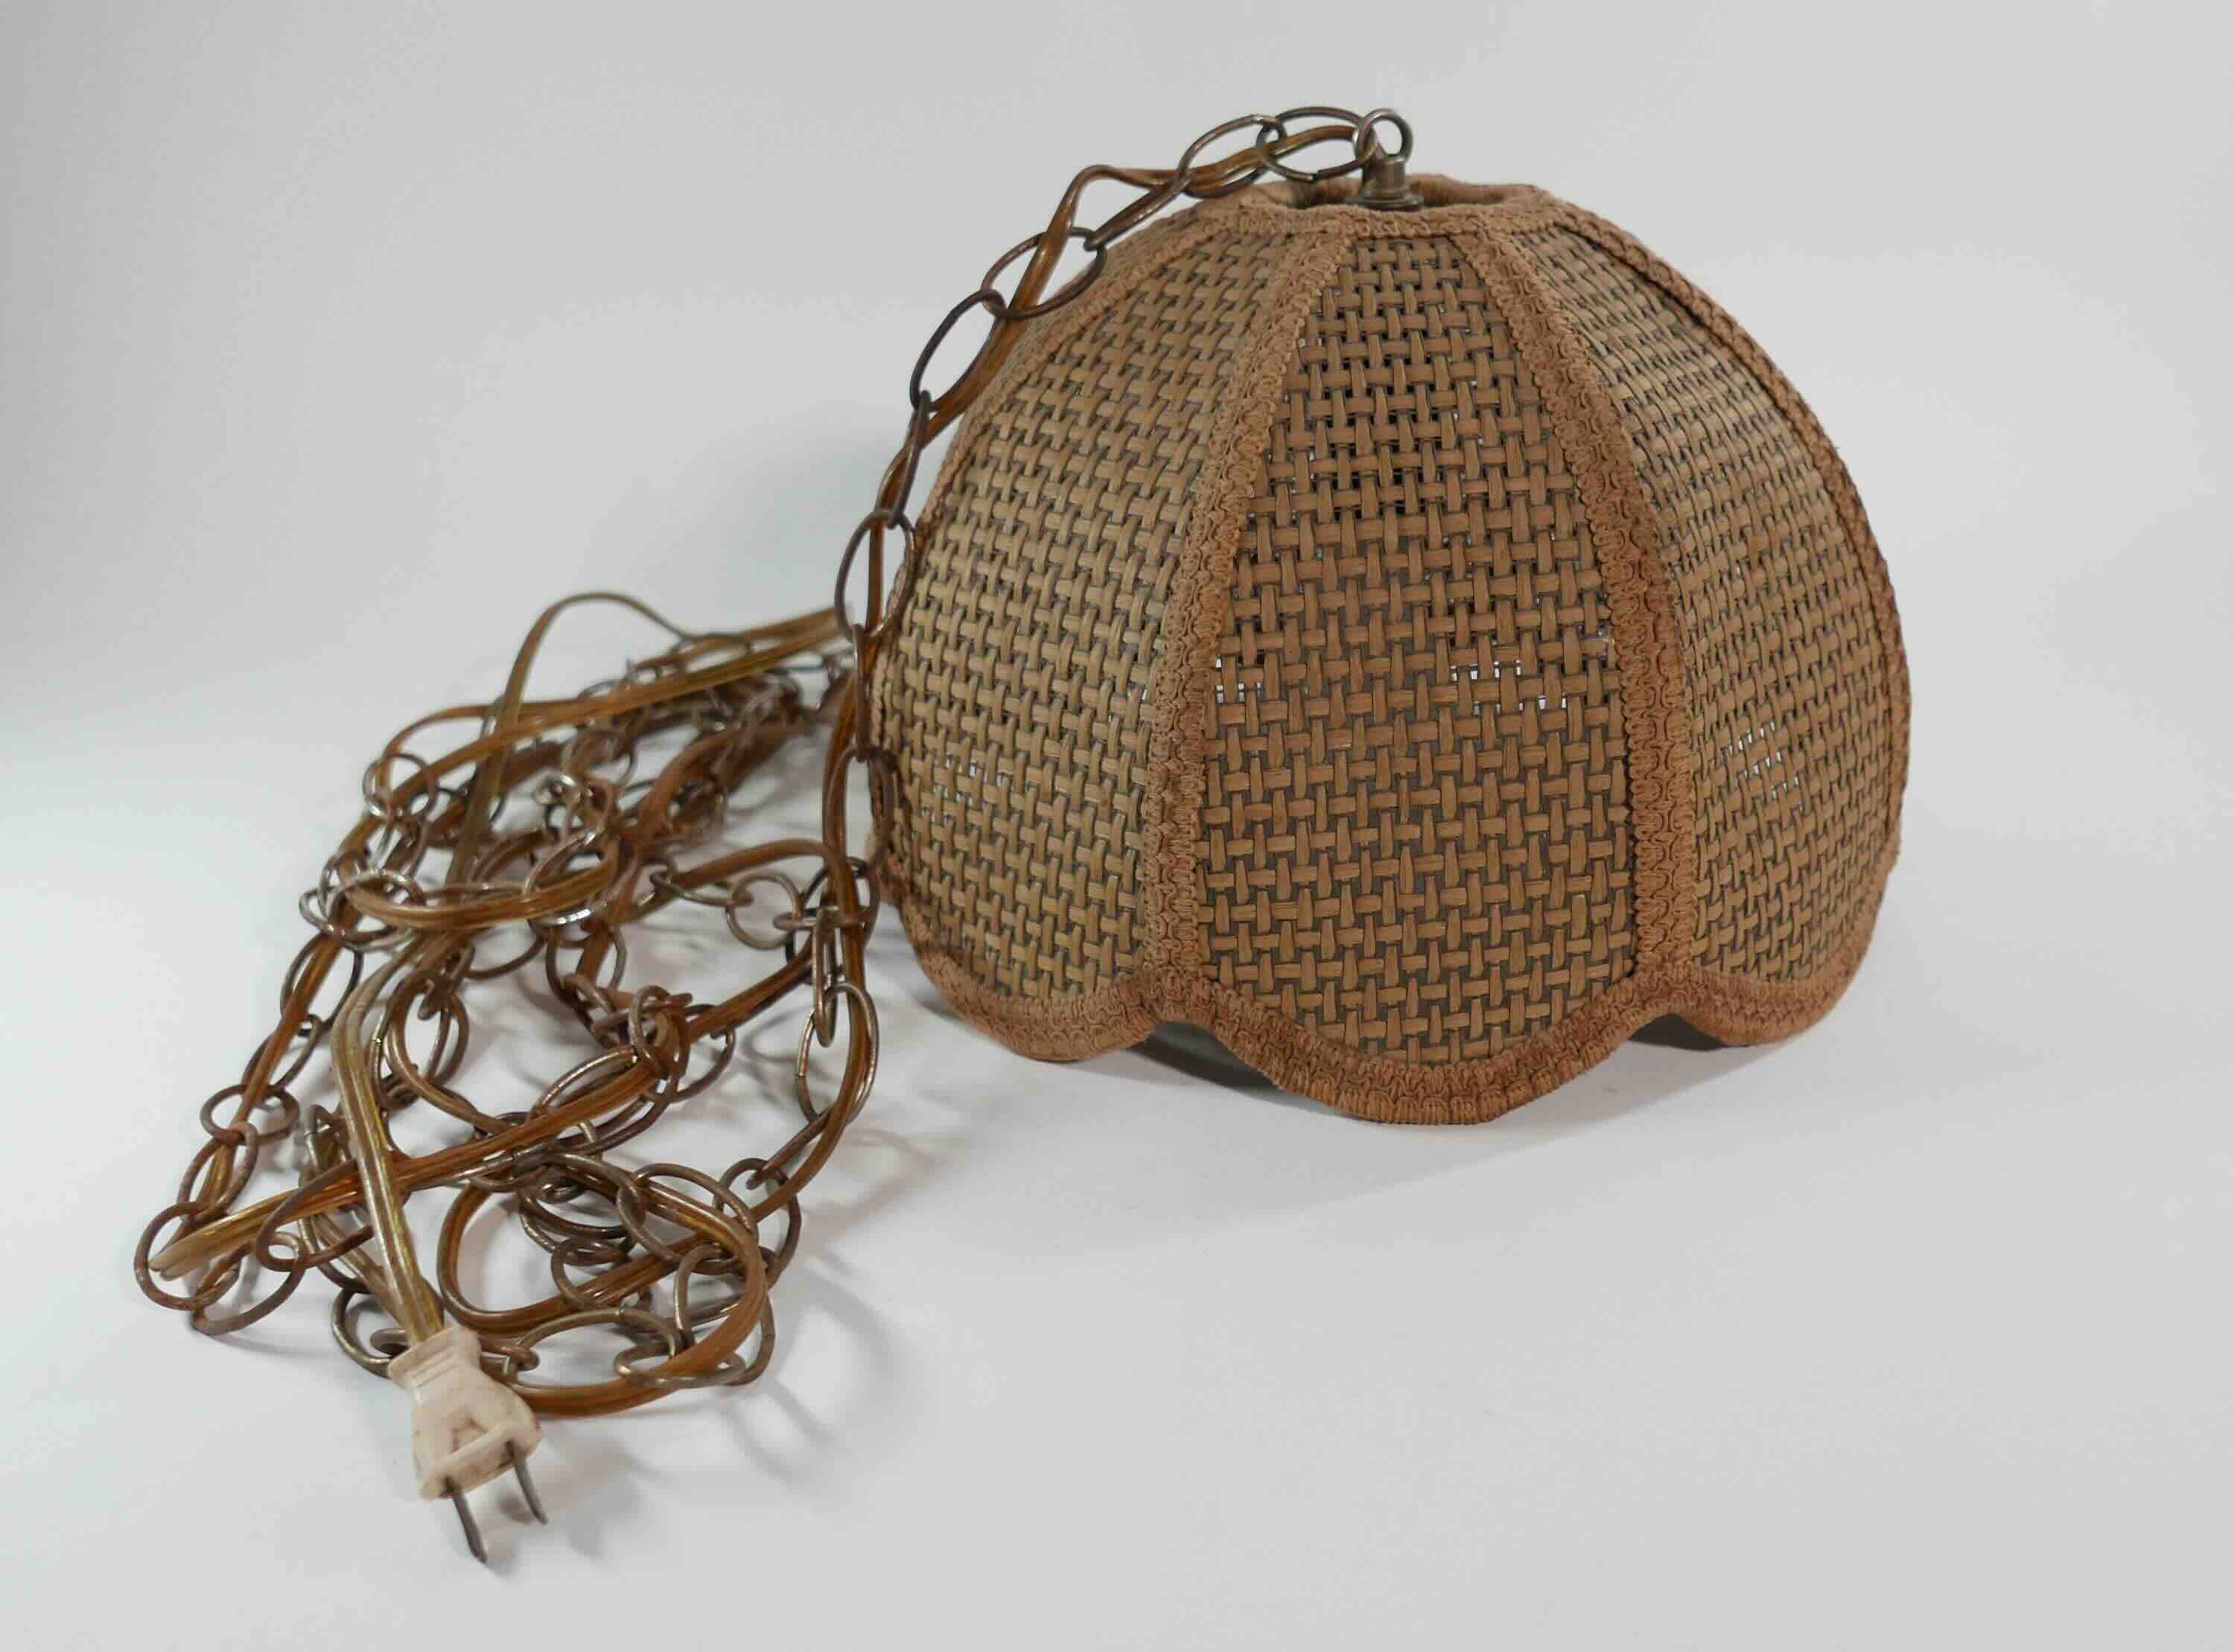
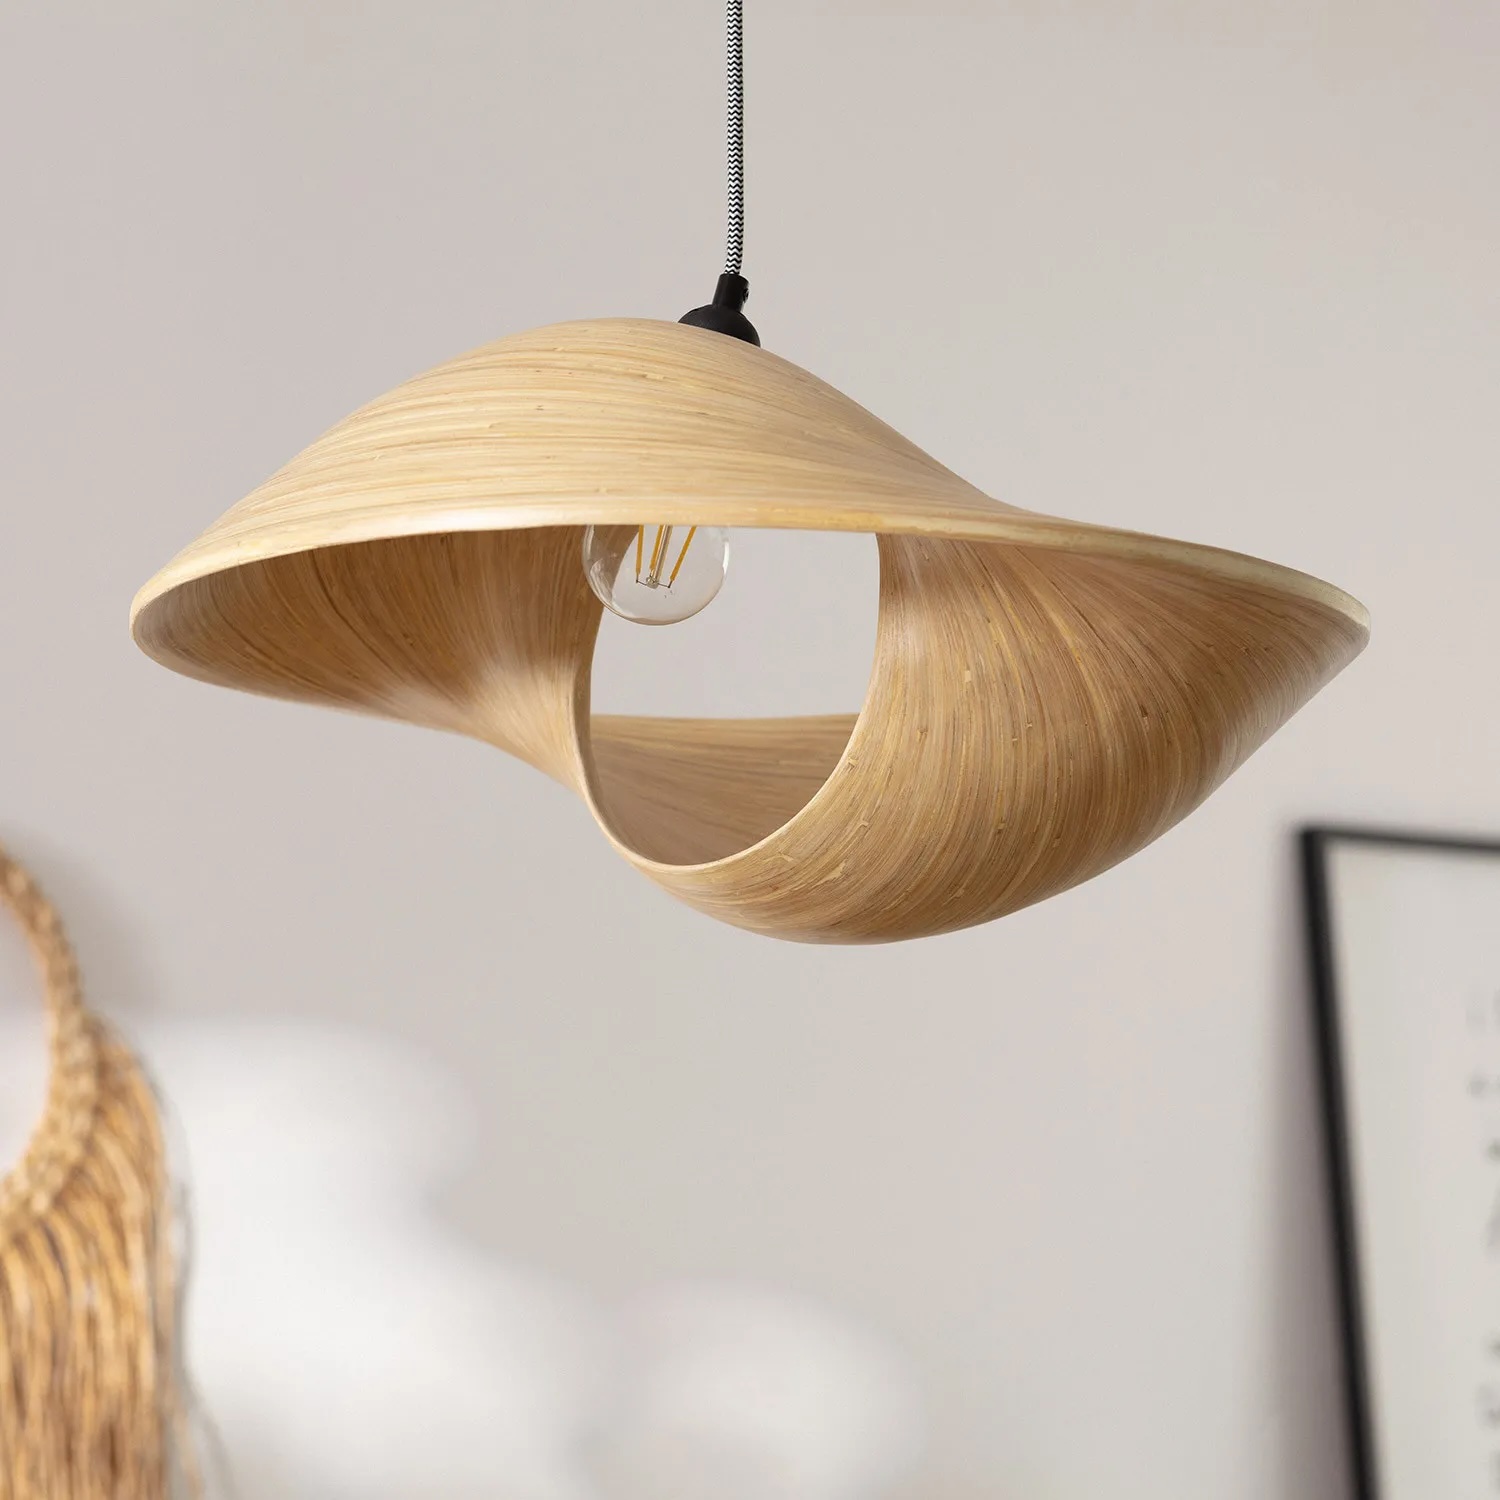
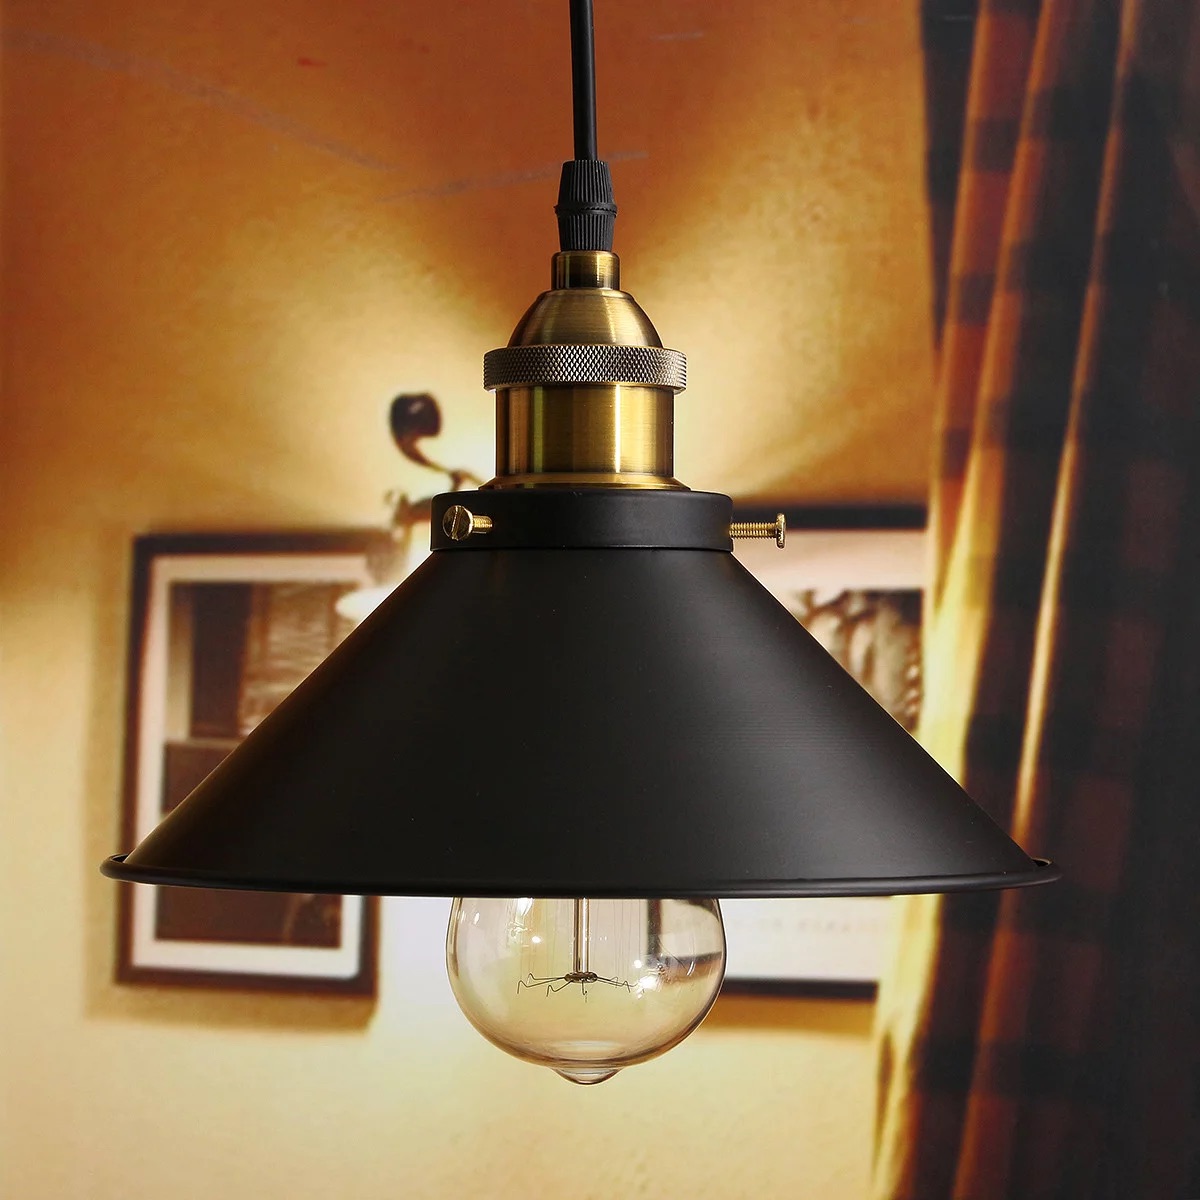
Adding a swag lamp to your home décor can instantly elevate the ambiance and add a touch of elegance. Swag lamps, also known as hanging lamps or pendant lamps, create a beautiful focal point in any room. Whether you want to create a cozy reading nook, enhance your dining area, or add a stylish lighting element to your bedroom, learning how to hang a swag lamp is a skill worth mastering.
In this article, we will guide you through the step-by-step process of hanging a swag lamp. From choosing the perfect location to securing the lamp cord, we’ll cover all the essentials to ensure a safe and visually pleasing installation.
Before we dive into the details, let’s take a look at the tools and materials you’ll need for this project.
Key Takeaways:
- Elevate your home décor with a swag lamp, adding elegance and ambiance to any room. Follow our step-by-step guide to confidently hang a swag lamp, creating a beautiful focal point while prioritizing safety and functionality.
- Master the art of hanging a swag lamp by choosing the perfect location, preparing the ceiling, and securing the lamp cord. Enjoy the stylish lighting element while ensuring a safe and visually pleasing installation.
Read more: How To Hang Swag Curtains
Tools and Materials Needed
Before you begin the installation process, gather the following tools and materials:
- Drill
- Stud finder
- Measuring tape
- Pencil
- Ladder or step stool
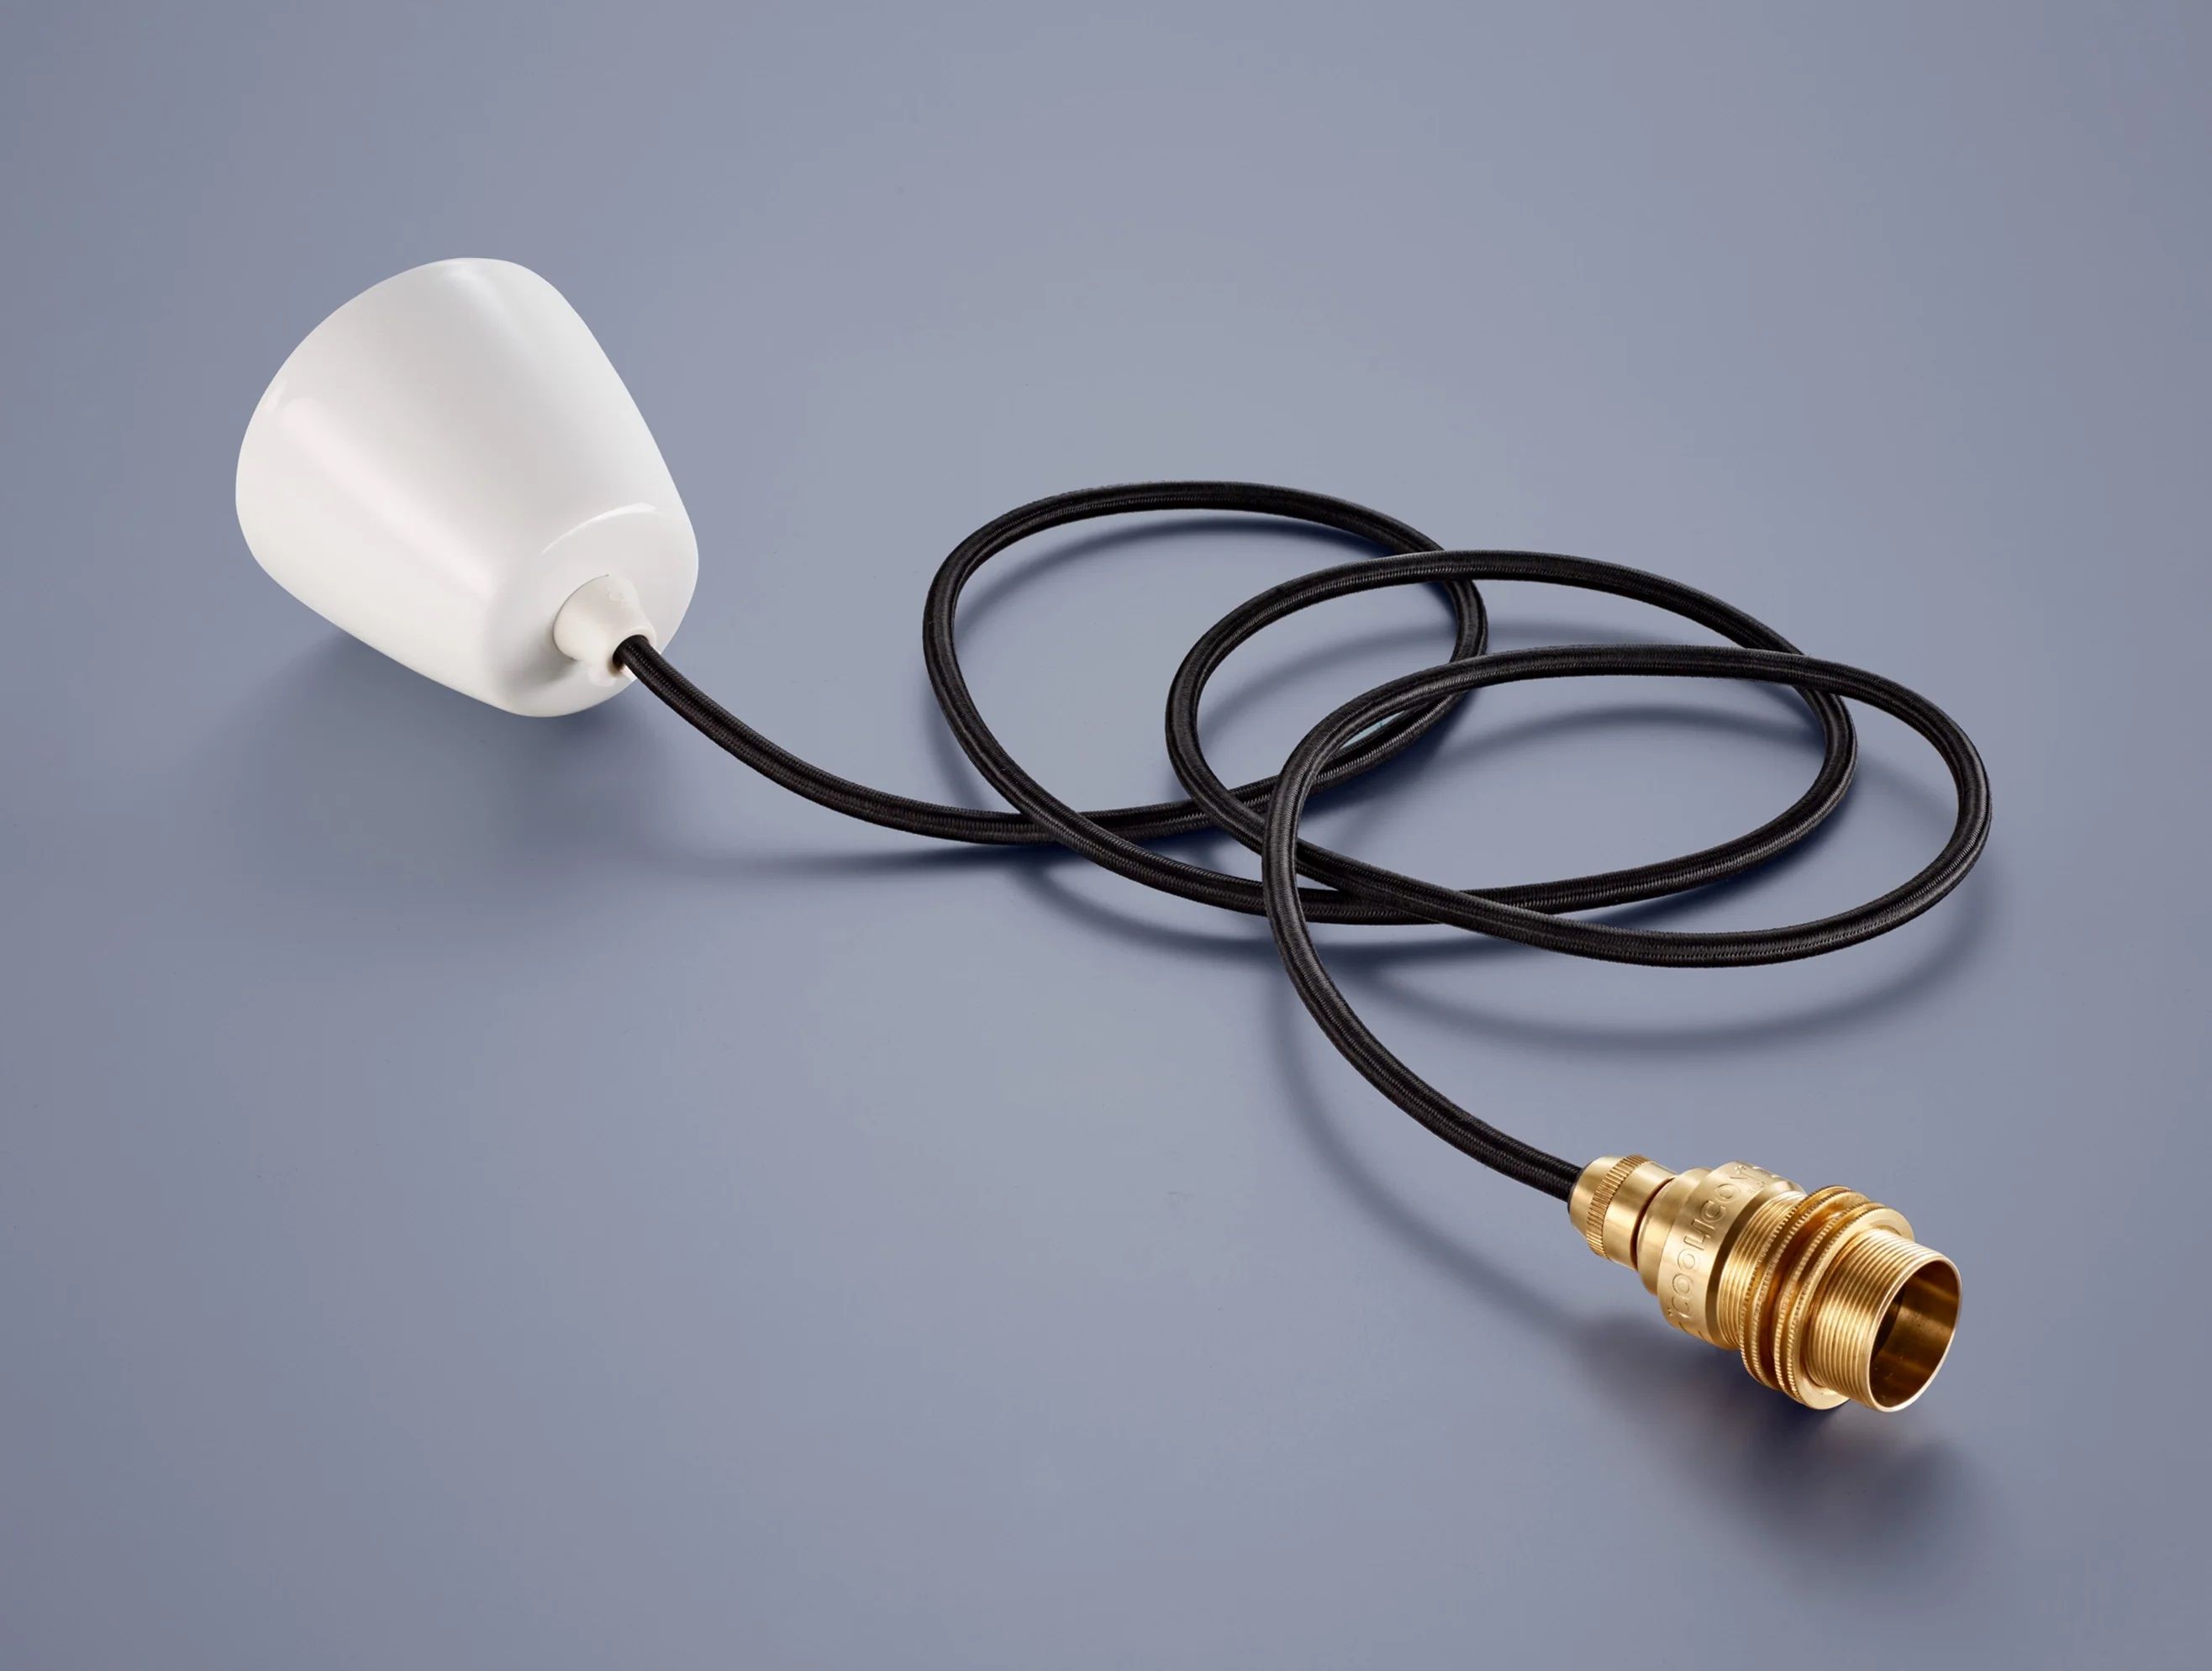
- Swag lamp kit (includes chain, cord, and plug)
- Screwdriver
- Hooks or anchors (depending on the type of ceiling)
- Wire cutters/strippers
- Electrical tape
- Light bulb
Make sure you have all these tools and materials on hand before you start the installation process. This will save you time and ensure a smooth installation experience.
Now that you have everything you need, let’s move on to the step-by-step instructions for hanging a swag lamp.
Step 1: Choose the Location
The first step in hanging a swag lamp is to determine the ideal location for it in your room. Consider the purpose of the lamp and the overall aesthetics of the space. Here are some factors to keep in mind when choosing the location:
- Lighting needs: Determine the purpose of the swag lamp. Do you need task lighting for a specific area, or do you want it to provide ambient lighting for the entire room? This will help you determine the height and placement of the lamp.
- Room layout: Consider the layout of the room and how the swag lamp will fit into the overall design. Will it be centered over a dining table, a seating area, or a specific focal point in the room?
- Electrical outlets: Take note of the location of electrical outlets in the room. You’ll need to ensure that there is an outlet nearby for the lamp cord to reach.
- Ceiling type: Assess the type of ceiling you have, whether it’s plaster, drywall, or another material. This will help determine the appropriate hardware needed to secure the lamp.
Once you have considered these factors, mark the chosen location on the ceiling with a pencil. This will serve as a guide for the next steps of the installation process.
Now that you have chosen the location, let’s move on to preparing the ceiling for installation.
Step 2: Prepare the Ceiling
Before installing the swag lamp, it’s important to prepare the ceiling to ensure a secure and stable hanging. Follow these steps to get the ceiling ready:
- Locate a Ceiling Joist: Use a stud finder to locate a ceiling joist near the marked location for hanging the swag lamp. This will provide a strong anchor point for the lamp.
- Mark the Joist: Once you locate the joist, use a pencil to mark the exact position on the ceiling. This will help you accurately place the mounting hardware.
- Choose the Mounting Hardware: Depending on your ceiling type, choose the appropriate mounting hardware. For plaster or drywall ceilings, use ceiling hooks or toggle bolts. If you have a suspended or drop ceiling, you may need to use special clips or hooks designed for this type of ceiling.
- Install the Mounting Hardware: Following the manufacturer’s instructions, install the chosen mounting hardware into the marked spot on the ceiling. Make sure it is securely attached to the joist for proper support.
Preparing the ceiling ensures that the swag lamp will be safely and securely hung. With the ceiling ready, it’s time to move on to the next step of installing the actual swag lamp.
Step 3: Install the Mounting Hardware
Now that the ceiling is prepared, it’s time to install the mounting hardware for your swag lamp. Follow these steps:
- Gather the Required Hardware: Check the swag lamp kit to see if it includes any mounting hardware. If not, purchase the appropriate ceiling hook or anchor that suits your ceiling type.
- Position the Mounting Hardware: Hold the ceiling hook or anchor against the ceiling joist or marked spot. Make sure it is aligned properly with the joist and centered in the desired location for your swag lamp.
- Mark the Screw Holes: Use a pencil to mark the placement of the screw holes on the ceiling. This will guide you during the installation process.
- Pre-Drill the Holes: If necessary, use a drill with a drill bit slightly smaller than the diameter of the screws. Pre-drill the marked holes on the ceiling. This will prevent the ceiling from cracking or splitting during installation.
- Install the Mounting Hardware: Place the hook or anchor into the pre-drilled holes and screw it securely into place. Ensure that it is tight and stable.
Proper installation of the mounting hardware is crucial for the stability and safety of your swag lamp. Once the hardware is securely in place, you’re ready to move on to connecting the swag lamp chain.
Read more: How To Make A Hanging Lamp
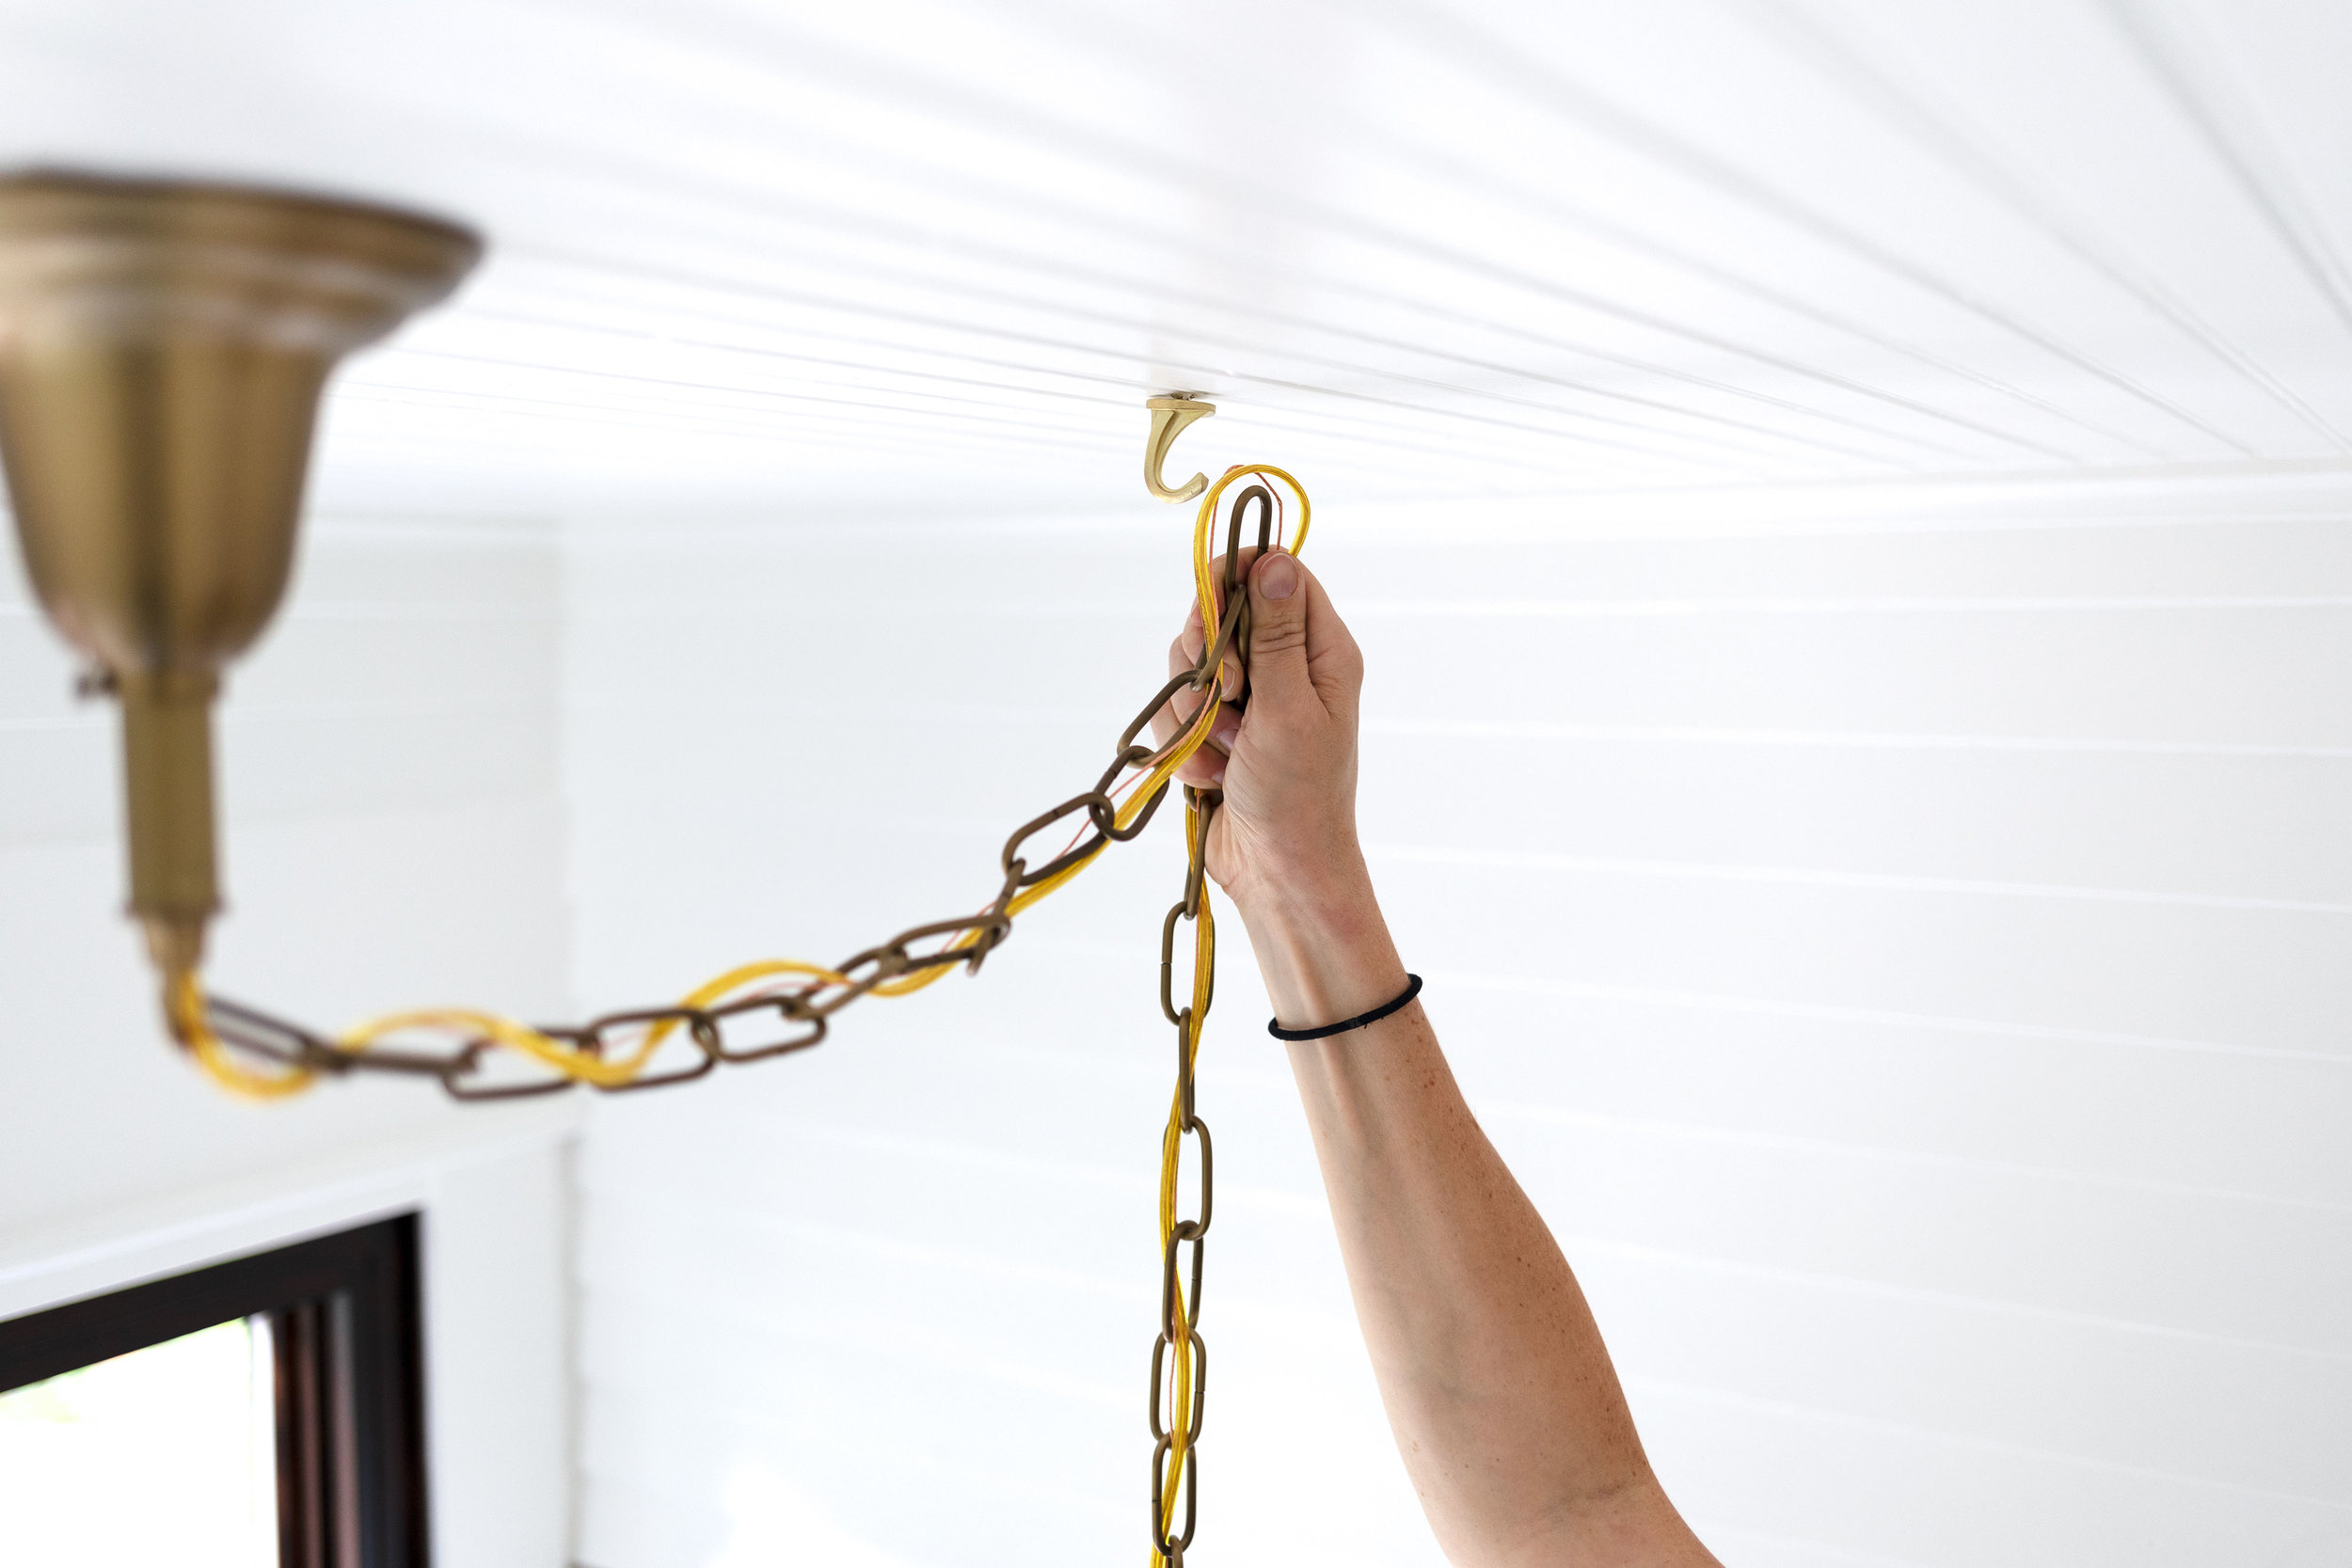
Step 4: Connect the Swag Lamp Chain
With the mounting hardware installed, it’s time to connect the swag lamp chain. Follow these steps:
- Unpack the Swag Lamp Kit: Open the swag lamp kit and take out the chain, cord, and plug. Ensure that all components are untangled and ready for installation.
- Measure the Desired Length: Determine how low you want the swag lamp to hang from the ceiling. Use a measuring tape to measure the desired length of the chain. Leave some extra length for adjusting the height later during the installation process.
- Cut the Chain: Using wire cutters, cut the swag lamp chain to the measured length. Make sure to cut it cleanly and remove any sharp edges.
- Attach the Chain: Attach one end of the chain to the swag lamp using the provided connectors or hooks. Ensure that it is securely fastened.
- Thread the Cord: Thread the lamp cord through the other end of the chain. Make sure the cord is properly aligned with the chain links.
- Secure the Cord: Once the cord is threaded through the chain, use electrical tape to secure it in place. Wrap the tape tightly around the cord and chain, ensuring that it stays in position.
By connecting the swag lamp chain, you are one step closer to having your hanging lamp in place. The next step is to hang the swag lamp itself.
When hanging a swag lamp, make sure to use a sturdy hook or anchor in the ceiling to support the weight of the lamp. Measure the desired height and use a swag hook to hang the lamp securely.
Step 5: Hang the Swag Lamp
Now that the chain is connected, it’s time to hang the swag lamp. Follow these steps:
- Position the Swag Lamp: Hold the swag lamp by the chain and position it directly under the installed mounting hardware on the ceiling.
- Hook the Chain: Hook the end of the chain onto the installed ceiling hook or anchor. Ensure that it is securely in place.
- Support the Lamp: While holding the chain in one hand, use your other hand to support the lamp and keep it level. This will prevent any accidental drops or unbalanced hanging.
- Double-Check the Alignment: Make sure the swag lamp is hanging straight and centered in the desired location. Adjust the position if needed.
- Test the Stability: Gently tug on the swag lamp to ensure that it is securely hung and does not move or sway excessively. If it feels unstable, double-check the mounting hardware and make any necessary adjustments.
Once the swag lamp is properly hung, you are ready to move on to adjusting the height and position.
Step 6: Adjust the Height and Position
Adjusting the height and position of your swag lamp is essential to achieving the desired lighting and aesthetic in your space. Follow these steps to make the necessary adjustments:
- Assess the Height: Determine if the swag lamp is hanging at the desired height. If not, carefully raise or lower the lamp by adjusting the chain.
- Check the Balance: Ensure that the lamp is balanced and level. Use a leveler or simply eyeball it to make any necessary adjustments.
- Consider the Placement: Take a step back and assess the lamp’s position in the room. Make any slight adjustments to align it properly with other furnishings or focal points.
- Test the Lighting: Turn on the swag lamp and assess the lighting in the room. Make sure it provides the desired brightness and illuminates the intended area effectively.
Take your time to adjust the height and position until you are satisfied with the overall look and functionality of the swag lamp in the space. Once it’s properly adjusted, it’s time to move on to securing the lamp cord.
Step 7: Secure the Lamp Cord
Securing the lamp cord is an important step to ensure the safety and tidy appearance of your swag lamp installation. Follow these steps to properly secure the lamp cord:
- Locate the Electrical Outlet: Identify the nearest electrical outlet where you will plug in the swag lamp. Ensure that it is easily accessible and within reach of the lamp cord.
- Route the Cord: Carefully route the lamp cord along the ceiling, walls, or any other surfaces towards the electrical outlet. Avoid placing the cord in areas where it may get tangled or pose a tripping hazard.
- Use Hooks or Clips: To keep the cord in place, use hooks or clips designed specifically for securing electrical cords. Place them at regular intervals along the cord’s route to prevent sagging or excessive movement.
- Secure the Cord: After routing the cord and attaching the hooks or clips, use zip ties or twist ties to secure the cord to each respective hook or clip. This will ensure that the cord stays in place and does not come loose.
- Hide or Disguise the Cord: If desired, you can further enhance the appearance of the installation by concealing the cord using cord covers, adhesive cord channels, or by painting it to match the surrounding surfaces.
By properly securing the lamp cord, you not only ensure the safety of your swag lamp installation but also create a visually pleasing and clutter-free look in your space. The final step is to test the swag lamp to make sure it functions properly.
Read more: How To Hang A Heat Lamp
Step 8: Test the Swag Lamp
After completing the installation and securing the lamp cord, it’s time to test the swag lamp to ensure that it functions properly. Follow these steps to test your swag lamp:
- Insert the Light Bulb: Check the wattage and type of light bulb recommended for your swag lamp. Screw it into the lamp socket securely. Make sure you have turned off the power switch before handling the bulb.
- Turn on the Power: Locate the switch or plug the swag lamp into the electrical outlet. If needed, switch on the power supply to the designated outlet.
- Check the Lighting: Observe the swag lamp to ensure that it illuminates properly and provides the intended amount of light. If the light is too dim or too bright, you may need to adjust the bulb or consider using a different wattage.
- Test the On/Off Switch (if applicable): If your swag lamp has a built-in switch, toggle it on and off several times to verify that it functions correctly.
- Inspect for Any Issues: Take a close look at the swag lamp, including the chain, mounting hardware, and electric cord, to ensure that everything is secure and functioning as expected. Look for any signs of loose connections or damage.
If everything looks and operates as intended, congratulations! You have successfully hung and tested your swag lamp. Enjoy the beautiful lighting and ambiance it brings to your space.
If you encounter any issues during the testing phase or notice any concerns with the installation, it is recommended to consult a professional electrician for assistance.
Now that you have learned how to hang a swag lamp, you can confidently add this stylish lighting element to any room in your home. Remember to always prioritize safety and follow the manufacturer’s instructions for your specific swag lamp model. Enjoy the beautiful glow and decorative touch that a swag lamp can bring to your space!
Conclusion
Hanging a swag lamp can transform the look and feel of any room in your home. By following the step-by-step instructions outlined in this guide, you now have the knowledge and confidence to install a swag lamp safely and effectively.
We began by understanding the tools and materials needed for the installation process. From there, we discussed how to choose the perfect location for your swag lamp, taking into consideration lighting needs, room layout, and electrical outlets.
We then moved on to preparing the ceiling by locating a ceiling joist and installing the necessary mounting hardware. This provides a secure foundation for hanging the swag lamp.
Next, we connected the swag lamp chain and ensured it was properly secured using connectors and electrical tape. This step is crucial for ensuring the lamp hangs safely and securely from the ceiling.
After that, we hung the swag lamp by attaching the chain to the installed mounting hardware. We emphasized the importance of ensuring the lamp is level and stable after installation.
Furthermore, we discussed the significance of adjusting the height and position of the swag lamp according to your preferences and the lighting needs of the room.
To maintain a tidy and organized appearance, we learned how to properly secure the lamp cord along the ceiling or walls using hooks, clips, and zip ties.
Lastly, we tested the swag lamp by inserting the light bulb, turning on the power, and inspecting for any issues. This step ensures that your swag lamp functions properly and provides the desired lighting in your space.
By following these steps and guidelines, you can confidently hang a swag lamp and enjoy the elegant and ambient lighting it brings. Remember to always prioritize safety and consult a professional if you have any concerns or encounter any difficulties during the installation process.
Now, go ahead and transform your space with the beautiful glow of a swag lamp!
Frequently Asked Questions about How To Hang A Swag Lamp
Was this page helpful?
At Storables.com, we guarantee accurate and reliable information. Our content, validated by Expert Board Contributors, is crafted following stringent Editorial Policies. We're committed to providing you with well-researched, expert-backed insights for all your informational needs.


0 thoughts on “How To Hang A Swag Lamp”