Furniture
How To Install A Wall Lamp
Modified: August 27, 2024
Learn how to effortlessly install a wall lamp in your home with our comprehensive guide. Enhance your furniture design and create a cozy ambiance.
(Many of the links in this article redirect to a specific reviewed product. Your purchase of these products through affiliate links helps to generate commission for Storables.com, at no extra cost. Learn more)
##
Introduction
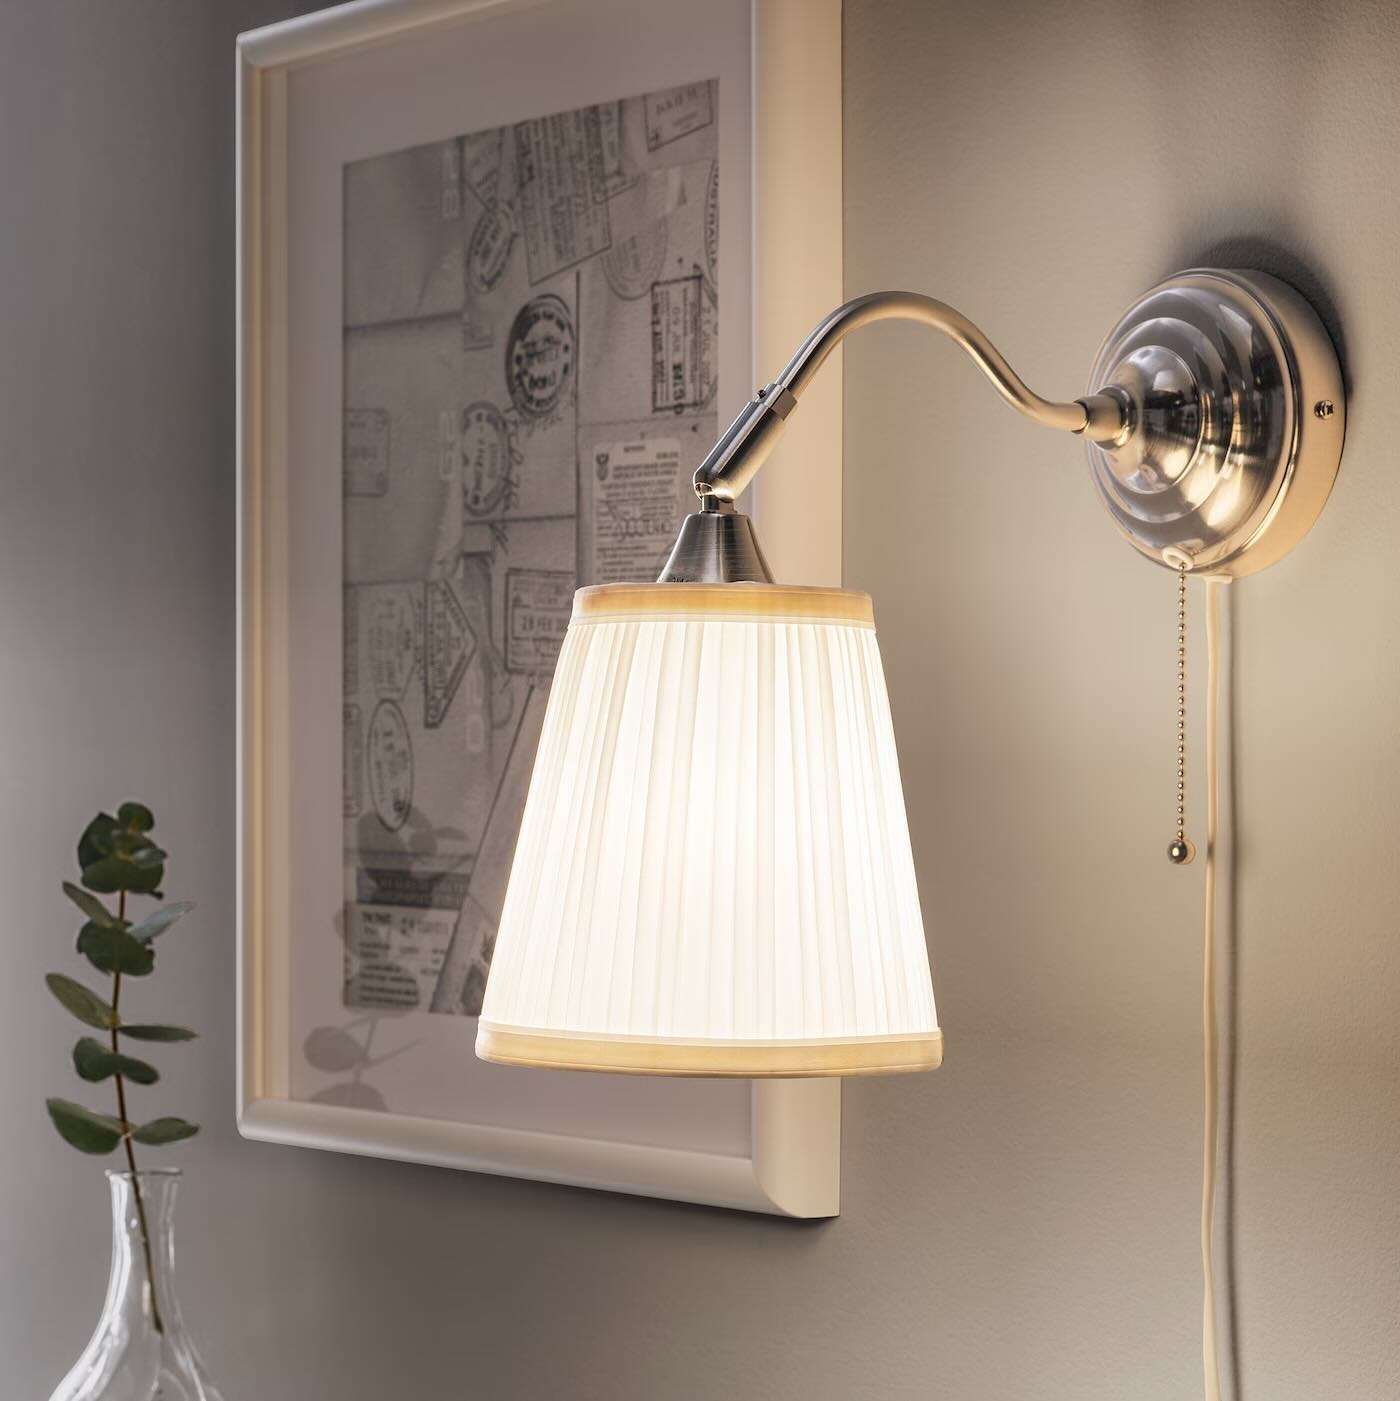
Installing a wall lamp can be a great way to add both functionality and style to your home. Wall lamps provide targeted lighting options while also serving as decorative elements that can enhance the overall ambiance of any space. Whether you want to create a cozy reading nook, illuminate a hallway, or highlight a specific area of a room, installing a wall lamp is a relatively simple and rewarding DIY project that can elevate the look and feel of your home.
In this guide, we’ll take you through each step of the installation process, from gathering the necessary tools and materials to testing and adjusting the lamp after installation. With the right preparation, a little bit of patience, and attention to detail, you’ll be able to enjoy the benefits of a beautifully installed wall lamp in no time.
Before we jump into the installation process, it’s important to note that while this guide provides general instructions, it’s always recommended to consult the specific manufacturer’s instructions that come with your wall lamp. Different models may have slight variations in terms of installation requirements and wiring configurations. Additionally, if you’re not comfortable working with electrical components, it’s advised to seek professional assistance to ensure your safety.
Now that we’ve covered the basics, let’s dive into the exciting world of wall lamp installation!##
Key Takeaways:
- Properly installing a wall lamp involves gathering the right tools, choosing the perfect location, and connecting the wiring securely. Attention to detail and safety measures are essential for a successful installation.
- Testing and adjusting the lamp after installation ensures optimal lighting effects and contributes to the overall ambiance of the room. Fine-tuning the direction, angle, and controls allows for a personalized lighting experience.
Read more: How To Install A Lamp Harp
Step 1: Gather Tools and Materials
Before you begin the installation process, it’s important to gather all the necessary tools and materials. Having everything ready in advance will streamline the installation process and ensure that you have everything you need at your fingertips. Here’s a list of items you’ll need:
Tools:
1. Screwdriver (flathead and Phillips)
2. Drill
3. Wire cutters/strippers
4. Voltage tester
Materials:
1. Wall lamp
2. Mounting bracket
3. Wiring connectors
4. Wire nuts/Caps
5. electrical tape
6. Screws
7. Wall anchors (if needed)
8. Light bulb
It’s essential to have the right tools on hand to make the installation process go smoothly and efficiently. Different wall lamps may require different tools, so double-check the manufacturer’s instructions to ensure you have the proper tools for your specific lamp model. Additionally, make sure to wear safety goggles and protective gloves to prevent any injury while handling tools and materials.
Once you’ve gathered all the necessary tools and materials, you’re ready to move on to the next step: choosing the perfect location for your wall lamp.##
Step 2: Choose the Perfect Location
Choosing the right location for your wall lamp is crucial for achieving both functionality and aesthetic appeal. Consider the purpose of the lamp and how it will contribute to the overall ambiance of the room. Here are a few factors to keep in mind when selecting the perfect location:
1. Purpose and Functionality: Determine the primary purpose of the wall lamp. Will it be used for task lighting, accent lighting, or ambient lighting? This will help you determine the ideal placement and angle of the lamp to achieve the desired lighting effect.
2. Height and Proportion: Consider the height of the wall lamp and how it will fit in with the overall proportions of the space. A tall lamp may look best on a larger wall, while a smaller lamp can be more suitable for compact areas.
3. Electrical Outlet Accessibility: Assess the proximity of an electrical outlet to the desired location of the wall lamp. Ensure that there is a readily accessible outlet nearby to connect the lamp’s wiring.
4. Room Layout and Furniture Placement: Take into account the room layout and the furniture arrangement. The wall lamp should be positioned in a way that complements the existing furniture and doesn’t interfere with the flow of the space.
5. Visual Impact: Consider the visual impact the wall lamp will have on the room. Will it enhance certain architectural features, highlight artwork, or provide a decorative accent? Choose a location that maximizes the visual appeal and adds to the overall aesthetic of the room.
Once you’ve considered these factors, mark the chosen location on the wall using a pencil or tape. This will serve as your guide when installing the mounting bracket in the next step.
Now that you’ve chosen the perfect location for your wall lamp, it’s time to move on to Step 3: turning off the power.##
Step 3: Turn Off the Power
Safety should always be the top priority when working with electrical components. Before starting any work, it’s essential to turn off the power to the area where you’ll be installing the wall lamp. Follow these steps to ensure your safety:
1. Locate the main electrical panel: The main electrical panel is usually located in a basement, utility room, or garage. Open the panel door to access the circuit breakers.
2. Identify the circuit breaker: Look for the circuit breaker that controls the power supply to the area where you’ll be installing the wall lamp. Typically, the circuit breakers are labeled to indicate which areas or rooms they correspond to. If the breakers are not labeled, you may need to test the power in each area to identify the correct circuit.
3. Switch off the circuit breaker: Once you’ve identified the correct circuit breaker, switch it to the “off” position. This will cut off the power supply to the designated area, ensuring that there’s no electricity flowing to the wires you’ll be working with.
4. Double-check the power: To ensure that the power is indeed turned off, use a voltage tester. Place the voltage tester against the wires you’ll be working with to verify that there’s no electrical current flowing.
5. Keep the circuit breaker off: As an extra precaution, keep the circuit breaker in the off position until you’ve completed the installation process. This will prevent any accidental power supply while you’re working.
By turning off the power, you’ll eliminate the risk of electrical shock or injury as you proceed with the installation. Remember, if you’re unsure or uncomfortable working with electrical components, it’s always best to consult a professional electrician to ensure the job is done safely.
With the power turned off, you’re now ready to move on to Step 4: marking the mounting area on the wall.##
Step 4: Mark the Mounting Area
Once you have chosen the location for your wall lamp and ensured that the power is off, it’s time to mark the mounting area on the wall. Properly marking the spot will ensure that your lamp is installed securely and at the desired height. Here’s how to go about it:
1. Position the mounting bracket: Take the mounting bracket included with your wall lamp and align it with the marked location on the wall. Hold it in place and ensure that it is level.
2. Mark the screw holes: With the mounting bracket in position, use a pencil or a marker to mark the locations of the screw holes on the wall. These marks will serve as a guide for drilling later.
3. Measure the height: Measure the desired height of the lamp from the floor or any reference point you have chosen. Mark this measurement on the wall using a level or a measuring tape. This will ensure that your wall lamp is installed at the correct height.
4. Evaluate the spacing: If you are installing more than one wall lamp, take into consideration the spacing between the lamps. Ensure that they are evenly distributed and aesthetically pleasing to the eye. Make any necessary adjustments to the placement of the mounting bracket to achieve the desired spacing.
5. Double-check the markings: Before moving on, review your markings to make sure they are accurate and aligned. Adjust as needed to ensure everything is in the right position.
By taking the time to mark the mounting area accurately, you will save yourself from any rework or mistakes later on. This step sets the foundation for a seamless and secure wall lamp installation.
Now that you have marked the mounting area, it’s time to move on to Step 5: installing the mounting bracket.##
Read more: How To Install A Hanging Lamp
Step 5: Install the Mounting Bracket
With the mounting area marked and ready, it’s time to install the mounting bracket for your wall lamp. The mounting bracket serves as the anchor that holds the lamp securely to the wall. Here’s how to proceed:
1. Gather the necessary screws and a drill: Check the manufacturer’s instructions to determine the appropriate screws needed for your specific lamp model. Using a drill, select a drill bit that matches the size of the screws.
2. Position the mounting bracket: Place the mounting bracket over the marked location on the wall, aligning it with the screw holes. Ensure that the bracket is level using a bubble level tool.
3. Secure the bracket to the wall: Using the drill and the appropriate drill bit, drill pilot holes into the marked positions. Make sure to drill just deep enough for the screws to fit snugly.
4. Attach the mounting bracket: Line up the screw holes on the mounting bracket with the pilot holes on the wall. Insert the screws into the holes and tighten them using a screwdriver or a drill.
5. Double-check the stability: Once the mounting bracket is securely attached to the wall, give it a gentle tug to ensure that it is firmly fixed in place. It should feel stable and not wobble or move when pulled.
By installing the mounting bracket accurately and securely, you will have a solid foundation to support your wall lamp. With this step completed, you are now ready to move on to the wiring process in Step 6.
Remember, if you are unsure about any electrical wiring procedures, it’s essential to seek professional help to ensure safety.##
When installing a wall lamp, make sure to turn off the power to the area where you will be working to avoid any electrical accidents. Always follow the manufacturer’s instructions for proper installation.
Step 6: Connect the Wiring
Connecting the wiring is a crucial step in installing your wall lamp. It involves safely and correctly connecting the electrical wires to ensure proper functionality. Follow these steps to connect the wiring:
1. Begin by turning off the power: Double-check that the power to the installation area is still switched off at the circuit breaker. Use a voltage tester to confirm there is no electrical current running through the wires.
2. Remove the lamp base cover: Unscrew or remove the cover of the lamp base, exposing the wiring junction box. This box contains the connections for the electrical wires.
3. Identify the wires: Within the junction box, you will find three wires: the black (hot) wire, the white (neutral) wire, and the green (ground) wire. The black wire carries the electrical current, the white wire is the return path for the current, and the green wire is the ground wire.
4. Match the wires: Locate the corresponding wires on the wall lamp itself. The lamp should have labeled wires or color-coded wires that match with the black, white, and green wires in the junction box. Connect the wires by twisting them together in a clockwise direction.
5. Secure the connections: Once the wires are twisted together, cover them with a wire nut (also known as a wire cap). Twist the wire nut clockwise until it is tight and provides a secure connection. Ensure that no bare wire is exposed or protrudes from the wire nut.
6. Insulate the connections: To provide extra protection and insulation, wrap each wire nut connection with electrical tape. This helps to prevent any accidental exposure of the wires.
7. Reattach the lamp base cover: After connecting and insulating the wires, carefully place the lamp base cover back onto the lamp. Make sure it is securely fastened using the appropriate screws or attachments.
8. Double-check the connections: Before proceeding further, double-check that all the wiring connections are secure and insulated. Avoid any loose connections or exposed wires that could pose electrical hazards.
Connecting the wiring correctly is crucial for the safe operation of your wall lamp. Take your time to ensure each connection is properly made and insulated. Once you are confident that the wiring is secure, you can move on to the next step: attaching the lamp base.##
Step 7: Attach the Lamp Base
After connecting the wiring, it’s time to attach the lamp base to the mounting bracket. The lamp base holds the actual light fixture in place, so it’s important to ensure a secure attachment. Follow these steps to attach the lamp base:
1. Position the lamp base: Hold the lamp base up to the mounting bracket, aligning it with the screw holes. Ensure that the base is level and straight.
2. Insert the screws: With the lamp base in position, insert the screws provided by the manufacturer into the screw holes on the base. Use a screwdriver or a drill to tighten the screws securely. Be careful not to overtighten, as it may damage the lamp base or mounting bracket.
3. Check for stability: Once the screws are tightened, give the lamp base a gentle shake to ensure it is stable and secure. The base should not wobble or move when lightly touched.
4. Adjust the angle (if applicable): Some lamp bases allow for adjustable angles. If your lamp base has this feature, adjust it to the desired angle before finalizing the attachment. Follow the manufacturer’s instructions on how to adjust the angle properly.
5. Verify the wiring is concealed: Take a moment to ensure that the wires from the lamp base are neatly concealed within the base and not visible. This helps to maintain a clean and professional appearance.
By attaching the lamp base securely, you’ll ensure that the light fixture stays in place and functions properly. With this step completed, you’re now ready to move on to the next step: installing the light bulb.
Remember to exercise caution while attaching the lamp base, and refer to the manufacturer’s instructions for any specific guidelines related to your particular wall lamp model.##
Step 8: Install the Light Bulb
Now that the lamp base is securely attached, it’s time to install the light bulb. The light bulb is the final component that will emit the desired illumination in your space. Follow these steps to properly install the light bulb:
1. Determine the appropriate bulb type: Check the specifications provided by the manufacturer to identify the type and wattage of the bulb recommended for your wall lamp. Using the wrong type or wattage can lead to poor performance or even damage to the lamp.
2. Ensure the lamp is turned off: Before handling the light bulb or inserting it into the socket, make sure the wall lamp’s switch is in the “off” position. This prevents any accidental activation or electrical shock.
3. Remove any cover or shade: If your wall lamp has a cover or shade, remove it or detach it from the lamp base. This will provide easy access to the light bulb socket.
4. Insert the light bulb: Take the light bulb and gently insert it into the socket of the lamp base. Depending on the type of socket, you may need to twist the bulb clockwise to secure it in place. Ensure that the bulb is firmly seated in the socket.
5. Test the bulb: Once the light bulb is installed, you can turn on the lamp and test the bulb’s functionality. If the bulb doesn’t illuminate, double-check that the lamp is receiving power and that the bulb is properly installed.
6. Secure the cover or shade: If you removed a cover or shade earlier, reattach it to the lamp base according to the manufacturer’s instructions. Make sure it is securely fastened to prevent any accidental detachment.
Congratulations! You have successfully installed the light bulb in your wall lamp. Make sure to properly dispose of any packaging materials and old bulbs in an environmentally friendly manner. Now, proceed to the next step: turning on the power supply.
Note that different wall lamp models may have specific instructions for light bulb installation. If you encounter any difficulties or uncertainties, refer to the manufacturer’s instructions for guidance.##
Read more: How To Install A Ceiling Lamp
Step 9: Turn On the Power
With the light bulb installed, you’re almost done with the installation process. The next step is to turn on the power supply and activate your newly installed wall lamp. Follow these steps to safely turn on the power:
1. Locate the circuit breaker panel: Return to the main electrical panel in your home where you previously switched off the power to the area where the wall lamp is installed.
2. Identify the correct circuit breaker: Look for the circuit breaker that corresponds to the area where your wall lamp is located. It should be the same breaker that you switched off earlier.
3. Flip the circuit breaker switch: With caution, switch the circuit breaker back to the “on” position. You should hear or feel a click as it engages. This will restore the electrical power supply to the wall lamp.
4. Verify the power supply: Once the circuit breaker is back on, use a voltage tester to check if there is electricity flowing to the wall lamp. Confirm that the wires are active and properly connected.
5. Test the wall lamp: With the power supply restored, you can now test your wall lamp. Turn on the lamp’s switch or use the designated control mechanism. The light should illuminate, indicating that the installation was successful.
6. Check for any issues: After turning on the power, observe the wall lamp for any signs of malfunction, flickering, or unusual behavior. If you notice any abnormalities, turn off the power supply immediately and consult a professional electrician for assistance.
By following these steps to turn on the power, you’ll be able to enjoy the illumination provided by your newly installed wall lamp. Take a moment to appreciate the ambience it brings to your space. Now, we’re ready for the final step: testing and adjusting the lamp’s settings.
Remember, always exercise caution when working with electricity. If you’re unsure or uncomfortable with electrical tasks, it’s best to seek the help of a qualified electrician to ensure your safety.##
Step 10: Test and Adjust the Lamp
After turning on the power, it’s time to perform the final step of testing and adjusting your wall lamp. This step ensures that the lamp is functioning correctly and allows you to make any necessary adjustments for optimal lighting. Follow these steps to test and adjust your lamp:
1. Observe the lighting effect: Take a moment to observe the lighting effect produced by the wall lamp. Pay attention to the brightness, direction, and spread of the light. Make note of any areas that may require additional adjustment.
2. Check for any shadows or glare: Assess if there are any shadows or unwanted glare caused by the positioning of the lamp or the angle of the light. If you notice any issues, consider adjusting the lamp’s position or angle to minimize these effects.
3. Fine-tune the direction and angle: If your wall lamp allows for adjustable direction or angle, experiment with different settings to achieve the desired lighting effect. You can try directing the light upwards or downwards, angling it towards a specific area, or adjusting it to eliminate any dark spots.
4. Test the switch and controls: Ensure that the lamp’s switch or controls are functioning properly. Turn the lamp on and off a few times to verify that it operates smoothly and without any issues.
5. Evaluate the ambiance: Step back and assess the overall ambiance created by the wall lamp. Does it create the desired atmosphere in the room? It should enhance the aesthetic appeal and contribute to the mood and functionality of the space.
6. Make any necessary adjustments: Based on your observations, make any necessary adjustments to the position, angle, or settings of the wall lamp. Play around with different configurations until you achieve the desired lighting effect.
7. Finalize the adjustments: Once you are satisfied with the position and lighting effect of your wall lamp, tighten any adjustable components to secure them in place. This ensures that your lamp maintains its desired configuration over time.
By thoroughly testing and adjusting your wall lamp, you can ensure that it provides the desired lighting effect and enhances the overall ambiance of your space. Take the time to make the necessary adjustments and enjoy the improved lighting in your home.
With Step 10 completed, your wall lamp installation process is finished! Sit back, relax, and enjoy the warm and inviting glow provided by your newly installed wall lamp.
Frequently Asked Questions about How To Install A Wall Lamp
Was this page helpful?
At Storables.com, we guarantee accurate and reliable information. Our content, validated by Expert Board Contributors, is crafted following stringent Editorial Policies. We're committed to providing you with well-researched, expert-backed insights for all your informational needs.


0 thoughts on “How To Install A Wall Lamp”