Home>Furniture>Living Room Furniture>How To Make A TV Stand Out Of Wooden Crates
Living Room Furniture
How To Make A TV Stand Out Of Wooden Crates
Modified: March 16, 2024
Learn how to create a unique TV stand for your living room with wooden crates. Enhance your living room furniture with this DIY project.
(Many of the links in this article redirect to a specific reviewed product. Your purchase of these products through affiliate links helps to generate commission for Storables.com, at no extra cost. Learn more)
Introduction
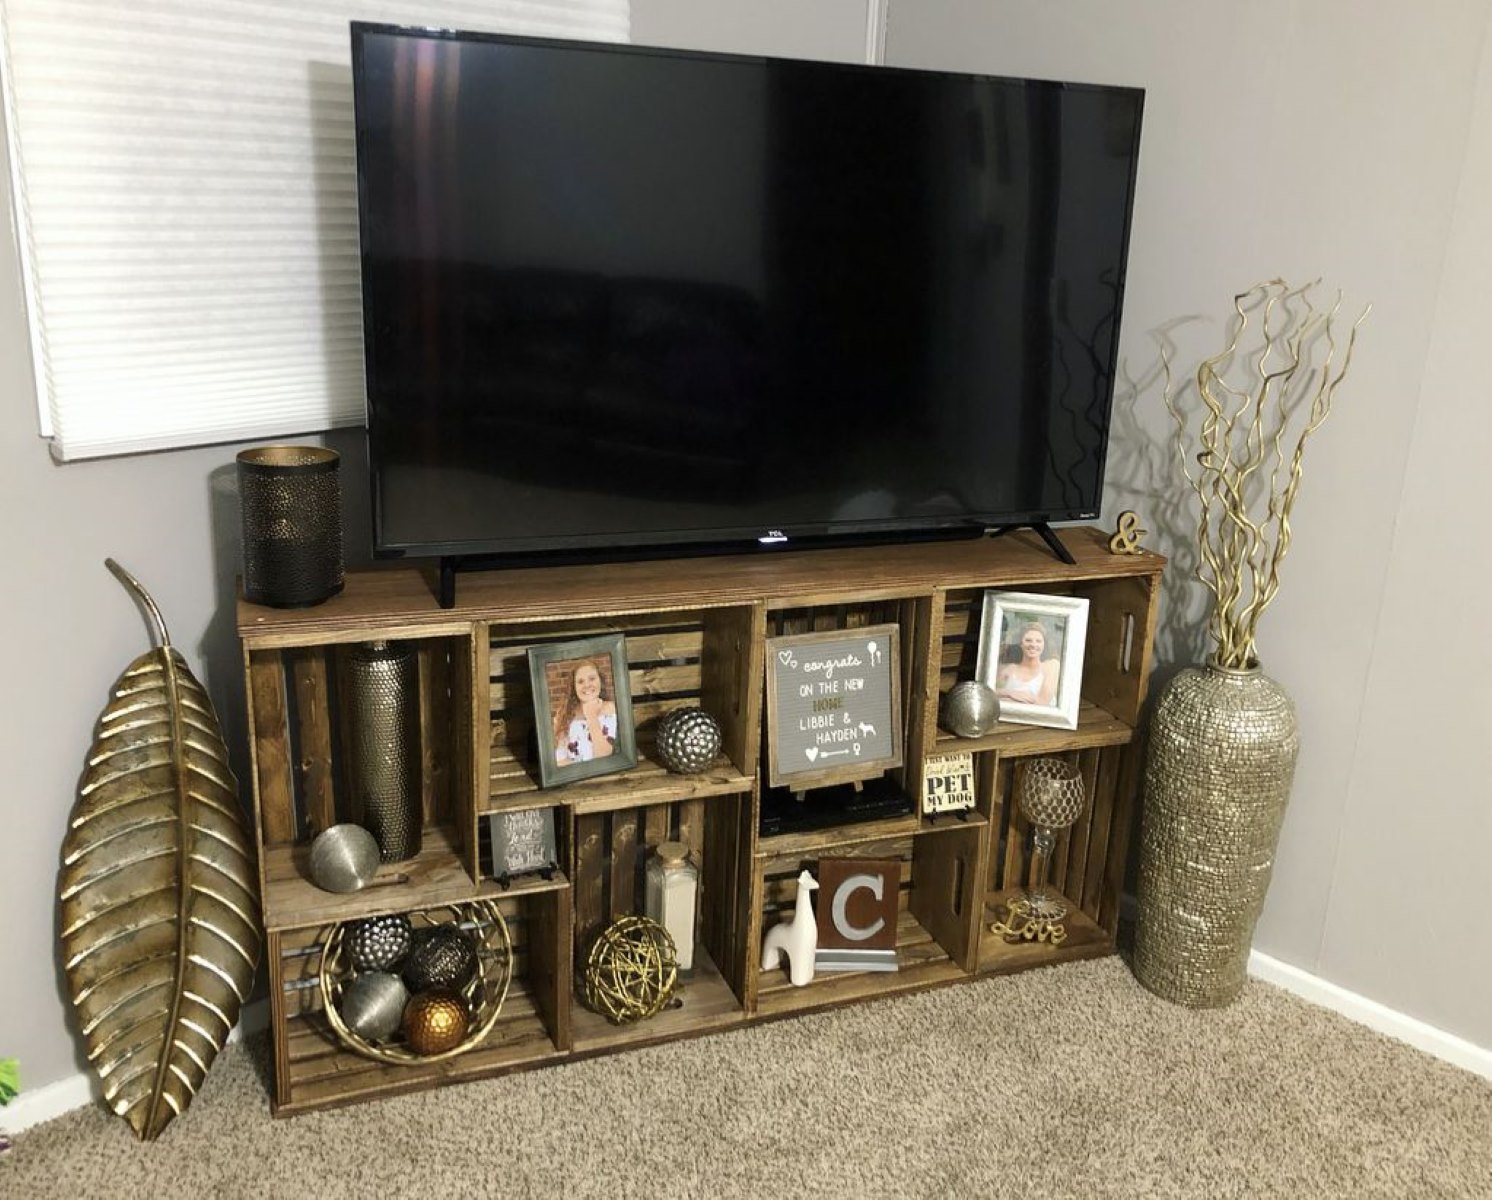
Welcome to the world of DIY furniture! If you’re looking to add a unique and personalized touch to your living room, making a TV stand out of wooden crates is a fantastic option. Not only does it offer a cost-effective solution, but it also allows you to unleash your creativity and showcase your woodworking skills.
In this article, we’ll guide you through the step-by-step process of creating a stylish and functional TV stand using wooden crates. Whether you’re a seasoned DIY enthusiast or a complete beginner, this project can be easily tackled with a few basic tools and materials.
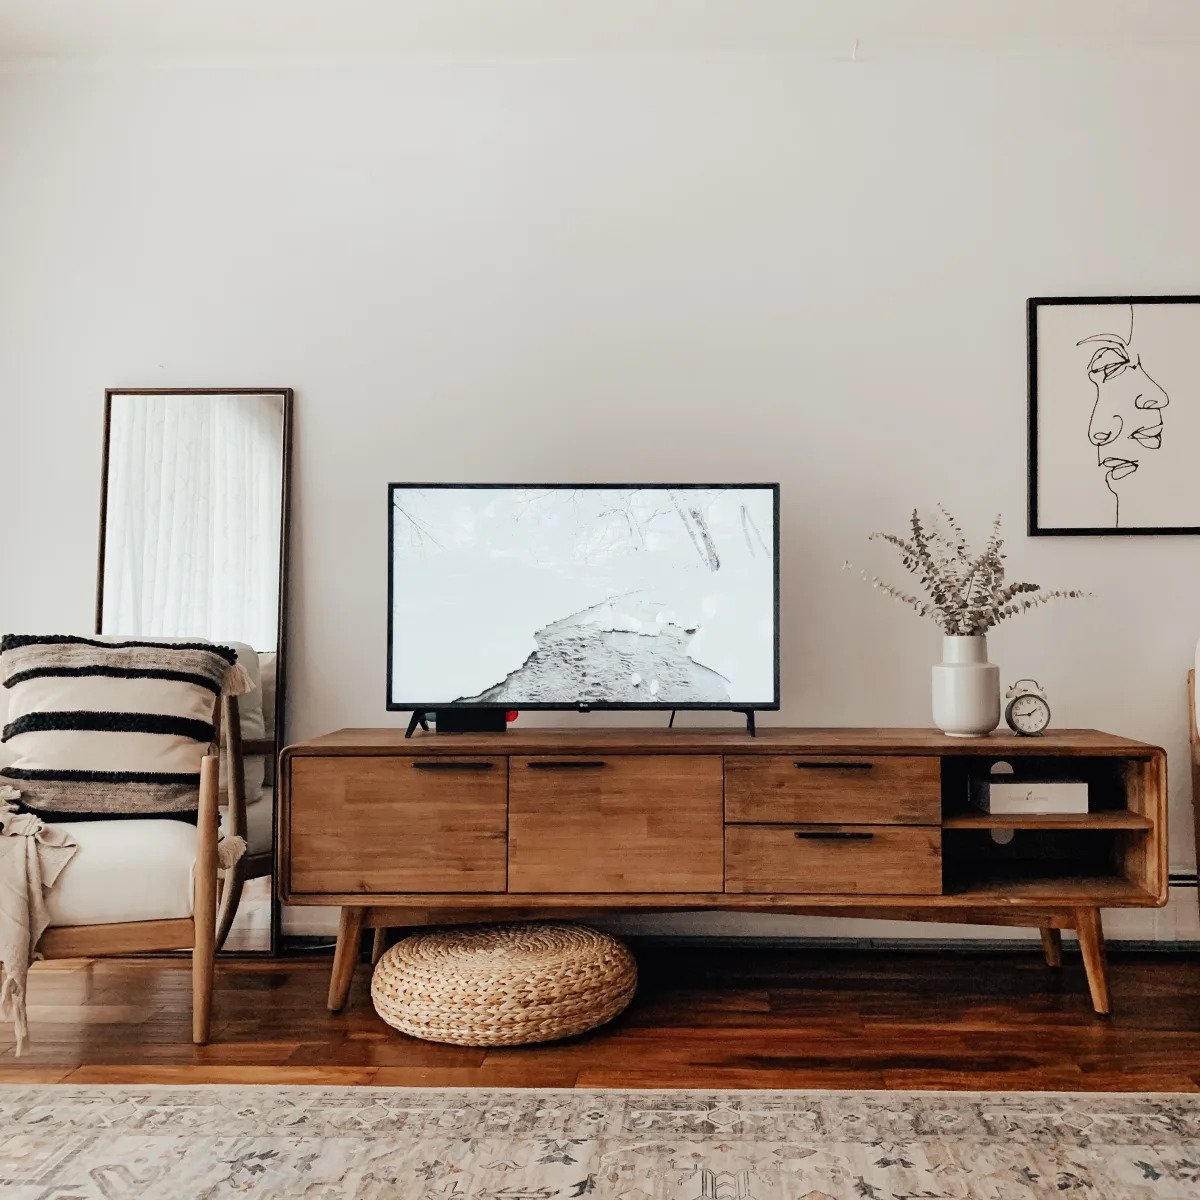
One of the great things about using wooden crates for this project is that they are readily available and versatile. You can typically find them at craft stores, home improvement centers, or even repurpose old ones you have lying around. The rustic charm and natural texture of the wooden crates will add a cozy and inviting feel to your living room.
By following these steps and putting your own creative spin on it, you’ll have a custom TV stand that perfectly complements your living room decor. So, let’s gather our materials and get started on this exciting DIY adventure!
Key Takeaways:
- Transforming wooden crates into a DIY TV stand is a fun and cost-effective way to add a personalized touch to your living room. With just a few basic tools and materials, you can unleash your creativity and woodworking skills to create a stylish and functional piece of furniture.
- By following the step-by-step process outlined in this article, you’ll not only save money but also learn valuable woodworking skills. The rustic charm of the wooden crates will add a cozy and inviting feel to your living room, making it a unique and personalized space to enjoy your favorite TV shows and movies.
Read more: How To Make A TV Stand Out Of Wood Pallets
Materials Needed
Before we dive into the step-by-step process, let’s gather all the materials we’ll need for this DIY project. Don’t worry; you won’t need a long list of supplies, as we’re keeping it simple and accessible. Here’s what you’ll need:
- Wooden crates: The number will depend on the size and design of your TV stand. Aim for at least three, but you can always add more for extra storage space.
- Screws: Choose screws that are appropriate for the thickness of the wooden crates you’re working with.
- Power drill: A power drill will make the process of attaching the crates together much easier and quicker.
- Screwdriver: This will come in handy for tightening the screws and making any adjustments.
- Sandpaper: You’ll need sandpaper to smooth out any rough edges or surfaces on the wooden crates.
- Wood stain or paint: If you’d like to add some color or match the TV stand to your existing furniture, wood stain or paint will do the trick.
- Paintbrush or foam roller: Depending on the finish you choose, you’ll need a paintbrush or foam roller to apply the stain or paint.
- Optional: Casters or furniture glides: If you want your TV stand to be mobile, you can attach casters or furniture glides to the bottom.
These materials can be found at your local hardware store or online. It’s always a good idea to gather everything in advance to ensure a smooth and uninterrupted DIY experience.
Now that we have all the necessary materials, it’s time to move on to the next step: gathering the wooden crates.
Step 1: Gathering the Wooden Crates
The first step in creating your DIY TV stand is to gather the wooden crates. As mentioned earlier, these crates can be found at craft stores, home improvement centers, or you can repurpose old ones you have lying around. Here’s what you need to do:
- Measure the space: Measure the area where you plan to place the TV stand to determine the dimensions of the crates you’ll need. Consider the width, height, and depth of the space to ensure a perfect fit.
- Choose the crate style: Depending on your aesthetic preference, select the style of wooden crates you want to use. There are various options available, such as plain wooden crates, crates with cut-out handles, or even crates with a distressed finish.
- Determine the number of crates: Decide how many crates you’ll need based on the size and design of your TV stand. As a general guideline, start with at least three crates, but you can always add more for extra storage space.
- Inspect the condition: Before purchasing or repurposing the crates, inspect them for any damage or defects. Ensure that they are sturdy and in good condition.
- Optional: Consider additional features: If you want to add a unique touch to your TV stand, look for crates with additional features like dividers or compartments. These can be great for organizing media equipment or displaying decorative items.
Once you have gathered the wooden crates, you are ready to move on to the next step: preparing the crates for assembly. Be sure to have your tools and other materials ready, as we’ll be putting them to use in the following steps.
Step 2: Preparing the Crates
Now that you have gathered your wooden crates, it’s time to prepare them for assembly. This step involves a few simple tasks to ensure that the crates are ready to be securely fastened together. Here’s what you need to do:
- Inspect the crates: Take a close look at each crate and check for any rough edges, splinters, or imperfections. If you come across any, use sandpaper to smooth them out. This will not only enhance the overall appearance but also prevent any potential injuries.
- Clean the crates: If the crates are dusty or dirty, wipe them down with a damp cloth or use a gentle cleaning solution. Make sure to dry them thoroughly before proceeding.
- Arrange the crates: Depending on your desired design and functionality, arrange the crates in the desired configuration. Experiment with different orientations and stack them to create different shelf heights and widths.
- Mark the drilling points: Once you have determined the crate arrangement, grab a ruler or measuring tape to mark the drilling points. Make sure to measure accurately to ensure that the shelves align properly.
- Pre-drill holes: To prevent the wood from splitting, pre-drill holes at the marked points using a drill bit that is slightly smaller in diameter than the screws you’ll be using. This will make it easier to attach the crates together.
By taking the time to prepare the crates, you’ll ensure a smooth and seamless assembly process. Once the crates are prepared, you’re ready to move on to the next step: assembling the base of your DIY TV stand.
Step 3: Assembling the Base
Now that the crates are prepared, it’s time to start assembling the base of your DIY TV stand. This step will involve securely attaching the crates together to create a sturdy foundation. Here’s how you can do it:
- Take the first two crates and align them in the desired configuration for the base. Make sure the pre-drilled holes are facing inward.
- Using a power drill and the appropriate screws, attach the crates together by inserting the screws into the pre-drilled holes. Start with the bottom corners and work your way up to the top corners.
- Double-check the alignment and tighten the screws using a screwdriver to ensure a secure connection between the two crates.
- Repeat this process with the third crate, attaching it to the existing base in the same manner. Ensure that all the crates are aligned properly and securely fastened.
By following these steps, you’ll have a solid base for your TV stand. The number of crates you choose to use will depend on the size and design of your TV stand. It’s important to pay attention to the alignment and stability of the base to ensure that it can support the weight of your TV and any other items you plan to place on it.
Once the base is assembled, you’re ready to move on to the next step: attaching the shelves.
When making a TV stand out of wooden crates, make sure to sand and paint the crates before assembling them to give the stand a polished look.
Read more: How To Make A TV Stand Higher
Step 4: Attaching the Shelves
With the base of your DIY TV stand complete, it’s time to move on to attaching the shelves. This step will give your TV stand additional storage space and create a visually appealing design. Here’s how to do it:
- Take the remaining wooden crates and arrange them on top of the base in the desired configuration. You can stack them directly on top of each other or place them side by side.
- Align the crates with the pre-drilled holes on the base to ensure a proper fit.
- Using your power drill and screws, secure the crates to the base by inserting the screws into the pre-drilled holes.
- Double-check the alignment and stability of the shelves, tightening the screws if necessary.
When attaching the shelves, consider spacing them evenly to create a balanced and visually appealing design. You can also experiment with different crate orientations to add a unique touch to your TV stand.
Once all the shelves are securely attached, take a step back and admire your progress. You now have a functional and stylish TV stand ready to be customized to your liking.
Before we move on to the next step, take a moment to ensure that all the screws are tightened and the shelves are stable. It’s important to double-check the structural integrity of the TV stand to ensure that it can safely hold your TV and other items.
In the next step, we’ll focus on sanding and finishing the TV stand to give it a polished and professional look.
Step 5: Sanding and Finishing
Now that your DIY TV stand is assembled, it’s time to give it a smooth and polished finish. This step involves sanding the wooden surfaces and applying a finish to enhance the overall appearance. Follow these steps to achieve a professional-looking result:
- Start by using sandpaper to smooth out any rough edges, splinters, or imperfections on the wooden surfaces of the TV stand. Sand in the direction of the wood grain for the best results. You can start with a coarse-grit sandpaper and gradually move on to a finer-grit for a smoother finish.
- Wipe down the TV stand with a damp cloth to remove any dust or debris created during the sanding process. Let it dry completely before proceeding.
- If you prefer a natural wood look, you can leave the TV stand as is or apply a clear wood sealer to protect the wood and enhance its natural beauty. Follow the manufacturer’s instructions for application and drying time.
- If you want to add some color to your TV stand, you can use wood stain or paint. Apply the stain or paint using a paintbrush or foam roller, following the manufacturer’s instructions. Allow sufficient drying time between coats if multiple coats are desired.
- Once the stain or paint is dry, you can add a protective finish, such as clear polyurethane or varnish, to seal the wood and provide extra durability. Apply the finish evenly using a brush or foam applicator, and allow it to dry completely according to the product instructions.
By sanding and finishing your TV stand, you not only enhance its appearance but also protect the wood from moisture and wear over time. The type of finish you choose will depend on your personal preferences and the style of your living room.
Now that your TV stand is sanded and finished, take a step back and admire your craftsmanship. It’s almost ready to be showcased in your living room. In the next step, we’ll explore some optional features you can add to make your TV stand even more functional and unique.
Step 6: Adding Extra Features (optional)
In this final step, we’ll explore some optional features that you can add to your DIY TV stand to make it even more functional and personalized. These additional features will allow you to customize the TV stand to suit your specific needs and style. Here are some ideas to consider:
- Casters or furniture glides: If you want your TV stand to be mobile, you can attach casters or furniture glides to the bottom of the base. This will make it easier to move the TV stand around when needed.
- Dividers or compartments: To organize your media equipment or display decorative items, you can add dividers or compartments within the wooden crates. This will help keep things neat and tidy.
- Cable management: To keep your cables and wires organized and out of sight, consider adding cable management solutions. This could be as simple as drilling holes in the back of the TV stand to route the cables or using adhesive cable clips.
- Additional shelves: If you need more storage space, you can add additional shelves by attaching extra crates above or below the existing ones. This will allow you to store DVDs, game consoles, or other media-related items.
- Decorative touches: To personalize your TV stand further, consider adding decorative elements such as knobs, handles, or even a coat of paint with stenciled designs. This will add a unique touch to your creation.
Remember, these extra features are completely optional and will depend on your specific preferences and needs. Feel free to get creative and let your imagination run wild.
Congratulations! You’ve completed all the steps to create your very own TV stand out of wooden crates. Take a moment to appreciate your hard work and craftsmanship. Your unique and personalized TV stand is now ready to be placed in your living room, adding charm, functionality, and a touch of your own style to the space.
Thank you for following along with this DIY project. We hope you’ve enjoyed the process and that your new TV stand brings joy and satisfaction every time you use it. Happy crafting!
Finishing touch: Validate that this is a valid html output
Conclusion
Congratulations on completing your DIY journey to create a TV stand out of wooden crates! By following the step-by-step process outlined in this article, you’ve not only saved money but also unleashed your creativity to craft a unique and customized piece for your living room.
Your DIY TV stand is not just a functional piece of furniture; it’s a testament to your woodworking skills and personal style. The rustic charm of the wooden crates adds warmth and character to any space, making your living room a cozy and inviting place to relax and enjoy your favorite TV shows or movies.
Throughout this project, you’ve learned valuable skills such as measuring, assembling, sanding, and finishing wood. These skills can be applied to future DIY projects, empowering you to explore even more creative endeavors.
Remember, this project is versatile, and you can adapt it to match your unique preferences and needs. Whether you choose to add extra features like casters or compartments, or decorate it with your favorite colors and designs, your TV stand will truly reflect your personality and taste.
As you admire your completed TV stand, take a moment to appreciate the satisfaction and sense of accomplishment that comes with creating something with your own hands. Not only have you transformed ordinary wooden crates into a functional piece of furniture, but you’ve also added a personal touch to your living room that can’t be replicated.
Thank you for joining us on this DIY adventure. We hope this article has inspired you to explore your creativity and continue to embark on new projects. Now, it’s time to sit back, relax, and enjoy your favorite shows in style!
Frequently Asked Questions about How To Make A TV Stand Out Of Wooden Crates
Was this page helpful?
At Storables.com, we guarantee accurate and reliable information. Our content, validated by Expert Board Contributors, is crafted following stringent Editorial Policies. We're committed to providing you with well-researched, expert-backed insights for all your informational needs.


0 thoughts on “How To Make A TV Stand Out Of Wooden Crates”