Home>Furniture>Living Room Furniture>How To Build A TV Stand With Fireplace
Living Room Furniture
How To Build A TV Stand With Fireplace
Modified: August 20, 2024
Learn how to build a TV stand with a fireplace as the perfect addition to your living room furniture. Transform your space with this DIY project.
(Many of the links in this article redirect to a specific reviewed product. Your purchase of these products through affiliate links helps to generate commission for Storables.com, at no extra cost. Learn more)
Introduction
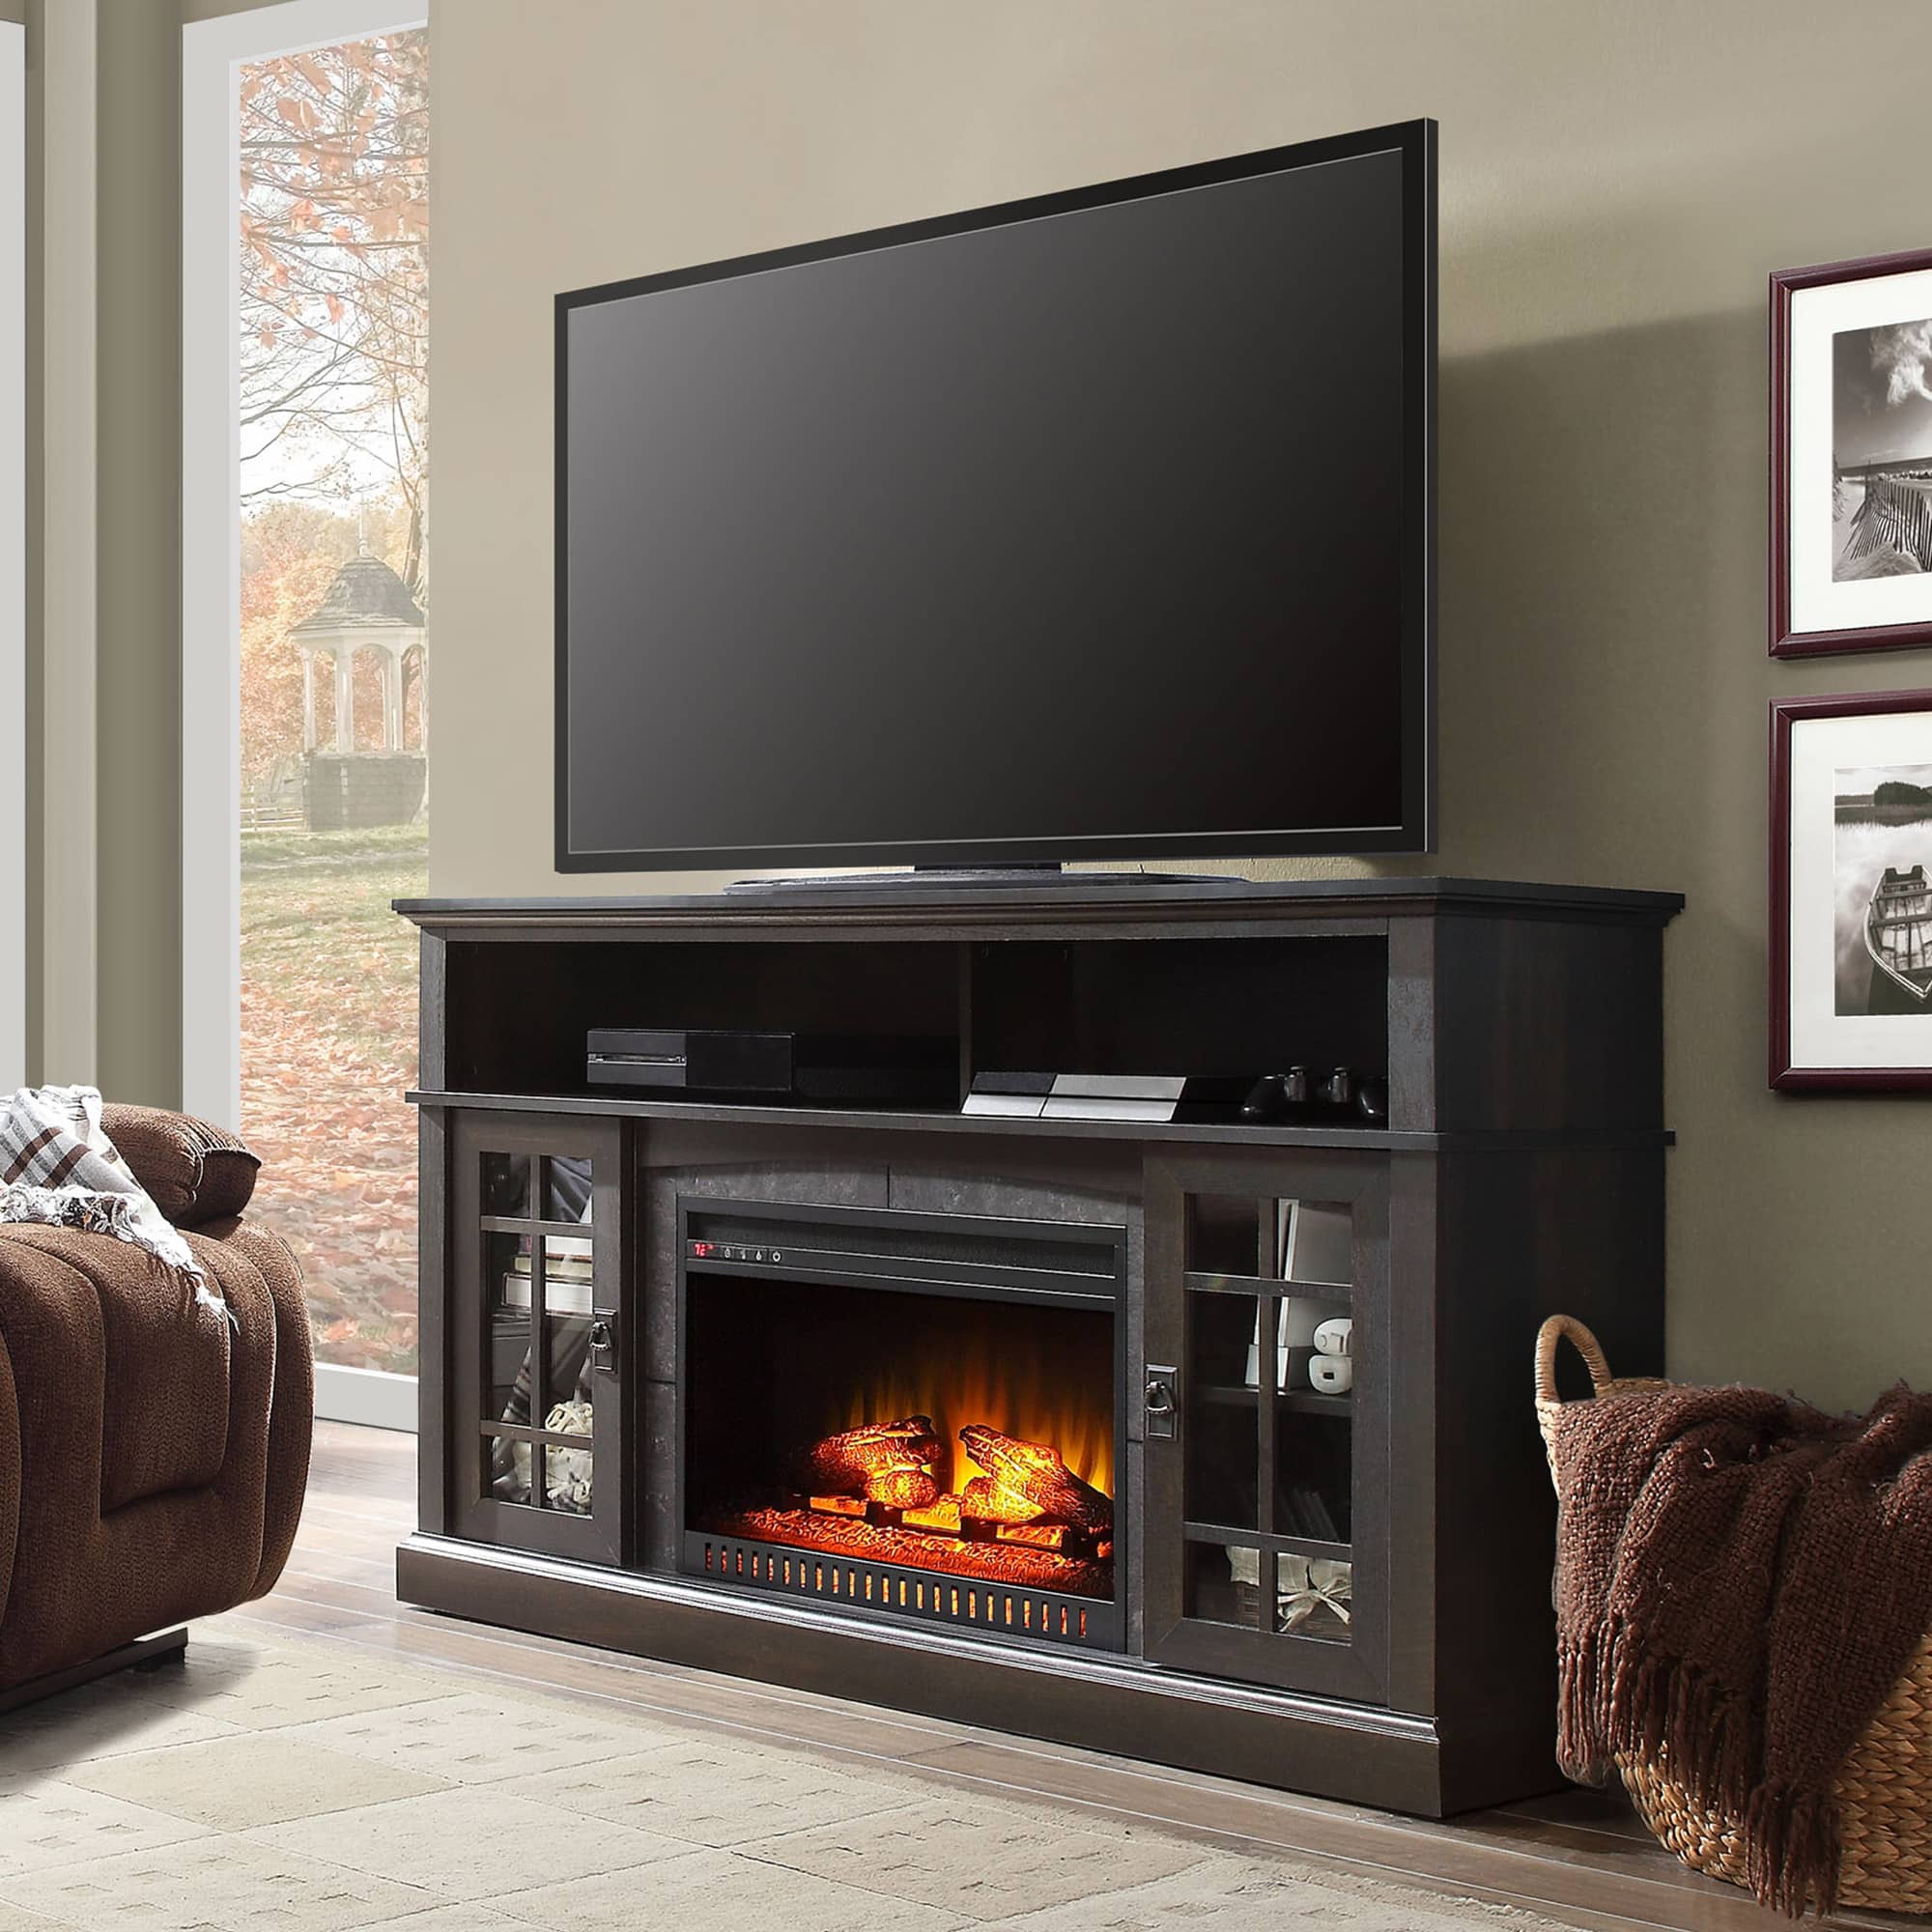
Welcome to our comprehensive guide on how to build a TV stand with a fireplace! A TV stand with a built-in fireplace not only adds functionality to your living room but also creates a cozy and inviting atmosphere. It’s the perfect addition for those chilly winter nights when you want to curl up and enjoy your favorite shows or movies.
Building your own TV stand with a fireplace is a rewarding DIY project that allows you to customize the design to suit your taste and space. Whether you’re a seasoned DIY enthusiast or a beginner looking to tackle your first major project, with a little bit of planning and the right tools, you can create a stunning and functional TV stand that will be the centerpiece of your living room.
In this guide, we will take you through each step of the process, from choosing the location and design to measuring, cutting, and assembling the wood pieces. We will also provide tips on how to install the fireplace insert and finish the stand for a professional-looking result.
Before we get started, it’s important to note that building a TV stand with a fireplace requires basic woodworking skills and tools. If you are uncomfortable with using power tools or have limited experience with woodworking, it may be beneficial to seek assistance from a professional or consider purchasing a pre-made TV stand with a fireplace.
Now, let’s dive into the exciting world of DIY and learn how to build a TV stand with a fireplace that will both impress your friends and family and provide a cozy ambiance to your living space.
Key Takeaways:
- Building a TV stand with a fireplace is a fun DIY project that adds warmth and functionality to your living room. It requires careful planning, precise measurements, and attention to detail for a successful outcome.
- Safety is crucial throughout the construction process, so always wear protective gear and follow the instructions for tools and materials. Once completed, enjoy the cozy ambiance and quality time with family and friends around your new TV stand with a fireplace.
Read more: How To Build A Cheap TV Stand
Materials Needed
Before you begin building your TV stand with a fireplace, it’s important to gather all the necessary materials and tools. Here’s a list of what you’ll need:
- Wood boards – Select high-quality boards that are sturdy enough to support the weight of your TV and fireplace insert. The type of wood is up to your personal preference, but popular options include pine, oak, and birch.
- Fireplace insert – Look for an electric fireplace insert that fits the dimensions of your TV stand. These inserts are easy to install and provide a realistic flame effect without the need for a chimney or gas line.
- Screws – Choose screws that are appropriate for the thickness of your wood boards. It’s best to consult a hardware store expert to ensure you select the correct size and type.
- Nails – Depending on your design, you may also need nails to secure certain parts of the TV stand.
- Wood glue – Use wood glue to reinforce the joints and ensure stability.
- Sandpaper – Get a variety of sandpaper grits to smooth out the wood surfaces and create a polished finish.
- Power drill – A power drill will make assembling the TV stand much easier and faster. Make sure it’s charged and ready for use.
- Saw – You’ll need a saw to cut the wood boards to the desired dimensions. A circular saw or a miter saw is recommended.
- Measuring tape – Accurate measurements are essential for a well-fitting TV stand. Have a measuring tape handy to ensure precision.
- Ruler or straightedge – Use a ruler or straightedge to draw straight lines and guide your cuts.
- Paint or stain – If you want to add color or finish to your TV stand, choose a paint or stain that suits your style.
- Paintbrushes – Have a couple of paintbrushes on hand for applying paint or stain.
- Safety equipment – It’s crucial to prioritize safety while working on your DIY project. Don’t forget to wear safety goggles, gloves, and a dust mask to protect yourself.
Once you have gathered all the materials and tools, you’re ready to move on to the next step: choosing the location for your TV stand with a fireplace.
Step 1: Choose the Location
The first step in building a TV stand with a fireplace is choosing the perfect location in your living room. Consider the following factors when deciding where to place your TV stand:
- Wall space – Measure the available wall space in your living room to determine the maximum dimensions for your TV stand. Make sure you leave some clearance around the stand for easy access and movement.
- Visibility – Choose a location that allows for optimal viewing of the TV from various seating positions in the room. Consider the layout of your furniture and the angles at which the TV will be most visible.
- Electrical outlet – Since you’ll be using an electric fireplace insert, ensure that there is a nearby electrical outlet to power the unit. You may need to install an outlet or use extension cords if necessary.
- Adequate ventilation – Fireplaces generate heat, so it’s important to place your TV stand in a well-ventilated area. Ensure there is enough space around the fireplace insert for proper airflow and to prevent overheating.
- Safety – Keep in mind that the fireplace will emit heat, so avoid placing the TV stand too close to flammable materials like curtains or furniture. It’s also essential to maintain a safe distance between the TV and the fireplace to prevent possible damage from heat exposure.
Take your time to assess different locations in your living room and visualize how the TV stand with a fireplace will fit in with the overall aesthetics of the space. Once you’ve chosen the ideal location, measure the wall space to determine the dimensions for your TV stand, which will inform the design and construction of the stand.
With the location selected, you’re now ready to move on to step 2: selecting the design and style of your TV stand with a fireplace.
Step 2: Select the Design and Style
Now that you have chosen the location for your TV stand with a fireplace, it’s time to select the design and style that best suits your preferences and complements your living room decor. Here are some factors to consider when selecting the design:
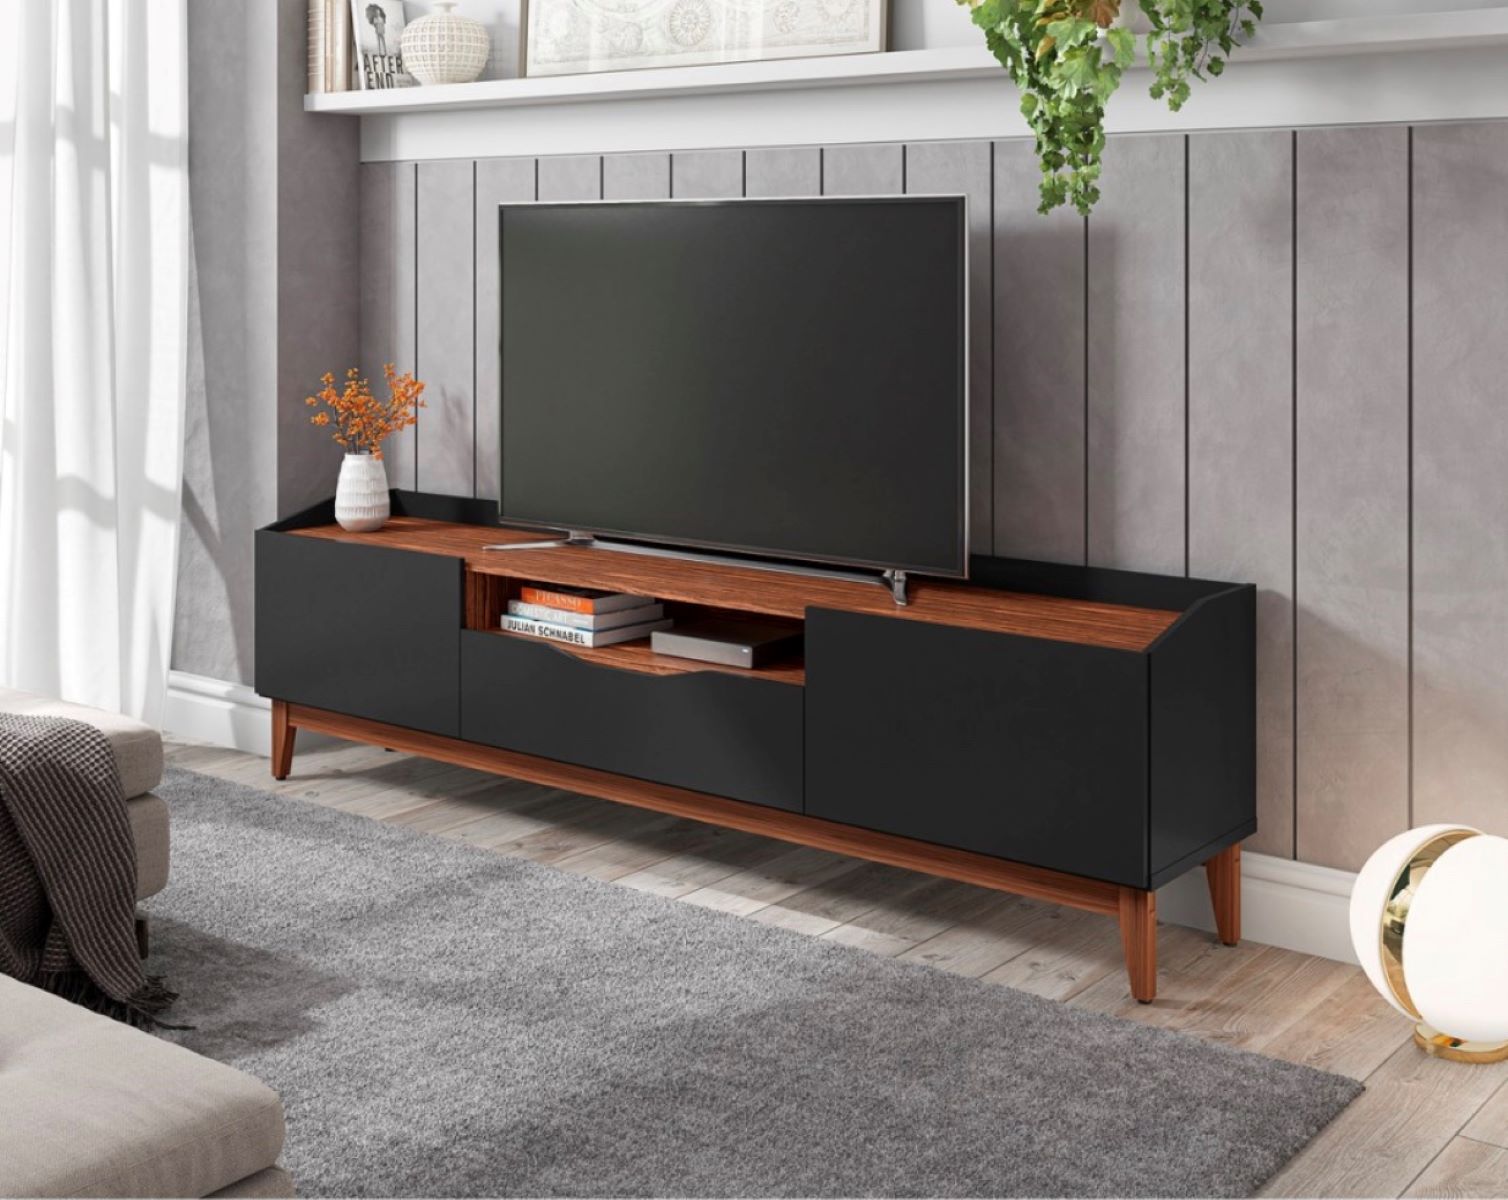
- Size and scale – Determine the appropriate size of the TV stand based on the dimensions of your TV and the available wall space. It should be proportionate to the room and not overwhelm the other furniture.
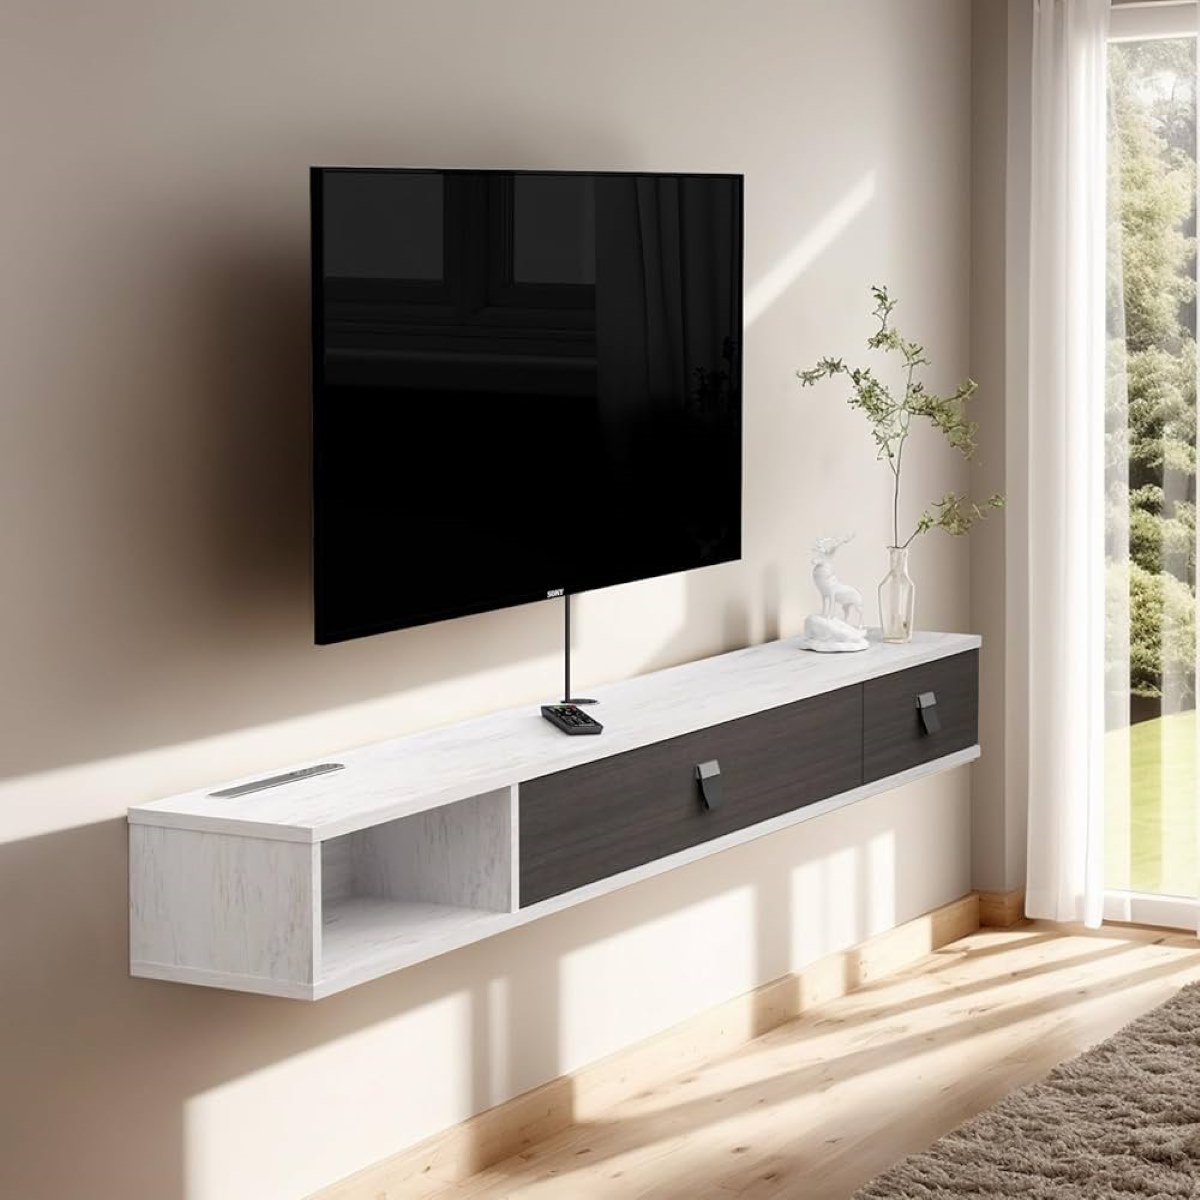
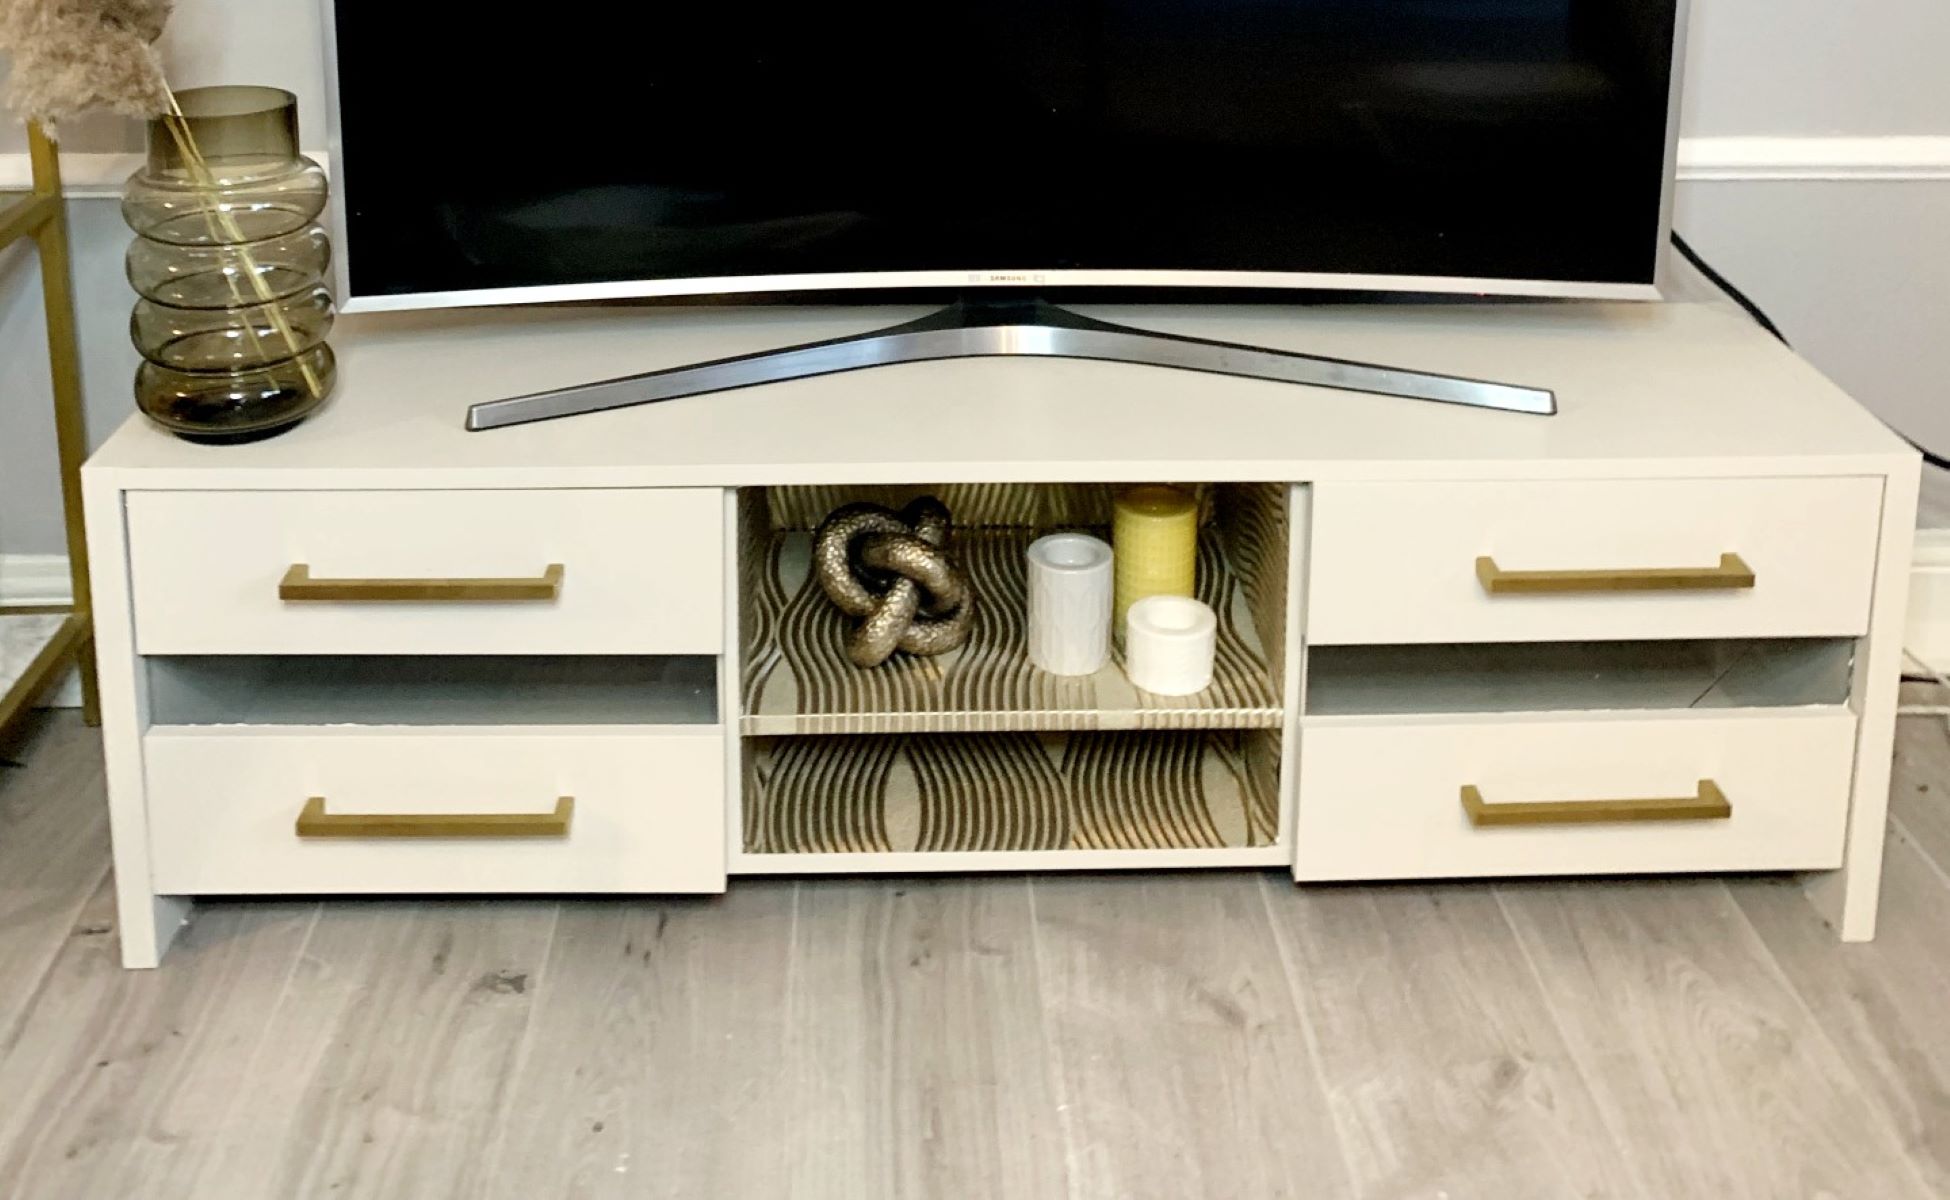
- Storage requirements – Consider the amount of storage you need for media consoles, DVDs, or other accessories. Decide if you want open shelves, closed cabinets, or a combination of both.
- Material and finish – Choose a material that aligns with your style and the overall aesthetics of your living room. Common options include wood, metal, or a combination of materials. Decide on the finish, whether you prefer a natural stain, painted, or distressed look.
- Integration of fireplace insert – Determine how you want the fireplace insert to be integrated into the design of the TV stand. It can be recessed, flush-mounted, or showcased on top of the stand.
- Additional features – Think about any additional features you might want, such as adjustable shelves, cable management solutions, or built-in lighting.
Take inspiration from home improvement magazines, online resources, or furniture stores to explore various designs and styles. Consider your personal taste, the existing decor in your living room, and the functionality you desire in a TV stand with a fireplace. Take note of any specific design elements or features that catch your eye.
Once you have a clear vision of the design and style you want, you can start planning the dimensions and layout of your TV stand. This will help you determine the amount of wood and other materials you will need for the construction. In the next step, we will discuss how to measure and plan the dimensions of your TV stand.
Step 3: Measure and Plan the Dimensions
With the design and style in mind, it’s time to measure and plan the dimensions of your TV stand with a fireplace. Accurate measurements are crucial to ensure a well-fitting and functional piece. Follow these steps to measure and plan the dimensions:
- Measure the wall space: Use a measuring tape to determine the width and height of the wall where the TV stand will be placed. Take note of any architectural features such as windows, doors, or outlets that may affect the placement and dimensions of the stand.
- Determine the TV size: Measure the width and height of your TV to determine the appropriate size for the stand. Ideally, the stand should be wider than the TV to provide stability and ensure a visually pleasing balance.
- Add clearance space: Allow some clearance space around the TV to account for cables, speakers, and other devices that need to be accommodated in the stand. Make sure there is enough room for proper ventilation of the TV and fireplace.
- Consider the fireplace insert dimensions: If you already have a specific fireplace insert or have a preferred model in mind, check its dimensions and adjust the design of the TV stand accordingly. Remember to account for any extra space required for the electrical wiring.
- Plan the shelf and storage dimensions: If you want to incorporate shelves or cabinets into the design, plan their dimensions based on your storage needs and the size of your media consoles or other accessories.
Once you have all the measurements, you can create a detailed plan or sketch of the TV stand, including the dimensions of each component. This will serve as a guide during the construction process and ensure that you have all the necessary materials ready.
Keep in mind that it’s always better to double-check your measurements and make adjustments before cutting any wood to avoid costly mistakes. Take your time in this planning phase to ensure a successful and seamless construction process.
Now that you have your dimensions and plan in place, you’re ready to move on to step 4: gathering the necessary tools for building your TV stand with a fireplace.
Read more: How To Build A Rolling TV Stand
Step 4: Gather the Necessary Tools
Before you embark on building your TV stand with a fireplace, it’s important to gather all the necessary tools and equipment. Having the right tools will make the construction process smoother and more efficient. Here’s a list of the essential tools you’ll need:
- Power drill with various drill bits – A power drill is essential for making holes and securing screws. Make sure you have a set of drill bits in different sizes to accommodate various screw sizes.
- Circular saw or miter saw – A saw will be needed to cut the wood boards to the desired dimensions. A circular saw or miter saw is recommended for precise and straight cuts.
- Sander or sandpaper – You’ll need a sander or sandpaper to smoothen the wood surfaces and remove any rough edges. Consider using sandpaper with different grits to achieve a polished finish.
- Measuring tape – Accurate measurements are crucial for a well-fitting TV stand. Have a measuring tape on hand to ensure precision.
- Square or speed square – A square or speed square will help ensure that your cuts and joints are at perfect right angles.
- Clamps – Clamps are handy for holding wood pieces together while gluing or securing them with screws. They help ensure a tight and secure joint.
- Wood glue – Use wood glue to reinforce joints and increase stability. Opt for a high-quality wood glue that dries quickly and offers a strong bond.
- Screws and nails – You’ll need screws to assemble the wood pieces and nails for certain elements, such as attaching the back panel.
- Safety equipment – Safety should be a top priority during the construction process. Don’t forget to wear safety goggles, gloves, and a dust mask to protect yourself from dust and debris.
It’s important to have these tools readily available before starting the construction process. Check if any of the tools need to be replaced or if you need to purchase additional ones. Having all the tools at your disposal will save time and allow for a smoother building experience.
Once you have gathered all the necessary tools, you’re ready to move on to the next step: preparing the workspace for building your TV stand with a fireplace.
Step 5: Prepare the Workspace
Before diving into the construction of your TV stand with a fireplace, it’s important to properly prepare your workspace. A well-organized and clean workspace will help you stay focused and ensure the safety of your project. Here are some steps to prepare your workspace:
- Clean and clear the area: Remove any unnecessary items or furniture from the workspace to create an open area. This will give you enough room to maneuver and work comfortably.
- Protect the floor: Place a drop cloth or old sheet on the floor to protect it from dust, paint, and any accidental spills that may occur during the construction process.
- Set up a worktable: If you have a worktable or a sturdy and flat surface, use it as your primary workspace. It will provide a stable foundation for measuring, cutting, and assembling the wood pieces.
- Organize your tools: Arrange all your tools and materials in an easily accessible manner. Consider using toolboxes, bins, or shelves to keep everything organized and within reach.
- Ensure proper lighting: Adequate lighting is essential for accurate measurements and safe cutting. If your workspace doesn’t have sufficient natural light, set up additional lighting sources such as work lamps or clamp lights.
- Ensure good ventilation: If you’re working with paints, stains, or using any adhesives, ensure that your workspace is well-ventilated. Open windows or use fans to circulate fresh air and remove any fumes.
- Create a comfortable working environment: Constructing a TV stand with a fireplace requires time and effort, so make sure you have a comfortable working environment. Use a chair or a stool with proper back support and consider having a water bottle nearby to stay hydrated.
- Follow safety precautions: Always prioritize safety while working in your workspace. Keep emergency contact numbers handy, familiarize yourself with safety procedures, and regularly inspect your tools for any defects or damages.
Taking the time to prepare your workspace will contribute to a smoother and more enjoyable construction process. Having a clean and organized area will help you focus on the task at hand and ensure that you have everything you need within reach.
Now that your workspace is ready, it’s time to move on to the exciting part of actually cutting and assembling the wood pieces. In the next step, we will guide you through the process of cutting the wood pieces for your TV stand with a fireplace.
When building a TV stand with a fireplace, make sure to carefully measure the space where it will be placed to ensure a proper fit. Additionally, consider the weight and size of the TV and fireplace to ensure the stand is sturdy enough to support them.
Step 6: Cut the Wood Pieces
Now that your workspace is prepared, it’s time to start cutting the wood pieces for your TV stand with a fireplace. Follow these steps to ensure accurate and precise cuts:
- Review your plan: Refer back to your plan or sketch to identify the dimensions and measurements of each wood piece. Check if any adjustments need to be made before cutting.
- Measure and mark: Use a measuring tape and a pencil to measure and mark the dimensions on the wood boards. Double-check your measurements to avoid any mistakes.
- Set up the saw: If you’re using a circular saw or miter saw, make sure it is properly set up and adjusted according to the type and thickness of the wood. Follow the manufacturer’s instructions and wear appropriate safety gear.
- Make the cuts: Position the wood boards securely on your worktable and align the marked lines with the saw’s guide. Take your time and make slow, steady cuts, ensuring that the saw blade remains perpendicular to the wood surface.
- Repeat for each piece: Continue measuring, marking, and cutting all the necessary wood pieces according to your plan. Double-check the dimensions as you go, ensuring that each piece is cut accurately.
- Trim or sand if needed: Once all the wood pieces are cut, assess the edges for any roughness or unevenness. Use a trim saw or sandpaper to smooth out the edges if necessary, ensuring a clean and professional finish.
Remember to focus on safety throughout the cutting process. Always wear protective goggles, gloves, and a dust mask to shield yourself from any potential hazards.
Once you have completed cutting all the wood pieces, take a moment to review each piece and confirm that they match your measurements and plan. With the wood pieces ready, you’re now ready to move on to the next step: assembling the frame of your TV stand with a fireplace.
Step 7: Assemble the Frame
With the wood pieces cut to the appropriate dimensions, it’s time to start assembling the frame of your TV stand with a fireplace. Follow these steps to ensure a sturdy and well-constructed frame:
- Organize the pieces: Lay out all the wood pieces according to your plan, grouping them by their respective sections or components.
- Apply wood glue: Apply a thin layer of wood glue to the edges of the wood pieces that will be joined together. This will provide additional strength and stability to the joints.
- Align the pieces: Carefully align the edges of the wood pieces and press them firmly together. Use clamps to secure the pieces in place, ensuring a tight and secure joint. Check for any gaps or misalignments and make adjustments as needed.
- Pre-drill and screw: Once the joints are aligned, use a power drill equipped with a appropriate drill bit to pre-drill pilot holes through the wood pieces. This will prevent the wood from splitting when you drive in the screws. Then, secure the joints by driving in screws through the pilot holes.
- Double-check for squareness: Use a square or speed square to check for squareness at each corner of the frame. Adjust as necessary to ensure that all corners are at perfect right angles.
- Repeat for all sections: Move on to the next section of the frame and repeat the process of applying wood glue, aligning the pieces, pre-drilling, and screwing. Continue this step until all sections of the frame are assembled.
- Allow time for the glue to dry: Once the frame is fully assembled, remove any excess glue and allow the wood glue to dry according to the manufacturer’s instructions. This will typically take a few hours or overnight.
Throughout the assembly process, it’s important to periodically check for squareness and ensure that all joints are secure and tight. This will result in a sturdy and stable frame for your TV stand.
With the frame assembled, you’ve made significant progress in building your TV stand with a fireplace. In the next step, we will guide you through attaching the shelves and back panel to complete the structure.
Read more: How To Build A Corner TV Stand
Step 8: Attach the Shelves and Back Panel
With the frame of your TV stand assembled, it’s time to move on to attaching the shelves and back panel. These components will provide additional stability and functionality to your TV stand with a fireplace. Follow these steps to ensure a secure attachment:
- Review your plan: Refer back to your plan or sketch to identify the dimensions and placements of the shelves and back panel.
- Measure and mark: Use a measuring tape and a pencil to measure and mark the positions on the side panels where the shelves and back panel will be attached. Double-check your measurements to ensure accuracy.
- Attach the shelves: Apply wood glue to the edges of the shelves that will come into contact with the side panels. Align the edges with the marked positions and press them firmly into place. Use a power drill and appropriate screws to secure the shelves to the side panels.
- Attach the back panel: Apply wood glue along the edges of the back panel and align it with the back of the frame. Ensure it is flush with the edges and corners of the frame. Use a power drill and screws to secure the back panel in place.
- Check for stability: Once the shelves and back panel are attached, check the stability of the TV stand. Shake the structure gently to see if there is any wobbling or shifting. If necessary, reinforce any weak joints with additional screws or reinforce them with L-brackets.
- Allow time for the glue to dry: After attaching the shelves and back panel, remove any excess glue and allow the wood glue to dry according to the manufacturer’s instructions. This will typically take a few hours or overnight.
It’s essential to ensure that the shelves and back panel are securely attached to the frame. This will provide the necessary support for your TV and other media devices while maintaining the structural integrity of the TV stand.
With the shelves and back panel in place, you’re one step closer to completing your TV stand with a fireplace. In the next step, we will guide you through the process of installing the fireplace insert.
Step 9: Install the Fireplace Insert
Installing the fireplace insert is a crucial step in building your TV stand with a fireplace. The fireplace insert will provide the warmth and visual ambiance to transform your living room. Follow these steps to ensure a successful installation:
- Review the manufacturer’s instructions: Read through the installation manual provided by the fireplace insert manufacturer. It will provide specific guidelines and requirements for the installation process.
- Prepare the opening: Measure and mark the dimensions of the opening where the fireplace insert will be placed. Ensure that the dimensions match the specifications outlined in the manufacturer’s instructions.
- Wire the electrical connection: If required, follow the manufacturer’s instructions to properly wire the electrical connection for the fireplace insert. If you’re not comfortable with electrical work, consider hiring a licensed electrician for this step.
- Position the fireplace insert: Carefully place the fireplace insert into the opening, ensuring that it sits securely and is level. Follow any specific instructions provided by the manufacturer for positioning and securing the insert.
- Connect the venting system: If applicable, connect the venting system to the fireplace insert as per the manufacturer’s instructions. Venting requirements may vary based on the type of fireplace insert you are using.
- Test the fireplace insert: Once the installation is complete, test the fireplace insert to ensure it is functioning correctly. Follow the manufacturer’s instructions to start up the fireplace and adjust the flame intensity and any other settings.
It’s essential to carefully follow the manufacturer’s instructions during the installation process, as each fireplace insert may have specific requirements and guidelines. If you’re unsure about any step or encounter any difficulties, consult the manufacturer or seek assistance from a professional.
With the fireplace insert successfully installed, your TV stand with a fireplace is starting to come together. In the next step, we will guide you through the process of sanding and finishing the stand to give it a polished look.
Step 10: Sand and Finish the Stand
Now that the structural components of your TV stand with a fireplace are complete, it’s time to sand and finish the stand to give it a polished and professional look. Follow these steps to achieve a smooth and beautiful finish:
- Gather the necessary materials: Prepare sandpaper in various grits (starting with a coarser grit and gradually moving to a finer grit), a sanding block, and a clean cloth.
- Sand the surfaces: Begin by using the coarser grit sandpaper to gently sand the wood surfaces of the TV stand. Move the sandpaper in smooth, even strokes, following the grain of the wood. Continue sanding until all rough edges, imperfections, and visible scratches are smoothed out.
- Switch to finer grits: Gradually switch to finer grits of sandpaper as you progress, ensuring that each sanding session further smoothens the wood surfaces. This will help achieve a silky texture and prepare the wood for the finishing step.
- Clean the surfaces: Once you’re satisfied with the smoothness of the wood, use a clean cloth to wipe away any dust or debris from the sanding process. Ensure that the surfaces are clean and free from any residual particles.
- Apply the finish: Choose a suitable finish for your TV stand, such as paint, stain, or varnish. Apply the finish according to the manufacturer’s instructions, using a paintbrush or a clean cloth. Apply thin, even coats and allow sufficient drying time between each coat.
- Inspect and touch up: After the first coat of finish has dried, inspect the TV stand for any missed spots or areas that require touch-ups. Sand any imperfections gently with a fine grit sandpaper before applying additional coats of finish if necessary.
- Allow complete drying: Once you’re satisfied with the finish and any touch-ups, allow the TV stand to dry completely. This may take several hours or according to the instructions specified by the finish manufacturer.
Remember to work in a well-ventilated area during the finishing process, and follow all safety precautions specified by the finish manufacturer. Always wear appropriate protective gear, such as gloves and a mask, to avoid inhalation of fumes or skin contact with the finish.
With the TV stand sanded and finished, it’s time for the exciting final step: setting up your TV and accessories on the stand.
Step 11: Set Up the TV and Accessories
Congratulations on reaching the final step of building your TV stand with a fireplace! Now it’s time to bring your living room to life by setting up your TV and accessories on the stand. Follow these steps to complete your project:
- Position the TV: Carefully place your TV on the designated space of the TV stand. Ensure that it is centered and aligned with the stand’s dimensions.
- Route the cables: Organize and route the cables neatly along the backside or inside the cable management system of the TV stand. This will help maintain a clean and clutter-free appearance.
- Connect the devices: Connect your media devices, such as game consoles, DVD players, or streaming devices, to the appropriate ports on the TV. Follow the manufacturer’s instructions for proper connectivity.
- Mount speakers or soundbar (if applicable): If you’re using additional audio equipment, such as speakers or a soundbar, follow the manufacturer’s instructions to mount them on the TV stand or wall.
- Arrange decorative items: Add a personal touch to your TV stand by placing decorative items, such as framed photos, vases, or plants, on the shelves or surfaces surrounding the TV.
- Test your setup: Turn on your TV and media devices, and test the functionality of all components. Ensure that the fireplace insert is working properly and adjust the flame intensity or settings as desired.
- Enjoy your new TV stand with a fireplace: Sit back, relax, and enjoy the cozy ambiance created by your TV stand with a fireplace. Gather your loved ones and immerse yourself in your favorite movies or TV shows.
Remember to consult the user manuals for your specific TV and accessories to ensure the correct setup and optimal performance.
With your TV and accessories in place, take a moment to appreciate the beauty and functionality of your DIY TV stand with a fireplace. It’s a testament to your creativity and craftsmanship.
Thank you for following this comprehensive guide on how to build a TV stand with a fireplace. We hope this project has brought warmth and joy to your living room for years to come!
Read more: How To Build Wall For TV And Fireplace
Conclusion
Building a TV stand with a fireplace is a rewarding DIY project that not only adds functionality to your living room but also creates a cozy and inviting atmosphere. Throughout this comprehensive guide, we have walked you through each step of the process, from choosing the location and selecting the design to measuring, cutting, and assembling the wood pieces. We have also provided guidance on installing the fireplace insert, sanding, finishing the stand, and setting up your TV and accessories.
By following this guide and incorporating your own creative touches, you have successfully built a custom TV stand with a fireplace that reflects your personal style and meets your specific needs. You have demonstrated your woodworking skills and attention to detail, resulting in a functional and visually appealing piece of furniture.
Remember, safety is always a priority. Throughout the construction process, make sure to wear appropriate safety gear and follow the manufacturer’s instructions for any tools or materials used. If you have any doubts or concerns about certain steps, it is always a good idea to consult a professional or seek advice from experienced individuals in the field.
Now that your project is complete, it is time to sit back, relax, and enjoy the cozy ambiance and warmth that your TV stand with a fireplace brings to your living room. Gather your loved ones, grab some popcorn, and immerse yourself in the world of your favorite movies or TV shows. Not only will you have a functional TV stand, but you will also have created a space that fosters relaxation and quality time with family and friends.
Thank you for embarking on this DIY journey with us. We hope this guide has inspired you to take on more creative projects and continue to enhance your living space with your personal touch. Enjoy your new TV stand with a fireplace and the memories that will be created around it for years to come!
Frequently Asked Questions about How To Build A TV Stand With Fireplace
Was this page helpful?
At Storables.com, we guarantee accurate and reliable information. Our content, validated by Expert Board Contributors, is crafted following stringent Editorial Policies. We're committed to providing you with well-researched, expert-backed insights for all your informational needs.

0 thoughts on “How To Build A TV Stand With Fireplace”