Home>Articles>How To Add A Covered Porch To An Existing Roof
Articles
How To Add A Covered Porch To An Existing Roof
Modified: October 25, 2024
Learn how to add a covered porch to your existing roof with our informative articles. Enhance your outdoor living space with our step-by-step guides and expert tips.
(Many of the links in this article redirect to a specific reviewed product. Your purchase of these products through affiliate links helps to generate commission for Storables.com, at no extra cost. Learn more)
Introduction
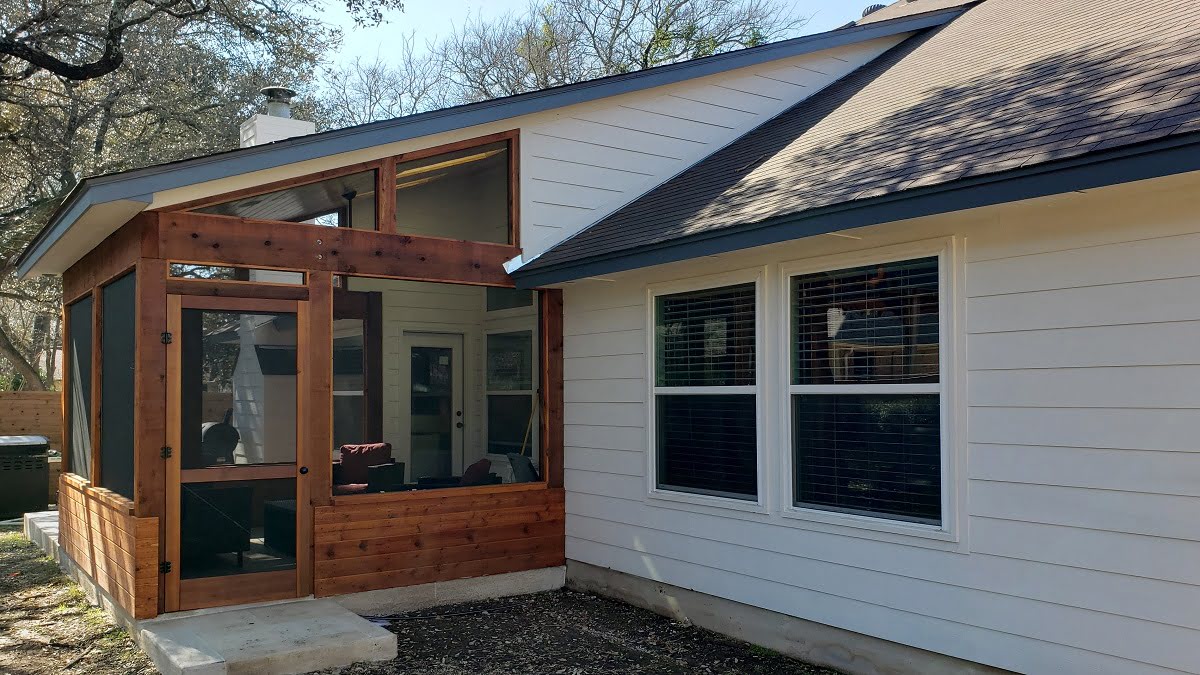
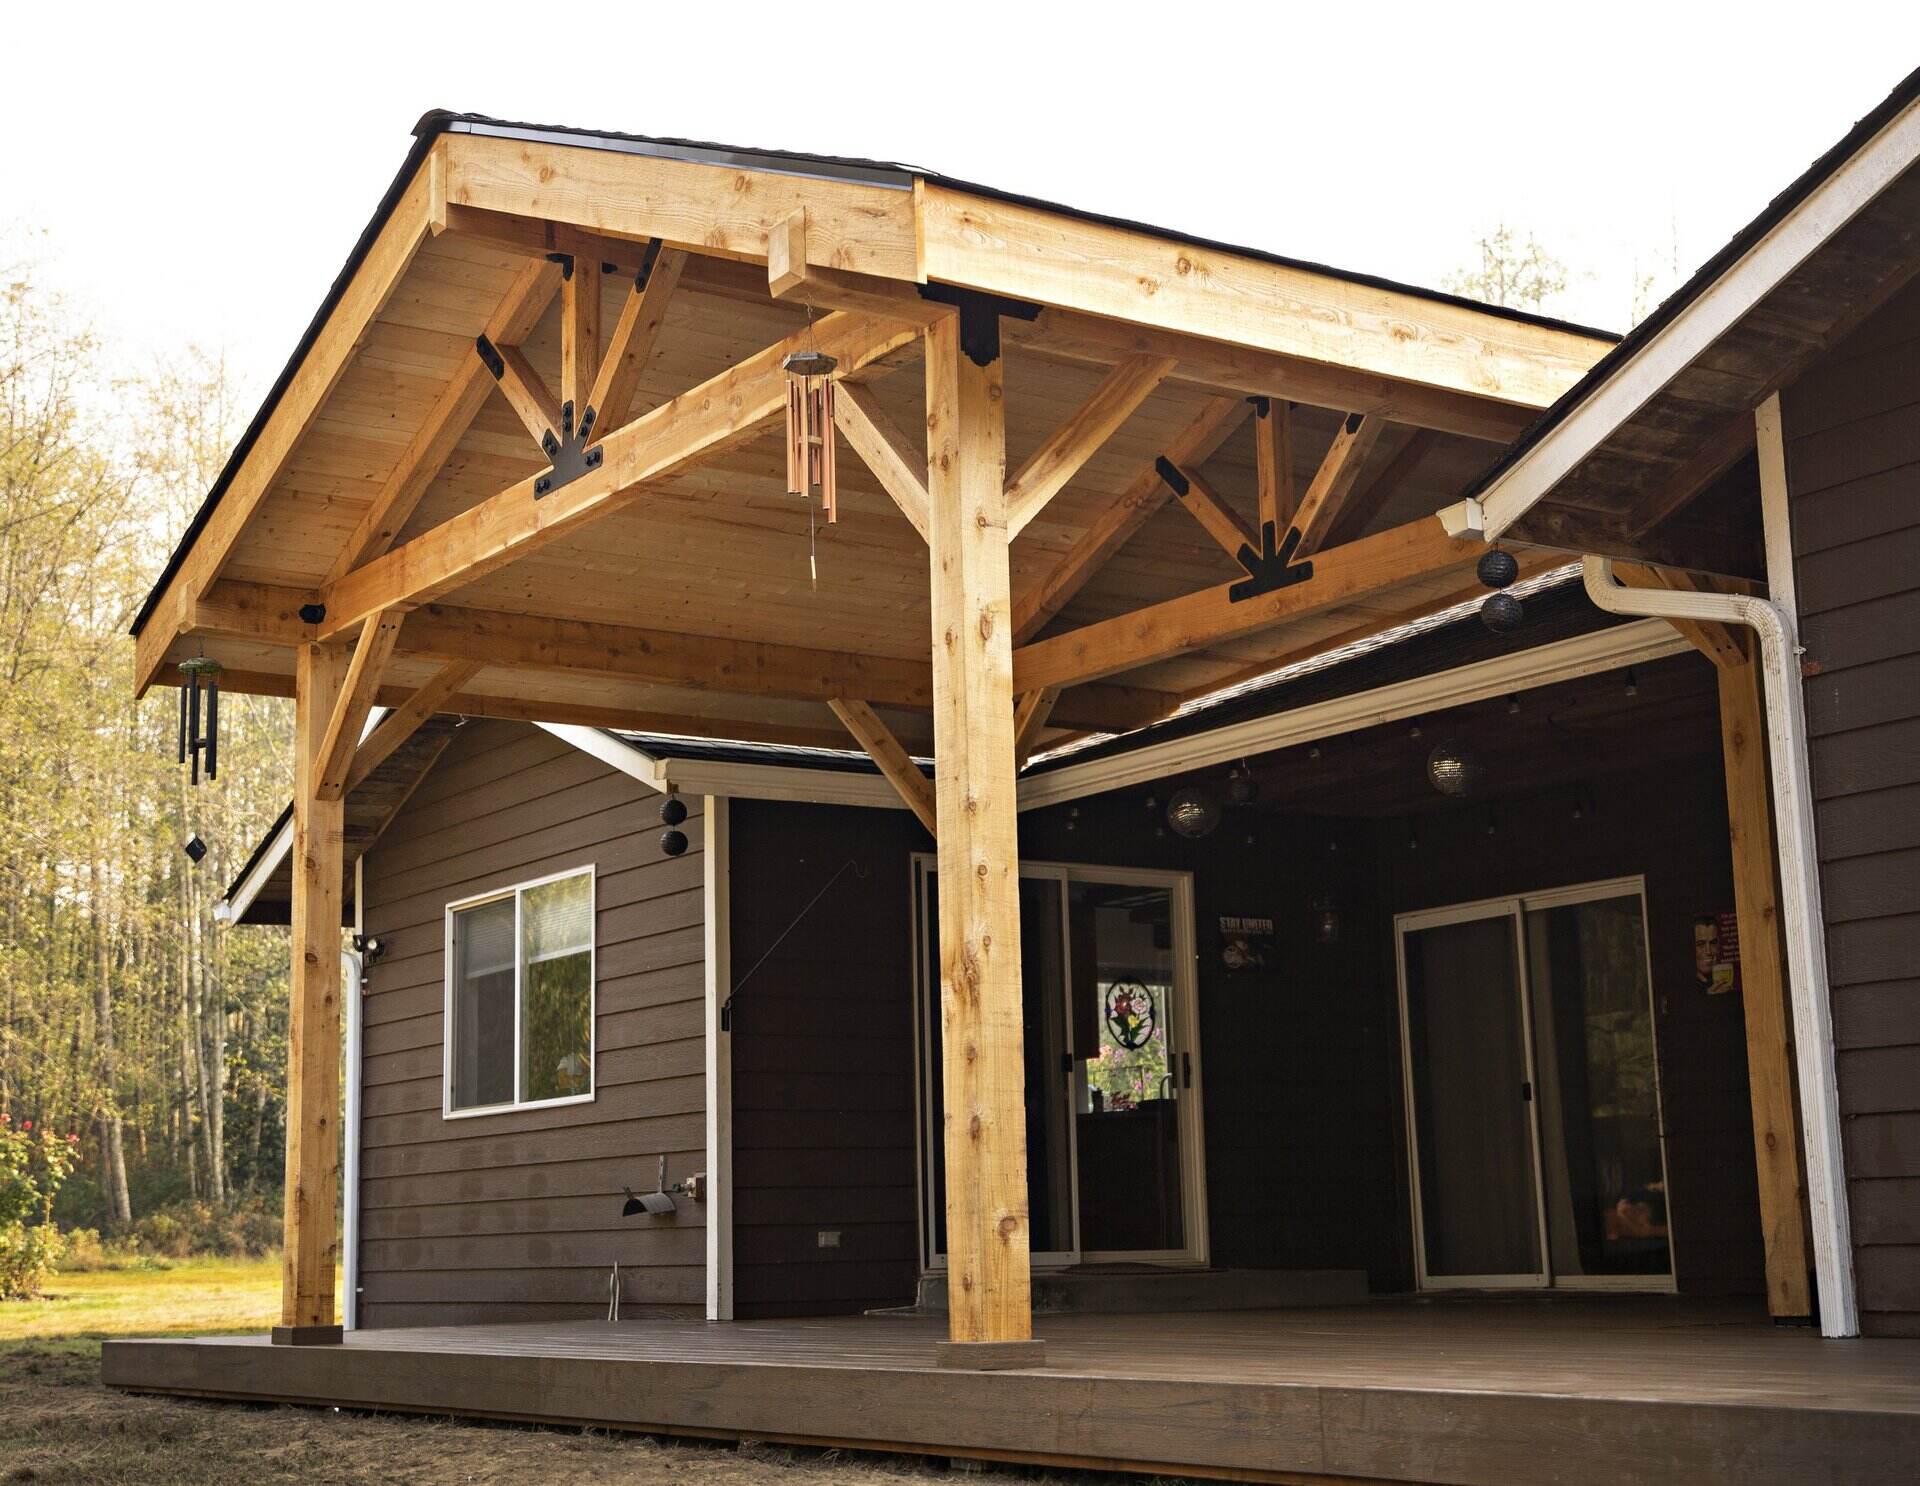
Adding a covered porch to an existing roof is a fantastic way to extend your living space and enhance the functionality and curb appeal of your home. Whether you envision a cozy nook to enjoy your morning coffee or a spacious outdoor entertaining area, a covered porch can provide the perfect solution.
Before embarking on this project, it’s crucial to assess the existing roof structure, obtain the necessary permits, choose appropriate materials, and plan the design. With careful consideration and proper execution, you can create a beautiful and functional covered porch that seamlessly integrates with your existing roof and enhances the overall aesthetics of your home.
This article will guide you through the step-by-step process of adding a covered porch to an existing roof, providing you with valuable insights and tips along the way. From assessing the existing roof to adding finishing touches, we will cover all the essential aspects to ensure a successful and visually appealing porch addition.
So, let’s dive in and learn how to create a covered porch that will not only elevate the charm of your home but also provide a welcoming space for you to enjoy the outdoors.
Key Takeaways:
- Assessing the existing roof, obtaining permits, choosing suitable materials, and adding finishing touches are crucial steps in creating a stunning covered porch that seamlessly integrates with your existing roof and enhances the overall beauty and functionality of your home.
- Proper preparation, installation of support beams and columns, adding the porch roof, waterproofing, insulating, choosing flooring options, and adding walls or enclosures are essential for creating a durable, comfortable, and visually appealing covered porch that meets your specific needs and style.
Read more: How To Add A Gable Roof To An Existing Roof
Assessing the Existing Roof
Before beginning the process of adding a covered porch to your existing roof, it is crucial to thoroughly assess the condition of the roof to ensure it can support the additional load and accommodate the changes.
Start by examining the structural integrity of the existing roof. Look for any signs of damage, such as sagging, rot, or weakened areas. It is essential to address and repair any issues before proceeding with the porch addition.
Next, determine the slope and pitch of the roof. This information will help in designing and constructing the porch roof, ensuring proper drainage and preventing water accumulation on the new structure.
Consider the orientation of the existing roof in relation to the sun and prevailing winds. This will help you plan the layout and position of the porch to optimize sunlight exposure and protect against strong winds.
Additionally, take into account any existing features or obstacles that may impact the porch design, such as chimneys, vents, or skylights. Properly incorporating these elements into the design will ensure a seamless integration of the porch with the existing roof.
Finally, assess the overall aesthetic compatibility of the porch with the existing roof. If your roof has a distinct architectural style, try to match the porch design accordingly to maintain the cohesive look of your home.
By carefully evaluating the condition, structure, orientation, and aesthetics of the existing roof, you can determine the feasibility of adding a covered porch and make informed decisions throughout the planning and construction process.
Designing the Covered Porch
Once you have assessed the existing roof and confirmed its suitability for a covered porch addition, it’s time to start designing your dream outdoor space. The design stage is where your vision for the porch comes to life, and careful planning is key to ensure a functional and aesthetically pleasing result.
Consider the purpose and function of the covered porch. Will it be primarily used for relaxing and enjoying the outdoors, or do you plan to use it for entertaining guests? Understanding the intended use will help determine the size, layout, and features of the porch.
Take into account the size and shape of your outdoor area when designing the porch. If you have limited space, consider a smaller porch with clever design elements to maximize usability. If you have ample space, you may opt for a larger porch to accommodate additional seating or recreational activities.
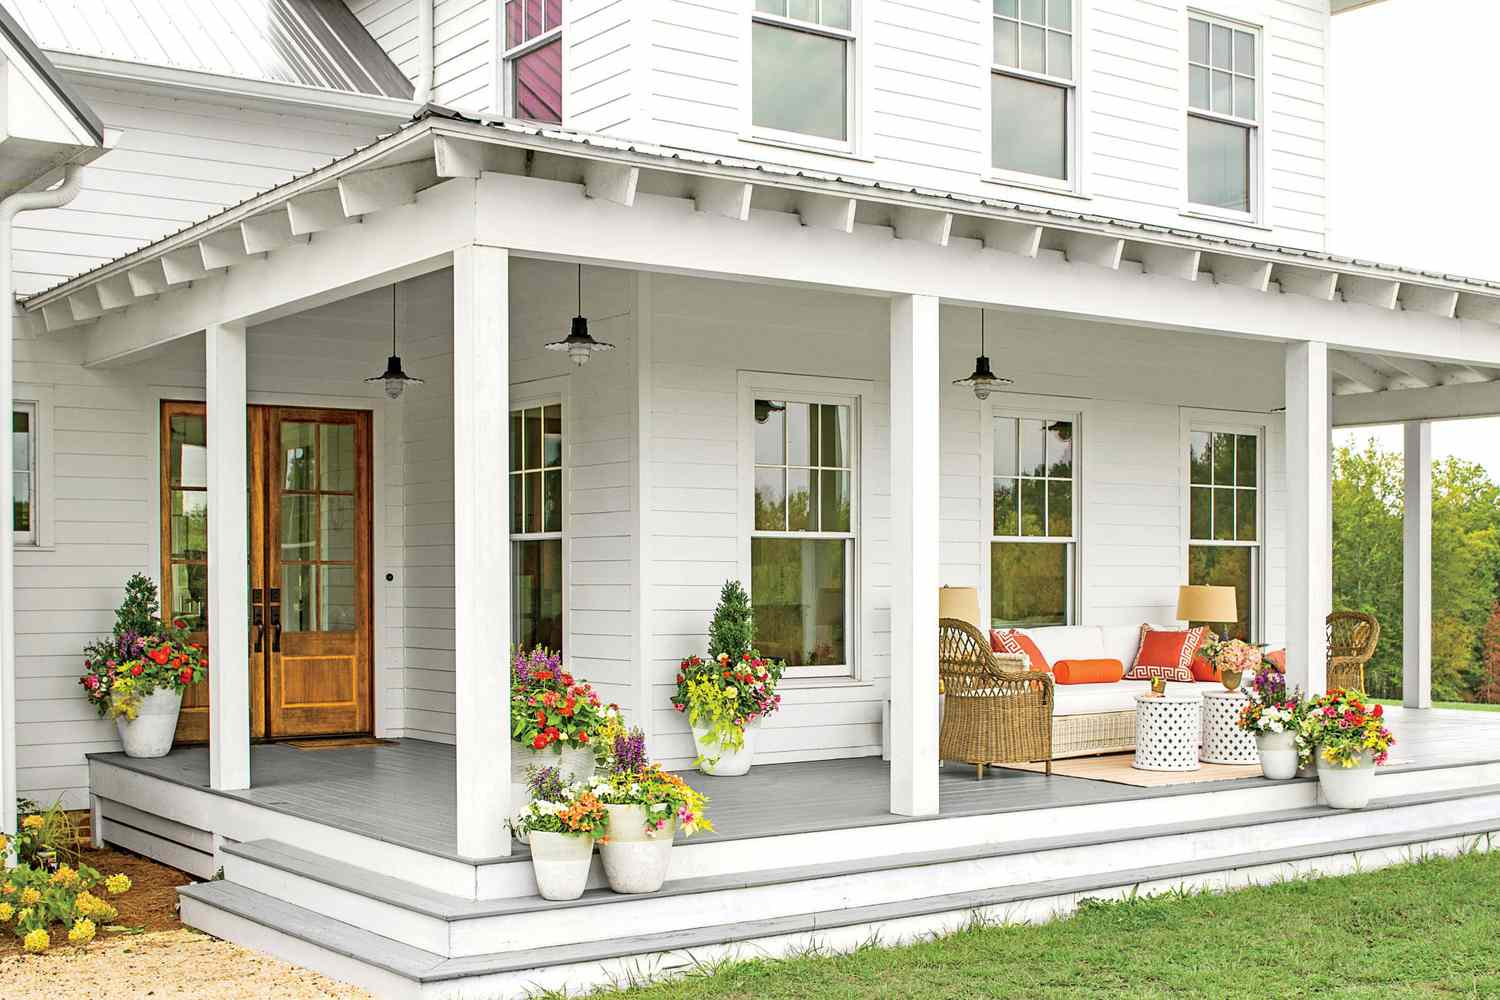
Think about the style and architectural character of your home. The porch design should complement the existing structure and seamlessly blend with its overall aesthetic. Consider using materials, colors, and design elements that harmonize with the existing roof and exterior of your home.
Decide on the roof style for your covered porch. Popular options include gable roofs, hip roofs, or shed roofs. Each style offers its own benefits in terms of architectural appeal, protection from the elements, and compatibility with the existing roof.
Consider architectural features and elements that can enhance the overall design of the porch, such as decorative columns, railings, or built-in seating. These elements can add both functionality and visual interest to the space.
Don’t forget about the entrance and access points to the porch. Determine whether you want a single access point or multiple entrances, and consider how these entryways will flow with the existing layout of your home.
Lastly, take into account factors such as lighting, ventilation, and privacy when designing your covered porch. Incorporate suitable lighting fixtures and consider natural ventilation options to ensure a comfortable and inviting atmosphere. If privacy is a concern, explore options such as screens, curtains, or landscaping.
By carefully planning and designing the covered porch, you can create a beautiful and functional space that enhances the overall appeal and value of your home. Take the time to consider your needs, the style of your home, and practical aspects to ensure a successful porch addition.
Obtaining Permits and Permissions
Before you can begin construction on your covered porch addition, it is important to obtain the necessary permits and permissions from your local authorities. This step ensures that your project complies with building codes and regulations, promoting safety and adherence to legal requirements.
Start by researching the specific requirements and regulations in your location. Contact your local building department or visit their website to understand the permits and approvals needed for a covered porch addition. They will provide you with important information such as application forms, fees, and submission deadlines.
Prepare the documentation required for the permit application. This typically includes detailed plans, architectural drawings, structural calculations, and specifications of the materials to be used. Make sure your plans meet all the necessary building codes and zoning requirements.
Submit your permit application along with the required documentation to the appropriate department. Pay the necessary fees, which can vary depending on the size and complexity of your project. Keep in mind that the review process may take some time, so it is advisable to submit your application well in advance.
Once your permit application is approved, you have permission to begin construction on your covered porch addition. During the construction phase, you may be subject to inspections by building officials to ensure that the work is being done according to the approved plans and in compliance with regulations.
It is important to note that obtaining permits and adhering to building codes is not only a legal requirement but also ensures the safety and structural integrity of your porch addition. Non-compliance can lead to fines, delays, or even the need to remove or modify the porch in the future.
In addition to obtaining building permits, you may also need to consider other permissions or approvals. This can include seeking approval from homeowner associations, local historical preservation boards, or adhering to neighborhood guidelines or covenants.
By following the necessary steps to obtain permits and permissions, you can proceed with confidence in your covered porch addition and enjoy the peace of mind that comes with knowing your project meets all the legal and regulatory requirements.
Choosing Materials
Choosing the right materials for your covered porch addition is essential to ensure durability, longevity, and a cohesive aesthetic with your existing roof and home exterior. Consider these factors when selecting materials for various components of your porch:
Roofing Materials: Select a roofing material that complements your existing roof and offers durability and weather resistance. Popular options include asphalt shingles, metal roofing, or clay or concrete tiles.
Support Beams and Columns: Choose sturdy and aesthetically pleasing materials for your support beams and columns. Common choices include pressure-treated lumber, steel, or composite materials.
Flooring: Opt for durable and slip-resistant flooring options that withstand outdoor elements. Wood, composite decking, stone, or concrete pavers are popular choices for porch flooring.
Railings: Select railings that provide safety and complement the overall design of your porch. Materials like wood, aluminum, or wrought iron can be used for railings, depending on your preferred style.
Walls or Enclosures: If you choose to add walls or enclosures to your covered porch, consider materials that offer both durability and visual appeal. Options can include materials such as wood, vinyl, or composite siding.
Trim and Finishes: Pay attention to the details by choosing trim and finishes that add a polished touch to your porch. Opt for materials that are weather-resistant and complement your chosen architectural style.
When choosing materials, consider factors such as durability, maintenance requirements, cost, and environmental sustainability. It’s also important to ensure that the materials you select are consistent with any architectural guidelines, building codes, or homeowner association regulations that may apply in your area.
Additionally, think about the long-term maintenance needs of the materials you choose. Some materials may require regular sealing or staining, while others may need occasional cleaning or repair. Consider your lifestyle and desired level of maintenance before finalizing your material selections.
By carefully selecting materials that are both functional and aesthetically pleasing, you can create a covered porch that seamlessly integrates with your existing roof and adds value and beauty to your home for years to come.
Read more: How To Add A Dormer To An Existing Roof
Preparing the Existing Roof
Before you can begin adding a covered porch to your existing roof, it is necessary to properly prepare the roof to ensure a secure and seamless integration. Preparing the existing roof involves several important steps to ensure stability, weatherproofing, and a strong foundation for the porch addition.
The first step is to thoroughly clean the existing roof surface. Remove any debris, leaves, or dirt that may have accumulated over time. Use a broom or a pressure washer, depending on the type of roofing material, to ensure a clean and smooth surface.
Inspect the roof for any existing damage or weak areas. This includes checking for leaks, loose shingles, or damaged flashing. Repair and replace any damaged elements to ensure the structural integrity of the roof and prevent further issues down the line.
Once the roof is cleaned and repaired, provide additional reinforcement if necessary. This may involve adding extra support beams or bracing to ensure the roof can bear the weight of the porch addition. Consult with a structural engineer if needed to determine the appropriate reinforcements for your specific roof structure.
Weatherproofing is another crucial aspect of preparing the existing roof. Apply a waterproofing membrane or sealant to the roof surface to protect against moisture infiltration. This will help prevent leaks and prolong the lifespan of both the existing roof and the new porch roof.
Consider installing flashing where the porch roof will connect with the existing roof. This metal or rubber material is placed to redirect water away from the joints, preventing leaks and water damage. Proper flashing installation is vital to ensure a watertight connection between the porch and the existing roof.
Ensure proper ventilation is in place to regulate airflow and prevent moisture buildup in the attic or roof cavity. Adequate ventilation helps to maintain the structural integrity of the roof and prevents the growth of mold and rot.
Lastly, consider insulating the existing roof to enhance energy efficiency and improve the overall comfort of your home. Insulation can help regulate temperature and reduce heat loss or gain, depending on the climate in your region.
By taking the time to properly prepare the existing roof, you create a solid foundation for your covered porch addition. This ensures a stable and durable structure and helps prevent potential issues such as leaks or damage in the future.
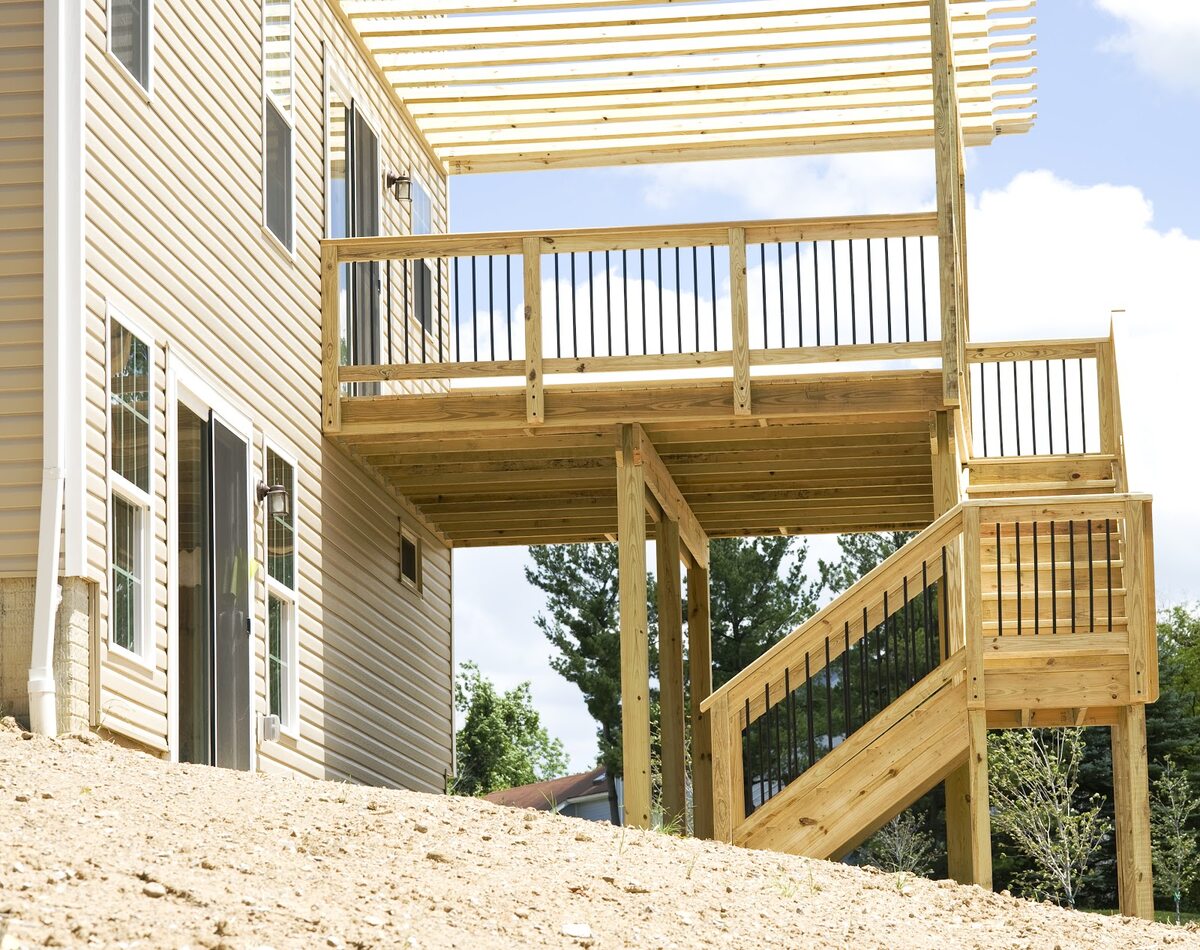
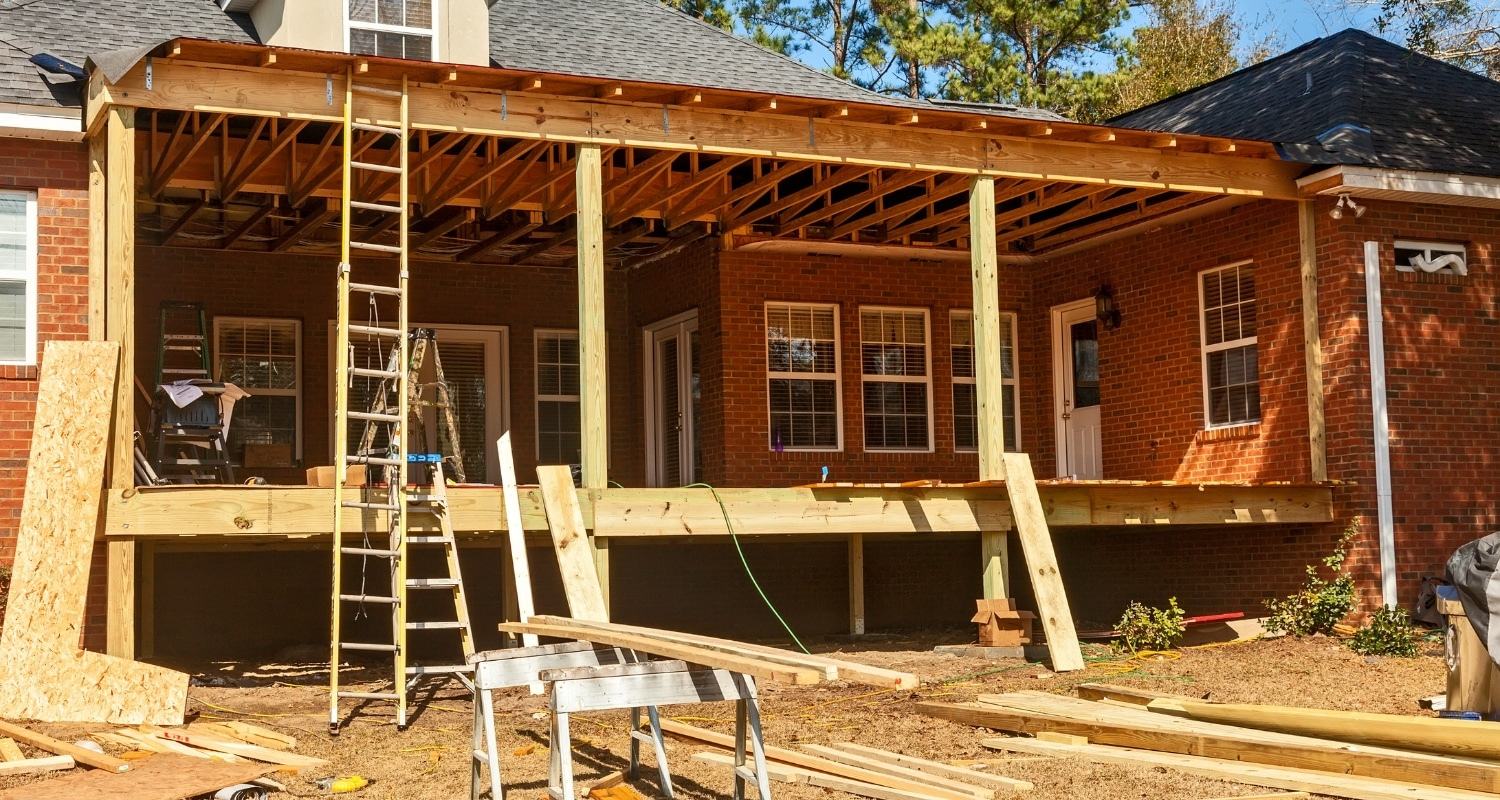
Installing Support Beams and Columns
Once the existing roof has been prepared, the next step in adding a covered porch is to install support beams and columns. These components provide structural stability and support for the porch roof, ensuring a safe and durable addition to your home. Here’s how to proceed with this crucial step:
1. Determine the placement: Decide where the support beams and columns will be positioned. This will depend on your porch design and the load-bearing requirements of the roof.
2. Mark the locations: Use a tape measure and level to accurately mark the positions of the support beams and columns on the existing roof. Ensure they are properly aligned and evenly spaced.
3. Install the support beams: Begin by installing the support beams that will bear the weight of the porch roof. The beams should be securely attached to the existing roof using appropriate methods such as brackets or hangers. Consult a professional to ensure the proper installation techniques are used.
4. Add the columns: Once the support beams are in place, install the columns that will provide additional support and stability for the porch. The columns can be made of materials such as wood, steel, or composite materials. Ensure the columns are plumb and securely anchored to the ground or foundation.
5. Check for stability: Once all the support beams and columns are installed, carefully check for any signs of instability or movement. The structure should feel solid and secure. If any issues are detected, consult a professional to address and rectify them before proceeding.
6. Consider decorative elements: Depending on your porch design, you may choose to add decorative elements such as trim or brackets to the support beams and columns. These details can enhance the aesthetic appeal and architectural style of your covered porch.
7. Seek professional guidance: If you are unfamiliar with construction techniques or unsure about the load-bearing requirements, it is advisable to consult a professional contractor or engineer. They can provide expert guidance and ensure that the support beams and columns are installed correctly.
By following these steps and ensuring the proper installation of support beams and columns, you establish a strong foundation for your covered porch. This ensures the structural integrity of the porch and guarantees a safe and durable addition to your home.
Make sure to carefully assess the structural integrity of the existing roof before adding a covered porch. Consult with a professional to ensure the new addition is properly supported and integrated with the existing structure.
Adding the Porch Roof
Adding the porch roof is a significant step in completing your covered porch addition. The roof not only provides protection from the elements but also defines the character and aesthetic appeal of the porch. Here’s a step-by-step guide on how to add the porch roof:
1. Plan the roof design: Determine the type of roof that best suits your porch design and complements the existing roof. Popular options include gable roofs, hip roofs, or shed roofs. Consider factors such as aesthetics, available space, and compatibility with the existing roof.
2. Measure and cut the roof framing: Measure the dimensions of the porch and calculate the required lengths and angles of the roof framing members. Cut the rafters and other framing components to the appropriate size and shape. Ensure accuracy and precision in your measurements to maintain the structural integrity of the roof.
3. Install the roof framing: Begin by attaching the ridge beam or board at the highest point of the roof. Secure it in place with appropriate hardware. Then, install the rafters, spacing them according to your design specifications. Ensure the rafters are level and properly aligned with the existing roof structure.
4. Add roof sheathing: Once the framing is in place, add the roof sheathing, typically made of plywood or oriented strand board (OSB). Secure the sheathing to the rafters using nails or screws, ensuring a solid and even surface for the roof covering.
5. Install the roof covering: Choose the appropriate roofing material based on your desired aesthetics, budget, and climate. Options include asphalt shingles, metal roofing, or clay and concrete tiles. Follow the manufacturer’s instructions to correctly install the chosen roofing material while ensuring proper weatherproofing and ventilation.
6. Flashing and gutter installation: Install flashing along the edges and intersections of the porch roof to prevent water infiltration. This includes areas such as where the porch roof meets the existing roof, as well as around chimneys or roof penetrations. Additionally, install gutters and downspouts to direct water away from the porch area.
7. Check for proper drainage: Ensure that the porch roof has the proper slope and drainage to prevent water from pooling or accumulating. This helps to prevent leaks and potential water damage to the porch and surrounding structures.
8. Seek professional assistance if needed: If you are unfamiliar with roofing techniques or require complex designs, it is advisable to consult a professional roofing contractor. They have the expertise to ensure a secure and watertight roof installation.
By carefully following these steps and paying attention to details, you can successfully add the porch roof, creating a functional and visually appealing outdoor space that complements your existing roof and enhances the overall architectural beauty of your home.
Waterproofing and Insulating the Porch
Waterproofing and insulating your porch are critical steps to protect the structure from moisture damage, improve energy efficiency, and create a comfortable environment. These measures help maintain the longevity and structural integrity of your covered porch. Here’s how to effectively waterproof and insulate your porch:
1. Seal the exterior: Apply a high-quality waterproofing sealant to the exterior surfaces of the porch, including the walls, columns, and any exposed wood or concrete. This sealant acts as a barrier against moisture infiltration, preventing damage and ensuring water resistance.
2. Choose suitable materials: Opt for materials that are specifically designed for outdoor use and can withstand moisture exposure. For example, use moisture-resistant decking materials, such as composite or pressure-treated wood, that are less prone to rot or warping.
3. Install proper drainage: Ensure that the porch has proper drainage systems in place to prevent water from pooling or accumulating. This includes installing gutters, downspouts, and appropriately sloped surfaces to redirect water away from the porch and foundation of the house.
4. Use watertight roofing materials: Select roofing materials that provide reliable waterproofing for your porch. Ensure that the chosen material is designed to withstand exposure to moisture and has proper installation techniques to prevent leaks.
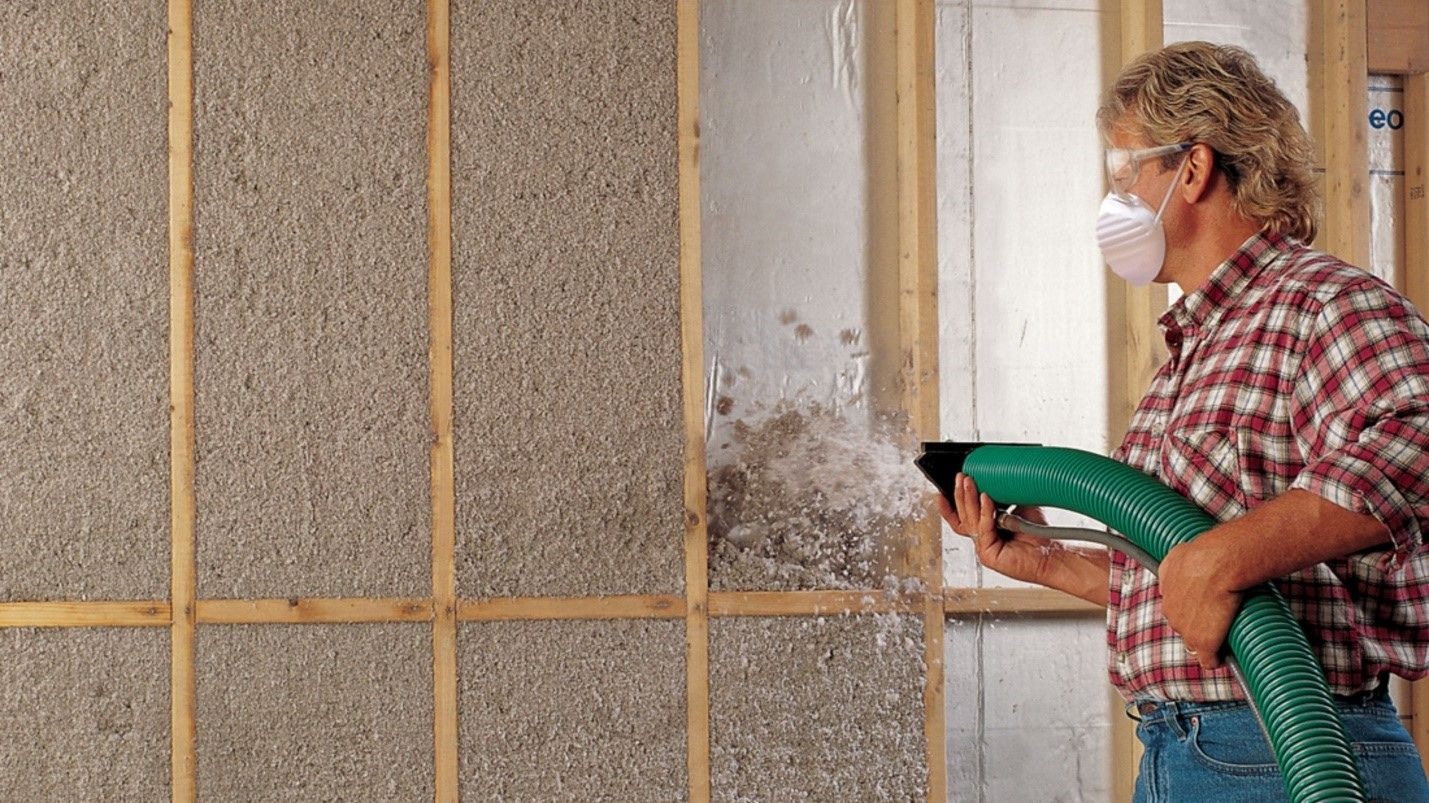
5. Insulate the porch: Insulation helps to regulate temperature, improve energy efficiency, and enhance the comfort of your porch. Consider adding insulation to the walls, ceiling, and flooring of the porch. Common insulation materials include fiberglass batts, rigid foam boards, or spray foam insulation.
6. Protect vulnerable areas: Pay attention to vulnerable areas prone to moisture intrusion, such as flashing points, joints, and seams. Use appropriate sealants and weatherproofing techniques to ensure these areas are properly protected against water infiltration.
7. Ventilate the porch: Proper ventilation is essential to prevent moisture buildup and control humidity levels in the porch. Install vents or fans to promote air circulation and prevent the growth of mold or mildew.
8. Regular maintenance: Perform regular inspections and maintenance to ensure the continued effectiveness of your waterproofing and insulation measures. Address any signs of damage or wear promptly to prevent further issues.
By effectively waterproofing and insulating your porch, you create a durable and comfortable outdoor space that is resistant to moisture and temperature fluctuations. These measures not only protect your investment but also enhance the overall enjoyment and usability of your covered porch for years to come.
Read more: How To Tie A Shed Roof Into An Existing Roof
Flooring Options
Choosing the right flooring for your covered porch is essential to create a functional and visually appealing space that withstands outdoor elements while complementing the overall design of your home. Consider these flooring options for your porch:
1. Wood: Wood flooring adds a natural and timeless beauty to your porch. Hardwood, such as cedar or mahogany, is a popular choice due to its durability and resistance to insects and decay. Ensure the wood is properly treated and sealed to protect it from moisture and UV damage.
2. Composite Decking: Composite decking is made from a combination of wood fibers and recycled plastic. This material offers low maintenance, excellent durability, and resistance to stains and fading. It can mimic the appearance of natural wood and comes in a variety of colors and styles.
3. Tile: Porcelain or ceramic tiles are an elegant and durable flooring option for a covered porch. These tiles come in various sizes, shapes, and designs, allowing you to create unique patterns and styles. Look for tiles with a slip-resistant surface to ensure safety, especially in wet conditions.
4. Concrete: Concrete flooring offers a versatile and cost-effective option for your porch. It can be stained, stamped, or textured to resemble other materials such as stone or brick. While it requires proper sealing to prevent moisture absorption, concrete is durable, easy to maintain, and offers a modern aesthetic.
5. Natural Stone: Natural stone, such as slate or travertine, lends a luxurious and sophisticated look to your porch. It is durable, resistant to wear, and comes in a range of colors and textures. Ensure the stone is properly sealed to protect it from staining and weather damage.
6. Vinyl: Vinyl flooring is a budget-friendly and easy-to-maintain option for your covered porch. It comes in a variety of designs, including wood, stone, or tile patterns, allowing you to achieve your desired aesthetic. Vinyl flooring is resistant to moisture, stains, and fading.
7. Outdoor Carpets or Rugs: Outdoor carpets or rugs provide a cozy and comfortable feel to your porch. They come in a variety of styles, colors, and patterns, allowing you to personalize your outdoor space. Look for carpets or rugs specifically designed for outdoor use, as they are resistant to moisture and mildew.
When selecting flooring for your porch, consider factors such as durability, maintenance requirements, slip resistance, and compatibility with your porch design and existing roof. Also, be sure to adhere to any local building codes or HOA regulations regarding flooring materials in outdoor spaces.
By choosing the flooring option that best suits your needs and style, you can create a beautiful and functional covered porch that enhances the overall appeal and enjoyment of your outdoor living space.
Adding Walls or Enclosures
Adding walls or enclosures to your covered porch can enhance privacy, protection, and visual appeal. They can create a defined space, offer additional security, and provide shelter from wind, rain, or excessive sunlight. Here’s a guide on how to add walls or enclosures to your porch:
1. Determine the purpose: Consider why you want to add walls or enclosures to your porch. Determine if it’s primarily for privacy, to create a defined outdoor room, or to protect against specific weather conditions.
2. Choose the right materials: Select materials that are suitable for outdoor use and can withstand exposure to the elements. Common options include wood, vinyl, composite, or metal panels. Ensure the materials complement the existing style and architecture of your home.
3. Measure and plan: Measure the dimensions of the porch and determine the layout and height of the desired walls or enclosures. Consider factors such as doorways, windows, or other openings for proper access and ventilation.
4. Install framing: Begin by installing the framing for the walls or enclosures. Use treated lumber or metal studs to create a sturdy framework. Ensure the framing is level, plumb, and securely anchored to the existing structure of the porch.
5. Add wall panels: Attach the chosen wall panels or siding material to the framing. Follow the manufacturer’s instructions for proper installation. Ensure that panels are properly sealed and fastened to prevent moisture infiltration and to maintain structural integrity.
6. Consider windows and doors: Decide if you want to include windows or doors in the walls or enclosures. This will depend on your desired level of privacy and the desired amount of natural light entering the space.
7. Ventilation: Ensure proper ventilation when adding walls or enclosures to your porch. This helps control temperature and humidity levels, preventing issues like condensation or mold growth. Install vents or consider incorporating windows that can be opened and closed.
8. Finishing touches: Once the walls or enclosures are in place, consider adding additional elements to enhance the visual appeal and functionality of the space. This can include trim, decorative features, or even integrating lighting fixtures into the walls.
Remember to check local building codes, neighborhood guidelines, or HOA requirements to ensure compliance when adding walls or enclosures to your porch. Obtaining any necessary permits or permissions may be required.
By carefully planning and executing the addition of walls or enclosures, you create a more versatile and comfortable outdoor space that meets your specific needs while adding value and elegance to your home.
Installing Lighting and Electrical Outlets
Proper lighting and electrical outlets are essential for creating a functional and inviting atmosphere on your covered porch. They allow you to enjoy your outdoor space day or night, and provide convenience for activities such as dining, entertaining, or relaxing. Here’s a guide on how to install lighting and electrical outlets on your porch:
1. Plan the lighting layout: Determine the areas on your porch that need lighting, such as seating areas, walkways, or task-specific locations. Decide on the type of lighting, such as overhead fixtures, wall sconces, or pendant lights, that best suits your porch design and functional needs.
2. Hire an electrician if needed: If you don’t have experience working with electrical wiring, it’s recommended to enlist the help of a licensed electrician. They can ensure the installation is done safely and in compliance with local electrical codes.
3. Install outdoor-rated fixtures: Choose lighting fixtures that are specifically designed for outdoor use and can withstand exposure to the elements. Look for fixtures with an appropriate IP (ingress protection) rating to ensure resistance to dust and moisture.
4. Determine power source and wiring: Decide on the power source for your porch lighting. It can be connected to an existing electrical circuit or require a separate circuit. Determine the best wiring route from the power source to the desired light fixtures.
5. Position and mount light fixtures: Install light fixtures according to your planned layout. Ensure they are properly mounted and securely fastened to the porch structure. Follow manufacturer’s instructions for wire connections, ensuring that all connections are tightly secured.
6. Install switches and dimmers: Install switches or dimmers in convenient locations for controlling the porch lighting. Consider using weatherproof switches or dimmers rated for outdoor use to ensure durability.
7. Install electrical outlets: Determine the locations for electrical outlets on your porch. Place outlets strategically for easy access, considering usage requirements for appliances, speakers, or electronic devices. Ensure the outlets are GFCI (ground fault circuit interrupter) protected to minimize the risk of electric shock.
8. Weatherproof all electrical components: Protect all electrical connections and outlets with weatherproof covers or enclosures. This prevents water and moisture from entering the electrical components, safeguarding against electrical hazards.
Remember to consult local building codes and regulations for specific requirements regarding outdoor electrical installations. It’s important to ensure all installations are done safely and meet the electrical standards in your area.
By carefully planning and installing the right lighting and electrical outlets, you can create a well-lit and functional porch that accommodates your needs and enhances the enjoyment of your outdoor space.
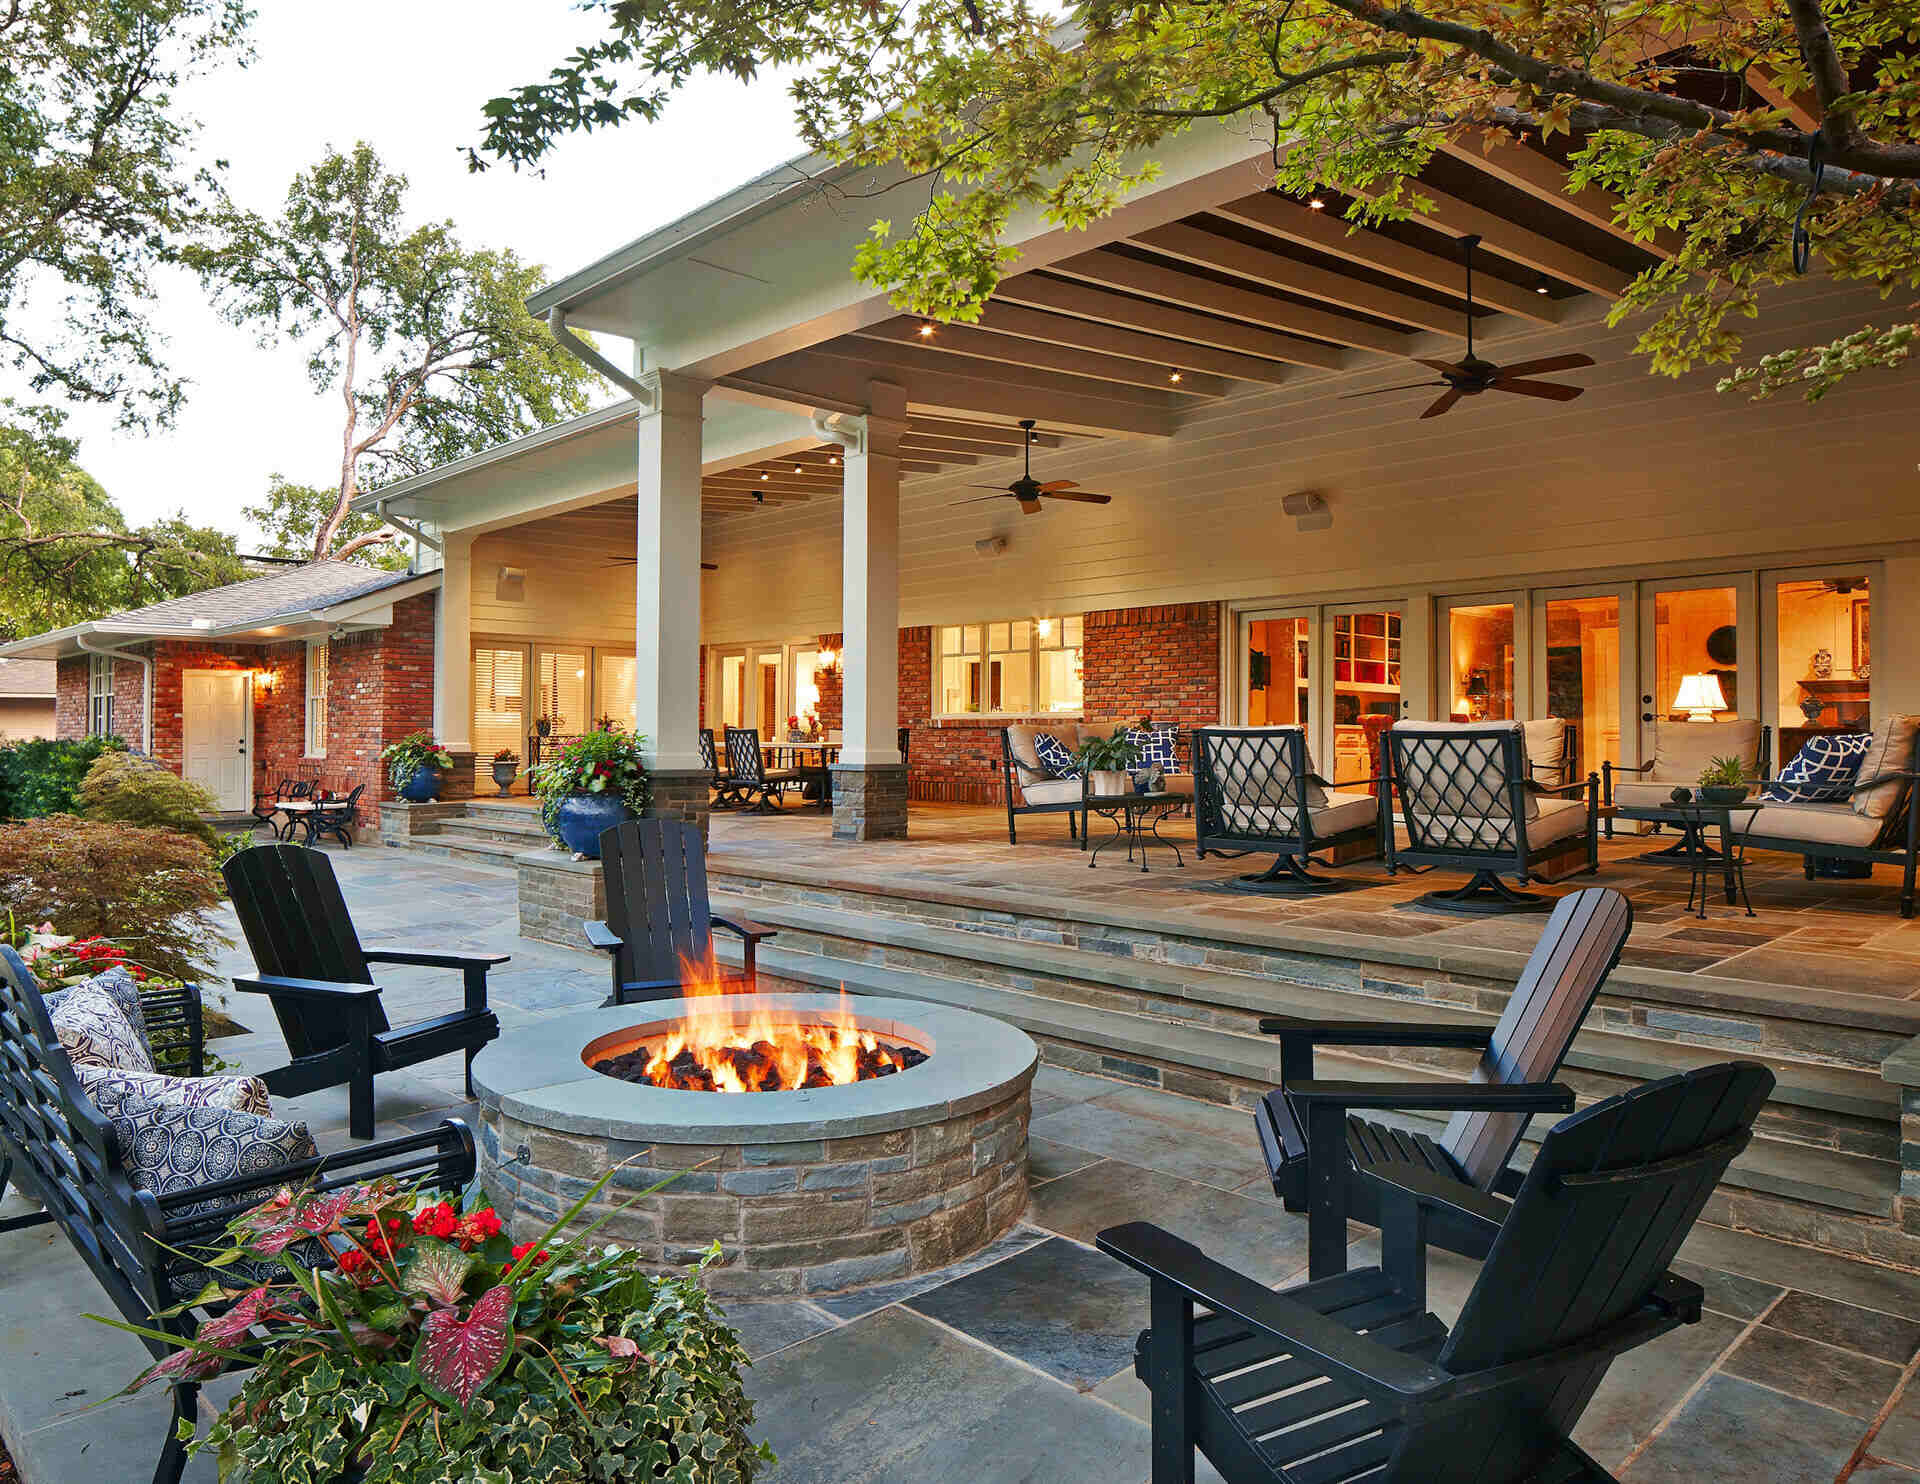
Adding Finishing Touches
Adding the finishing touches to your covered porch not only enhances its aesthetic appeal but also adds comfort and functionality. It’s these final details that give your porch a personalized and inviting atmosphere. Here are some ideas on how to add those finishing touches:
1. Furnishings: Choose outdoor furniture that suits your style and needs. Opt for weather-resistant pieces made from materials such as wicker, aluminum, or teak. Include seating options like chairs, sofas, or benches, as well as tables for dining, drinks, or placing decorative accents.
2. Comfort elements: Enhance the comfort of your porch by adding cushions, pillows, and throws to your furniture. This not only adds a cozy touch but also allows you to personalize the space with colors, patterns, and textures. Ensure that the fabrics used are designed for outdoor use, providing durability and resistance to the elements.
3. Outdoor rugs: Define different areas of your porch by adding outdoor rugs. Choose rugs that are specifically designed for outdoor use, as they are made to withstand the elements and provide both comfort and style.
4. Decorative accents: Personalize your porch with decorative accents such as potted plants, lanterns, sculptures, or artwork. Choose items that are weather-resistant and are in line with your preferred style, whether it’s classic, contemporary, or bohemian.
5. Privacy solutions: If privacy is a concern, consider options such as outdoor curtains, blinds, or shades. These not only provide privacy but also offer protection from the sun and create an intimate ambiance on your porch.
6. Greenery and landscaping: Incorporate plants and greenery into your porch design by adding planters or hanging baskets. Choose plants that thrive in outdoor conditions and complement the style of your porch. Consider vines, ferns, or colorful flowers to bring natural beauty to your space.
7. Outdoor lighting: Enhance the ambiance and functionality of your porch by incorporating outdoor lighting. Use string lights, lanterns, or pathway lights to create a warm and inviting atmosphere. Additionally, consider installing motion-sensor lights for added security and convenience.
8. Outdoor entertainment: Make your porch an entertainment hub by adding features such as an outdoor sound system, a built-in bar, or a TV. These elements allow you to entertain guests and create a lively atmosphere for gatherings.
9. Seasonal decor: Change up the look of your porch according to the seasons. Add seasonal decorations such as wreaths, garlands, or themed accents to celebrate holidays or embrace the beauty of each season.
Remember to choose finishing touches that reflect your personal style and create a cohesive look with the existing design of your home. By adding these final details, you transform your porch into a welcoming and enjoyable space for relaxation, entertainment, and spending time with loved ones in the great outdoors.
Read more: How To Attach Shed Roof To Existing Roof
Conclusion
Adding a covered porch to an existing roof is a rewarding project that allows you to expand your living space and create a beautiful outdoor retreat. From assessing the existing roof to adding finishing touches, each step in the process is crucial to ensure a successful and visually appealing porch addition.
By carefully assessing the condition and structure of your existing roof, you can determine its suitability for a covered porch and address any necessary repairs or reinforcements. Designing the porch involves considering its purpose, the architectural style of your home, and the desired features and materials.
Obtaining the necessary permits and permissions ensures that your project complies with building codes and regulations. Choosing the right materials for your porch, including roofing, support beams, flooring, and walls, is essential to achieve durability, aesthetics, and functionality.
Preparing the existing roof involves cleaning, repairing, and weatherproofing to ensure a solid foundation for the porch addition. Installing support beams and columns provides structural stability and support for the porch roof, while adding the porch roof itself involves careful planning, framing, and selecting appropriate roofing materials.
Waterproofing and insulating the porch protect against moisture damage and enhance energy efficiency, while choosing suitable flooring options and adding walls or enclosures define the space and add privacy and protection.
Installing lighting and electrical outlets allows you to enjoy your porch day and night, and adding finishing touches such as furnishings, comfort elements, decorative accents, and greenery brings your porch to life and makes it a welcoming oasis. These final details add character and allow you to personalize the space according to your taste and needs.
In conclusion, the process of adding a covered porch to an existing roof is a comprehensive one. It requires careful planning, attention to detail, and adherence to building codes and regulations. With proper assessment, design, materials, installation, and finishing touches, you can create a stunning covered porch that seamlessly integrates with your existing roof and enhances the overall beauty and functionality of your home.
So, take the time to embark on this exciting project, and soon you’ll have a delightful and inviting covered porch where you can relax, entertain, and enjoy the great outdoors, right outside your doorstep.
Now that you've mastered adding a covered porch, why stop there? Dive into our guide on outdoor living to see how colorful decor and simple add-ons can transform your deck into a perfect space for relaxation and entertainment. Or, if you're feeling handy, our insights on DIY projects might just inspire your next weekend activity. Both articles are packed with practical tips to maximize your home's potential and enjoyment.
Frequently Asked Questions about How To Add A Covered Porch To An Existing Roof
Was this page helpful?
At Storables.com, we guarantee accurate and reliable information. Our content, validated by Expert Board Contributors, is crafted following stringent Editorial Policies. We're committed to providing you with well-researched, expert-backed insights for all your informational needs.


0 thoughts on “How To Add A Covered Porch To An Existing Roof”