Home>Furniture>Outdoor Furniture>How To Build A Patio Roof

Outdoor Furniture
How To Build A Patio Roof
Modified: October 18, 2024
Learn how to build a beautiful patio roof to enhance your outdoor space. Find tips, ideas, and DIY instructions for creating the perfect shelter for your outdoor furniture.
(Many of the links in this article redirect to a specific reviewed product. Your purchase of these products through affiliate links helps to generate commission for Storables.com, at no extra cost. Learn more)
Introduction
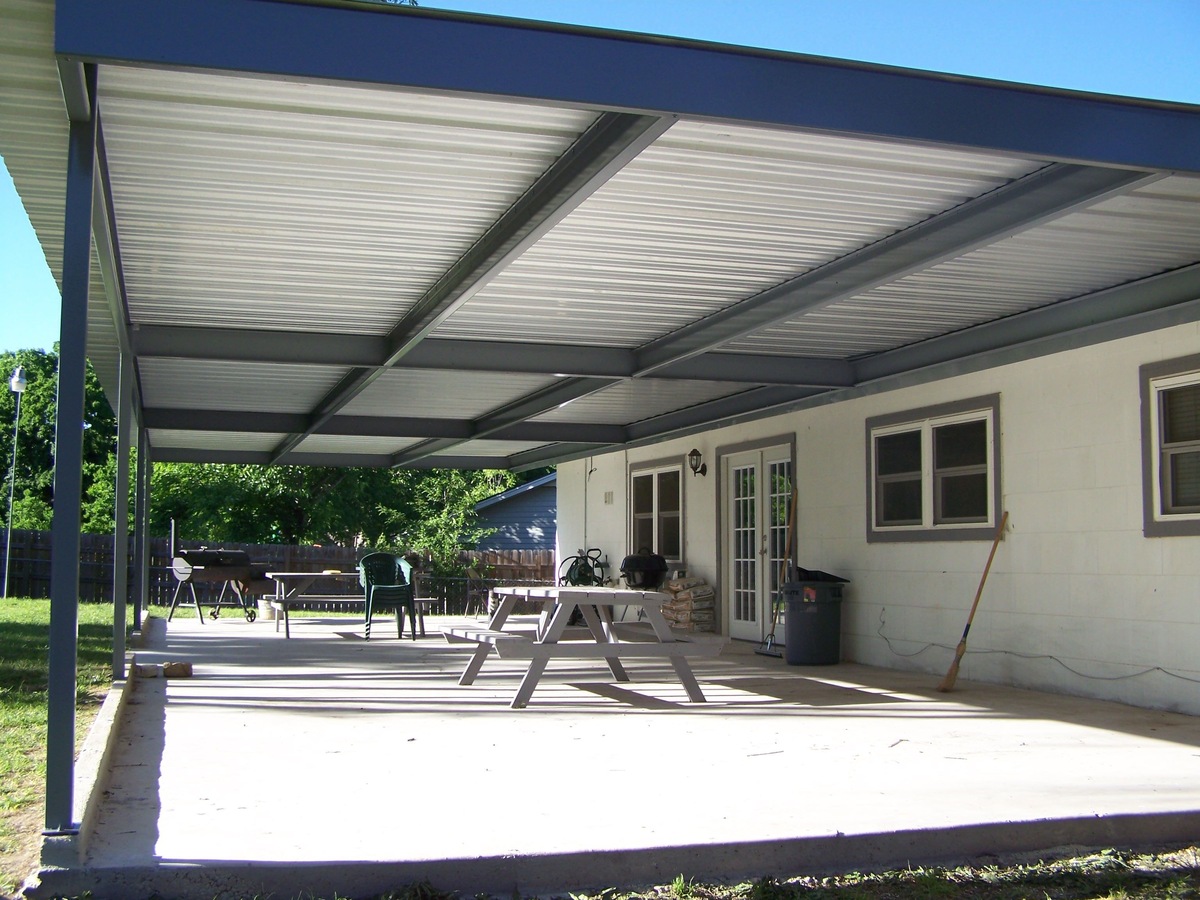
Welcome to this comprehensive guide on how to build a patio roof. A patio roof can transform your outdoor space, providing shade, protection from the elements, and creating a cozy and comfortable area for relaxation and entertainment. Whether you want to enjoy a summer barbecue, host a gathering with friends and family, or simply have a tranquil spot to unwind, building a patio roof is a rewarding project that can enhance both the functionality and aesthetics of your outdoor area.
Before embarking on this project, it’s important to plan carefully and consider various factors such as design, materials, and weather conditions. By following the step-by-step instructions and tips provided in this guide, you’ll be well-equipped to create a sturdy and beautiful patio roof that will withstand the test of time.
In this article, we will explore the key steps involved in building a patio roof, from determining the design and purpose to adding the finishing touches. So, let’s get started and transform your outdoor space into a haven of relaxation and enjoyment!
Key Takeaways:
- Building a patio roof involves careful planning, sturdy construction, and thoughtful finishing touches to create a cozy and functional outdoor space for relaxation and entertainment.
- From determining the design and purpose to installing the roofing material and adding final touches, building a patio roof is a rewarding project that enhances the aesthetics and functionality of your outdoor area.
Step 1: Determine the Design and Purpose
The first step in building a patio roof is to determine the design and purpose of your project. This involves considering factors such as the size of your patio, the style of your home, and how you intend to use the space.
Begin by measuring the dimensions of your patio to ensure that the roof will adequately cover the area. Take note of any existing structures, such as walls or pillars, that may impact the design and placement of the roof.
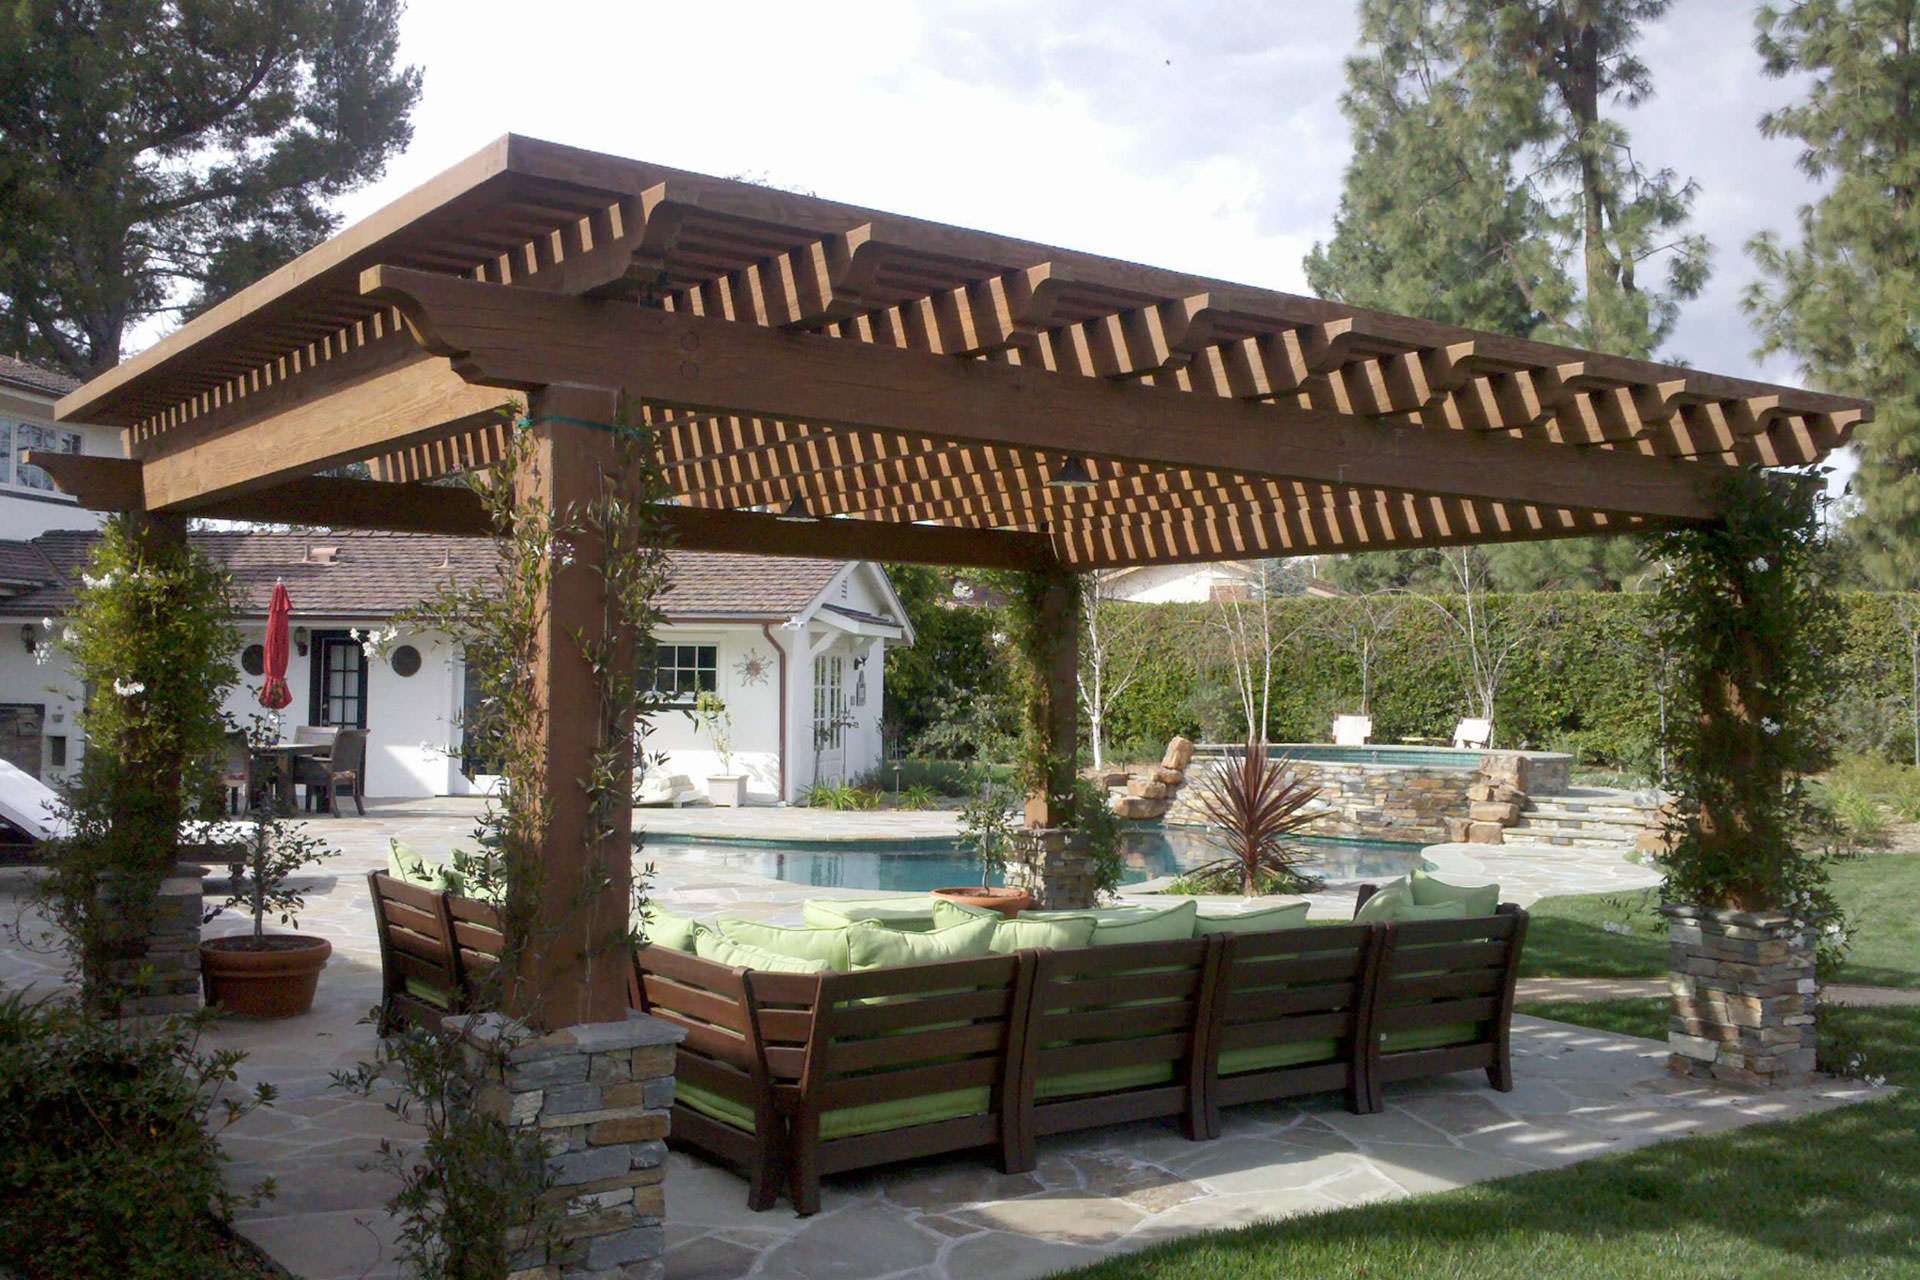
Next, consider the style of your home and the overall aesthetic you wish to achieve. The patio roof should complement the architecture of your house and blend well with the surrounding environment. Whether your home has a modern, traditional, or rustic design, there are various roof styles to choose from, such as gable, hip, or flat roofs.
Equally important is determining the purpose of your patio roof. Are you looking to create an outdoor dining area, a lounge space, or a combination of both? The specific purpose will influence the size, layout, and features of the patio roof. For example, if you plan to install outdoor lighting or a ceiling fan, you will need to factor in electrical wiring during the design phase.
Additionally, consider the local weather conditions. If you live in an area with heavy rain, snow, or strong winds, you may need to design a sturdier roof and choose materials that can withstand the elements. Conversely, if you reside in a region with mild weather, you might prioritize an open design that maximizes natural light and ventilation.
Take some time to research different patio roof designs and gather inspiration. Browse magazines, websites, and social media platforms for ideas. Consider consulting with a professional contractor or architect who can provide guidance based on your specific needs and budget.
Once you have determined the design and purpose of your patio roof, you can move on to the next step: gathering materials and tools.
Step 2: Gather Materials and Tools
Now that you have determined the design and purpose of your patio roof, it is time to gather the necessary materials and tools for the project. This step is crucial to ensure a smooth and efficient construction process.
First and foremost, make a list of all the materials you will need. This typically includes lumber for the framework, such as pressure-treated 2×4 or 2×6 boards, as well as roofing materials like shingles, metal panels, or polycarbonate sheets. The exact materials will depend on your chosen design and the local climate.
Consider how you want to finish the ceiling under the patio roof. You may opt for tongue-and-groove cedar planks for a rustic look or go for a more modern and sleek appearance with drywall or beadboard panels. Other materials you might need include hardware such as screws, nails, and brackets, as well as waterproofing materials to protect the roof from moisture.
When it comes to tools, ensure that you have the necessary equipment to complete the project. This typically includes a tape measure, level, circular saw or miter saw, drill or impact driver, hammer, and a variety of hand tools such as a carpenter’s square and chisels. Depending on the complexity of your design, you may also need additional tools like a table saw, jigsaw, or air compressor for nail guns.
It’s important to have safety equipment as well. This includes safety goggles, gloves, and a dust mask to protect yourself from potential hazards during construction.
Once you have compiled your materials and made sure you have all the necessary tools, take the time to organize them and set up a designated work area. This will make the construction process more efficient and help prevent any delays or confusion.
If you are unsure about the specific materials and tools needed for your patio roof project, consult with a local contractor or visit a home improvement store for expert advice.
With your materials and tools ready, you are now prepared for the next step: preparing the area for construction.
Step 3: Prepare the Area
Before you can begin the actual construction of your patio roof, it is important to properly prepare the area. This step involves clearing the space, making any necessary repairs, and ensuring a solid foundation for your project.
Start by removing any furniture, plants, or other objects from the patio area. Clearing the space will give you a clean and unobstructed area to work with. Additionally, it will prevent any damage to your belongings during the construction process.
If there are any existing structures on the patio, such as pergolas or awnings, you may need to dismantle them in order to make way for the new roof. Follow the manufacturer’s instructions or consult a professional if you are unsure about the proper removal process.
Next, thoroughly inspect the patio for any signs of damage or deterioration. Look for cracks, rot, or weakened areas in the flooring or supporting structures. If you come across any issues, it is important to address them before proceeding. Repair or replace damaged materials to ensure the stability and longevity of your patio roof.
In addition, you will need to verify that the patio has a solid and level foundation. Uneven surfaces can lead to structural issues and compromise the integrity of the roof. Use a level to check the slope and make any necessary adjustments. This can involve adding or removing soil, leveling the ground with a compactor, or using concrete pavers to create a stable base.
Consider the drainage of the patio as well. Proper drainage is essential to prevent water accumulation and potential damage to the roof. Ensure that the patio slopes away from your home and that there are no areas where water can pool. If needed, install a drainage system or adjust the gradient of the patio to ensure water flows away from the structure.
Lastly, be aware of and comply with any local building codes or regulations. Some areas may have specific requirements or permits for patio roof construction. Research and familiarize yourself with these regulations to ensure that your project is in compliance.
By taking the time to properly prepare the area, you will create a solid foundation for your patio roof and ensure a successful construction process. With the area cleared and ready, it’s time to move on to the next step: installing the support beams.
Step 4: Install the Support Beams
With the area prepared, it’s time to start building the framework for your patio roof by installing the support beams. These beams will provide the structural support for the roof and ensure its stability.
Begin by determining the placement of the support beams. This will depend on the design and size of your patio roof, as well as any existing structures or obstacles. Measure and mark the locations of the beams on the patio floor, ensuring they are evenly spaced and aligned according to your design plan.
Next, cut the pressure-treated 2×4 or 2×6 boards to the desired length for the support beams. Use a circular saw or miter saw to make accurate cuts, following your measurements.
Before installing the beams, it is recommended to apply a wood preservative or waterproofing sealant to protect them from moisture damage. This will extend the lifespan of the beams and ensure their durability.
Now, position the first support beam in its designated location. Align it with the marks on the patio floor and use a level to ensure it is perfectly horizontal. Attach the beam to the patio surface using brackets or anchors, securing it firmly in place.
Repeat this process for the remaining support beams, making sure each one is level and properly secured. Use a carpenter’s square to ensure the beams are square with each other for a balanced and symmetrical construction.
If your patio roof design requires additional support in the form of posts or columns, install them at this stage as well. Position the posts according to your design plan and secure them to the patio floor using anchors or brackets.
Once all the support beams and additional posts are installed, inspect their stability and make any necessary adjustments. It’s important to ensure that the framework is solid and can withstand the weight of the roof and any external elements.
With the support beams in place, you have now laid the foundation for your patio roof. The next step is to attach the rafters, which will create the structure for the roof and connect to the support beams.
When building a patio roof, make sure to use durable and weather-resistant materials to ensure longevity and protection from the elements.
Read more: How Much To Build A Patio Roof
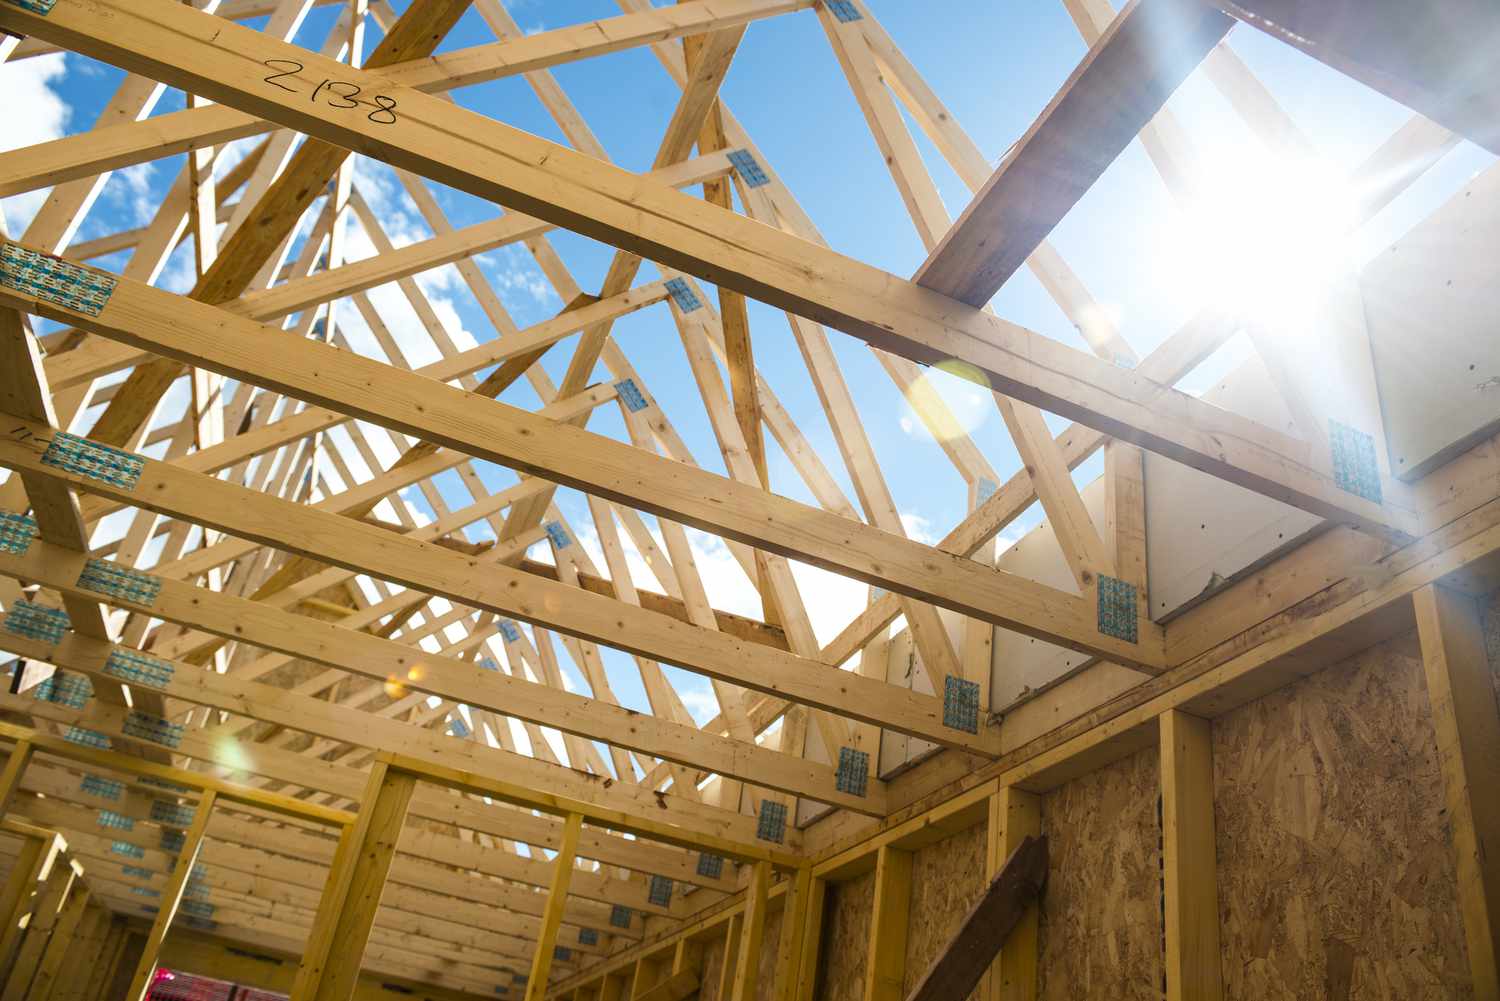
Step 5: Attach the Rafters
With the support beams securely installed, it’s time to move on to the next crucial step: attaching the rafters. The rafters are an essential component of your patio roof, as they provide the framework for the roof structure and support the roofing material.
Before attaching the rafters, determine the required length and angle of each rafter based on your design plan. Cut the rafters to size using a circular saw or miter saw, ensuring accurate measurements and clean cuts.
Starting at one end of the patio, position the first rafter against the support beam. Align the top of the rafter with the top of the support beam, and use a level to ensure it is perfectly horizontal. Attach the rafter to the support beam with screws or nails, ensuring a secure connection.
Continue attaching the remaining rafters at regular intervals along the entire length of the patio roof. Use a tape measure or a spacer block to maintain consistent spacing between the rafters. Remember to check the levelness of each rafter as you go, making any necessary adjustments to ensure a level and uniform structure.
If your patio roof design includes a gable or pitched roof, additional rafters will be required to form the triangular shape at each end. Cut and position these rafters accordingly, ensuring they align with the existing rafters and create a symmetrical and balanced structure.
Once all the rafters are installed, check their alignment and stability. Make any necessary adjustments to ensure the roof structure is secure and level.
It’s worth mentioning that if you are not confident in your carpentry skills or prefer a more streamlined construction process, pre-fabricated roof trusses are available. These trusses are pre-assembled and designed to provide the necessary support for the roof, saving time and effort during the construction process.
With the rafters attached, you have completed a significant milestone in building your patio roof. The next step is to install the roofing material, which will provide protection from the elements and give your patio roof its finished appearance.
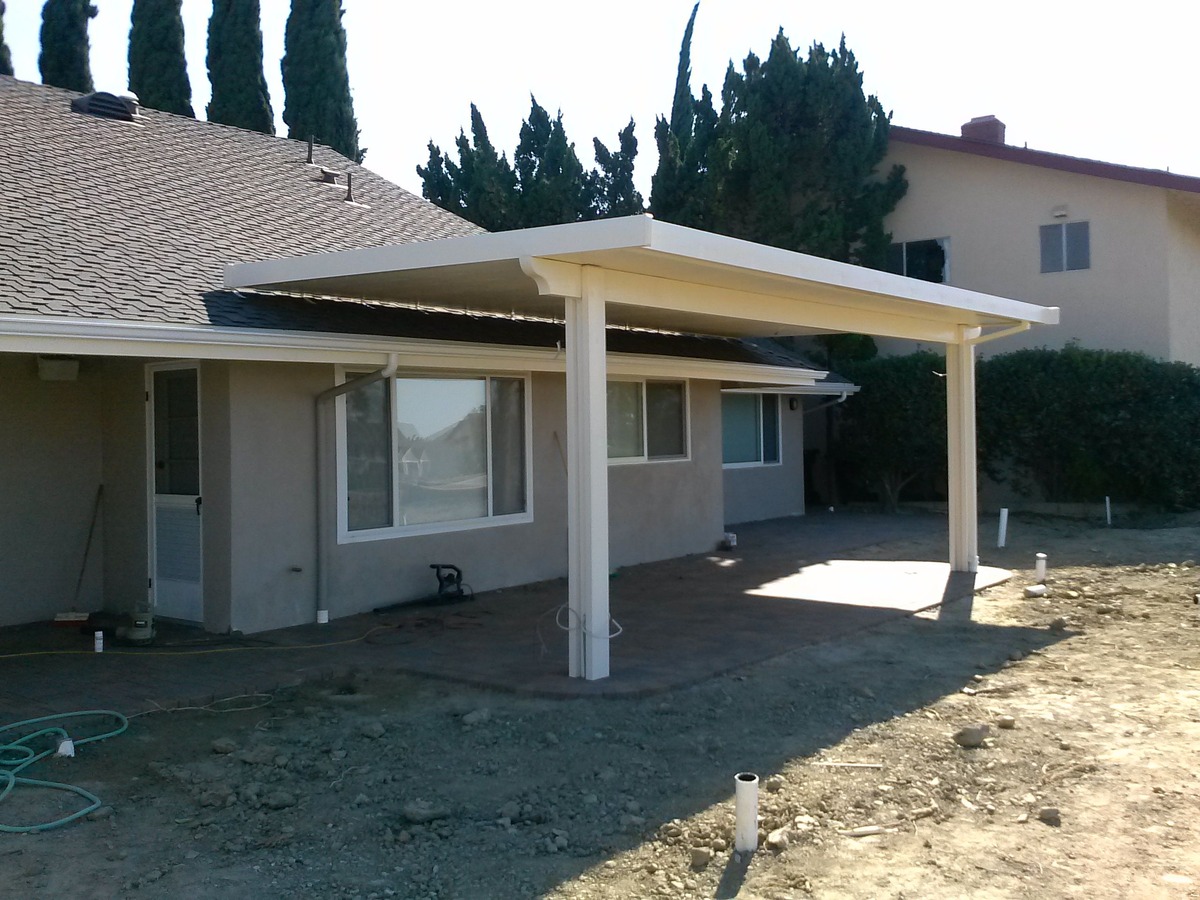
Step 6: Install the Roofing Material
With the framework of your patio roof complete, it’s time to move on to the next step: installing the roofing material. The choice of roofing material will depend on your design preferences, budget, and the climate in your area.
If you opt for traditional shingles as your roofing material, start by applying an underlayment on top of the rafters. This provides an added layer of protection against water and helps to create a smooth surface for the shingles. Secure the underlayment using staples or roofing nails.
Next, begin installing the shingles, starting from the bottom edge of the roof and working your way up. Follow the manufacturer’s instructions for the specific shingles you have chosen, as the installation process may vary.
Overlap each shingle with the one below it to ensure proper water drainage. Use roofing nails or staples to secure the shingles to the roof, following the recommended spacing provided by the manufacturer.
Alternatively, if you prefer a more modern and sleek look, you may consider metal panels or polycarbonate sheets. Metal roofing provides durability and longevity, while polycarbonate sheets offer versatility and allow natural light to filter through.
When installing metal panels or polycarbonate sheets, start from one end of the roof and work your way across. Secure them to the rafters using screws or specialized fasteners recommended by the manufacturer. Pay attention to the spacing and alignment to maintain a consistent and professional finish.
Ensure that the roofing material is properly installed and securely attached. Check for any gaps, loose connections, or irregularities and make any necessary adjustments to ensure a watertight and sturdy roof.
To further enhance the durability and weather resistance of your patio roof, consider adding flashing around areas where the roof meets walls or other structures. Flashing helps to prevent water seepage and potential damage.
With the roofing material installed, your patio roof is now protected from the elements and ready for the final step: adding the finishing touches.
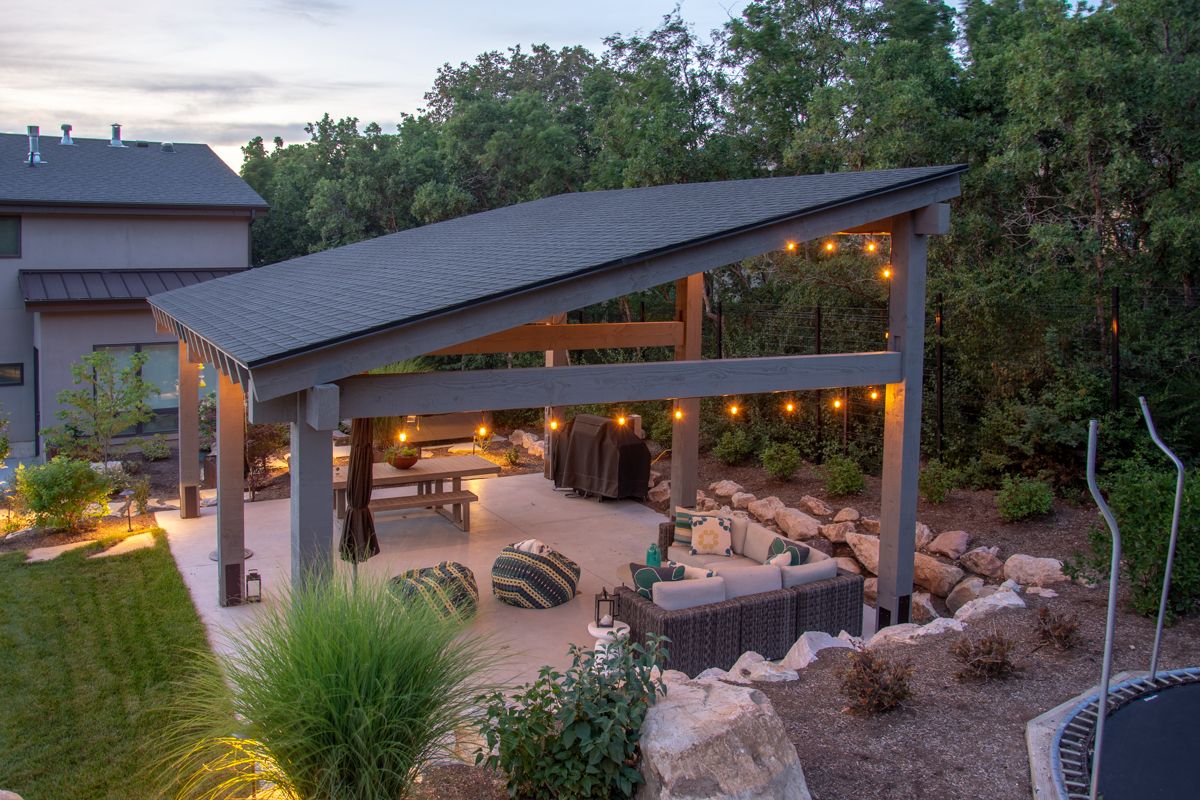
Step 7: Add Finishing Touches
Congratulations! You’re in the final step of building a patio roof – adding the finishing touches to complete your project. These final touches will not only enhance the appearance of your patio roof but also improve its functionality and overall enjoyment.
One of the first finishing touches to consider is adding gutters and downspouts. Gutters will help redirect rainwater away from the patio area, protecting both the roof and your outdoor furniture. Install gutters along the edges of the roof, ensuring they slope towards the downspouts. Connect downspouts to the gutters and direct the water away from the foundation of your home.
Additionally, you might want to consider adding lighting to your patio roof. This can include overhead string lights, recessed lighting, or even solar-powered fixtures. Installing lighting fixtures will extend the usability of your patio space into the evening hours and create a cozy and inviting ambiance.
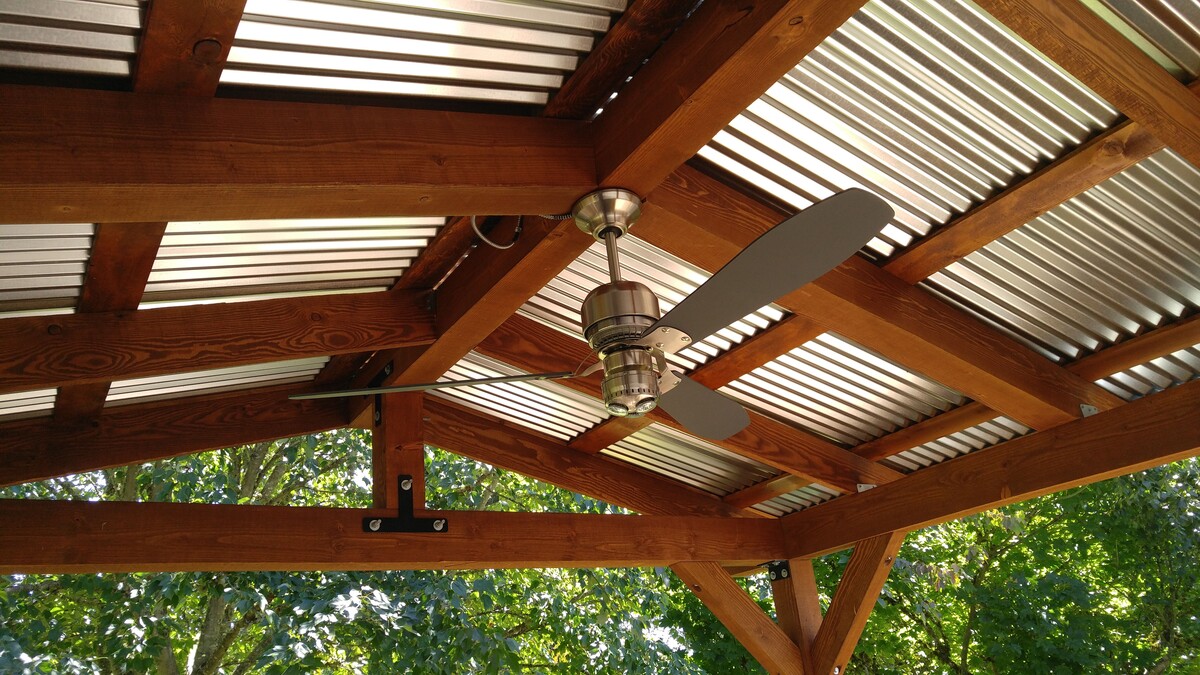
Another finishing touch that can enhance the functionality of your patio roof is the addition of ceiling fans. Ceiling fans provide a cooling breeze during hot summer days, making your patio a comfortable retreat. Ensure that you choose a fan suitable for outdoor use and follow the manufacturer’s installation instructions carefully.
For those who crave extra privacy or want to block out excessive sunlight, consider installing outdoor curtains or blinds. These can be easily attached to the support beams or rafters and provide additional shade and privacy when needed.
To add a personal touch to your patio roof, you can consider incorporating decorative elements such as hanging plants, outdoor artwork, or a retractable awning. These features will help to create a unique and inviting outdoor space that reflects your style and personality.
Finally, as part of the finishing touches, conduct a thorough inspection of your patio roof. Check for any loose screws or nails, damaged shingles or panels, and ensure that all elements are securely fastened. This regular maintenance will help keep your patio roof in optimal condition and prolong its lifespan.
With the finishing touches complete, you can now sit back, relax, and enjoy your newly built patio roof. Whether it’s hosting a summer barbecue, lounging with a good book, or simply enjoying the fresh air, your patio roof will provide a sheltered and inviting space to make the most of your outdoor area.
Congratulations again on successfully building your patio roof! You’ve transformed your outdoor space into a haven of comfort and style.
Conclusion
Building a patio roof is a rewarding project that can significantly enhance your outdoor space. From providing shelter and shade to creating a cozy and inviting atmosphere, a patio roof adds both functionality and charm to your home. By following the step-by-step guide outlined in this article, you are well-equipped to embark on this exciting project.
Remember to carefully consider the design and purpose of your patio roof, taking into account factors such as the size of your patio, the style of your home, and the local weather conditions. Gather the necessary materials and tools before starting, ensuring that you have everything you need for a smooth construction process.
Through proper preparation, including clearing the area, making repairs, and ensuring a solid foundation, you set a sturdy base for your patio roof. Installing the support beams and attaching the rafters create the framework and structure, providing the backbone of your roof.
From there, it’s all about selecting and installing the appropriate roofing material, whether it’s traditional shingles, metal panels, or polycarbonate sheets. Pay attention to detail, ensuring a secure and watertight roof that can withstand the test of time.
Finishing touches, such as adding gutters, lighting, and additional features, further enhance the functionality and aesthetics of your patio roof. These final steps allow you to create a space that reflects your style and meets your needs.
Now, it’s time to sit back, relax, and enjoy the fruits of your labor. Your patio roof provides an inviting and comfortable space to spend time with family and friends, host gatherings, or simply relax and unwind in the fresh air.
Remember to regularly inspect and maintain your patio roof to ensure its longevity and functionality. This includes checking for any loose elements, conducting necessary repairs, and cleaning the roof as needed.
So, go ahead and transform your outdoor area into a haven of comfort, style, and relaxation. With your newly built patio roof, your outdoor space becomes an extension of your home, allowing you to create cherished memories and enjoy the beauty of the great outdoors.
Now that you've mastered building a patio roof, why not spruce up the space further? Dive into vibrant options for outdoor living that transform any deck into a cozy haven, perfect for relaxation and entertainment. Or, if you're keen on expanding your backyard's appeal, consider constructing a DIY patio that promises simplicity and style. For those seeking varied ways to shield their outdoor areas, our guide on patio cover ideas offers creative and practical solutions. Each guide is packed with tips to ensure your outdoor spaces are as welcoming as they are beautiful.
Frequently Asked Questions about How To Build A Patio Roof
Was this page helpful?
At Storables.com, we guarantee accurate and reliable information. Our content, validated by Expert Board Contributors, is crafted following stringent Editorial Policies. We're committed to providing you with well-researched, expert-backed insights for all your informational needs.


0 thoughts on “How To Build A Patio Roof”