Home>Furniture>Outdoor Furniture>How To Put Up String Lights On A Patio
Outdoor Furniture
How To Put Up String Lights On A Patio
Modified: March 7, 2024
Learn how to beautifully illuminate your patio with string lights. Our step-by-step guide will help you create a cozy outdoor space with outdoor furniture.
(Many of the links in this article redirect to a specific reviewed product. Your purchase of these products through affiliate links helps to generate commission for Storables.com, at no extra cost. Learn more)
Introduction
Welcome to our comprehensive guide on how to put up string lights on a patio. Adding string lights to your outdoor space is a fantastic way to create a warm and inviting atmosphere, perfect for entertaining guests or simply enjoying a cozy evening outdoors.
String lights, also known as fairy lights or patio lights, can transform your patio into a magical oasis, providing both functionality and aesthetic appeal. Whether you’re hosting a backyard barbecue, celebrating a special occasion, or just want to create a relaxing ambiance, string lights are a versatile and cost-effective lighting solution.
In this guide, we’ll walk you through the step-by-step process of installing string lights on your patio. From evaluating the patio area and gathering the necessary materials to attaching the lights and ensuring they are secure, we’ll cover everything you need to know to achieve stunning results. So, let’s get started and make your patio shine!
Key Takeaways:
- Transform your patio into a magical oasis by following our step-by-step guide to hanging string lights. Create a warm and inviting atmosphere for entertaining or relaxing outdoors.
- Plan, install, and enjoy your well-lit patio with string lights. From evaluating the area to securing loose wires, our guide helps you create a cozy and inviting outdoor space.
Read more: How To String Up Patio Lights
Step 1: Evaluate the Patio Area
The first step in putting up string lights on your patio is to evaluate the area and determine the best layout for your lights. Take a moment to assess the size and shape of your patio, as well as any obstacles or existing structures that may impact the placement of the lights. Consider factors such as the height of the ceiling or roof, the availability of power sources, and the overall aesthetic you want to achieve.
Start by measuring the length and width of your patio. This will give you an idea of how many string lights you’ll need and how much wire or cable will be required to span the area. It’s essential to have accurate measurements to ensure a seamless installation process.
Next, consider the style and design of your patio. Think about the ambiance you want to create – do you envision a cozy, intimate space or a bright and cheerful atmosphere? This will help determine the type and color of string lights that will best suit your needs. Classic white lights are versatile and elegant, while colored lights can add a festive touch.
Furthermore, think about the available power sources on your patio. Are there outdoor power outlets that can safely accommodate your lighting setup? If not, you may need to use extension cords or consult an electrician to ensure a safe and reliable electrical connection.
Lastly, evaluate any existing structures or features that can serve as support for your string lights. This could include trees, pergolas, awnings, or even the walls of your house. Identifying these potential anchoring points will help you plan the layout and determine the necessary hardware or additional support structures required for installation.
By thoroughly evaluating your patio area, you’ll have a clear understanding of the logistics and design elements involved in putting up string lights. This will provide a solid foundation for the next steps in the installation process.
Step 2: Gather the Necessary Materials
Once you have evaluated your patio area, it’s time to gather all the necessary materials for installing your string lights. Having everything you need before starting the installation will save you time and ensure a smooth process.
Here’s a list of materials you may need:
- String lights: Choose high-quality outdoor-rated string lights that are designed to withstand exposure to the elements. Look for options that are waterproof and have durable wiring.
- Hanging hardware: Depending on your patio’s setup, you may need various types of hardware, such as hooks, clips, or tension wire to hang your string lights. Make sure to choose hardware that is suitable for outdoor use and can support the weight of your lights.
- Extension cords: If your patio doesn’t have nearby power outlets, you’ll need extension cords to connect your string lights to a power source. Opt for outdoor-rated extension cords that are weather-resistant and long enough to reach your desired location.
- Timers or dimmers: Consider adding timers or dimmers to your string lights to easily control the brightness and set automated schedules for turning them on and off. This can provide convenience and save energy.
- Ladder or step stool: Depending on the height of your patio, you may need a ladder or step stool to safely reach the hanging points for your string lights.
- Additional support structures: If your patio doesn’t have suitable anchoring points, you may need to procure additional support structures like poles or poles for mounting your string lights. Ensure these structures are sturdy and capable of withstanding outdoor conditions.
Before purchasing your materials, double-check your patio’s measurements and layout plan to ensure you buy the correct quantity and length of string lights, as well as the appropriate hardware. It’s always better to have a few extra supplies on hand in case of unexpected needs or replacements.
By gathering all the necessary materials in advance, you’ll be well-prepared to move on to the next step and begin the installation process smoothly and efficiently.
Step 3: Plan the Layout of the Lights
Before starting the installation process, it’s important to carefully plan the layout of your string lights. A well-thought-out design will not only enhance the aesthetic appeal of your patio but also ensure that the lights are evenly distributed and provide adequate illumination.
Here are some tips to help you plan the layout:
- Consider the focal points: Identify the key areas of your patio that you want to highlight with the string lights. This could be a seating area, a dining table, or any architectural feature that you want to draw attention to. Use these focal points as a guide when determining the placement of the lights.
- Measure the spacing: Depending on the length of your string lights and the desired aesthetic, determine how far apart you want each light to be. This will give you an idea of how many lights you’ll need and how far the wire or cable should span.
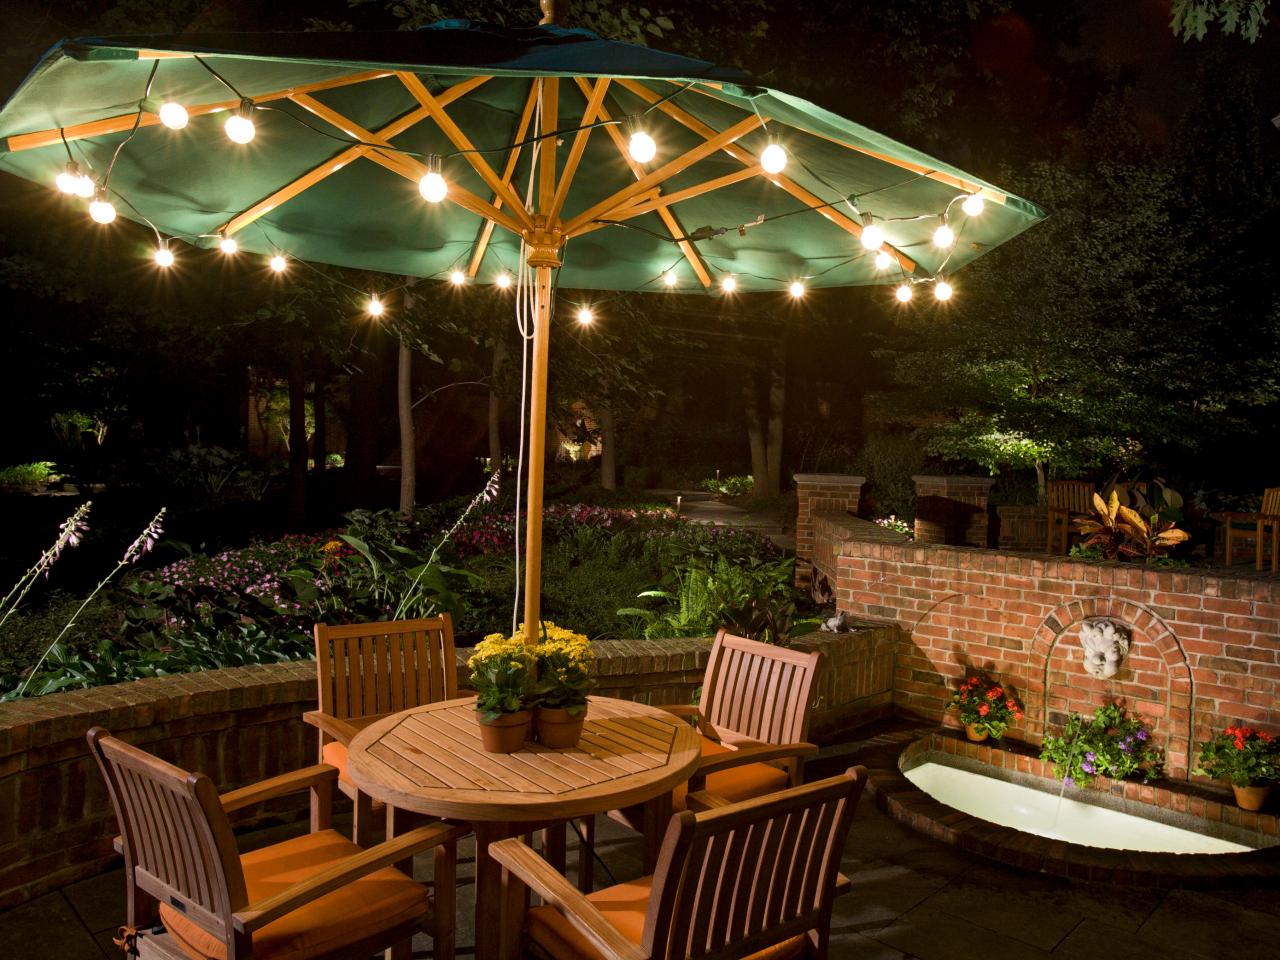
- Create a pattern or shape: To create visual interest, consider arranging the string lights in a specific pattern or shape. This could be a straight line, a zigzag, or even a canopy effect. Experiment with different arrangements to find the one that suits your patio’s style and dimensions.
- Account for power source: Plan the layout in a way that allows easy access to the power source. Ensure that the extension cords can reach the outlets without being a tripping hazard or obstruction.
- Test the lighting effect: Before finalizing the layout, it’s a good idea to do a test run by hanging the lights temporarily. This will allow you to see how the lights look and make any necessary adjustments before permanently installing them.
By taking the time to plan the layout of your string lights, you’ll be able to create a visually pleasing and functional lighting design for your patio. Once you’re satisfied with the layout, you can move on to the next step and begin the installation process.
Step 4: Install the Supporting Structure
Once you have planned the layout of your string lights, it’s time to install the supporting structure that will hold the lights in place. The type of supporting structure you’ll need will depend on your patio’s setup and the design you have chosen.
Here are some common methods for installing the supporting structure:
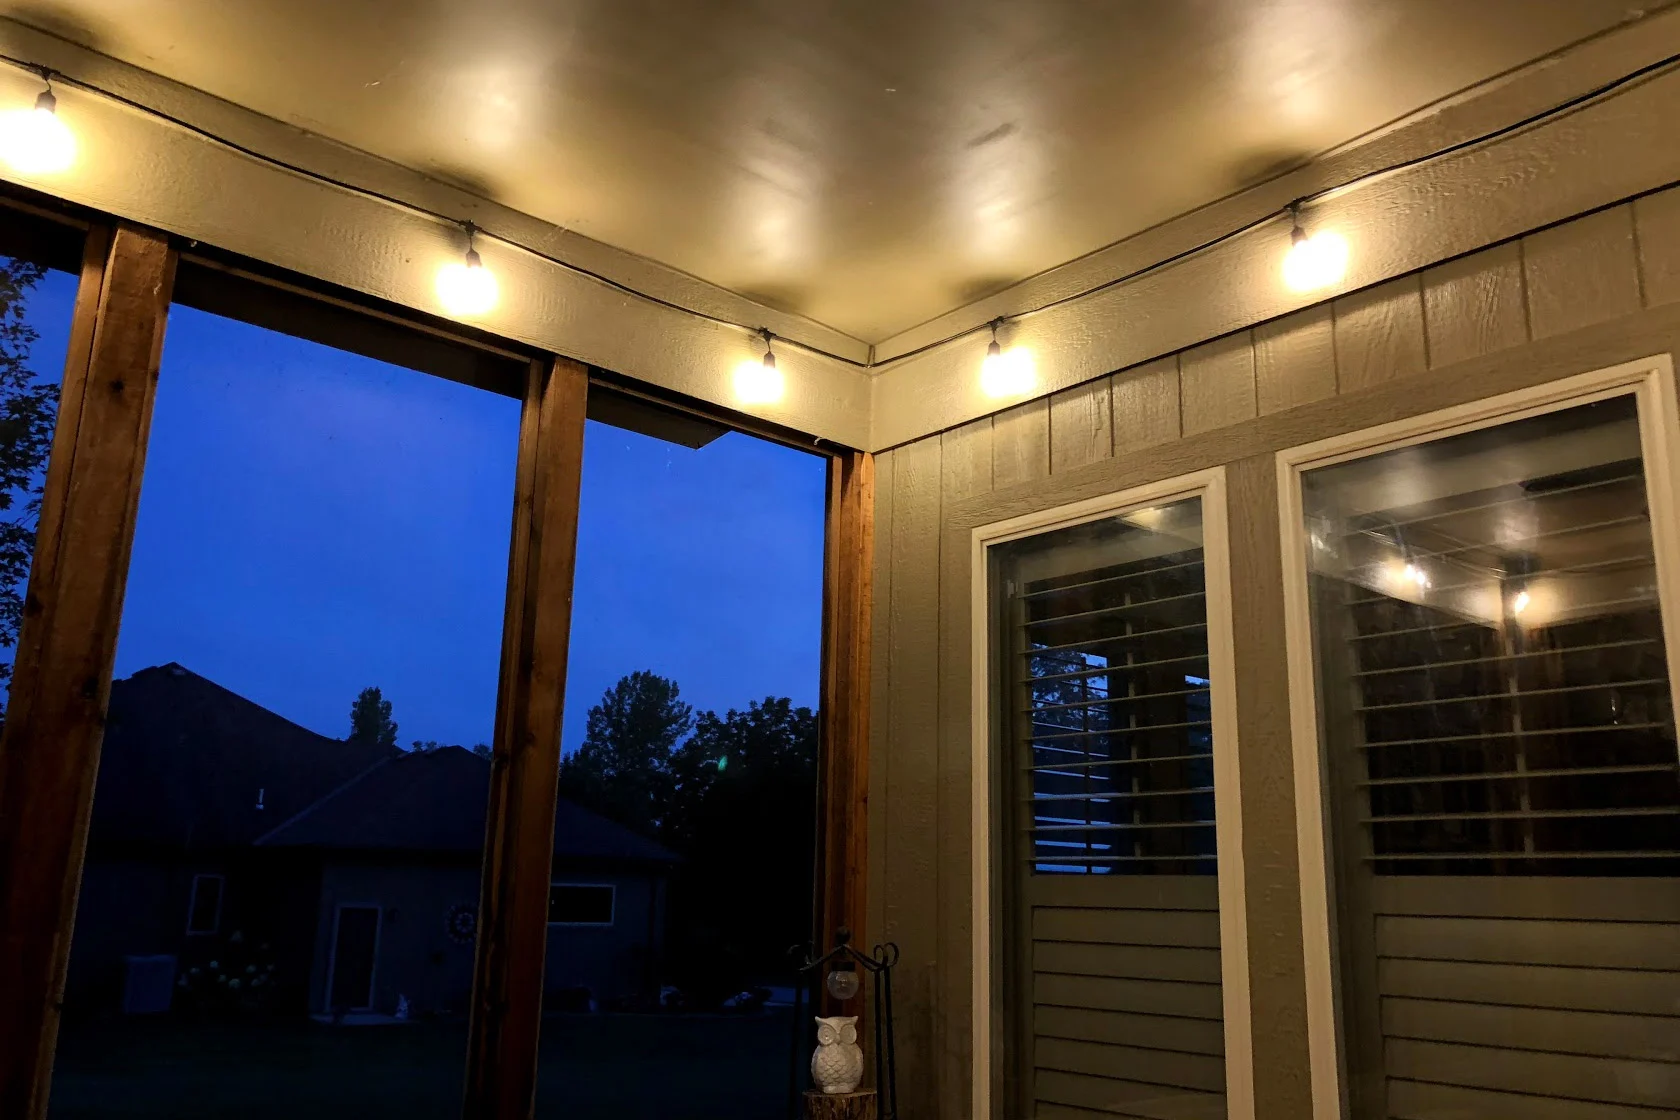
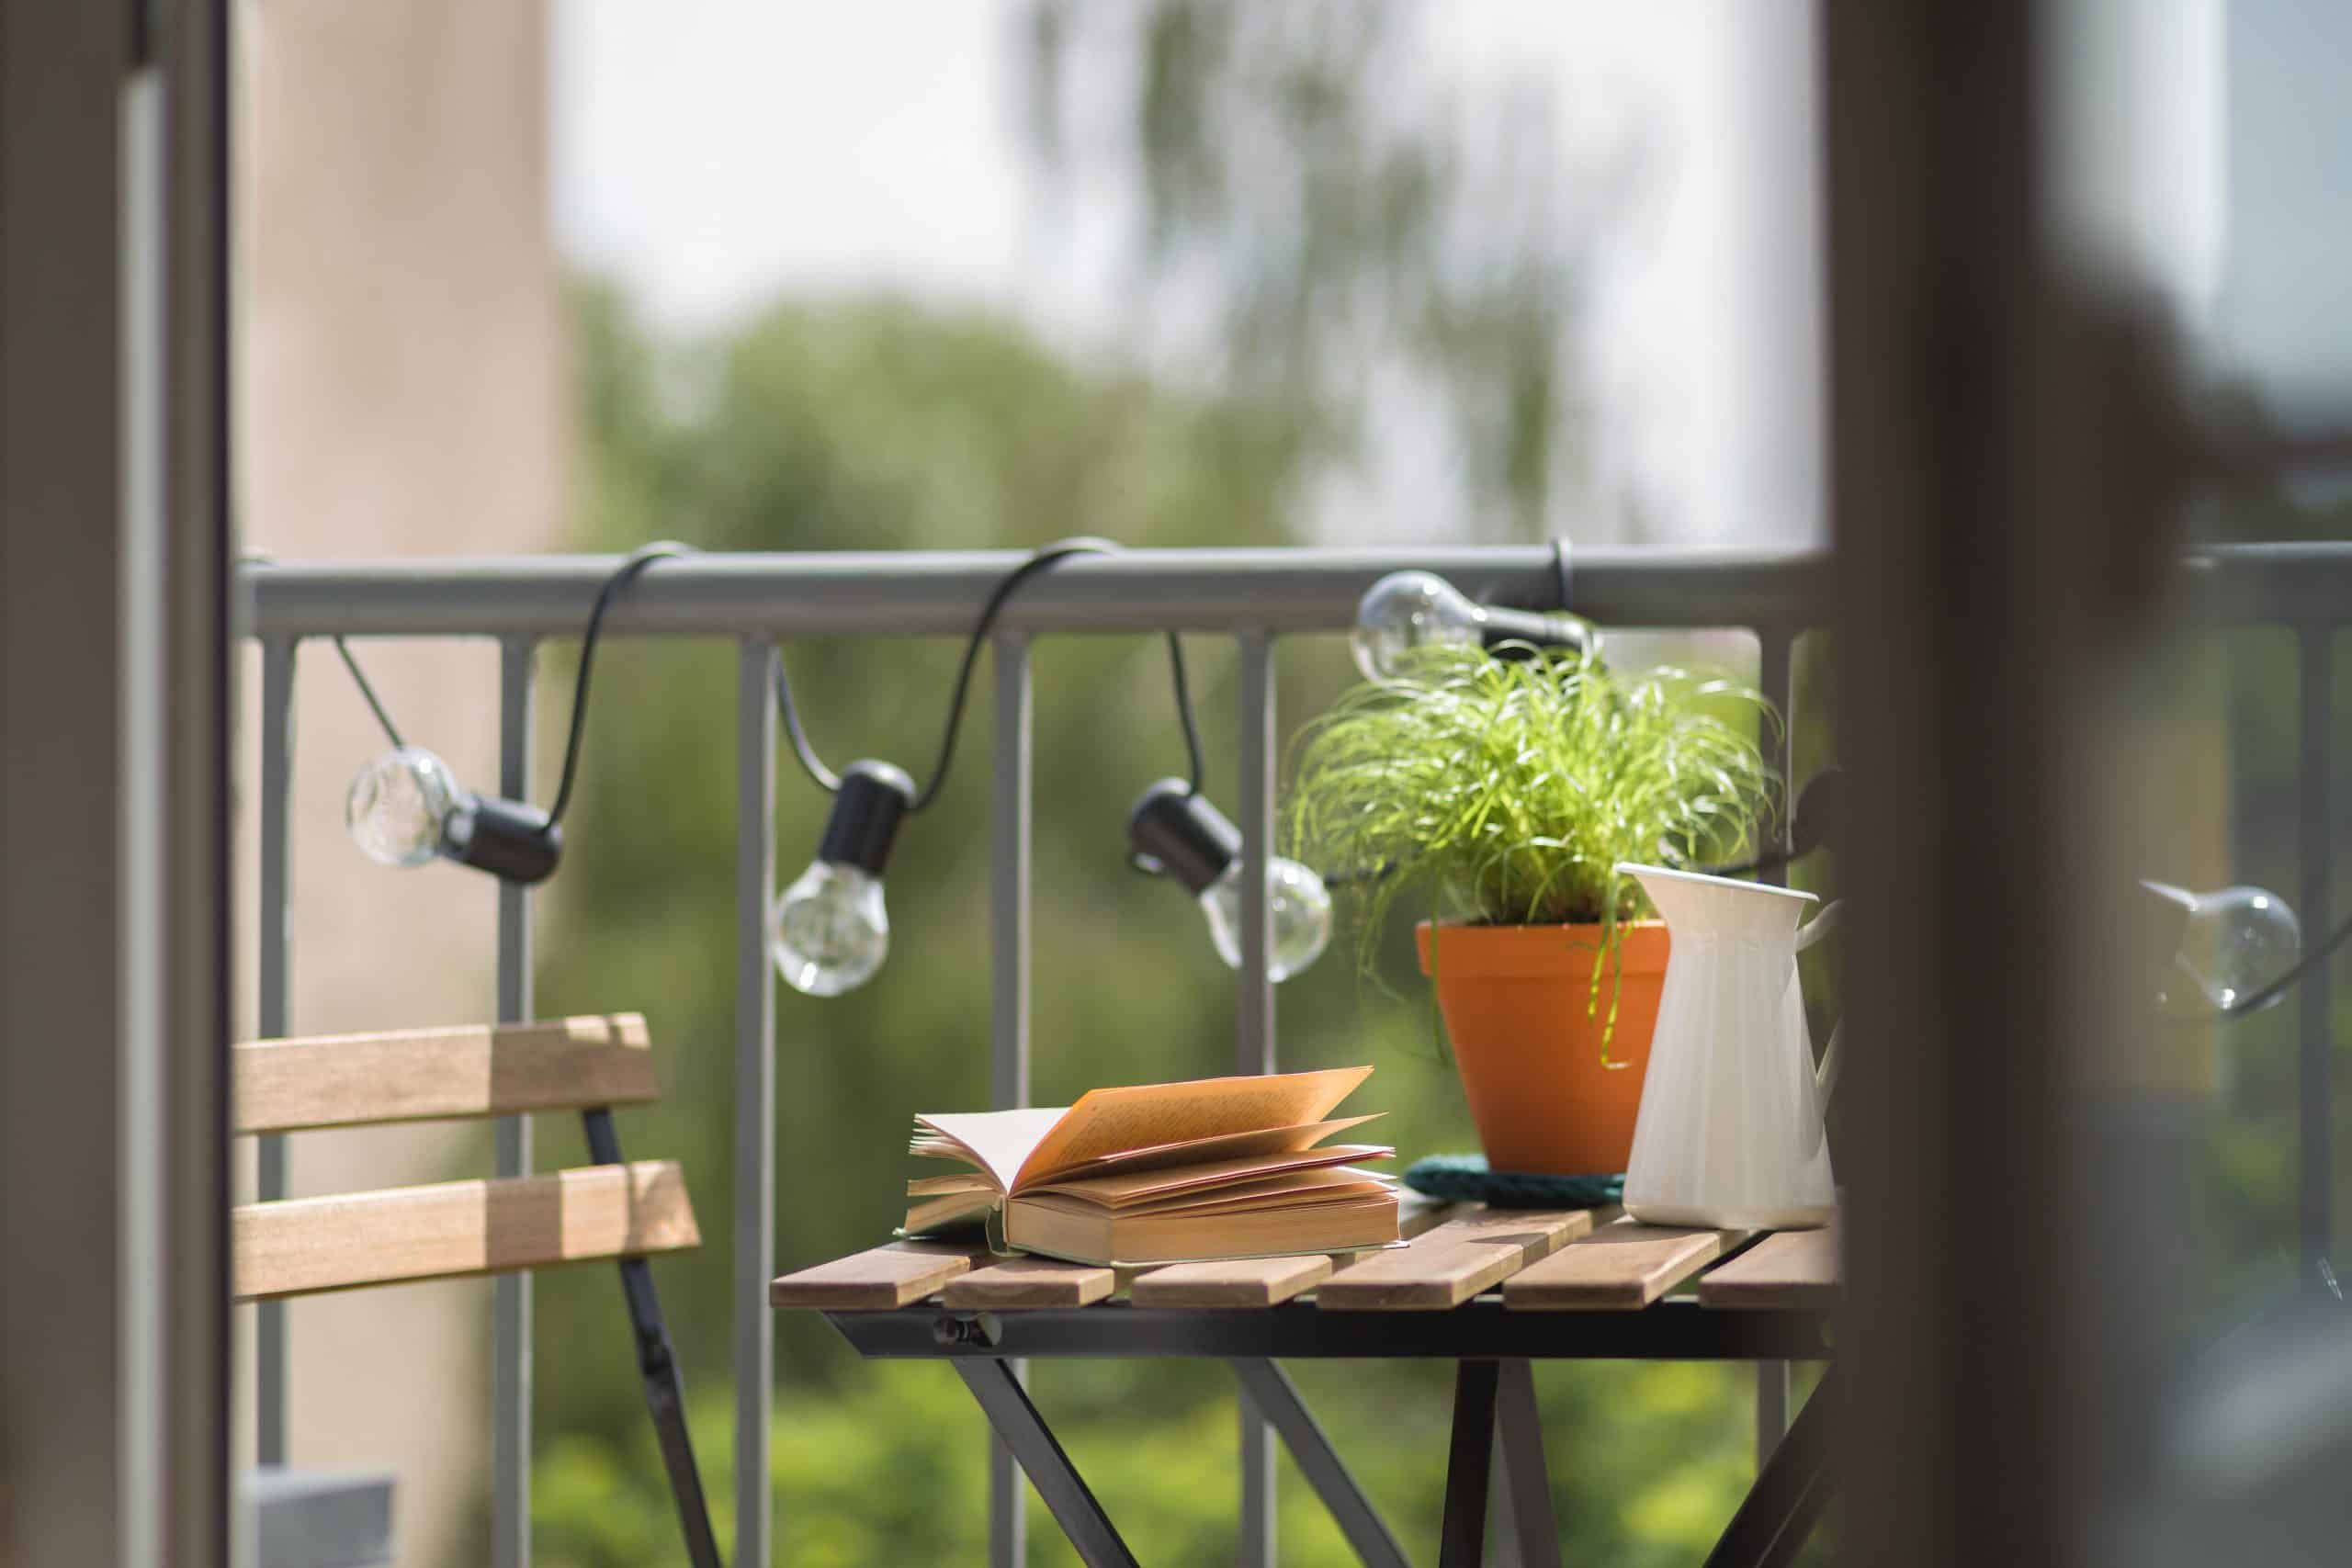
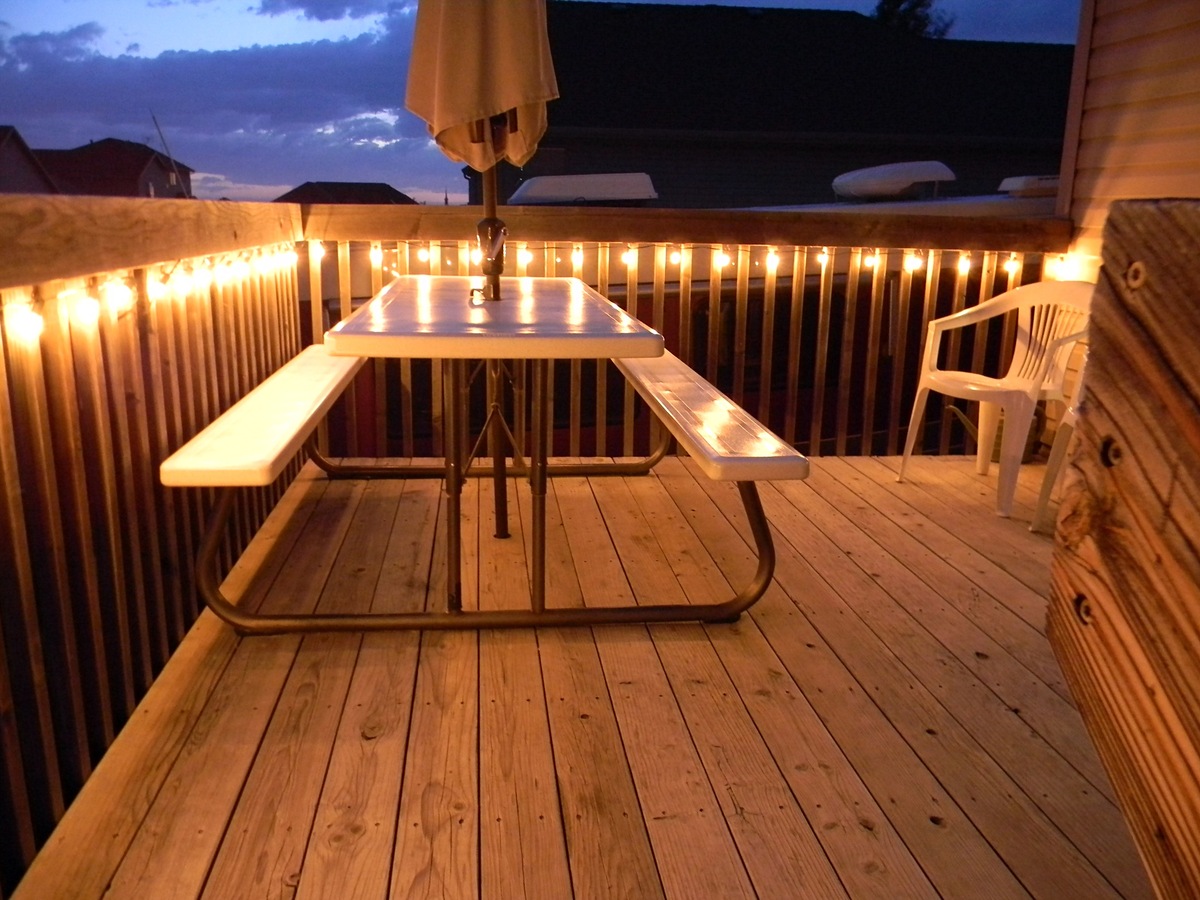
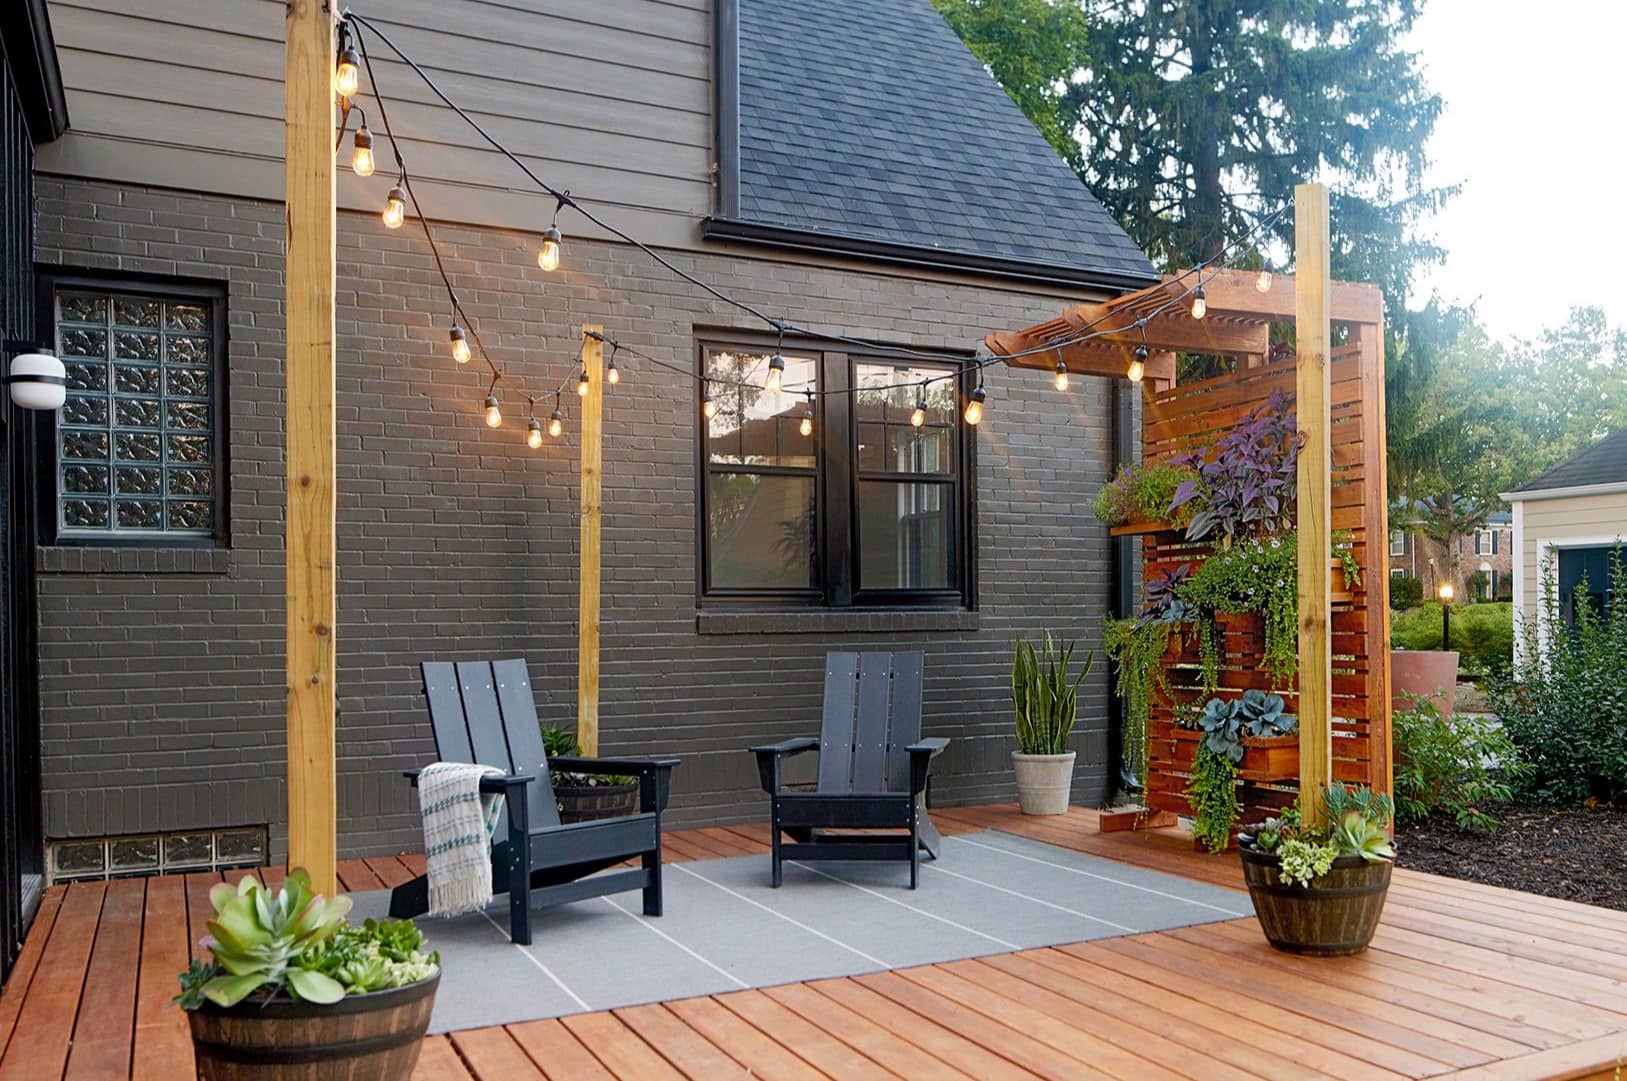
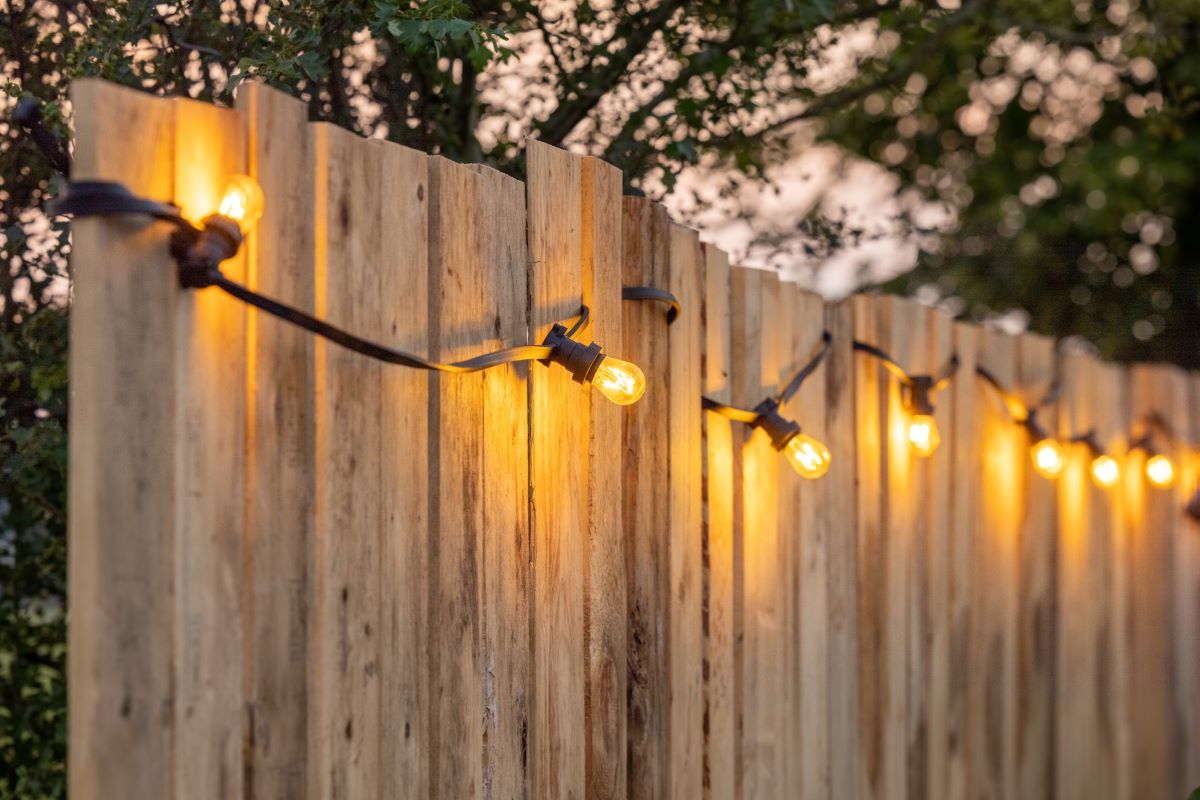
- Attach to existing structures: If your patio has pergolas, awnings, or the walls of your house, you can use these existing structures to hang the string lights. Use hooks or clips specifically designed for outdoor use to secure the lights along these structures. Make sure the hooks or clips are securely fastened and capable of supporting the weight of the lights.
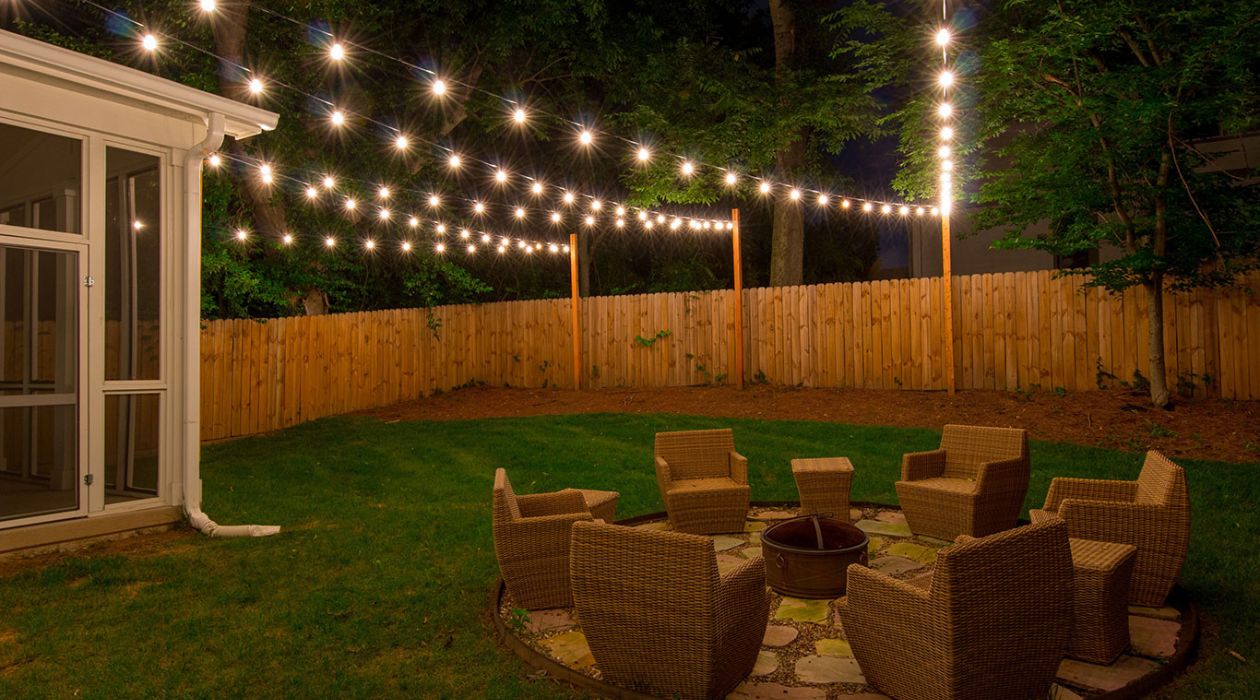
- Install poles or posts: If your patio doesn’t have suitable structures for hanging the lights, you can install poles or posts to create a support system. Choose durable, weather-resistant poles or posts and secure them firmly into the ground. Ensure that the height and distance between the poles are suitable for the desired lighting effect.
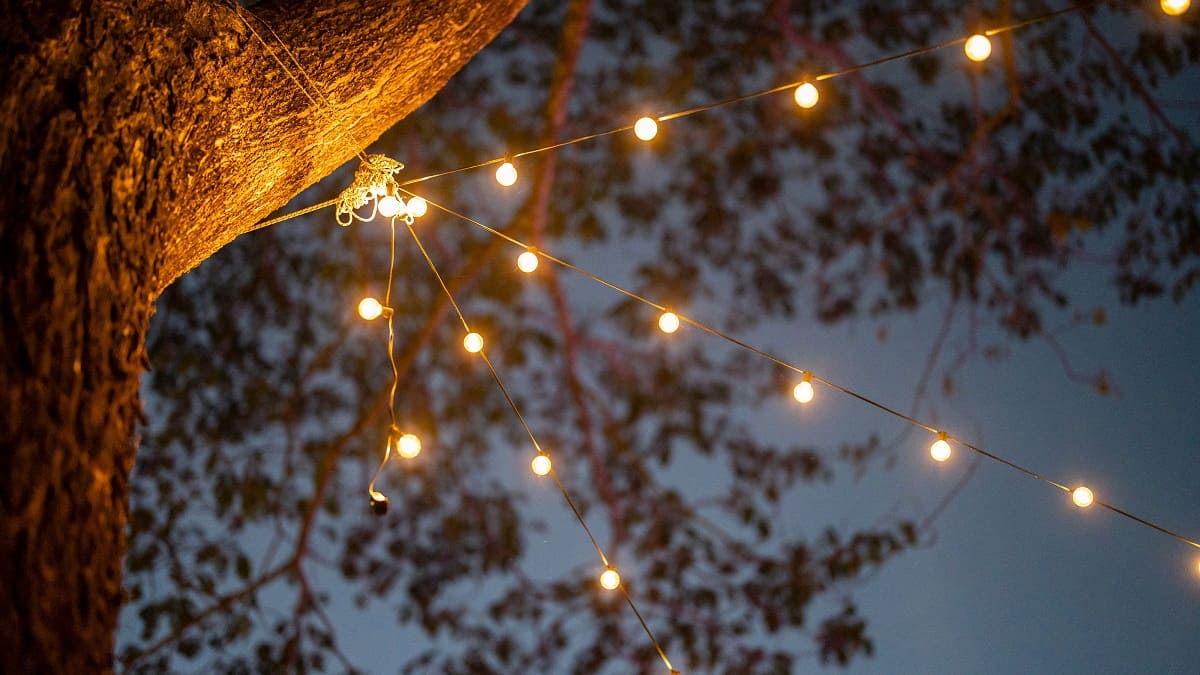
- String between trees: If you have trees in your patio area, you can string the lights between them. Use tree-safe clips or ties to attach the lights to the branches, making sure not to damage the trees in the process. Be mindful of the weight of the lights and the tension on the branches.
Regardless of the method you choose, it’s essential to ensure that the supporting structure is stable and can withstand various weather conditions. This is especially important if you live in an area prone to strong winds or heavy rain.
As you install the supporting structure, refer to your layout plan and make any necessary adjustments to accommodate the desired placement of the lights. Take your time with this step to ensure the structural integrity and safety of the installation.
Once the supporting structure is in place, you’re ready to move on to the next step and start attaching the string lights to create a captivating lighting display on your patio!
When putting up string lights on a patio, start by planning the layout and measuring the space. Use sturdy hooks or clips to hang the lights, and make sure to secure the cords to prevent tripping hazards. Always follow the manufacturer’s instructions for installation.
Read more: How To Put Up Outdoor String Lights
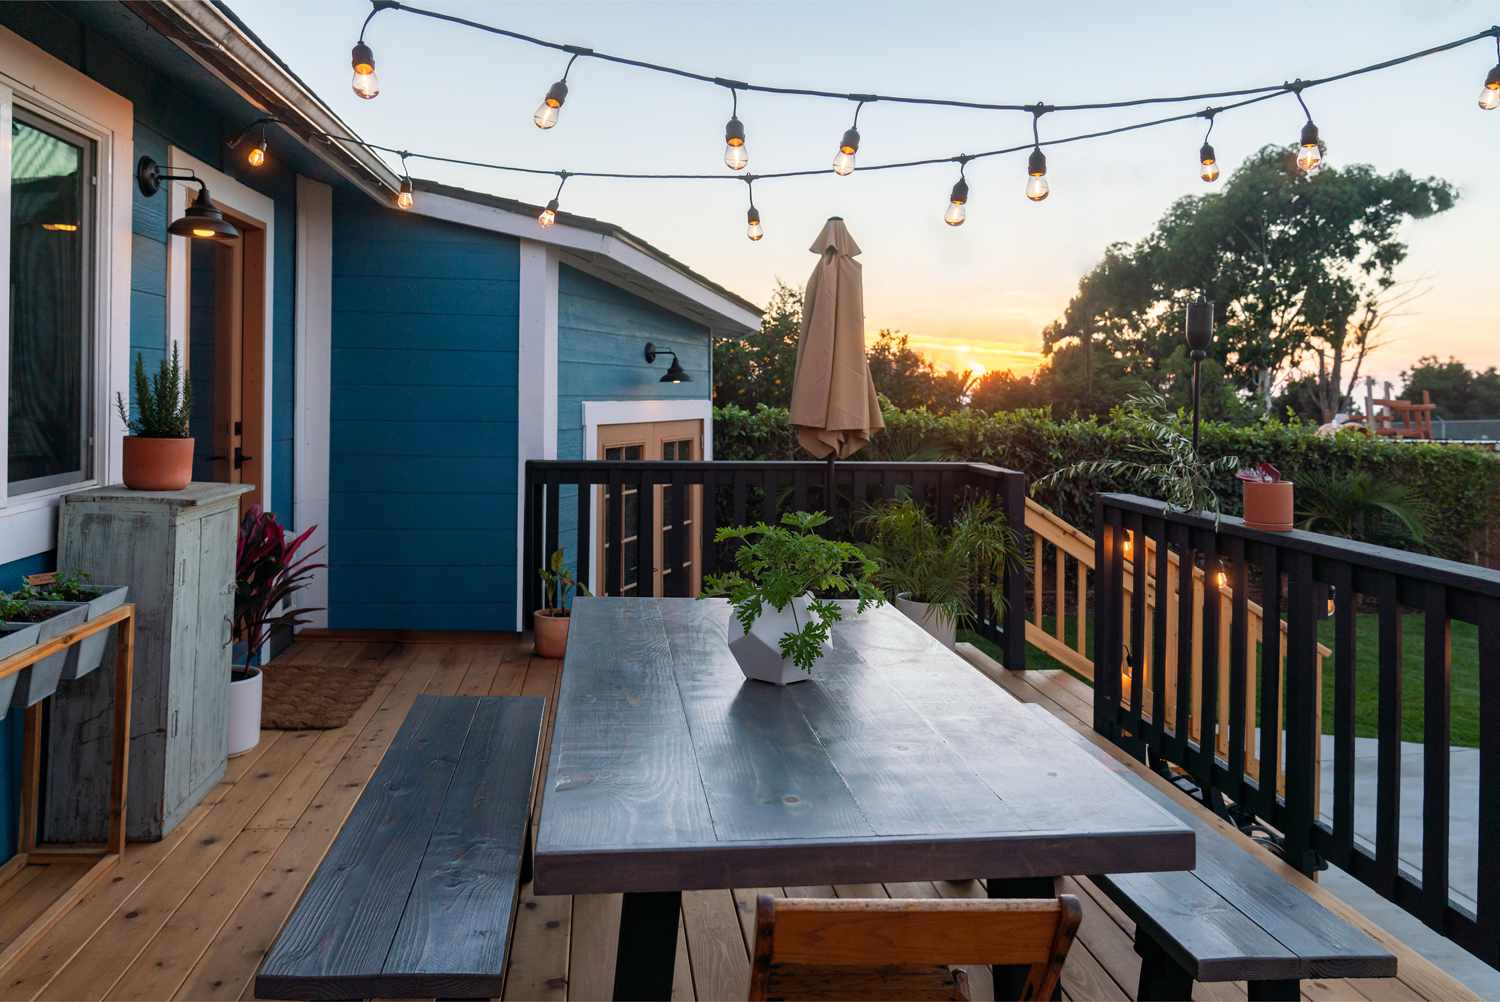
Step 5: Attach the String Lights
After installing the supporting structure, it’s time to attach the string lights and bring your patio to life with a warm and inviting glow. This step requires careful handling and attention to detail to ensure a secure and visually appealing installation.
Follow these steps to attach the string lights:
- Start at the power source: Begin by connecting the first string light to the power source. Plug it into the outdoor outlet or extension cord that you have prepared. Ensure that the connection is secure and protected from moisture.
- Hang the lights: Working methodically, hang the string lights according to your layout plan. Use the hooks, clips, or ties that are appropriate for your supporting structure. Gently secure the lights, making sure they are taut and evenly spaced. Avoid pulling or stretching the lights too much, as this can cause damage.
- Secure any loose wires: As you hang the lights, be mindful of any loose or dangling wires. Use zip ties or electrical tape to secure and hide any exposed wires. This will not only improve the appearance but also prevent any tripping hazards.
- Continue hanging the lights: Repeat the process, attaching the remaining string lights along the designated path. Take your time to ensure that the lights are hung straight and evenly distributed. Step back occasionally to assess the overall lighting effect and make any necessary adjustments.
- Test the lights: Once all the lights are hung, test them to make sure they are working properly. Turn on the power and check for any bulbs that may be burnt out or not lighting up. Replace any defective bulbs before proceeding.
During the installation, pay attention to the design and arrangement of the lights. Consider the pattern you want to create and the overall aesthetic you desire. Adjust the positioning of the lights as needed to achieve your desired effect.
Remember, safety is paramount when working with electrical components. Ensure that all connections are secure and protected from moisture. If you have any doubts or concerns about the electrical aspects, consult a professional electrician for assistance.
With the string lights properly attached, your patio is one step closer to becoming a beautiful and enchanting space. Take a moment to admire your handiwork before moving on to the next step.
Step 6: Test and Adjust the Lighting
Once you have attached the string lights, it’s important to test and adjust the lighting to ensure the desired ambiance and functionality. Taking the time to fine-tune the lighting setup will help create the perfect atmosphere on your patio.
Follow these steps to test and adjust the lighting:
- Turn on the lights: With the string lights properly installed and connected to the power source, turn them on to test their functionality. Ensure that all bulbs are lit and check for any flickering or irregularities in the lighting.
- Assess the lighting effect: Step back and evaluate the overall lighting effect. Pay attention to the brightness, intensity, and distribution of the light. Take note of any areas that may require additional or less illumination.
- Adjust the string lights: If you find that certain areas are too dim or too bright, make adjustments to the string lights. This could involve moving individual lights or adjusting the tension of the wire. Experiment with different arrangements until you achieve the desired balance of lighting.
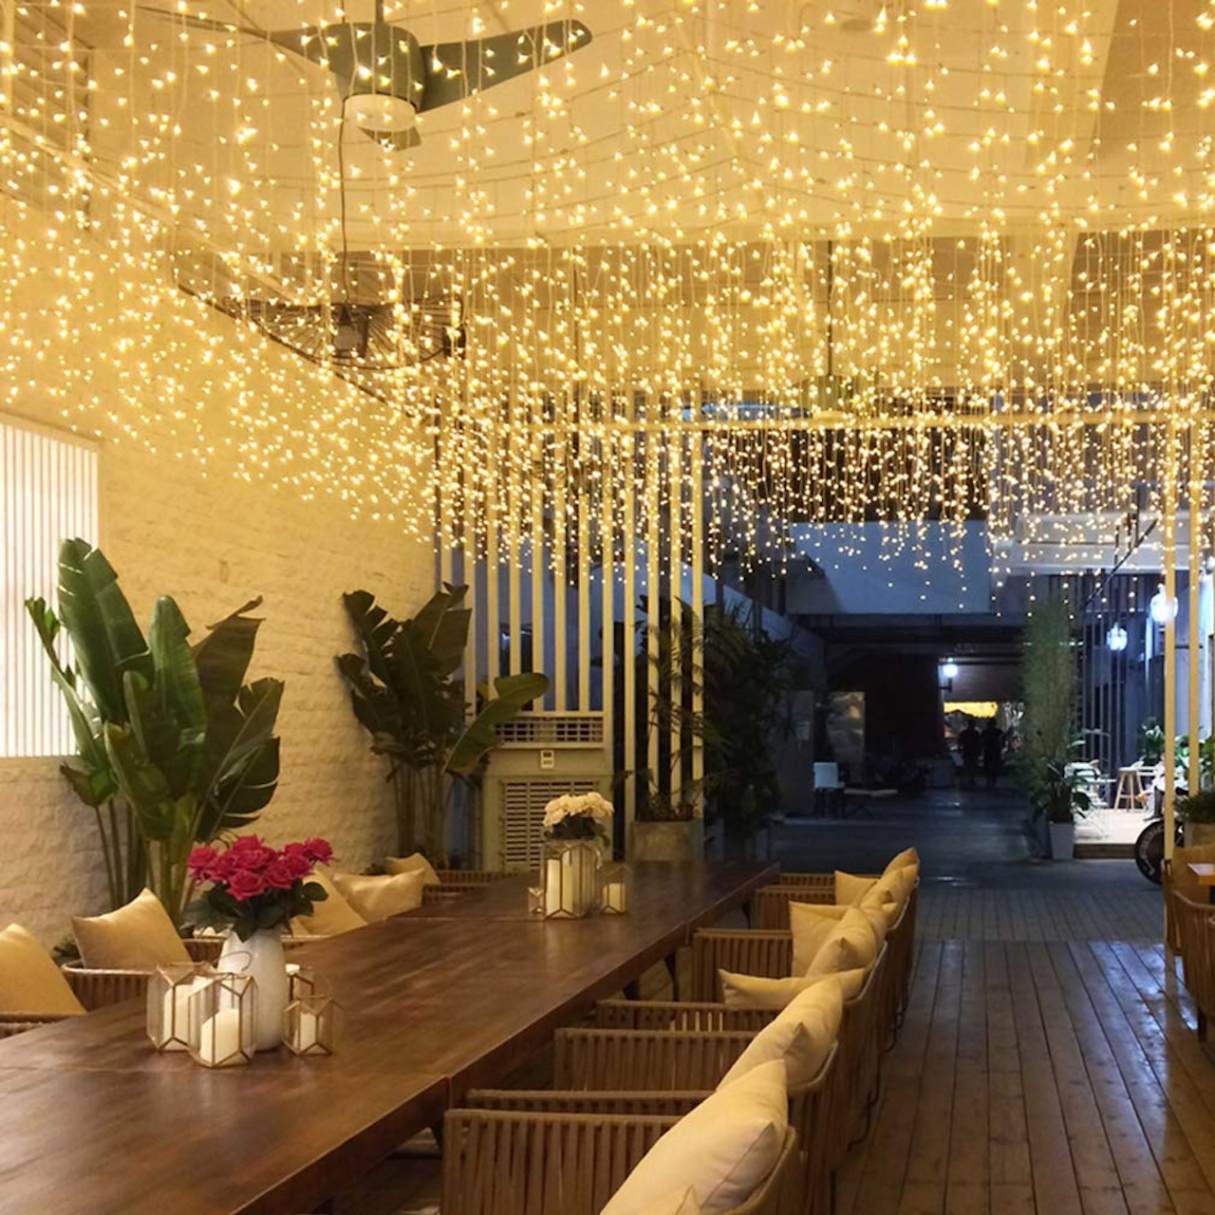
- Add accessories: Consider adding accessories to enhance the lighting effect. This could include lanterns, candle holders, or decorative elements that complement the string lights. These additional elements can add depth and character to your patio lighting setup.
- Test different settings: If your string lights are equipped with dimmers or timers, explore different settings to create varying moods and atmospheres. Play with the brightness level and experiment with programmed schedules to effortlessly control the lighting throughout the day or night.
During the testing and adjusting process, pay attention to the practicality of the lighting as well. Ensure that the patio area is well-illuminated, allowing for safe movement and functionality. Take into consideration both aesthetics and functionality to achieve the perfect balance.
Remember, personal preferences matter when it comes to lighting. It’s your patio, so feel free to customize the settings to suit your style and taste. The goal is to create an inviting and comfortable atmosphere that you and your guests will love.
With the lighting tested and adjusted, you’re almost done with transforming your patio into a stunning and cozy space. Take a moment to appreciate the beautiful lighting effect before moving on to the final step.
Step 7: Secure any Loose Wires or Cables
Securing any loose wires or cables is an important step in ensuring the safety and longevity of your string lights installation. Loose or dangling wires can pose a safety hazard, increase the risk of damage to the lights, and diminish the overall aesthetic appeal of your patio.
Follow these steps to secure any loose wires or cables:
- Identify loose wires: Inspect the entire length of the string lights and look for any loose or hanging wires. These can occur during the installation process or over time due to weather or movement.
- Reposition and adjust: Carefully reposition any loose wires or cables and adjust them to their proper place. Ensure that the wires are taut and aligned with the supporting structure or attachment points.
- Use cable clips or ties: Secure the wires in place using cable clips or ties designed for outdoor use. These accessories will help keep the wires neatly fastened and prevent them from sagging or tangling.
- Hide wires where possible: If feasible, hide the wires along the supporting structure, under furniture, or behind plants to create a clean and polished look. This will minimize the visual impact of the wires and create a seamless lighting display.
- Inspect regularly: Regularly inspect the string lights and wiring to ensure that they remain secure and in good condition. This is especially important during or after severe weather conditions like storms or strong winds.
By taking the time to secure any loose wires or cables, you can ensure the longevity of your string lights and maintain a safe environment on your patio. Regular inspections will help you identify any issues and address them promptly, preventing any potential hazards or damage.
Remember, it’s always better to be cautious and proactive when it comes to electrical components. If you are unsure about any aspect of securing the wires or if you notice any significant damage, it’s recommended to consult a qualified electrician for assistance.
With the wires securely fastened, your string lights installation is almost complete. Enjoy the peace of mind knowing that your patio is not only beautifully illuminated but also safely maintained.
Step 8: Enjoy Your Well-Lit Patio
Congratulations on completing the installation of your string lights! Now it’s time to step back, relax, and enjoy your beautifully illuminated patio. With the lights sparkling overhead, you have transformed your outdoor space into a cozy and inviting haven.
Here are a few tips for maximizing your enjoyment:
- Create a welcoming ambiance: Use your newly installed string lights to set the mood and create a warm and inviting atmosphere on your patio. The soft glow of the lights will provide the perfect backdrop for gatherings or quiet evenings with loved ones.
- Arrange cozy seating areas: Arrange your outdoor furniture in a way that encourages conversation and relaxation. Consider adding cushions, pillows, and throws to make the seating areas even cozier. The combination of comfortable seating and the magical glow of the string lights will make your patio an irresistible space.
- Host memorable gatherings: Your well-lit patio is the ideal setting for hosting memorable gatherings with family and friends. Whether it’s a barbecue, a cocktail party, or a casual get-together, the warm ambiance created by the string lights will set the stage for a truly special event.
- Extend the evenings: With the addition of string lights, you can now extend your evenings on the patio. Enjoy late-night conversations, intimate dinners, or simply unwind after a long day. The gentle illumination of the lights will create an enchanting setting that encourages relaxation and connection.
- Experiment with lighting effects: Don’t be afraid to experiment with different lighting effects. Dim the lights for a more intimate setting, or adjust the brightness to create a festive atmosphere. Consider adding other decorative elements such as lanterns or candles to further enhance the ambiance.
- Maintain and care for your lights: Regularly inspect and clean your string lights to ensure they remain in optimal condition. Check for any loose bulbs, replace any burnt-out bulbs, and secure any wires that may have come loose. Proper maintenance will prolong the life of your lights and keep them shining brightly for years to come.
Now that your patio is transformed into a magical oasis, take the time to relax, unwind, and appreciate the beautiful space you have created. Whether it’s a quiet evening alone or a lively gathering, your well-lit patio is sure to become a favorite spot for making cherished memories.
Thank you for following our comprehensive guide on how to put up string lights on a patio. We hope this step-by-step process has been helpful and has allowed you to create the perfect outdoor retreat. Cheers to many enjoyable evenings on your well-lit patio!
Frequently Asked Questions about How To Put Up String Lights On A Patio
Was this page helpful?
At Storables.com, we guarantee accurate and reliable information. Our content, validated by Expert Board Contributors, is crafted following stringent Editorial Policies. We're committed to providing you with well-researched, expert-backed insights for all your informational needs.


0 thoughts on “How To Put Up String Lights On A Patio”