Home>Furniture>Outdoor Furniture>How To Resurface A Cement Patio
Outdoor Furniture
How To Resurface A Cement Patio
Modified: March 7, 2024
Learn how to resurface your cement patio and transform it into the perfect outdoor furniture oasis. Get step-by-step instructions and expert tips now!
(Many of the links in this article redirect to a specific reviewed product. Your purchase of these products through affiliate links helps to generate commission for Storables.com, at no extra cost. Learn more)
Introduction
Welcome to our guide on how to resurface a cement patio. If your outdoor space is looking tired and worn, resurfacing your cement patio can be a great way to revitalize its appearance and improve its durability. Over time, exposure to the elements can cause a cement patio to develop cracks, stains, and an uneven surface. Resurfacing it can help restore its beauty and make it more enjoyable for outdoor activities.
Resurfacing a cement patio involves applying a new layer of material to the existing surface to create a smooth and even finish. This process not only improves the aesthetics of the patio but also helps to protect the underlying concrete from further damage. Whether you want to freshen up the look of your patio or address more significant issues like cracks and uneven surfaces, this guide will take you through the step-by-step process of resurfacing a cement patio.
Before you begin, it’s important to note that resurfacing a cement patio requires some patience, time, and a bit of DIY skills. It’s a relatively straightforward project, but it does require careful preparation and attention to detail. By following the steps outlined in this guide, you can achieve a professional-looking result and enjoy a beautiful, durable, and functional patio for years to come.
Now, let’s dive into the process of assessing the condition of your cement patio to determine the necessary repairs and the appropriate resurfacing technique.
Key Takeaways:
- Revitalize your worn-out cement patio by following our comprehensive guide. From assessing the condition to applying the resurfacing compound, achieve a stunning outdoor space with patience and attention to detail.
- Maintain the longevity of your resurfaced patio with regular cleaning, prompt repairs, and proper protection. Follow our maintenance tips to preserve its beauty and enjoy your outdoor oasis for years to come.
Read more: How To Resurface A Concrete Patio
Assessing the Condition of Your Cement Patio
Before you start resurfacing your cement patio, it’s important to assess its current condition. This will help you determine the extent of the repairs required and the best approach to take. Here are some key steps to follow when assessing your cement patio:
- Inspect for cracks: Walk around your patio and carefully examine the surface for any cracks. Take note of their size and location, as this will be important information for the repair process. Small hairline cracks can usually be repaired easily, while larger cracks may require more extensive treatment.
- Look for uneven areas: Check for any sections of the patio that are uneven or have sunken spots. These areas may need to be leveled before applying the resurfacing compound.
- Check for stains and discoloration: Take note of any stains or discoloration on the surface of the patio. These can be caused by spills, weathering, or the growth of algae and mold. Stains may require additional cleaning or treatment before resurfacing.
- Check the drainage: Evaluate how well the patio drains after rainfall. If you notice areas where water pools or doesn’t drain properly, it may indicate a problem with the slope or the sub-base. Addressing drainage issues may be necessary before resurfacing.
- Assess the overall condition: Step back and evaluate the overall condition of your patio. Consider factors such as its age, the severity of the damages, and your desired end result. This will help you determine the appropriate resurfacing technique and materials to use.
By thoroughly assessing the condition of your cement patio, you’ll be able to identify and prioritize the necessary repairs. This will ensure that you take the right steps to transform your worn-out patio into a smooth and visually appealing outdoor space.
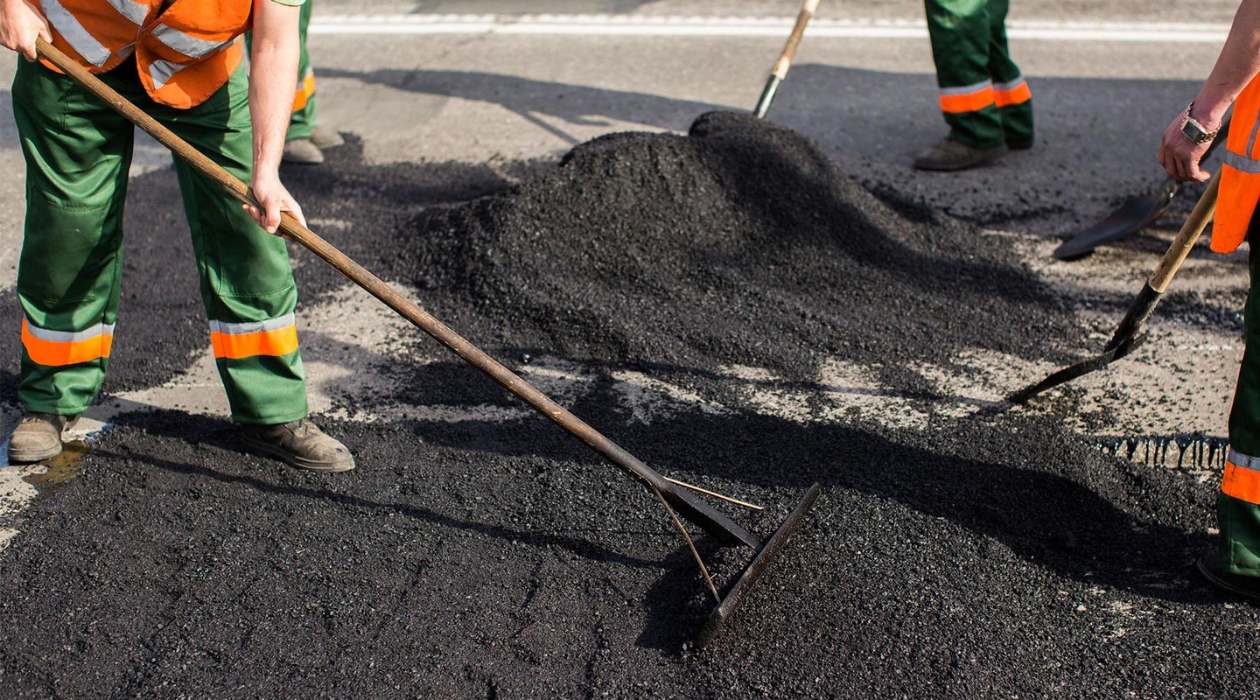
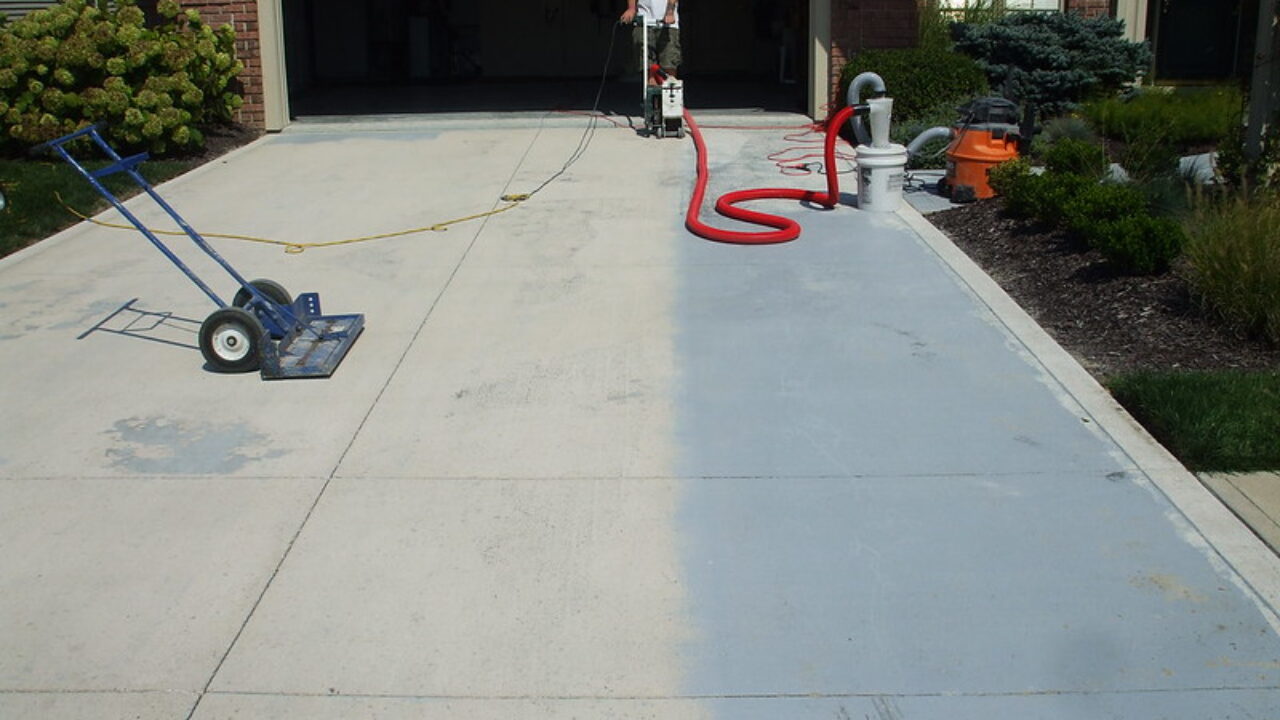
Cleaning the Cement Patio
Before you begin the resurfacing process, it’s essential to clean your cement patio thoroughly. Cleaning the surface will remove dirt, debris, stains, and any other contaminants that could affect the adhesion of the resurfacing compound. Here are the steps to follow when cleaning your cement patio:
- Sweep or use a leaf blower: Start by removing any loose dirt, leaves, or debris from the surface of your patio. Use a broom or leaf blower to sweep the area thoroughly.
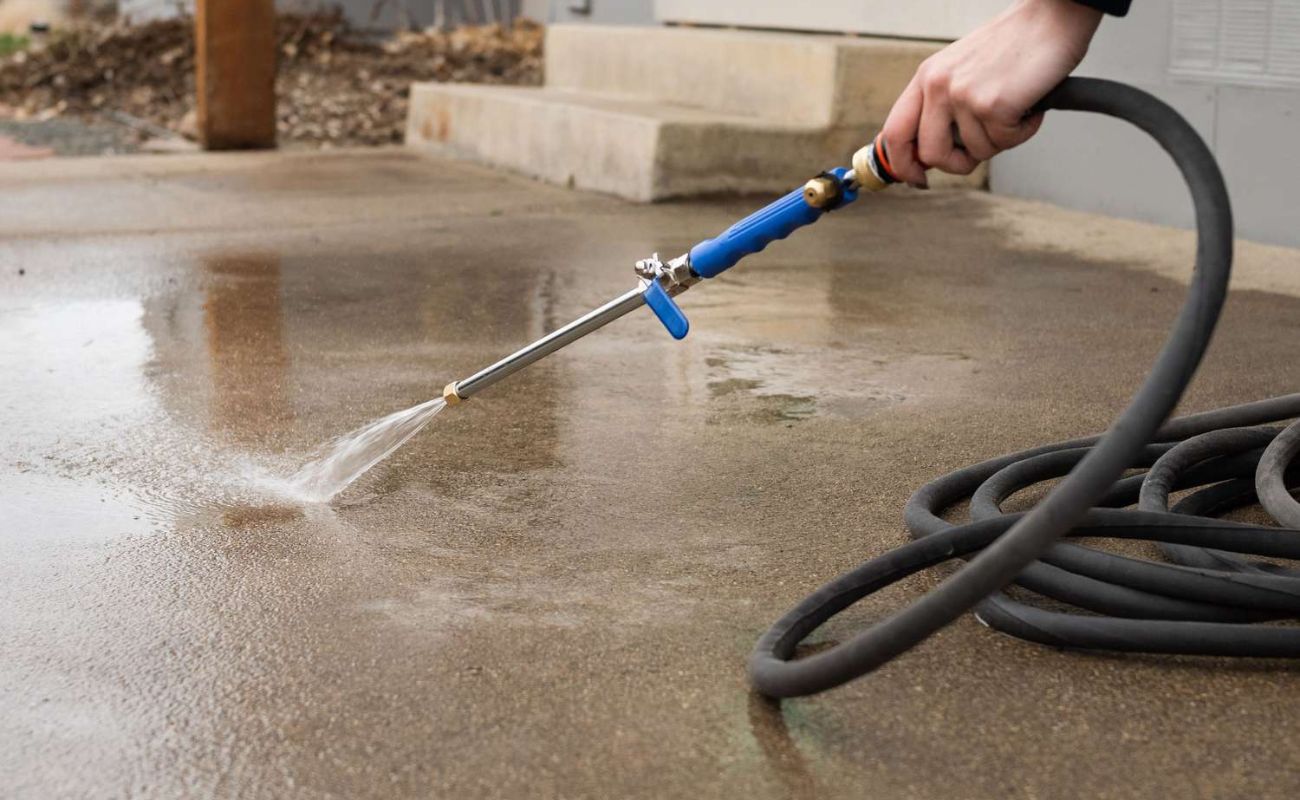
- Pressure washing: The next step is to pressure wash the patio. Rent or purchase a pressure washer and follow the manufacturer’s instructions for use. Use a high-pressure setting and move the nozzle evenly across the entire surface. This will help remove stubborn stains, dirt, and algae buildup.
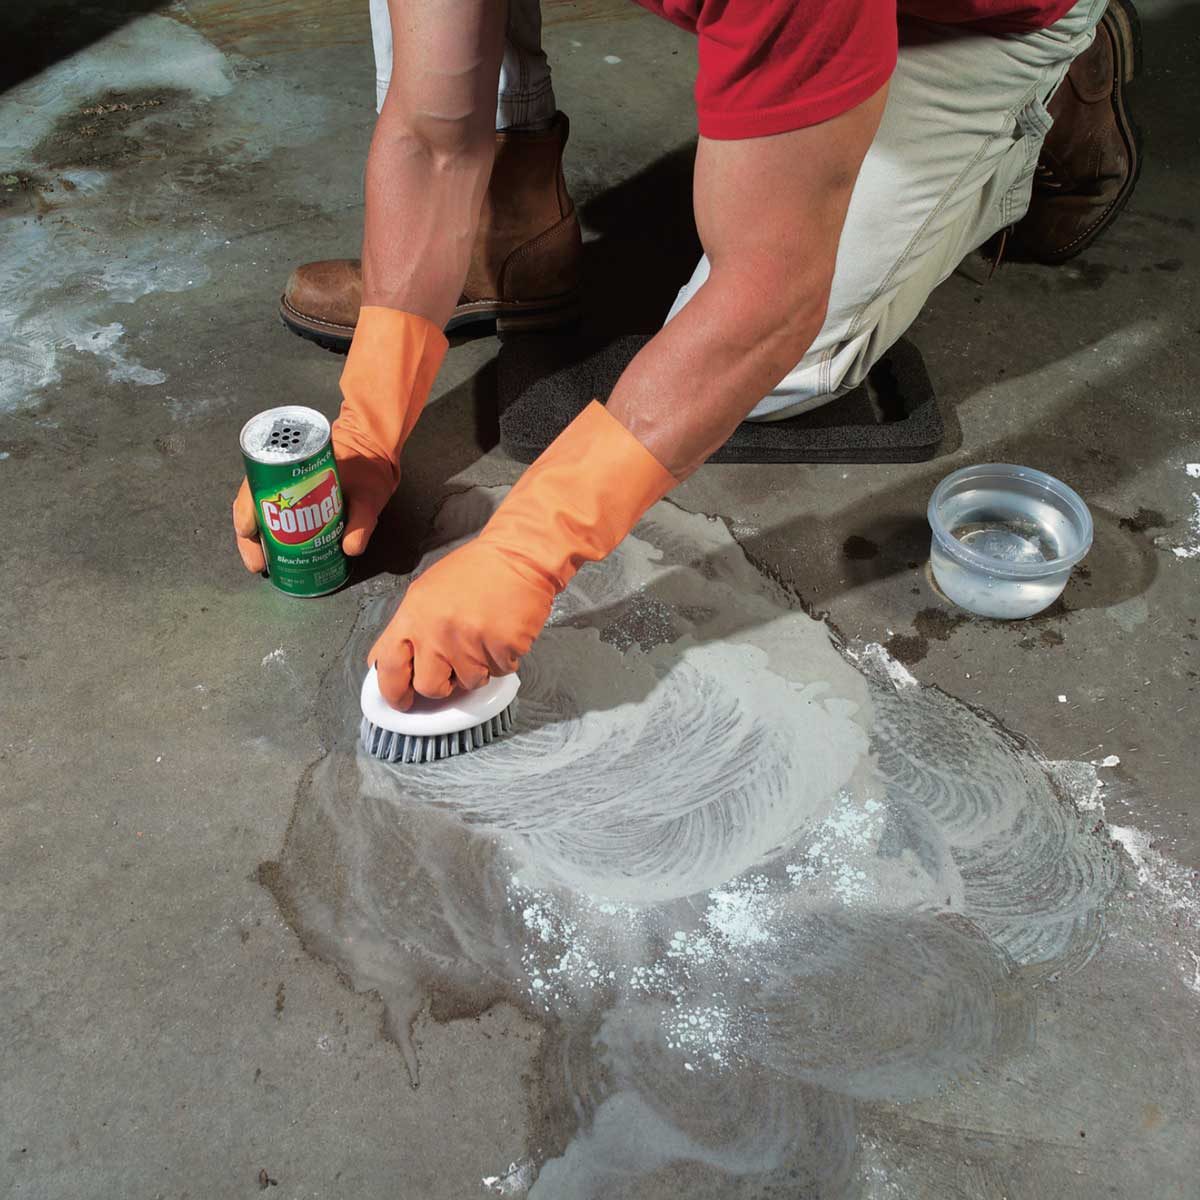
- Cleaning solution: For particularly stubborn stains or areas with heavy algae or mold growth, you may need to use a cleaning solution. Mix a solution of water and a mild detergent or a concrete cleaner. Apply the solution to the affected areas and scrub gently with a stiff brush. Rinse the area thoroughly afterward.
- Stain removal: If you have specific stains on your patio, such as oil or rust, you may need to address them using specialized stain removers. Follow the manufacturer’s instructions for application and wait for the recommended amount of time before rinsing off the product.
- Final rinse: Once you have completed the cleaning process, give your patio a final rinse with clean water. Use the pressure washer or a hose with a high-pressure nozzle to ensure that all cleaning residue is removed.
Allow your patio to dry completely before moving on to the next step. This may take a day or two, depending on the weather conditions. Once your patio is clean and dry, it will be ready for any necessary repairs and the application of the resurfacing compound.
Properly cleaning your cement patio is a crucial step in the resurfacing process. It not only prepares the surface for the application of the new material but also helps ensure a long-lasting and visually appealing result.
Repairing Cracks and Damaged Areas
Once your cement patio is clean and dry, the next step in the resurfacing process is to repair any cracks and damaged areas. Here’s how you can effectively repair these issues:
- Prepping the cracks: Start by cleaning out any dirt, debris, or loose concrete from the cracks. Use a wire brush or a chisel to remove any loose material, ensuring that the crack is clean and free of loose particles.
- Applying a concrete patch: For small cracks, you can use a premixed concrete patching compound. Apply the compound to the crack, using a trowel to fill it evenly. Smooth the surface with the trowel or a putty knife, ensuring that the patch is level with the surrounding area.
- Repairing larger cracks: If you have larger cracks on your patio, you may need to use a polymer-modified cement-based patching material. Mix the patching compound following the manufacturer’s instructions, and then apply it to the crack using a trowel. Smooth the surface and ensure that the patch is level with the surrounding area.
- Addressing damaged areas: If your cement patio has areas with significant damage, such as crumbled or sunken sections, you may need to consider more involved repairs. For extensive damage, it may be necessary to consult with a professional to assess the best course of action.
- Curing time: Allow the concrete patch to cure according to the manufacturer’s instructions. This typically takes 24 to 48 hours, but it may vary depending on the temperature and humidity levels in your area.
Repairing cracks and damaged areas is essential to ensure a smooth and even resurfacing finish. Take the time to address these issues before moving on to the next steps in the process.
Once the repaired sections have fully cured, you are ready to move on to the next step: filling low spots and leveling the surface of your cement patio.
Filling Low Spots and Leveling the Surface
After repairing any cracks and damaged areas on your cement patio, the next step in the resurfacing process is to fill in any low spots and level the surface. This will ensure that the resurfacing compound is applied evenly and creates a smooth and uniform finish. Here’s how you can achieve this:
- Clean the surface: Before filling low spots, make sure to clean the entire surface of the patio to remove any debris or dust that may interfere with the leveling process.
- Identify low spots: Carefully inspect the patio to identify any areas that appear uneven or sunken. These low spots can be filled in to create a level surface for the resurfacing compound.
- Choose a leveling material: There are various options for filling low spots, such as a self-leveling compound, a cement-based patching material, or a fine-grain concrete mix. Select the material that best suits your needs and follow the manufacturer’s instructions for mixing and application.
- Fill in the low spots: Apply the leveling material to the identified low spots, using a trowel or a putty knife to spread it evenly. Smooth the surface and ensure that the material is level with the surrounding areas. Pay extra attention to achieving a uniform and flat surface.
- Curing time: Allow the leveling material to cure according to the manufacturer’s instructions. This typically takes 24 to 48 hours, but it may vary depending on the product and environmental conditions.
By filling in the low spots and leveling the surface of your cement patio, you create a solid foundation for the resurfacing compound. This step is crucial in achieving a smooth and professional finish.
Once the leveled areas have fully cured, you are now ready to apply the resurfacing compound and transform the appearance of your cement patio. Keep reading to learn about the next steps in the resurfacing process.
Clean the surface thoroughly before resurfacing to ensure good adhesion. Use a pressure washer and a concrete cleaner to remove dirt, oil, and debris. Let the patio dry completely before applying the resurfacing material.
Read more: How To Resurface Your Patio
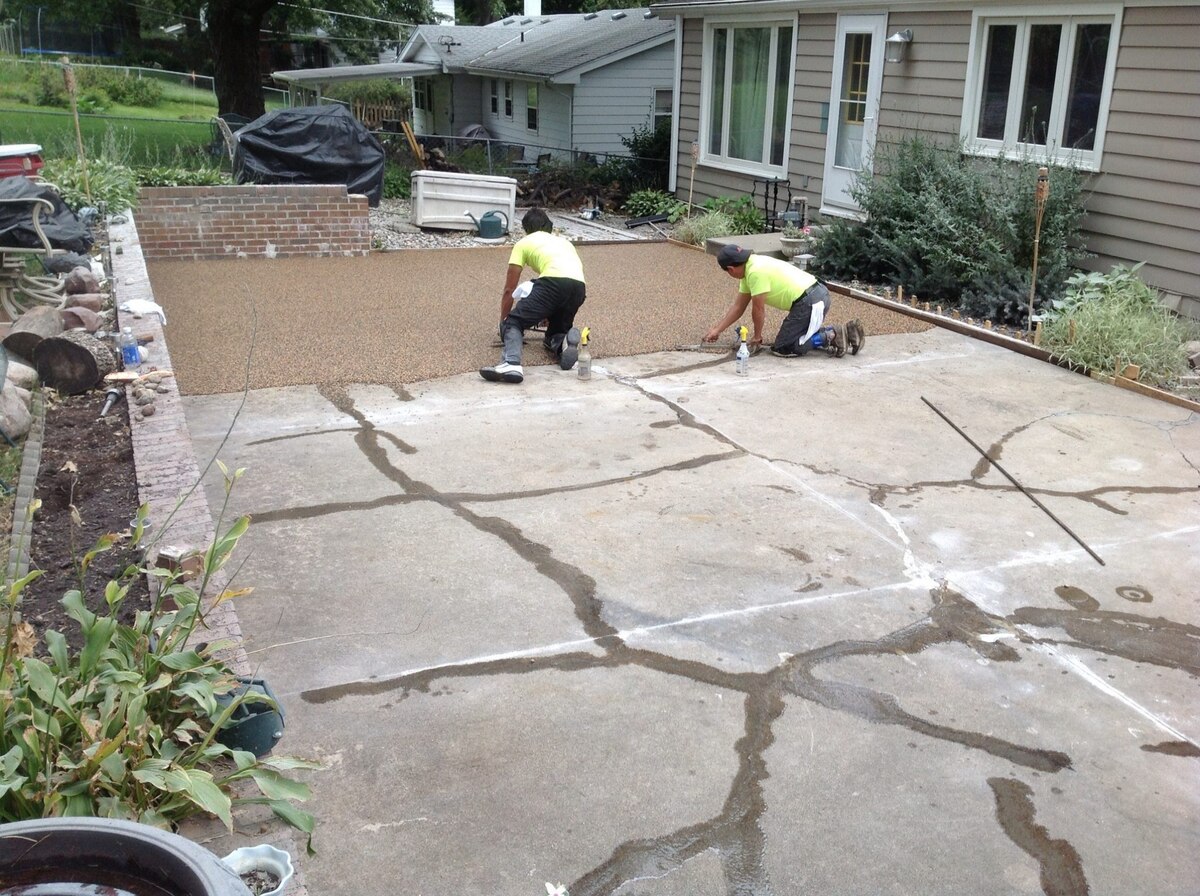
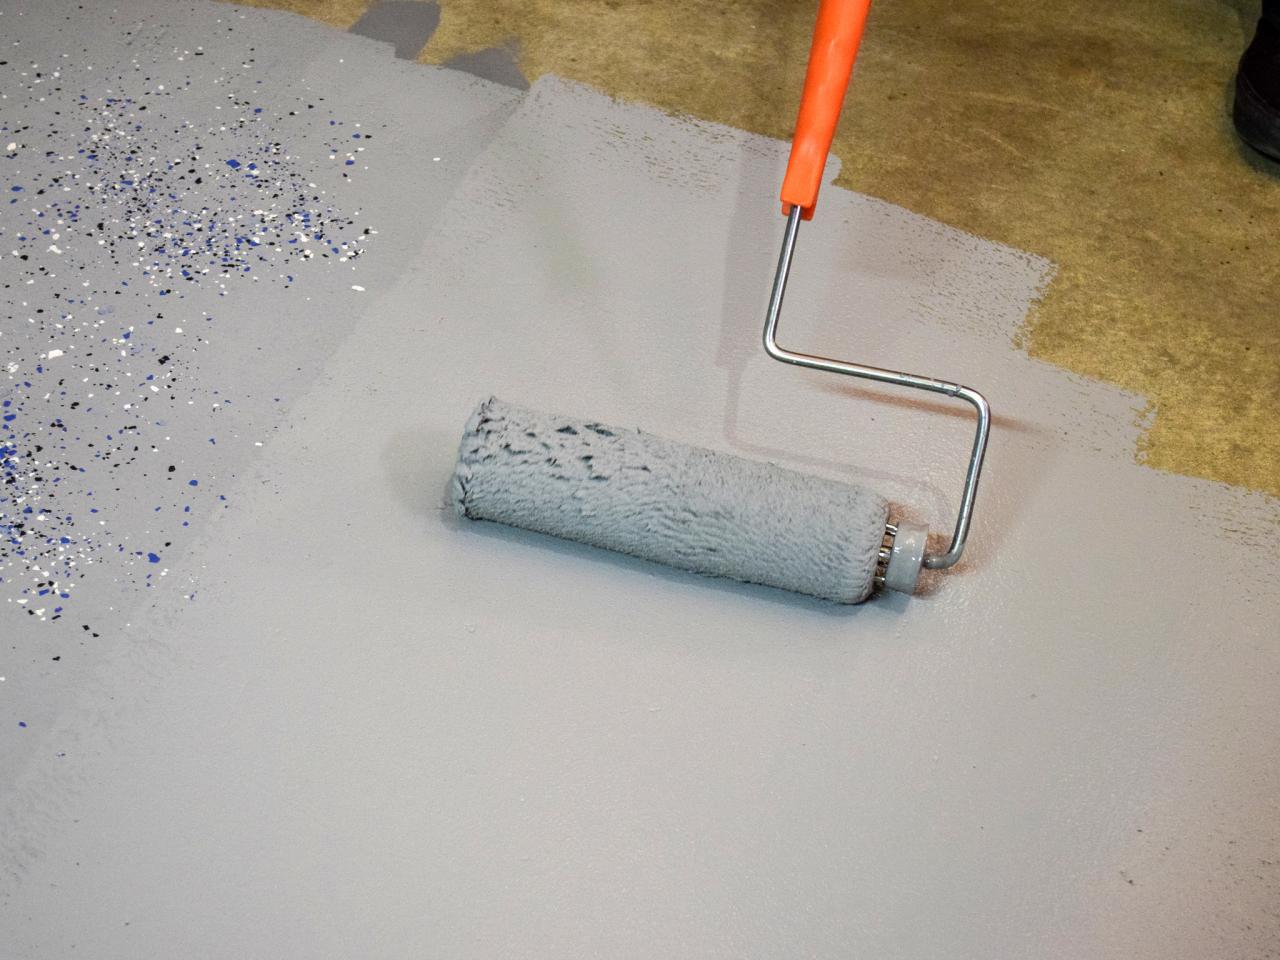
Applying the Resurfacing Compound
With the cracks repaired, damaged areas addressed, low spots filled, and the surface leveled, it’s time to apply the resurfacing compound to your cement patio. The resurfacing compound will provide a new and fresh layer, giving your patio a brand-new look. Follow these steps to apply the resurfacing compound:
- Prepare the surface: Clean the entire patio surface once again, removing any dust or debris that may have accumulated since the previous steps. It’s crucial to have a clean and smooth surface to ensure proper adhesion of the resurfacing compound.
- Choose a resurfacing compound: There are various resurfacing compounds available, including concrete overlays or micro-toppings. Read the manufacturer’s instructions to select the right product for your patio, considering factors like durability, finish, and ease of application.
- Mix the resurfacing compound: Follow the manufacturer’s instructions to mix the resurfacing compound. Pay attention to the recommended water-to-mix ratio to ensure a proper consistency.
- Apply the compound: Starting at one corner of the patio, use a trowel or a long-handled squeegee to apply the resurfacing compound. Work in small sections, spreading the compound evenly over the surface. Use smooth and even strokes to ensure a consistent layer across the entire patio.
- Level and smooth: After applying the compound, use a trowel or a float to level and smooth the surface. Work in circular motions or back and forth to eliminate any imperfections and create a uniform appearance. Pay attention to the edges and corners to ensure they blend seamlessly.
- Allow curing time: The resurfacing compound will have a recommended curing time, typically ranging from 24 to 48 hours. Follow the manufacturer’s instructions regarding drying and curing time before proceeding to the next step.
By applying the resurfacing compound, you’re not only enhancing the visual appeal of your patio but also providing a protective layer that improves its durability and resistance to wear and tear.
Once the resurfaced patio has fully cured, it’s time to move on to the final steps of the process: smoothing and finishing the surface of the newly applied compound.
Smoothing and Finishing the Surface
After applying the resurfacing compound to your cement patio, the next step is to smooth and finish the surface. This will give your patio a polished and professional look. Follow these steps to achieve a smooth and refined finish:
- Inspect the surface: Begin by inspecting the resurfaced patio for any imperfections or rough spots. These can be caused by air bubbles, trowel marks, or uneven application of the compound. Identify areas that may require additional attention before proceeding.
- Sanding or grinding: If you notice any rough spots or imperfections, you may need to lightly sand or grind the surface to smooth them out. Use a handheld sander or a grinder with a fine-grit sandpaper or diamond wheel attachment. Work in small sections, applying even pressure and keeping the tool moving to avoid creating dips or grooves in the surface.
- Remove dust and debris: After sanding or grinding, thoroughly clean the patio surface to remove any dust or debris. Use a broom or a leaf blower to sweep away loose particles, and then use a damp cloth or mop to wipe the surface clean. Make sure the surface is completely dry before proceeding to the next step.
- Finishing touches: Once the surface is clean, apply a concrete sealer or a protective coating to enhance the durability and appearance of your resurfaced patio. Follow the manufacturer’s instructions for application, including the recommended number of coats and drying time between coats.
By smoothing and finishing the surface, you’ll achieve a polished and professional-looking patio. Make sure to take the time to address any imperfections and apply a protective sealant to ensure longevity and resistance to the elements.
After completing these steps, allow the sealant to cure completely before using your newly resurfaced patio. This will help ensure that the surface is fully hardened and ready to withstand foot traffic, furniture, and outdoor elements.
Now that you’ve finished the resurfacing process, it’s time to explore some maintenance tips to keep your patio looking its best for years to come.
Curing and Sealing the Resurfaced Patio
After the resurfacing process, it’s important to properly cure and seal your newly transformed patio. Curing allows the resurfacing compound to fully harden, while sealing provides an added layer of protection and helps to maintain its appearance. Follow these steps to ensure a successful curing and sealing process:
- Curing time: Pay attention to the manufacturer’s instructions regarding the recommended curing time for the resurfacing compound. Typically, this can take up to 28 days, although it may vary depending on the specific product used.
- Minimize foot traffic: During the curing period, minimize foot traffic and avoid placing heavy objects on the patio. This will allow the resurfacing compound to harden properly and prevent any damage to the newly applied surface.
- Avoid moisture exposure: Keep your newly resurfaced patio protected from moisture during the curing process. This includes avoiding excessive water exposure, such as heavy rain or sprinkler systems. Moisture can interfere with the curing process and affect the overall quality of the surface.
- Sealing the surface: Once the curing period is complete, it’s time to apply a sealer to protect and enhance the resurfaced patio. Choose a high-quality concrete sealer that is suitable for outdoor use. Follow the manufacturer’s instructions for application, including the recommended number of coats and drying time between coats.
- Apply maintenance coats: Over time, the sealer may wear off due to weather exposure and foot traffic. To maintain the longevity and appearance of your resurfaced patio, periodically apply maintenance coats of the sealer as recommended by the manufacturer.
- Regular cleaning and maintenance: Keep your resurfaced patio clean by regularly sweeping away debris and dirt. Use a gentle cleaner and a soft-bristle brush for more thorough cleaning as needed. Avoid using harsh chemicals or abrasive cleaners that may damage the sealed surface.
Properly curing and sealing your resurfaced patio will help protect it from the elements, moisture, and everyday wear and tear. It will also enhance its appearance and make it easier to clean and maintain in the long run.
By following these steps and incorporating regular maintenance, you can enjoy a beautiful and durable resurfaced patio for years to come.
Now that you have learned how to resurface and maintain your patio, it’s time to put your knowledge into practice and transform your outdoor space into a stunning and functional area for relaxing and entertaining.
Maintenance Tips for a Long-lasting Patio
After resurfacing your patio, it’s important to establish a regular maintenance routine to ensure its longevity and keep it looking its best. Here are some helpful maintenance tips for maintaining a long-lasting patio:
- Sweep regularly: Regularly sweeping your patio with a broom or a leaf blower will help prevent debris from accumulating and scratching the surface. This simple step can go a long way in preserving the appearance of your patio.
- Clean up spills promptly: Accidental spills can happen, especially during outdoor gatherings. To prevent stains or discoloration, clean up spills promptly using a mild detergent and water. Avoid using harsh chemicals that can damage the resurfaced surface.
- Protect from heavy furniture: If you plan on placing heavy furniture or objects on your patio, use furniture pads or coasters to distribute the weight and prevent indentations. This will help avoid damaging the surface and maintain its smooth appearance.
- Remove snow and ice carefully: During winter months, be cautious when removing snow and ice from your patio. Avoid using metal shovels or sharp objects that can scratch or chip the surface. Opt for plastic shovels and gentle snow removal techniques.
- Regularly inspect for damage: Periodically inspect your patio for any signs of damage or wear. Look out for cracks, chips, or any other issues that may require repair. Addressing these problems promptly can prevent further damage and extend the lifespan of your patio.
- Reseal as needed: The protective sealer applied during the resurfacing process will wear off over time. It’s important to reseal your patio as recommended by the manufacturer to maintain its durability and appearance. This will help to protect the surface from stains, moisture, and UV damage.
- Use caution with chemicals: When using cleaners or chemicals on your patio, make sure they are suitable for use on sealed concrete surfaces. Harsh chemicals or abrasive cleaners can damage the sealed surface. Always follow the manufacturer’s guidelines and test any new products in an inconspicuous area before applying them to the entire patio.
By following these maintenance tips, you can keep your resurfaced patio in excellent condition for years to come. Regular cleaning, prompt repairs, and proper protection will help preserve its beauty and ensure that you can enjoy your outdoor space for many seasons ahead.
Remember, the key to a long-lasting patio is consistent care and maintenance. With a little effort, your resurfaced patio will continue to be a source of enjoyment and a beautiful addition to your outdoor living area.
Now that you’re armed with these maintenance tips, go ahead and make the most of your resurfaced patio!
Read more: How To Build A Cement Patio
Conclusion
Congratulations! You have reached the end of our comprehensive guide on how to resurface a cement patio. By following the steps outlined in this guide, you can transform your worn-out patio into a stunning and functional outdoor space that you’ll love to spend time in.
We started by assessing the condition of your cement patio, identifying cracks, damaged areas, and uneven surfaces. From there, we walked you through the cleaning process, ensuring that your patio was free of debris and stains. We then addressed repairs, filling cracks and fixing damaged areas to create a solid foundation for the resurfacing compound.
Afterwards, we filled low spots and leveled the surface, preparing it for the exciting step of applying the resurfacing compound. Once the new layer was applied and cured, we took the time to smooth and refine the surface, achieving a polished and professional finish.
To ensure the long-lasting beauty of your resurfaced patio, we covered the importance of properly curing and sealing the surface. By following the recommended curing time and applying a protective sealer, you’ll enhance the durability and resistance of your patio to the elements.
We wrapped up with maintenance tips to help you keep your resurfaced patio in top shape. From regular sweeping and cleaning to protecting it from heavy furniture and addressing repairs promptly, these tips will maintain the longevity and aesthetics of your patio.
Remember, resurfacing a cement patio is a DIY project that requires careful preparation and attention to detail. With the knowledge and steps provided in this guide, you can confidently tackle this project and enjoy the rewards of a beautifully transformed outdoor space.
So, roll up your sleeves, gather your materials, and embark on the journey of resurfacing your cement patio. Soon enough, you’ll be enjoying the fruits of your labor, whether it’s relaxing with a book, hosting outdoor gatherings, or simply appreciating the renewed beauty of your outdoor oasis.
Here’s to creating a fantastic outdoor space that you’ll enjoy for years to come!
Frequently Asked Questions about How To Resurface A Cement Patio
Was this page helpful?
At Storables.com, we guarantee accurate and reliable information. Our content, validated by Expert Board Contributors, is crafted following stringent Editorial Policies. We're committed to providing you with well-researched, expert-backed insights for all your informational needs.


0 thoughts on “How To Resurface A Cement Patio”